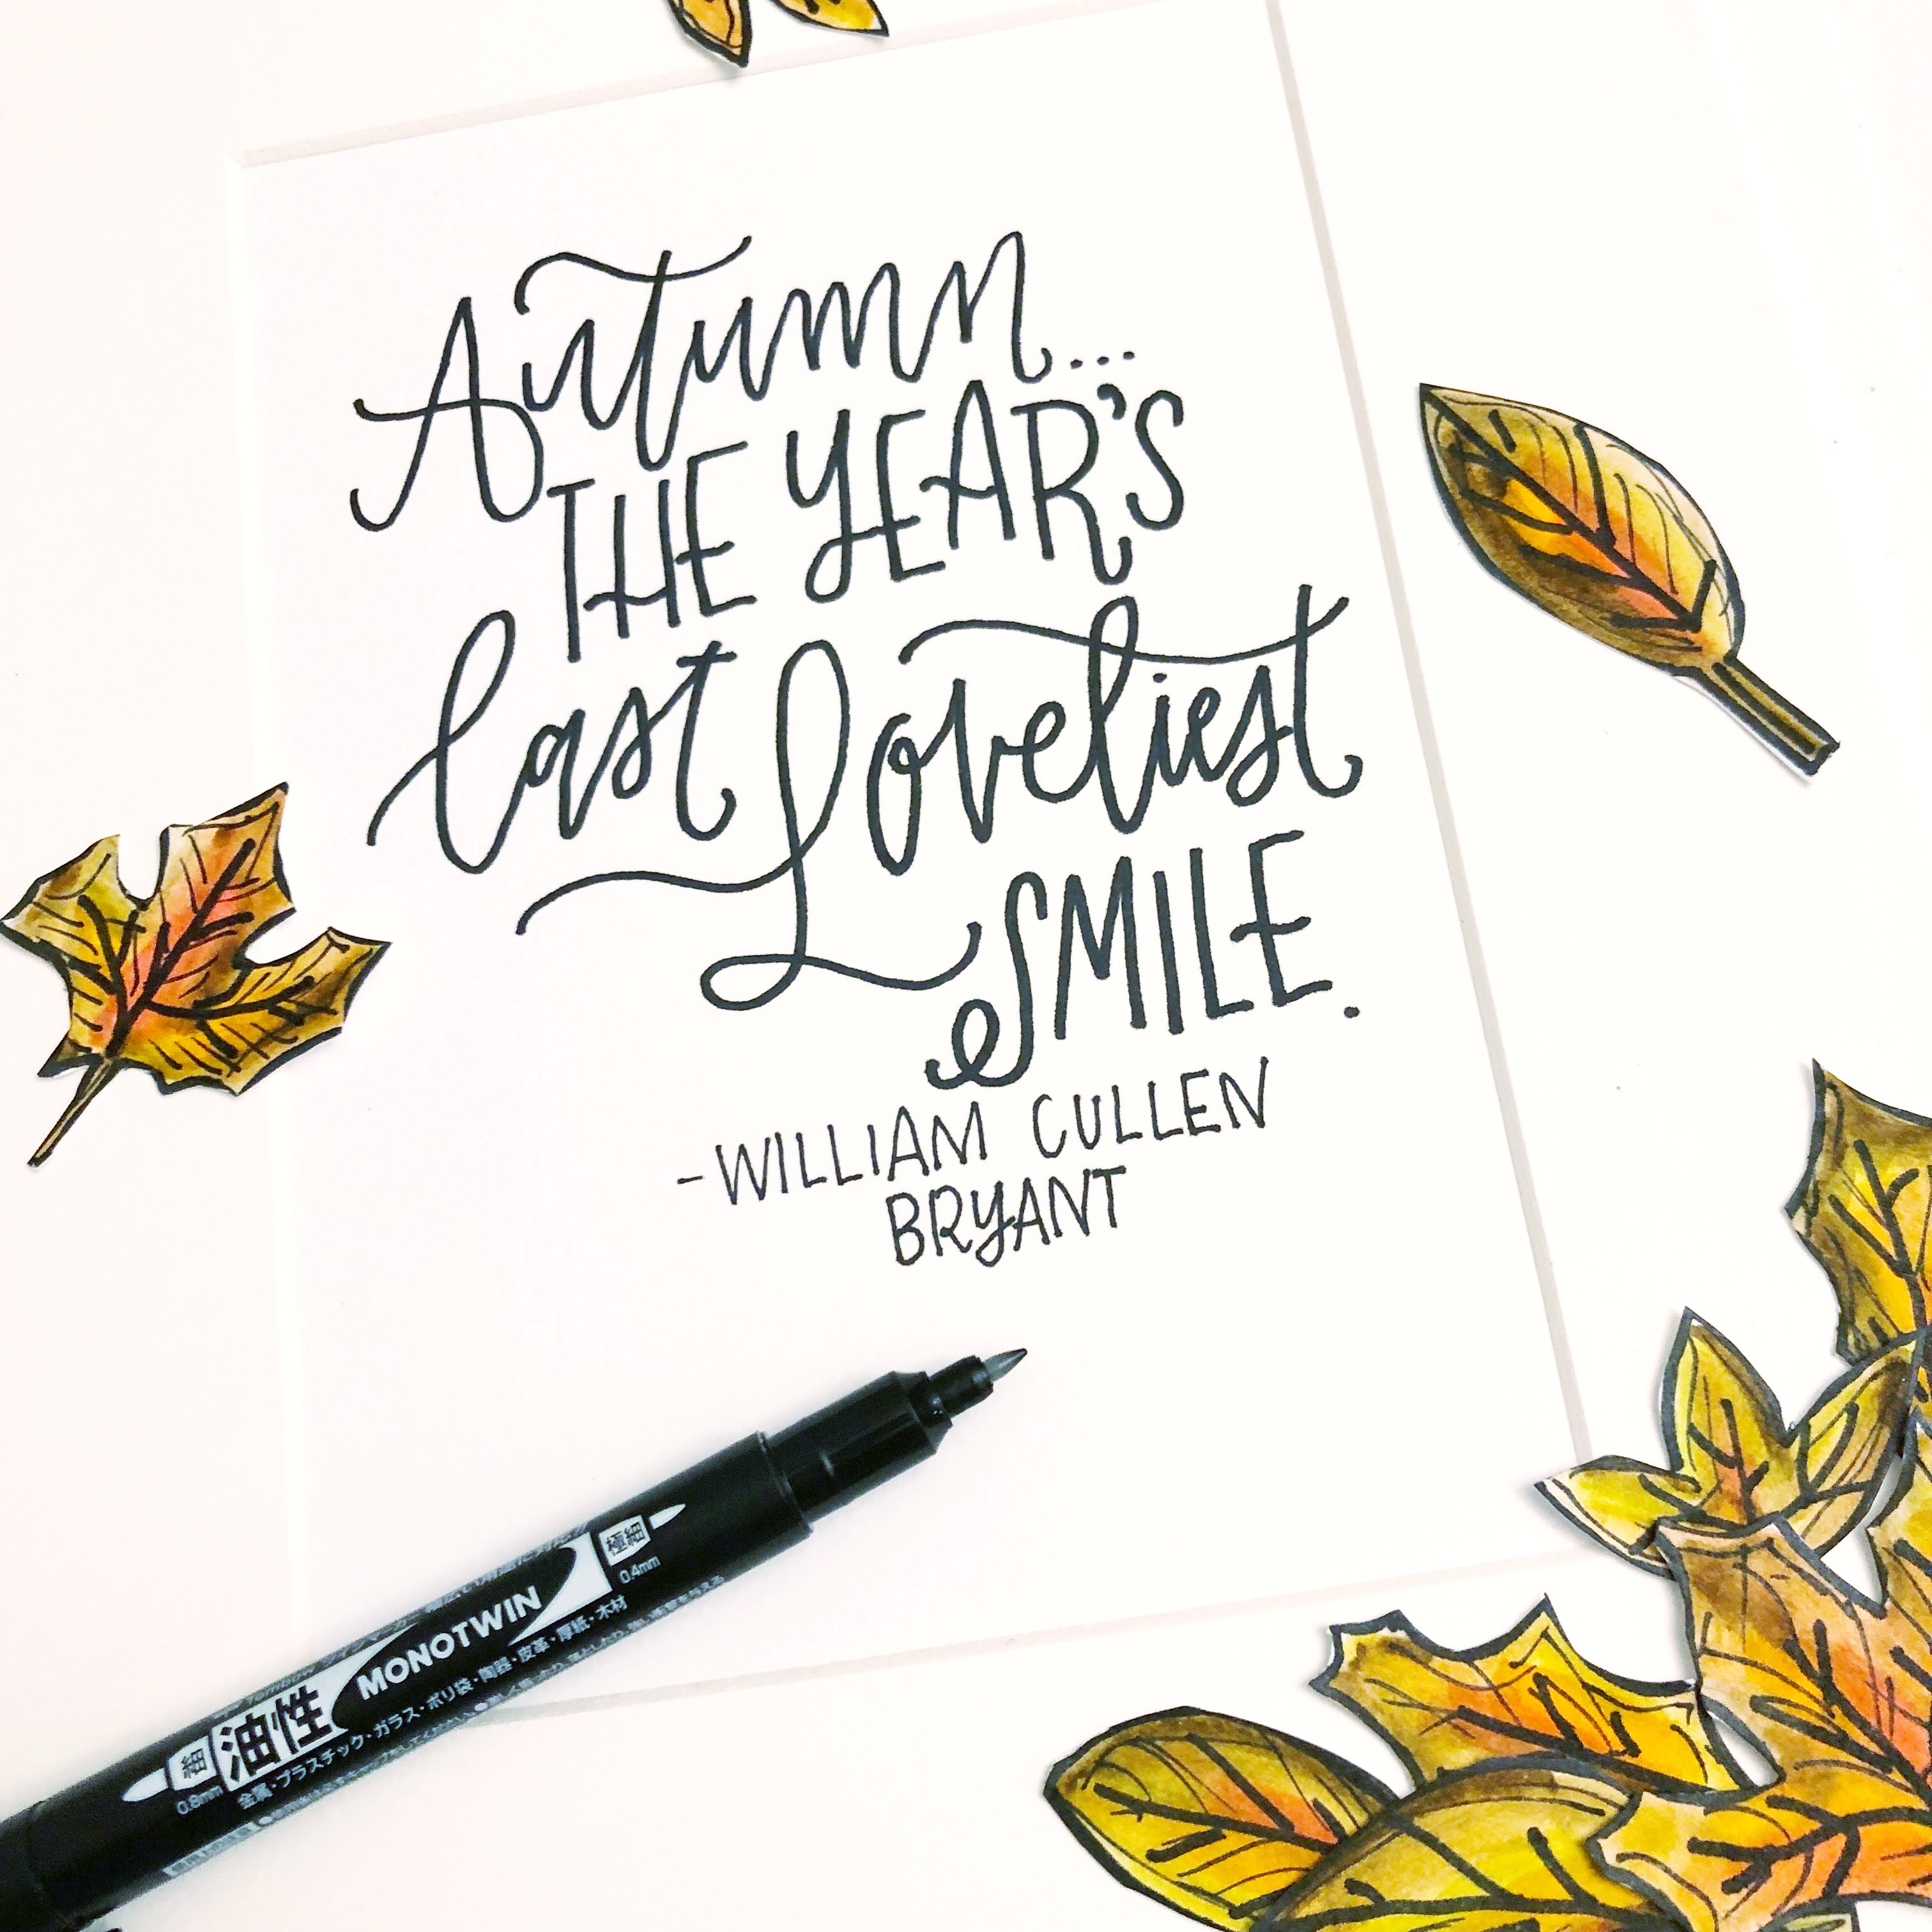
Fall is upon us, lovelies, and what better way to get in the mood for those pumpkin spice latte’s than a fun DIY Fall Leaves Doodle Frame Mat tutorial?! This project will be perfect for framing your favorite fall quote or picture.
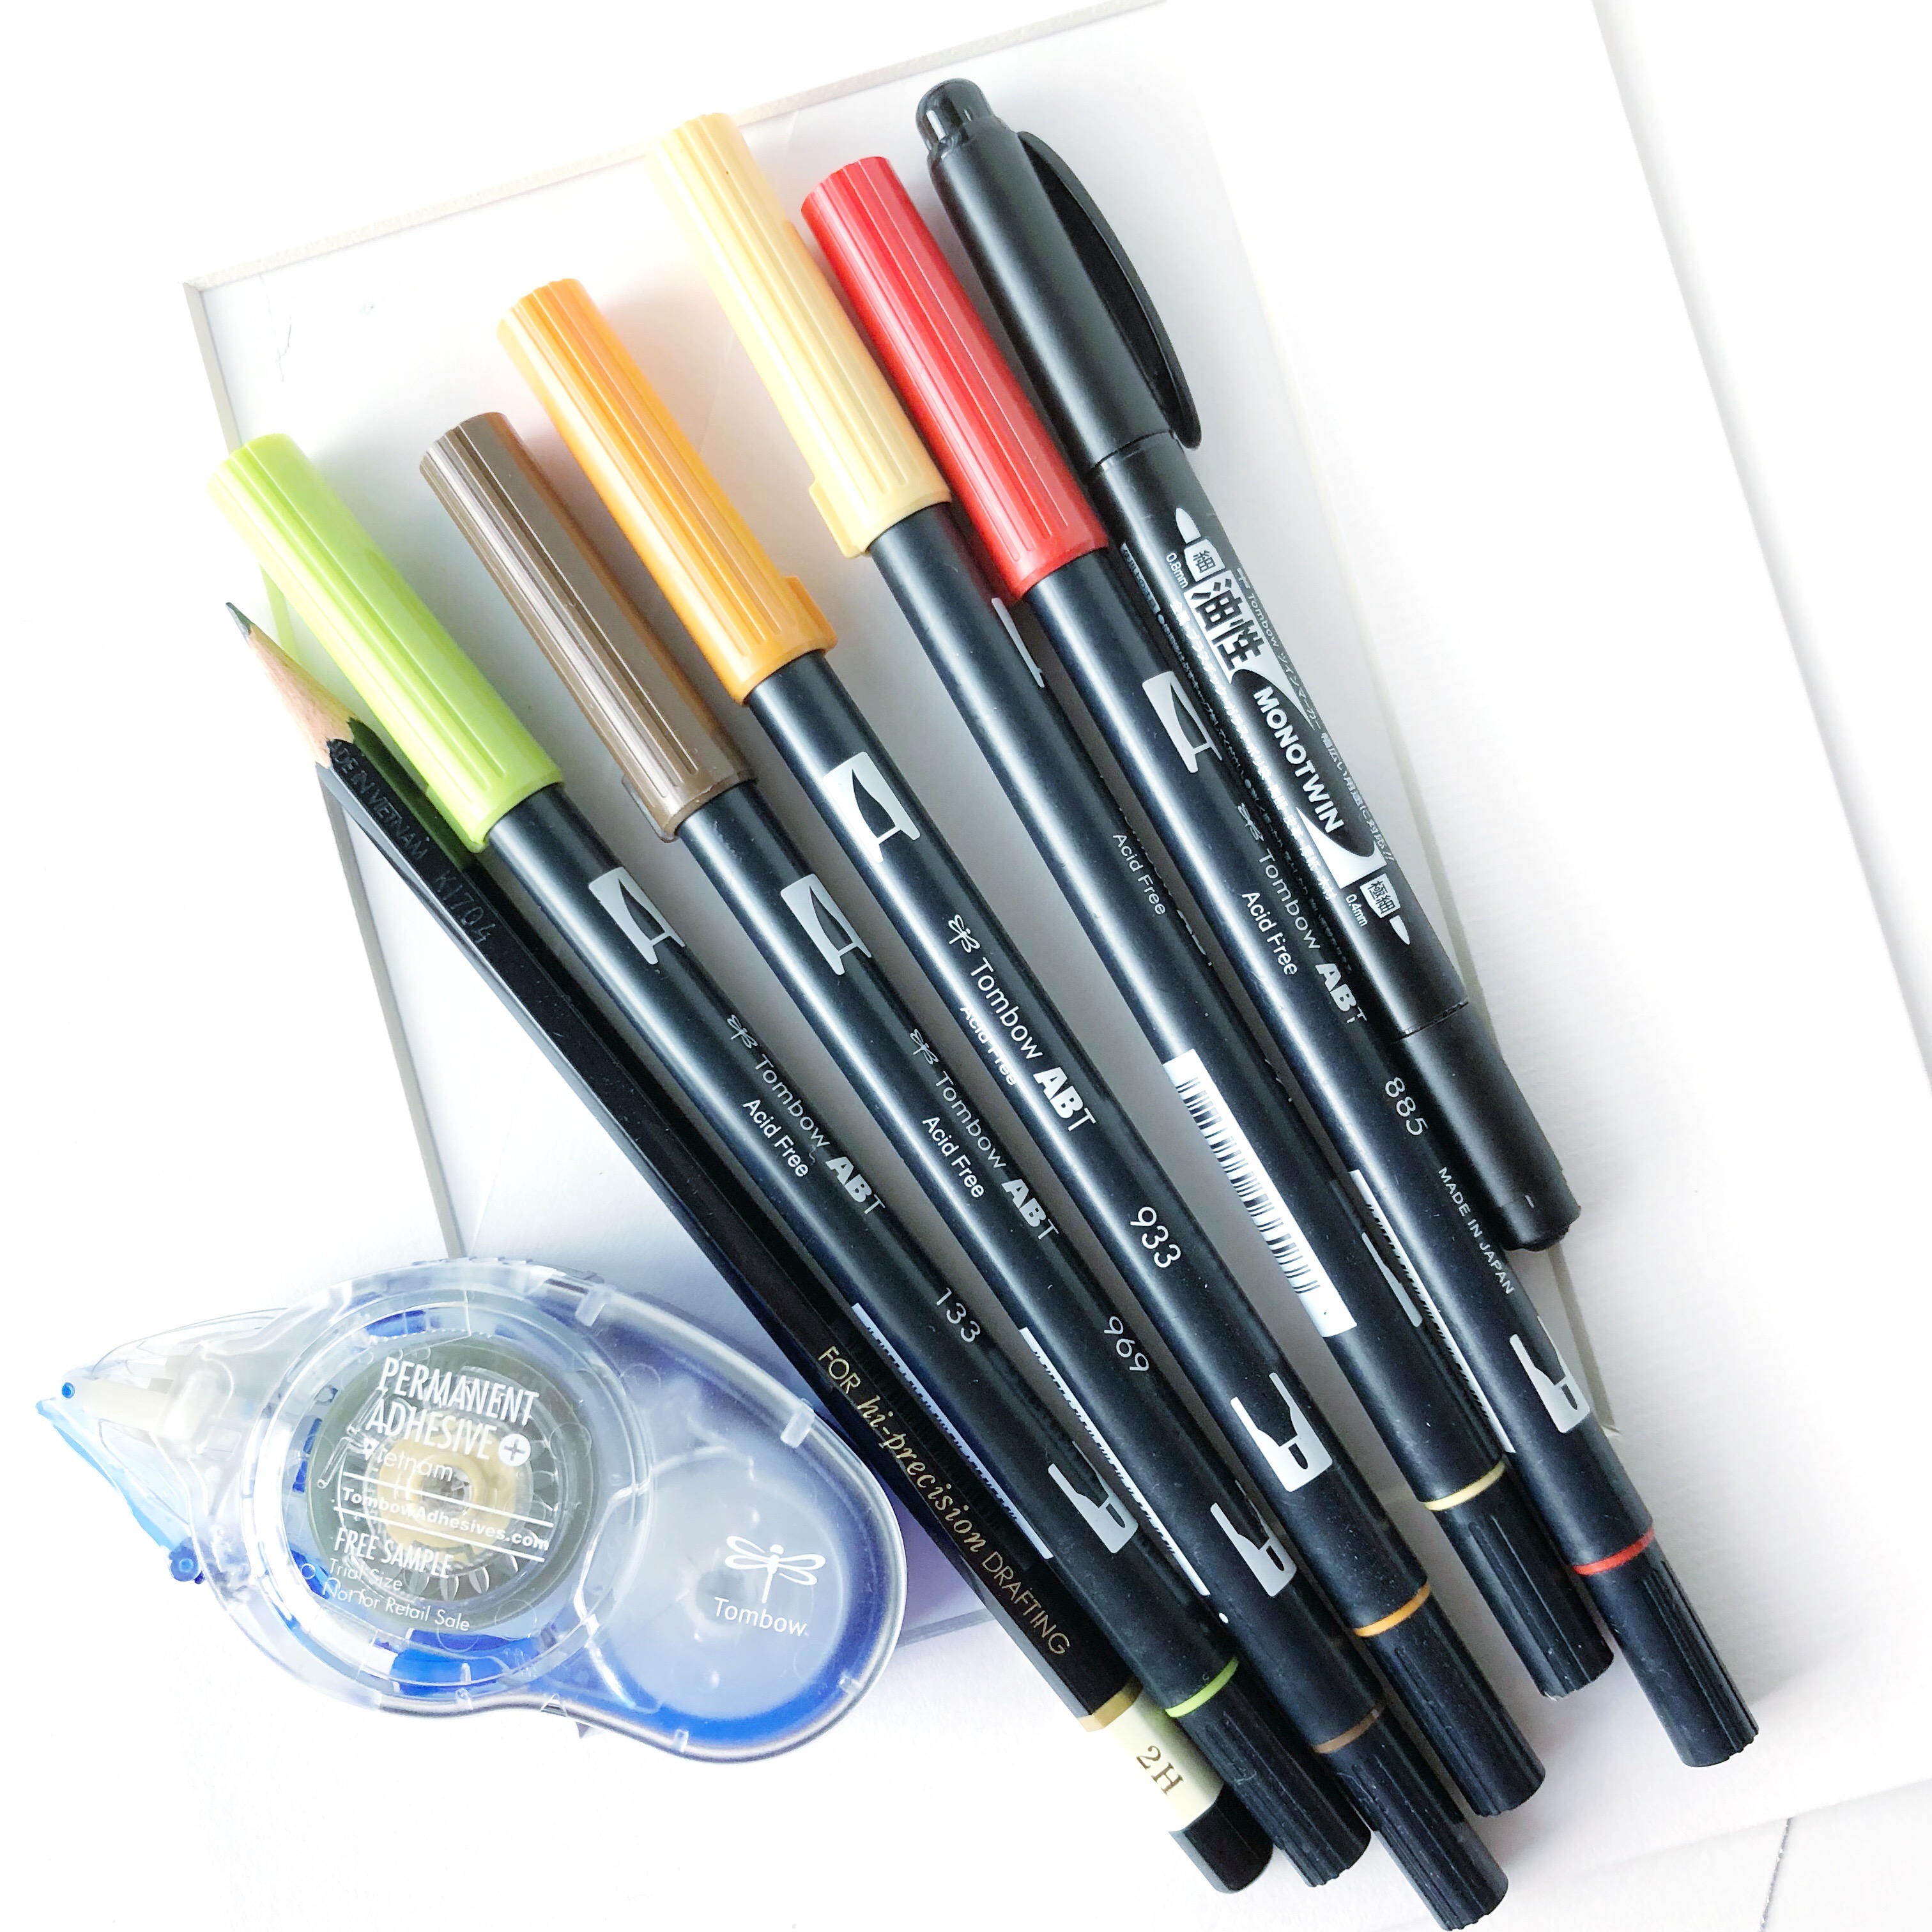
WHAT YOU’LL NEED
- 5 inch by 7 inch picture mat
- Mix Media Paper
- Tombow MONO Drawing Pencil
- Tombow Dual Brush Pens (Fall colors: The Secondary 10 Pack is perfect!)
- Tombow MONO Twin Permanent Marker
- Tombow Blender Pen
- Tombow MONO Permanent Adhesive+
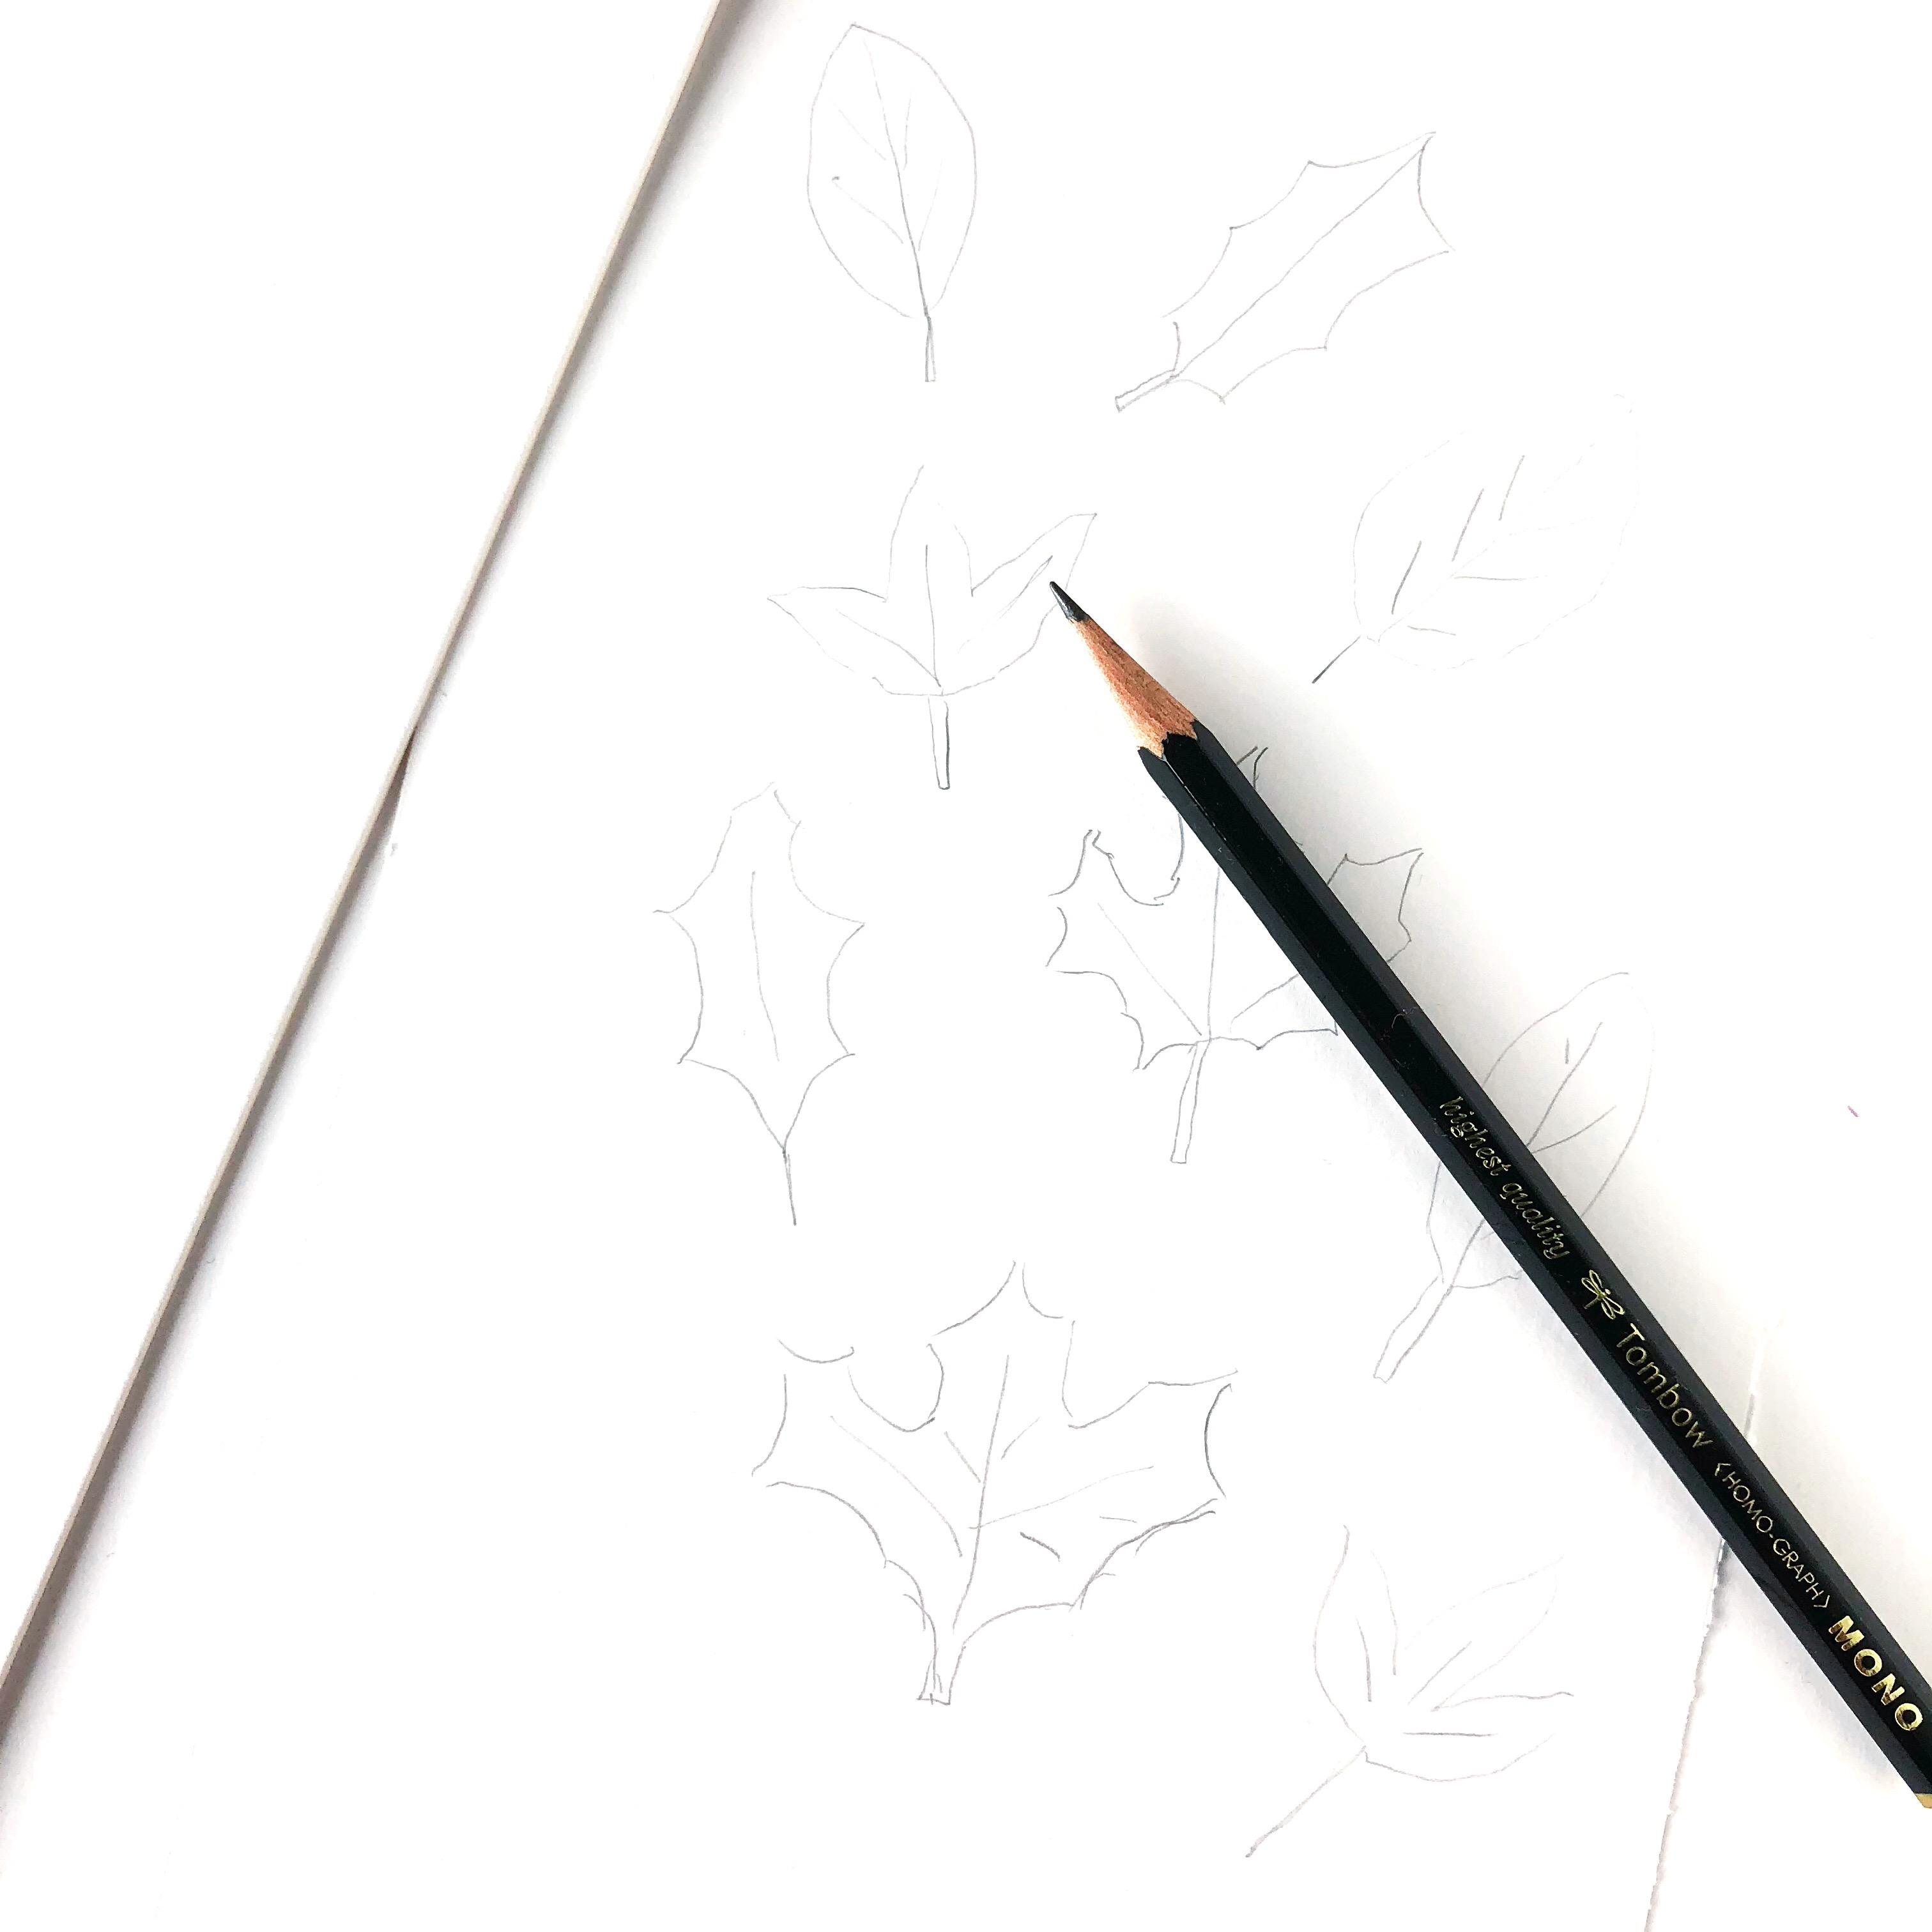
1. DOODLE THE LEAVES
Start by sketching fall leaves onto mix media paper with a Tombow MONO Drawing Pencil.
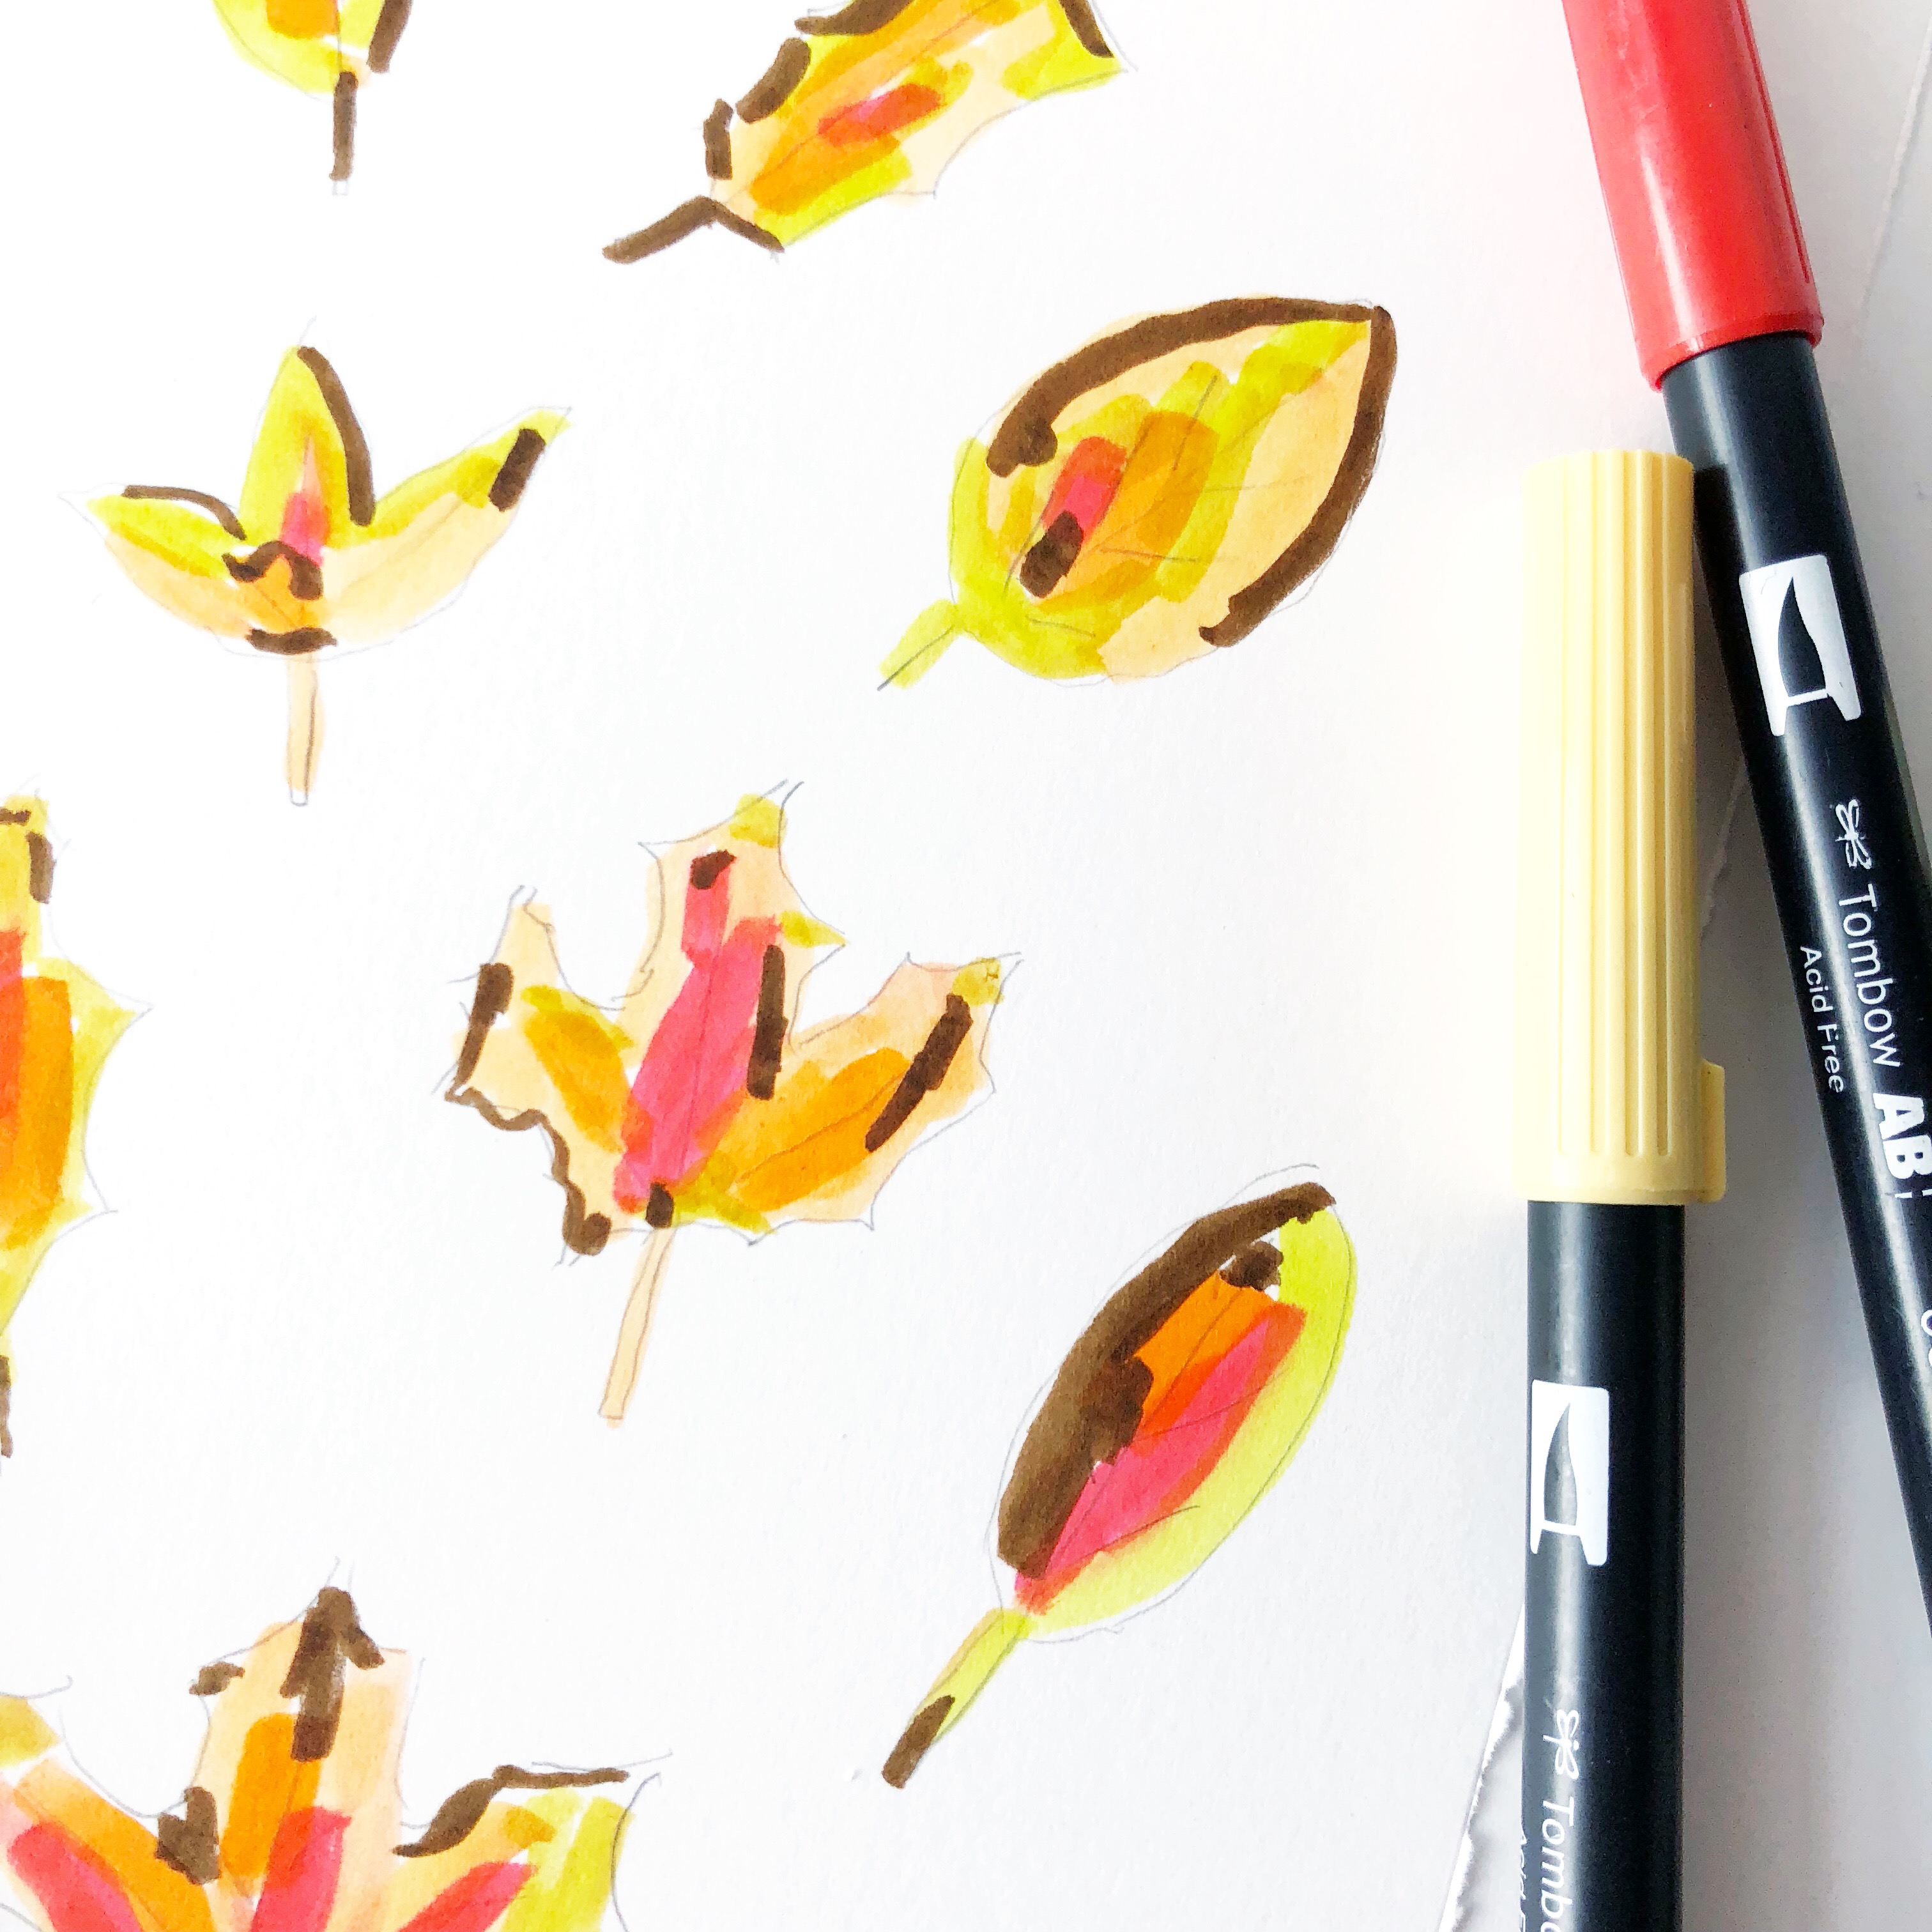
2. ADD COLOR TO THE LEAVES
Randomly add color to the leaves using reds, oranges, yellows, greens, and browns… there are many options of Tombow Dual Brush Pen Colors.
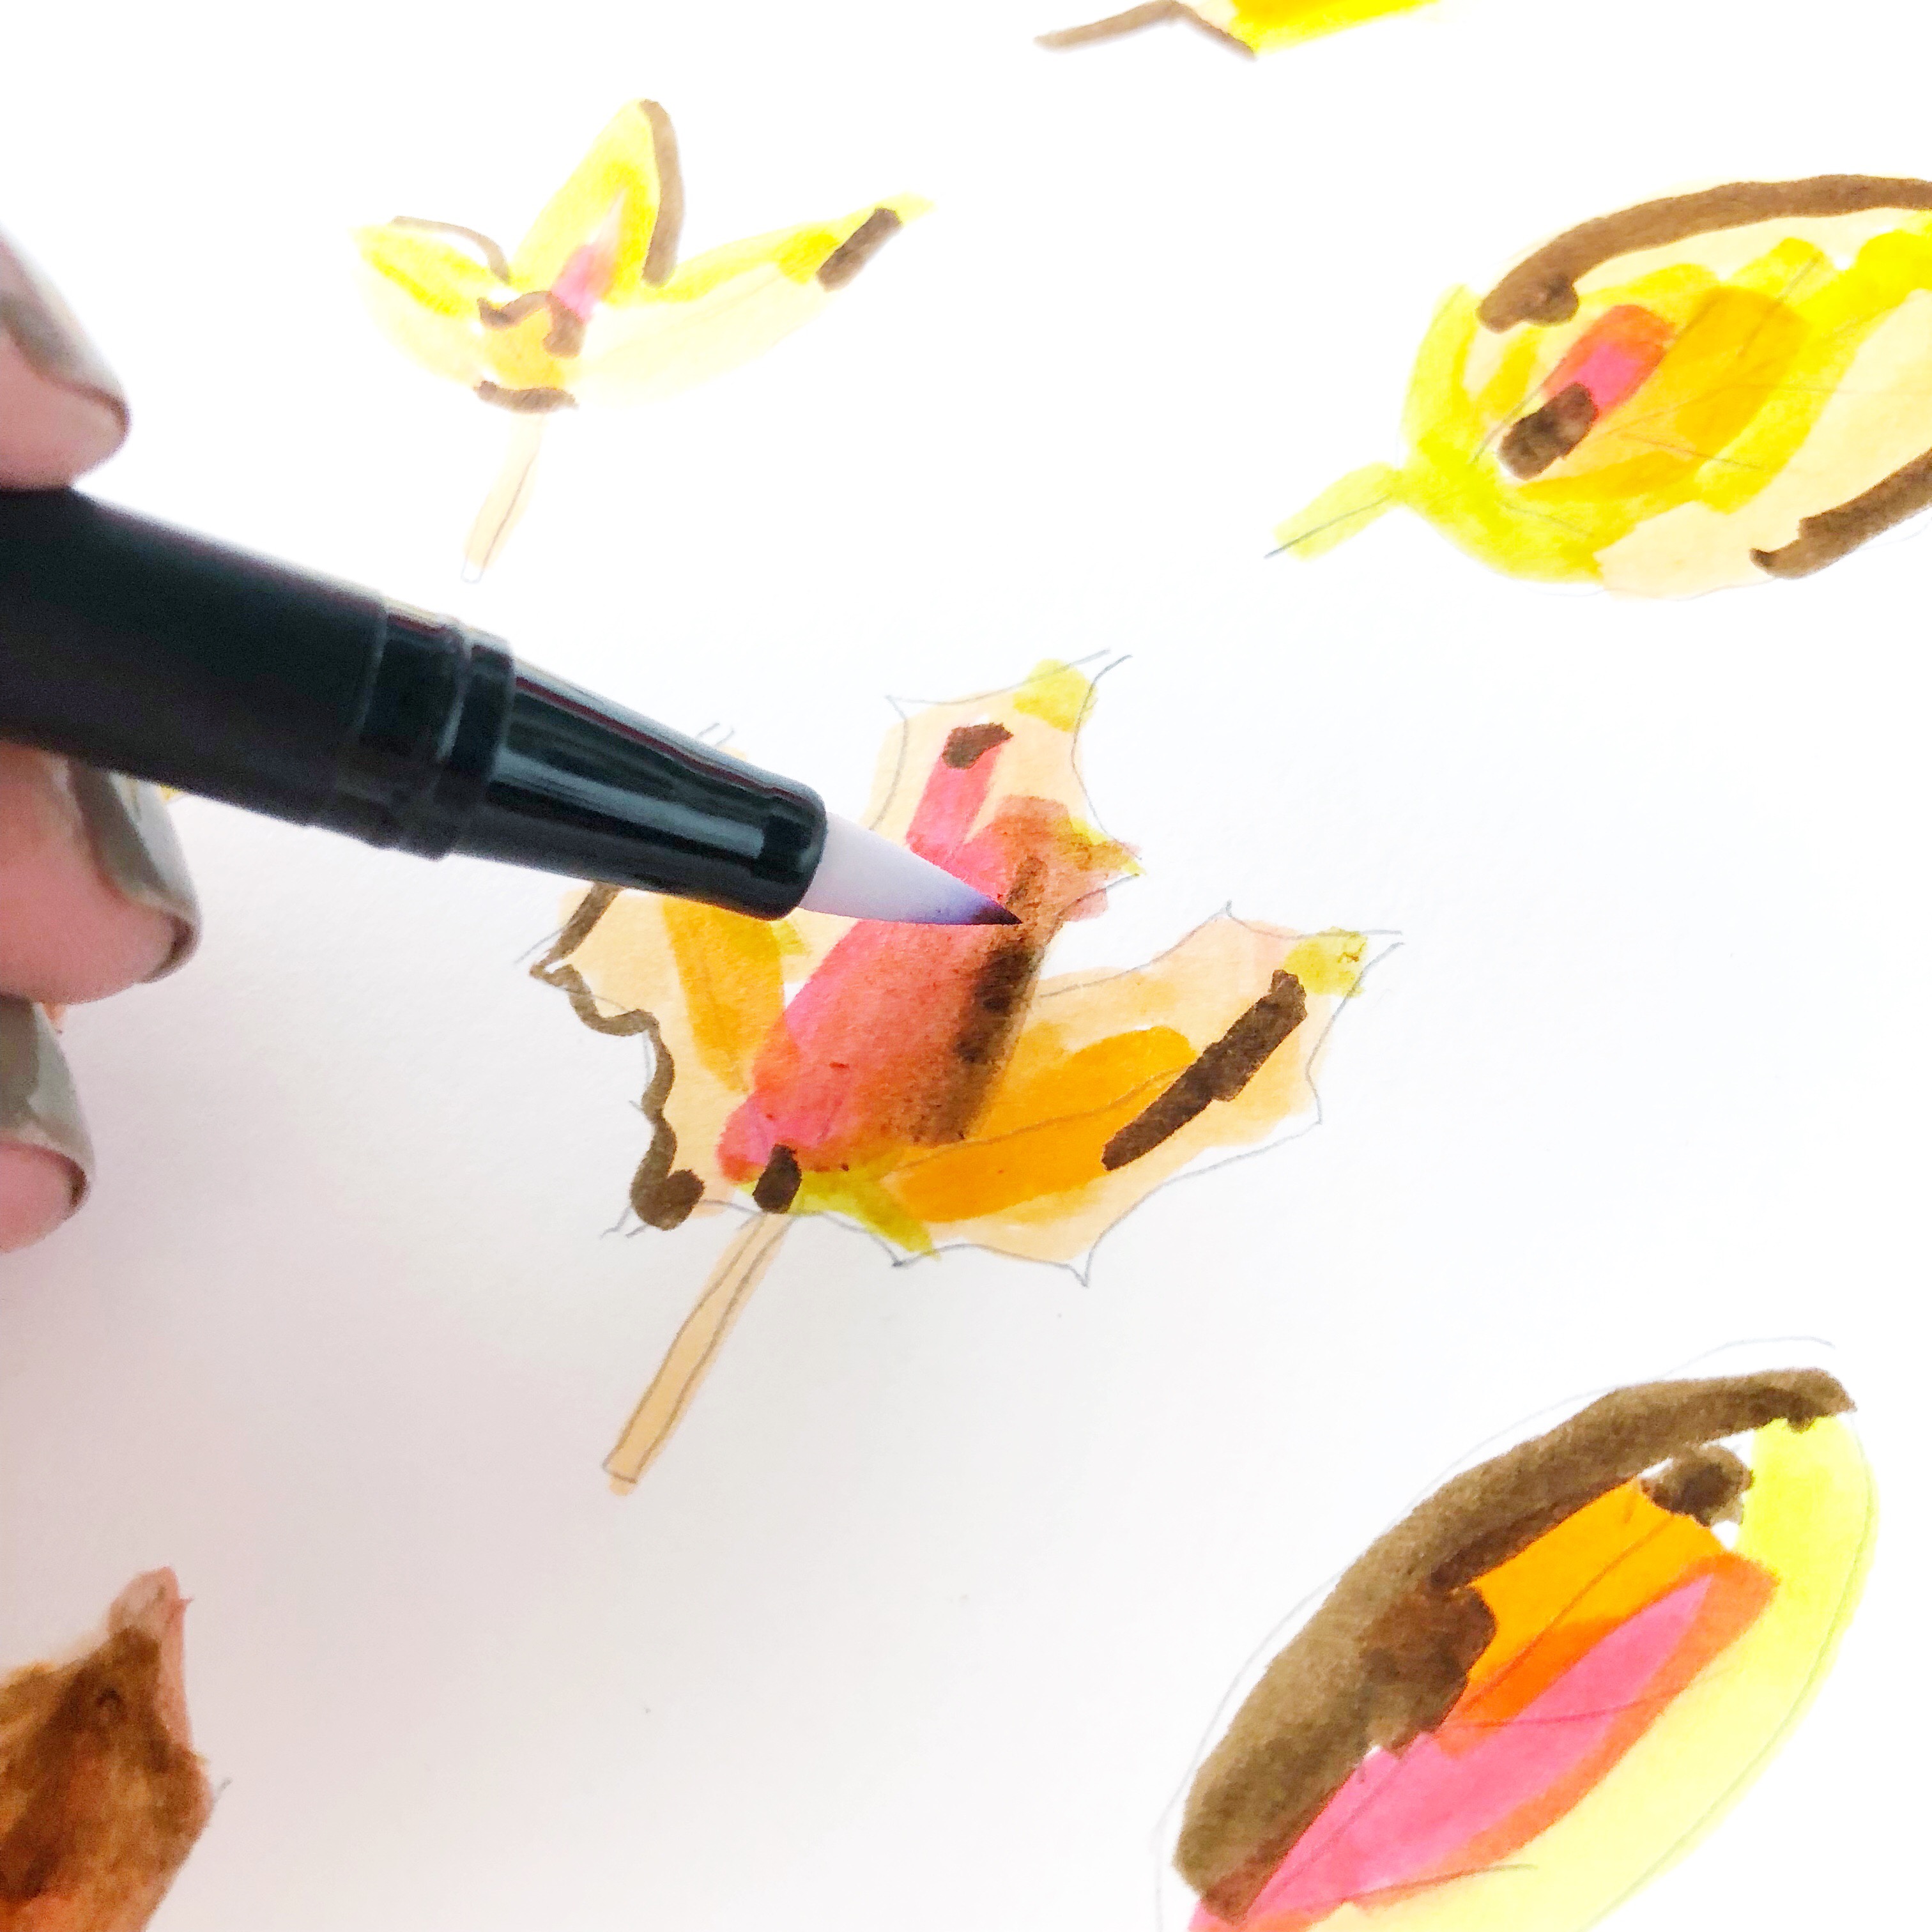
3. BLEND THE COLOR
Once the leaves are colored, use the blender pen to blend and mix the colors together, filling in any blank space and making the leaves look more cohesive.
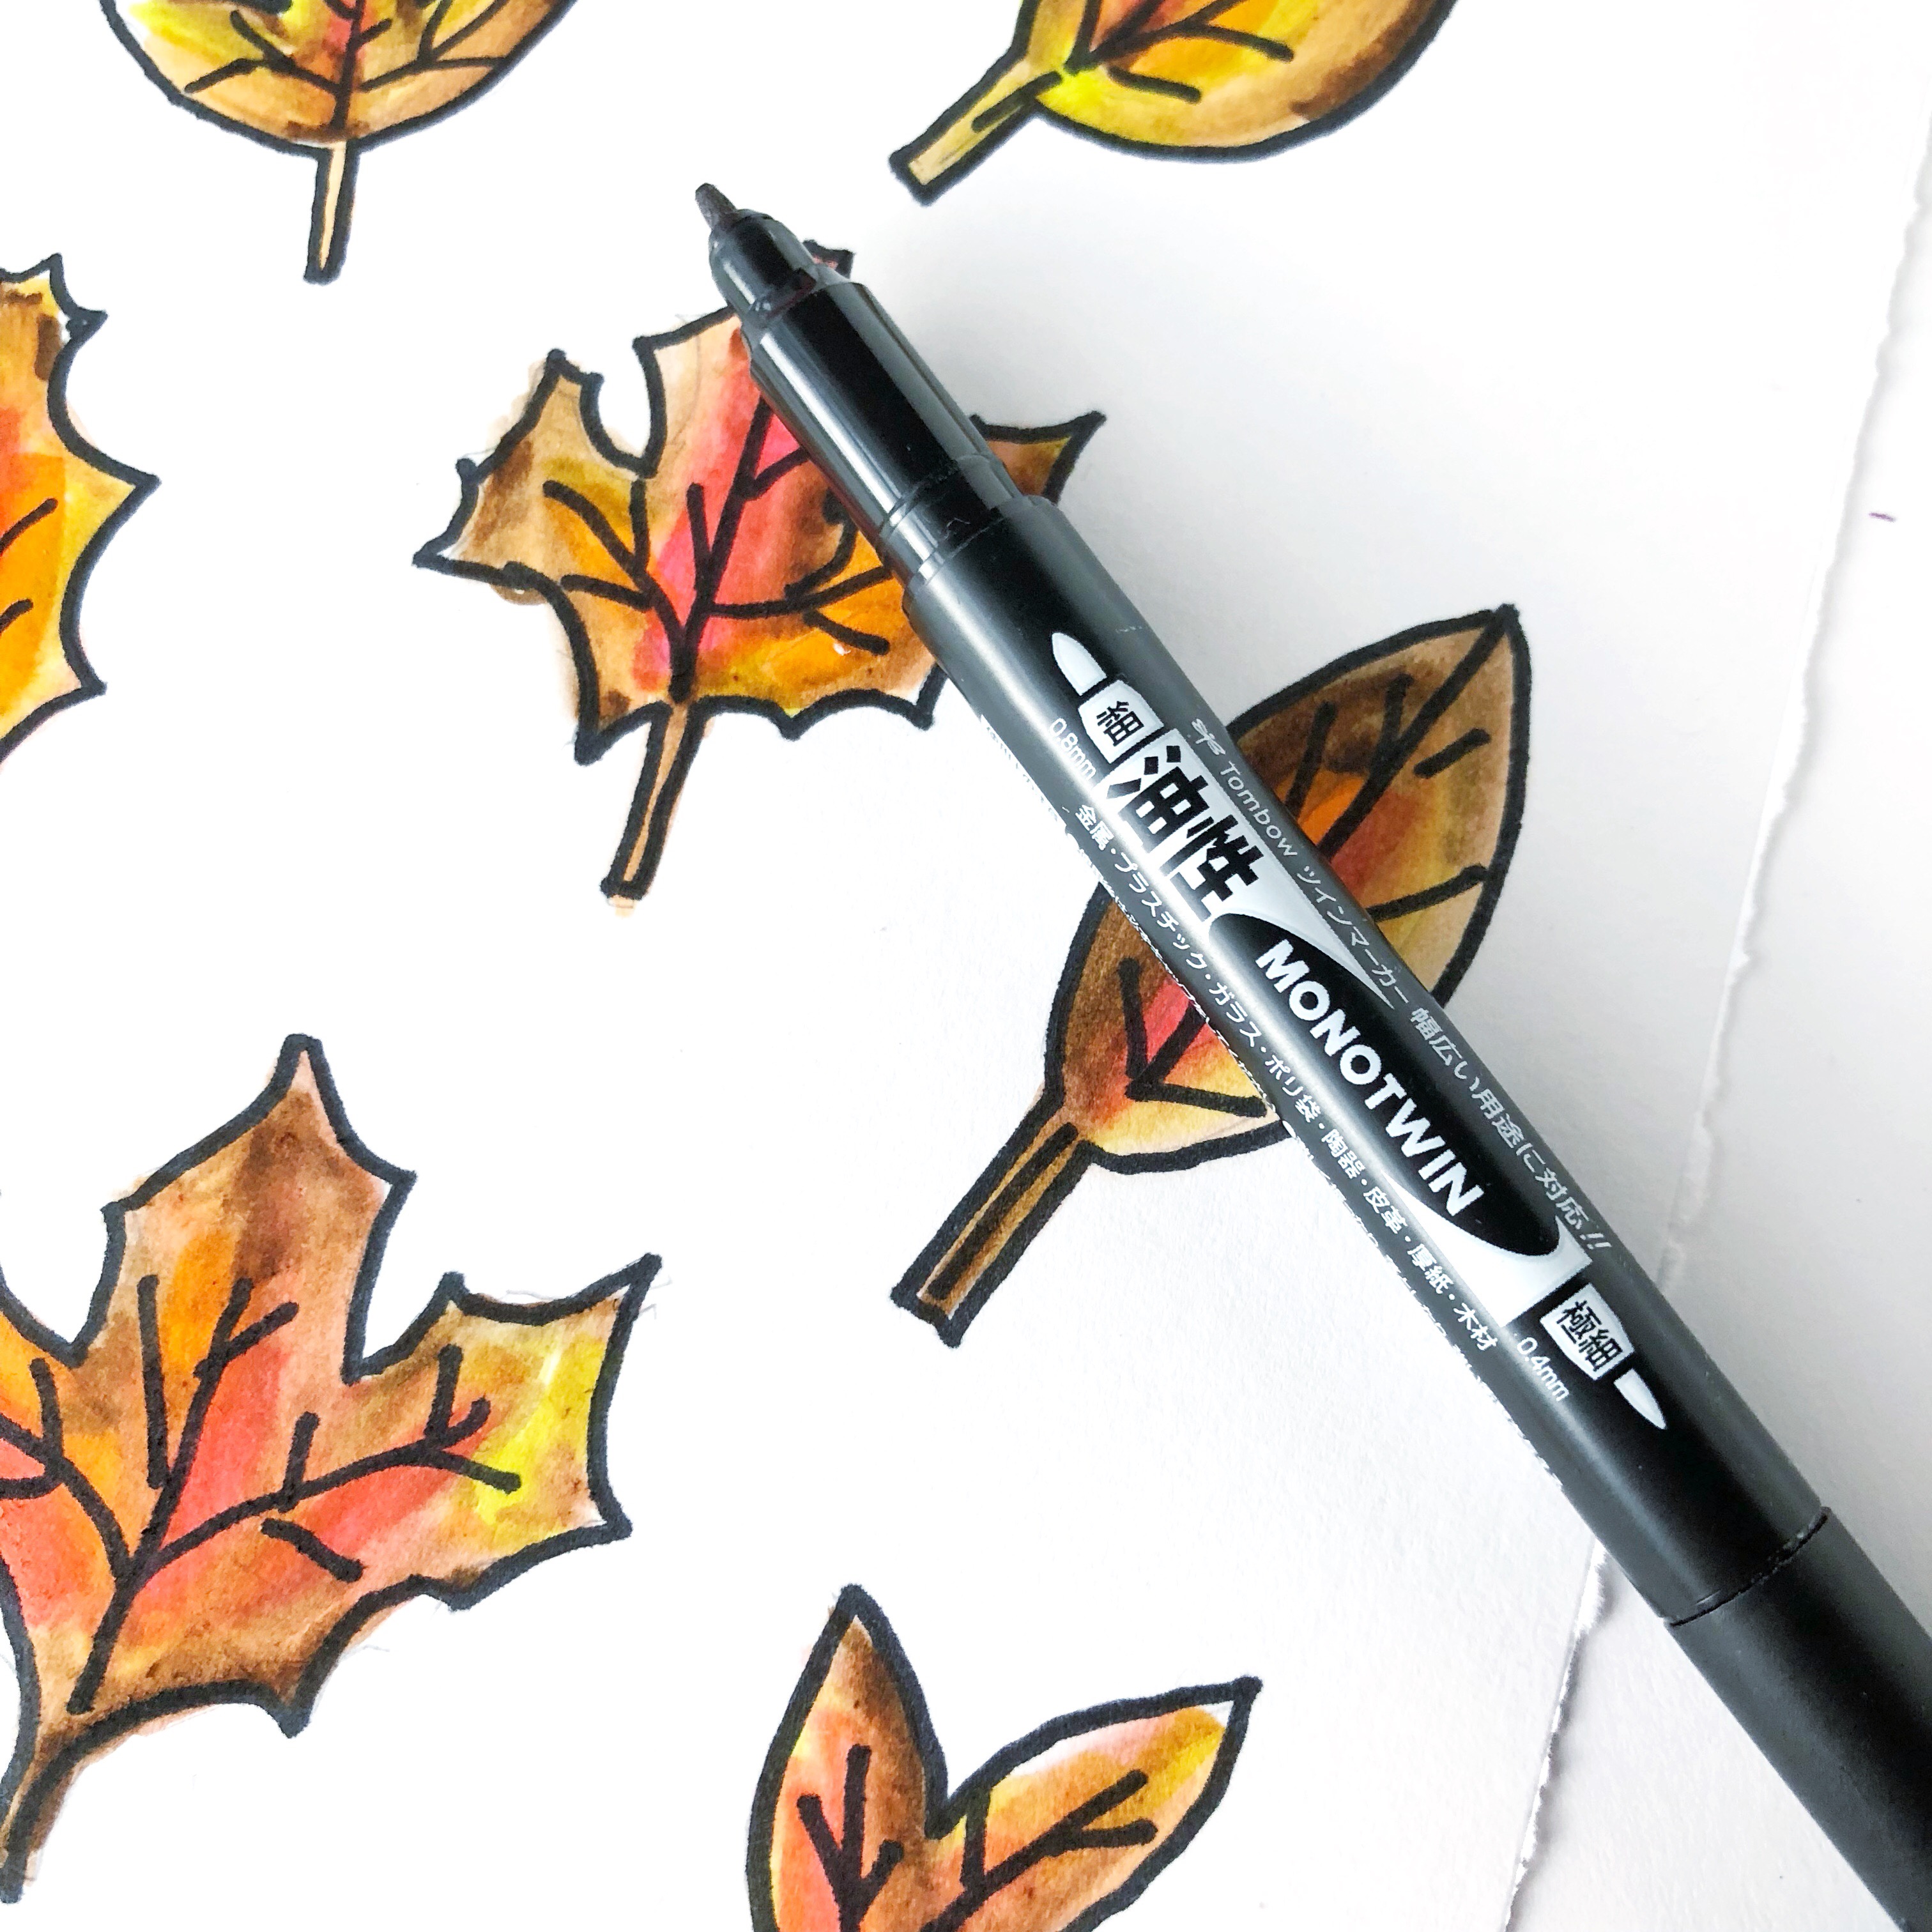
4. OUTLINE AND ADD DETAIL
Outline the leaves by drawing over the pencil sketches with the bold tip of the Tombow MONO Twin Permanent Marker.
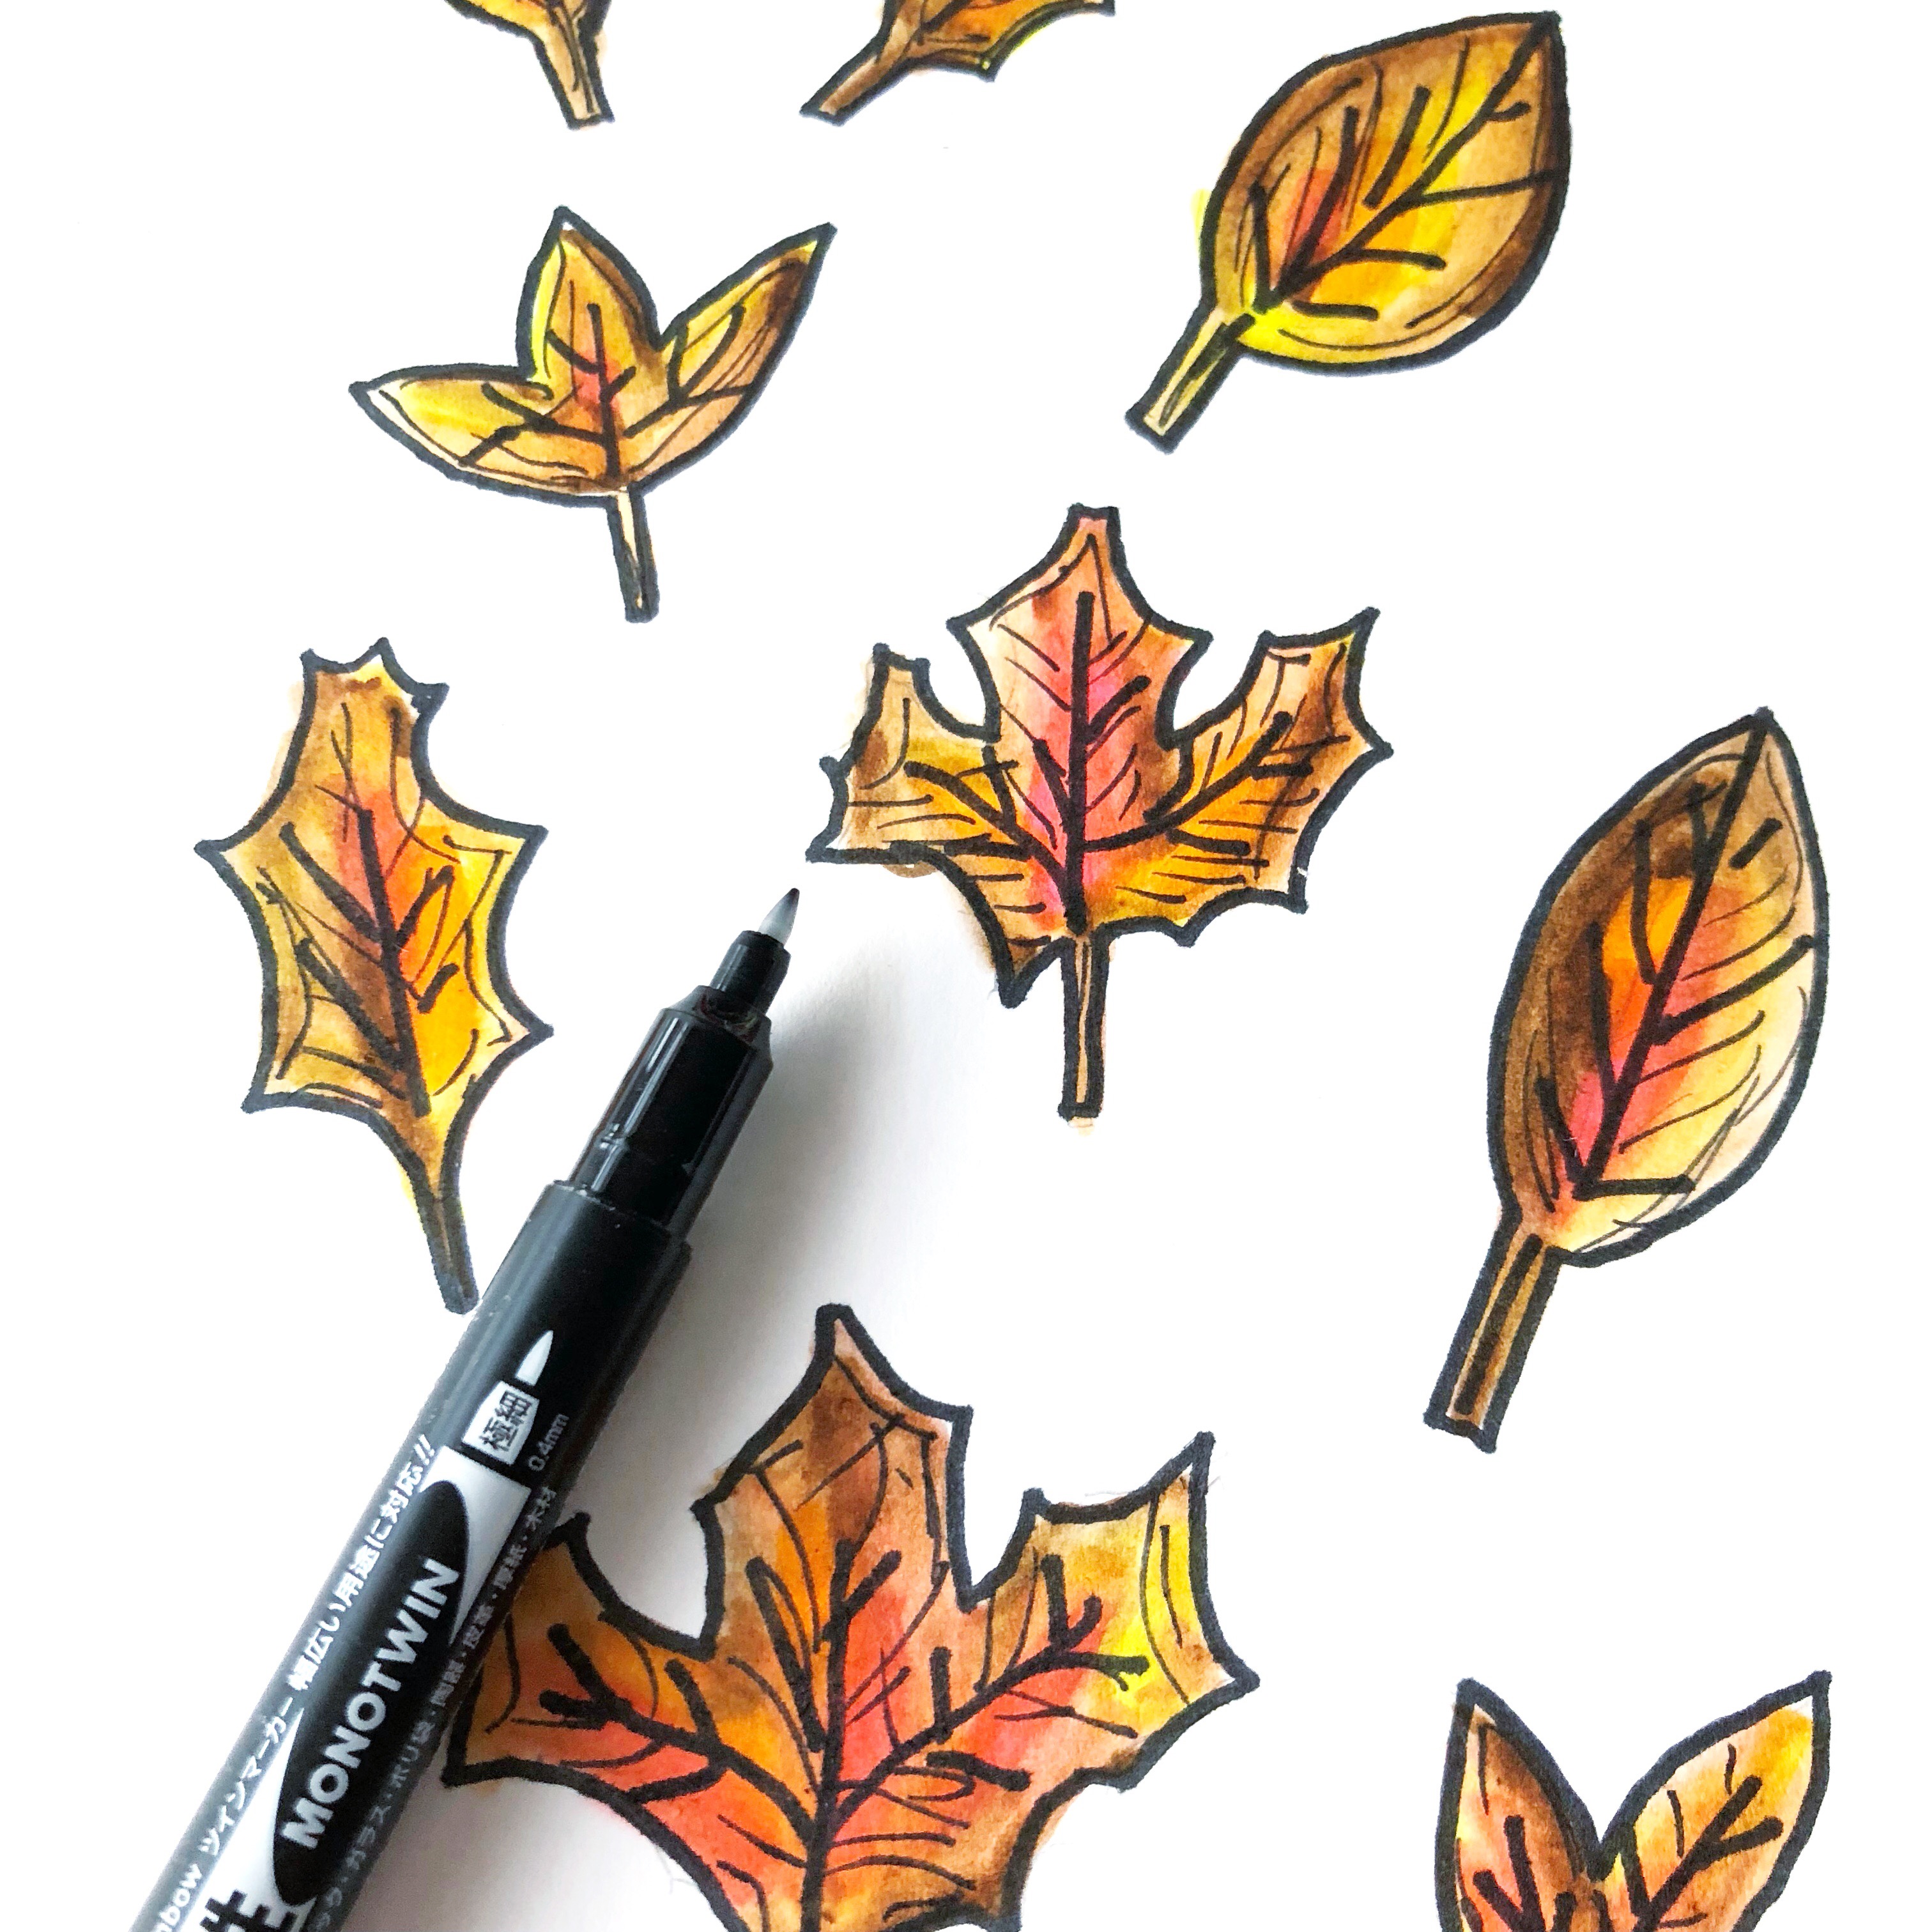
Add small details with the fine tip of the Tombow MONO Twin Permanent Marker. Then your leaves are complete.
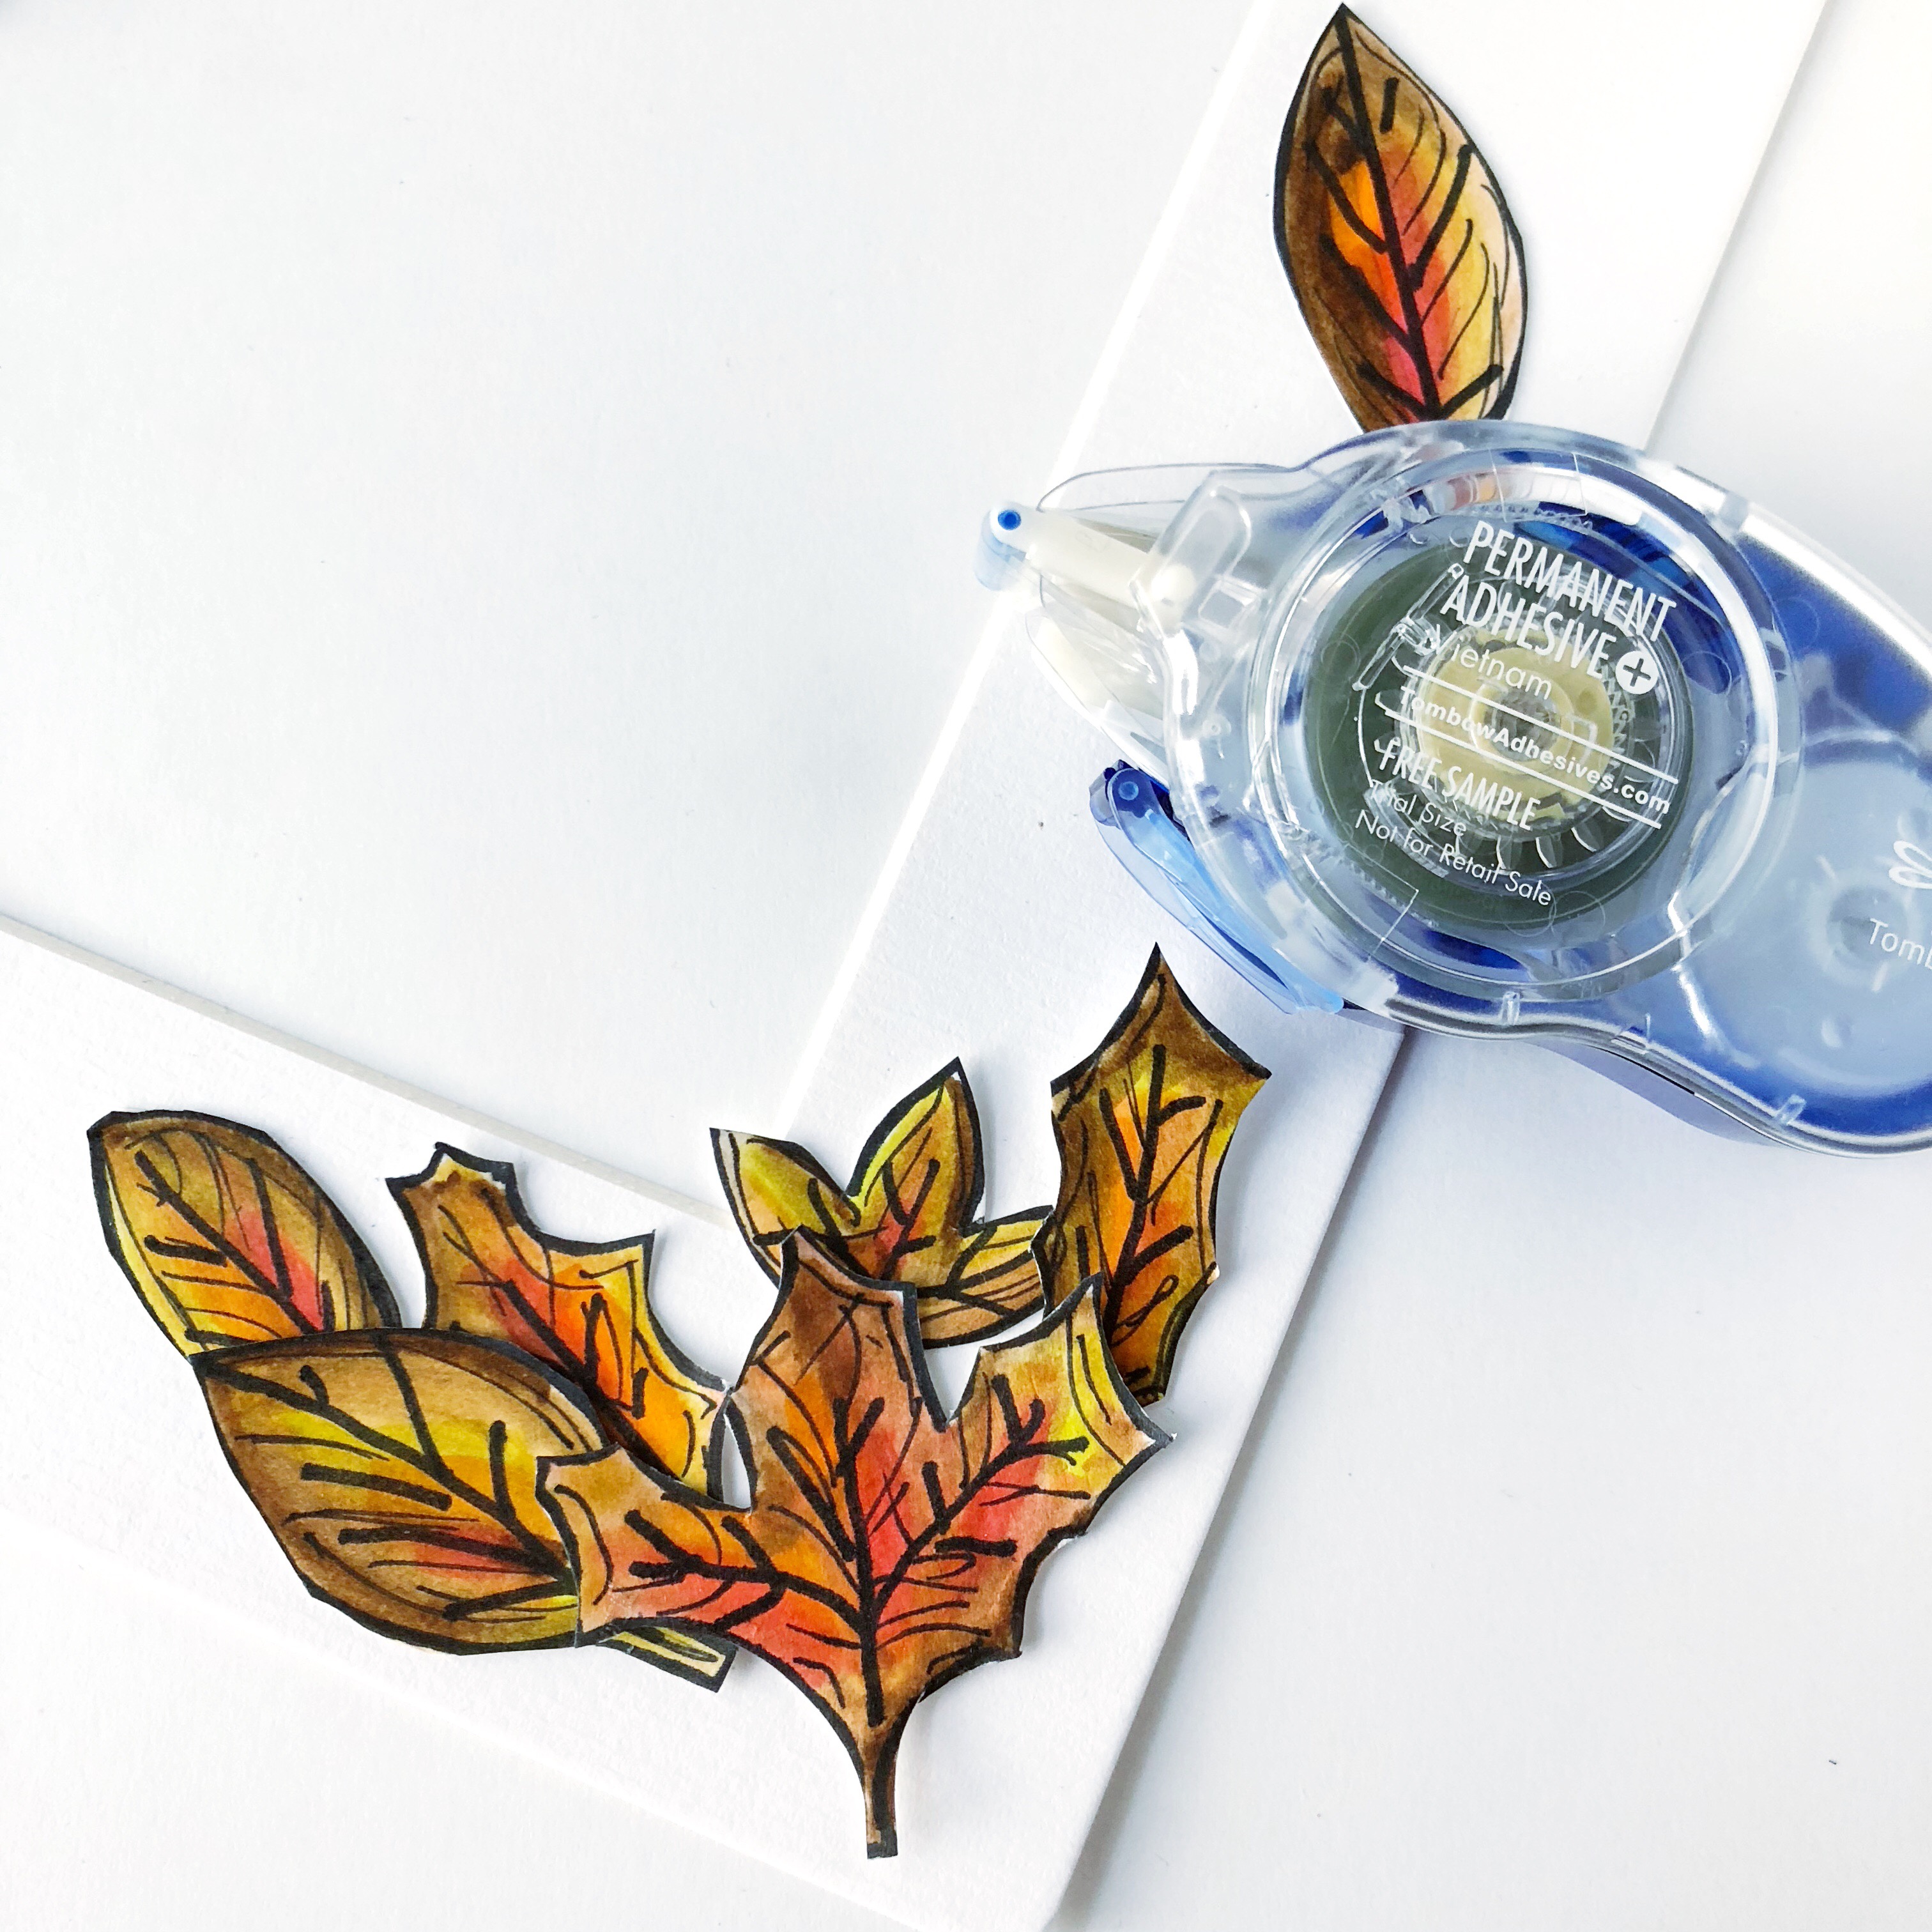
5. CUT OUT AND ATTACH THE LEAVES TO A MAT
Cut out the leaves and adhere them to the corner of the mat using the Tombow MONO Permanent Adhesive+. Cluster a group of leaves in one corner and scatter a few stray leaves around the rest of the mat to add balance to the piece.
6. FILL THE MAT AND FRAME
The completed mat is now ready to be added to a quote or picture. Want to learn how I lettered the simple monoline lettering composition I used in the mat? Head on over to this post on my website ( renmadecalligraphy.com ) and check it out!
TombowUSA.com has many of the amazing products you see in this tutorial. Make sure to check out the Tombow website or instagram this week for more fall-themed tips and projects!
Happy Lettering!
If some one needs expert view regarding blogging and site-building afterward
i recommend him/her to pay a quick visit this webpage, Keep up the nice
job.