Hello friends, it’s Smitha here with a new blog post! I have a really simple and fun watercolor Halloween pumpkin drawing tutorial that I am excited to share with you all! This is such a creative way to make your own themed home decor.
Material list:
- Tombow Dual Brush Pens
- Mixed Media Sketchbook
- Paint brush and water
- Tombow MONO Twin Permanent Marker
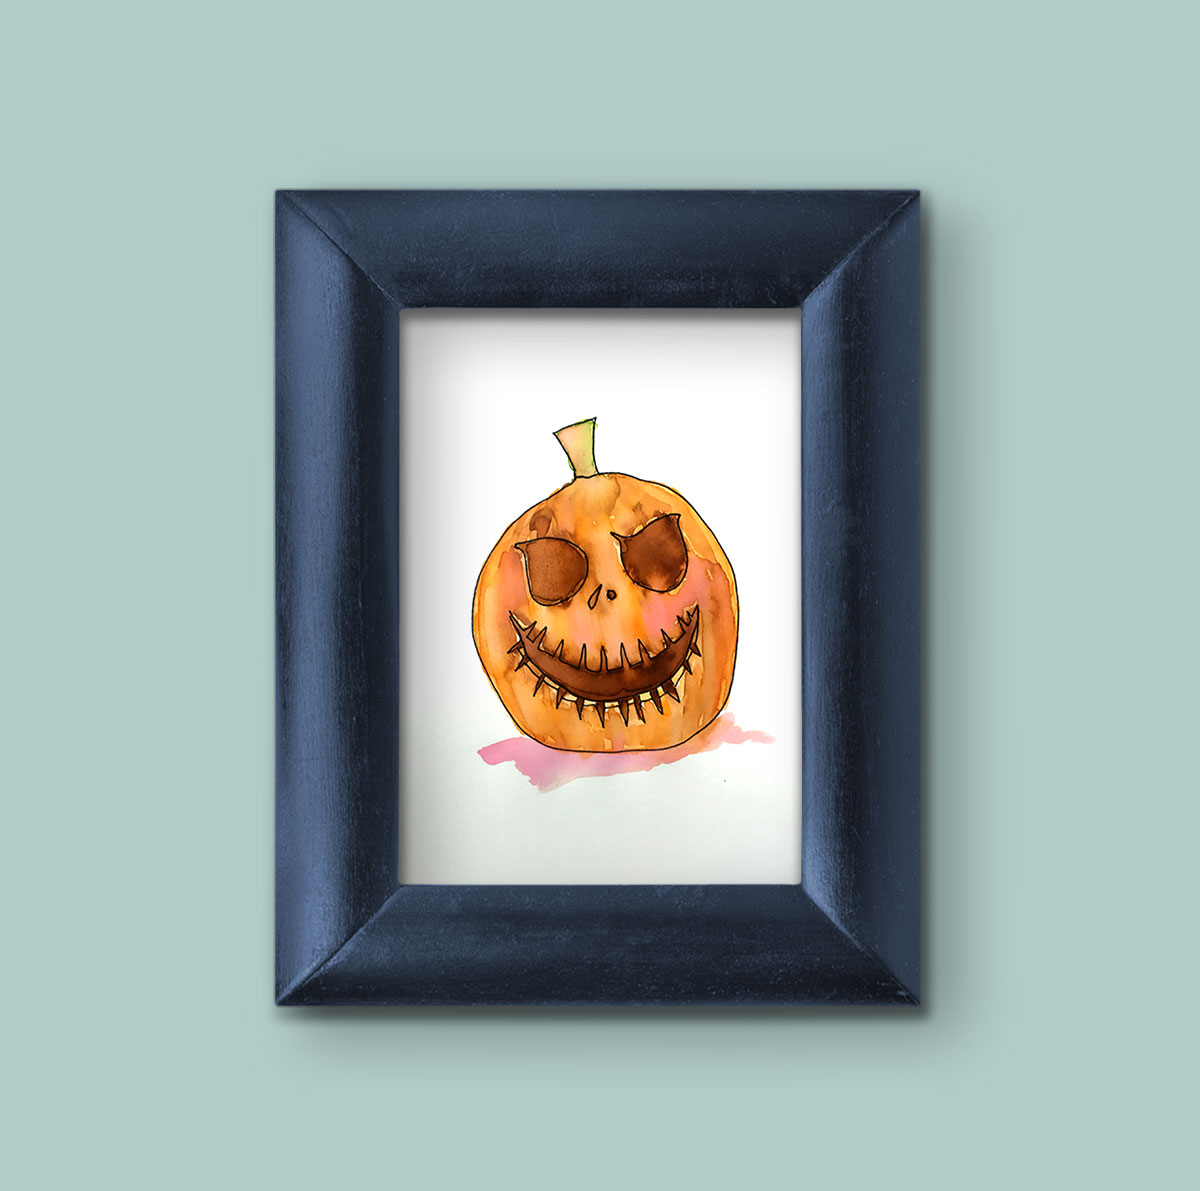
- Photo frame
Watch the video Tutorial:
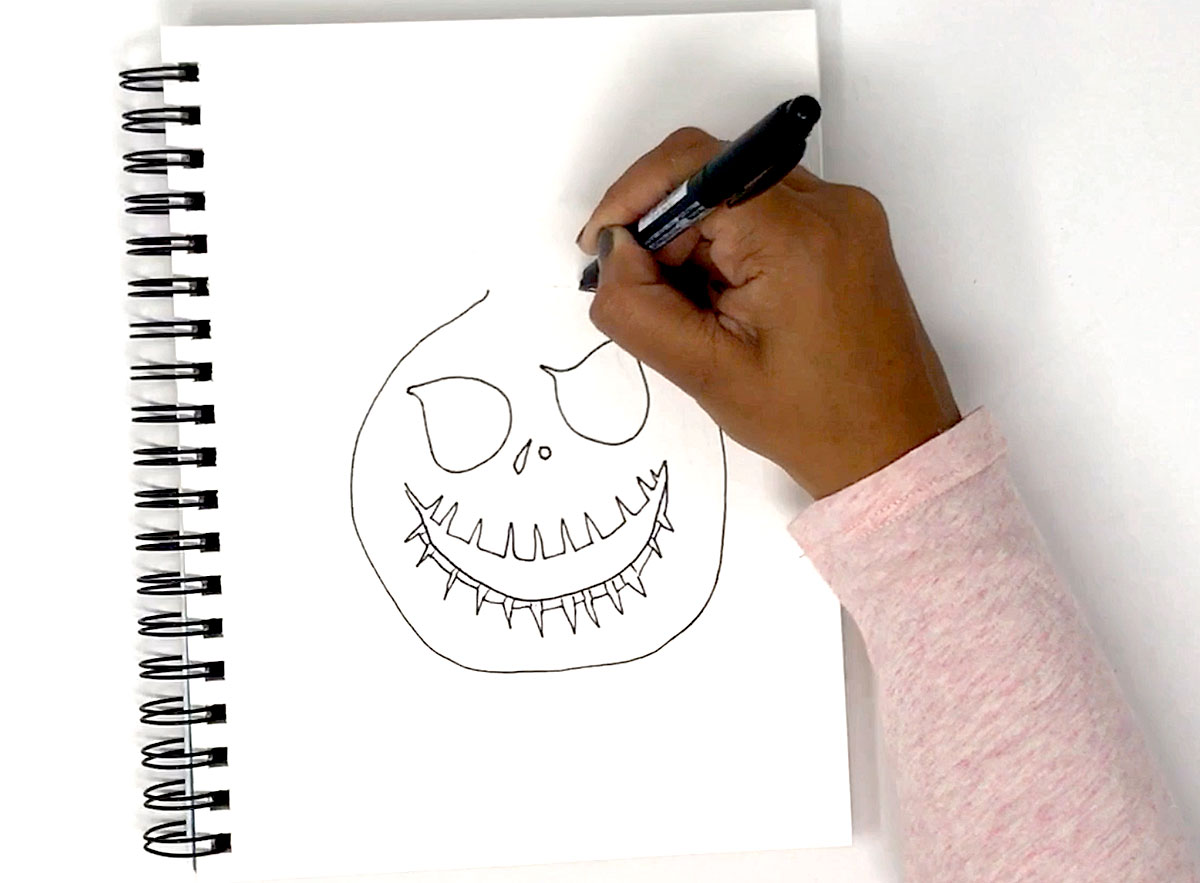
Step 1:
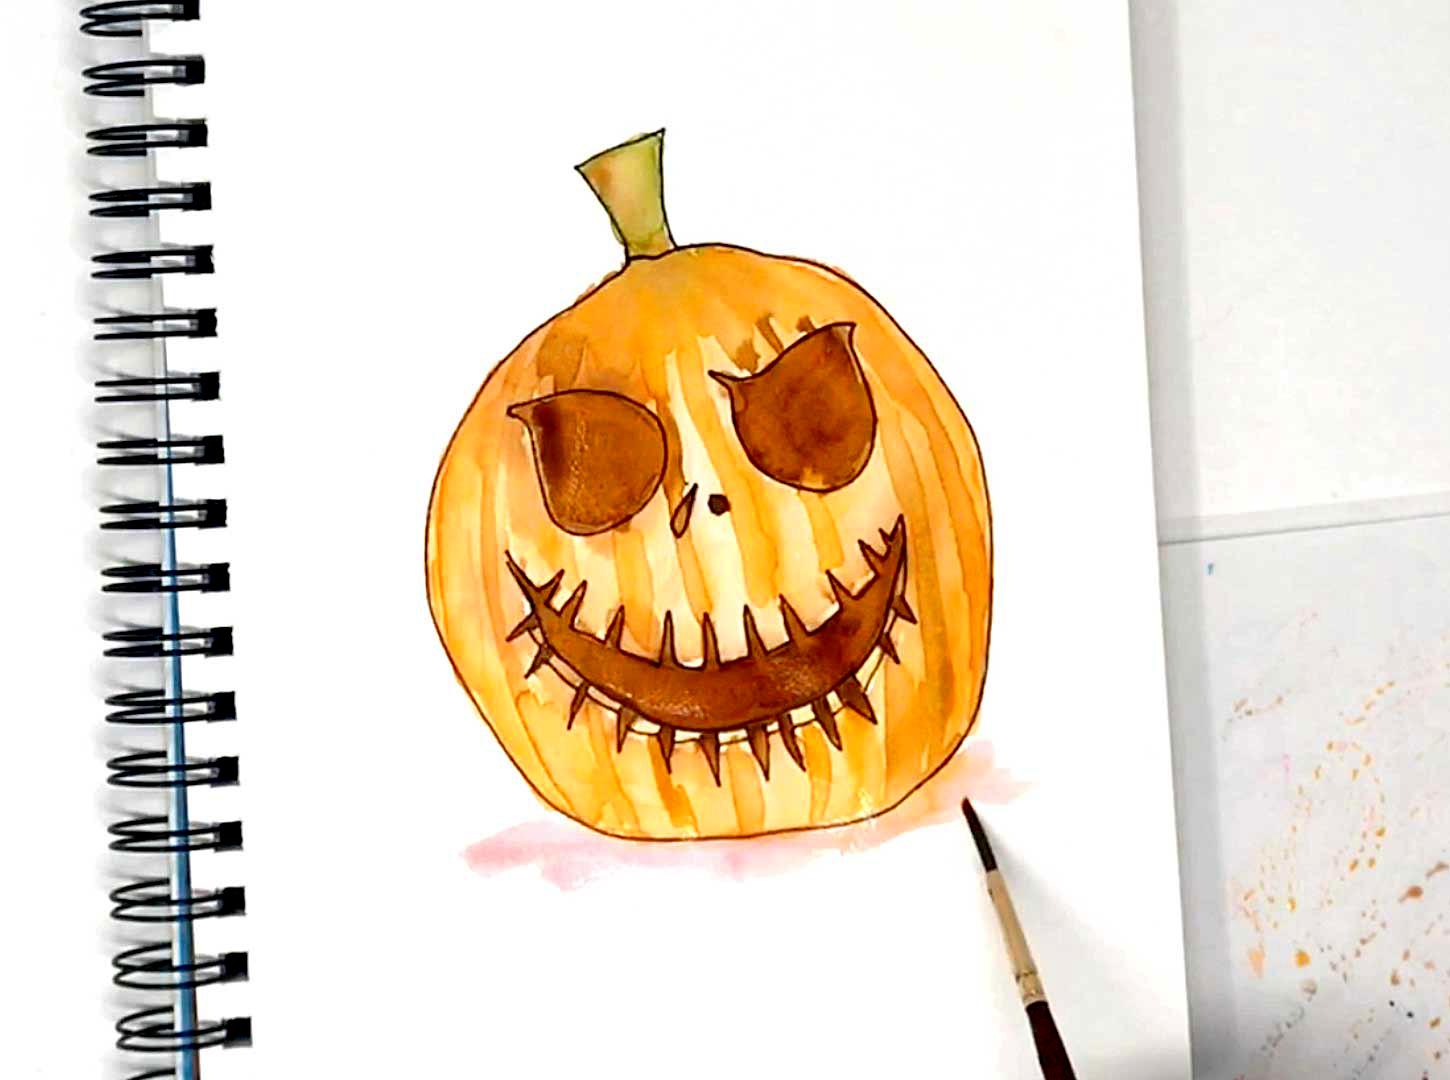
I start by first inking my pumpkin shape with the MONO Twin Permanent Marker. This pen is oil based and that means that I can go back and watercolor over it without smudging my black lines. I add all of my pumpkin details first with the pen, I like having the black outline.
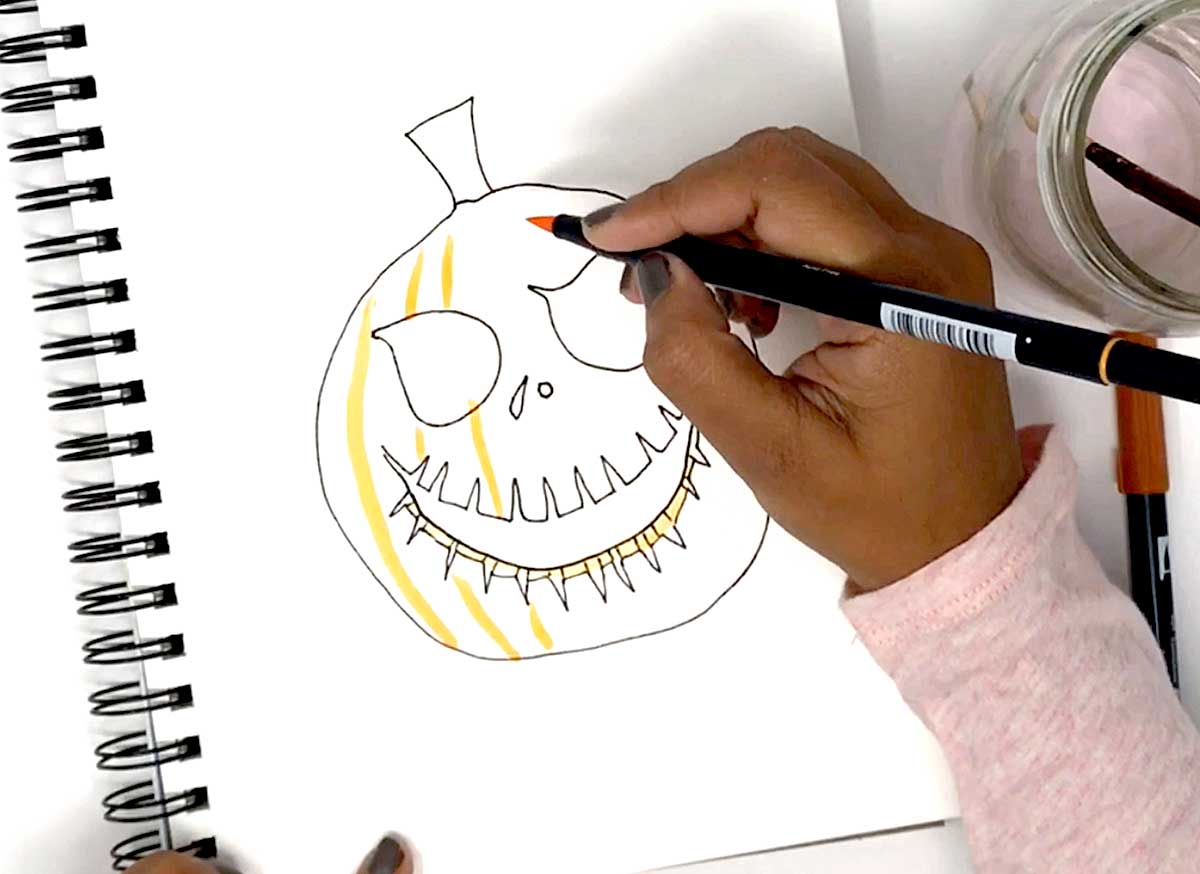
Step 2:
Next I use my Dual Brush Pens to watercolor and color in my pumpkin. I add my marker ink directly onto the paper in the areas I want the color to be the darkest.
Step 3:
I simply paint over the Dual Brush Pen lines with water to spread the color and create a watercolor effect. The more water you add, the lighter the color will get.
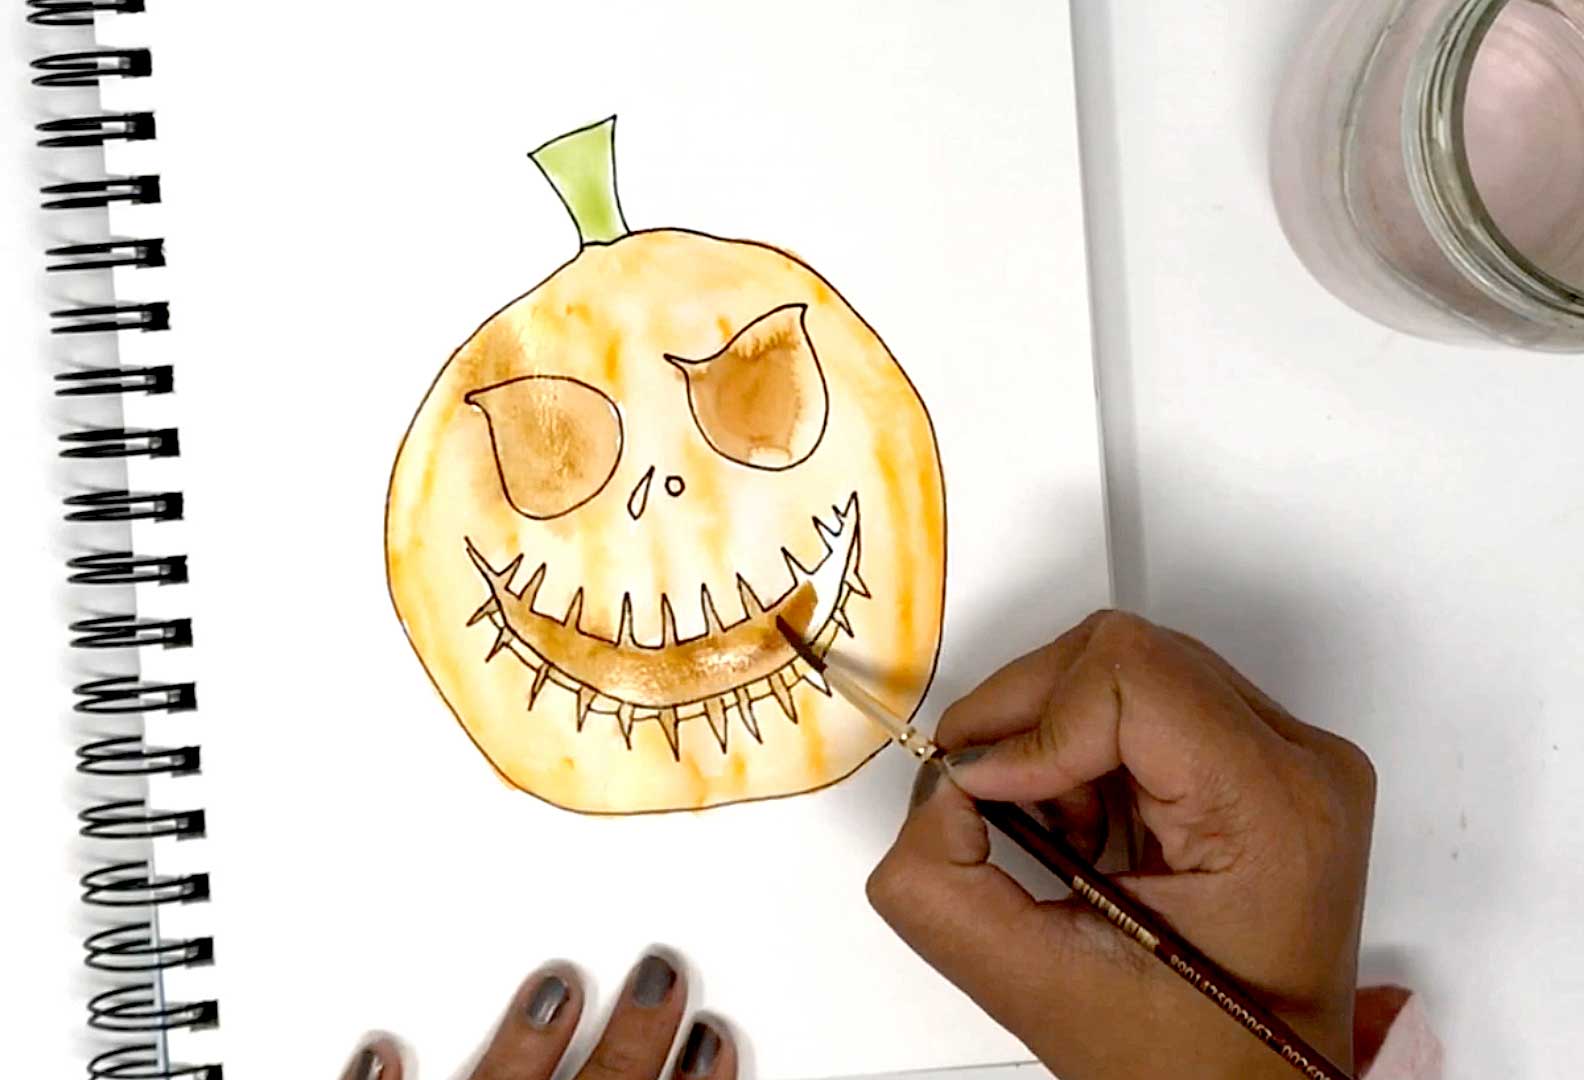
Step 4:
I let the water dry and then go in and add more and more layers of color. By layering colors like this you have more control on how dark you want the end design to look. When you are happy, let it dry and pop it into a frame!
And that’s it! That’s a fun Halloween decor project for you to try. I hope you enjoyed this tutorial friends.
Happy Crafting!
Smitha