Happy Friday Tombow Fans! This week we are trimming the tree! We have a few DIY ornaments in our blog if you need some ideas. Today I am made a little city shadow box for my tree.  I used a 6×5 piece of chipboard and I scored at one inch on each side. I cut out the squares in the four corners. Glue the papers using the Tombow Xtreme Permanent Adhesive. Start by adhering the Fancy Pants Designs paper (3×4 inches) at the bottom of the box. My chipboard is really thick (it needs to be toddler proof-ish) that is why I had to fold the chipboard before gluing it. I needed a 1/8 inch space for my chipboard to fold nicely.
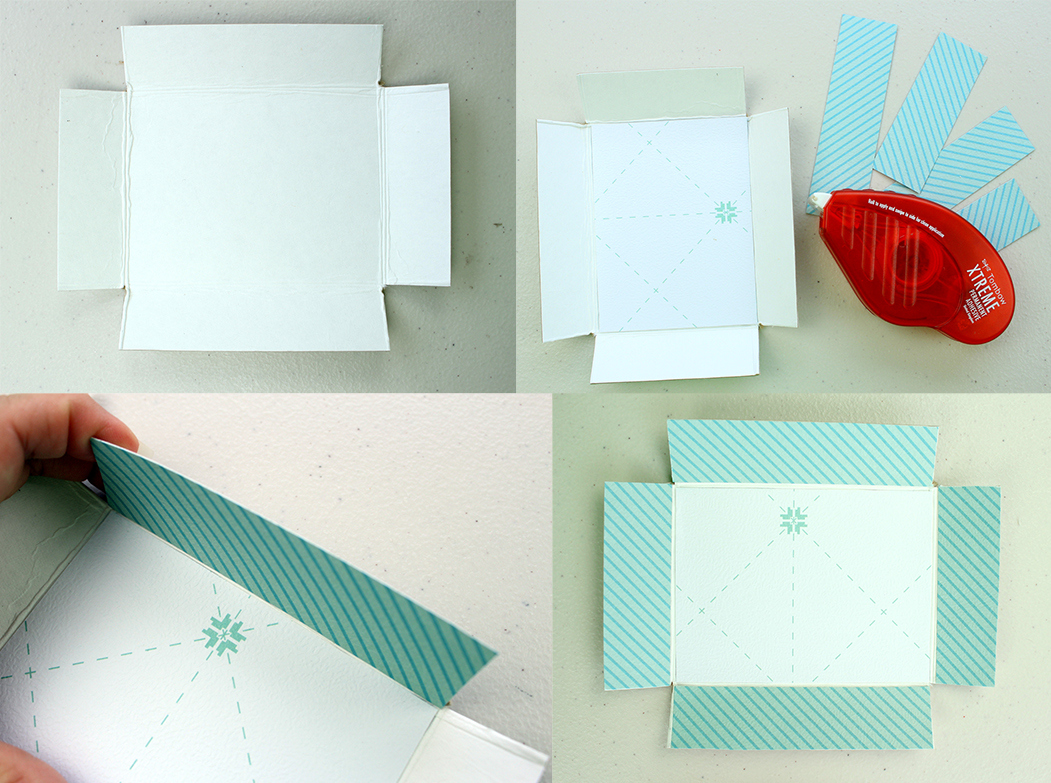
Glue the corners using the Tombow Mono Multi Liquid Glue. Hold it until it dries a little bit. To cover the outside of the box I used a 6 1/4 x 5 1/4 paper from Fancy Pants Designs. Score the sides at 1 1/8. Glue the center first using the Tombow Xtreme Permanent Adhesive. Now to add the snow and glitter I love my Tombow Mono Aqua Liquid Glue. I put the house and the cloud inside the frame using a stack of Tombow Foam Tape. I feel that if I glue them to the background you won’t be able to see them.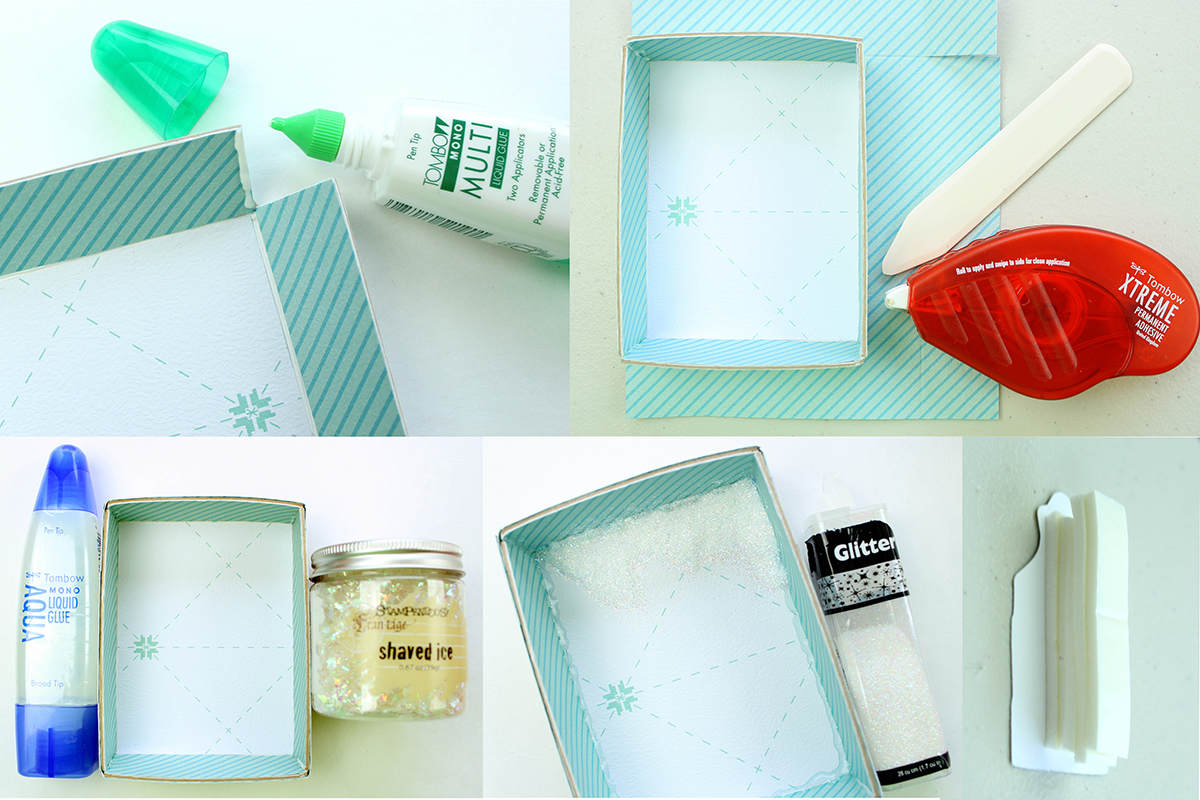
I punched a hole on the top and added a ribbon so I can put it in my tree. I used the Tombow Mono Multi Liquid Glue to glue the May Arts Pompom trim around the box. I applied a bit of Tombow Mono Aqua Liquid Glue to the trees and I sprinkled a bit more of “snow” on them. To glue the Fancy Pants trees to the scene I used the Tombow Mono Multi Liquid Glue.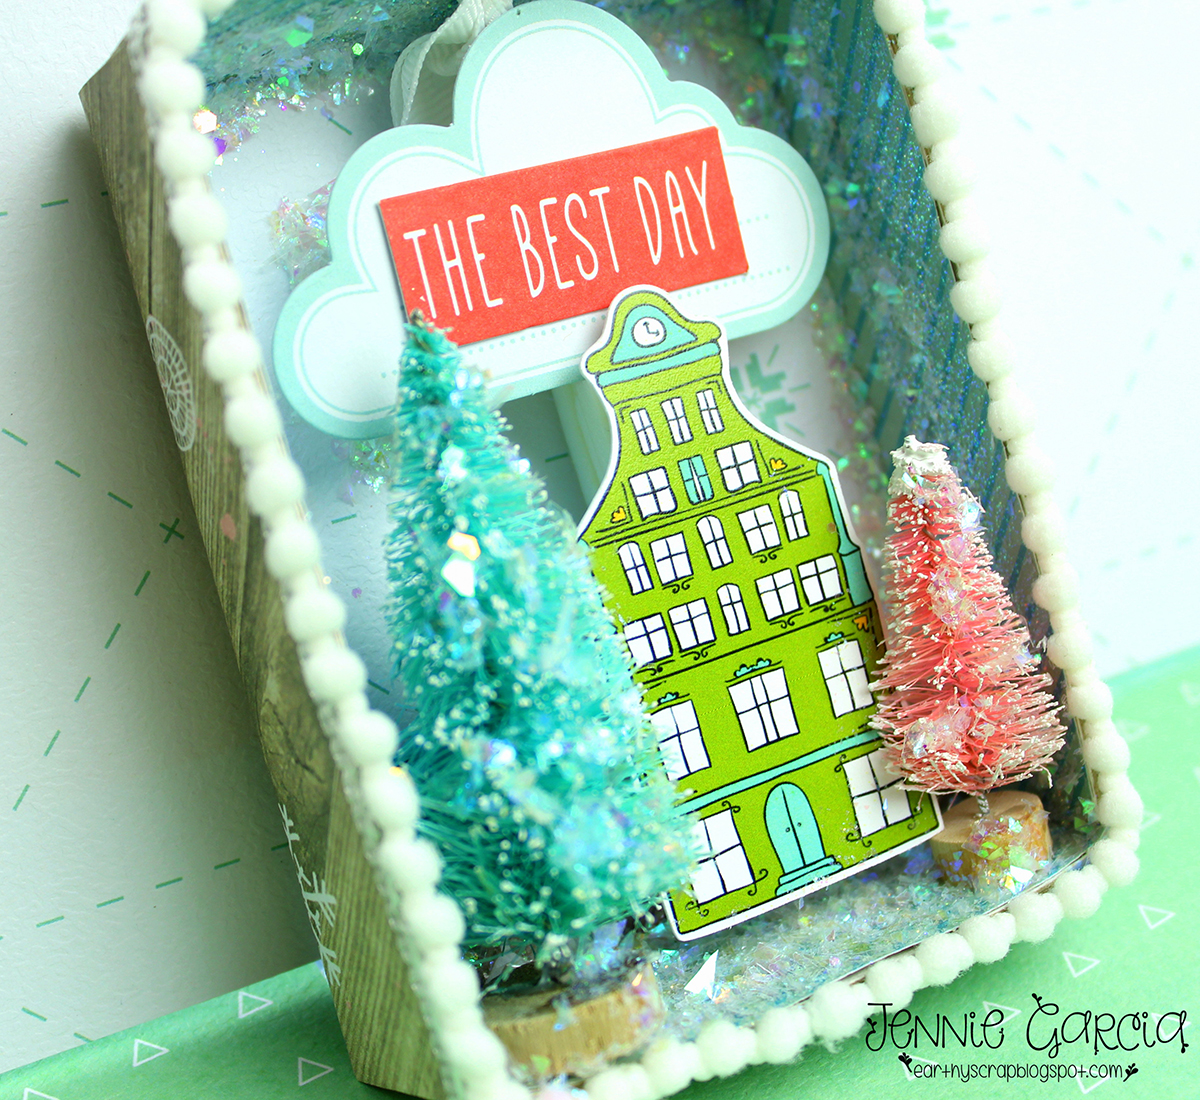
I had so much fun making these! Hopefully I can make a few more ornaments for my tree this year. I hope you enjoyed it!
Jennie
simple but it looks so beautiful