Have you ever wanted to learn how to draw rain drops? It’s spring right now, so we’ve had a lot of rain storms lately. But I won’t complain because, of course, April showers bring May flowers! We have so many flowers blooming in our yard right now and I love it!
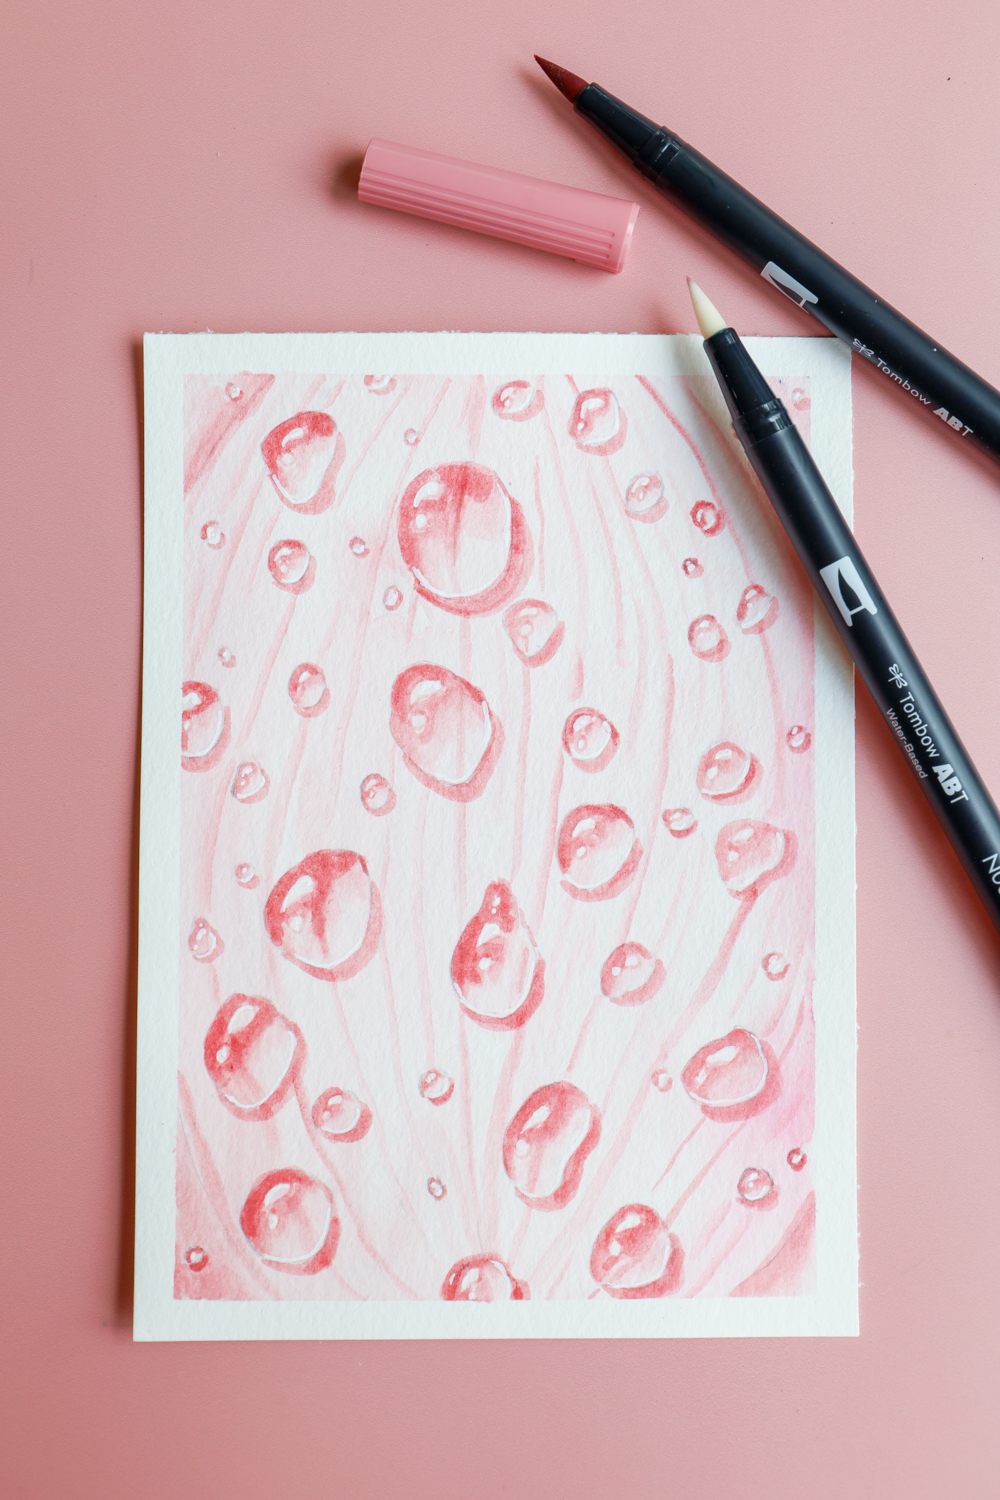
I was inspired by rain drops on flower petals, and decided to create an illustration of them using my Dual Brush Pens!
Supplies:
Tombow Dual Brush Pen Art Markers, Cottage, 10-Pack
Watercolor Paper or Bristol Paper (these are my favorite to use for illustrations like this and blend colors.)
Tombow Blending Kit (We’ll be using the N00 Blending Marker and the Blending Palette!)
Washi Tape
Tombow MONO Graph Mechanical Pencil
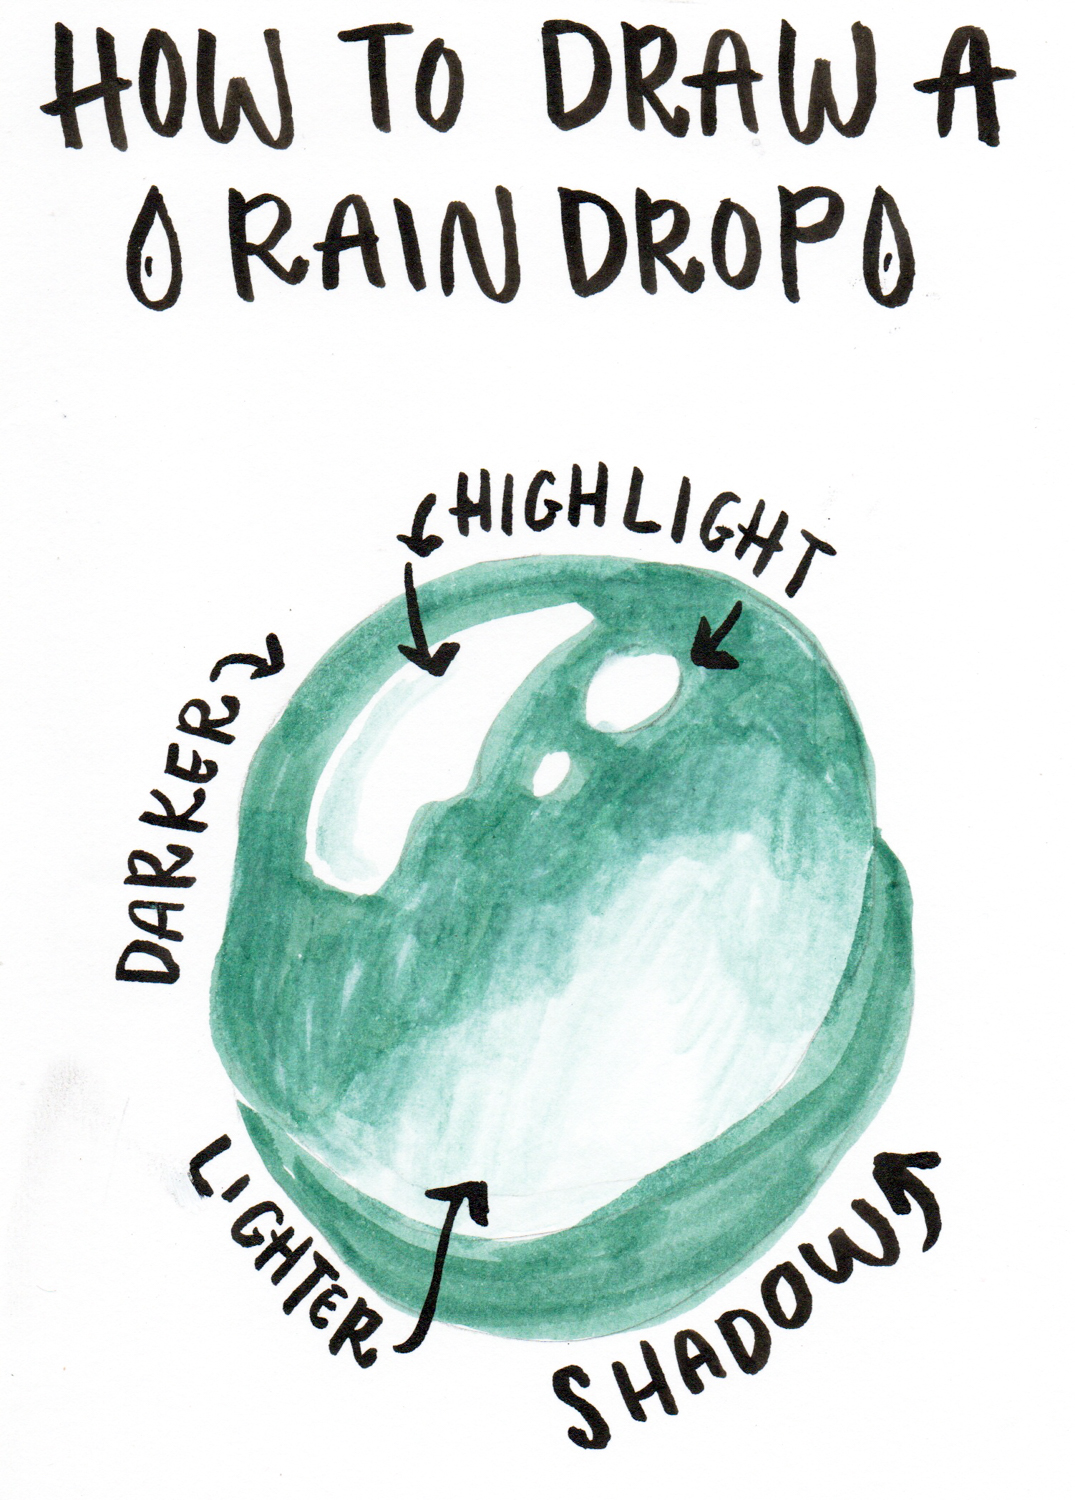
How to draw a Rain Drop:
Drawing a rain drop or water drop is so much fun and pretty easy to do too once you understand the highlights and shadows!
- Start by drawing a circle shape, it can be more round or more wobble, either way!
- You want to draw a couple of highlights, then shade the top edge, leave the bottom edge lighter, and then add a drop shadow beneath it raindrop!
Now, let’s draw a full scene of water drops on a flower petal, using Dual Brush Pen 772, and the Colorless Blender .
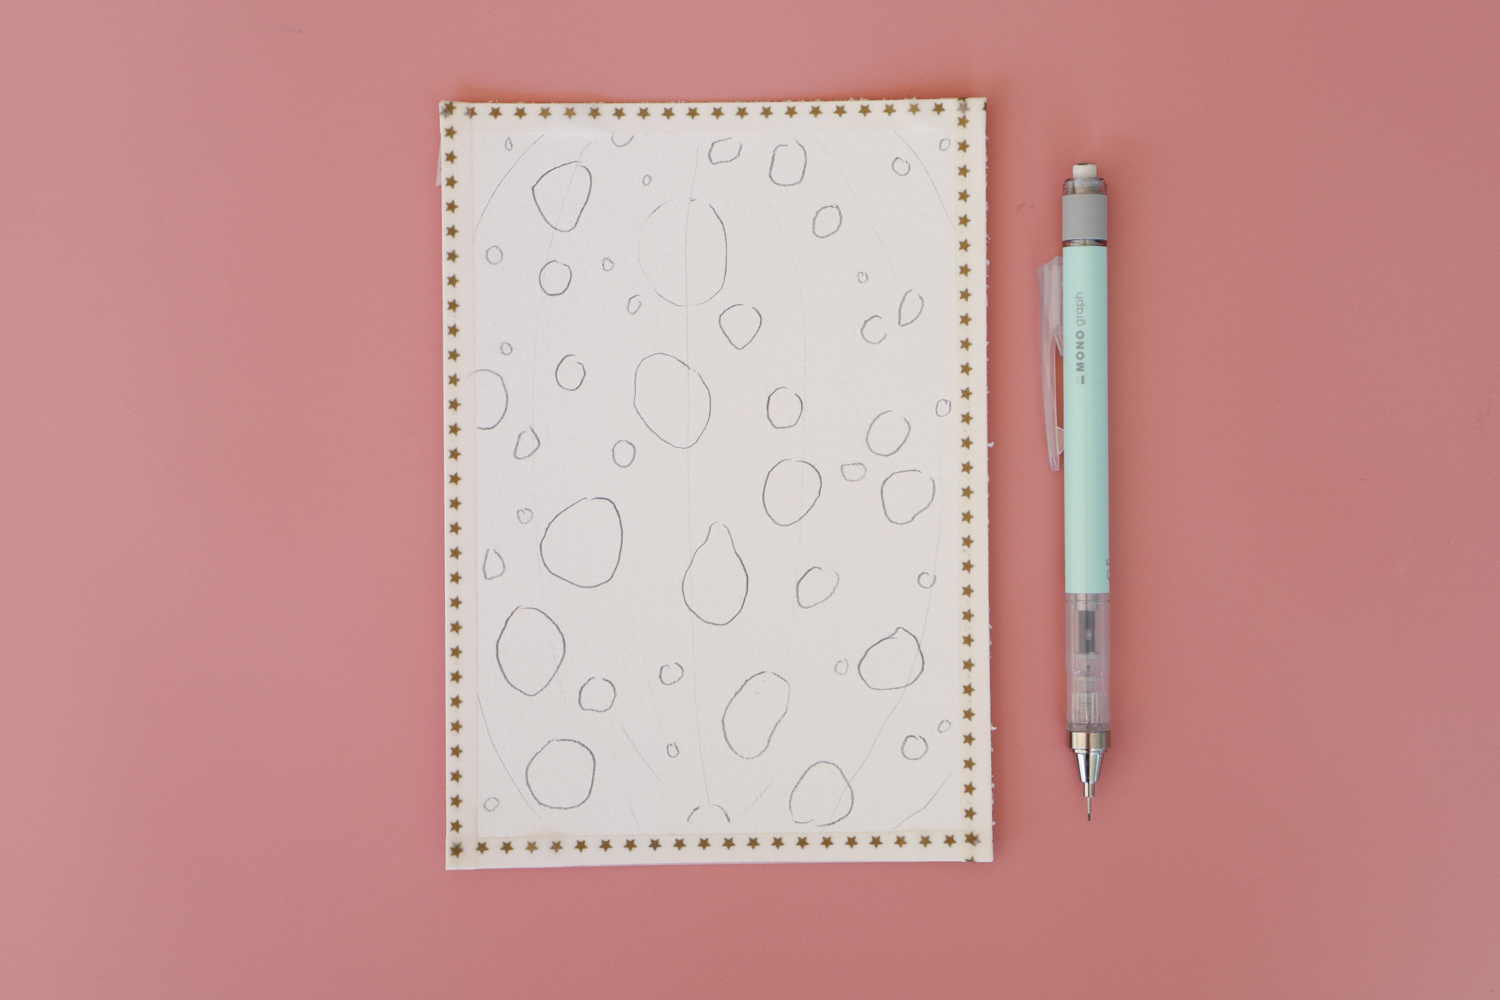
Step one:
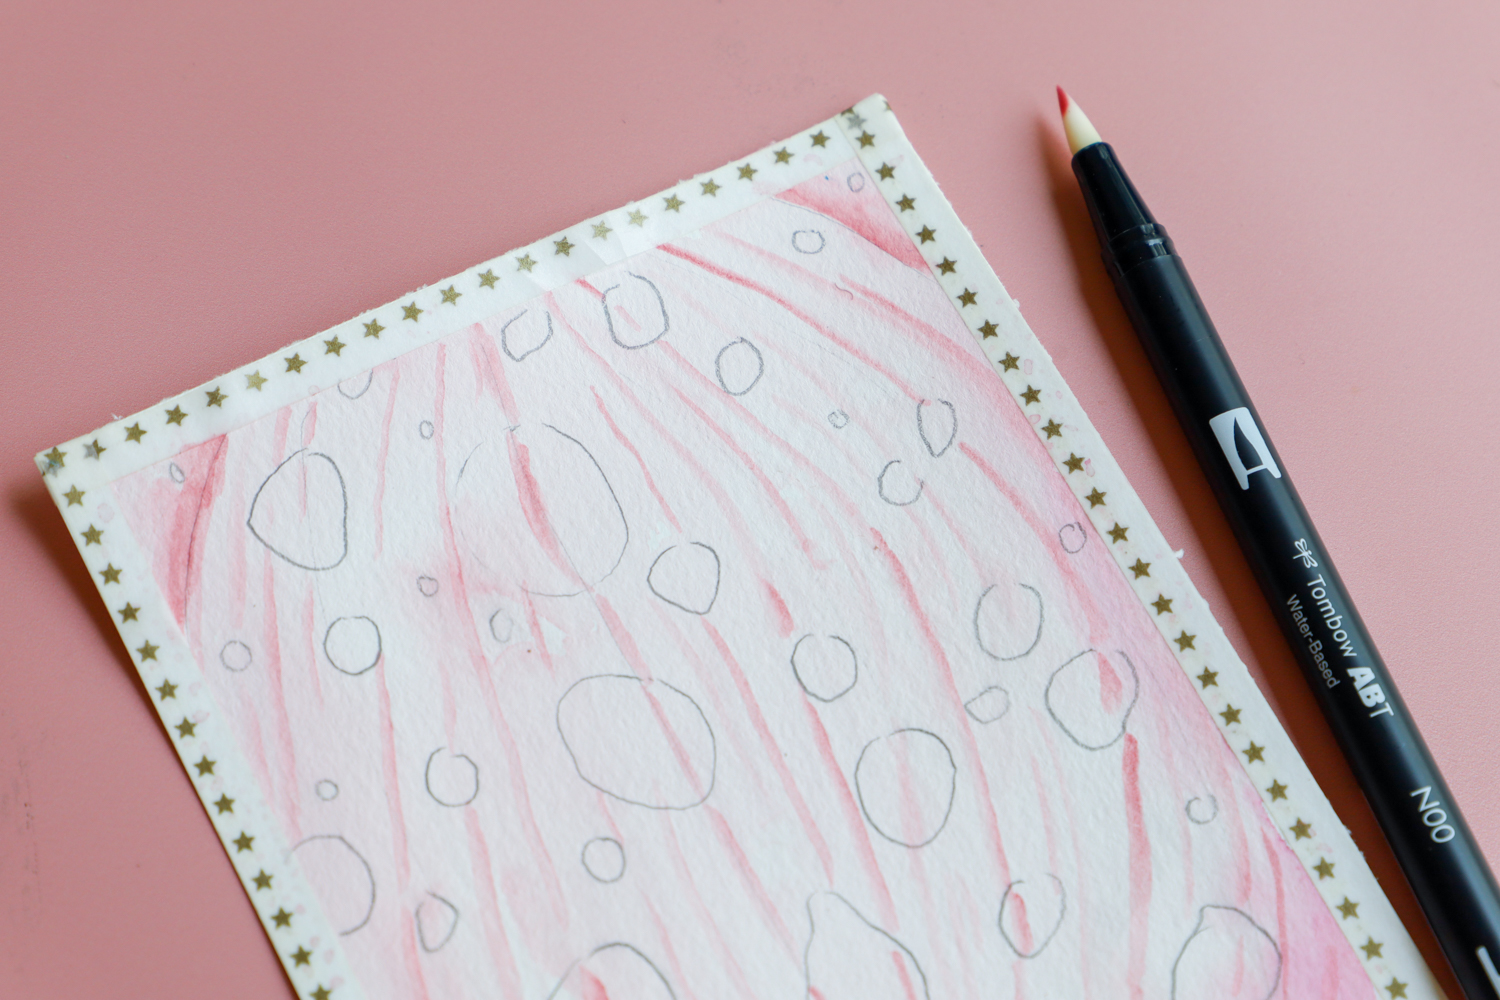
Add washi tape to the outside of your paper, I like doing this because it creates crisp white edges on the final illustration!
Next, lightly sketch raindrops across the page. I also lightly sketched curving lines vertically across the page to mimic the veins in flower petals.
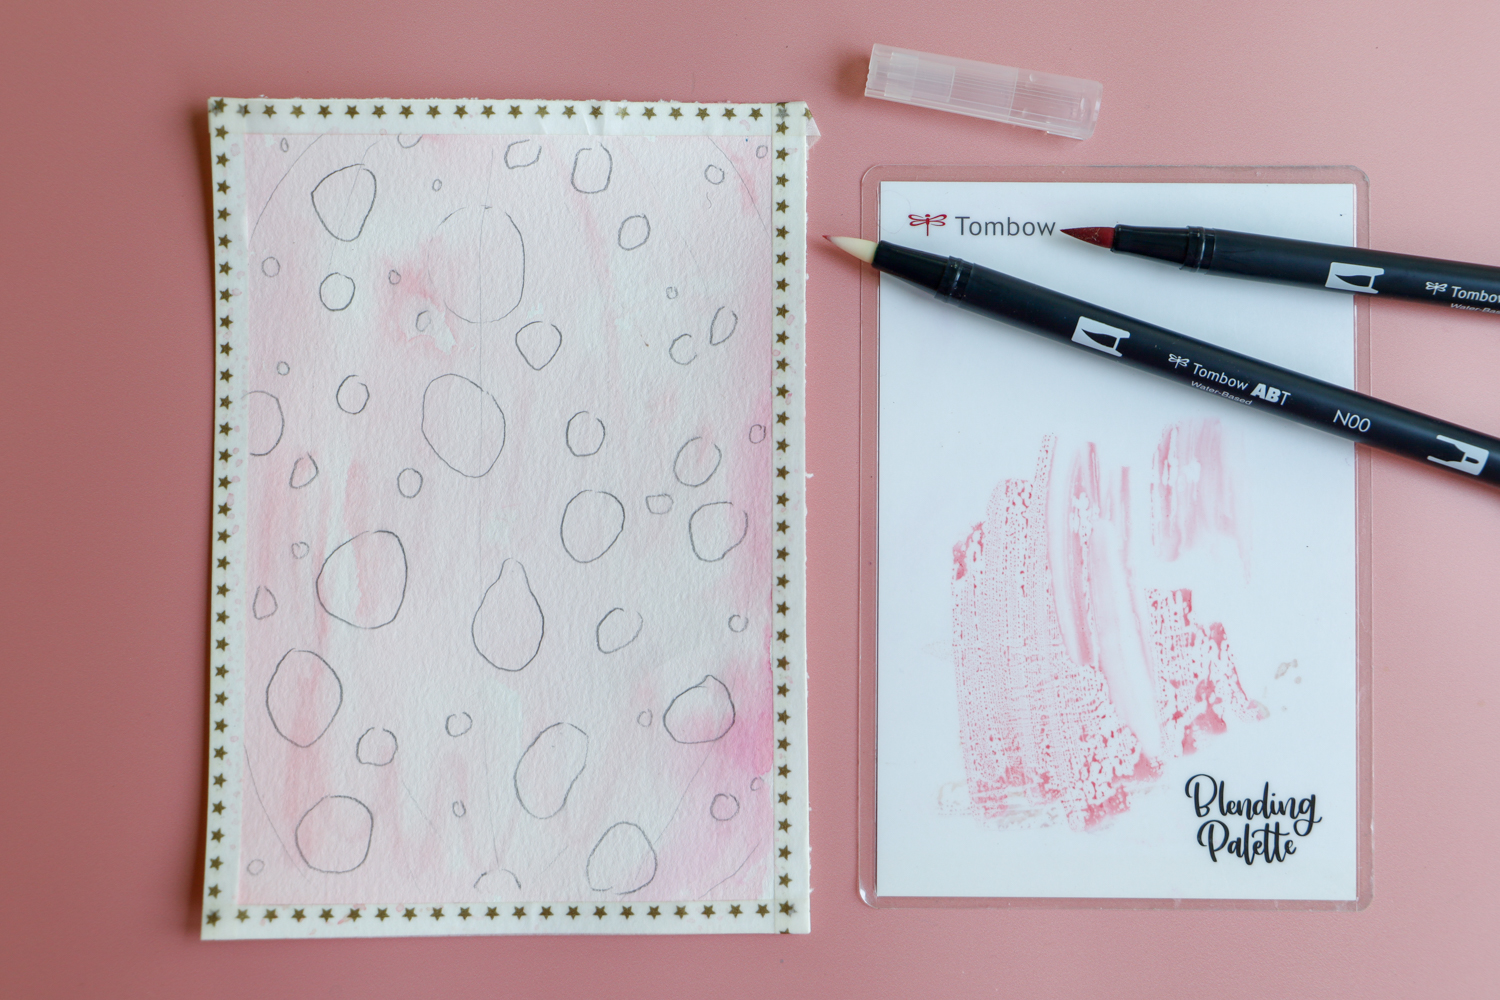
Step two:
Give the paper a very light wash of 772. You can apply the Dual Brush Pen ink directly to a Blending Palette, and pick up the color with the felt tip of the N00 Colorless Blender and then applying it to the paper for a soft look.
Step three:
Next, pick up some color on the N00 Pen again, and sketch out the veins on the flower petal.
I kept them pretty light, because I didn’t want them to distract from rain drops.
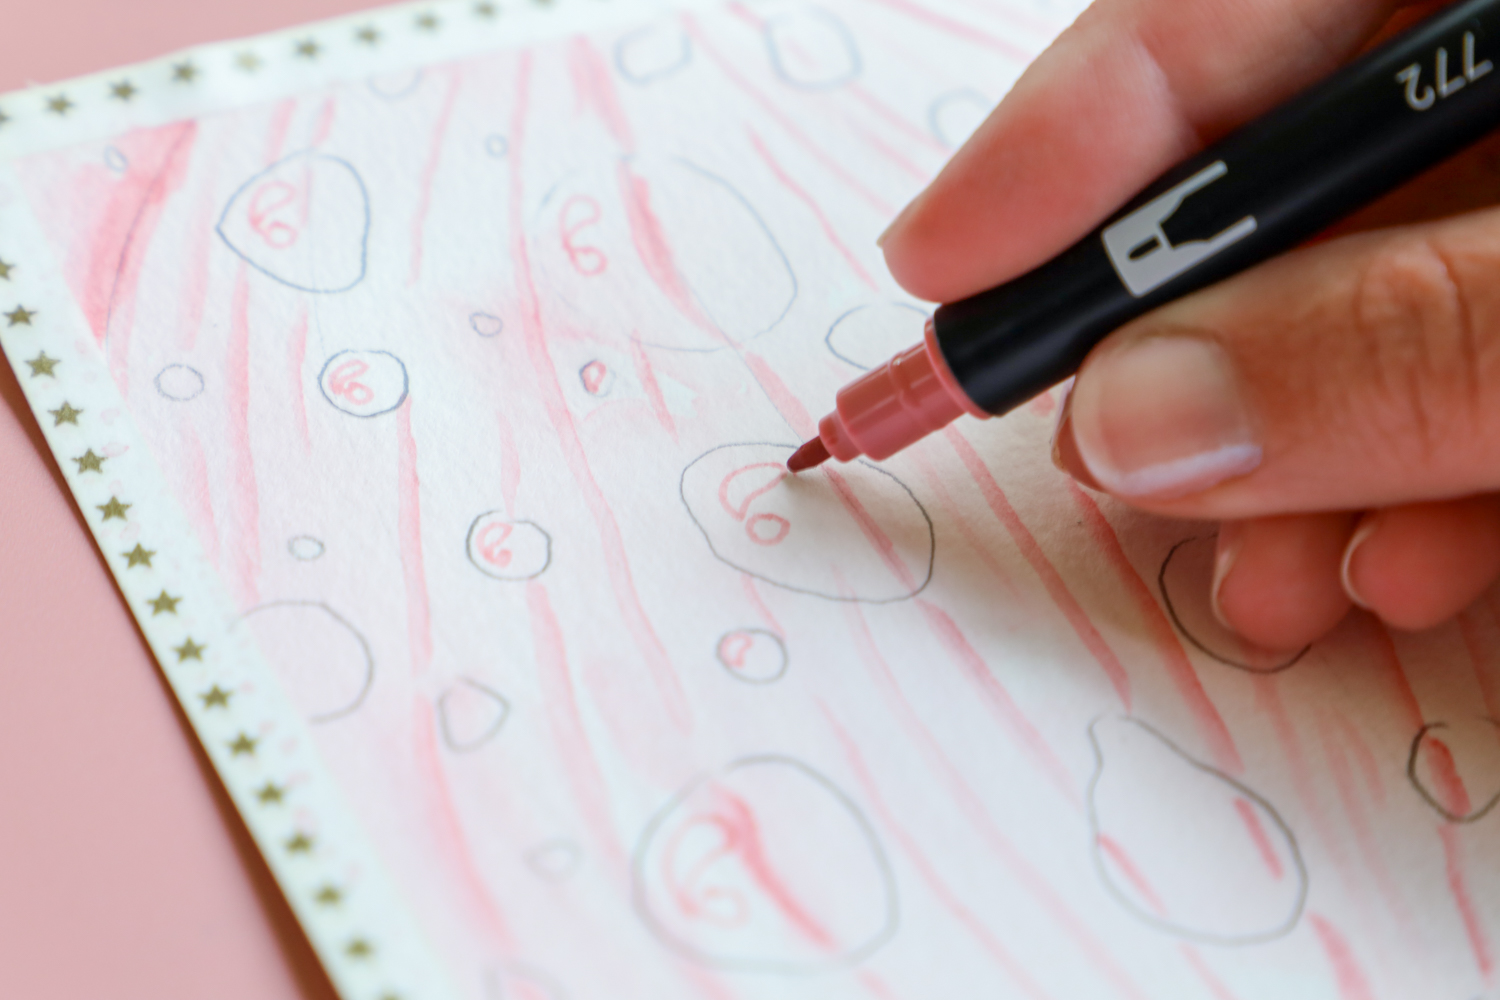
Step four:
Use the bullet tip of the 772 Dual Brush Pen to draw out the highlights on each of the rain drops. You’ll leave the areas inside of these highlights blank.
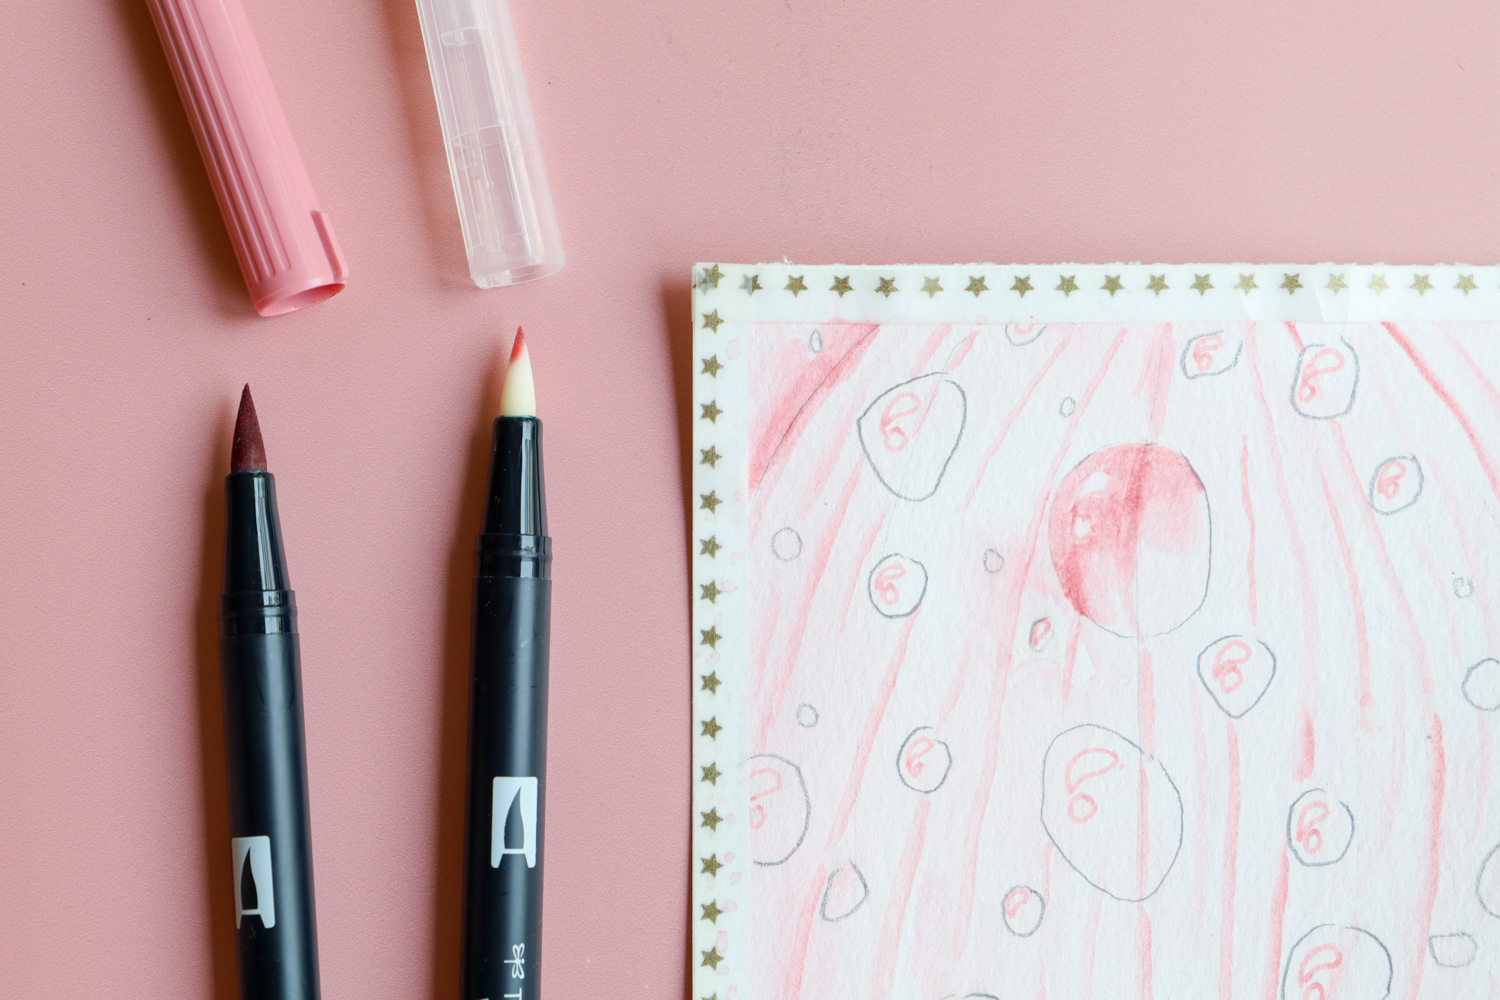
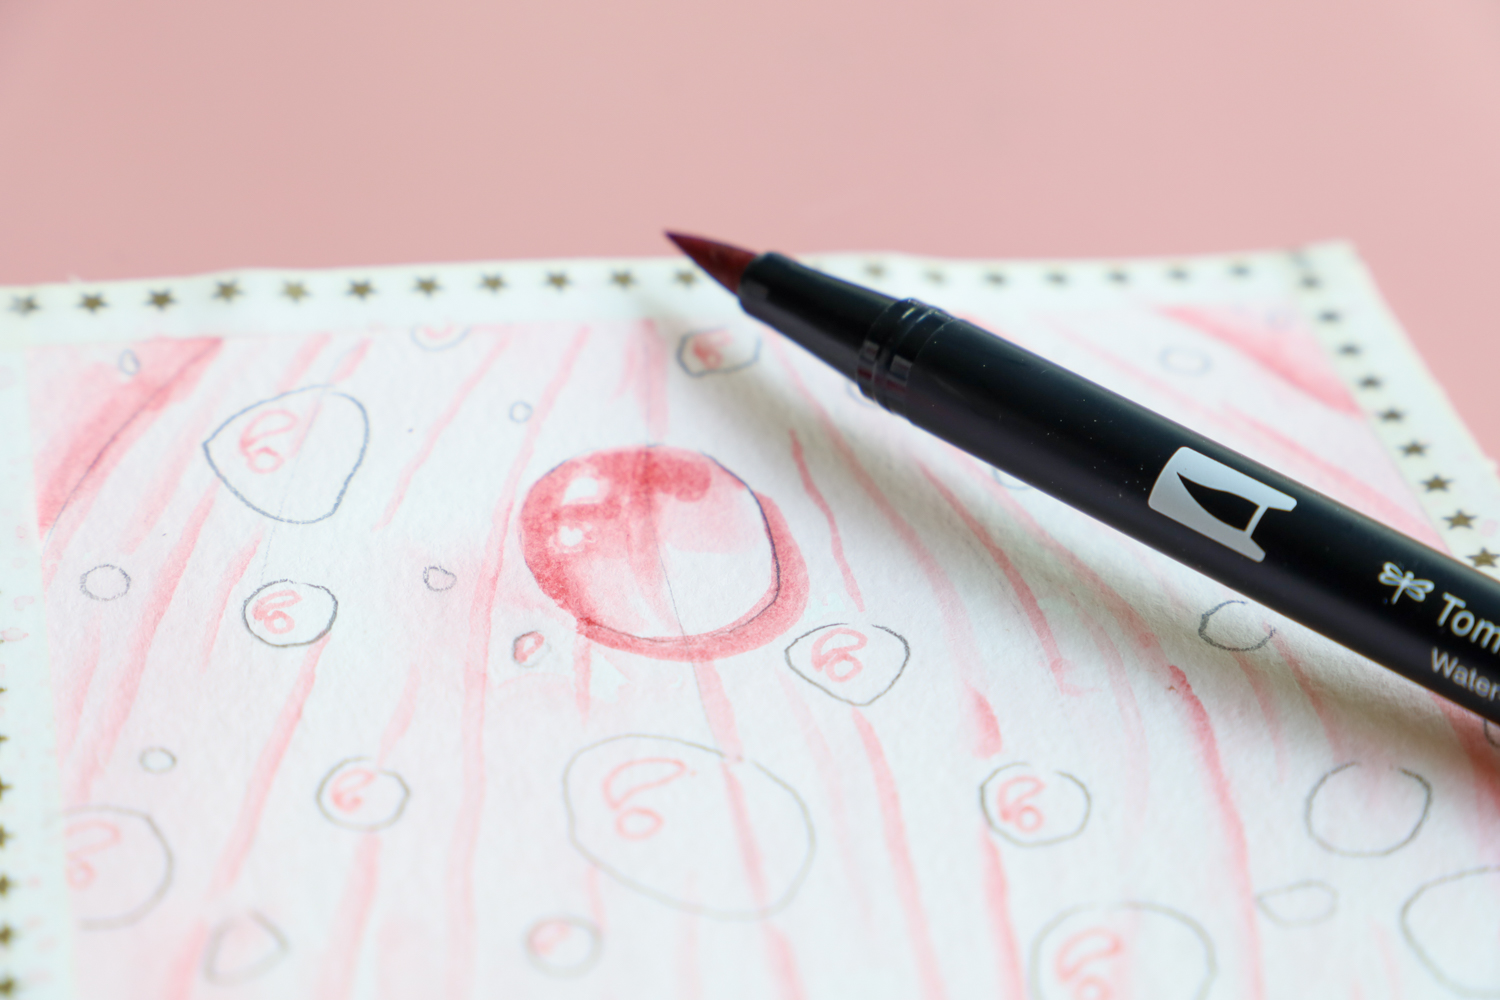
Step five:
Time to color in the rain drops! Color in the top 1/3 of the curve of the circle with the 772 Dual Brush Pen directly to the paper, and then use the N00 Colorless Blender to blend the color down, leaving the bottom curve of the circle light. Then add a drop shadow below the circle.
Step six:
Erase your pencil guidelines. I love the MONO Natural Eraser, because it’s made partially from scallop shells.
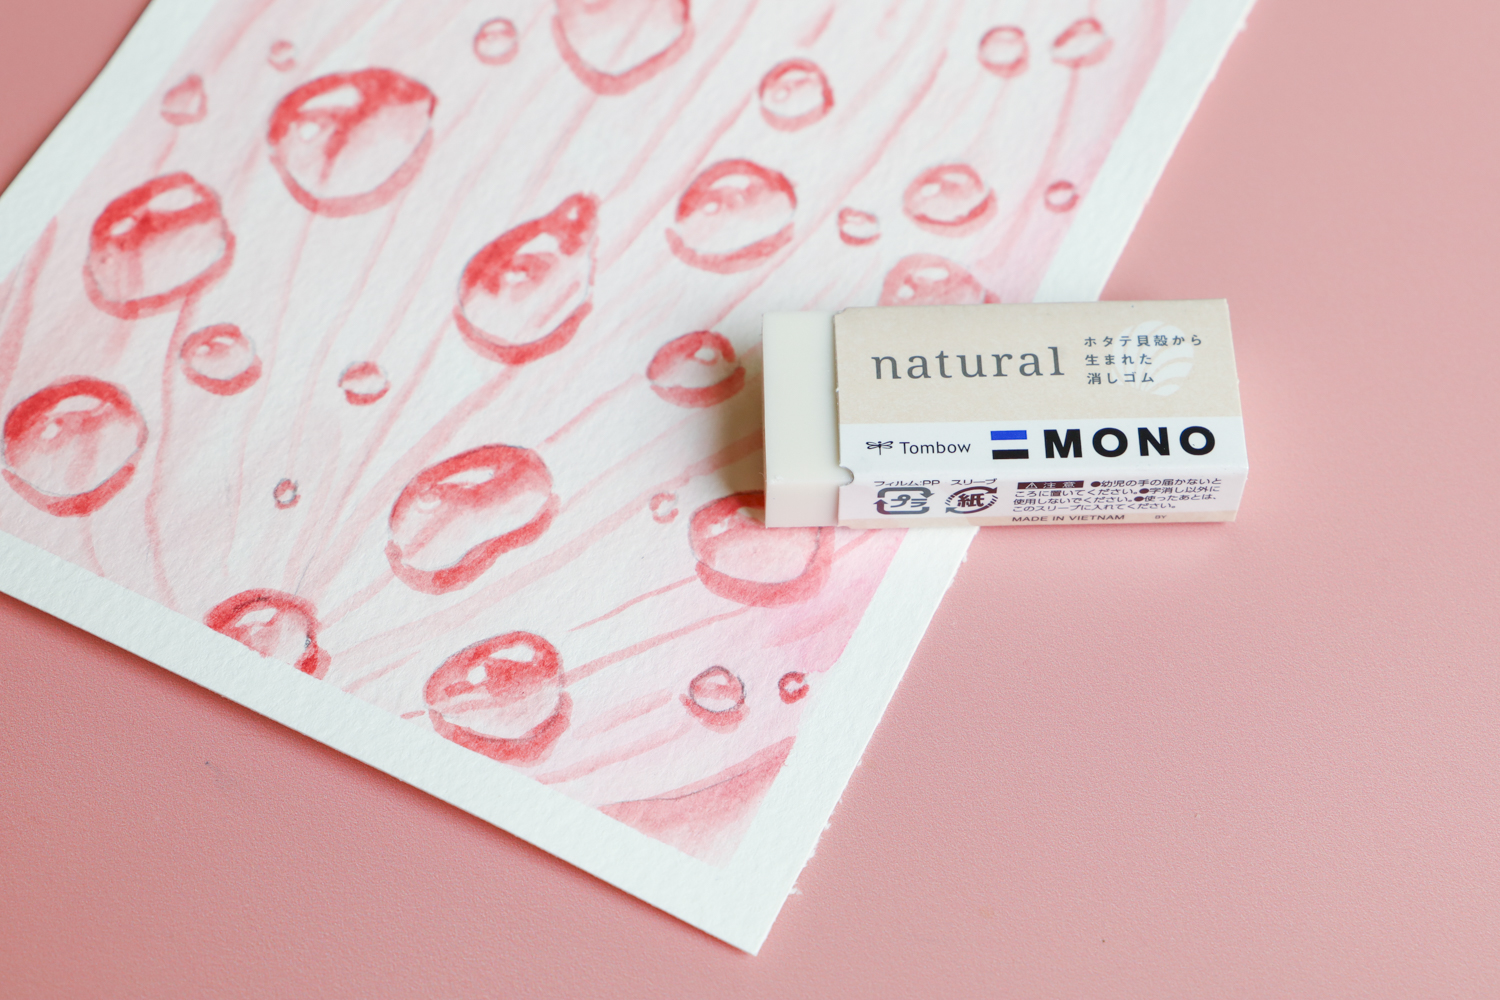
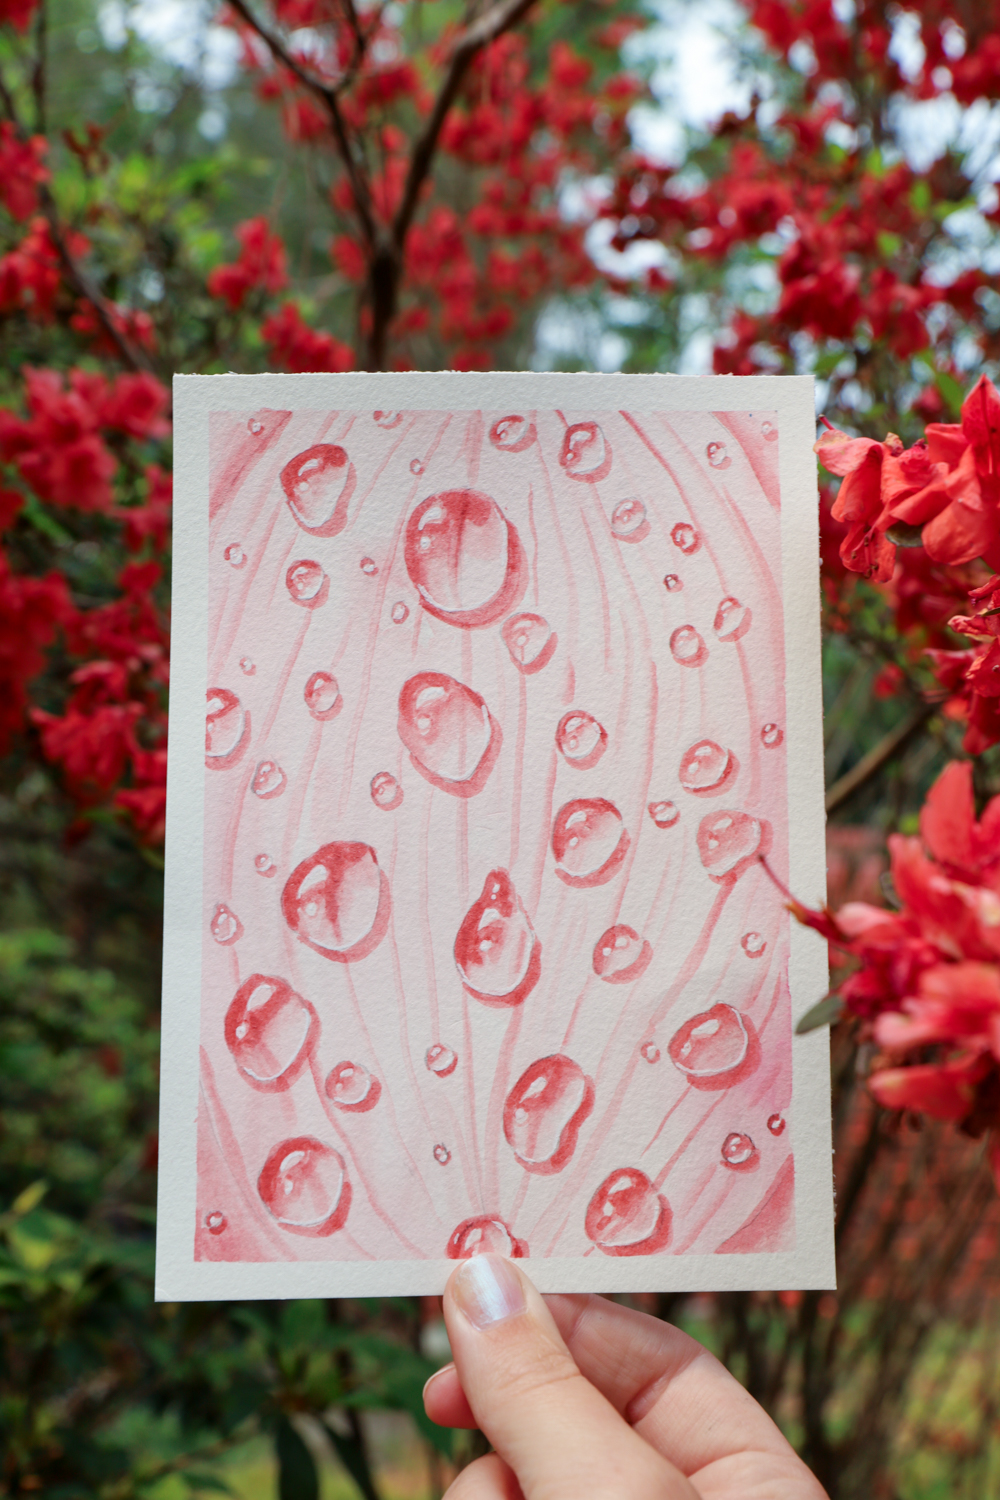
And that’s it! I am so happy with how this little rain drop flower petal came out, because I think it captures the Spring aesthetic so perfectly!
I hope you enjoyed it too, if you created your own version, make sure to tag us on instagram so that we can see, @tombowusa & @studio.katie
If you’re looking for more Springtime tutorials, I think you’ll love this post: DIY Spring Letters With Dual Brush Pens