Hi, friends! I’m Andrea Lake, and I’m excited to share how I created a cute 12×12 scrapbook layout from our road trip to Boone, Iowa this summer. We rented a cozy cabin in the woods and had the best time relaxing and exploring the area with our lovely dogs. Supplies: […]
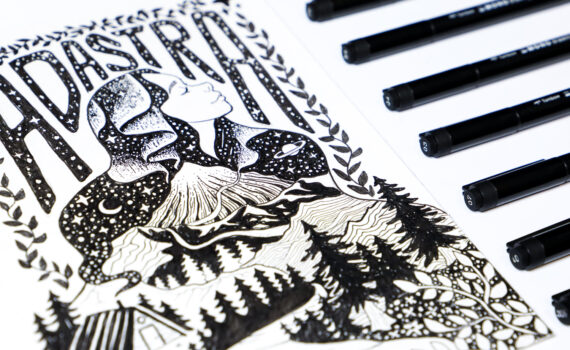
Do you ever dream up a story that doesn’t exist yet, but one you’d love to read? Me too! I’m Katie, and I’m not a writer, but I love reading science fiction, fantasy, or any adventure story! Tombow challenged me to create a fictional book cover, so I combined my […]
Fantasy Book Cover Illustration with Tombow MONO Drawing Pens
Hi, friends! I’m Andrea Lake, and I’m beyond excited to share how I created some watercolor embellishments using two stamp sets and my favorite Dual Brush Pen Art Markers to decorate a spread in my junk journal. This layout leans more into a scrapbooking style, with layered elements and hidden […]
Watercolor Days with Tombow
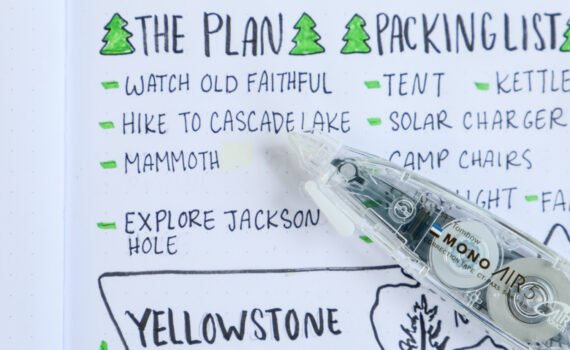
Hey everyone, Katie here today to share with you How I use Correction Tape in my Travel Planner. If you’re like me, Planning a trip is almost as fun as the trip itself, especially when I get to pull out my pens, markers, and journal and start doodling the adventure […]
How I Use Correction Tape to Fix Mistakes in My ...
Hi, friends! I’m Andrea Lake, and I’m getting ready for summer by diving into one of my favorite creative activities—scrapbooking! I grabbed a few of my go-to Tombow adhesives and a MONO Drawing Pen to create a colorful 12×12 scrapbook layout documenting last year’s trip to Puerto Rico with my […]
Waves, Wonder, and the Perfect Adhesive with Tombow
Hi, friends! I’m Andrea Lake, and I’m so excited to share a simple yet elegant idea you can create for parties—and especially for weddings! These handmade name cards are perfect for your big day or to gift to a loved one celebrating their special moment. Supplies: Fudenosuke Brush Pen, Hard […]
Elegant Wedding Name Cards with Tombow

Hi friends, it’s Carola and in this post, we’ll make a fun Summer craft project: inspired by Summerween (Summer-Halloween), let’s make recipe cards for “Candy Corn Popsicles”. As the weather warms up, my kids and I turn to homemade ice pops or popsicles to keep us cool. How fun would […]
Create Summerween Candy Corn Popsicle Recipe Cards
Hi, friends! I’m Andrea Lake, and I’m so excited to share my take on a fun and creative Summer Bucket List project featuring the MONO Multi Liquid Glue from Tombow. There are certain projects I love making again and again—and they take on new meaning each time. This DIY globe […]
Summer Bucket List Globe with Tombow

By Sara Hynes Hi friends! I’m Sara Hynes, and today we’re creating a fun, illustrated summer bucket list. I love making these lists to help plan memorable activities for the sunny months—and checking each one off is half the fun! What You’ll Need: Dual Brush Pen Art Markers – Tropical […]
Summer Bucket List

Hey friends, It’s Katie here! Let’s talk about Nature Sketching! As summer begins to wind down, it’s actually my favorite time of year. It’s the perfect time to go outside with your art supplies to soak up those golden hours and reflect on your Summer adventures, or upcoming Autumn Adventures. […]
Nature Sketching with MONO Drawing Pen Colors
Hi, friends! I’m Andrea Lake, and I’m excited to share a fun journal page all about Arches National Park. I wanted to document one of my favorite photos from our visit to the park back in 2017, as well as write down a list of 10 interesting facts about the […]
Arches National Park Memories and Facts with Tombow

OPEN CALL: 2026 Tombow Creator Crew Applications Are Now Open! Tombow is thrilled to announce our Open Call for submissions to join the 2026 Tombow Creator Crew! If you’re a talented, video-first creator based in the United States or Canada, this is your opportunity to join a team that values […]