How to Draw a repeating Fruit and Floral Pattern for Scrapbooking Using Tombow USA Products
Scrapbooking is a fantastic way to preserve memories, and one of the most enjoyable aspects of scrapbooking is adding unique, personalized designs to your pages. In this blog post, I’ll walk you through how to create a beautiful fruit and floral pattern using Tombow products. The best part? You’ll be able to customize your design with vibrant colors, delicate details, and your favorite photos.
What You’ll Need:
- MONO Graph Mechanical Pencil
- Tombow MONO Drawing Pen 08
- Dual Brush Pen Art Markers, Citrus, 10-pack
- The Power Mini Glue Tape
- Scrapbook Paper
- Ruler
- Photos
- Eraser
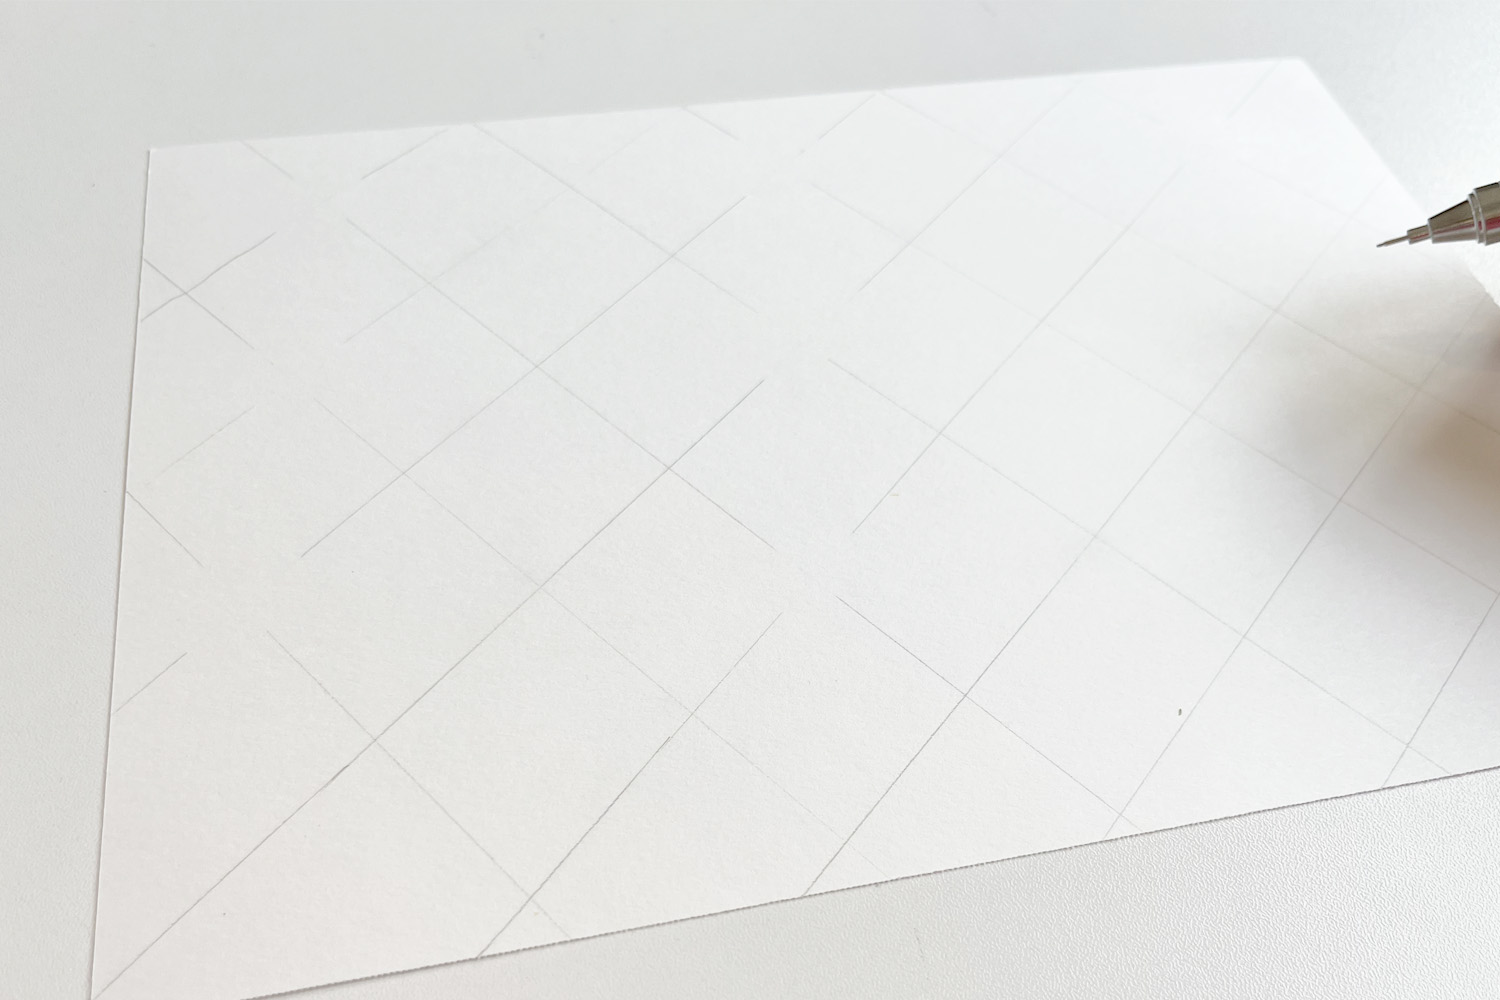
Step 1: Draw a Grid
To begin, create a foundation for your design by drawing a grid. A grid will help you plan out your pattern and keep your drawing in proportion.
- Prepare Your Scrapbook Page: Lay your scrapbook page flat and decide where you want the pattern to go. You can create a full-page design or a smaller section of the page.
- Use Your Ruler: Use a ruler to draw evenly spaced horizontal and vertical lines on your page. These lines will form the grid. You can adjust the size of the squares depending on how detailed you want your design to be.
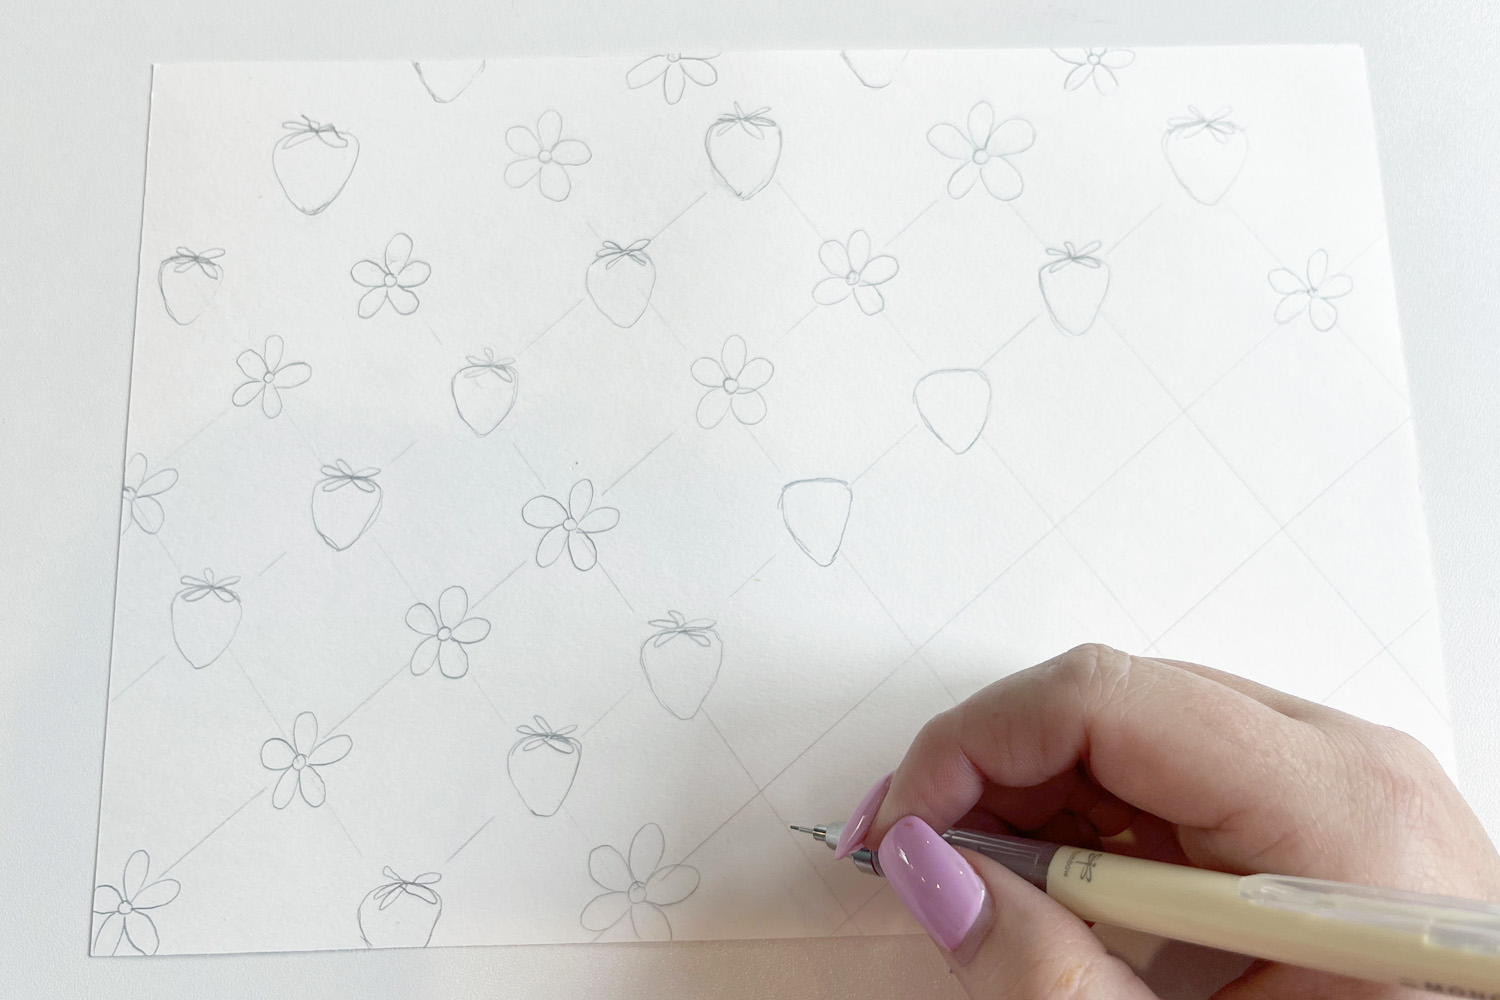
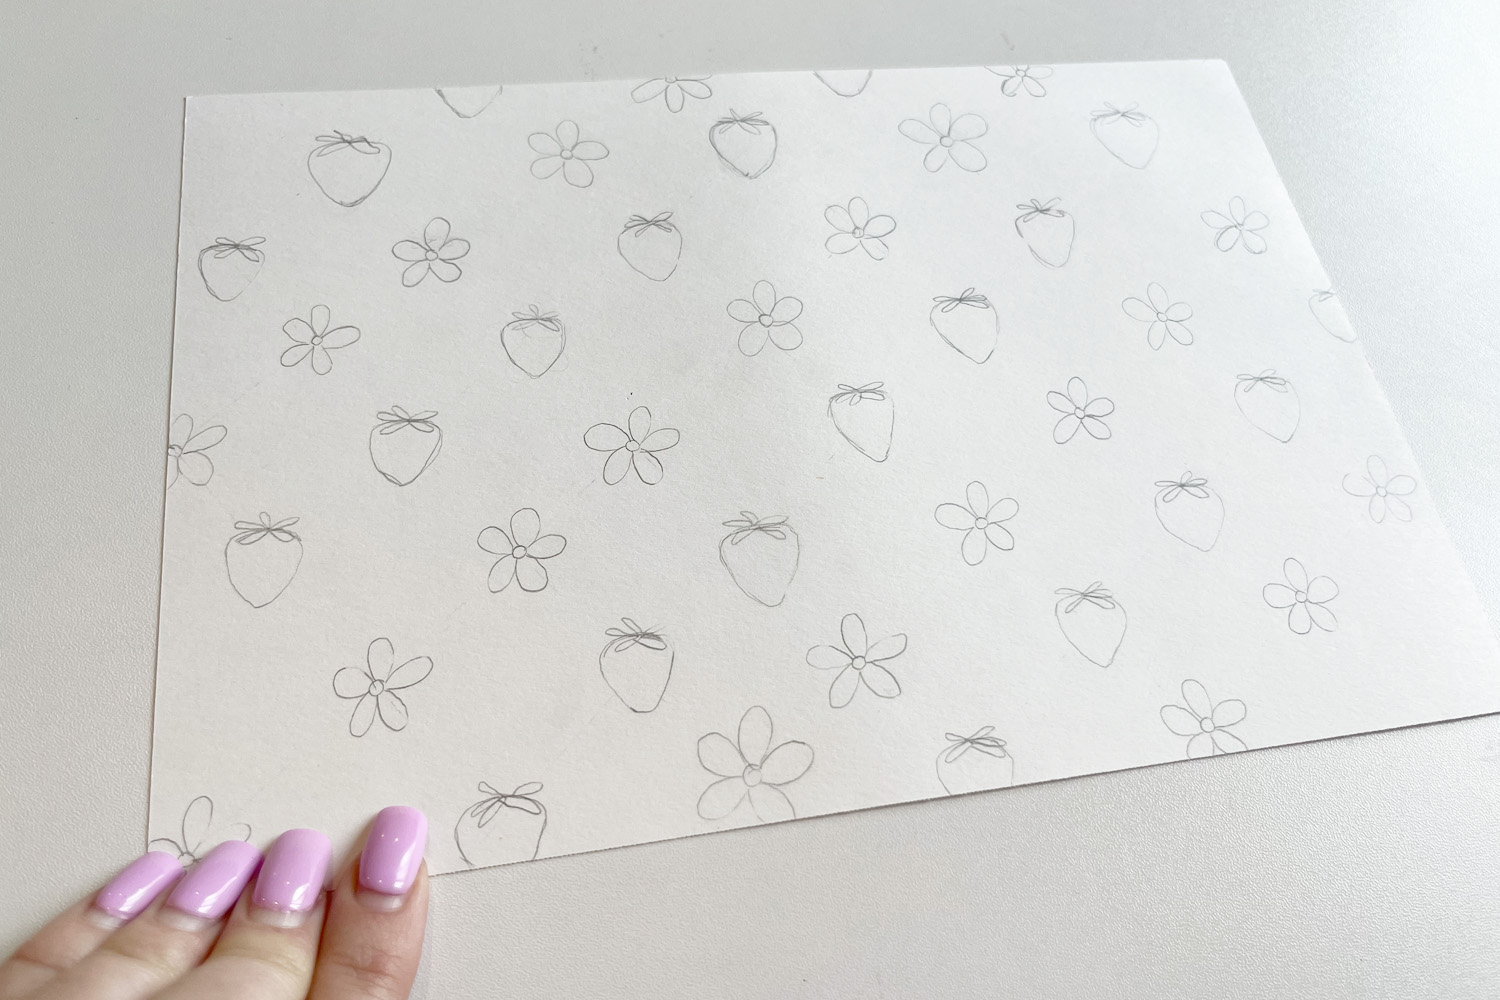
Step 2: Sketch the Fruit and Floral Design
Now it’s time to get creative! I drew strawberries and flowers, which will give your design a fresh, summery feel. You can choose any fruit or flower you would like.
- Start with Strawberries: Where each grid line overlaps, begin sketching a small strawberry. You can vary the size and shape of the strawberries for visual interest. Start by drawing a round shape, then add a small stem at the top and a few leaves on either side.
- Draw the Flowers: Next, sketch some simple floral shapes, like daisies or peonies. Draw petals by making oval or rounded shapes around a small center circle. You can see I drew my strawberries along one diagonal and my flowers along another to create a repeating pattern.
- Use the Mechanical Pencil: Continue using the Tombow MONO Graph Mechanical Pencil to sketch the fruit and flowers in light, clean lines. Don’t worry if the lines aren’t perfect — this is just the base, and you’ll refine everything later.
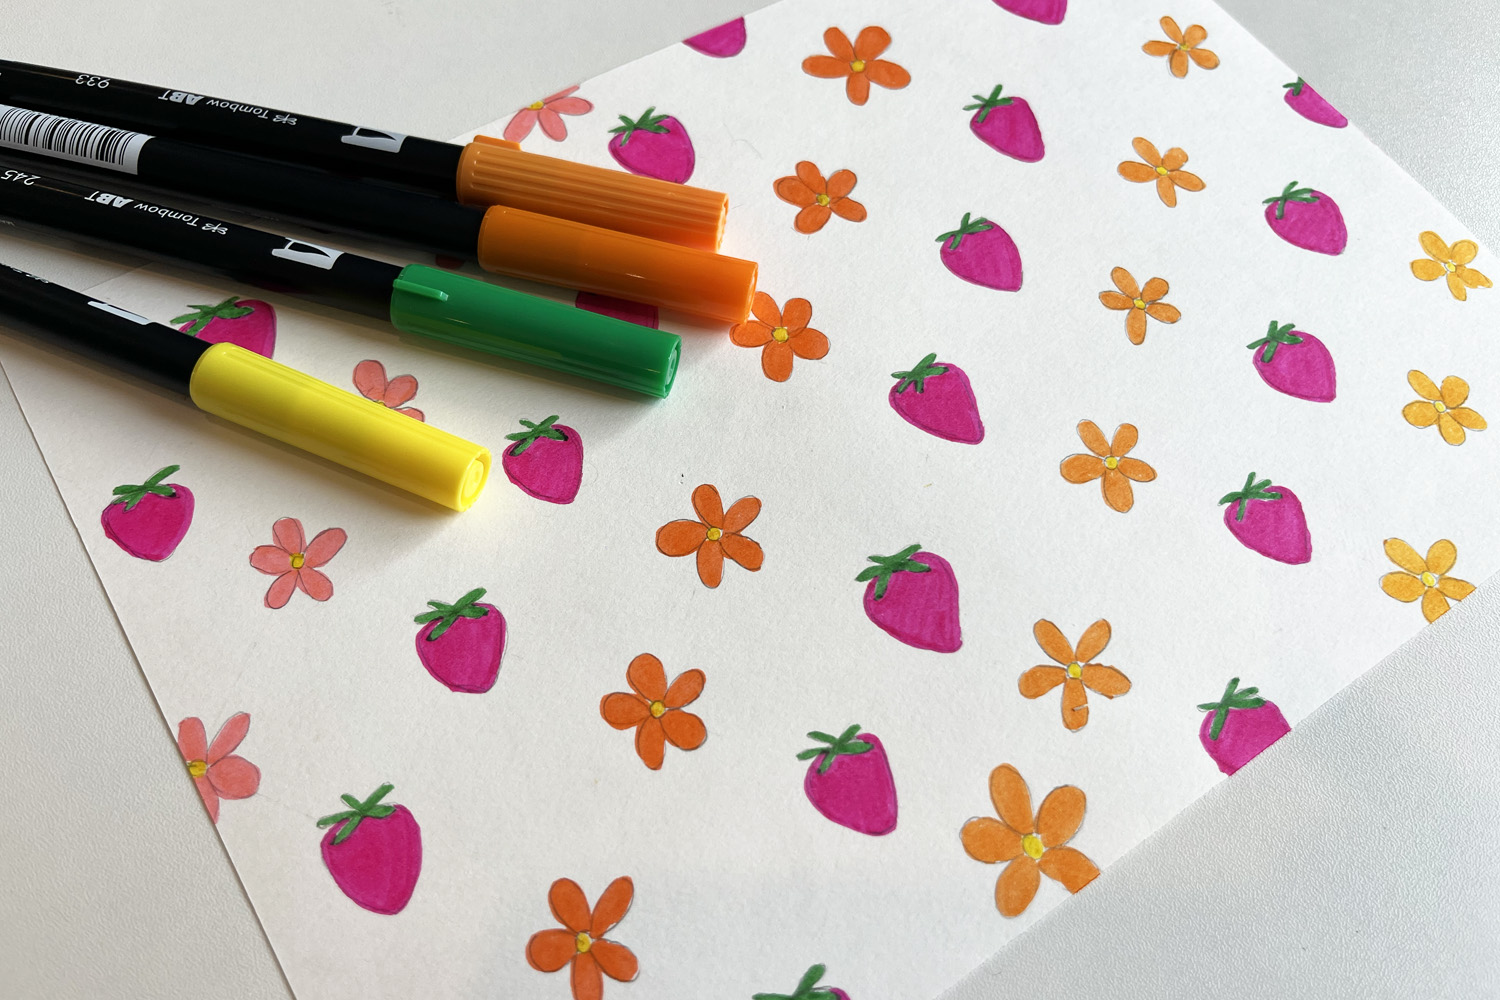
Step 3: Add Color with the Citrus 10-Pack Dual Brush Pens
Now the fun part begins: adding color to your design! Tombow’s Dual Brush Pen Art Markers, Citrus, 10-pack are perfect for this task. The bright, vibrant colors will bring your design to life.
- Color the Strawberries: Use a red or pink color marker to color in the strawberries. Start by adding a light layer of color and then build up the intensity in certain areas to create shadows and depth. Use a green color for the leaves and stem.
- Color the Flowers: Choose bright, cheerful colors for the flowers. You can use a mix of yellow, orange, or purple — whatever matches your style and the overall feel of your scrapbook page.
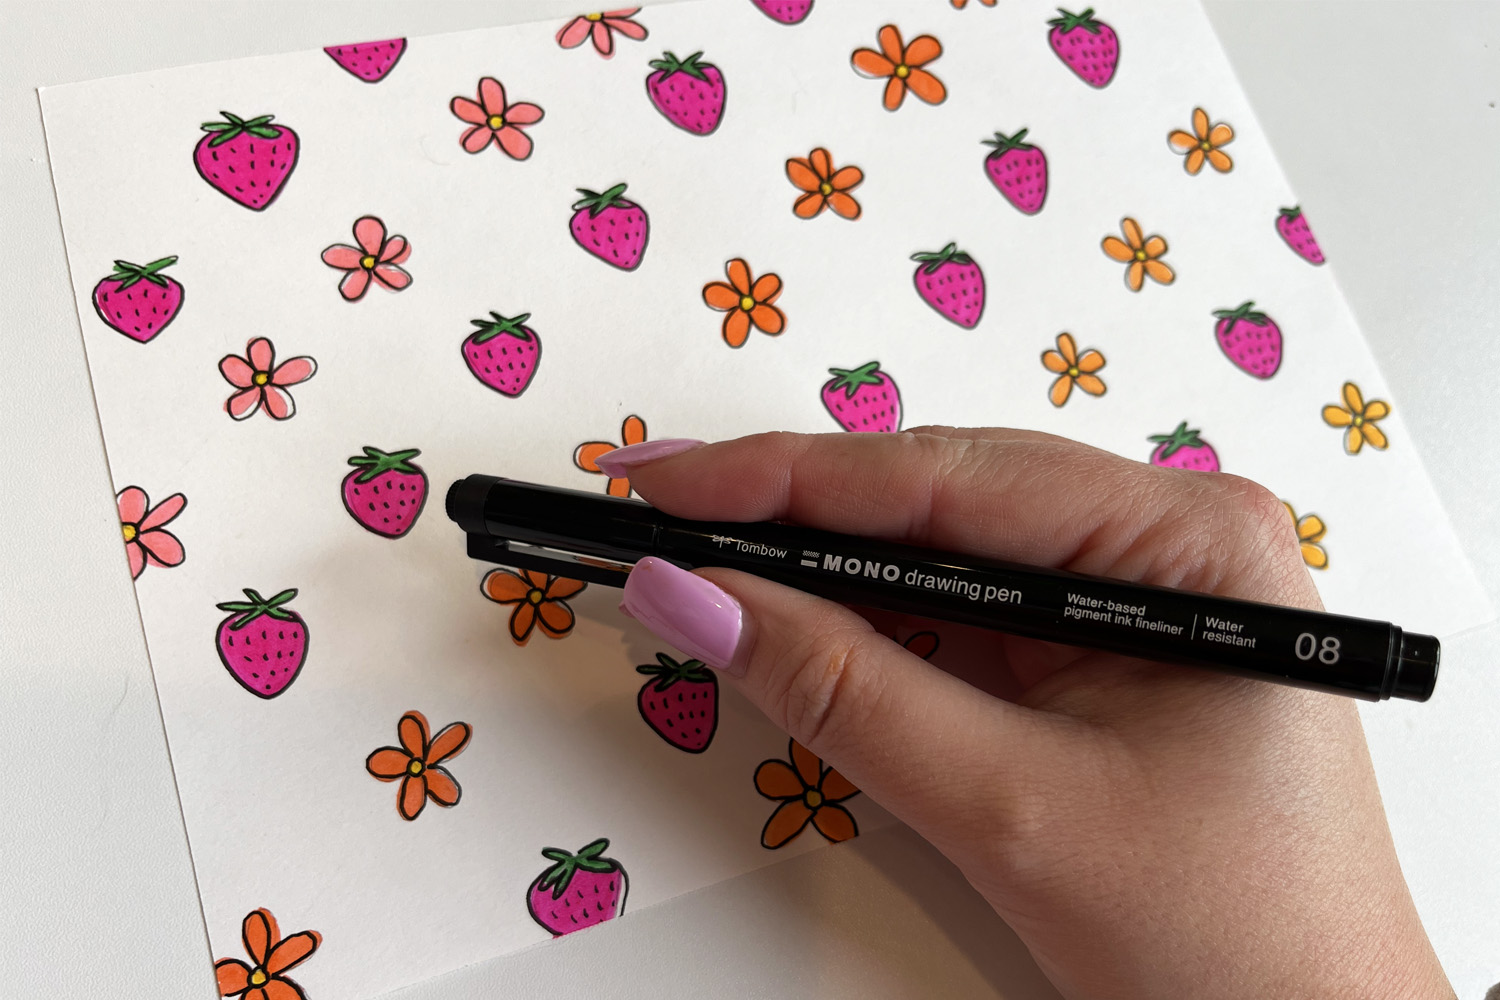
Step 4: Outline with the MONO Drawing Pen 08
Once you’ve added color, it’s time to define your design by outlining everything with a Tombow MONO Drawing Pen 08.
- Outline the Fruits and Flowers: Take your MONO Drawing Pen 08 and carefully trace over the pencil lines you’ve drawn. This will make your design pop and give it a polished, finished look.
- Add Details: Feel free to add extra details with the pen. For example, you can add seeds to the strawberries or finer lines to the flowers’ petals for texture. The fine tip of the MONO Drawing Pen 08 will help you create delicate details that stand out.
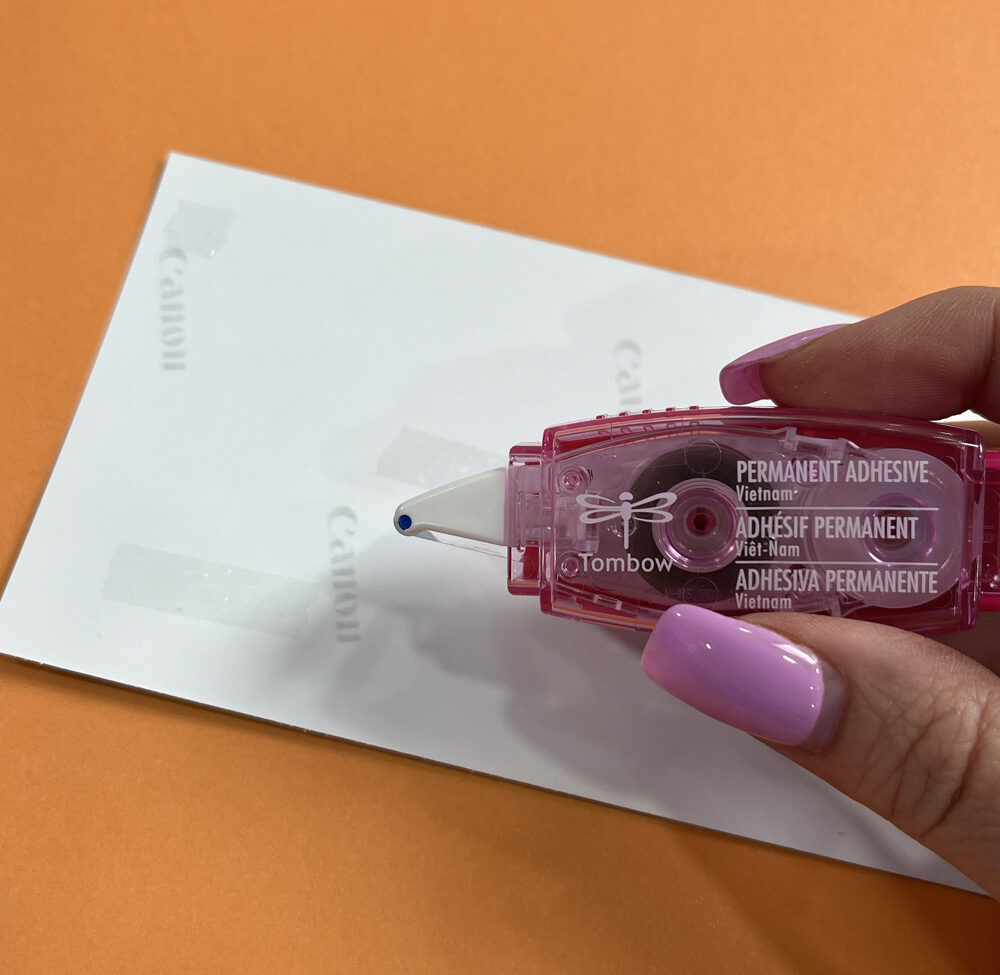
Step 5: Attach Photos with Tombow Power mini glue tape
Now that your fruit and floral pattern is complete, it’s time to add your photos to the scrapbook page. Tombow’s Permanent Adhesive is ideal for securely attaching photos to your page.
- Prepare Your Photos: Select the photos you’d like to include in your scrapbook. Trim them to fit the space you’ve left in the design or simply place them where they complement the pattern.
- Apply Adhesive: Take your Tombow Power Mini Glue Tape and apply it to the back of each photo. Be sure to place the adhesive around the edges and center of the photo for a strong hold.
- Position and Press: Carefully position the photos on your scrapbook page, making sure they align with your design. Press down firmly to ensure the photos stick well.
Step 6: Final Touches and Enjoy
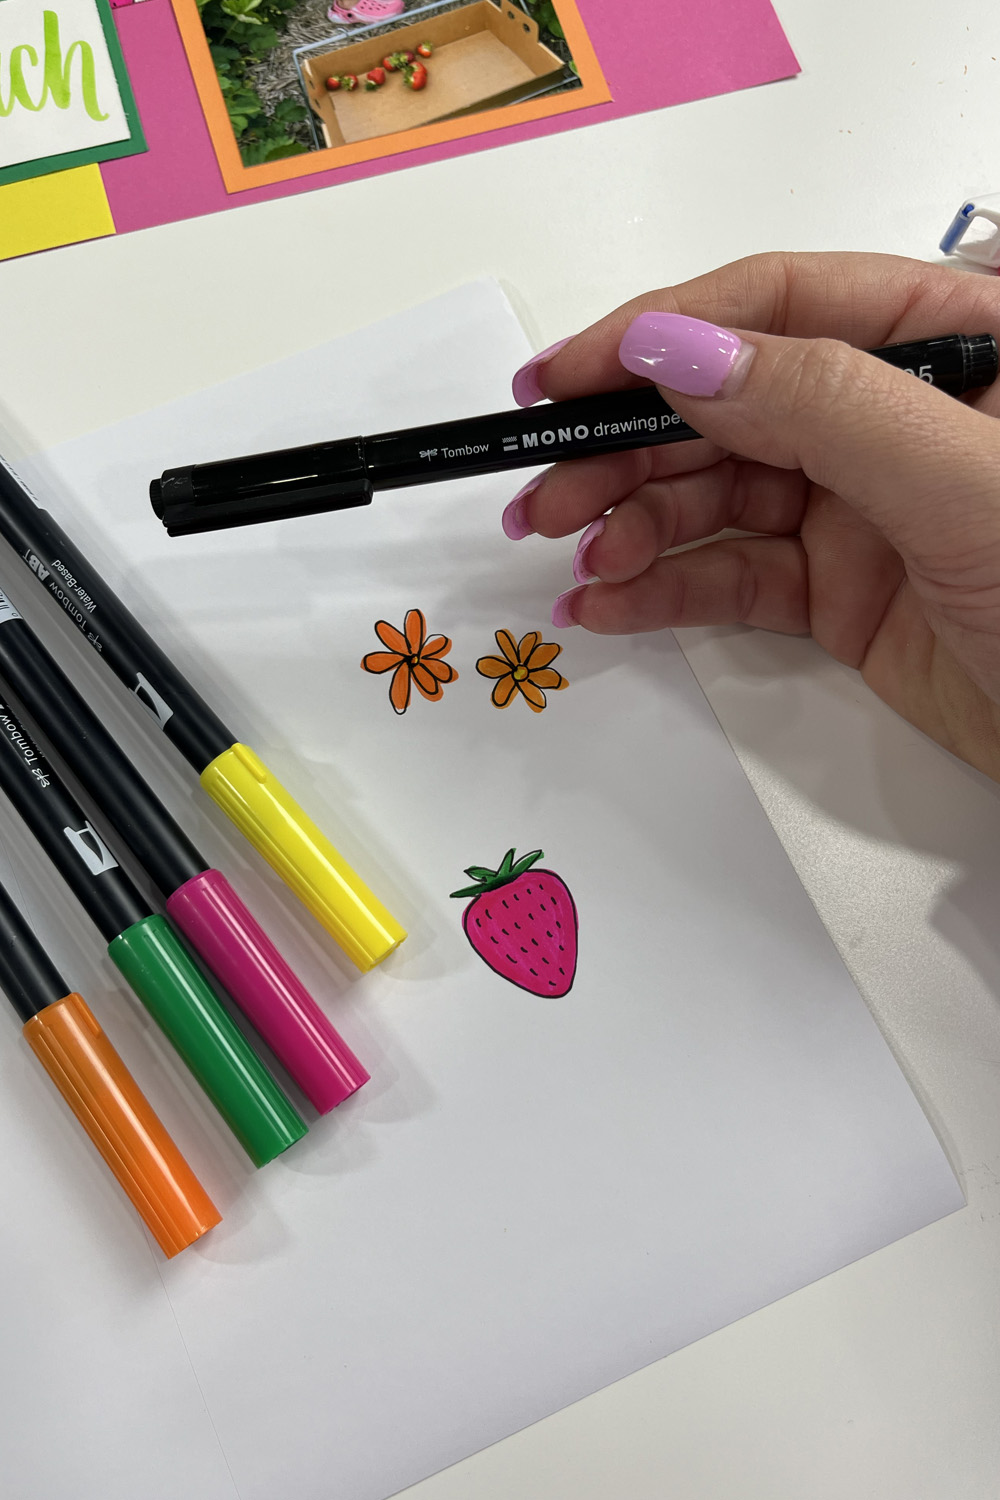
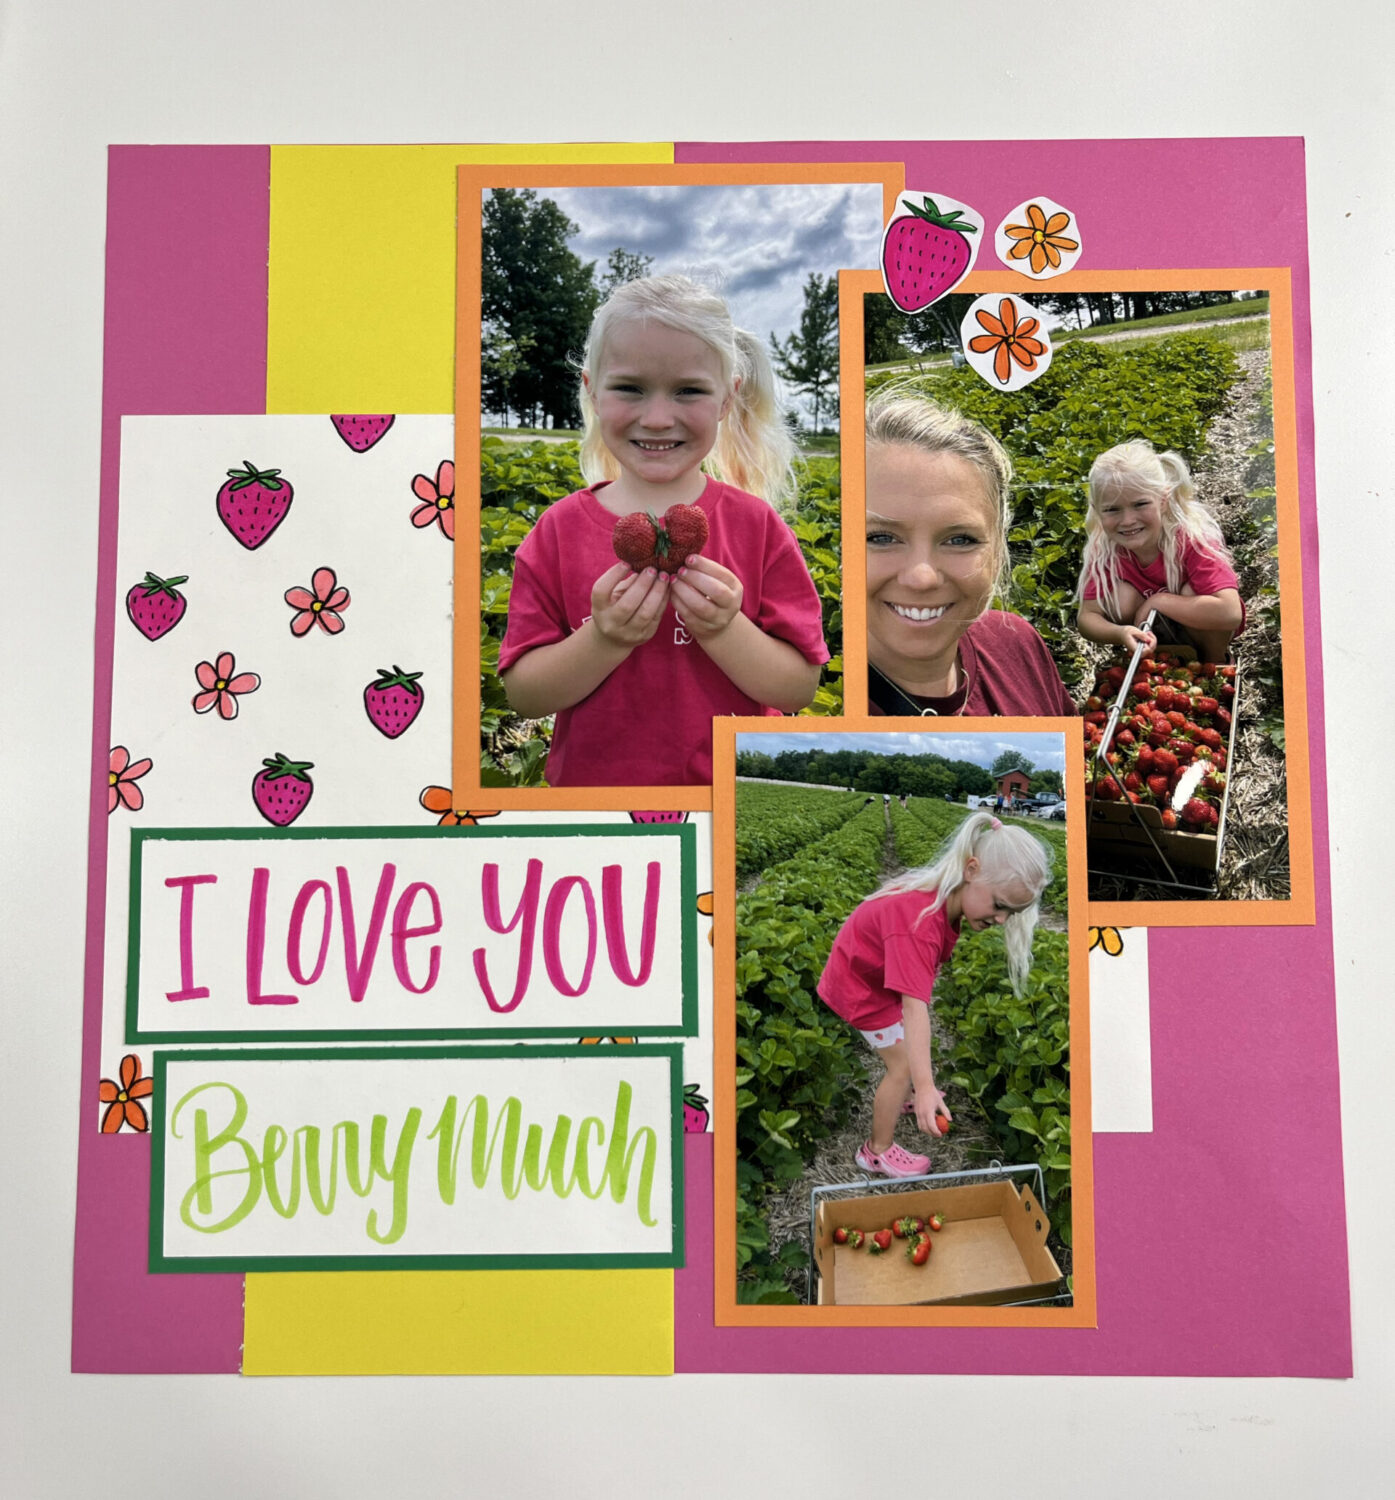
Finally, take a step back and admire your completed scrapbook page. You can always add more embellishments, such as washi tape, stickers, or journaling, to enhance the page further. I used sticker paper and drew some more strawberries and flowers to add as well as hand lettering a cute phrase that matched my layout.
Conclusion:
Creating a fruit and floral pattern for your scrapbook page with Tombow products is an enjoyable and creative process. By following these simple steps, you can create a beautiful design that complements your photos and adds a personal touch to your scrapbook.
Happy scrapbooking! <3 Sara Hynes
I’d love to see how you apply your art to your scrapbook page! Tag @sarahynesdesigns and @tombowusa in your creations.
Want to see more scrapbook layout ideas? Check out another Tombow Blog post I made here.