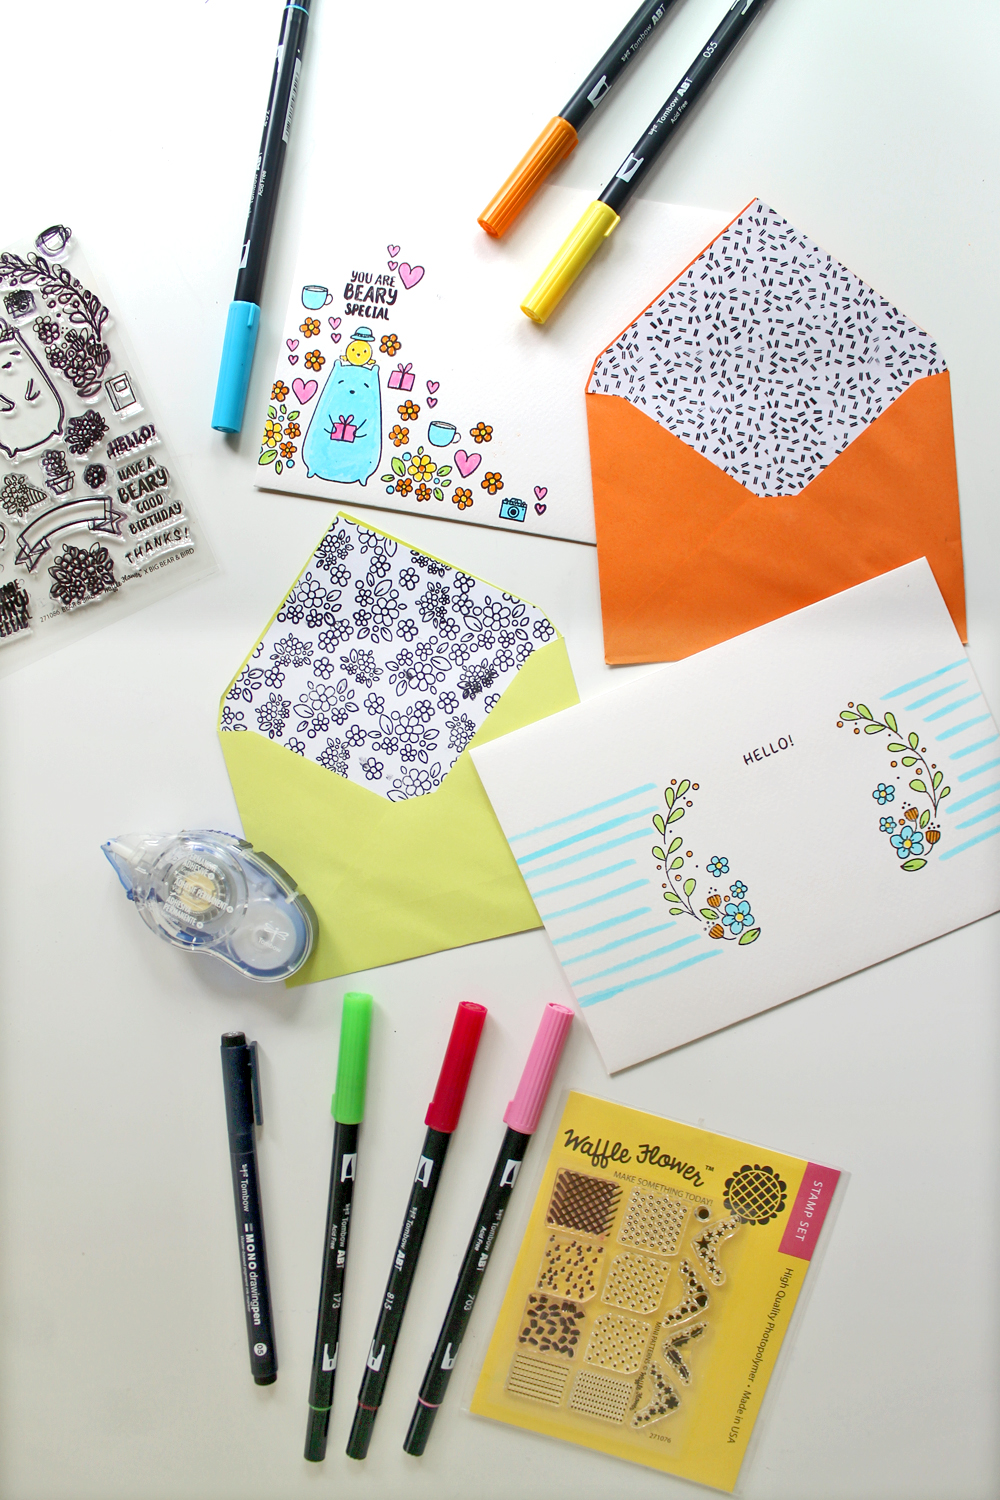
Hello everyone, Katie here sharing a fun project using both Tombow products and some adorable stamps by Waffle Flower. I love to make and send out a lot of handmade cards and happy mail, because who doesn’t love happy mail, right? And it’s even more fun if that mail comes in a pretty stationery envelope. So today I am showing you guys how to make stamped stationery!

Supplies:
- Dual Brush Pens
- MONO Drawing Pens
- White Paper
- Scissors
- Envelopes
- MONO Adhesive + Permanent
- 8900 Pencil HB
- Bear and Bird Stamp Set
- Mini Patterns Stamp Set
Project 1: Stamping on Envelopes – Step 1
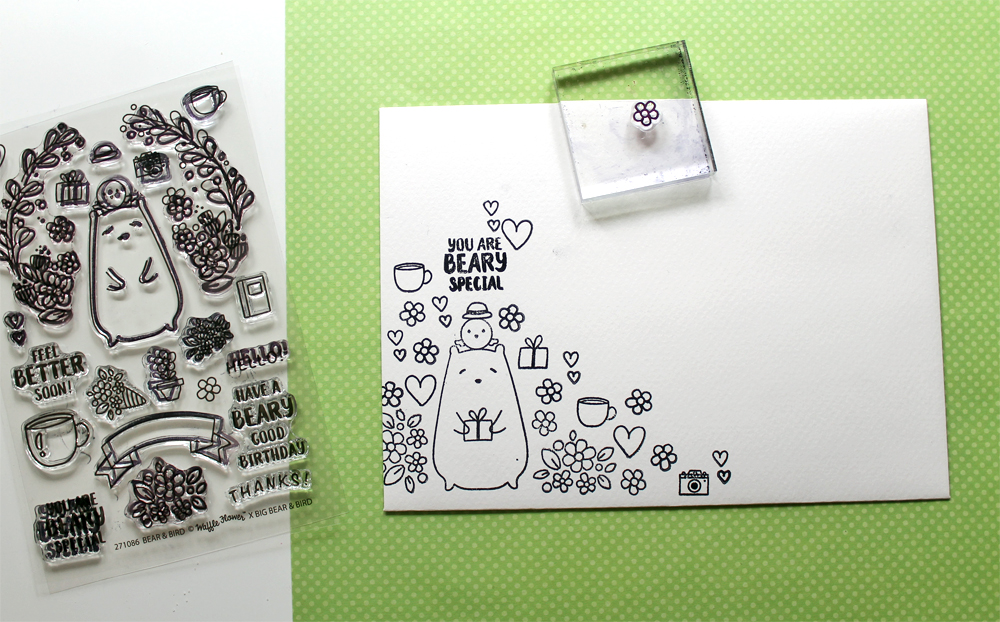
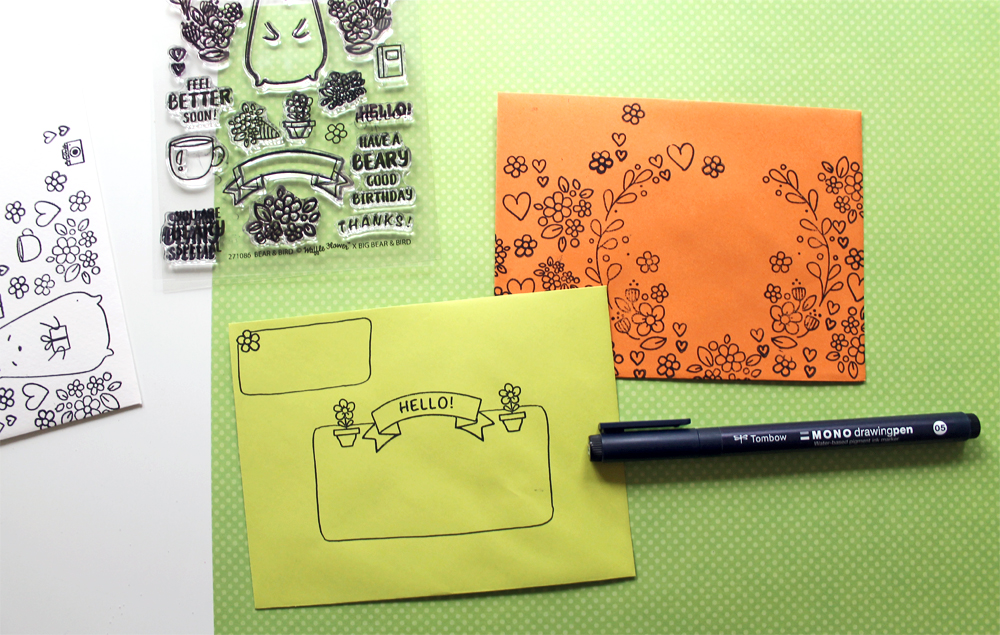
To create fun patterned envelopes, decide on what stamps you want to use. I’m using the Bear and Bird set by Waffle Flower. I love the bear and bird, but I also think all of the little florals and the sentiments are really cute.
Place the acrylic stamps onto an acrylic stamping block, apply a permanent black ink and stamp onto the front of the envelope.
I think this would also be fun to try with Serena’s Ombre Stamping Technique.
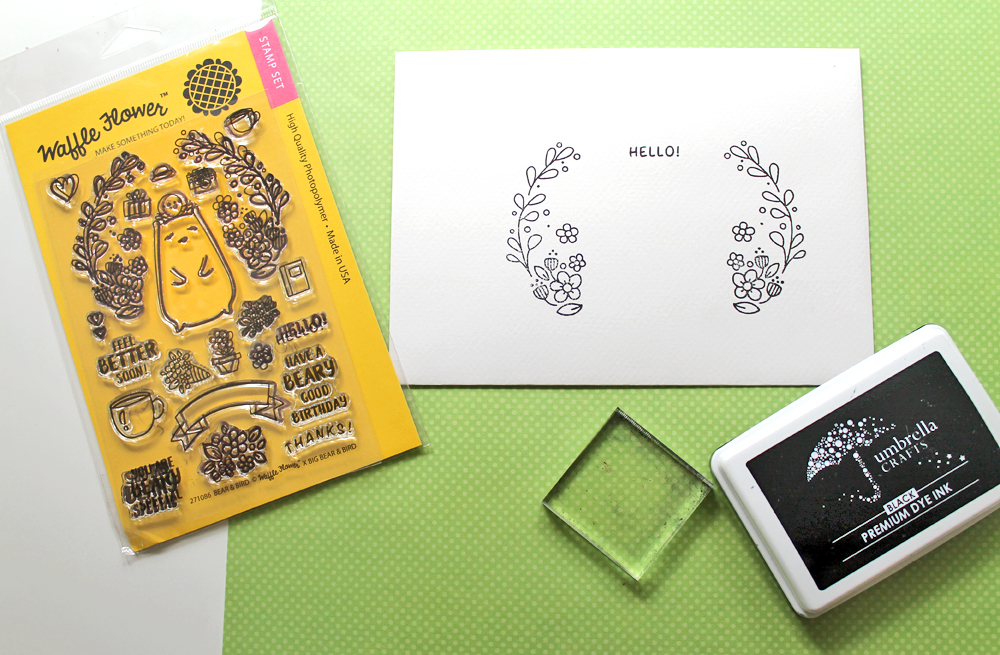
You can stamp as much or as little as you like, but you will want to be sure to leave a space to address the envelope.
Step 2
Try adding your own doodles in with the stamps. You can draw boxes for the addresses using a MONO Drawing Pen and then add stamping around them.
Step 3
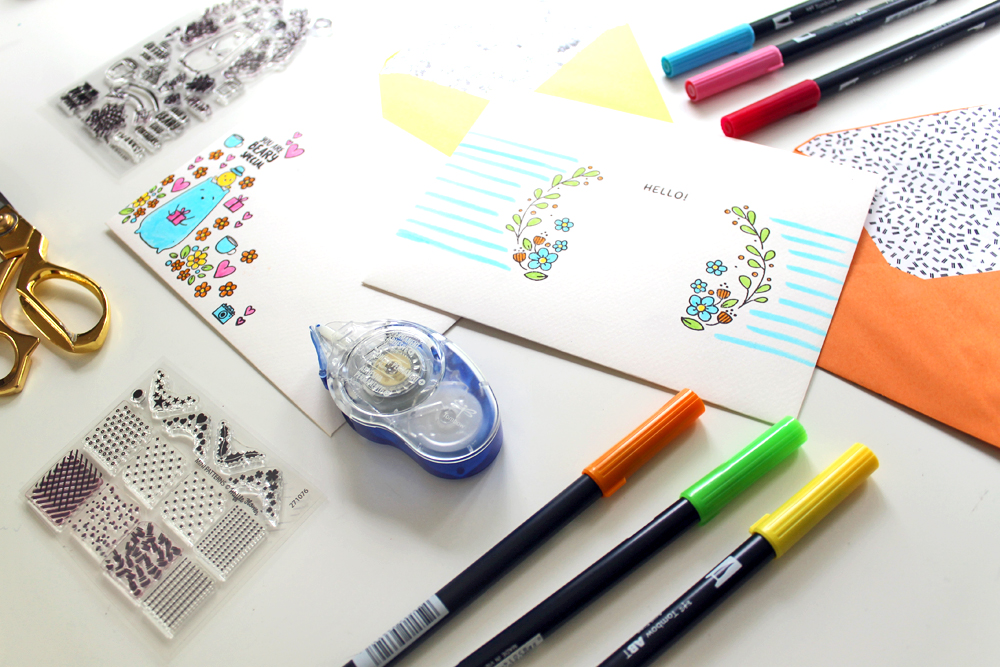
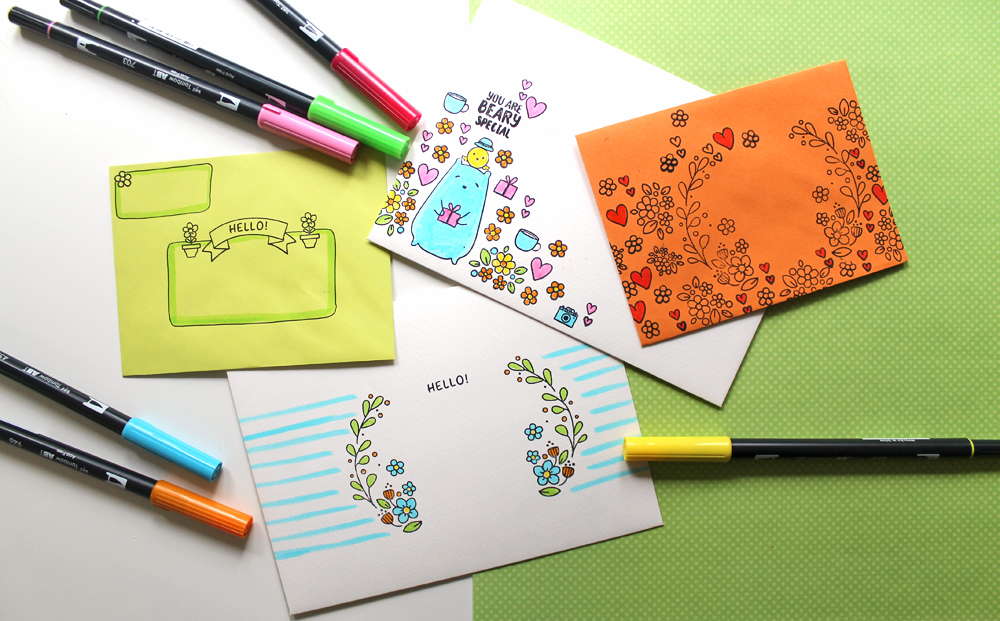
Add color! I love coloring, so this is my favorite part. I grabbed a few of my favorite shades of Dual Brush Pens to add color to these envelopes by coloring in the stamped designs.
Here are 2 easy ways to color in stamped designs.
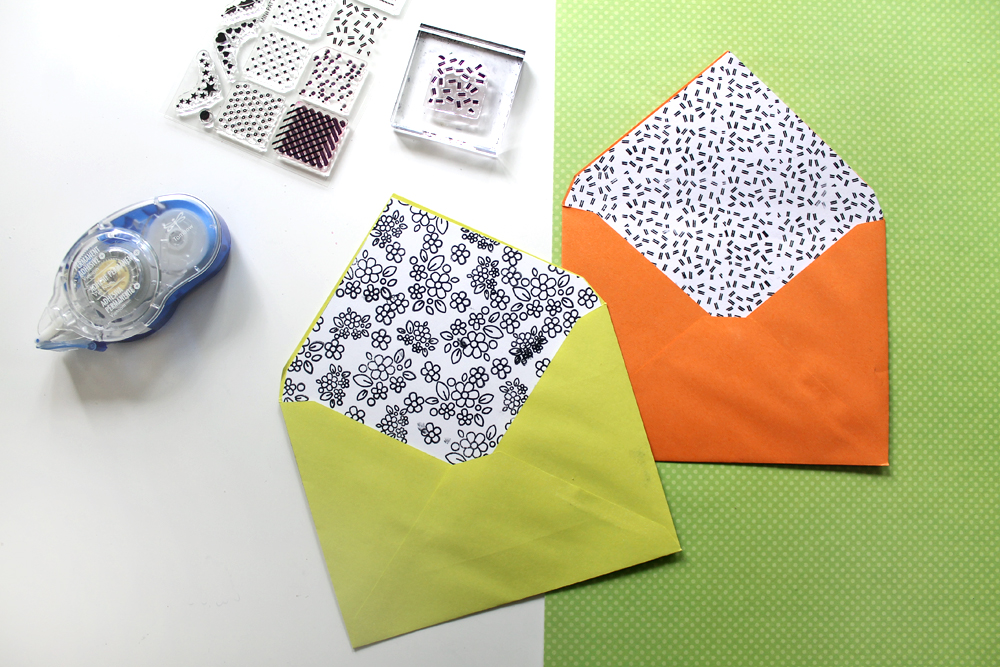
Project 2: Make Your Own Envelope Liners
If you want to add an even cuter touch to your stationery, try adding an envelope liner!
Step 1
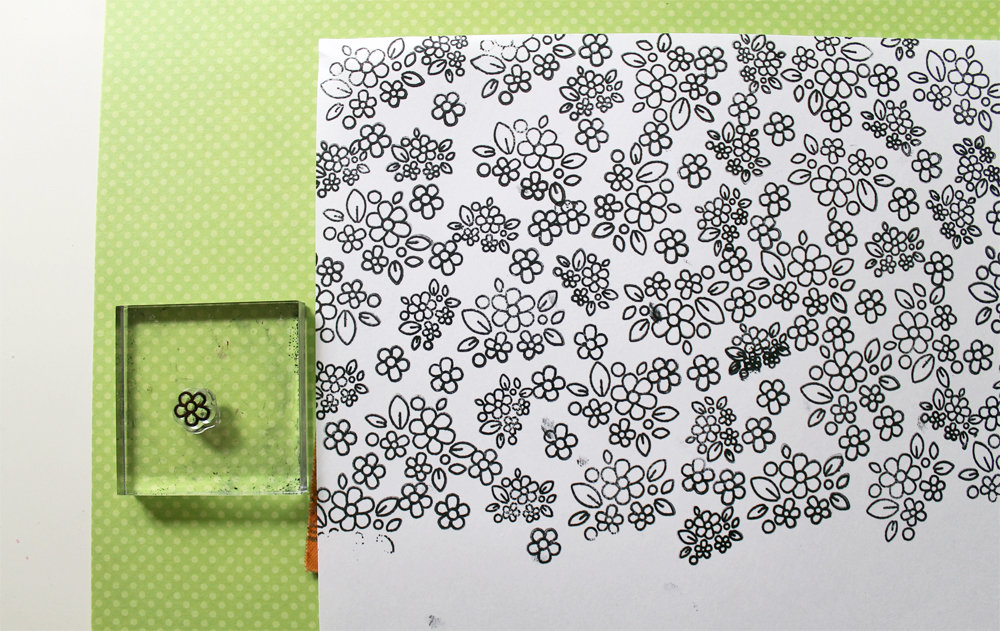
Stamp a pattern onto white paper.
I don’t plan to color this in, so I’m just stamping on inexpensive white printer paper. However if you plan to color it in using Dual Brush Pens, you will want to use a marker paper of vellum, as printer paper can fray the marker tips over time.
Step 2
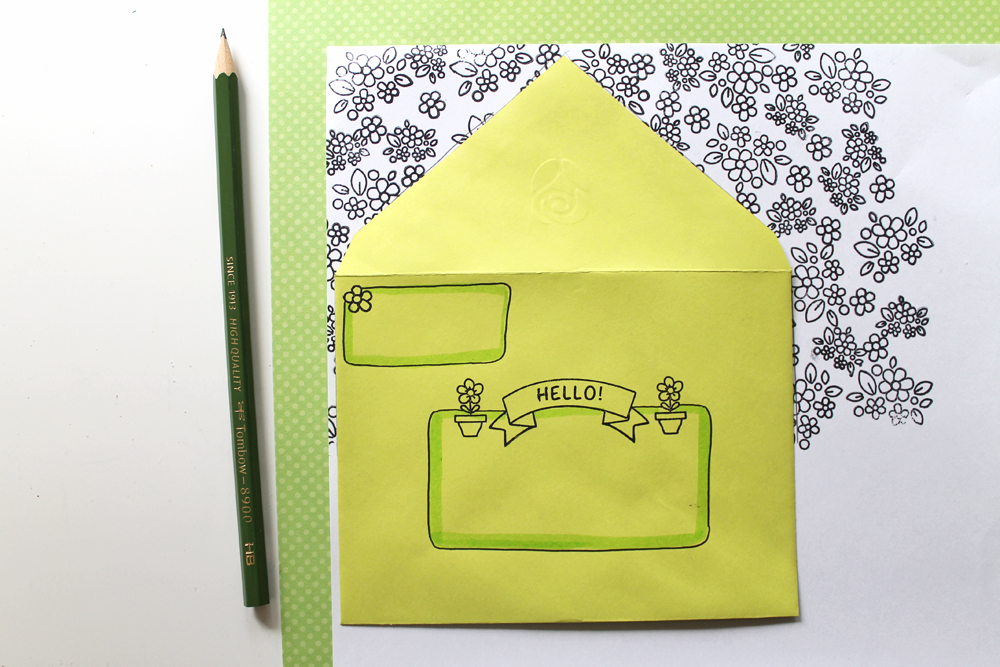
Place your envelope on to the top of your stamped paper and trace around the outline of the envelope. Use it as a guideline to cut the shape out of your stamped paper.
Step 3
Use MONO Adhesive+ Permanent to apply strips of adhesive to the back of the stamped paper, going along the edges. Slip the paper inside the envelope and adhere. You now have cute lined envelopes! Yay!
Do you love sending out happy mail and cards too? Do you ever decorate the outside or inside of the envelopes?