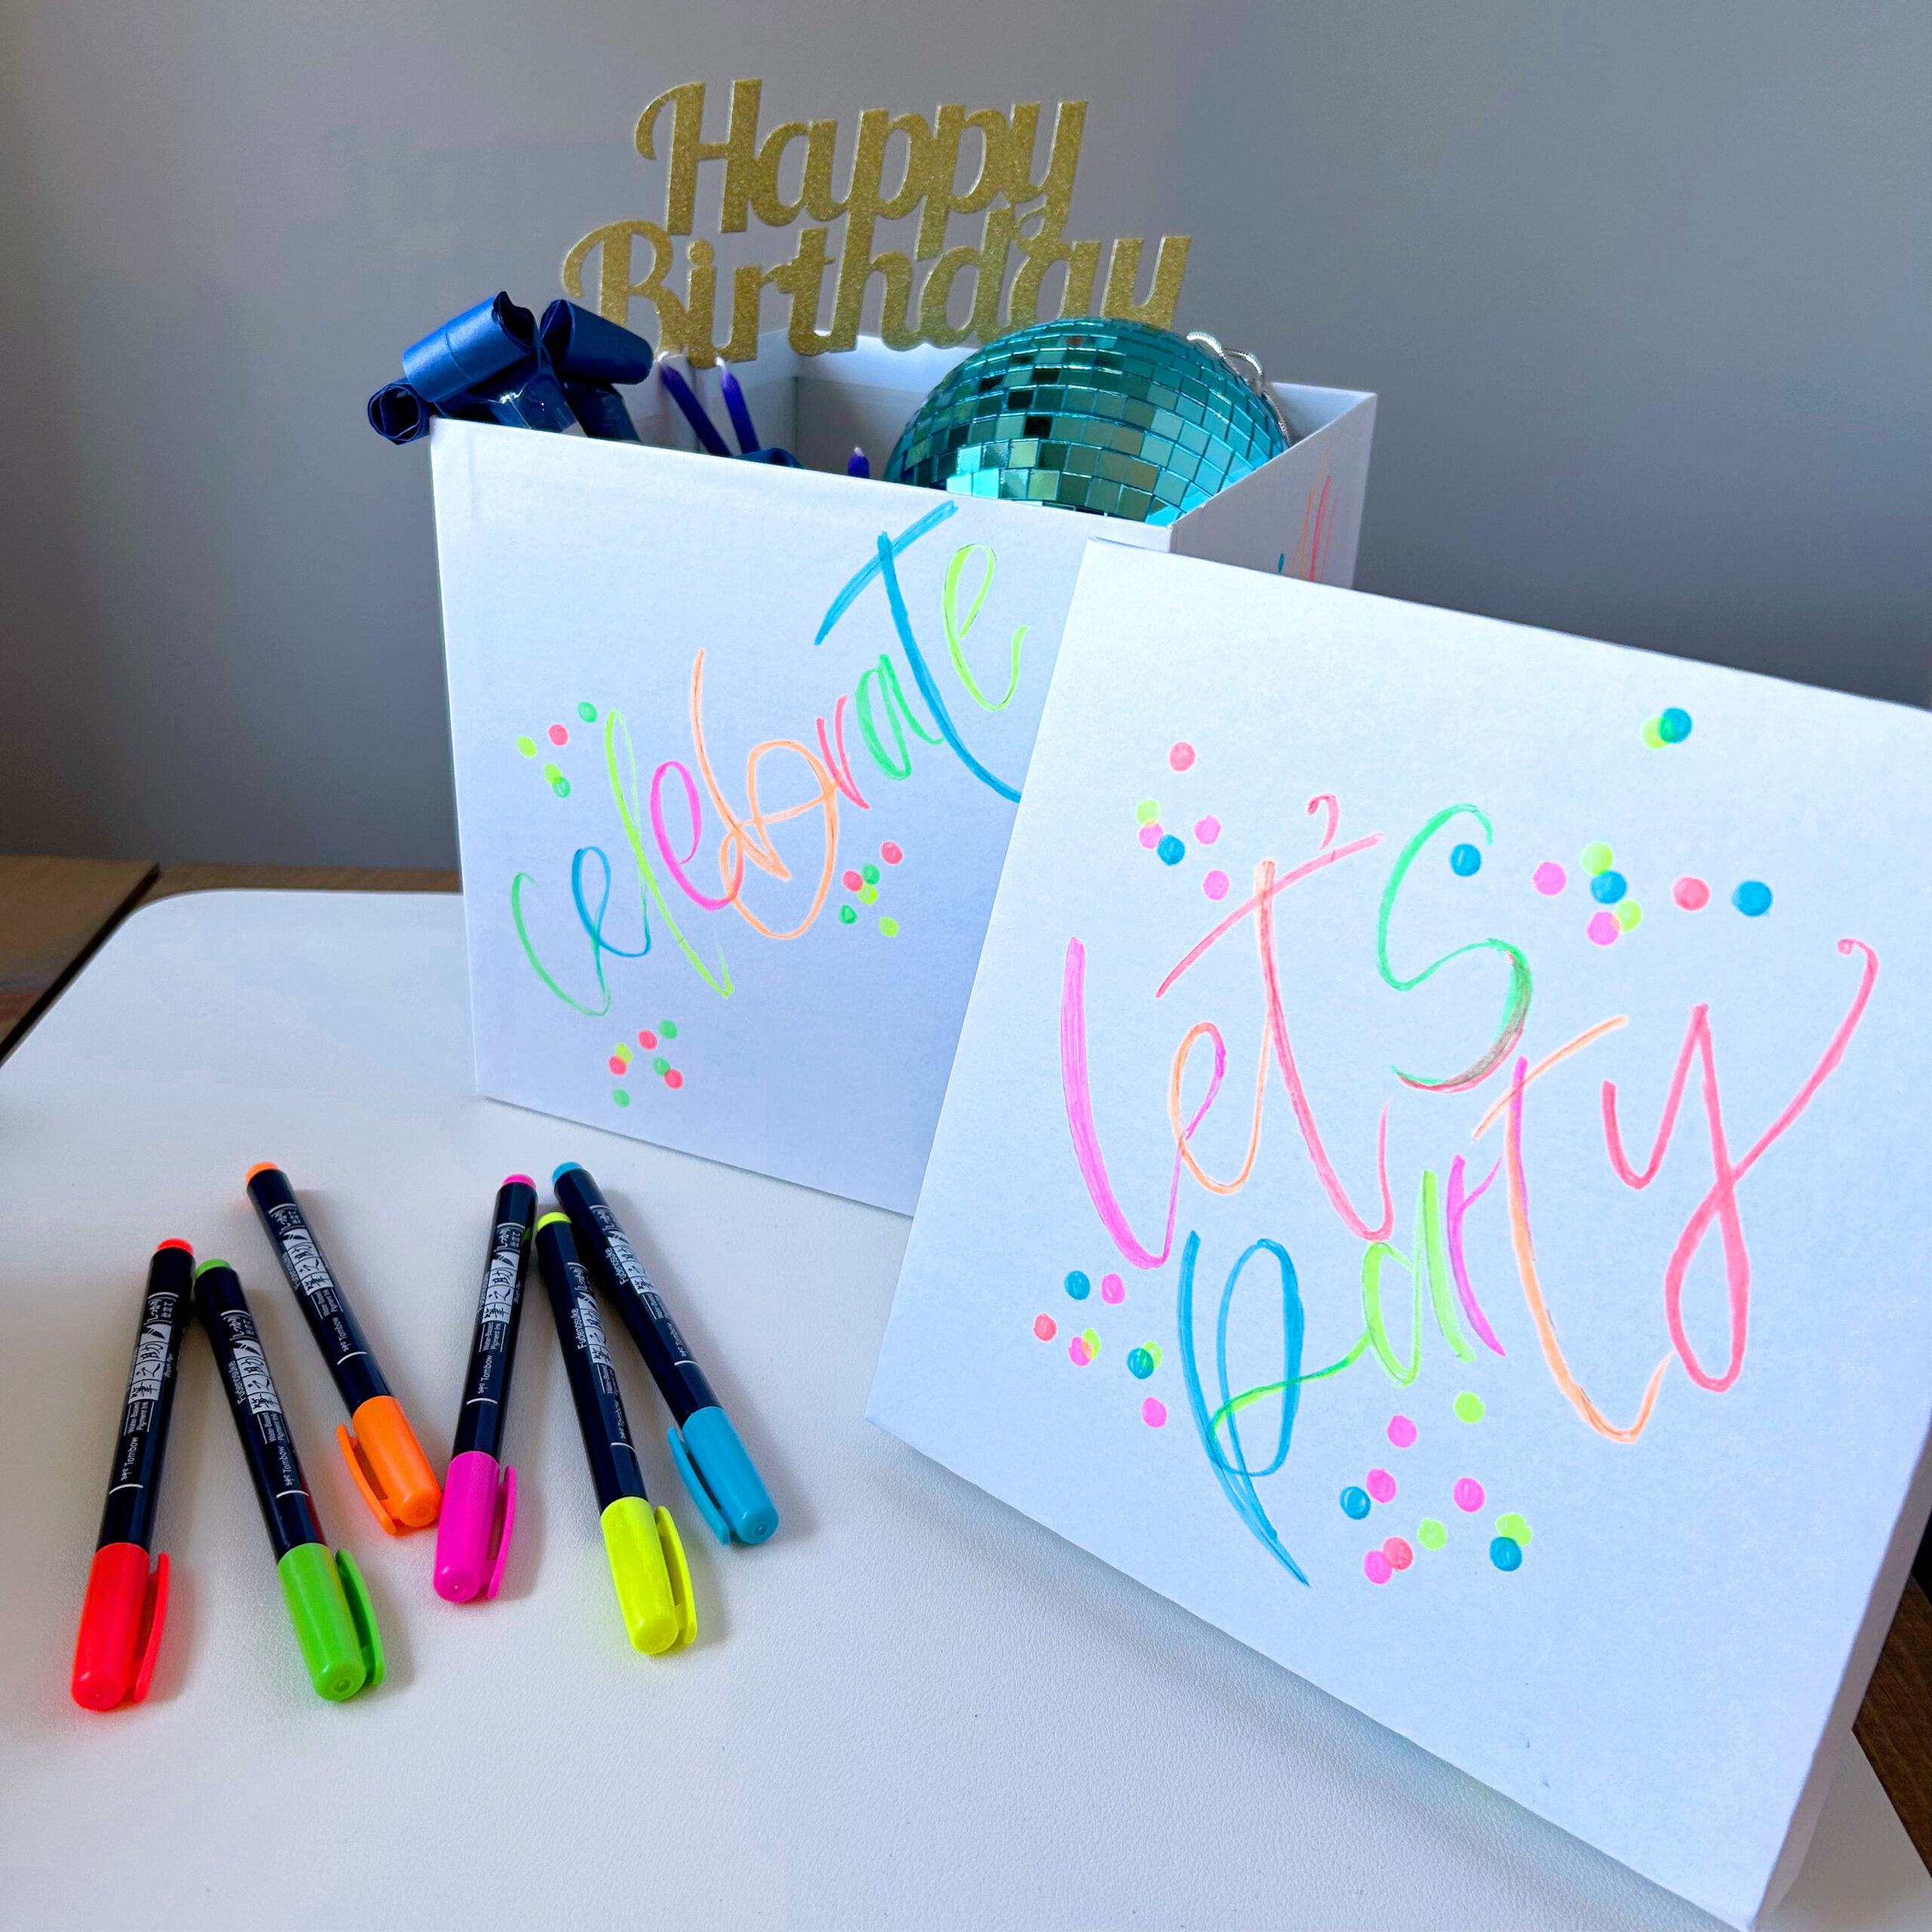
Hi all, Carola here with a fun tutorial on how to turn a plain white box into a neon bright birthday gift box! It’s Tombow’s Birthday Month, so join me in celebrating here on day 4 as part of a 28-day art challenge throughout February.
In this post, I’ll show you step-by-step how to use Fudenosuke Neon Brush Pens to create a hand lettered decorative gift box that you can the fill with party essentials.
Supplies Used:
- Plain white box
- Fudenosuke Neon Brush Pen Set, 6-Pack
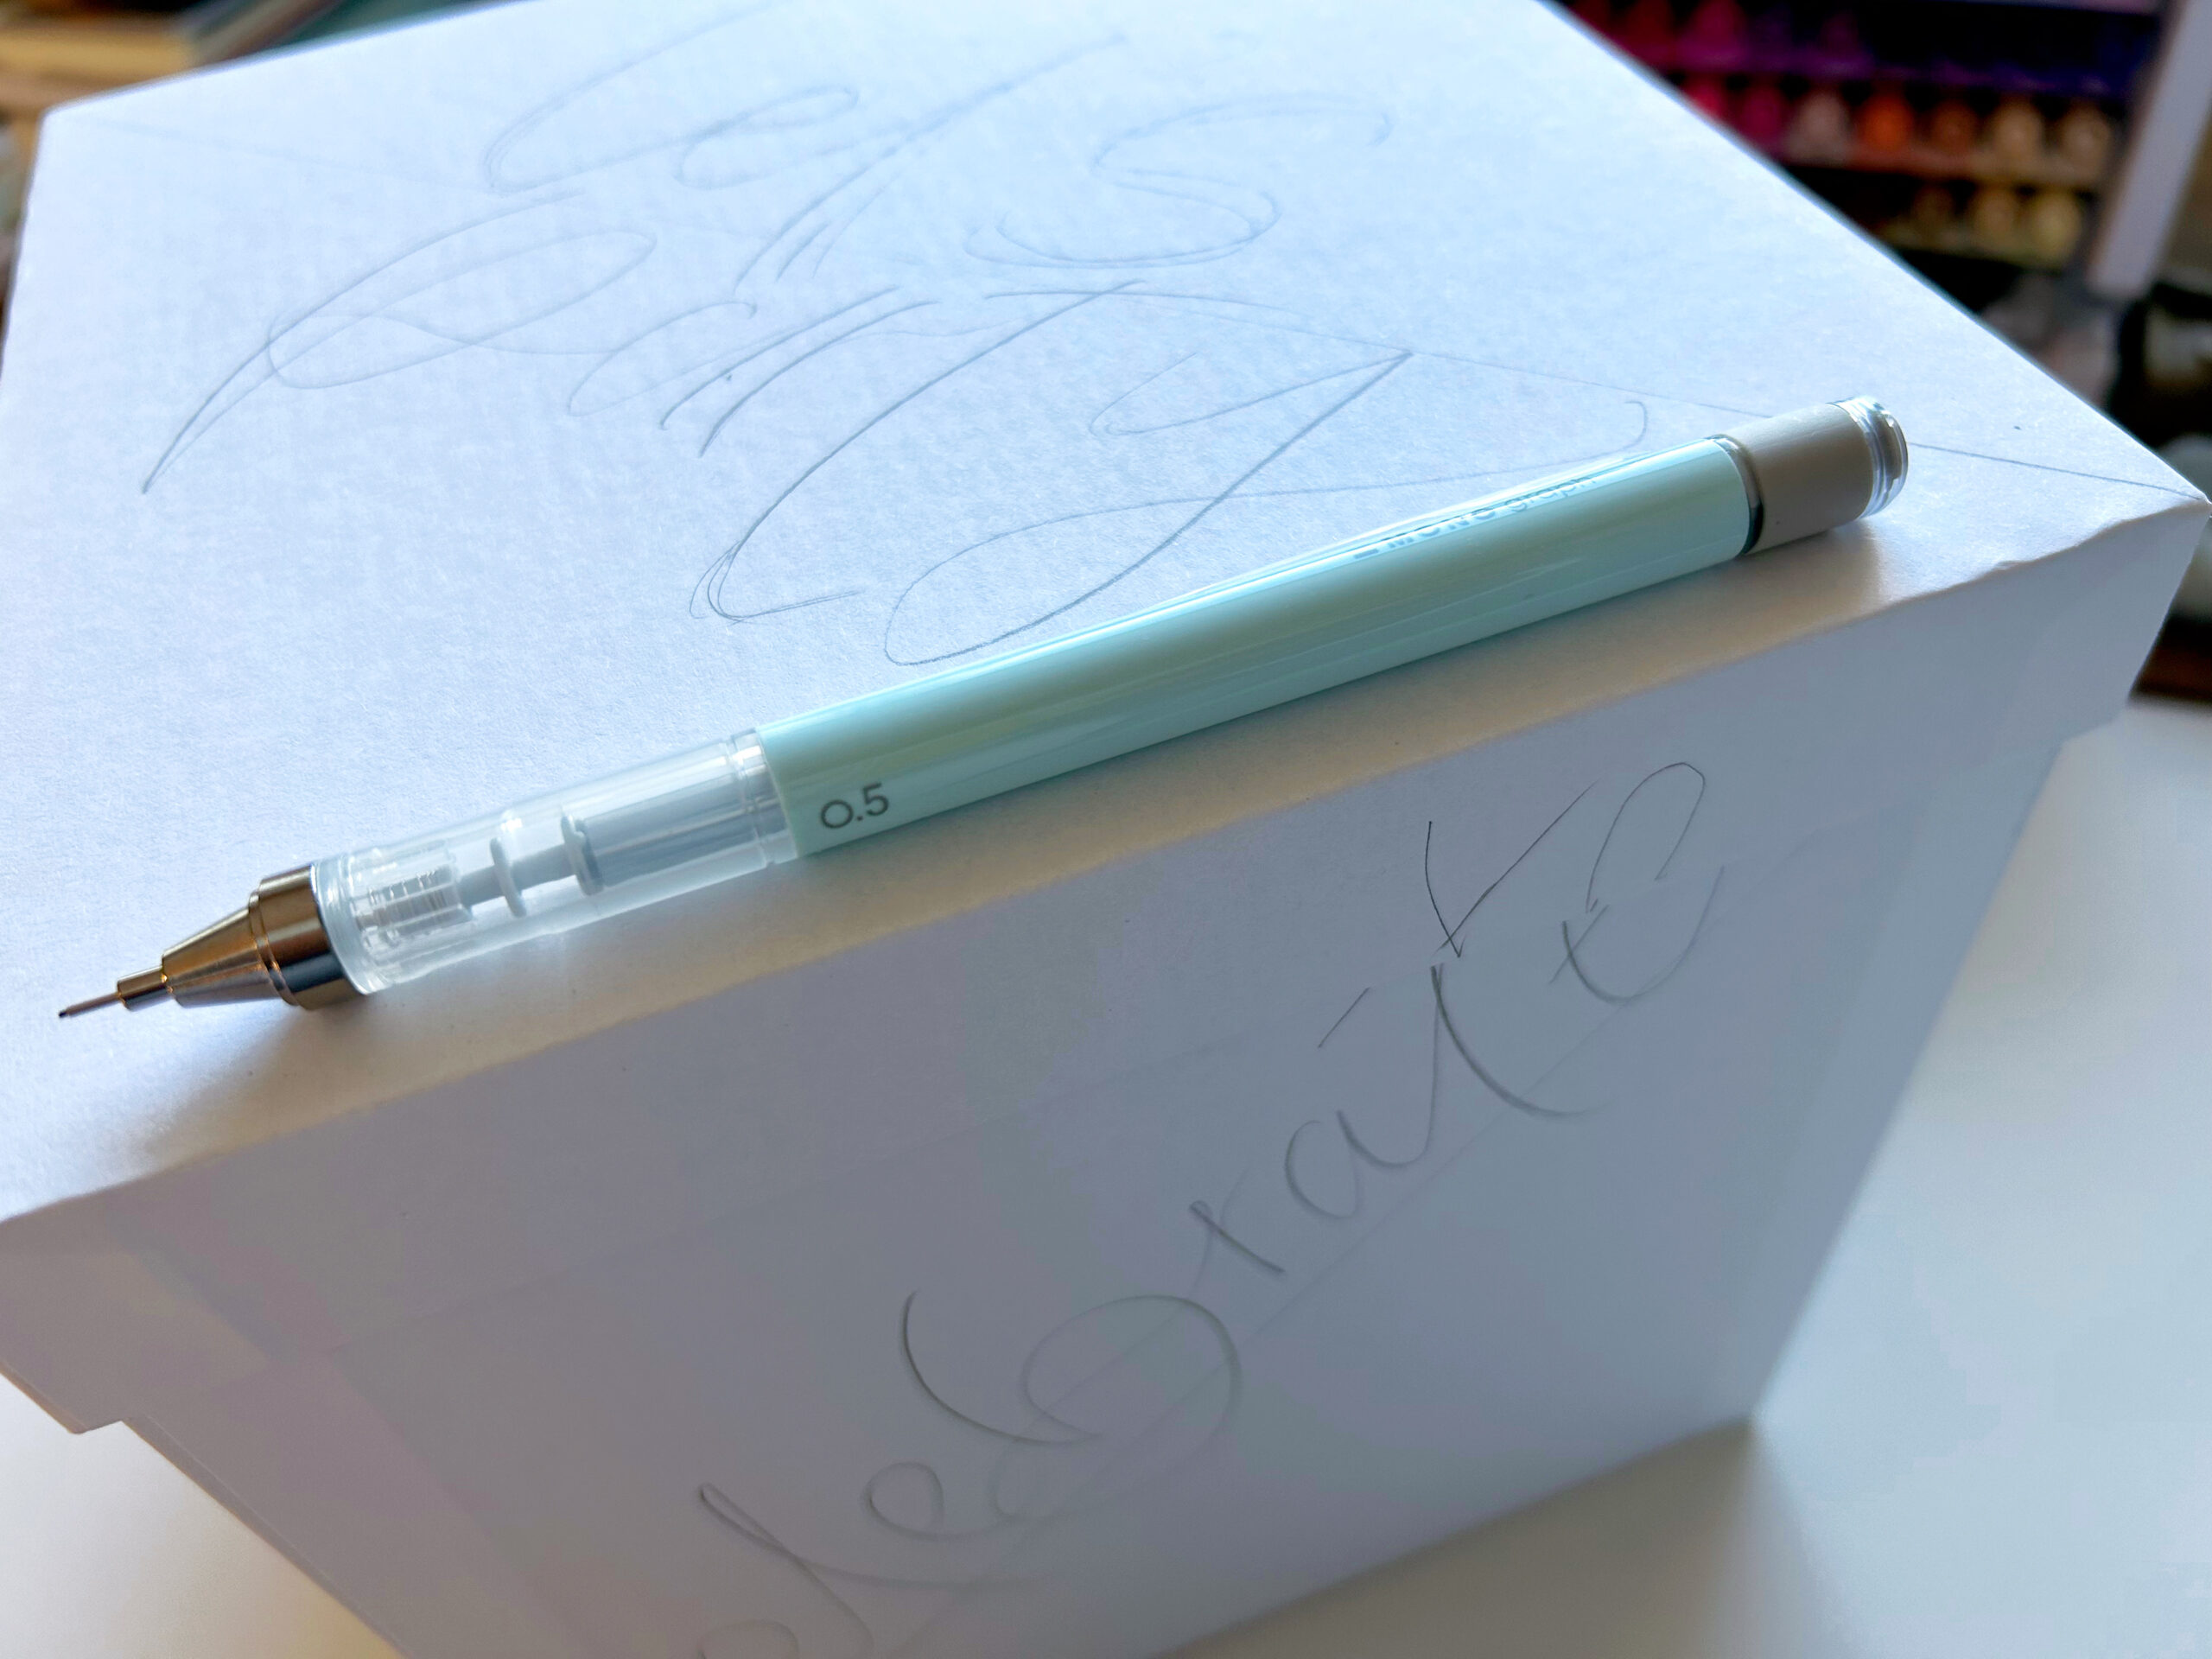
- MONO Graph Mechanical Pencil, Pastel, Ice Blue
- MONO Natural Eraser
- Hole Punch
- Colored paper
Step One:
Using a MONO Graph Mechanical Pencil, hand letter the phrase “Let’s Party” on the lid of the box in a diagonal line. Then, hand letter the word “celebrate” on each of the four sides of the box. If it ends under the lid, don’t forget to put the lid on and letter on top (to make the word visible with the box closed).
Step Two:
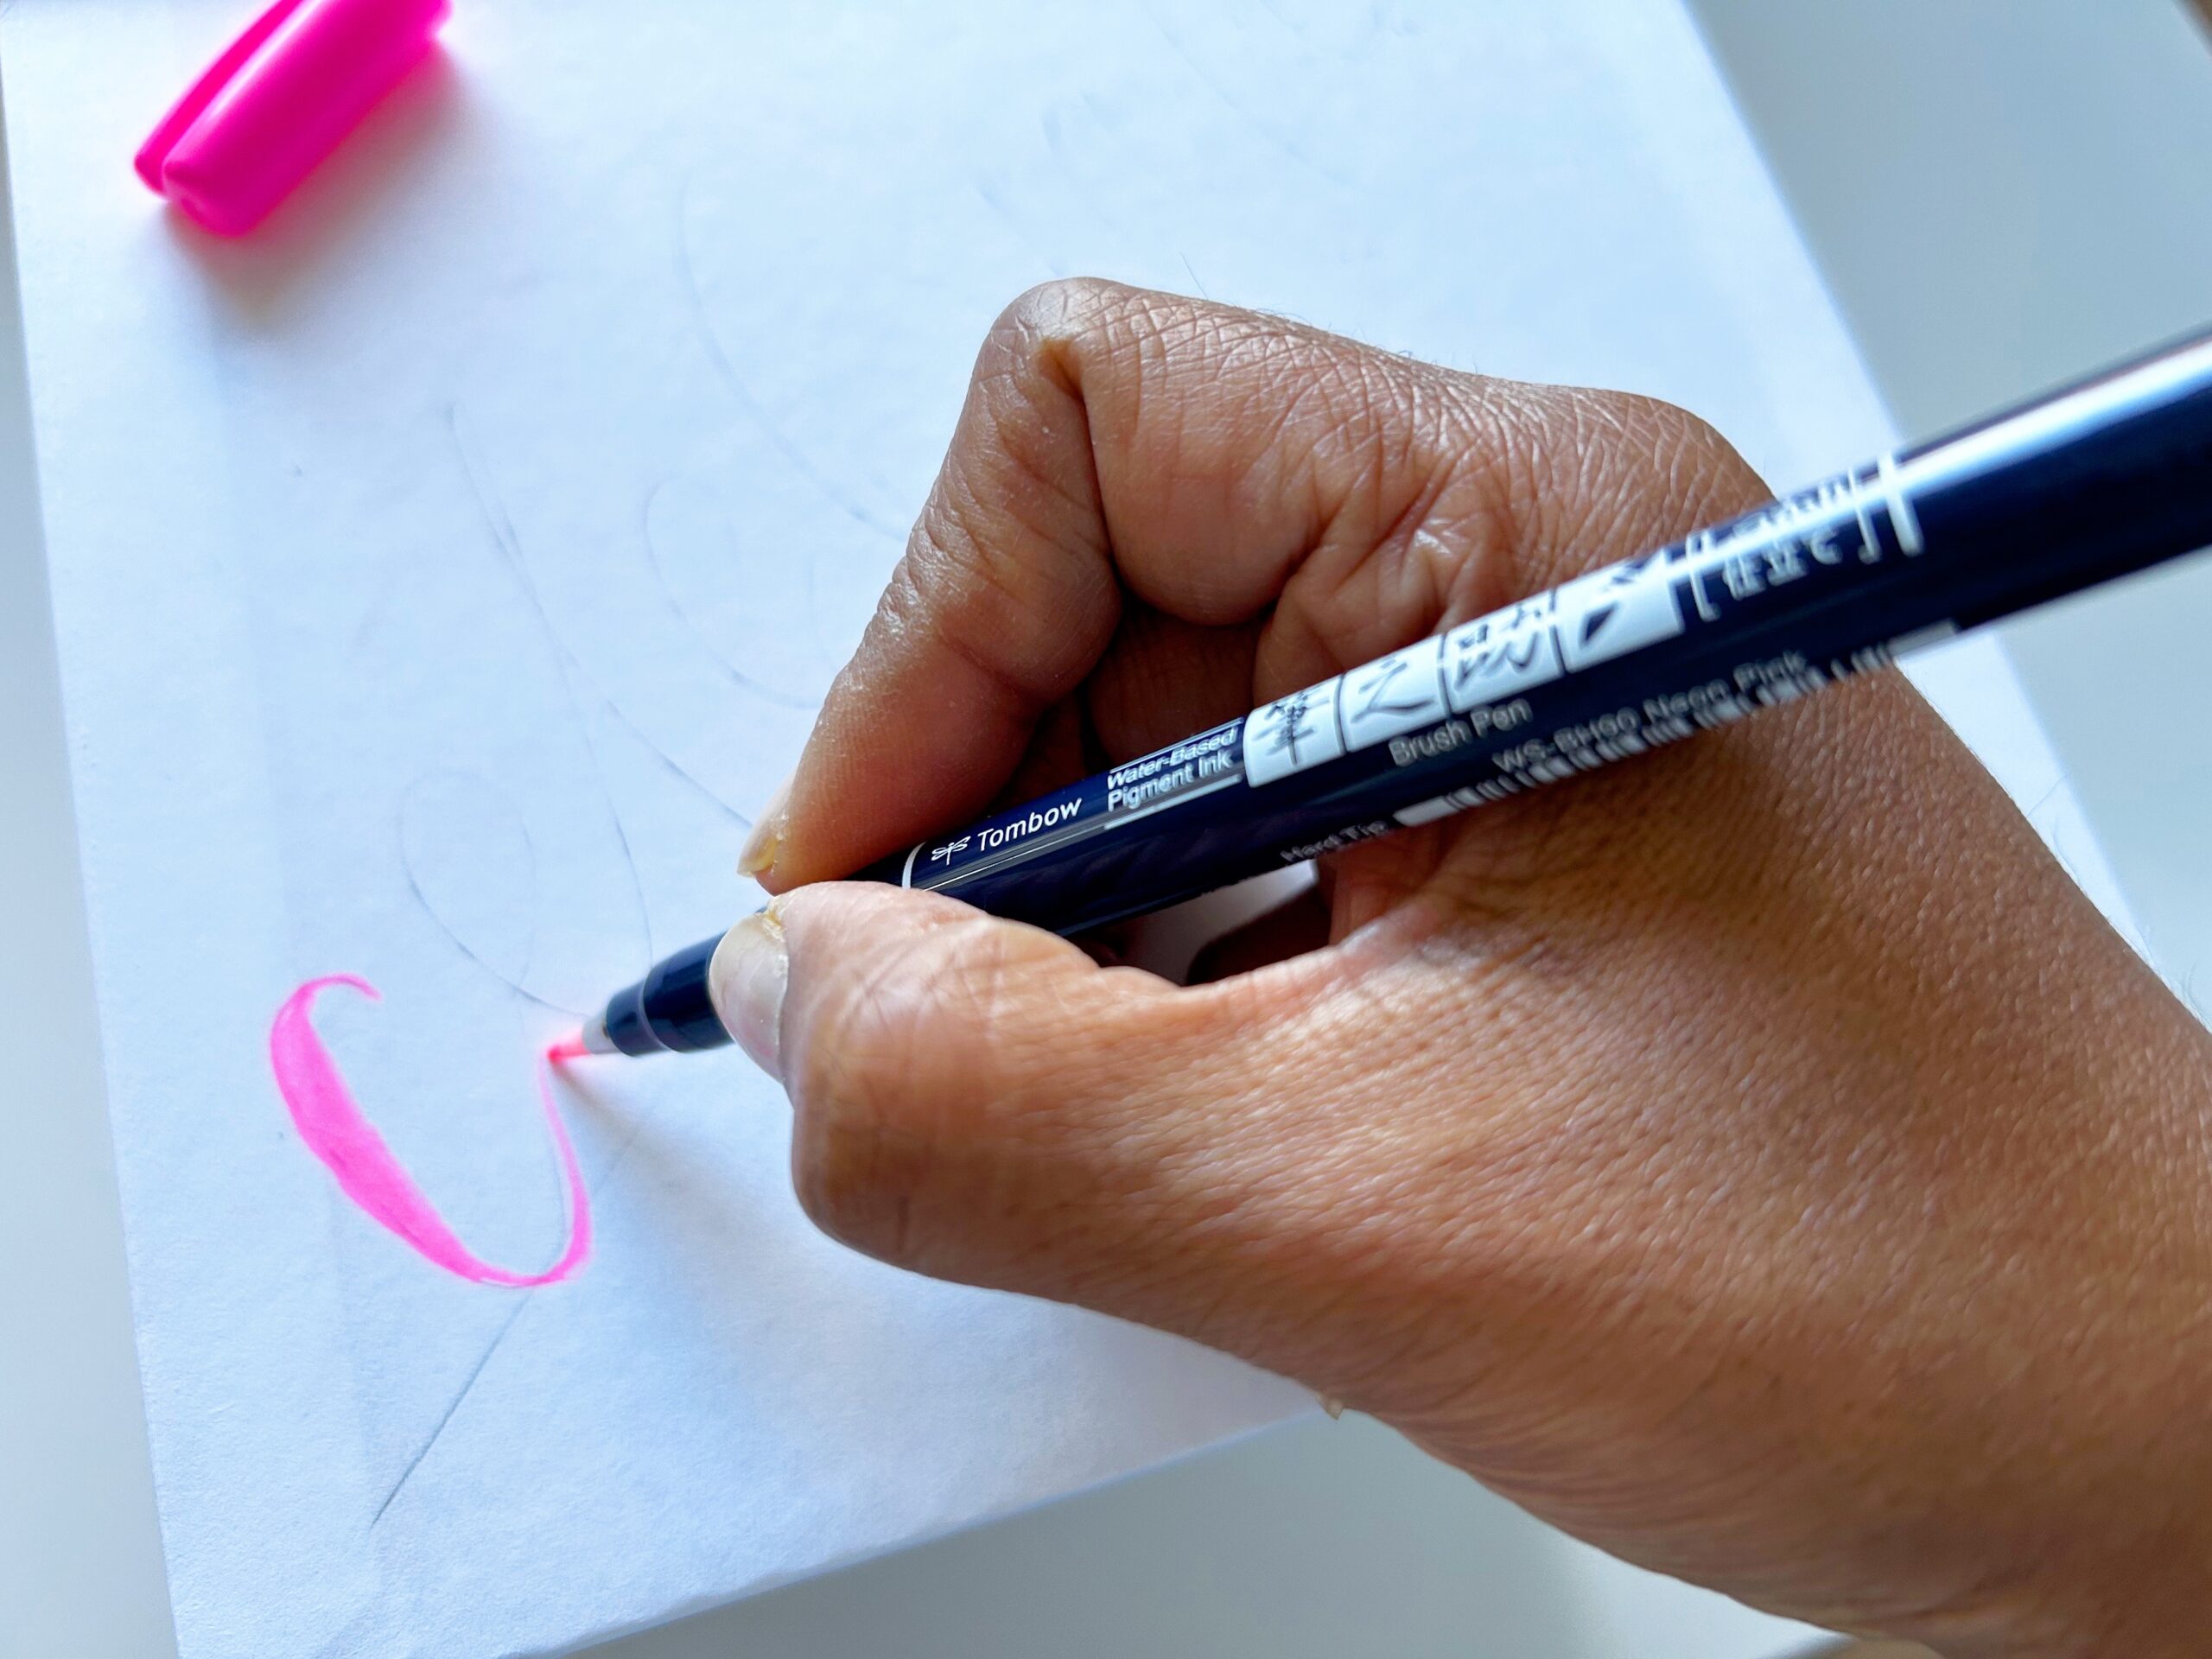
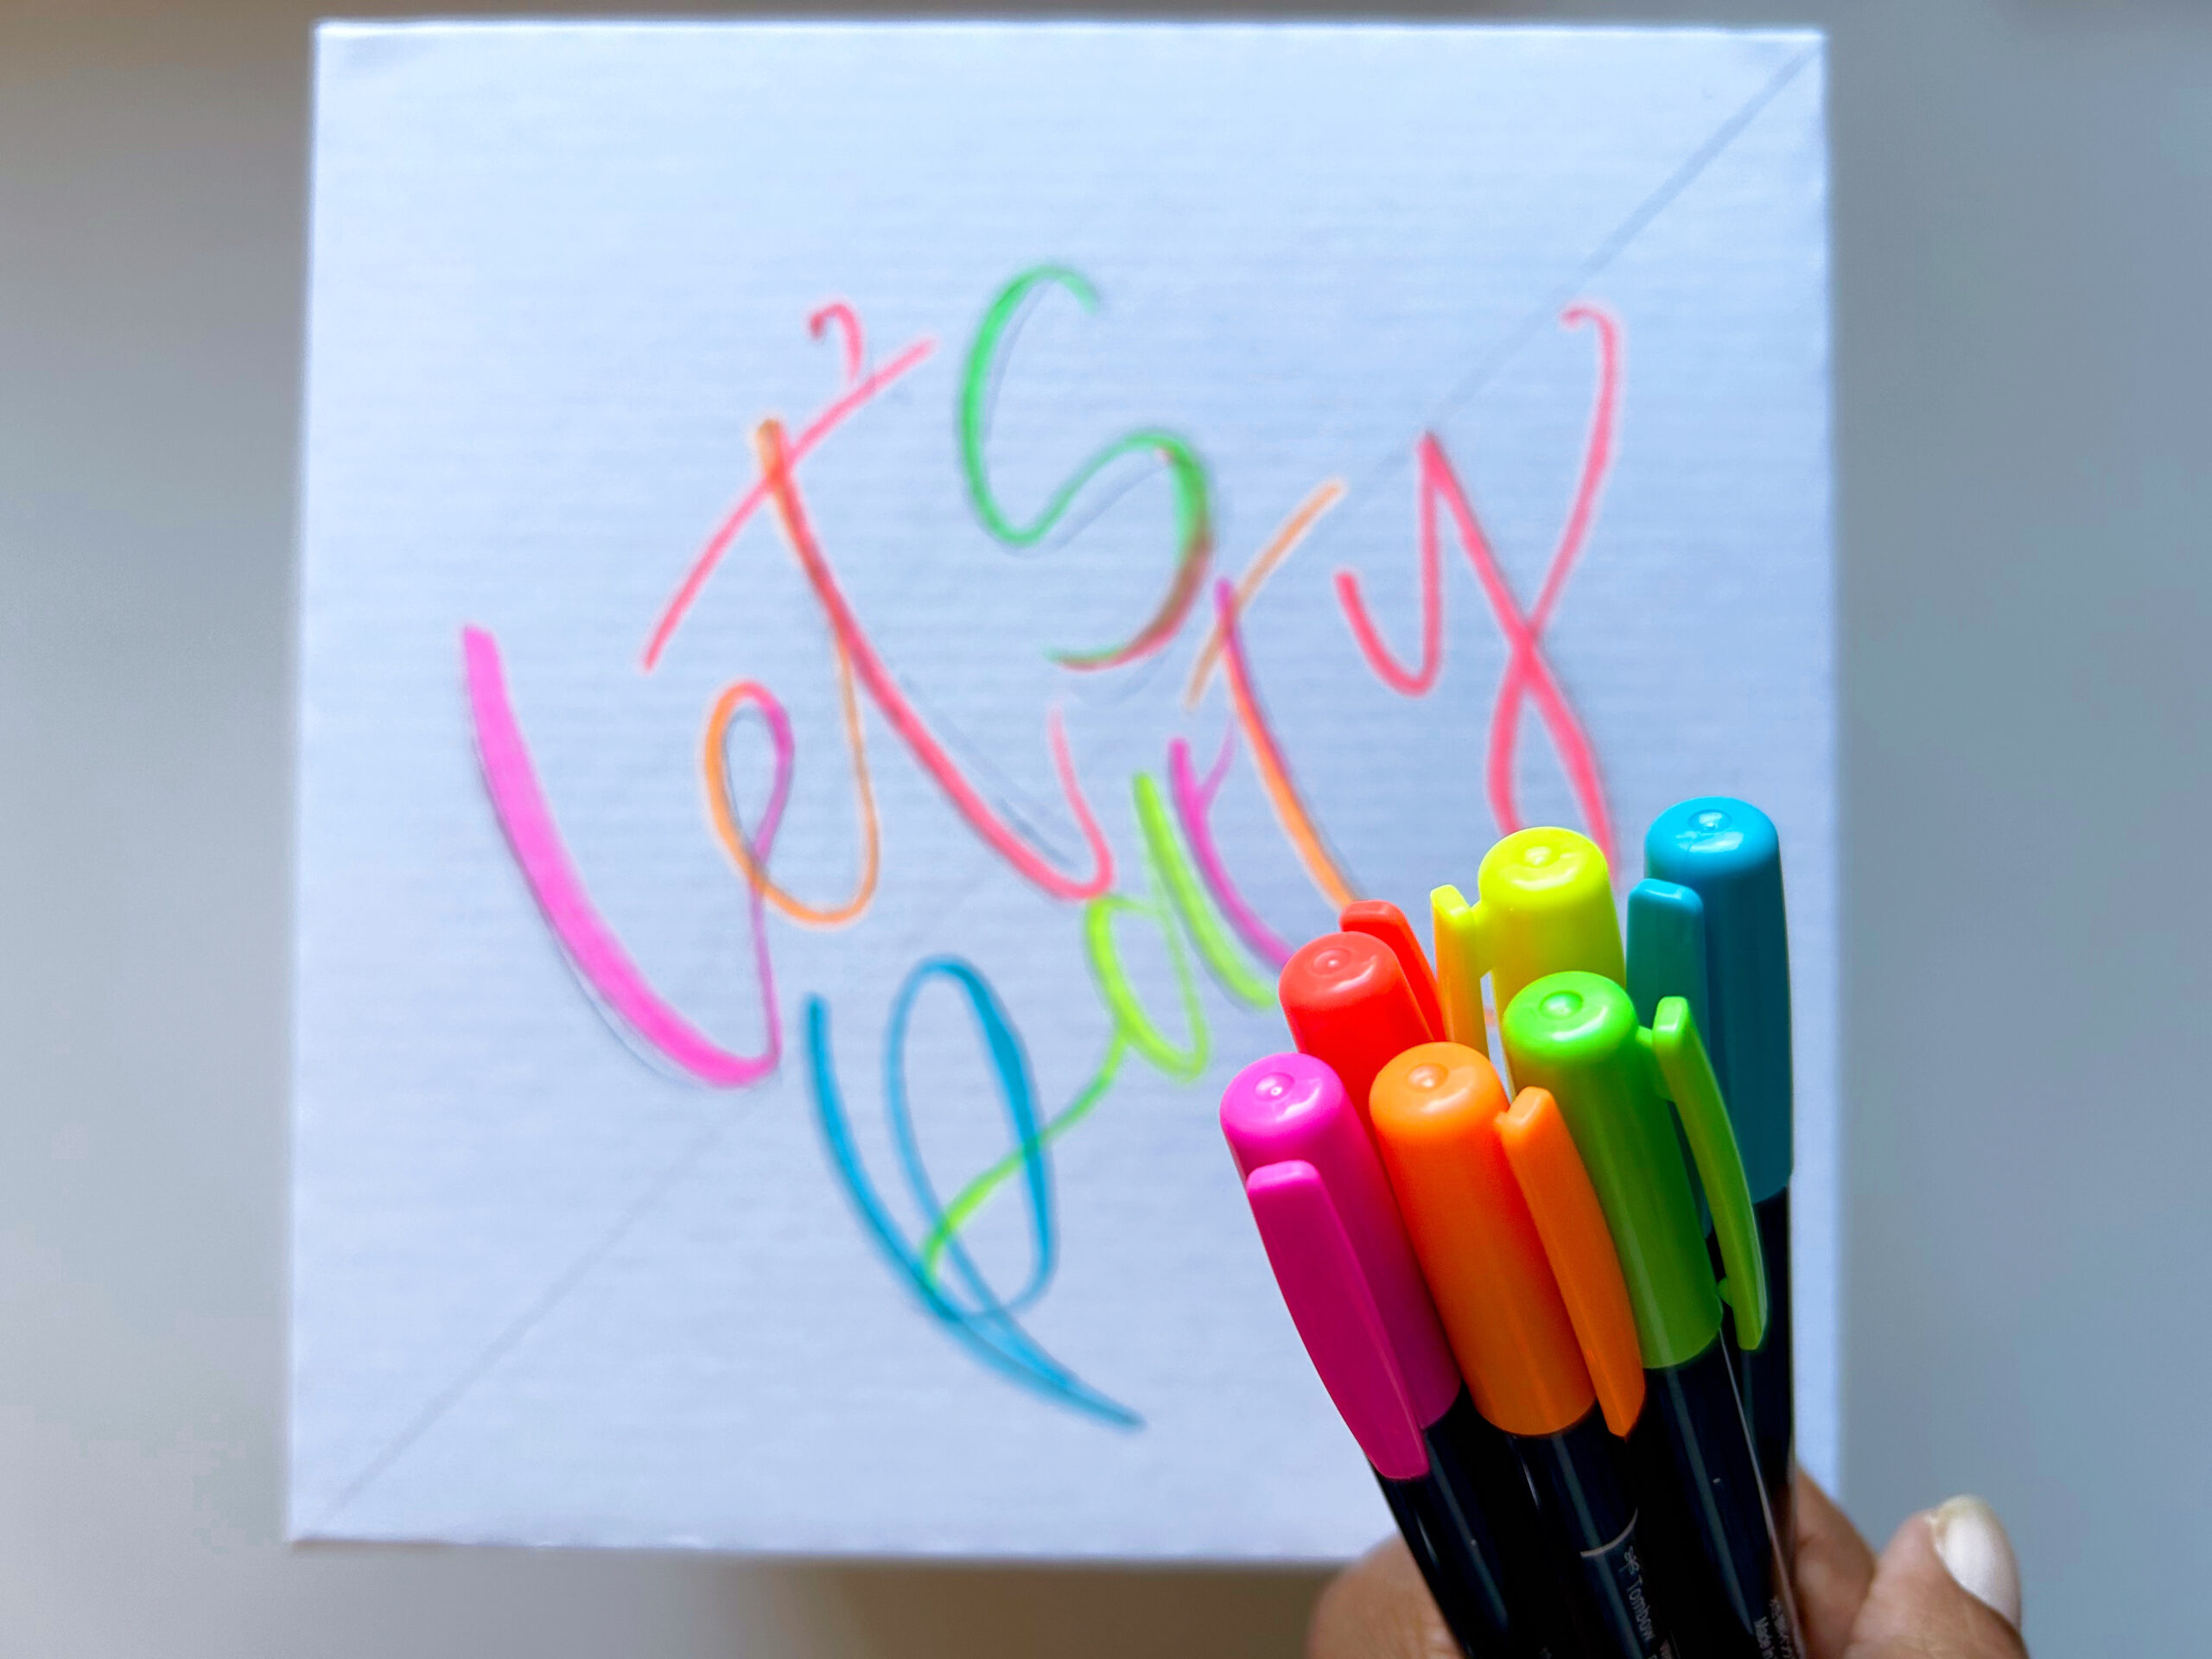
If you’re happy with the draft lettering, you’re ready to add color! Grab your set of Fudenosuke Neon Brush Pens and alternate the pens while you copy over the hand lettered words. The Brush Pens blend so well together that you can use two colors on one letter to get a color shifting effect.
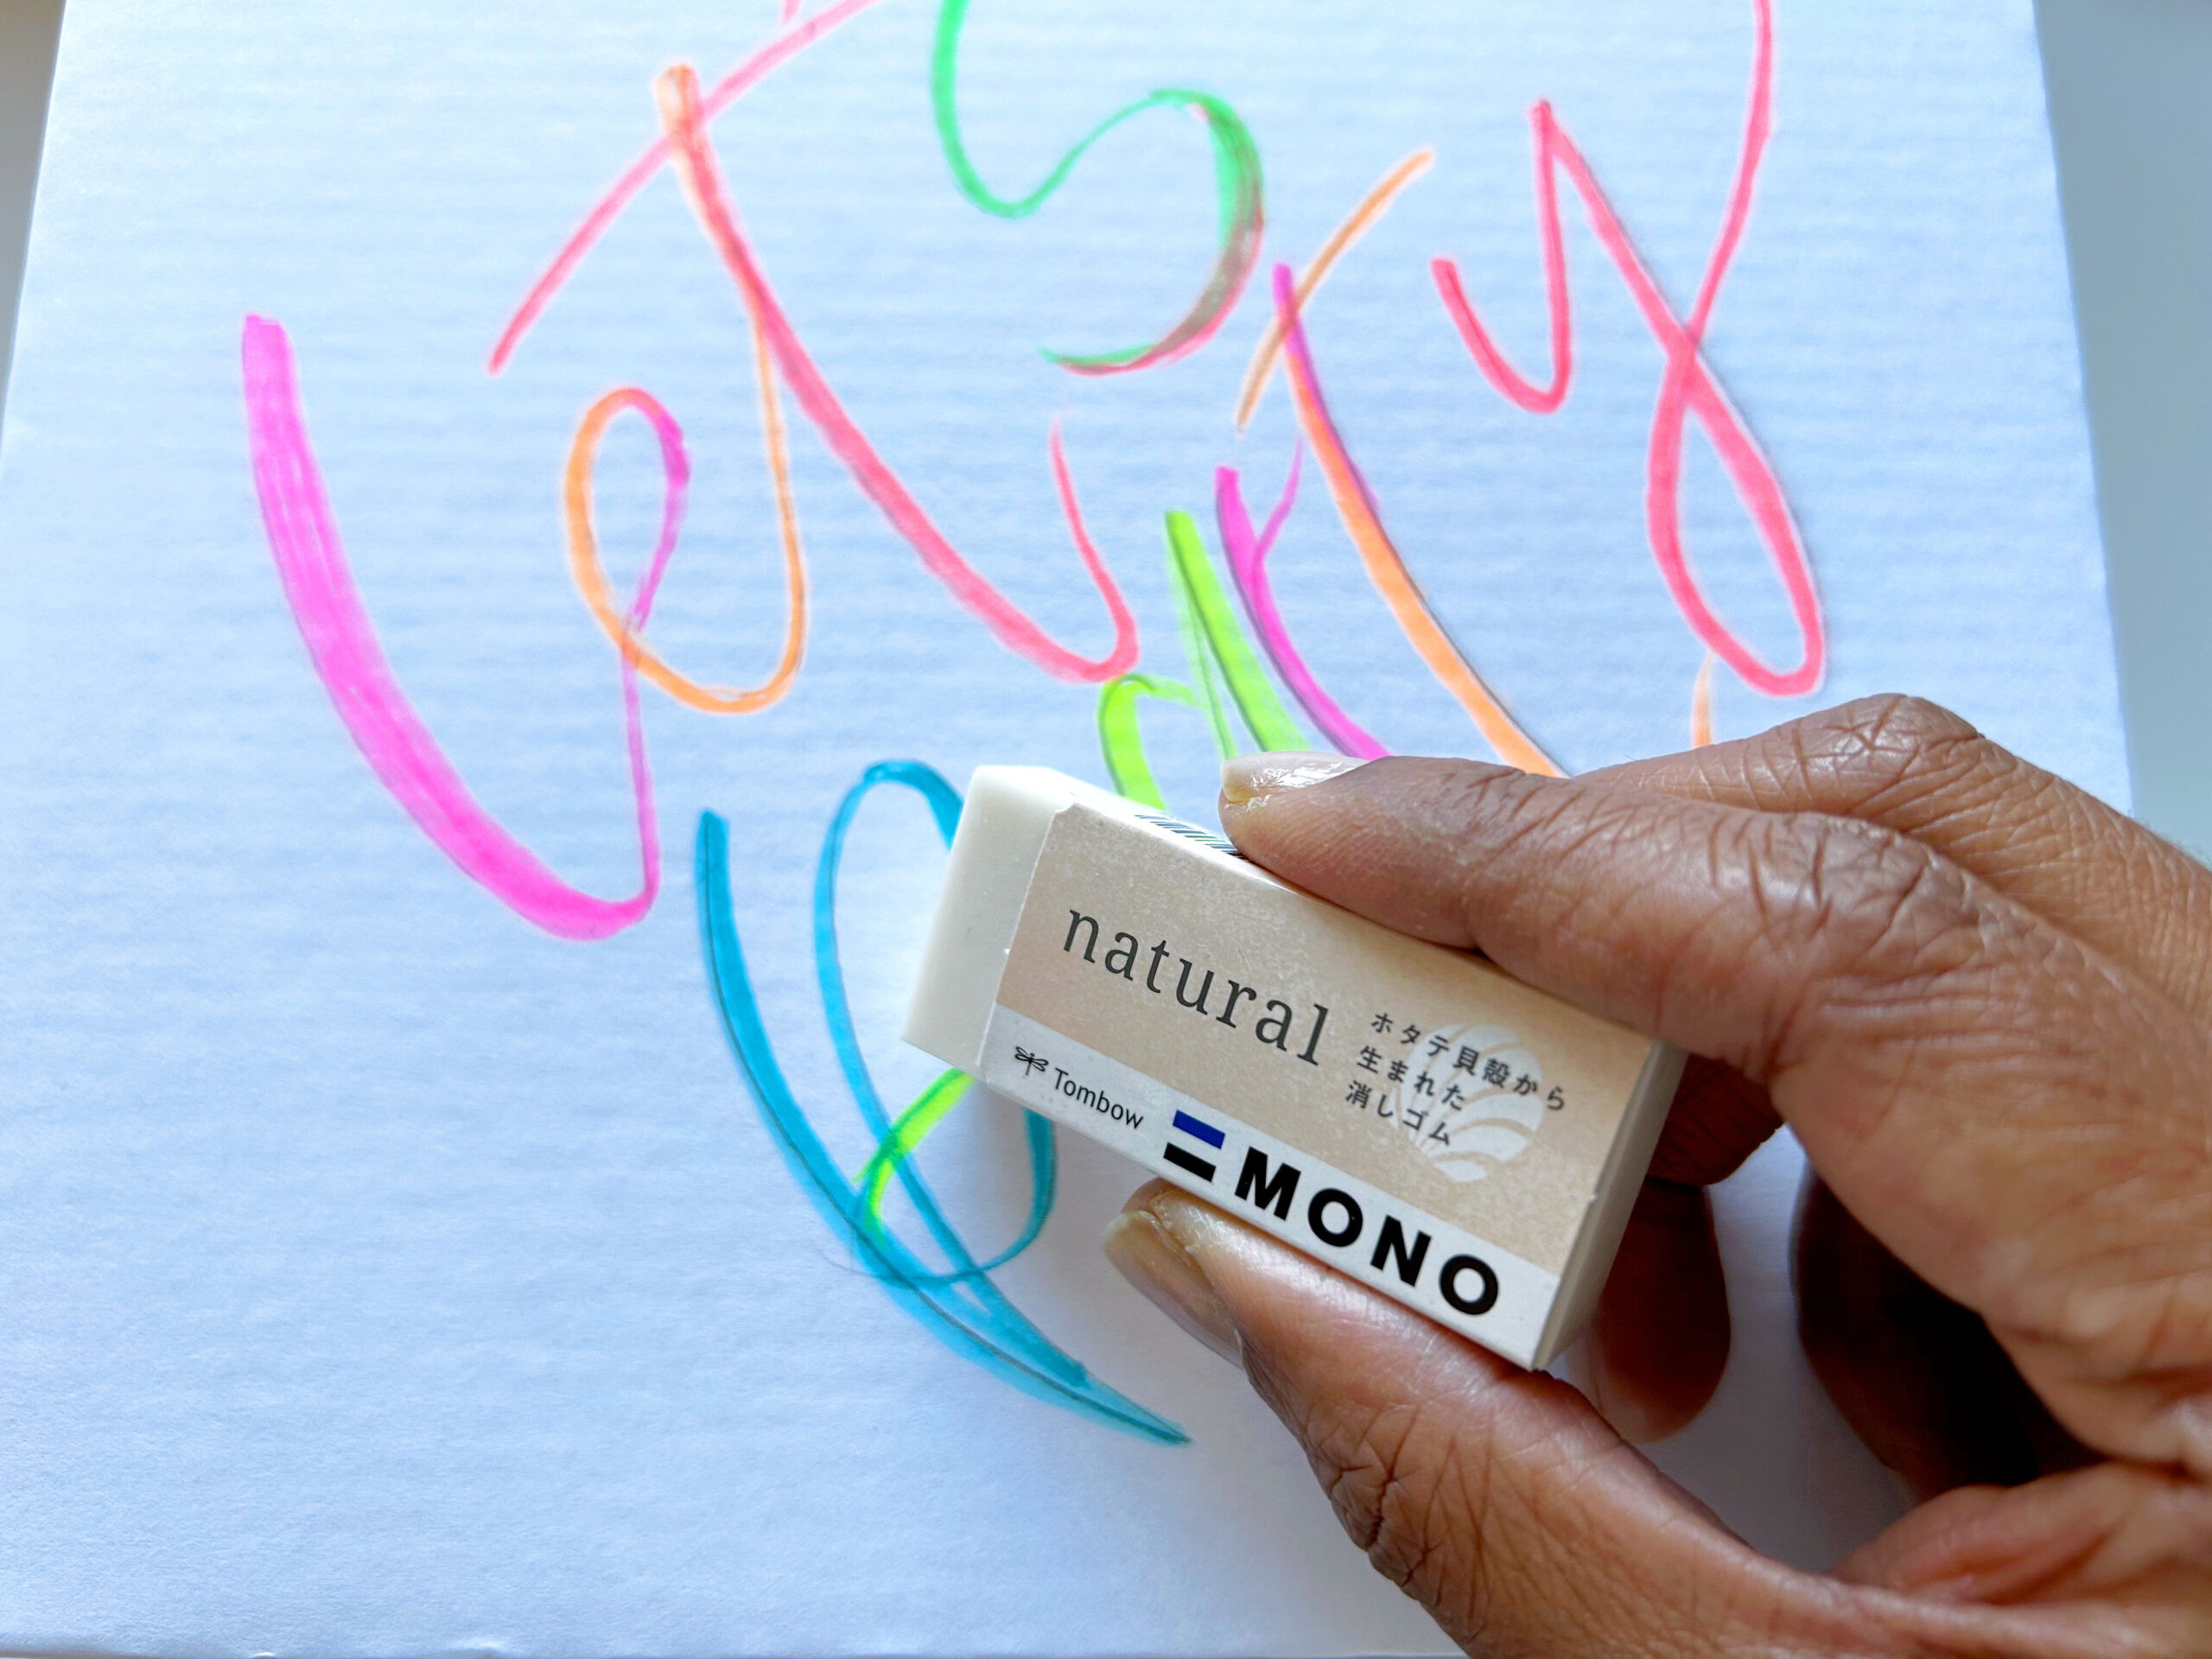
Step Three:
Don’t forget to erase all pencil marks using a MONO Natural Eraser.
Next, we’re going to draw some fun neon polka dots using a template that you can create from colored paper (I like using up old paint swatch cards) and a handheld hole punch.
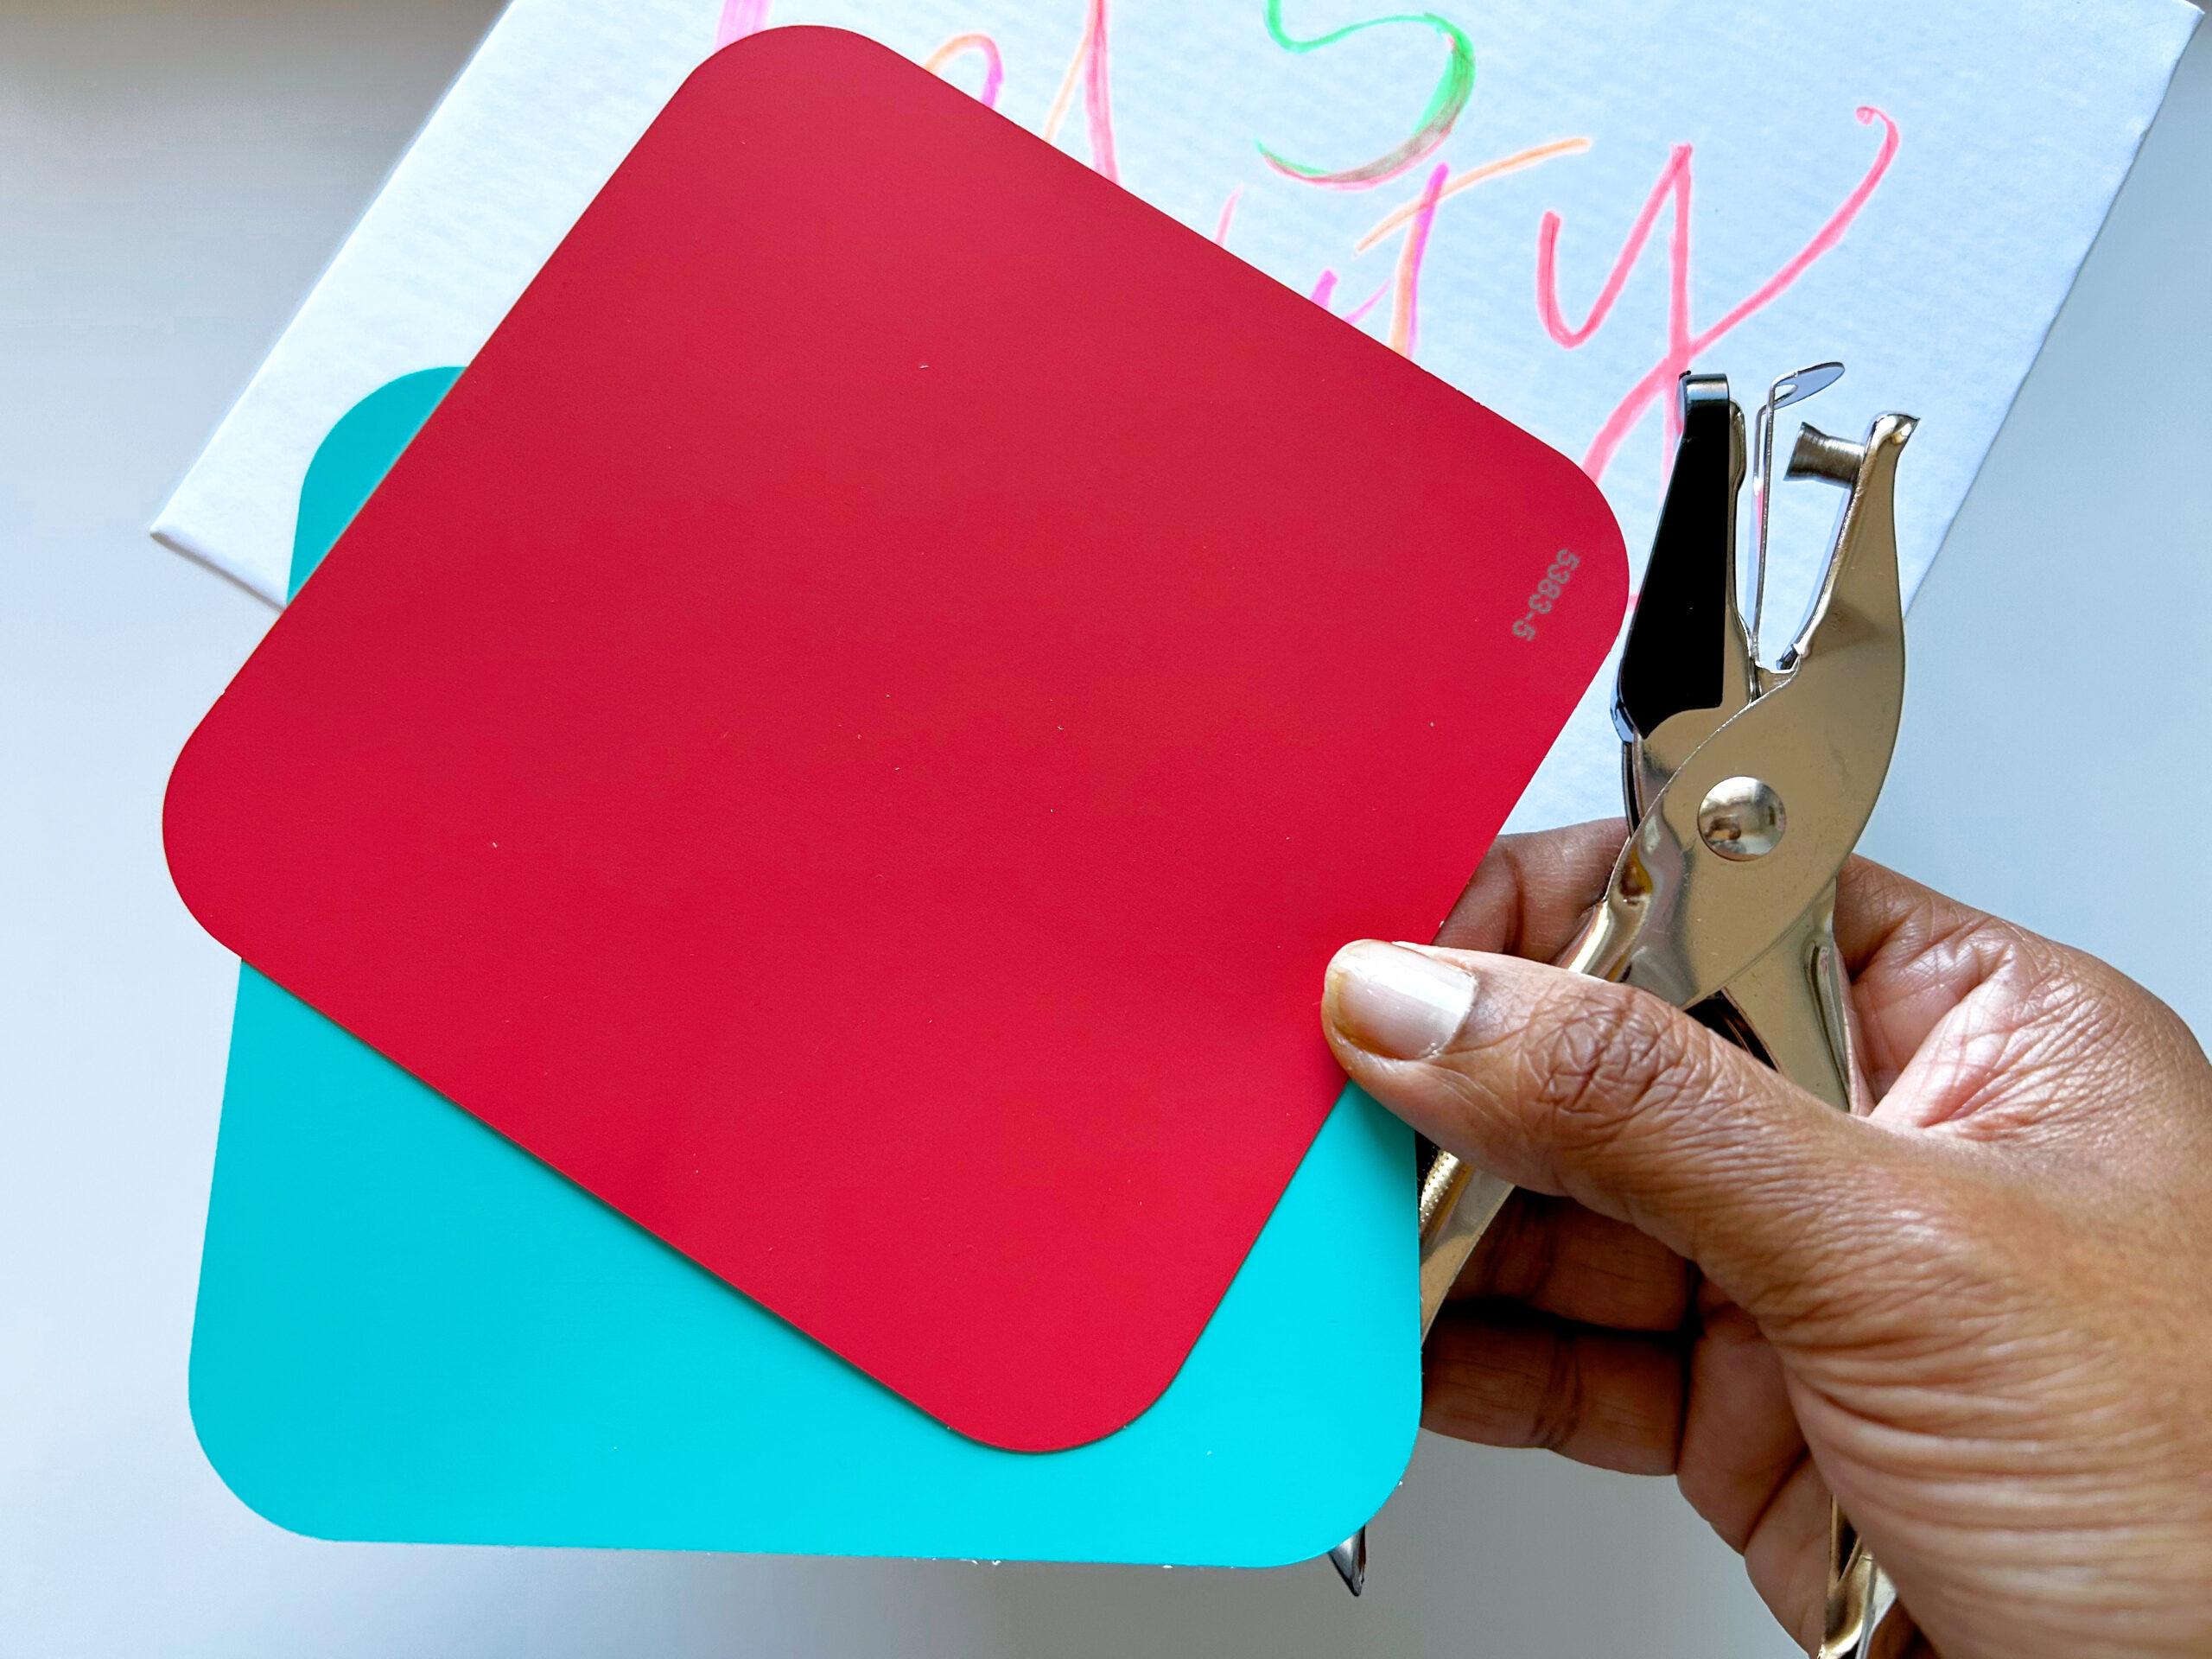
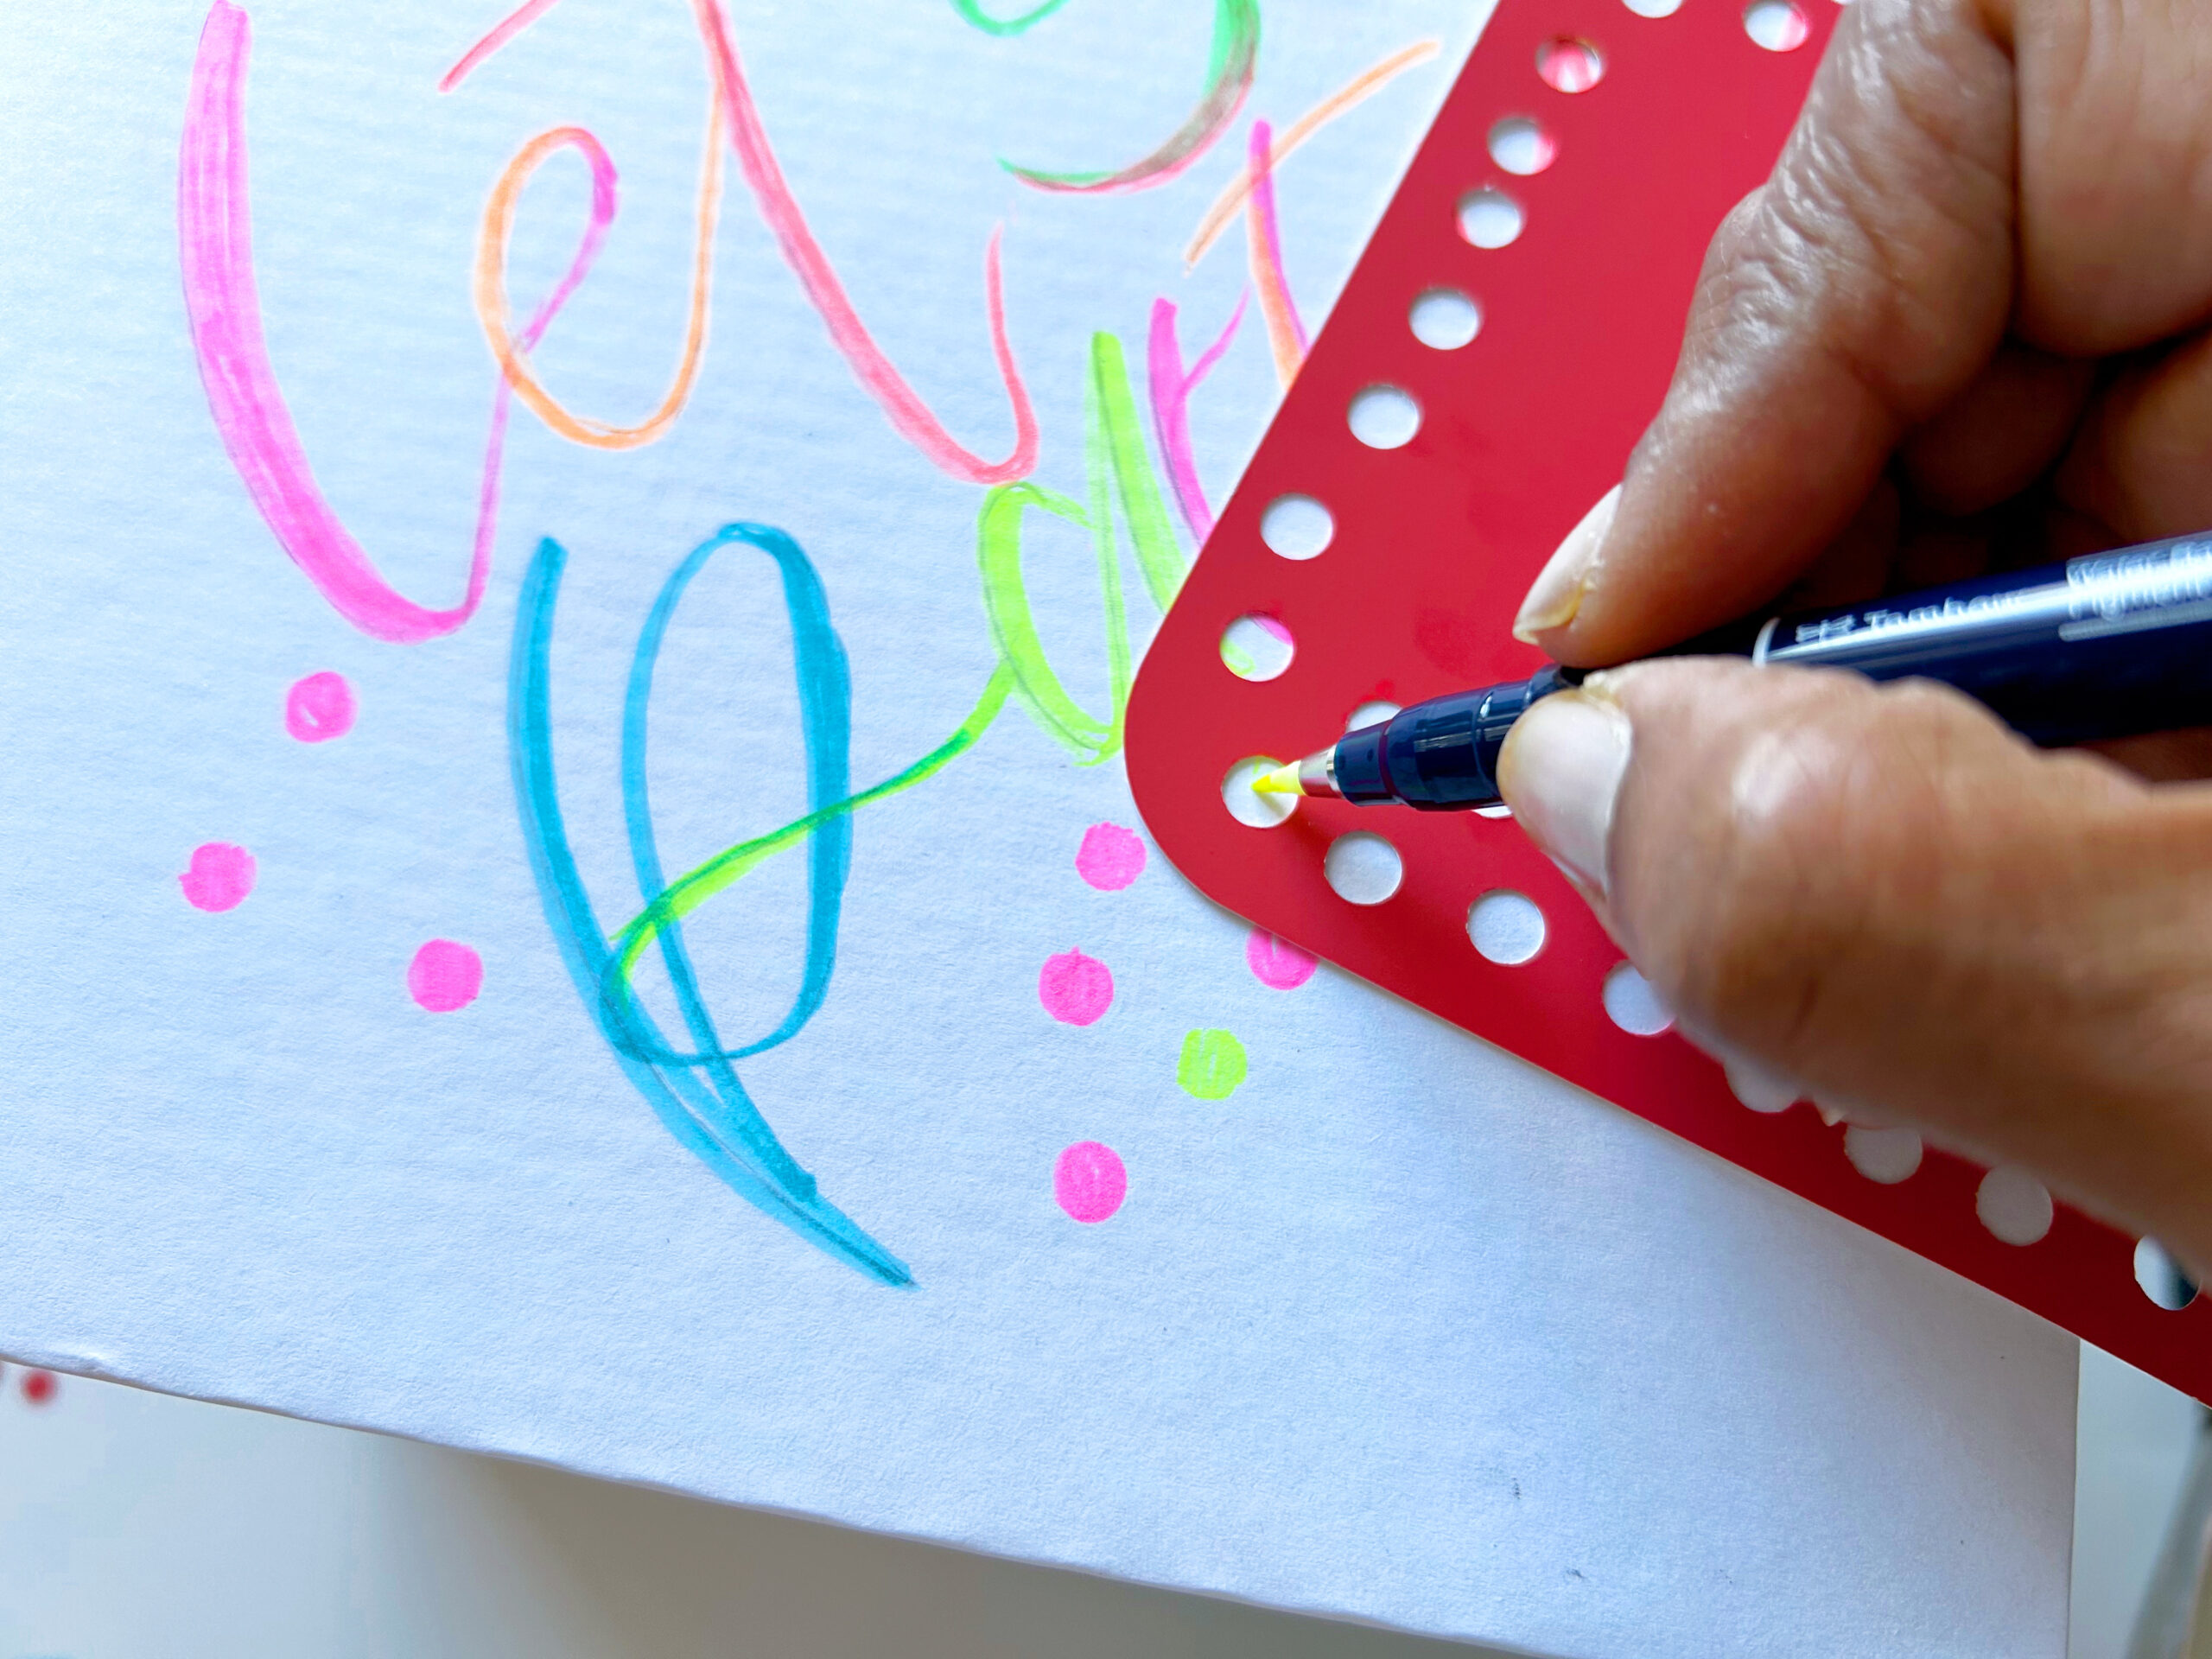
Step 4:
Punch holes into the paper and set them aside as confetti. Taking the punched paper, hold it up to the box and use a Fudenosuke Neon Brush Pen to color in the circle. Keep moving the paper around the box and alternate Brush Pens.
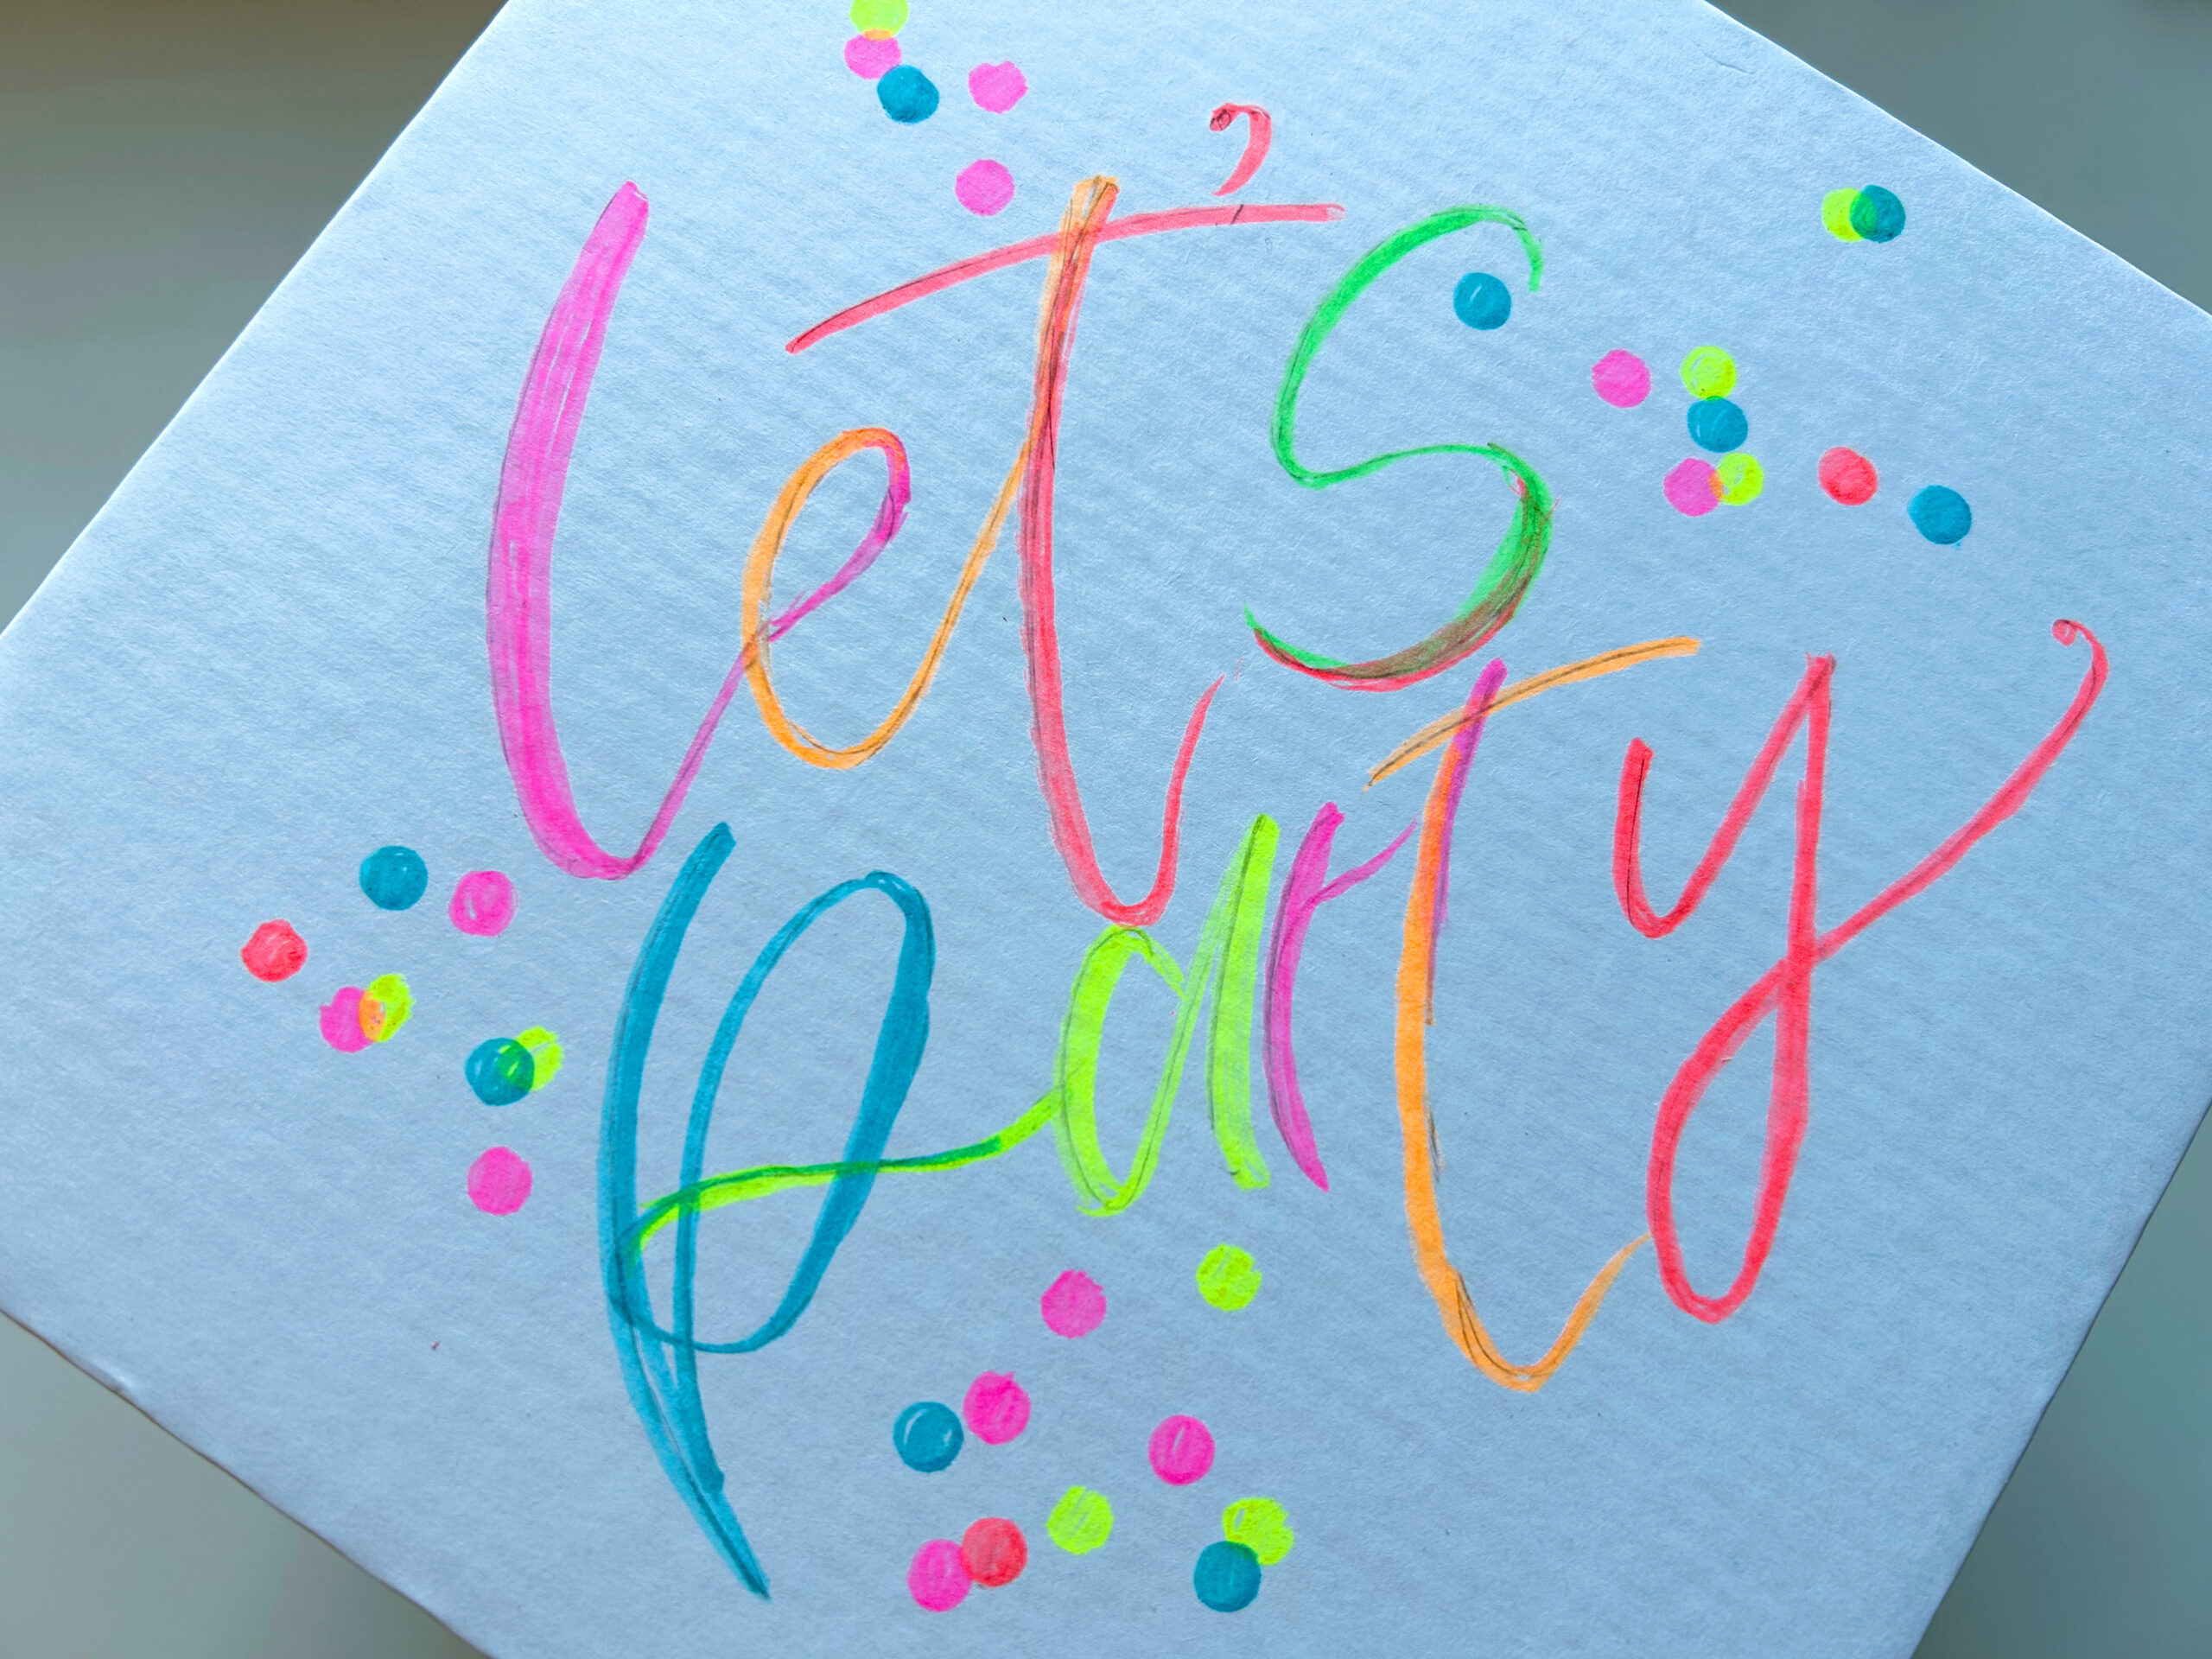
That’s it! You now have a bright neon gift box that you can fill with fun birthday party essentials!
Join the art challenge throughout the month and share your creations on Instagram using #TombowBirthdayChallenge and tag @TombowUSA.
Looking for another fun tutorial? Try out this DIY Travel Memory Wall Art!