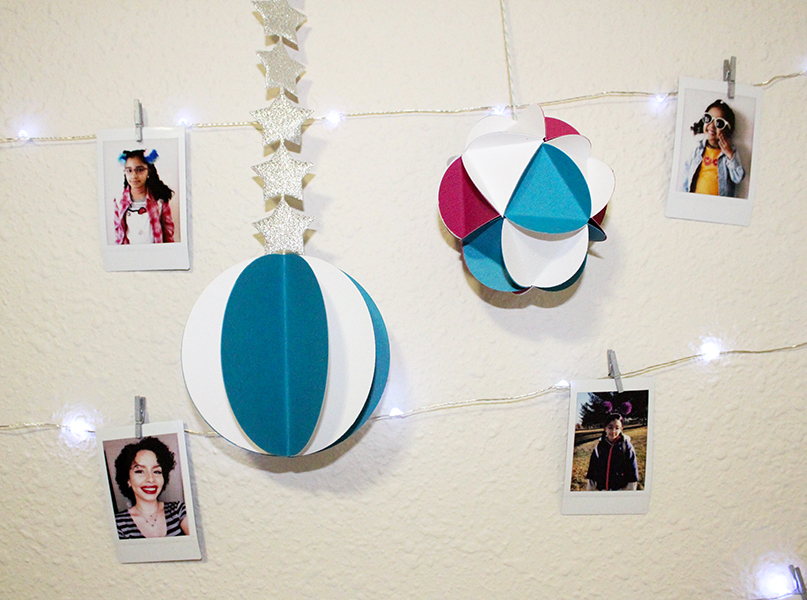
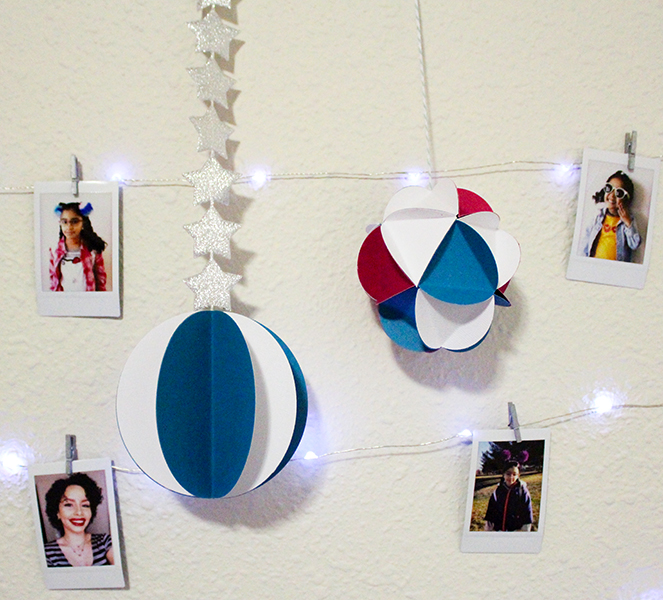
Hi Tombow Fans! This is Jennie and December caught me by surprise this year! It got here way too fast! The year is almost over, so this week we are giving you some NYE party decoration ideas. I made these as ceiling party decorations, but you can also use them as backdrop in a photo booth.
Materials:
- Tombow Xtreme Adhesive
- Cardstock
- Tombow MONO Removable Adhesive
- Die Cut Machines or Circle Punches
- Tombow MONO Multi XL Liquid Glue
- Ribbon or Twine
Step One:
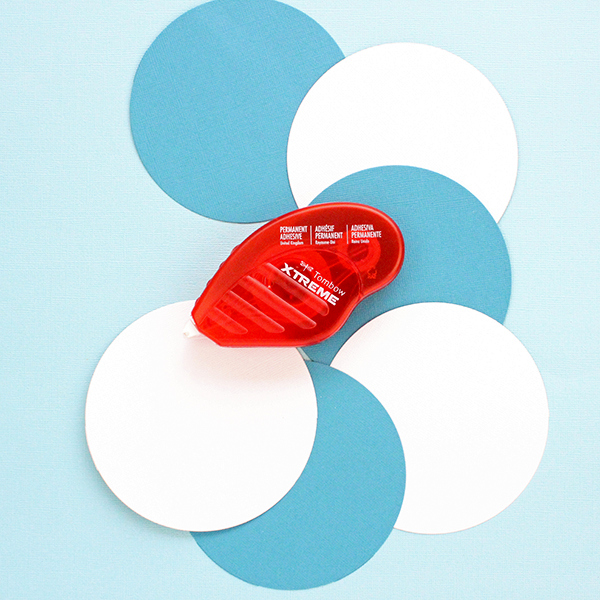
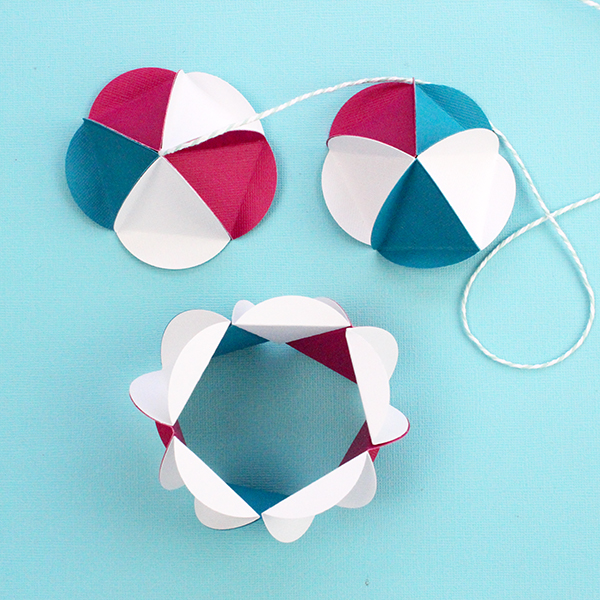
Cut 8 to 12 circles. You can choose any size, but make sure they are all the same size. You can cut them by hand, but it is so much easier to use a die cutting machine or a paper punch.
Step Two:
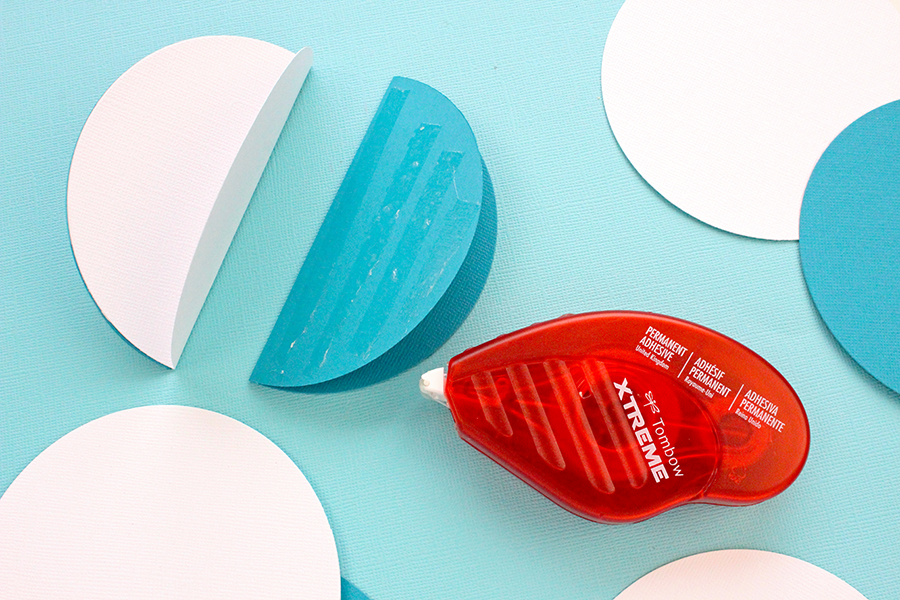
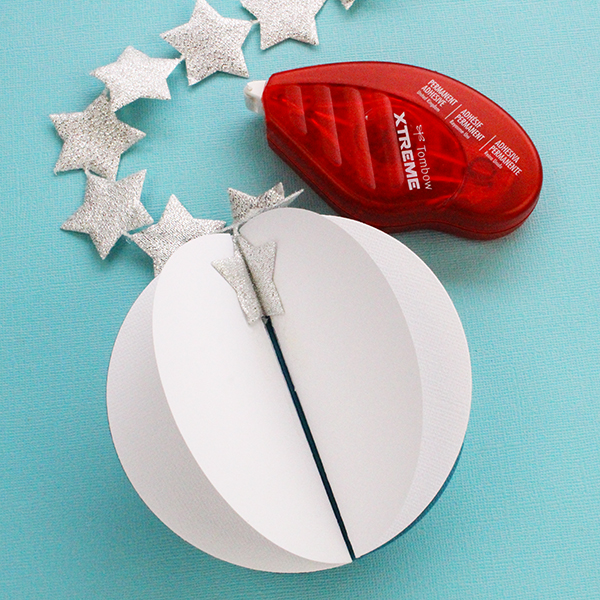
Fold the circles in half. Using a bone folder is helpful to get a crisp fold. Apply the Tombow Xtreme Adhesive. Don’t be stingy!
Step Three:
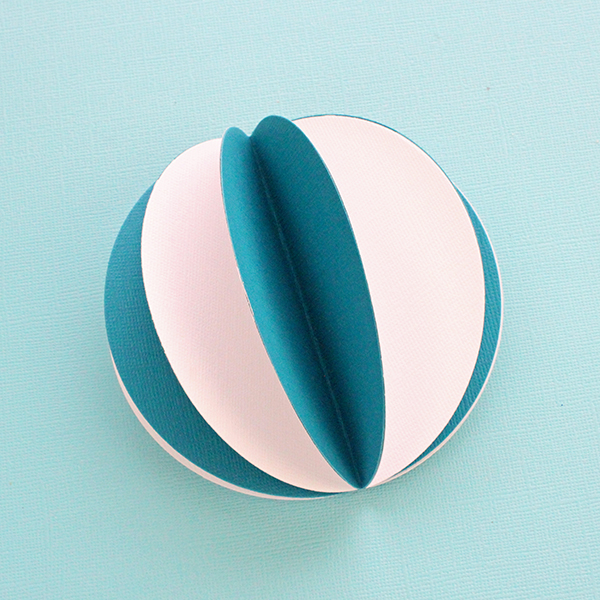
I used two colors, so I alternated them. You can pick as many colors as you want. Do it slowly so the circles line up. If you want to hang the sphere, alternate the colors until you have a spherical shape. Or if you want to apply directly to the wall for a backdrop, make a half-sphere then adhere to the wall using Tombow Xtreme Mounting Putty.
Step Four:
To hang these party decorations from the ceiling, add ribbon or twine before you close it to make a sphere. You can make a few of these and put them on a string to make a garland.
This first party decoration is easier to make and is a better choice if you are in a hurry or need to make many. This second decoration is also easy, but a little more time consuming. 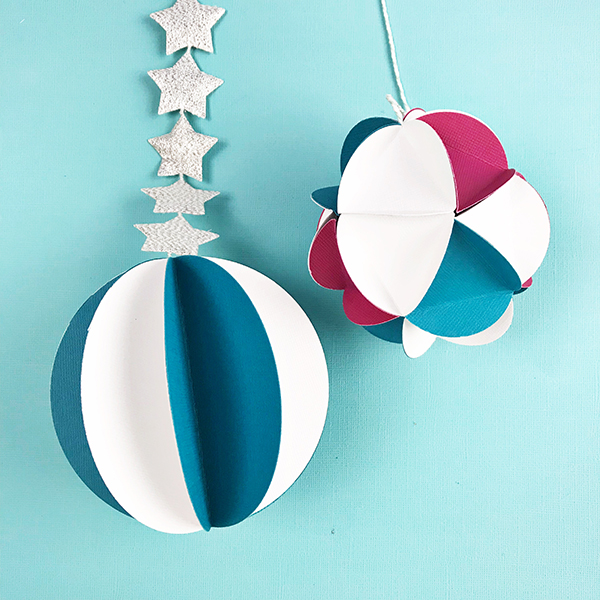
Step One:
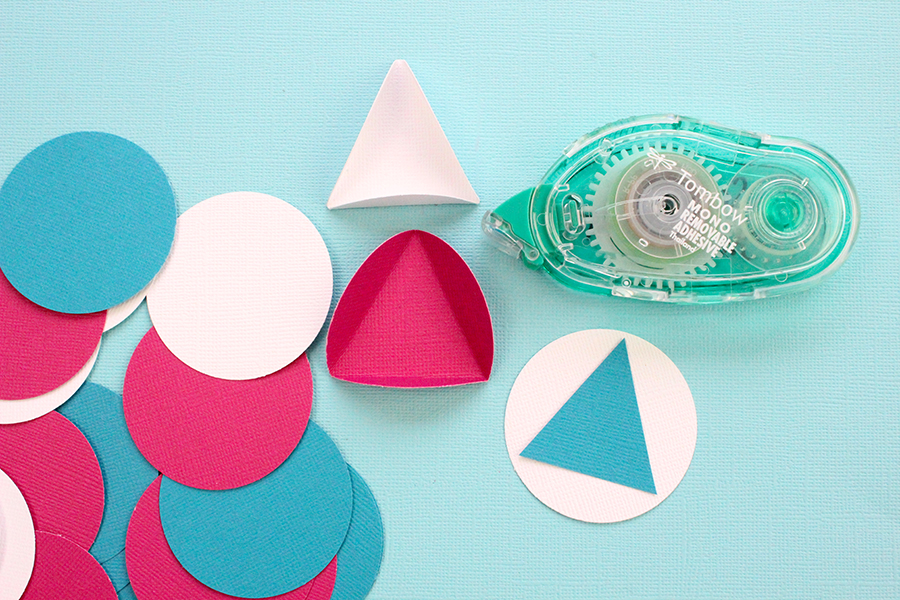
Using a paper punch or a die cutting machine, cut 20 circles of the same size.
Step Two:
Using an extra circle, cut a triangle that fits inside the circle. You could trace the triangle with a pencil but then you would have to erase the lines. I think it’s easier to use the Tombow MONO Removable Adhesive to keep the triangle in place while you fold the circles to make the triangles.
Step Three:
Using the Tombow Xtreme Adhesive, start gluing the circles.
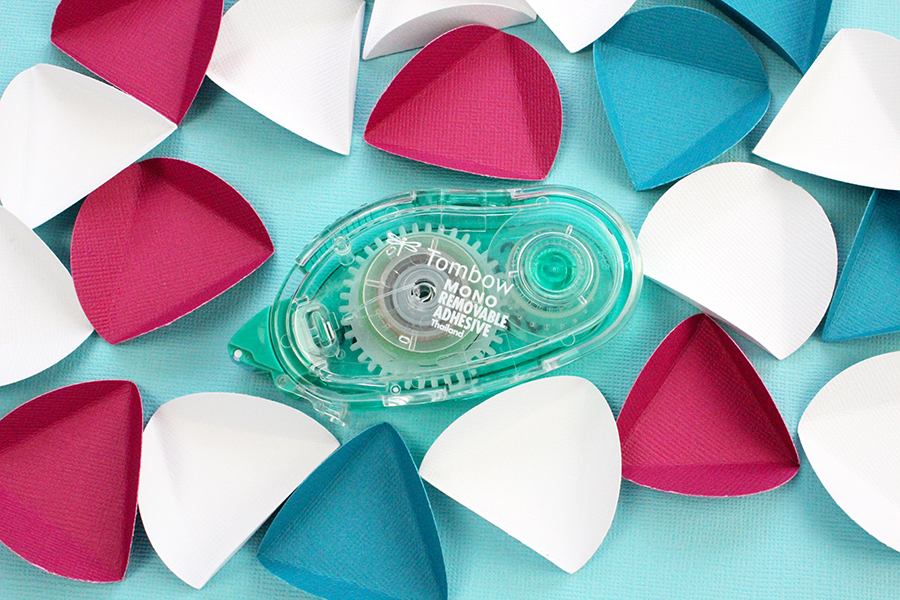
Make the top using 5 circles. The triangles should all point in the same direction. Add twine using tape to hold it inside one of the circles. To make the bottom, repeat this step without the twine. For the middle, alternate the direction of the other 10 triangles. I also alternated the colors.

Step Four:
Connect the circles in the corners. At the top and bottom you will have 5 flaps. Align those with the flaps from the top and bottom pieces. For these pieces is easier to use the Tombow MONO Multi XL Liquid Glue.
Voilá! Two easy party decorations! Add different colors and sizes to create an interesting background!
Get ready for 2019! Tombow has lots of great plans! We can’t wait to share them with you!