Hello Lovelies! Serena here, and I can’t wait to share with you my projects for this year’s CHA Megashow!
If you don’t already know, I am obsessed with making cupcake liner embellishments! They are just so much fun to make and the possibilities are endless! And what better way to celebrate Party With Tombow this CHA then by using them to make fun party favors and decor! Let’s get started!
The first step is to gather up your cupcake liners, Tombow Dual Brush Pens in the Bright Palette, your favorite Tombow adhesives (I used my Tombow MONO Aqua Liquid Glue, Tombow Xtreme Adhesive, Tombow Adhesive Dots, and Tombow’s Xtreme Mounting Putty) and different die cuts or stickers you might have in your stash!
It’s okay if you don’t have a lot of patterned cupcake liners for these projects; you can make your own customized liners by coloring plain white liners with the Dual Brush Pens. I did this for the purple embellishment you see here. You can color pretty much anything with these Tombow markers.
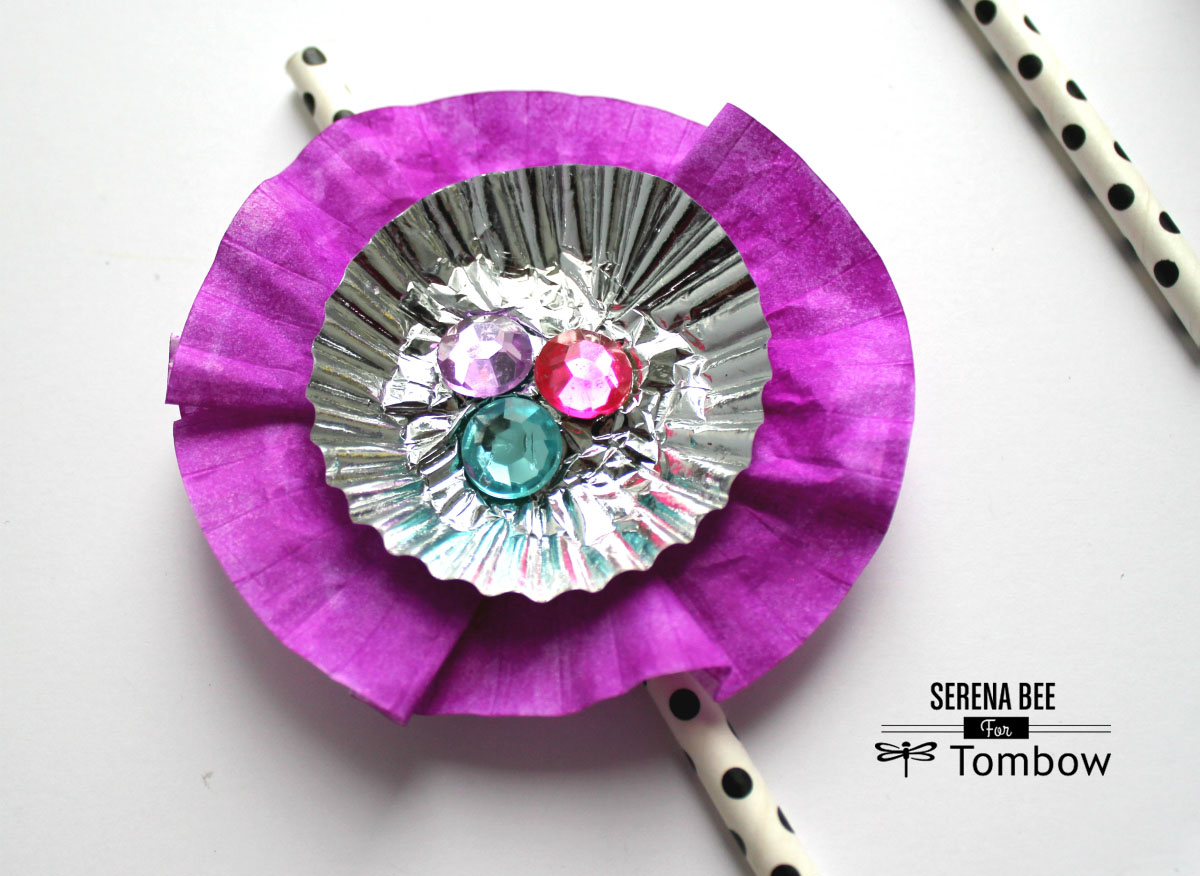
To make the liners smaller, simply pinch the center of the liner until you reach your desired size. Once you have your liners colored up, the next step is to layer 2-3 liners to create a flower or rosette. For the center of my embellishments I used jumbo rhinestones that I had in my stash. I glued them down using the Adhesive Dots.
To further decorate my cupcake liner embellishments I added die cut words and pretty fibres I have in my stash. I adhered these items down using MONO Aqua, which is perfect for thin intricate dies.
Decorative Paper Straws/Drink Markers:

Once you have your cupcake liners made, you can then add them on to paper straws using the Tombow Xtreme Mounting Putty. To finish up, I added a die cut scallop circle on the back to help make the straw sturdier and to help hide the glue. These decorative straws are the perfect touch for parties, now your guests will have cute embellished straws to help distinguish which cup is theirs!
Party Wand:
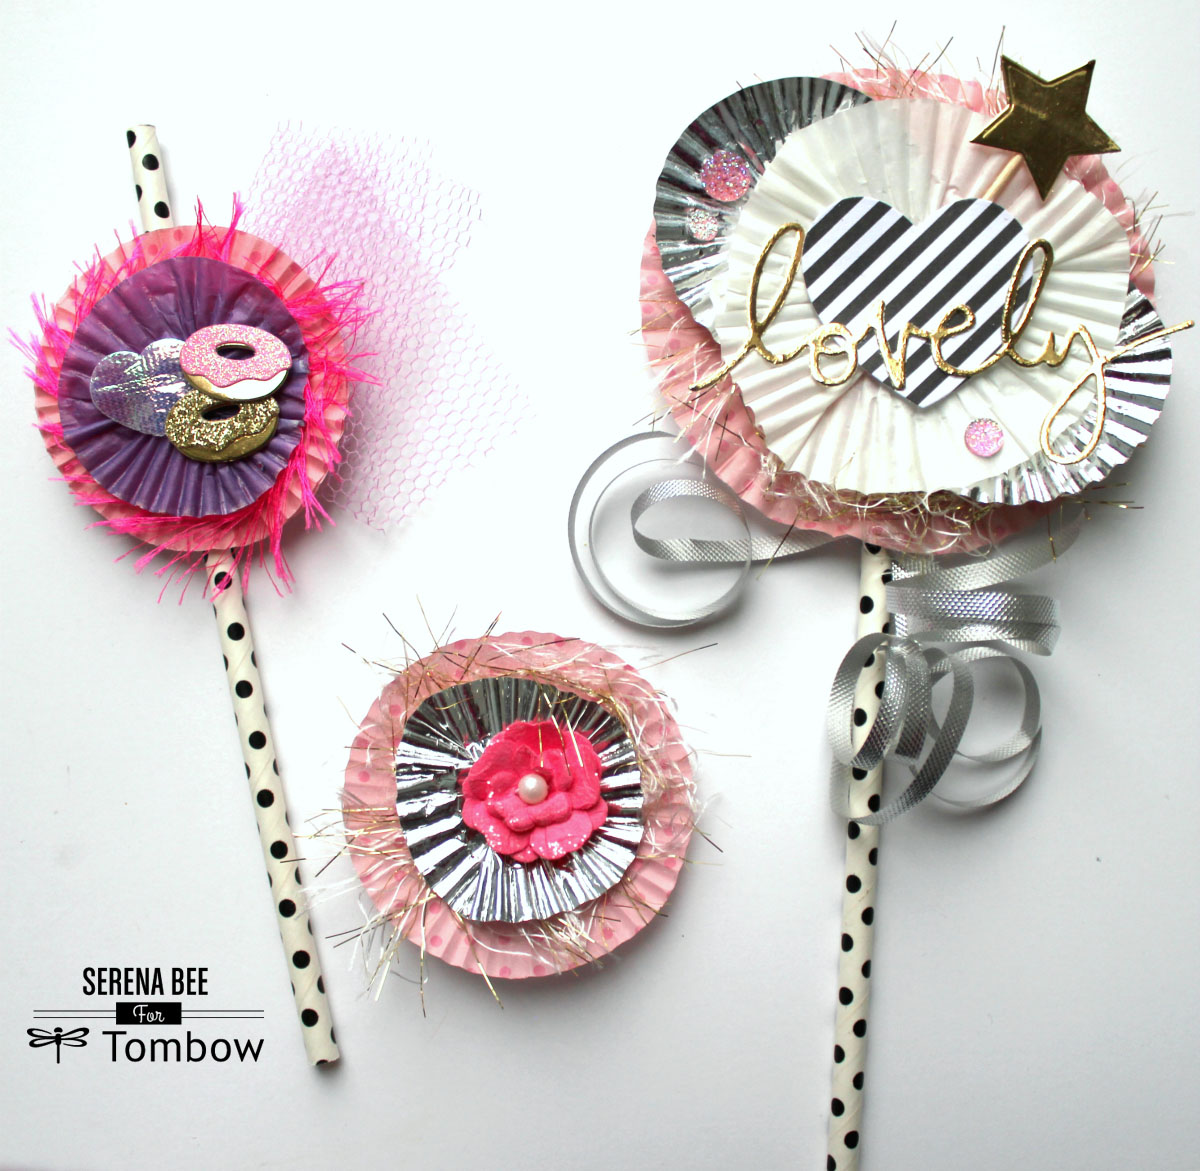
To make fun princess or party wands, simply add a cupcake liner embellishment to the top of a pretty paper straw. Secure it by using Tombow Xtreme Mounting Putty and add a circle die cut to the back to make it sturdier. I used pink glitter card stock so that both sides remain decorated. Next using gift ribbon tie 1-2 strands around the bottom of your embellishment. Using a scissor, curl the ribbon.
Party Hat Banner:
I have a detailed Youtube tutorial showing you how I created this gorgeous banner from creating my own watercolored patterned paper (using the Dual Brush Pens and the Tombow Blending Kit), to how I decorated it and added the tinsel. Please watch it below:
Favor Boxes:
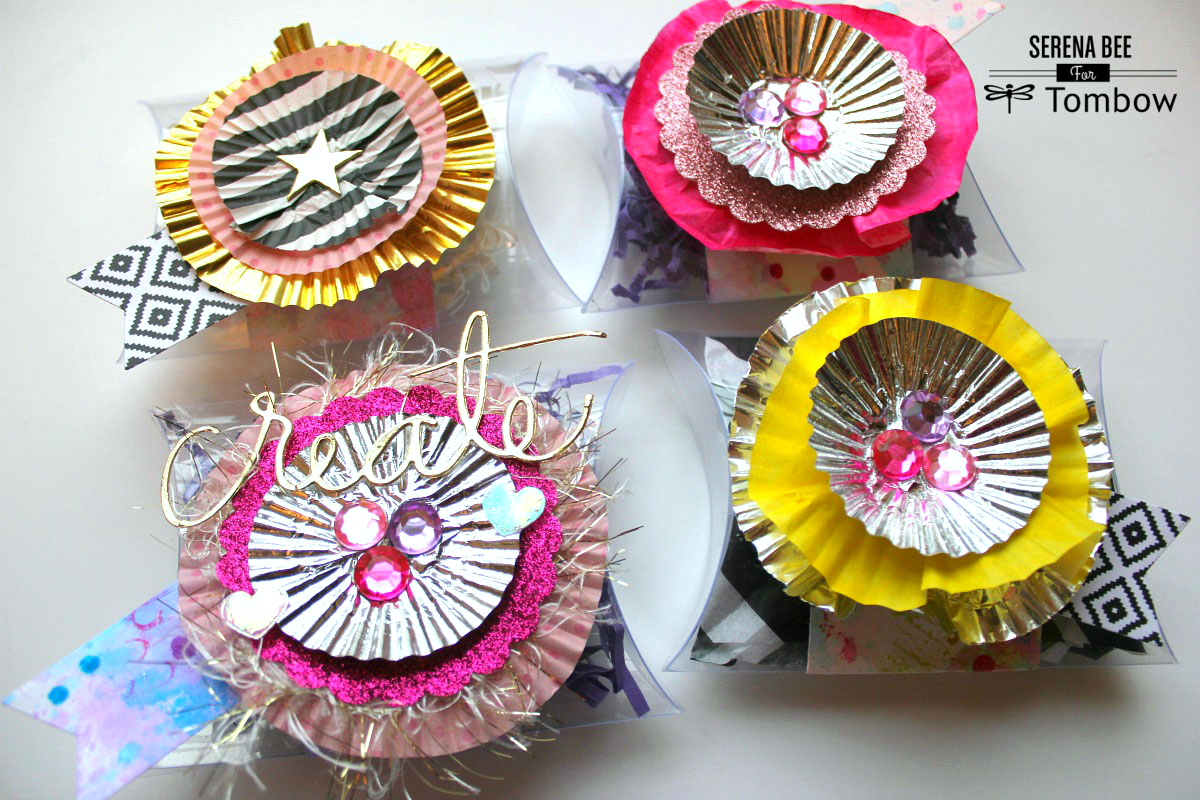
For this tutorial you will need your already made cupcake liner embellishments, favor boxes (I’m using clear pillow boxes), Dual Brush Pens, Tombow Blending Kit, and white card stock.
Begin by creating the belly band for your favor boxes by using white card stock and your favorite colors of the Tombow markers. Using the Blending Kit, scribble some color on the palette then spray some water with the spray mister. Then transfer the color onto your white card stock. If you would like a better look at this technique, please watch the tutorial for my Party Hat Banner, I go over this technique in further detail.
Once you have made your watercolor masterpiece, cut them into strands that will fit around the center of your favor boxes. Next, add a cupcake liner embellishment on top. To further decorate use the scraps of your watercolored paper to create tags where you can write the names of your guests!
Thank you for joining me today on the blog, I hope you try making your own cupcake liner embellishments. They can be made for any occasion and celebration. And if you do give this tutorial a try make sure to tag me on Instagram so I can see! @Seresbee
Just have fun and let your creativity shine!
Serena Bee
Sweet Serena ♡ Loved all the colors you used. Great way to spice up a party.
♡♡♡♡♡
Oh my gosh it’s all so freakin cute!