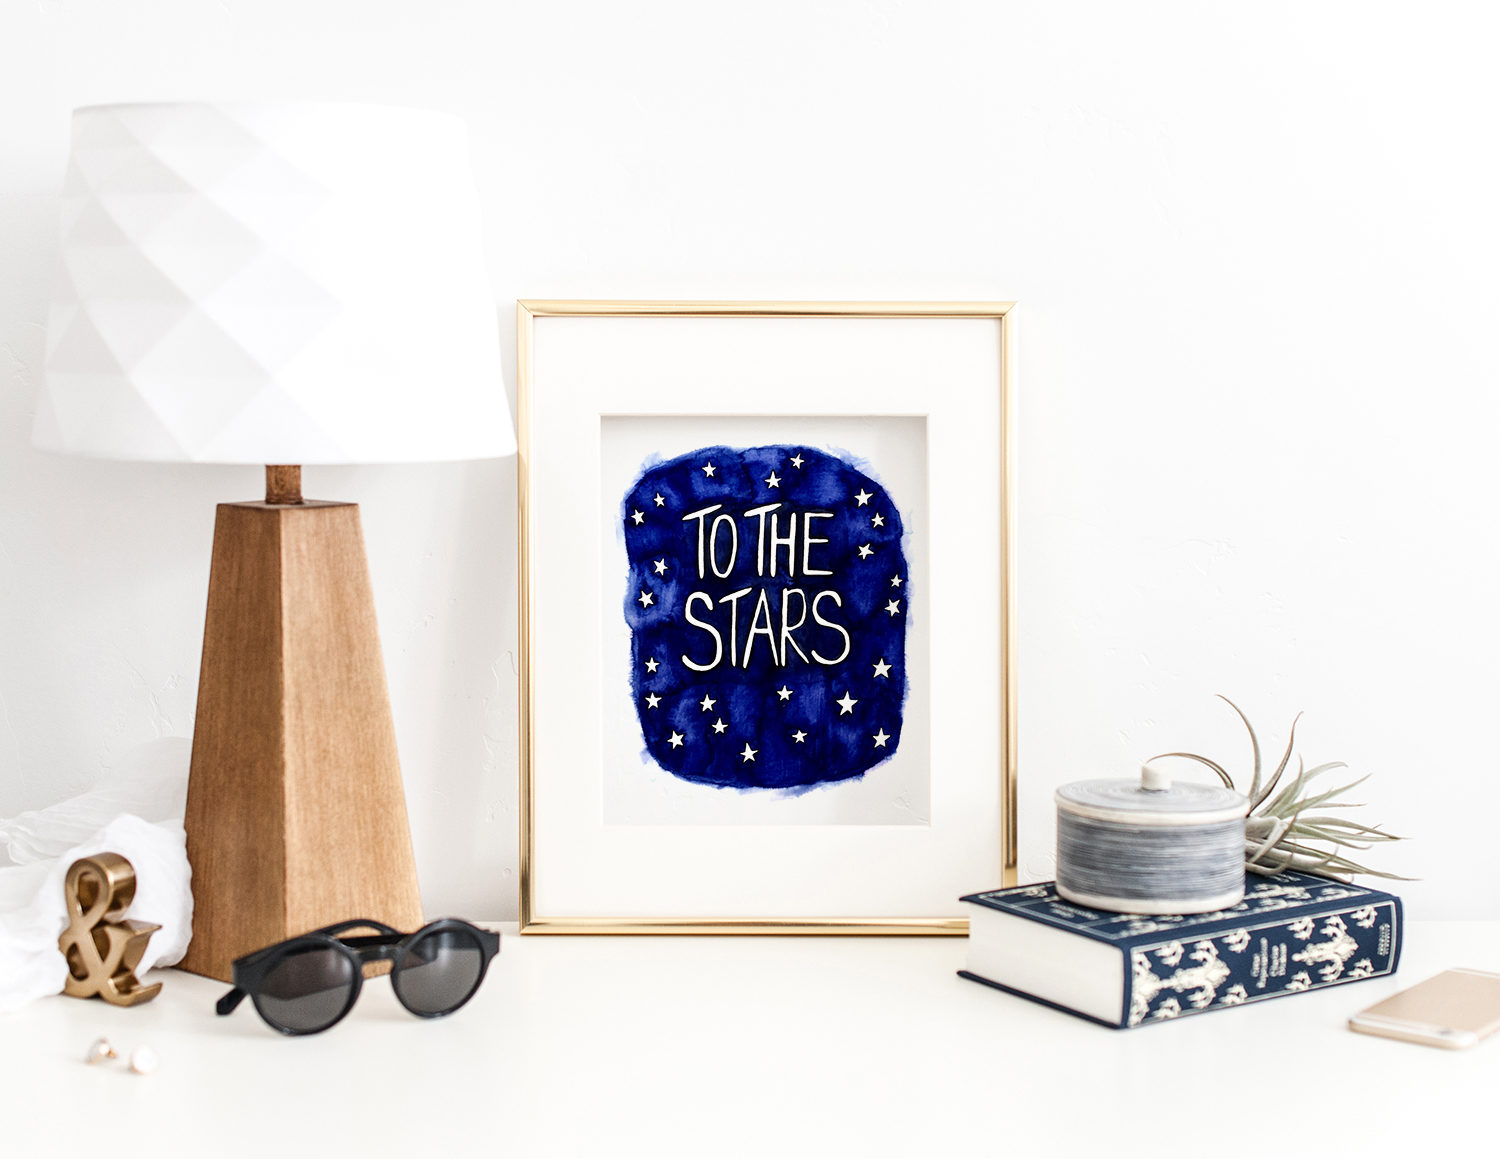
Hello, Jessica from BrownPaperBunny here. When I think of the color indigo I think of stargazing on warm summer nights. I just love the inky color of sky after the sun has completely disappeared. Today I’m going to show you how to make this easy watercolor word art so you can dream of the stars anytime you like.
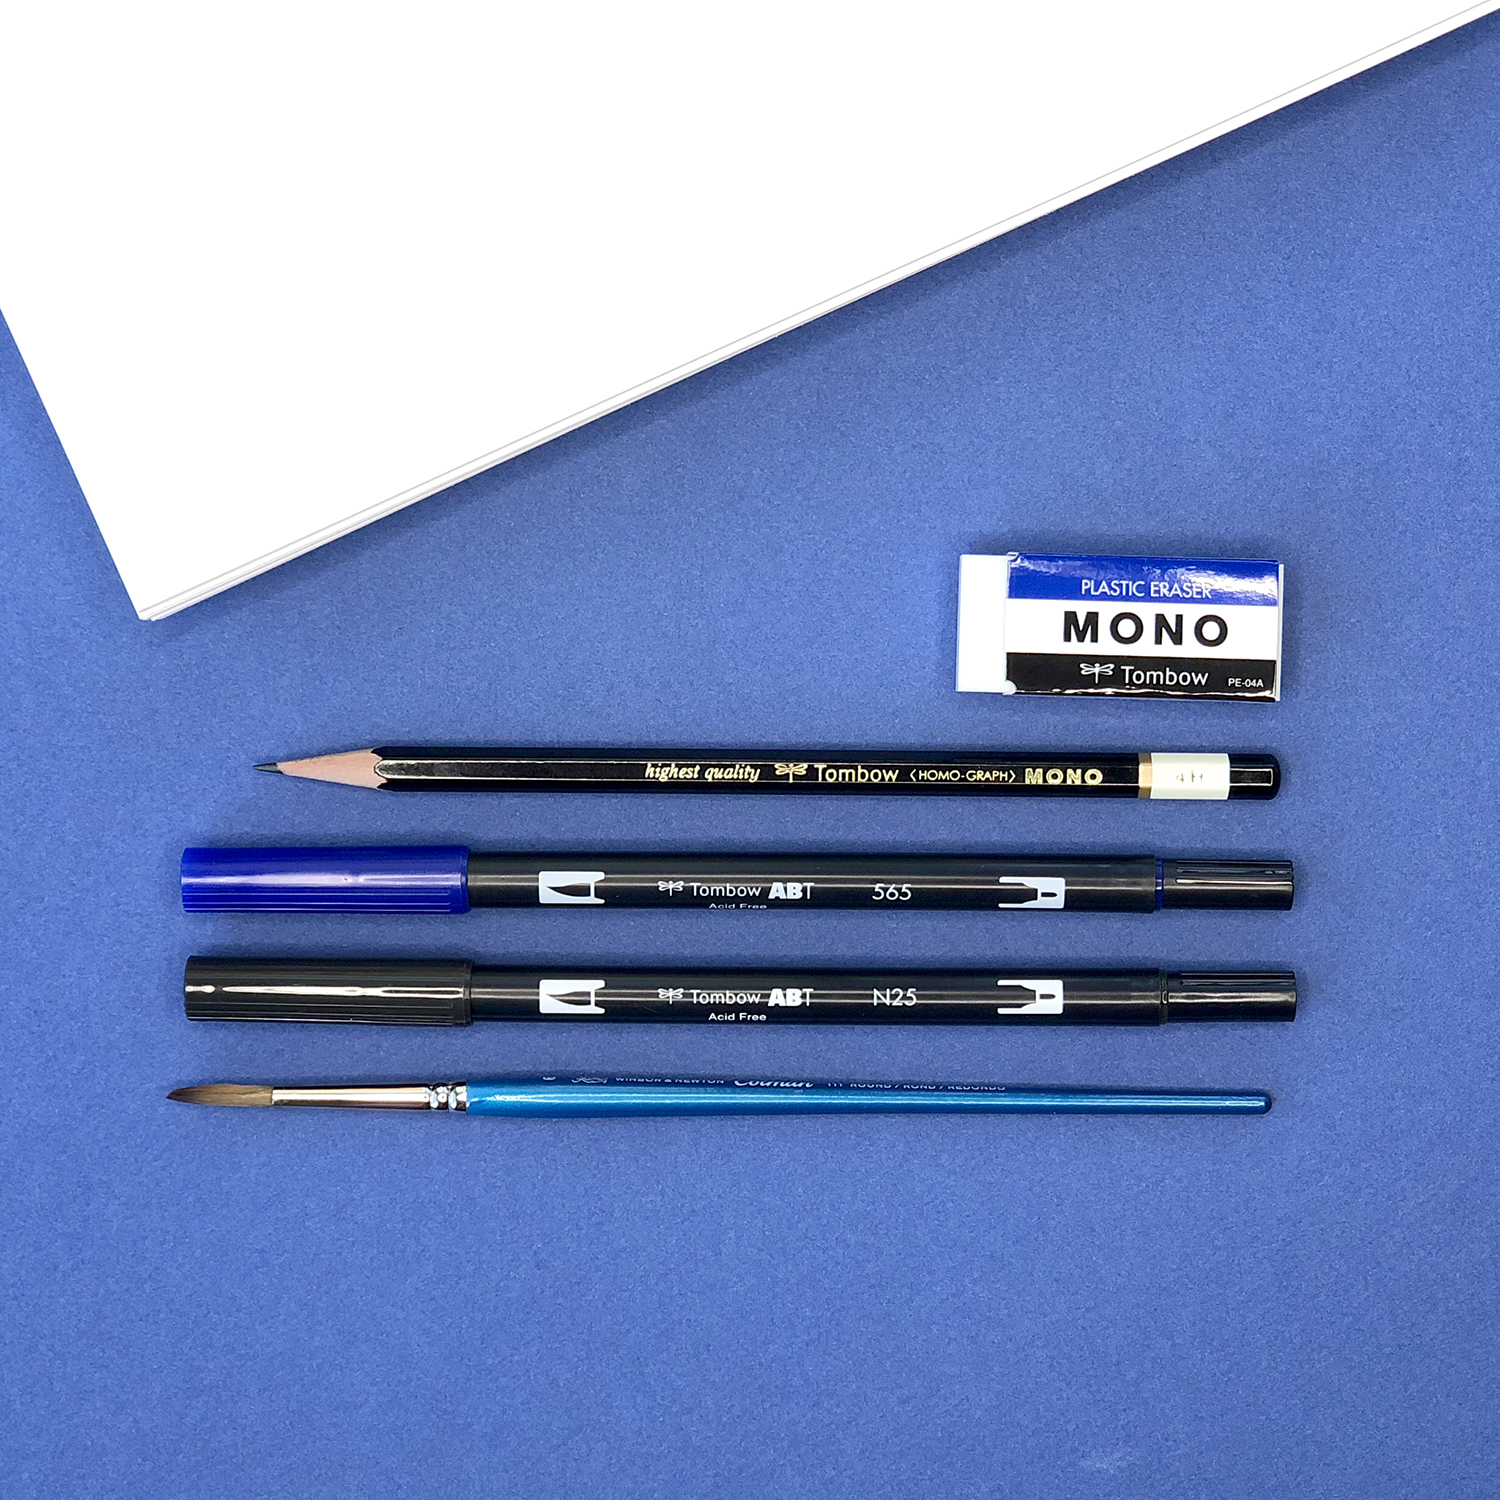
Supplies:
- Tombow Dual Brush Pens (N25 and 565)
- 140 lb Watercolor paper
- Tombow MONO Plastic Eraser
- Paintbrush and water
- Tombow MONO Drawing Pencil (4H)
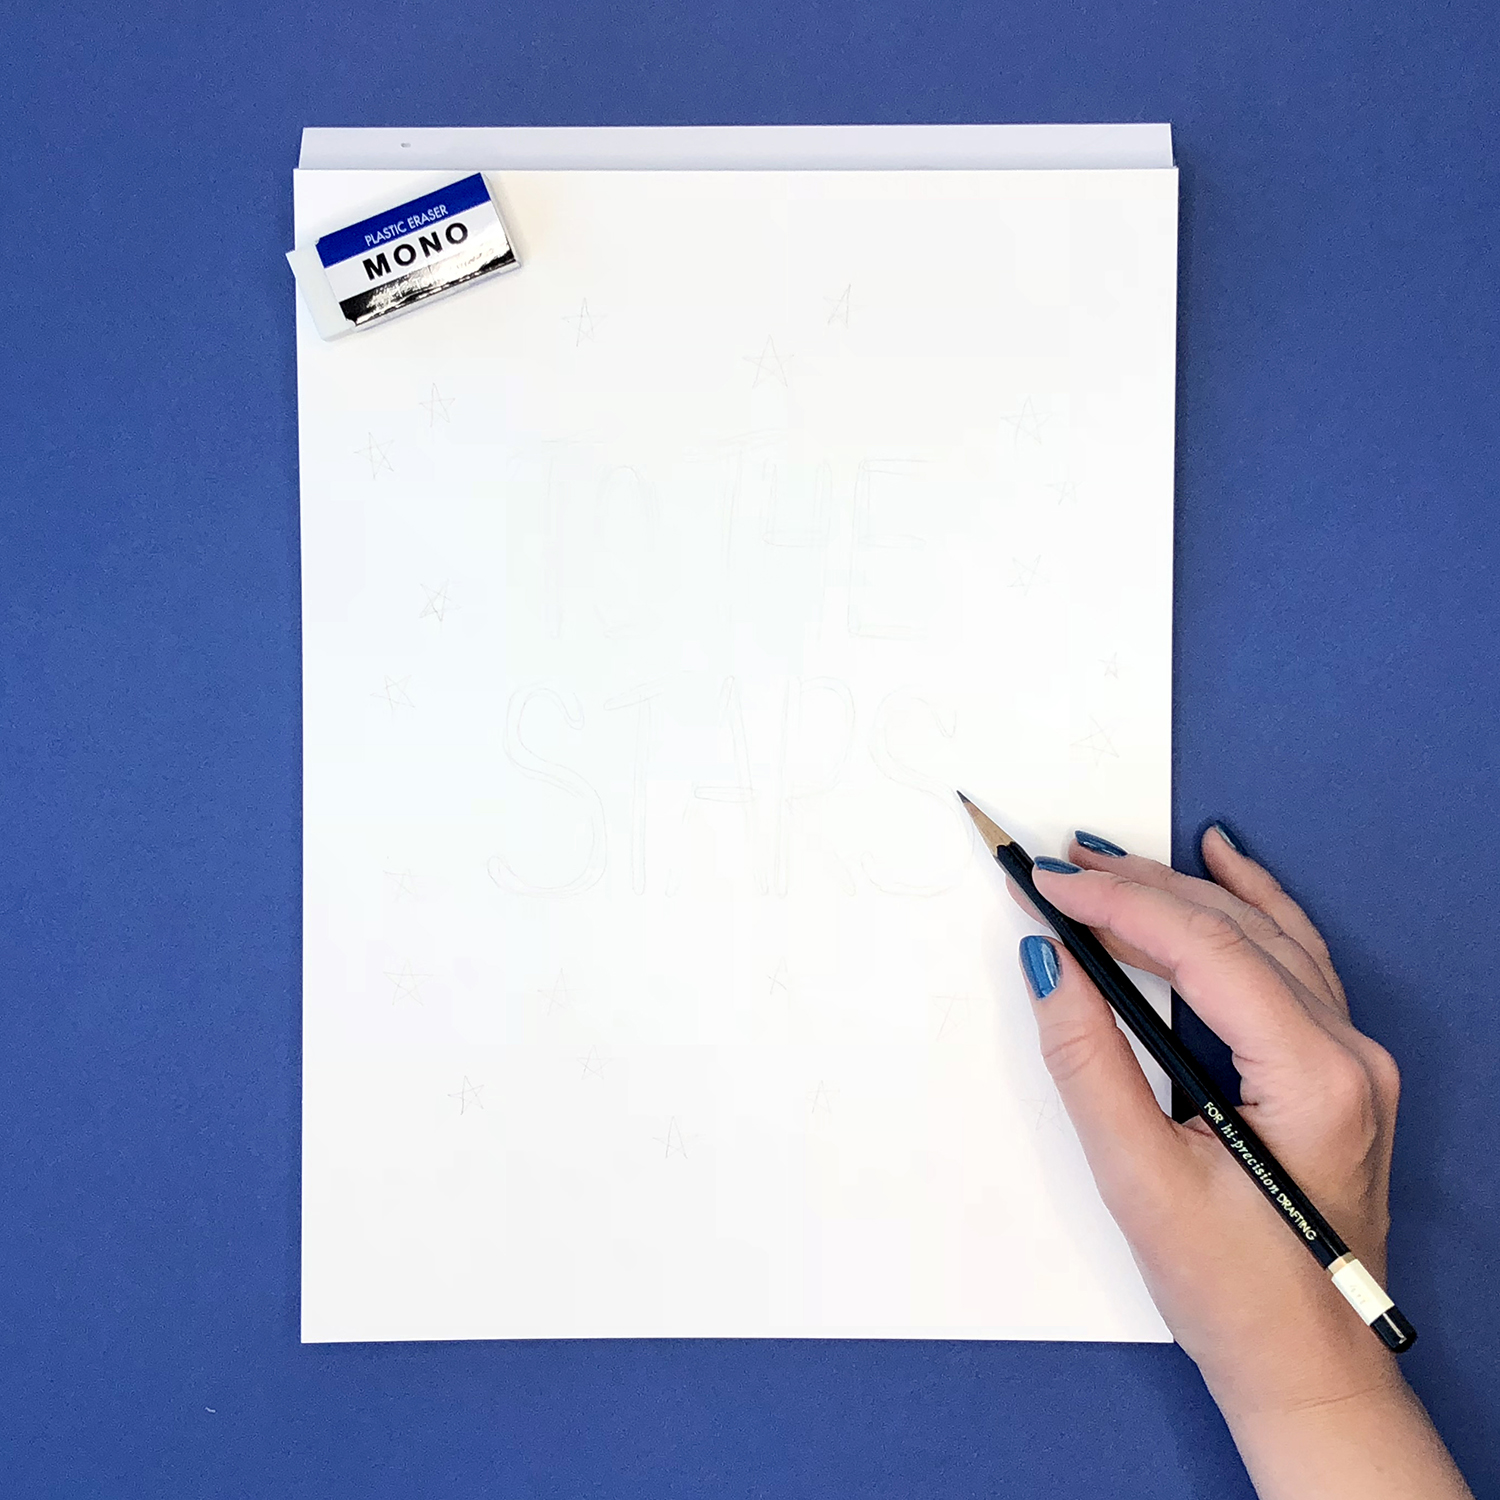
Step 1: Sketch Your Words in Pencil
Use a nice light pencil (2H or 4H works well) to sketch in your words and stars. You’ll be able to erase any visible lines at the end so don’t worry about it being too neat at this stage.
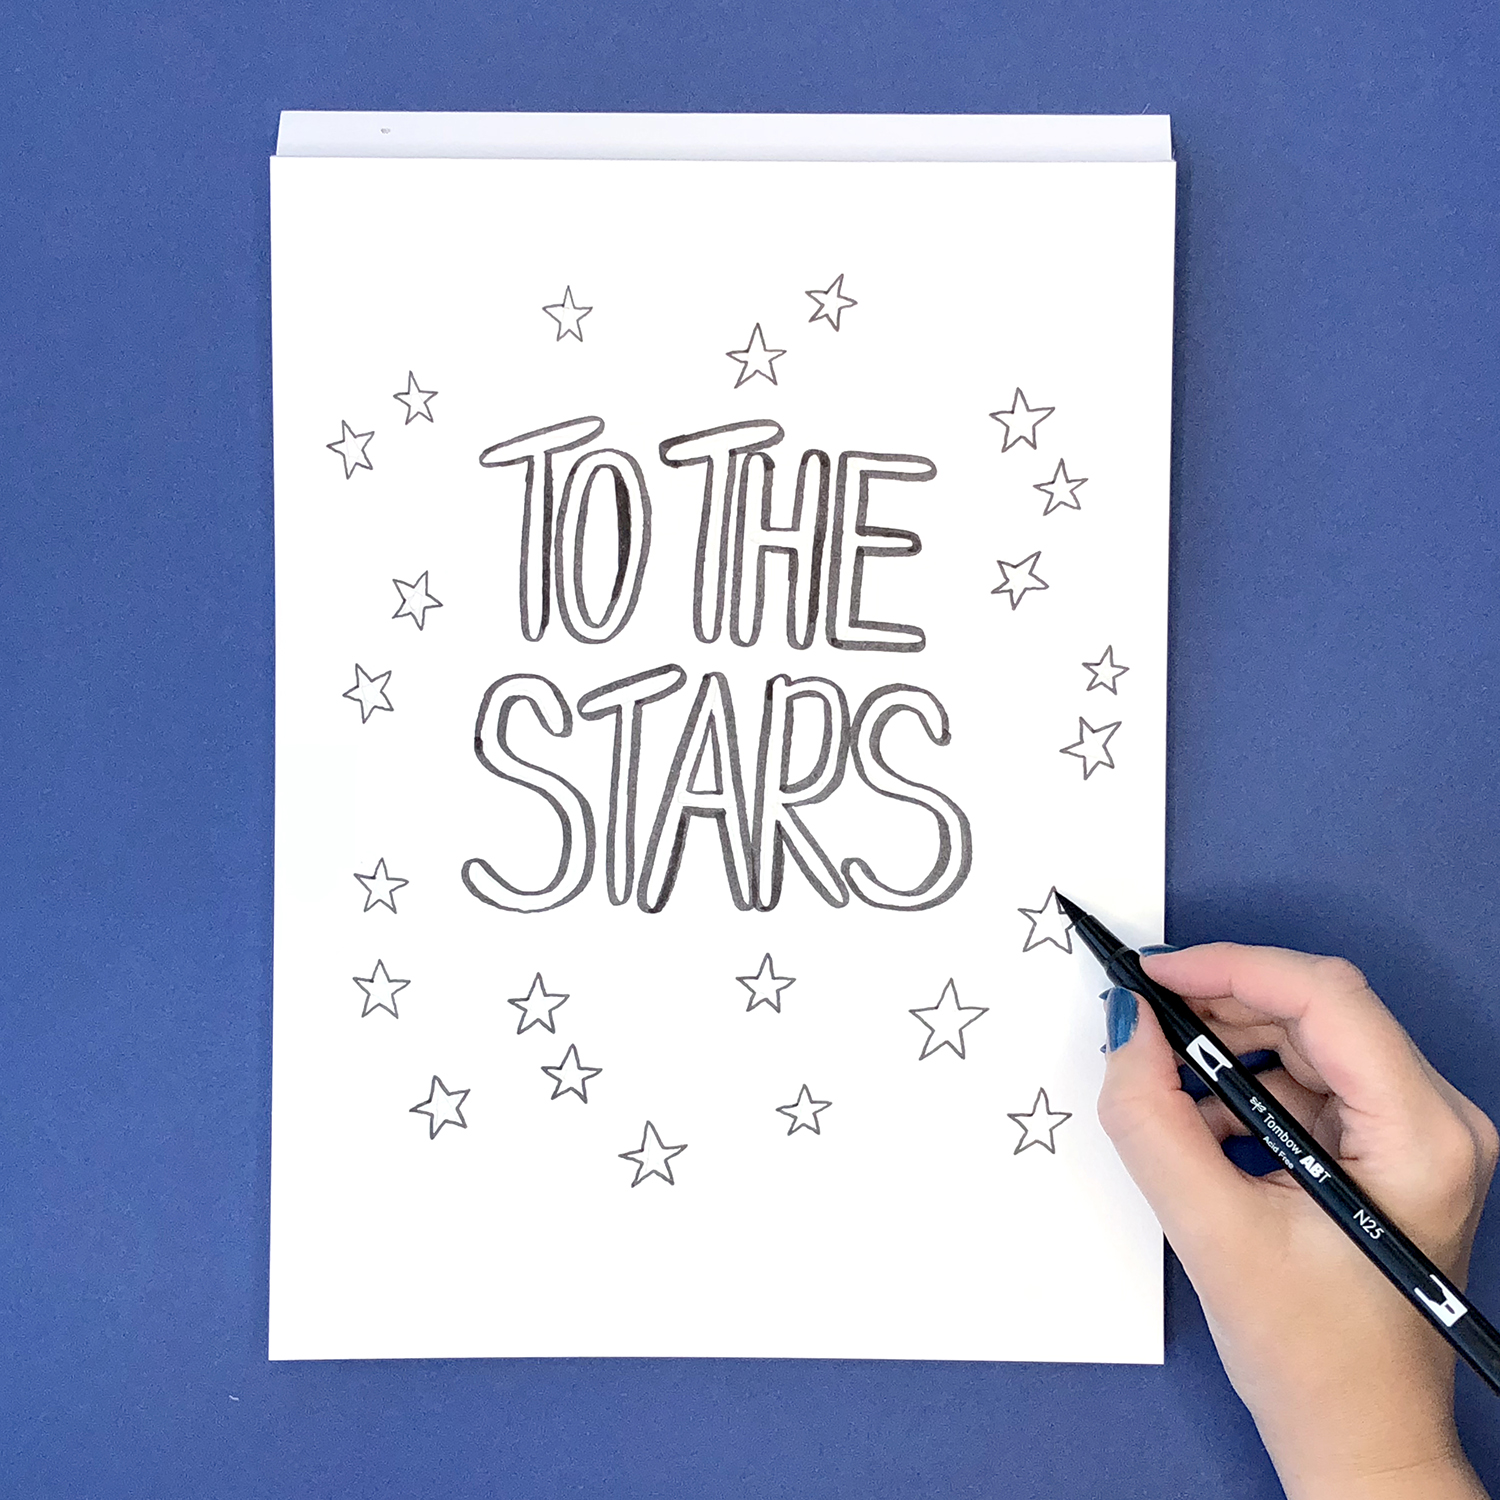
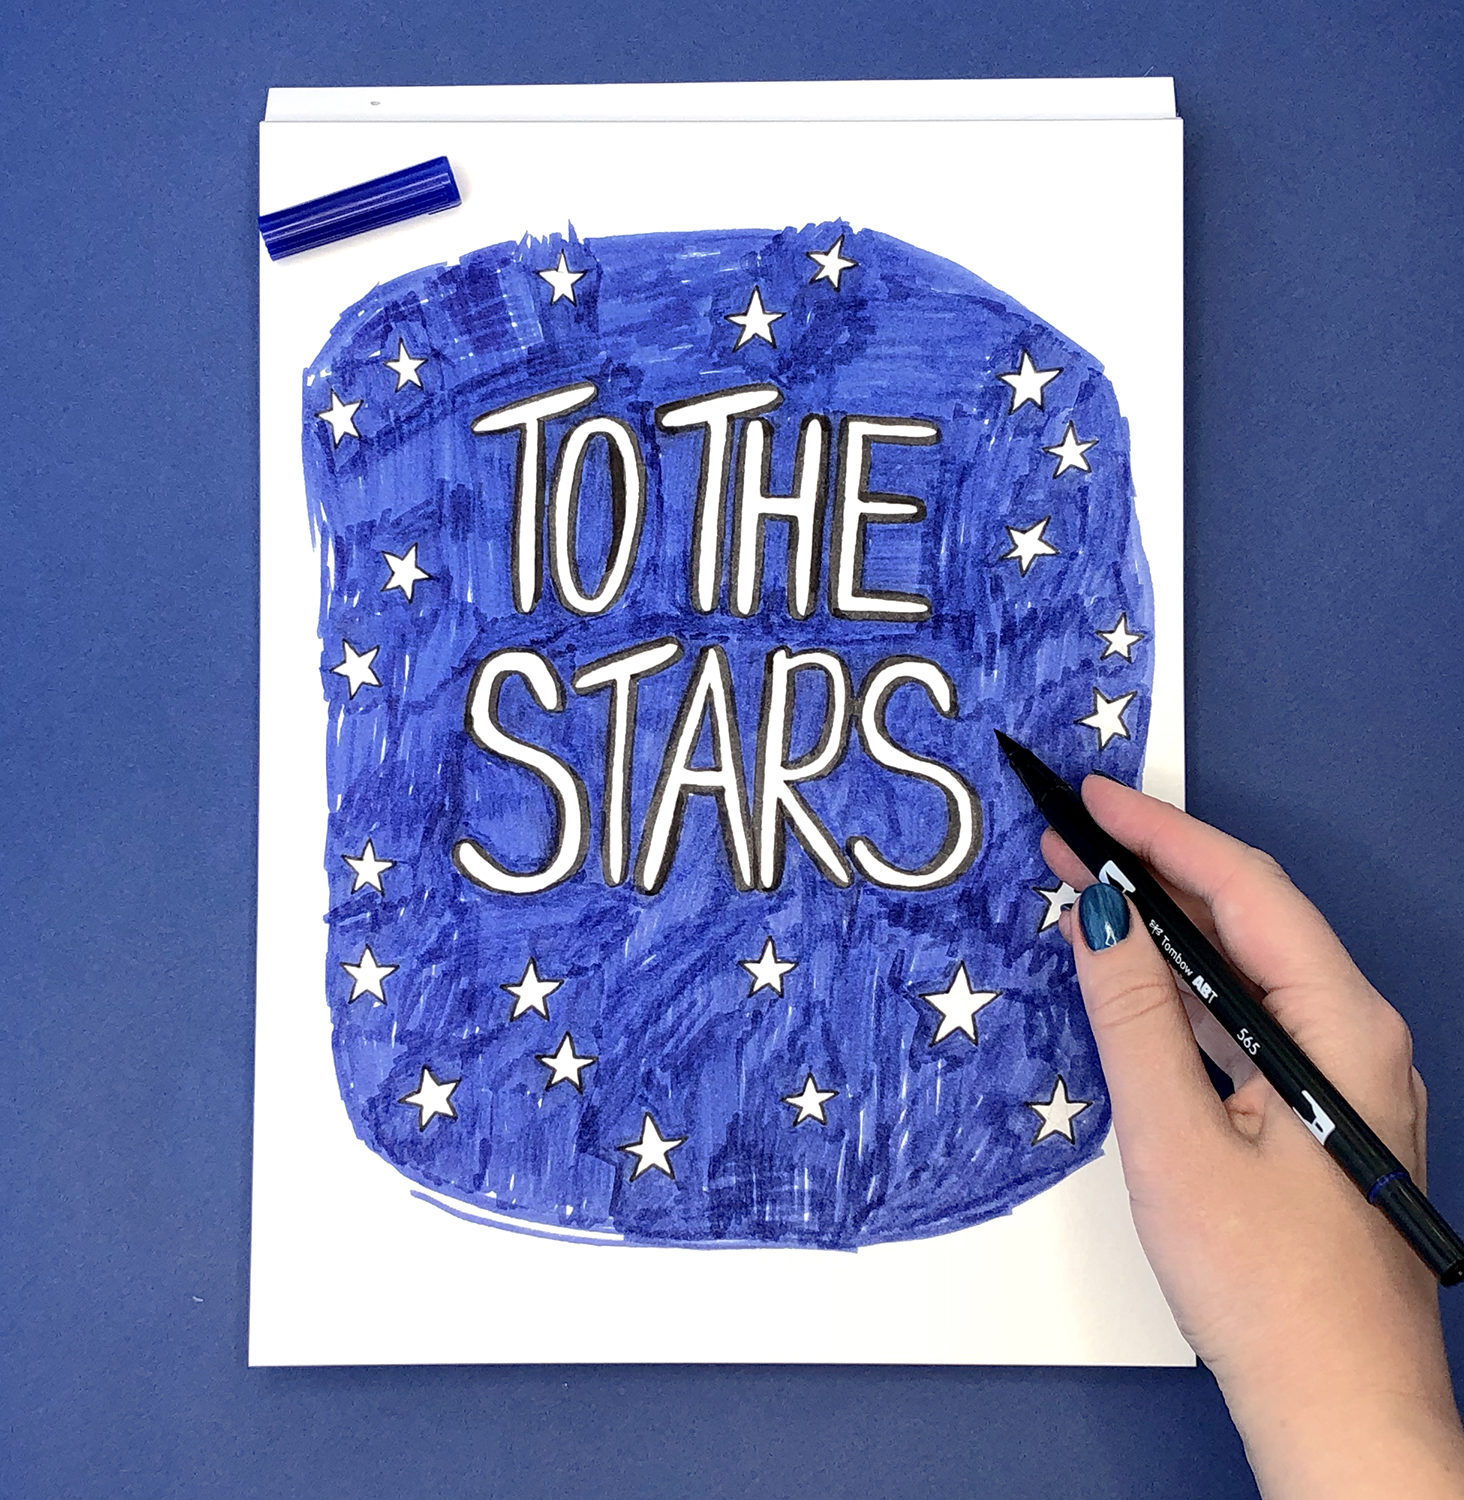
Step 2: Outline Your Words
Outline your words and stars in black or charcoal Dual Brush Pen ink. This gives you greater contrast around the letters once everything is blended together.
Step 3: Color in the Background
Using your dark blue Dual Brush Pen (I used 565) fill in the background around your stars and words. You don’t need to fill in every tiny space, it’s ok if there is some white showing through. In the next step you’re going to blend it all together anyway.
Step 4: Blend the Ink With Water
Using your paintbrush and some water start blending the ink together. I find it easiest to start with the fiddly bits around the letters and stars first and then fill in the larger areas. The ink won’t be perfectly uniform, it will have dark areas and water marks, which gives you that great watercolor look.
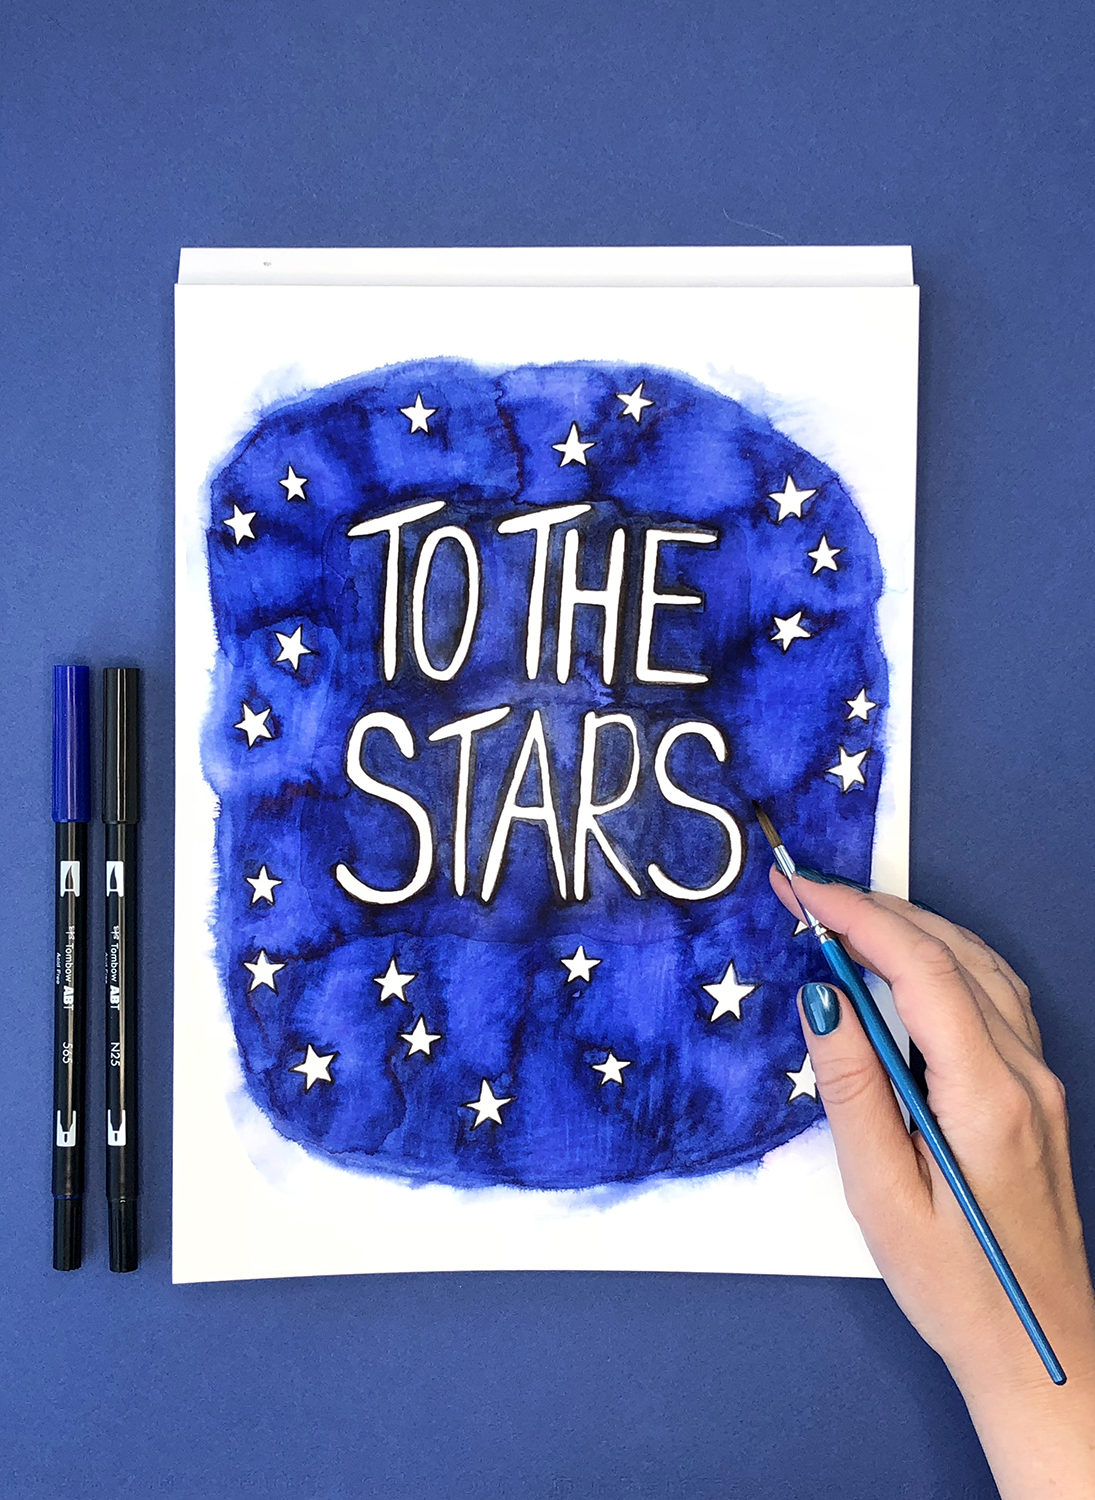
Once you’re happy with the way it is blended, let it dry, erase any visible pencil lines, and you’re ready to frame your watercolor word art!