Hello everyone, Adrienne from Studio 80 Design here to share with you 5 different ways to design a title in your planner! I’ll be using the Academic Radiant Rose Gold Planner from Passion Planner, which is so handy for organizing your life and goals! The great thing about these planners is they have lots of both empty and dot grid pages in the back so you can get creative and do you own thing! Plus, these planners are absolutely gorgeous! Mine has a dusty rose cover with just the right amount of shimmer! These headers are great for writing your lists, tracking your progress, or just down right doodling!
Materials you’ll need:
- Passion Planner
- Tombow Dual Brush Pens
- Tombow MONO Drawing Pen 01
- Tombow Fudenosuke Hard Tip Brush Pen Black

Header 1
Write out your header with your Dual Brush Pen in a blank page in the back of your planner. Then, think of your title as a 3D object and using your MONO Drawing Pen draw a monoline shadow at the angle you choose. I drew arrows in with pencil to show you the angle at which I would be “looking” at the title so I would know where to draw the lines.


Header 2
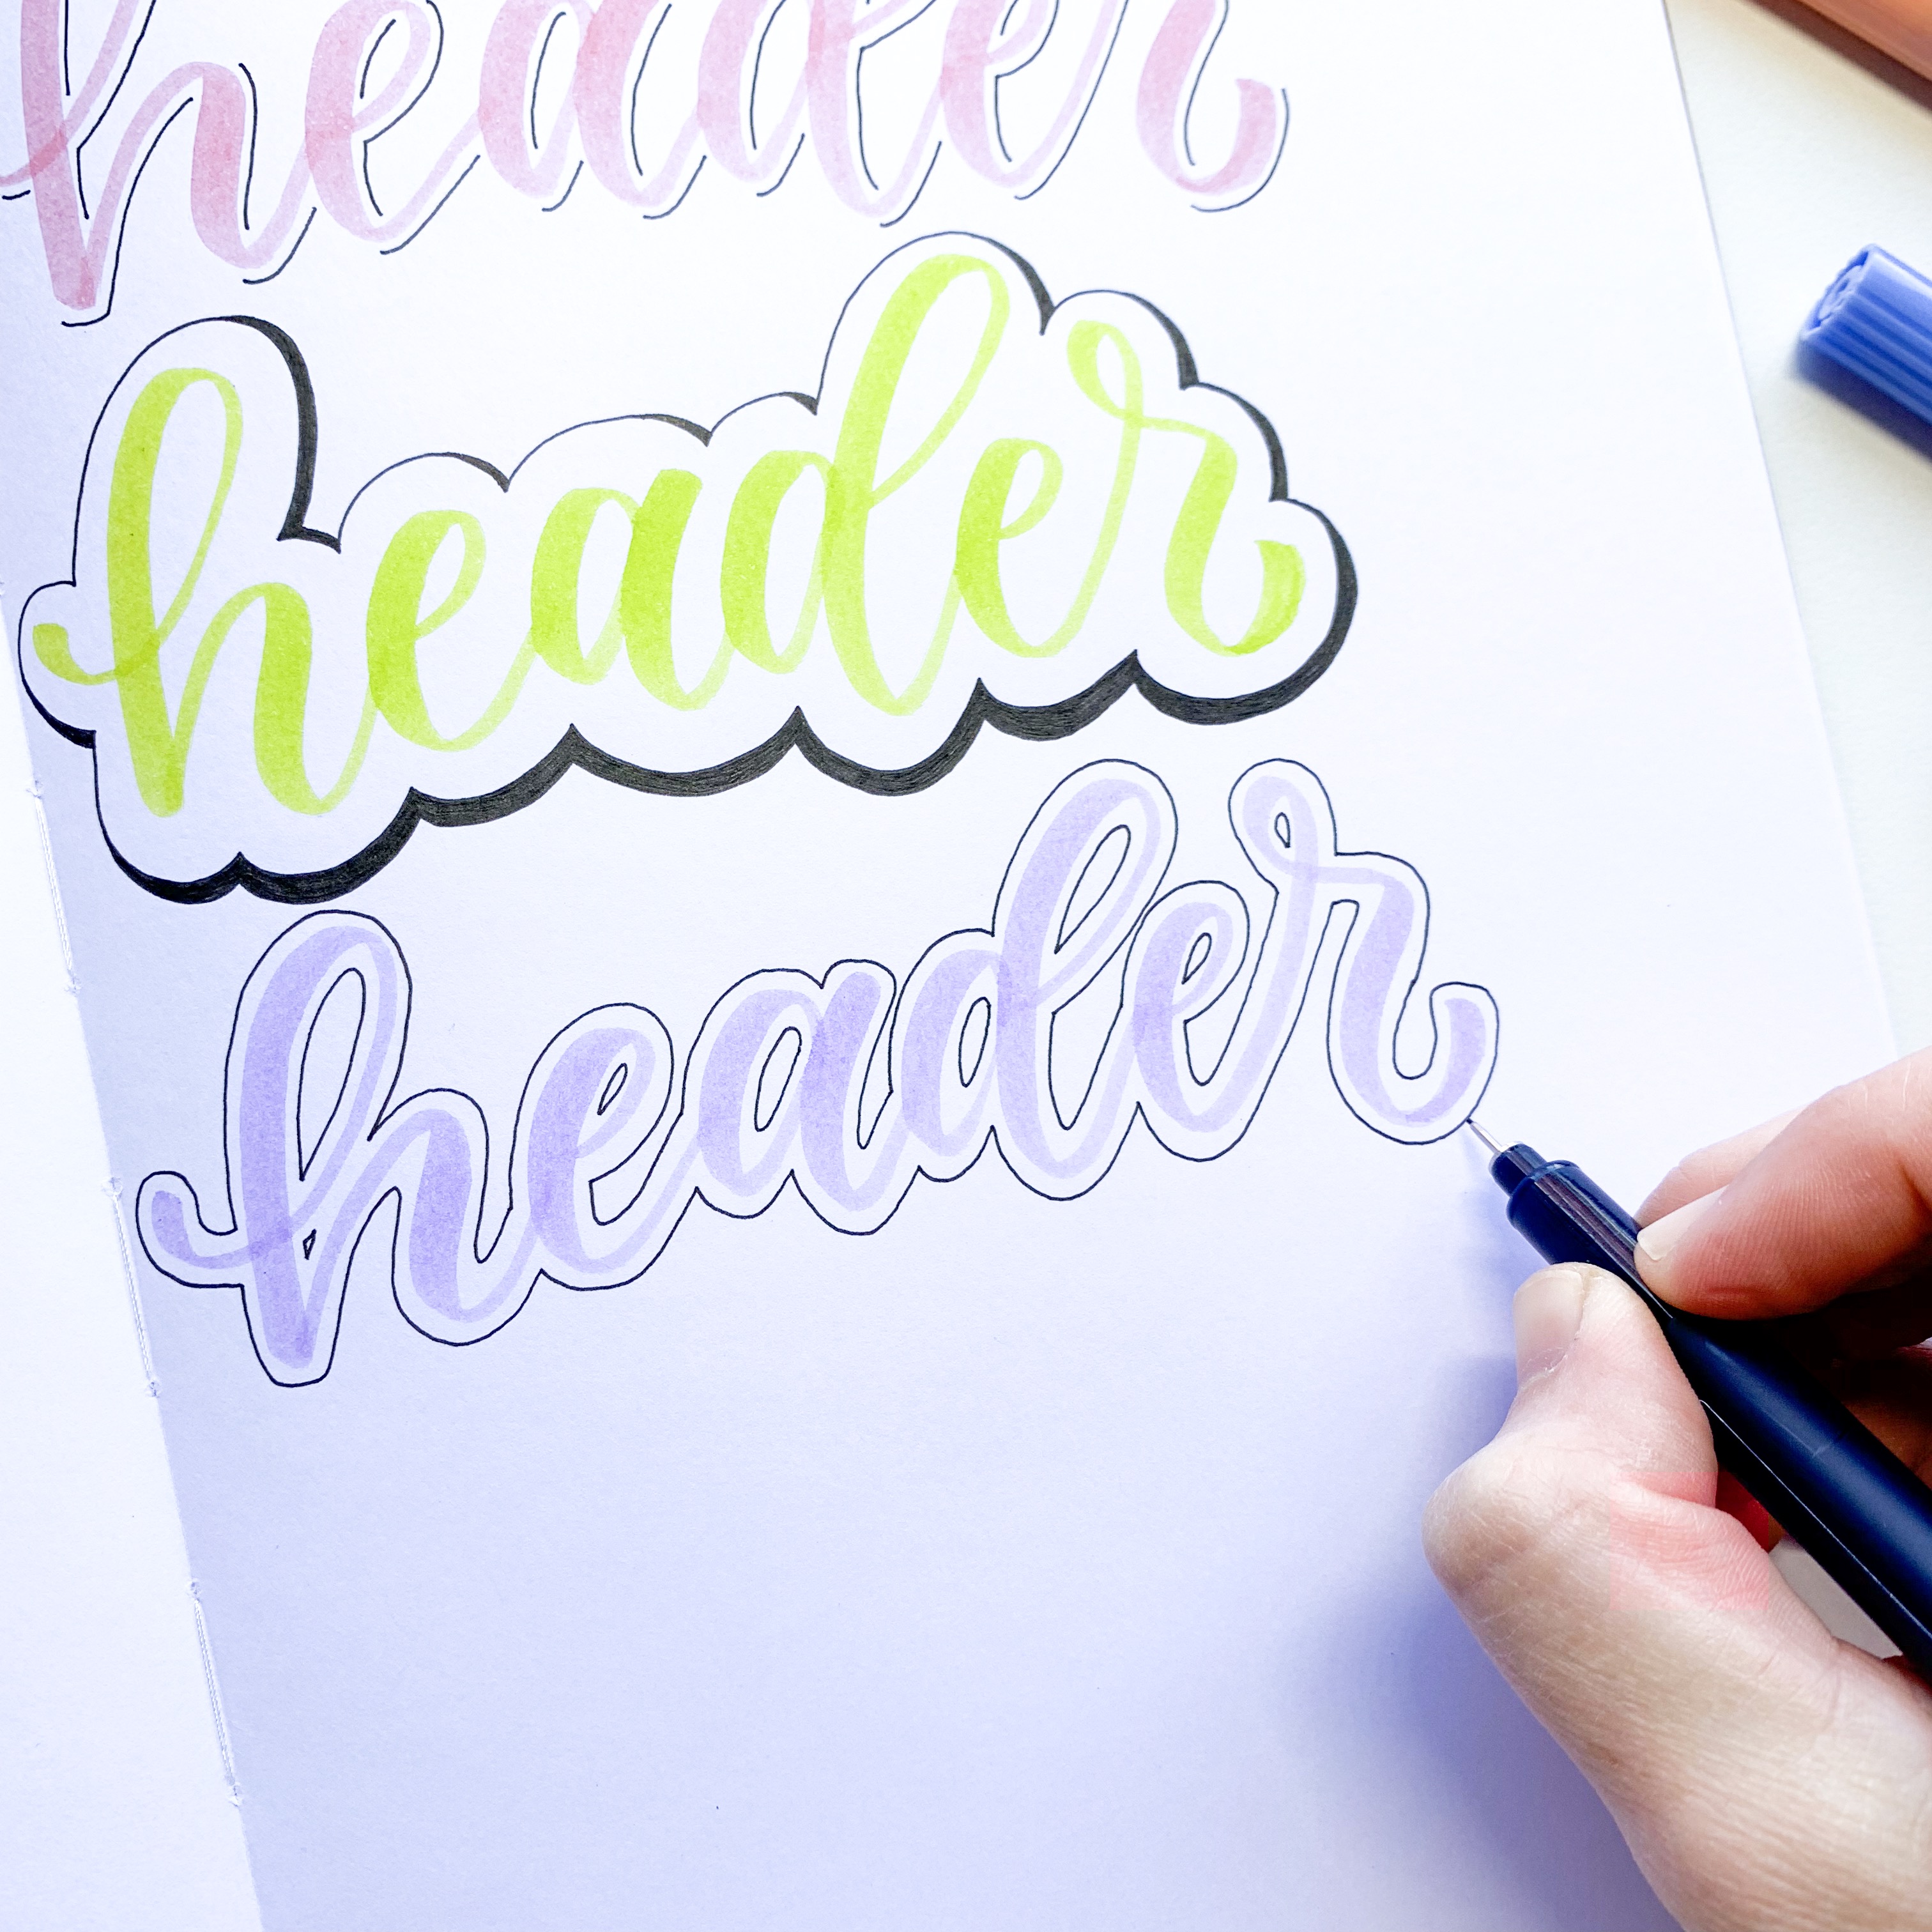
After you draw your title with your Dual Brush Pen, using your MONO Drawing Pen 01, create a bubble shape around it. Again, imagine your title as a 3D object and you’re looking at it from the bottom right. Draw in a shadow of the bubble shape and then color it in!


Header 3
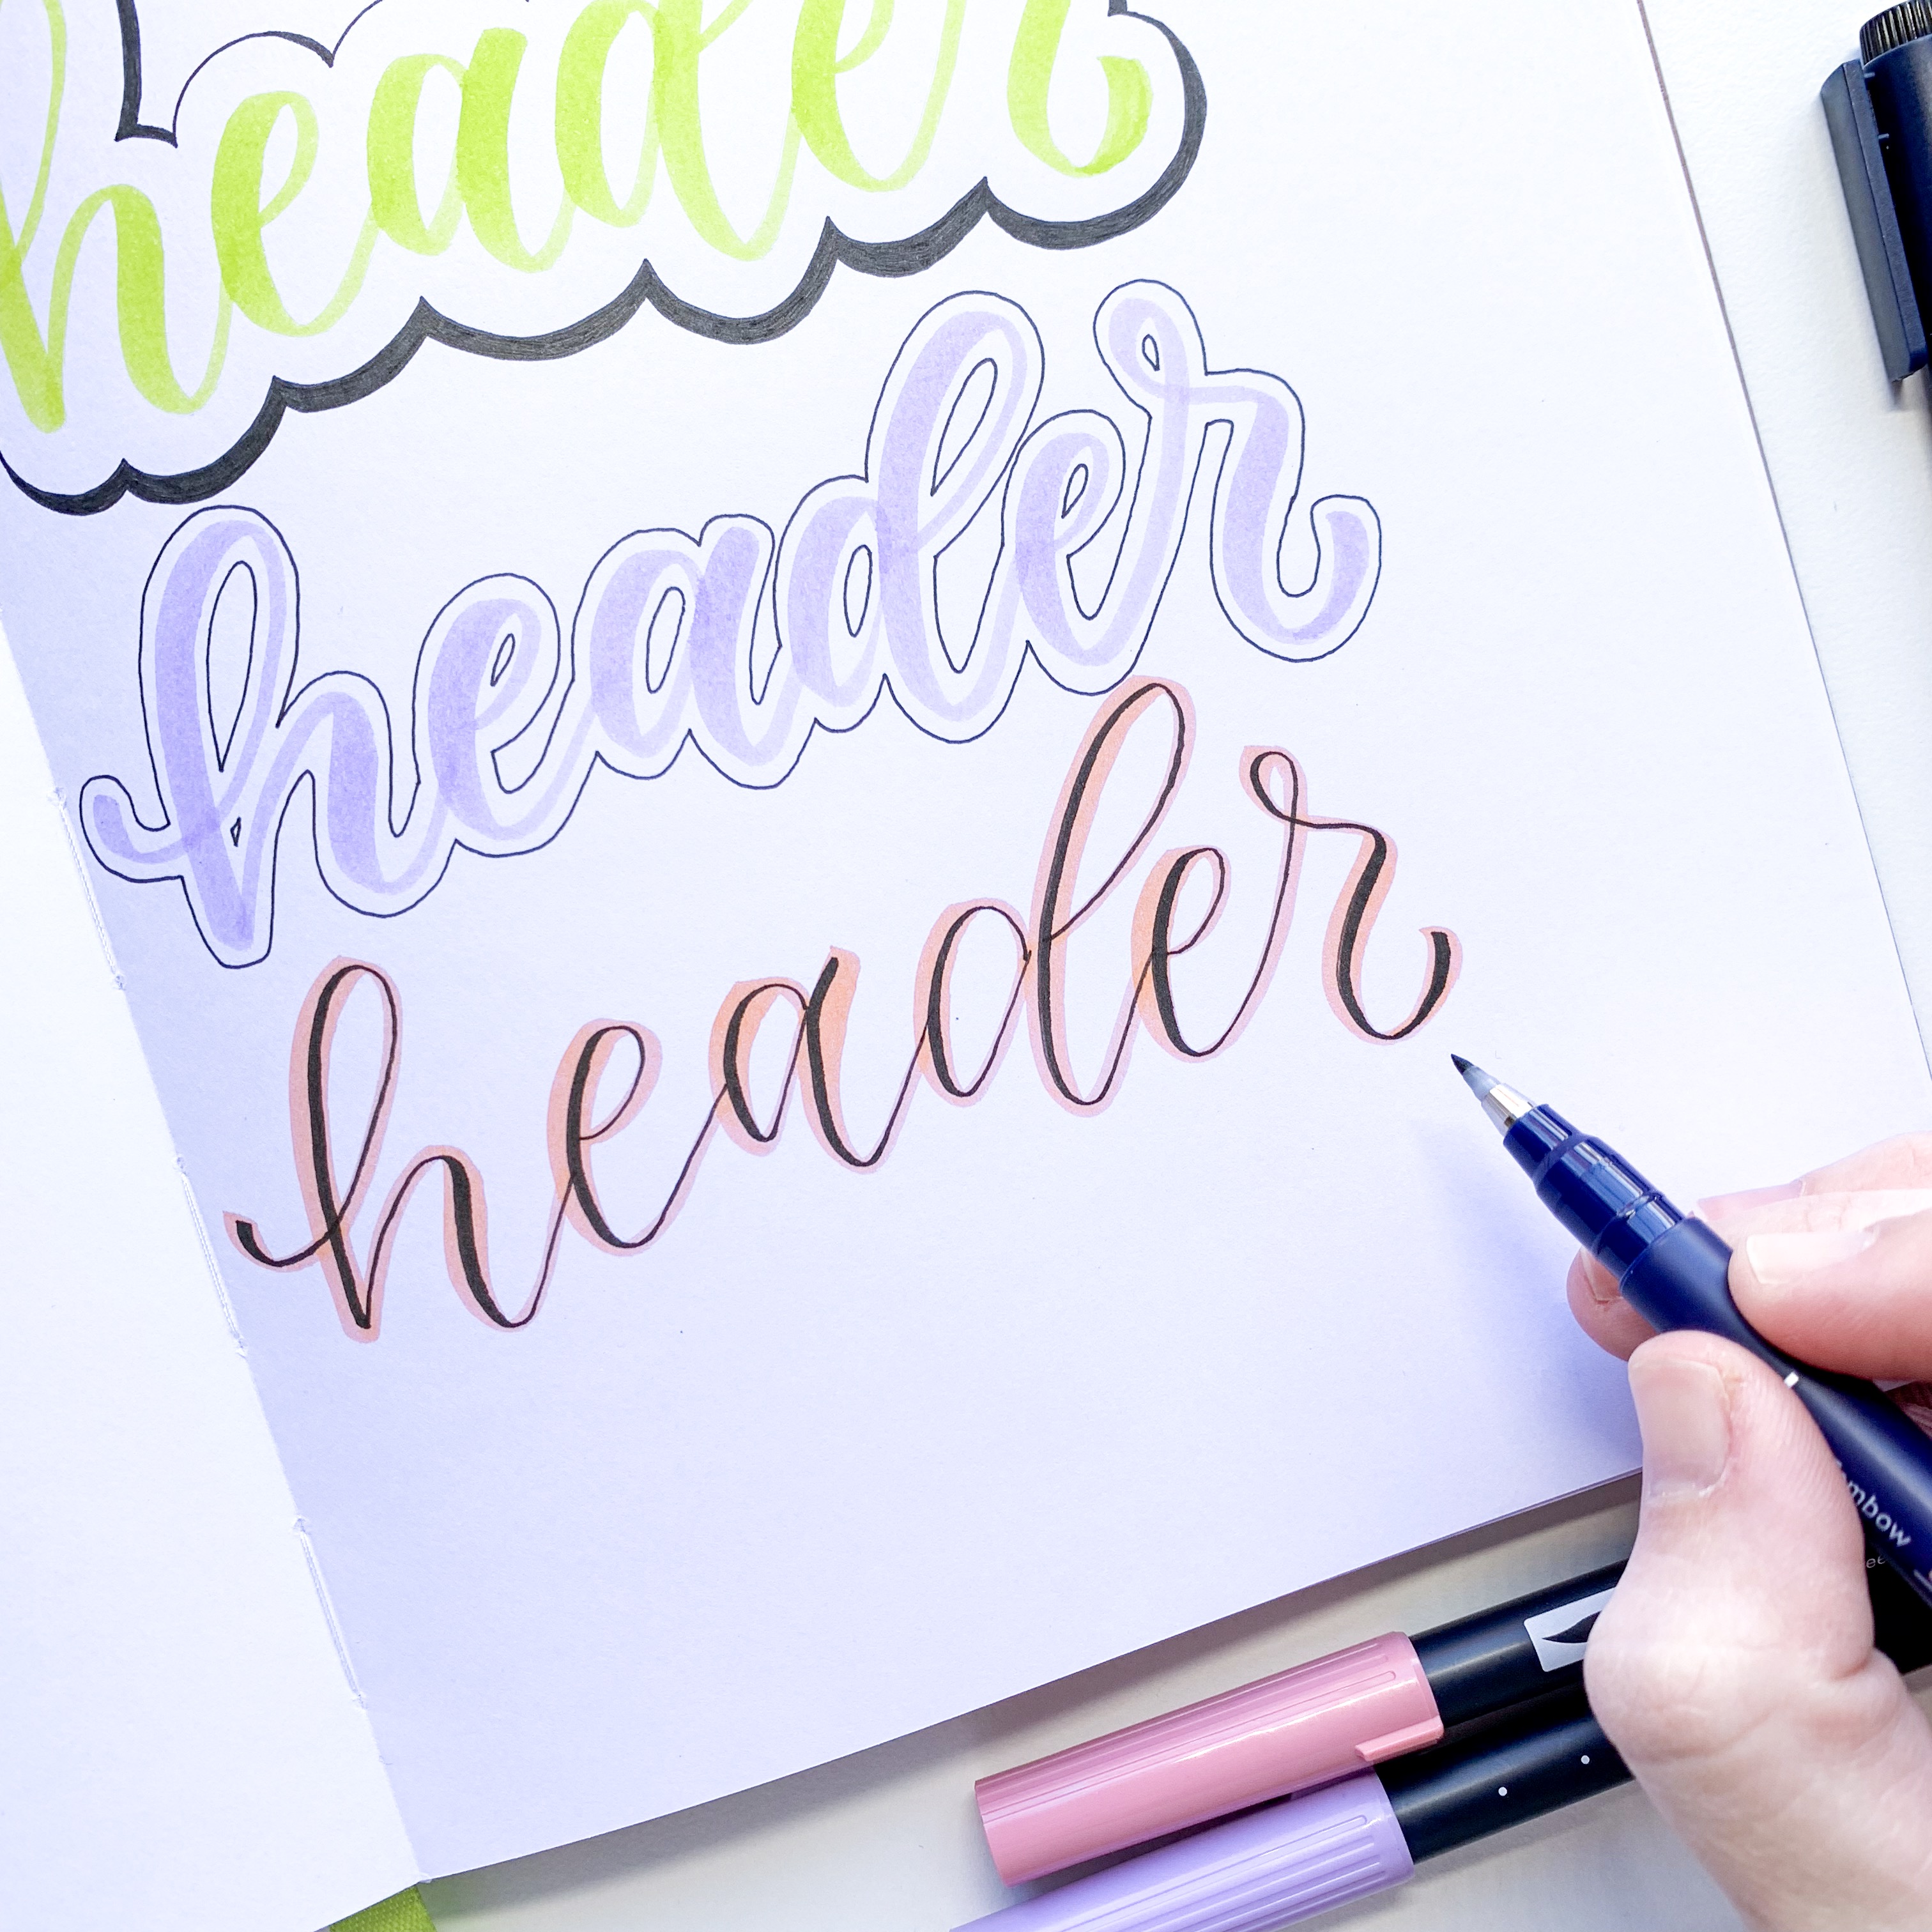
Write out your title and then with your MONO Drawing Pen, outline the letters. When you are outlining, leave white space around your letters to make it a little more interesting! Make sure you leave the same amount of white space for each letter throughout your title!

Header 4
Write out your title with a Dual Brush Pen. Then, using your Black Fudenosuke Hard Tip Brush Pen, write your title on top. Making sure to apply pressure on all of your down strokes! This gives your title a colorful background!

Header 5
For the last title, write it out with your Dual Brush Pen. Then, using your MONO Drawing Pen 01, outline your letters. Make sure to make it a tight outline and don’t leave any white space like we did above. Next, draw in the back of the title like it’s a 3D object. And last, draw in some shading lines.


Here are all the finished titles together!

And there you have it! These different lettering styles are so fun and easy to create! Use them in your planner to bring some creativity and color to your pages! For more inspiration like this, make sure you check me out @studio80design! Thanks for reading!
Adrienne
Adrienne, this was so helpful! Thank you!!