Hi friends, Adrienne from @studio80design here to show you how you can create your own geometric patterns in your dot grid notebook!
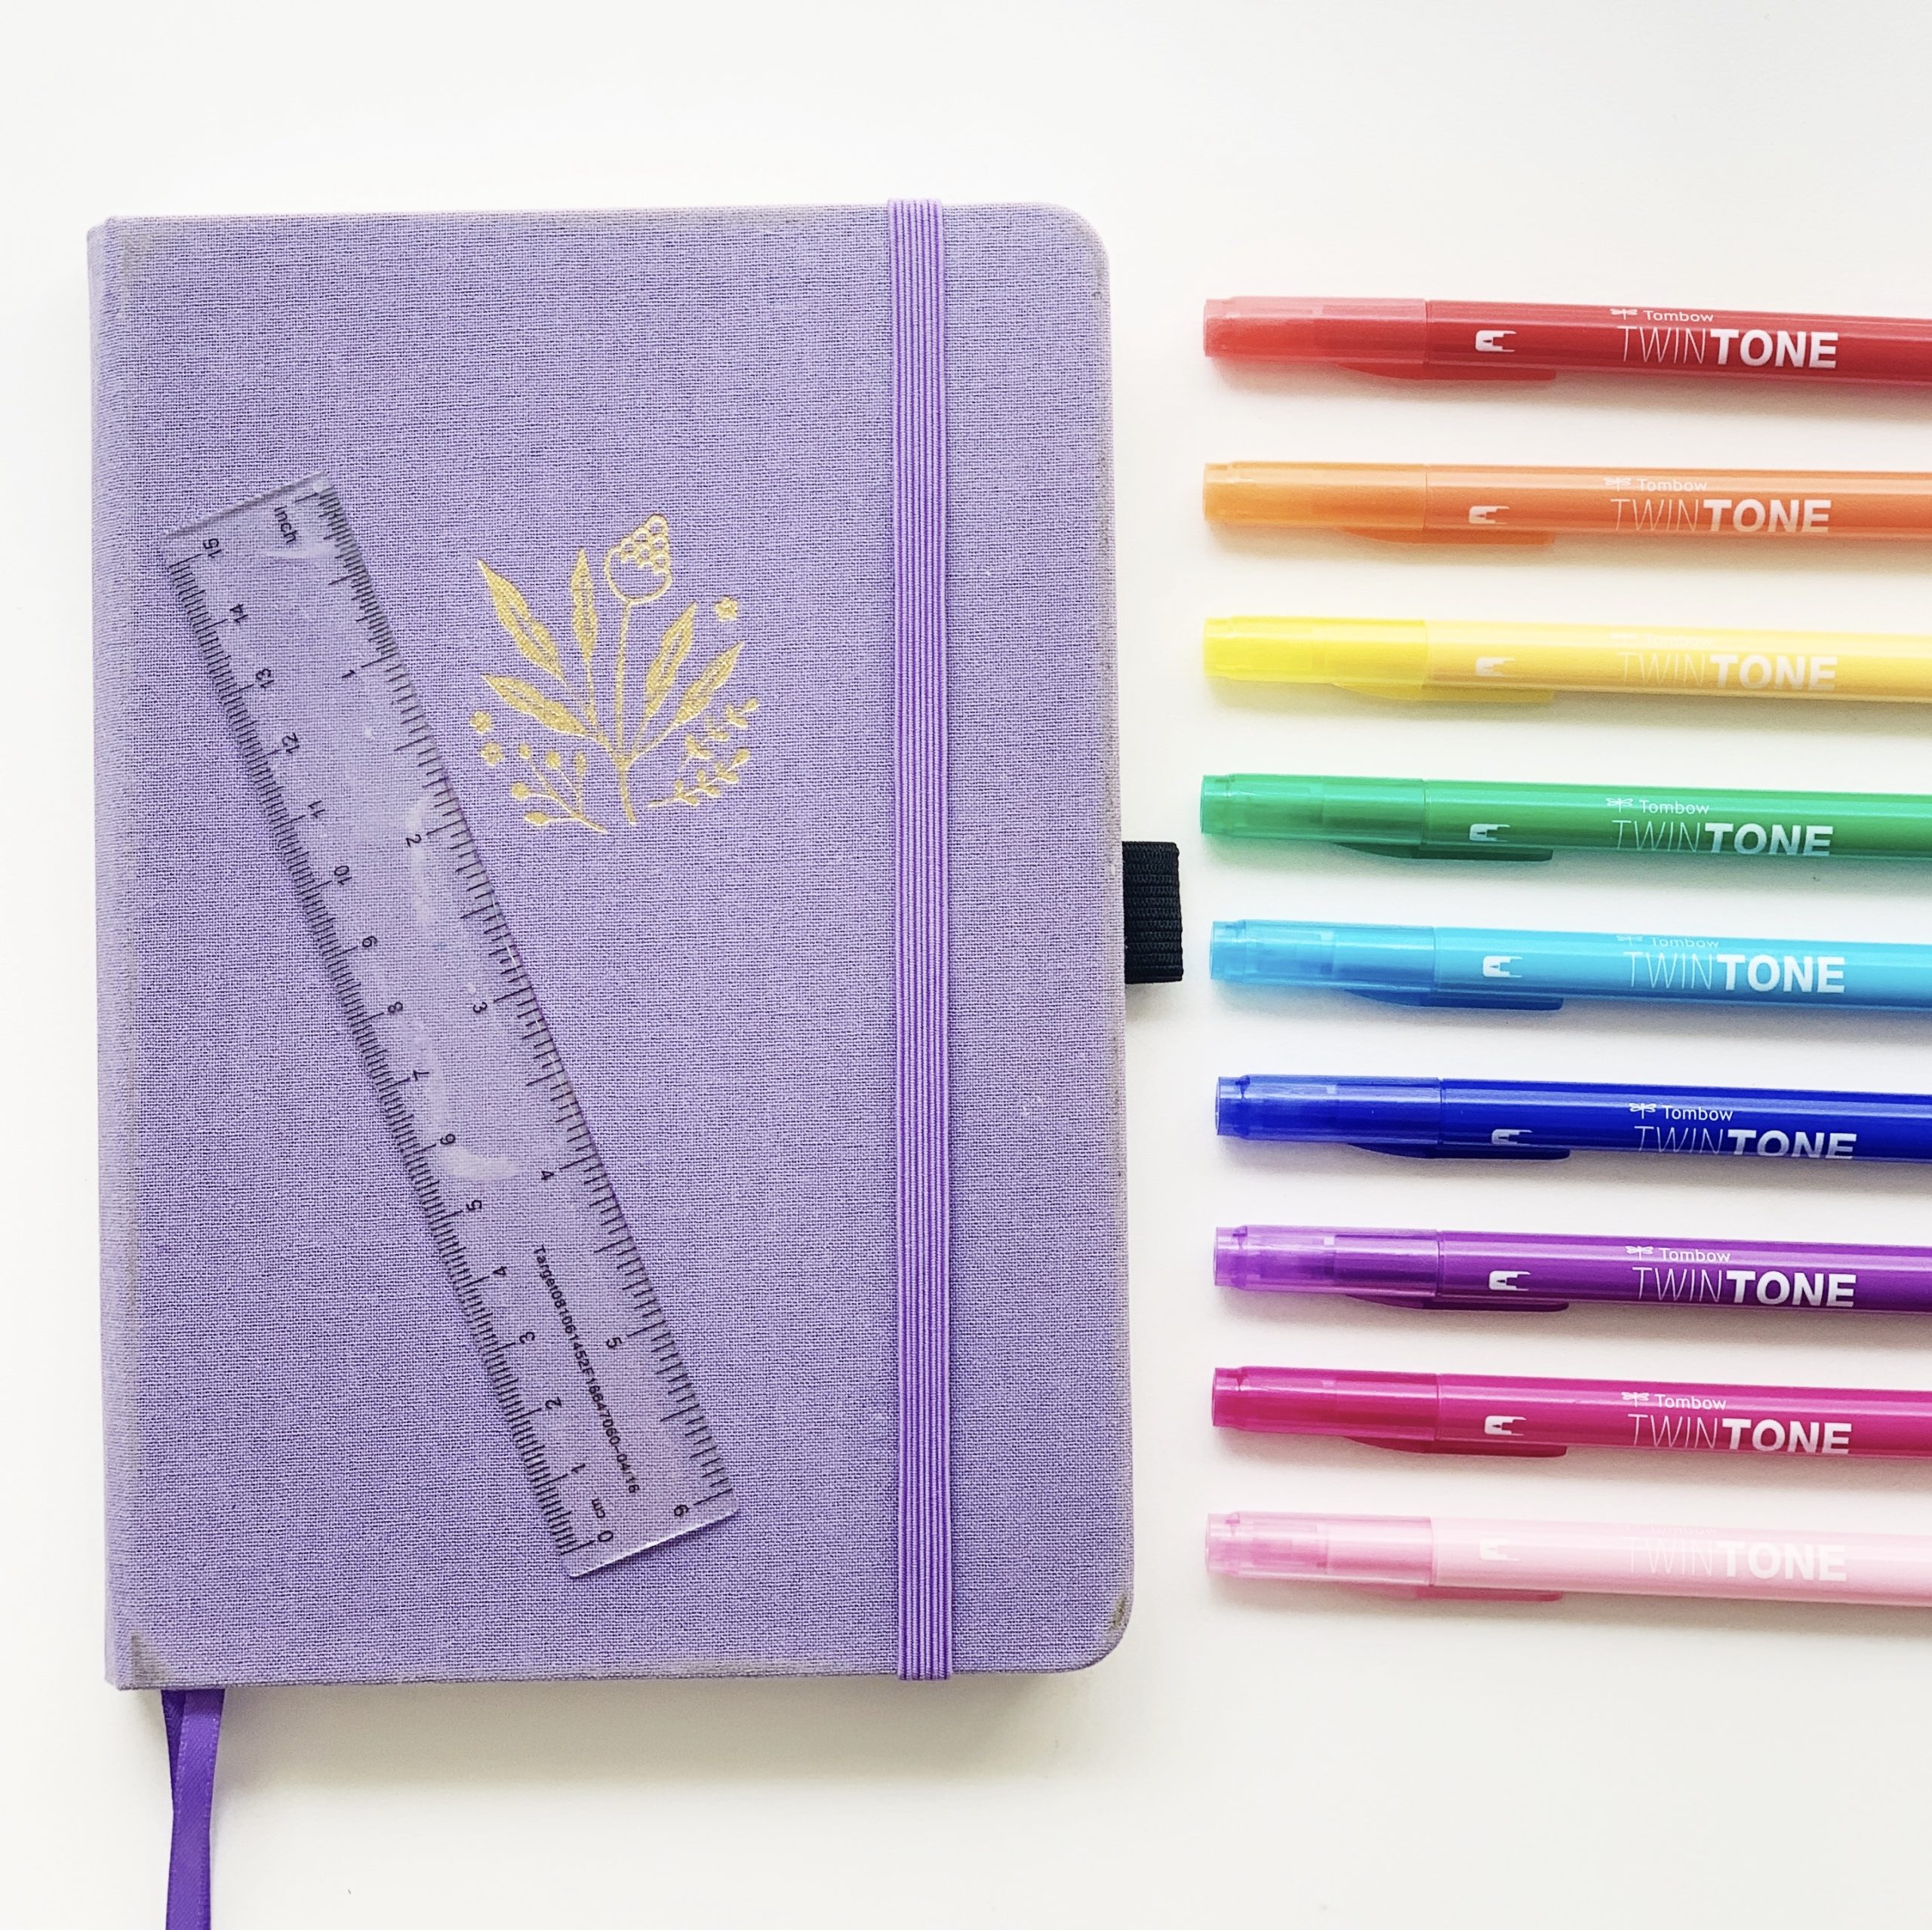
Materials you’ll need:
Step 1
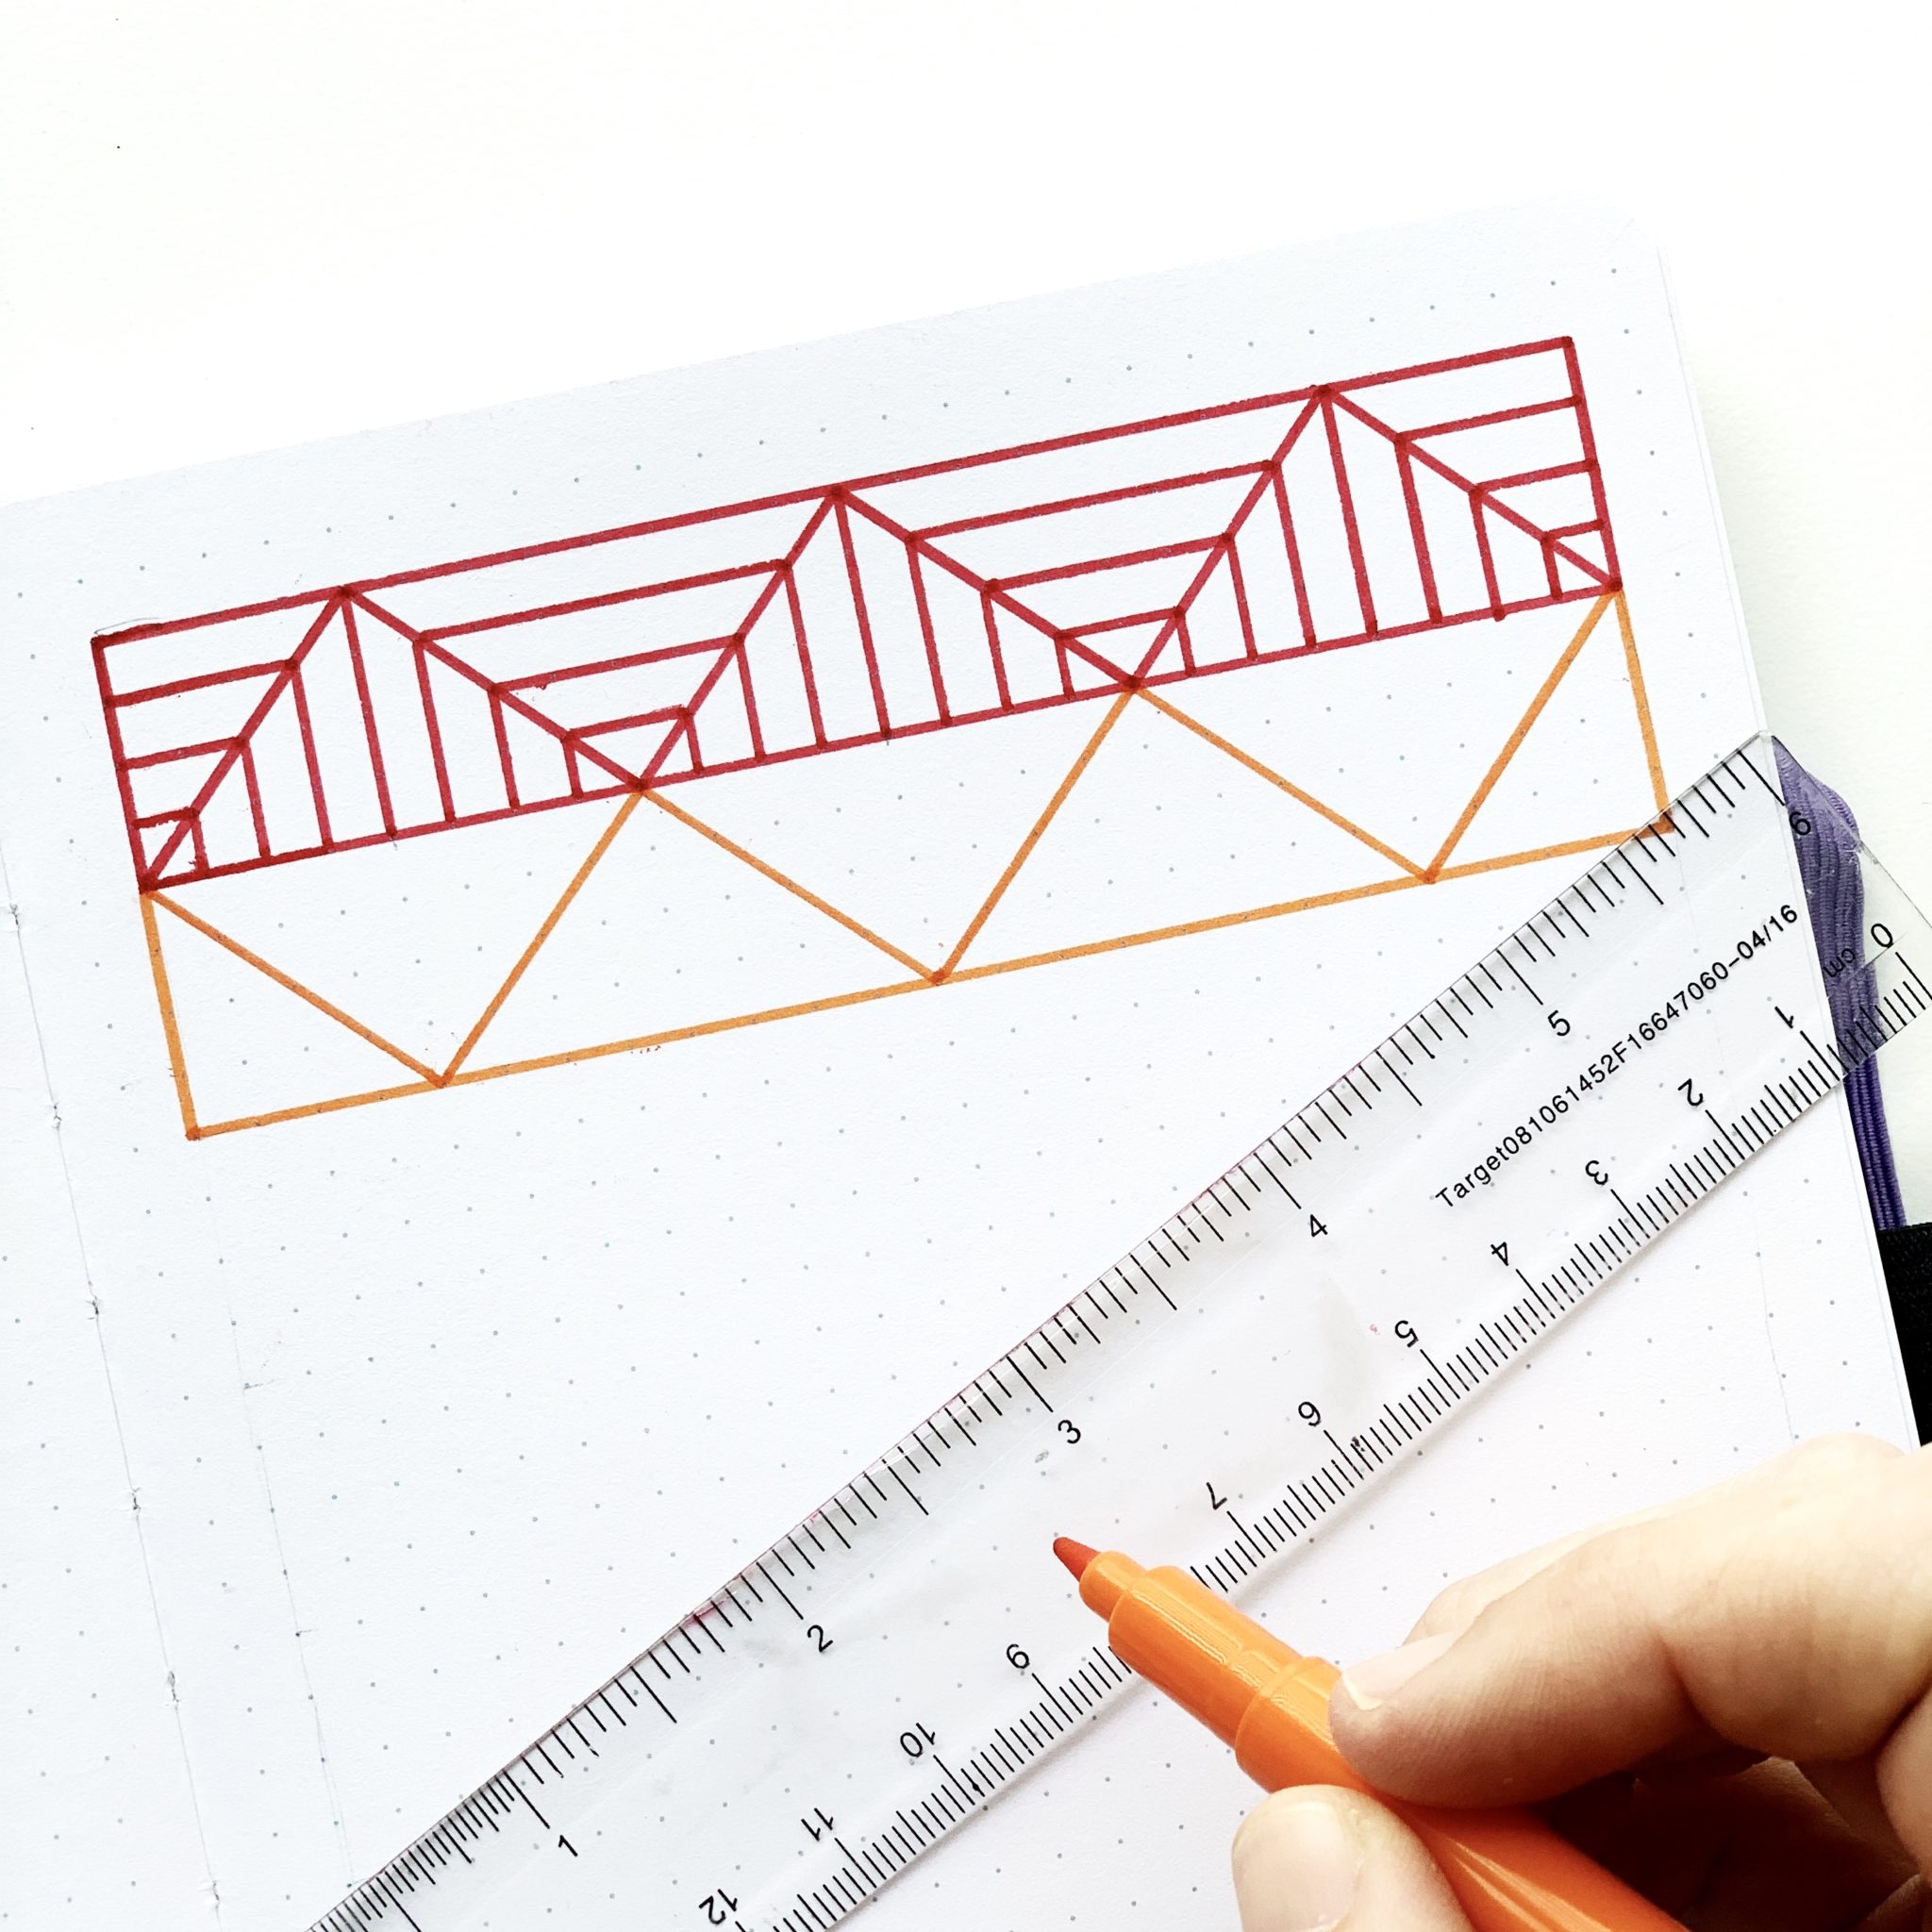
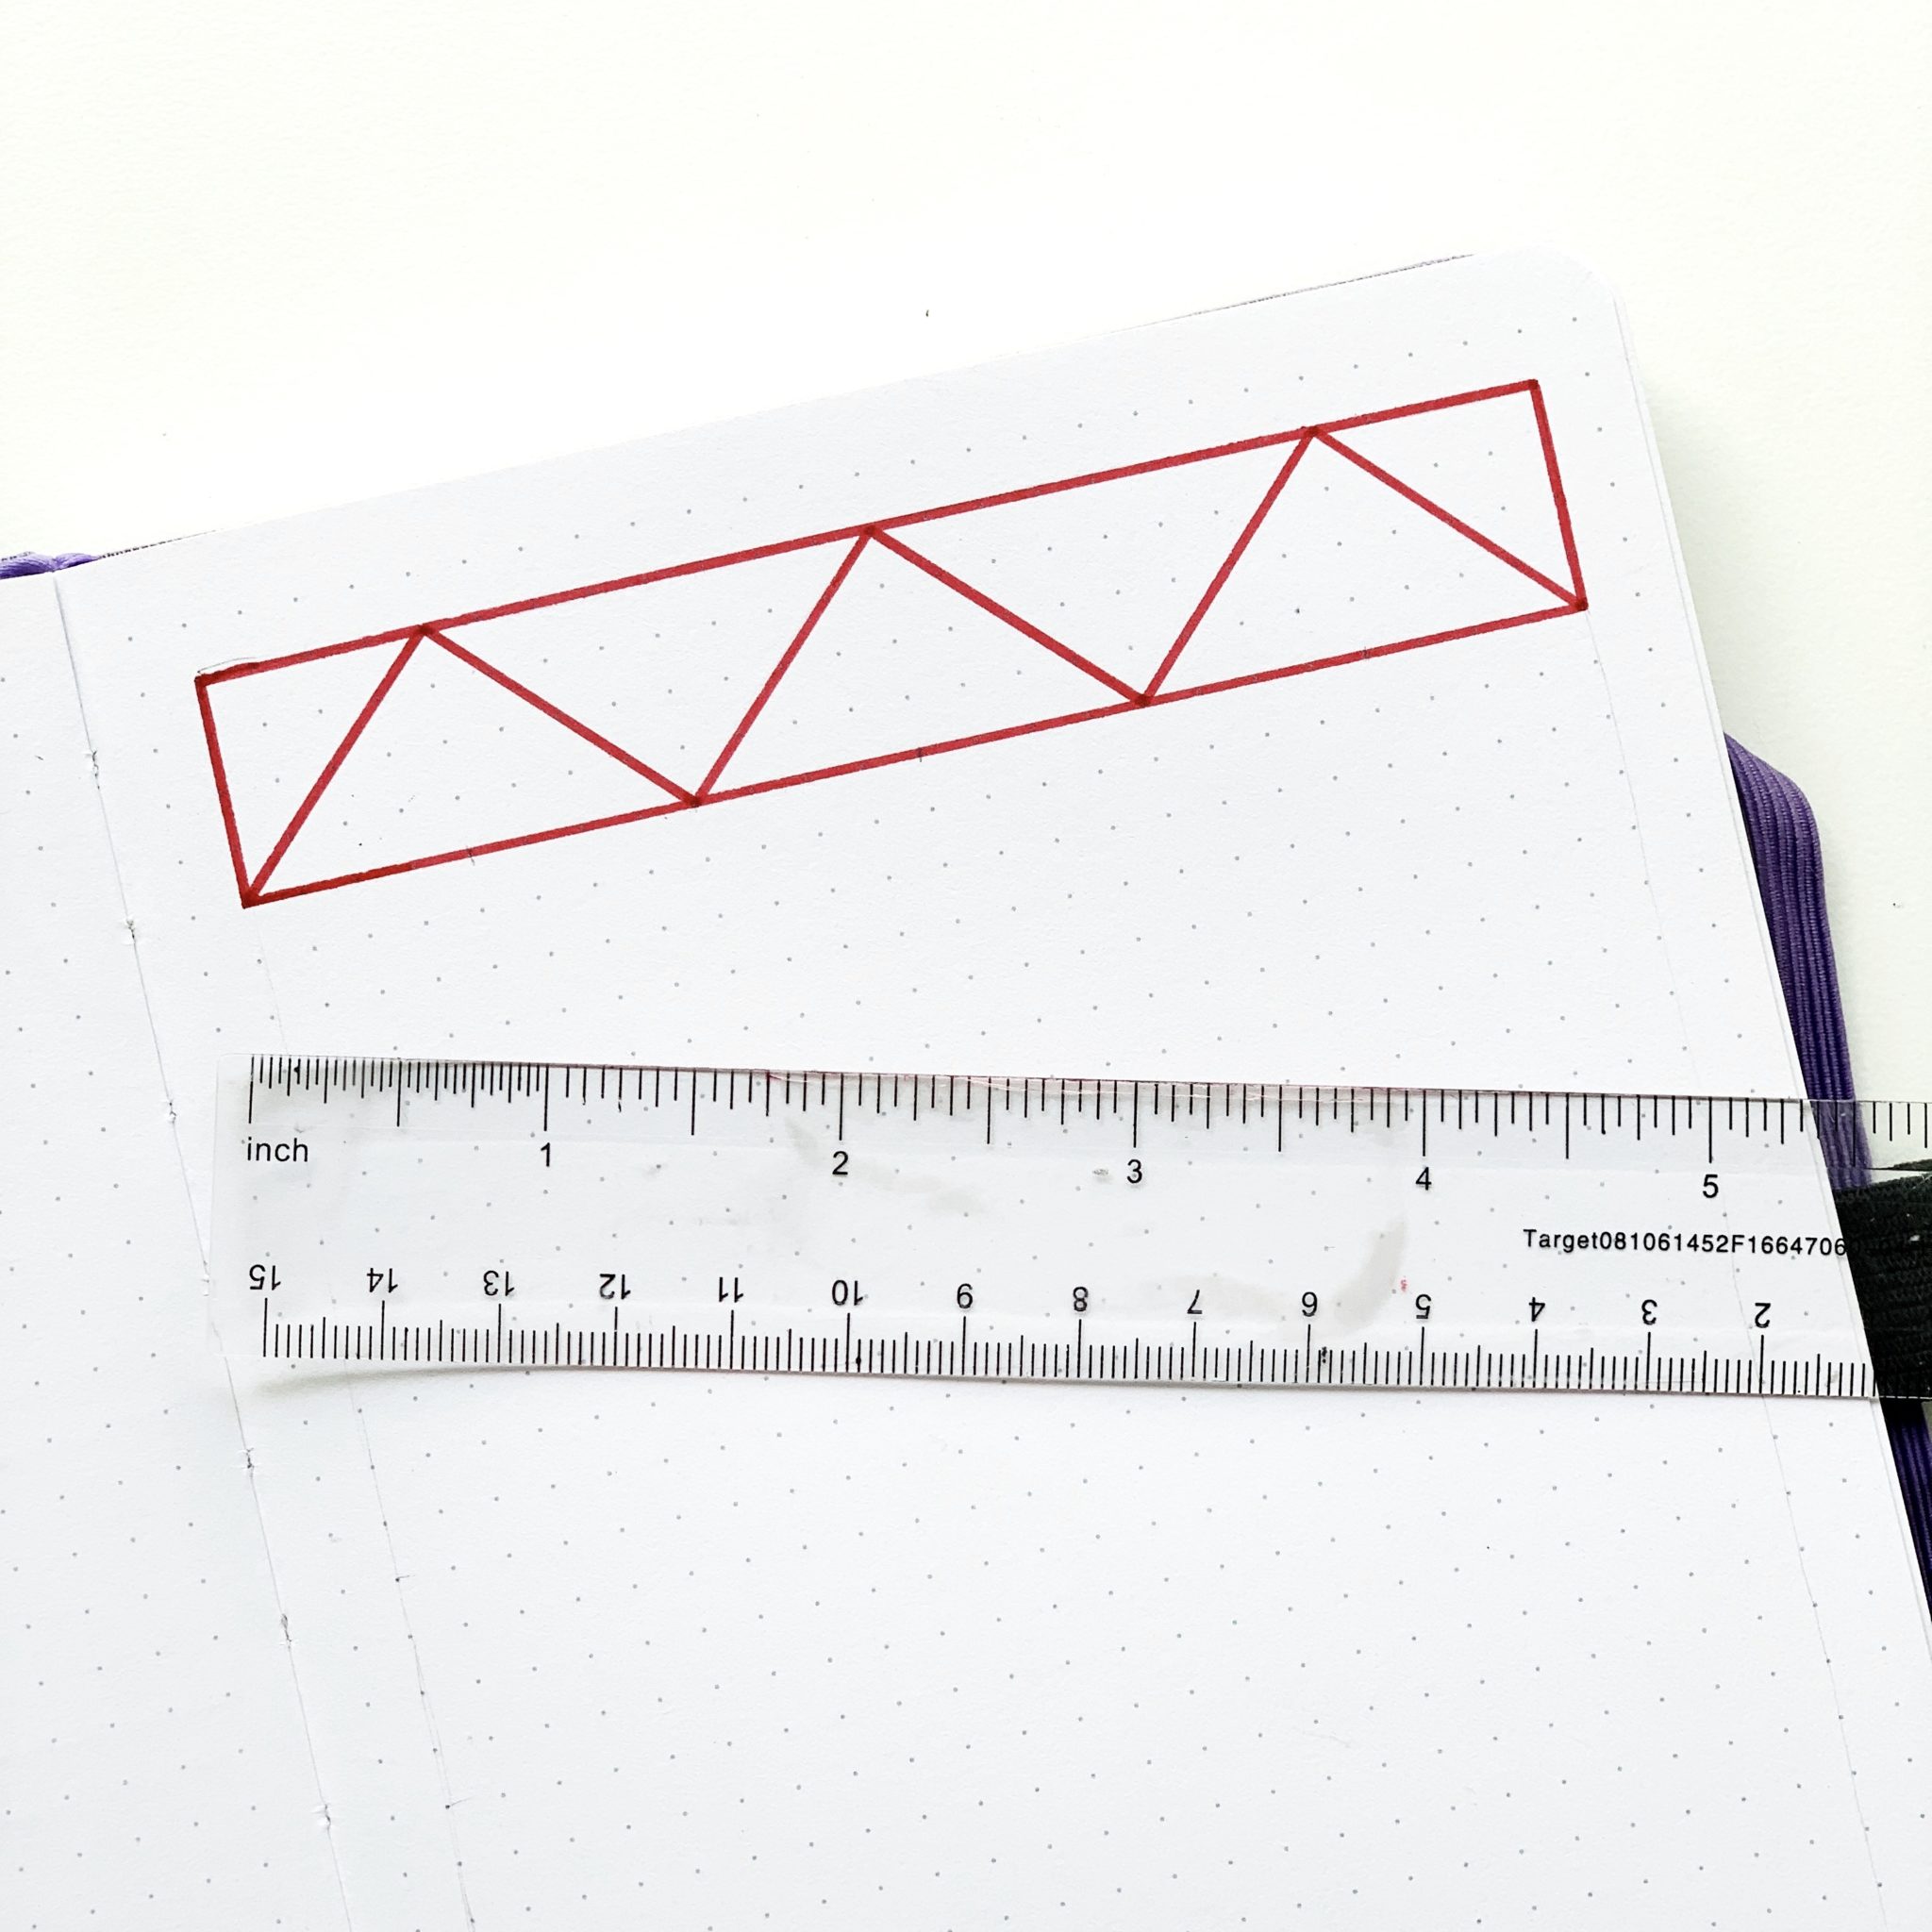
Start with your red TwinTone Marker and draw a zig-zag pattern with your ruler. Each triangle is four squares high and eight squares long. I measured beforehand and to center this image, I’m leaving one square border around the page. If you need to make marks with your pencil to help guide you, that’s totally fine!

Step 2
Draw a rectangle around the triangles you drew.

Step 3
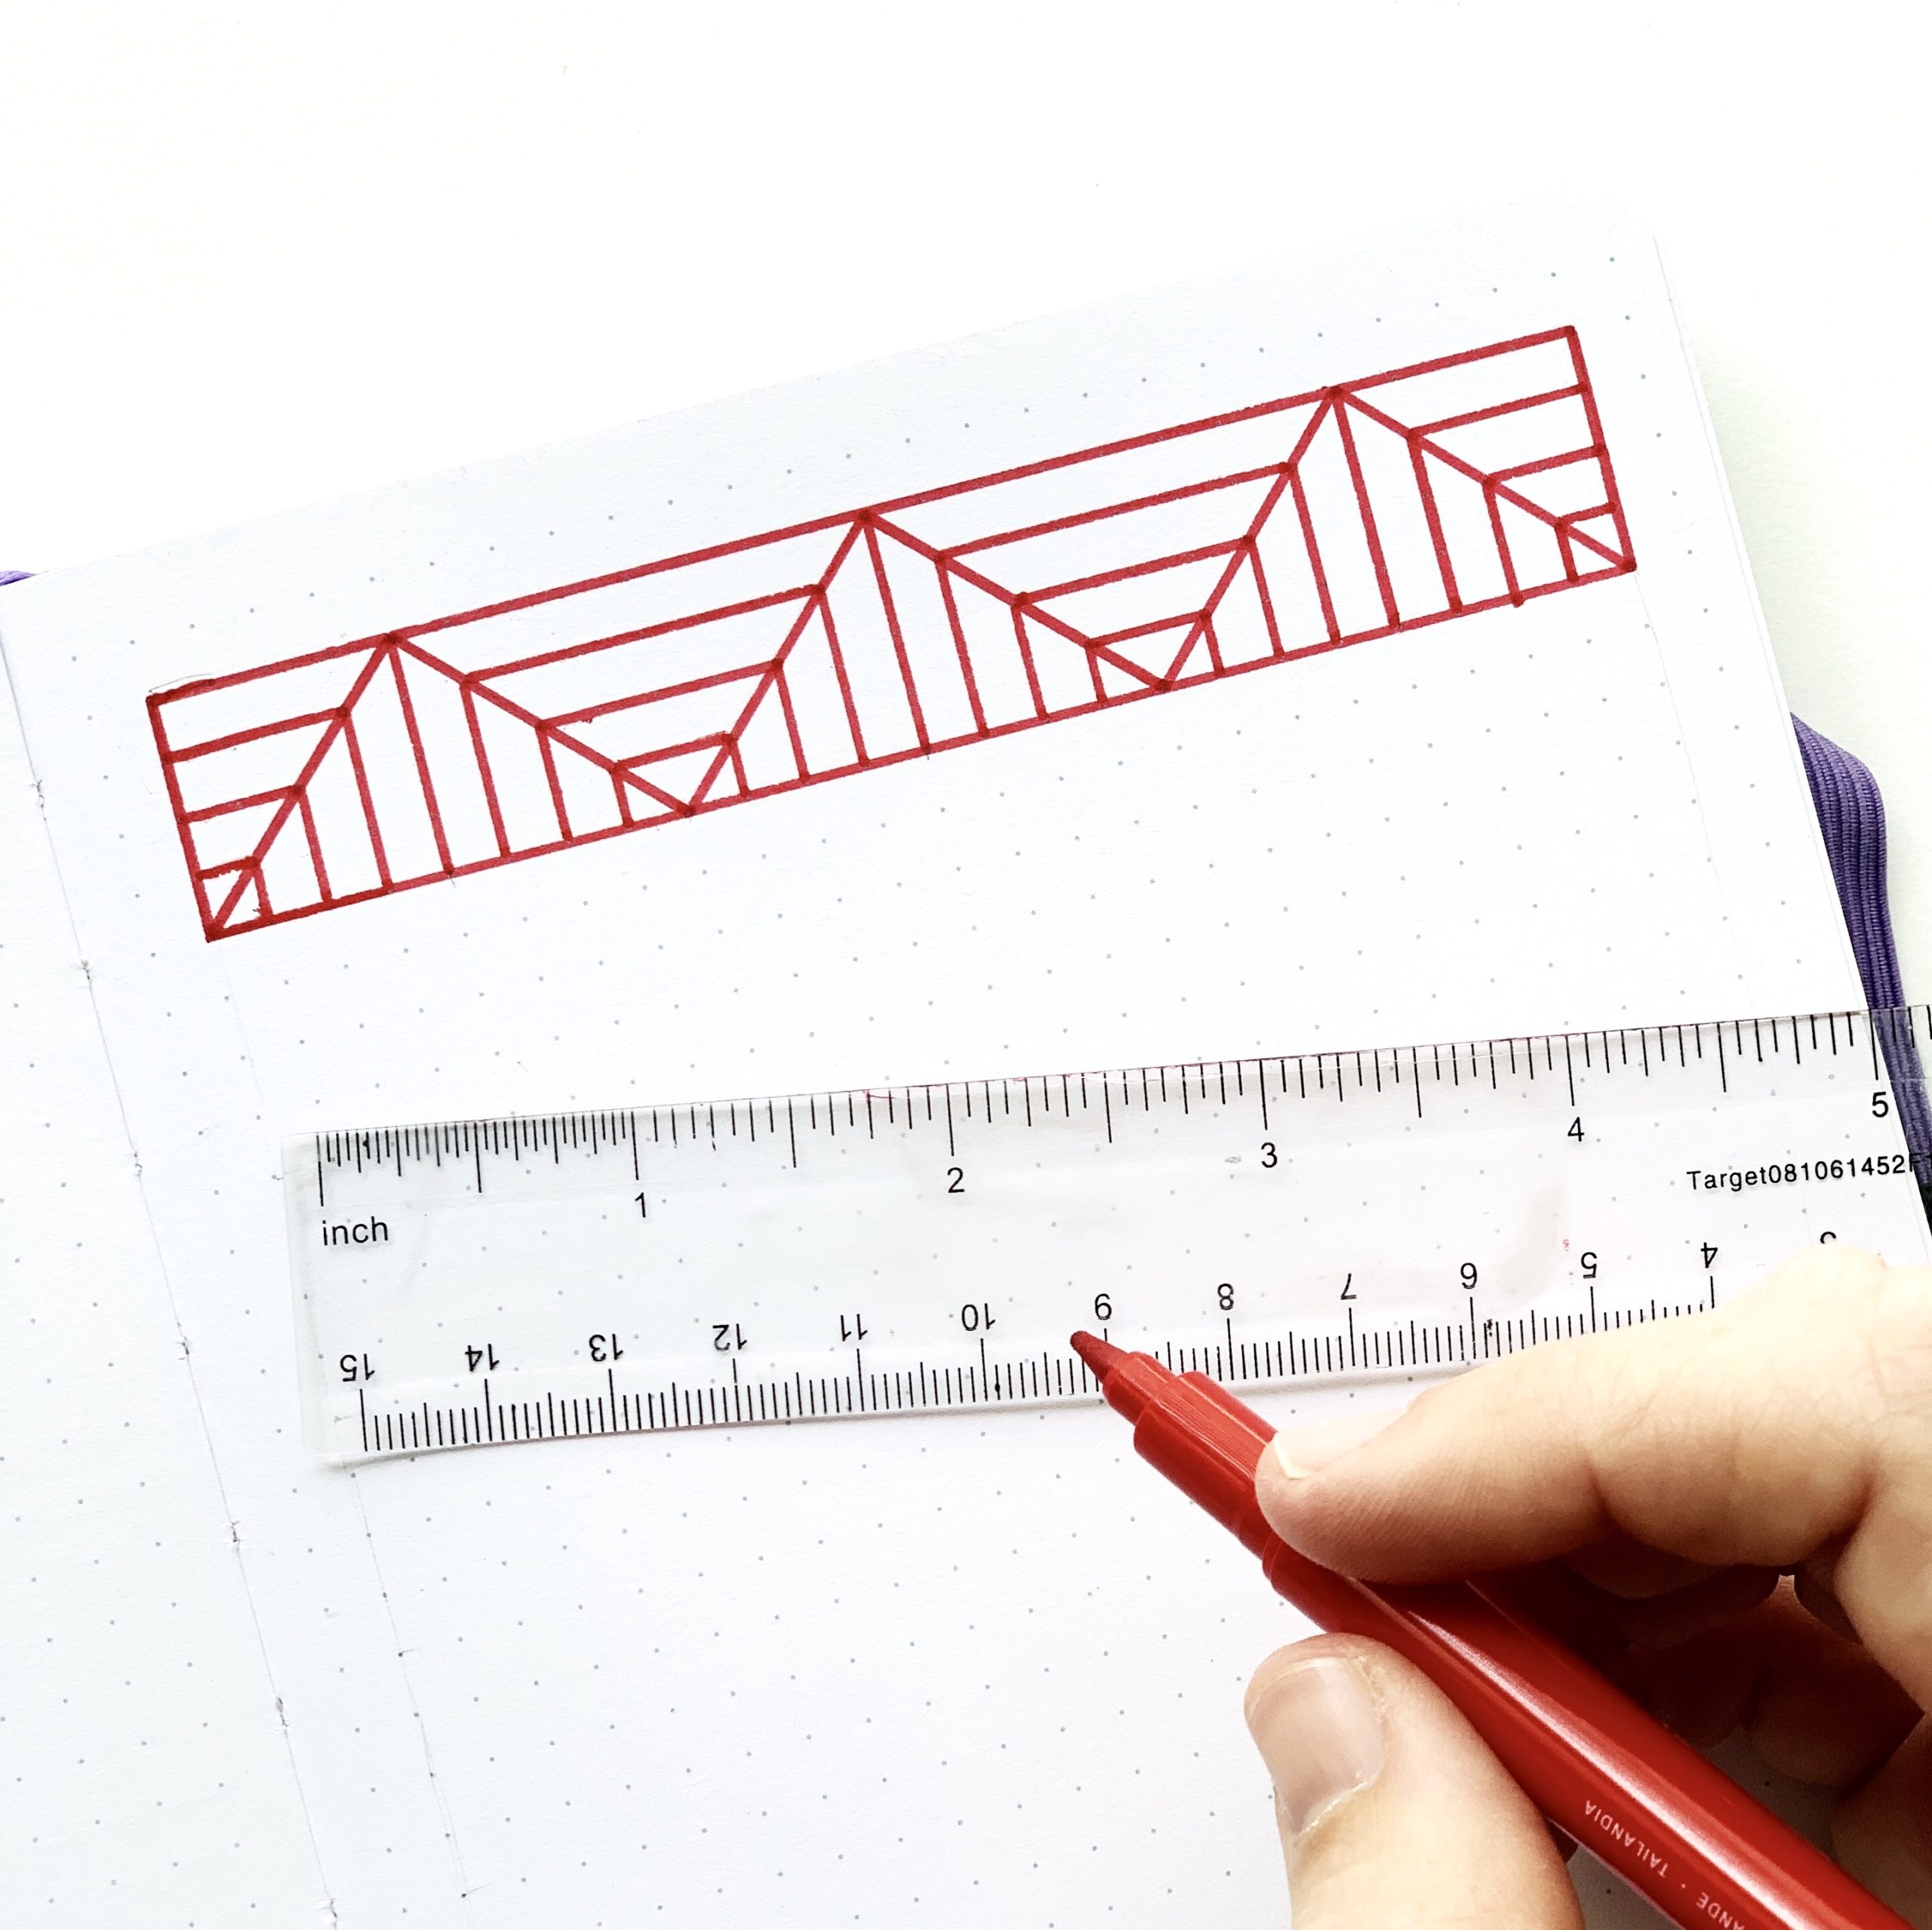
On the bottom set of triangles, draw vertical lines from the triangles to the bottom of the rectangle. Each line will be one square in thickness. This is where a dot grid notebook really comes in handy. The guide is built right in!

Step 4
On the top triangles, draw horizontal lines on the rest of the square guides. The red pattern is done. Now onto orange!

Step 5
We’re moving onto the next color! We’re going to do the same pattern, but reversed so it looks upside down! So, draw the triangles and the bottom half of the rectangle border.
Step 6
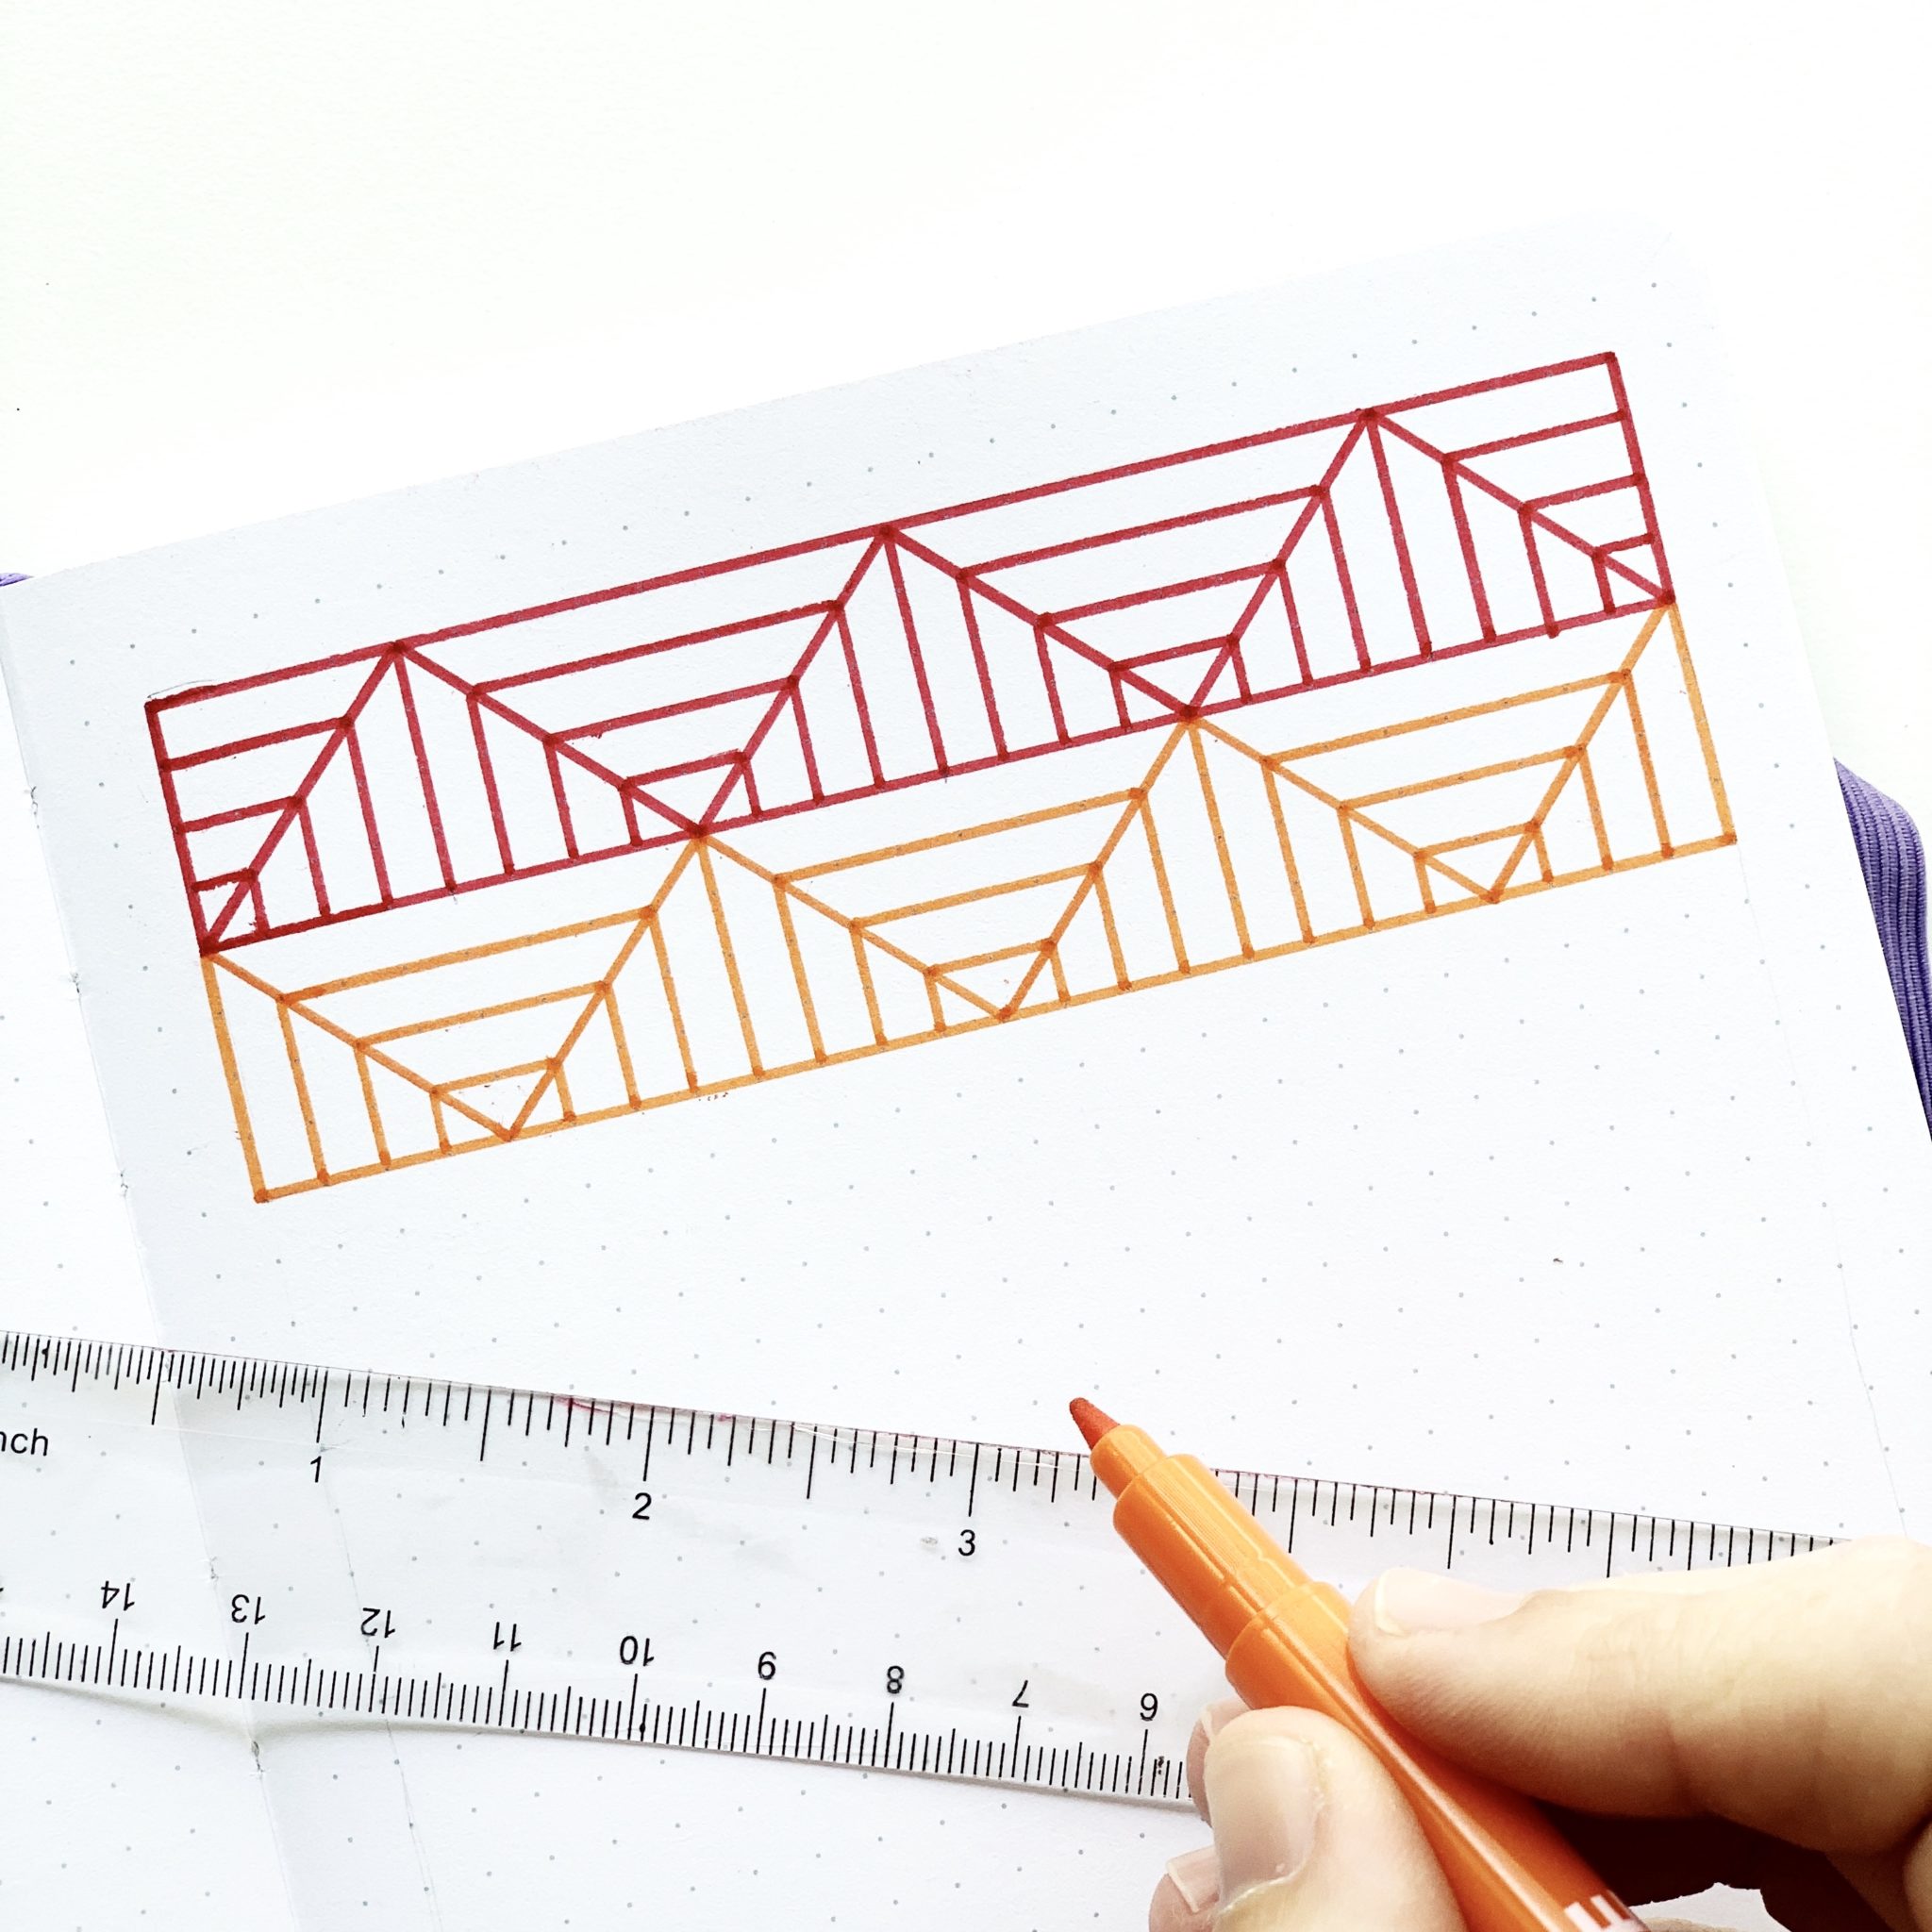
Use the orange to draw in the horizontal and vertical lines, making sure they’re reversed from the first color!
Step 7
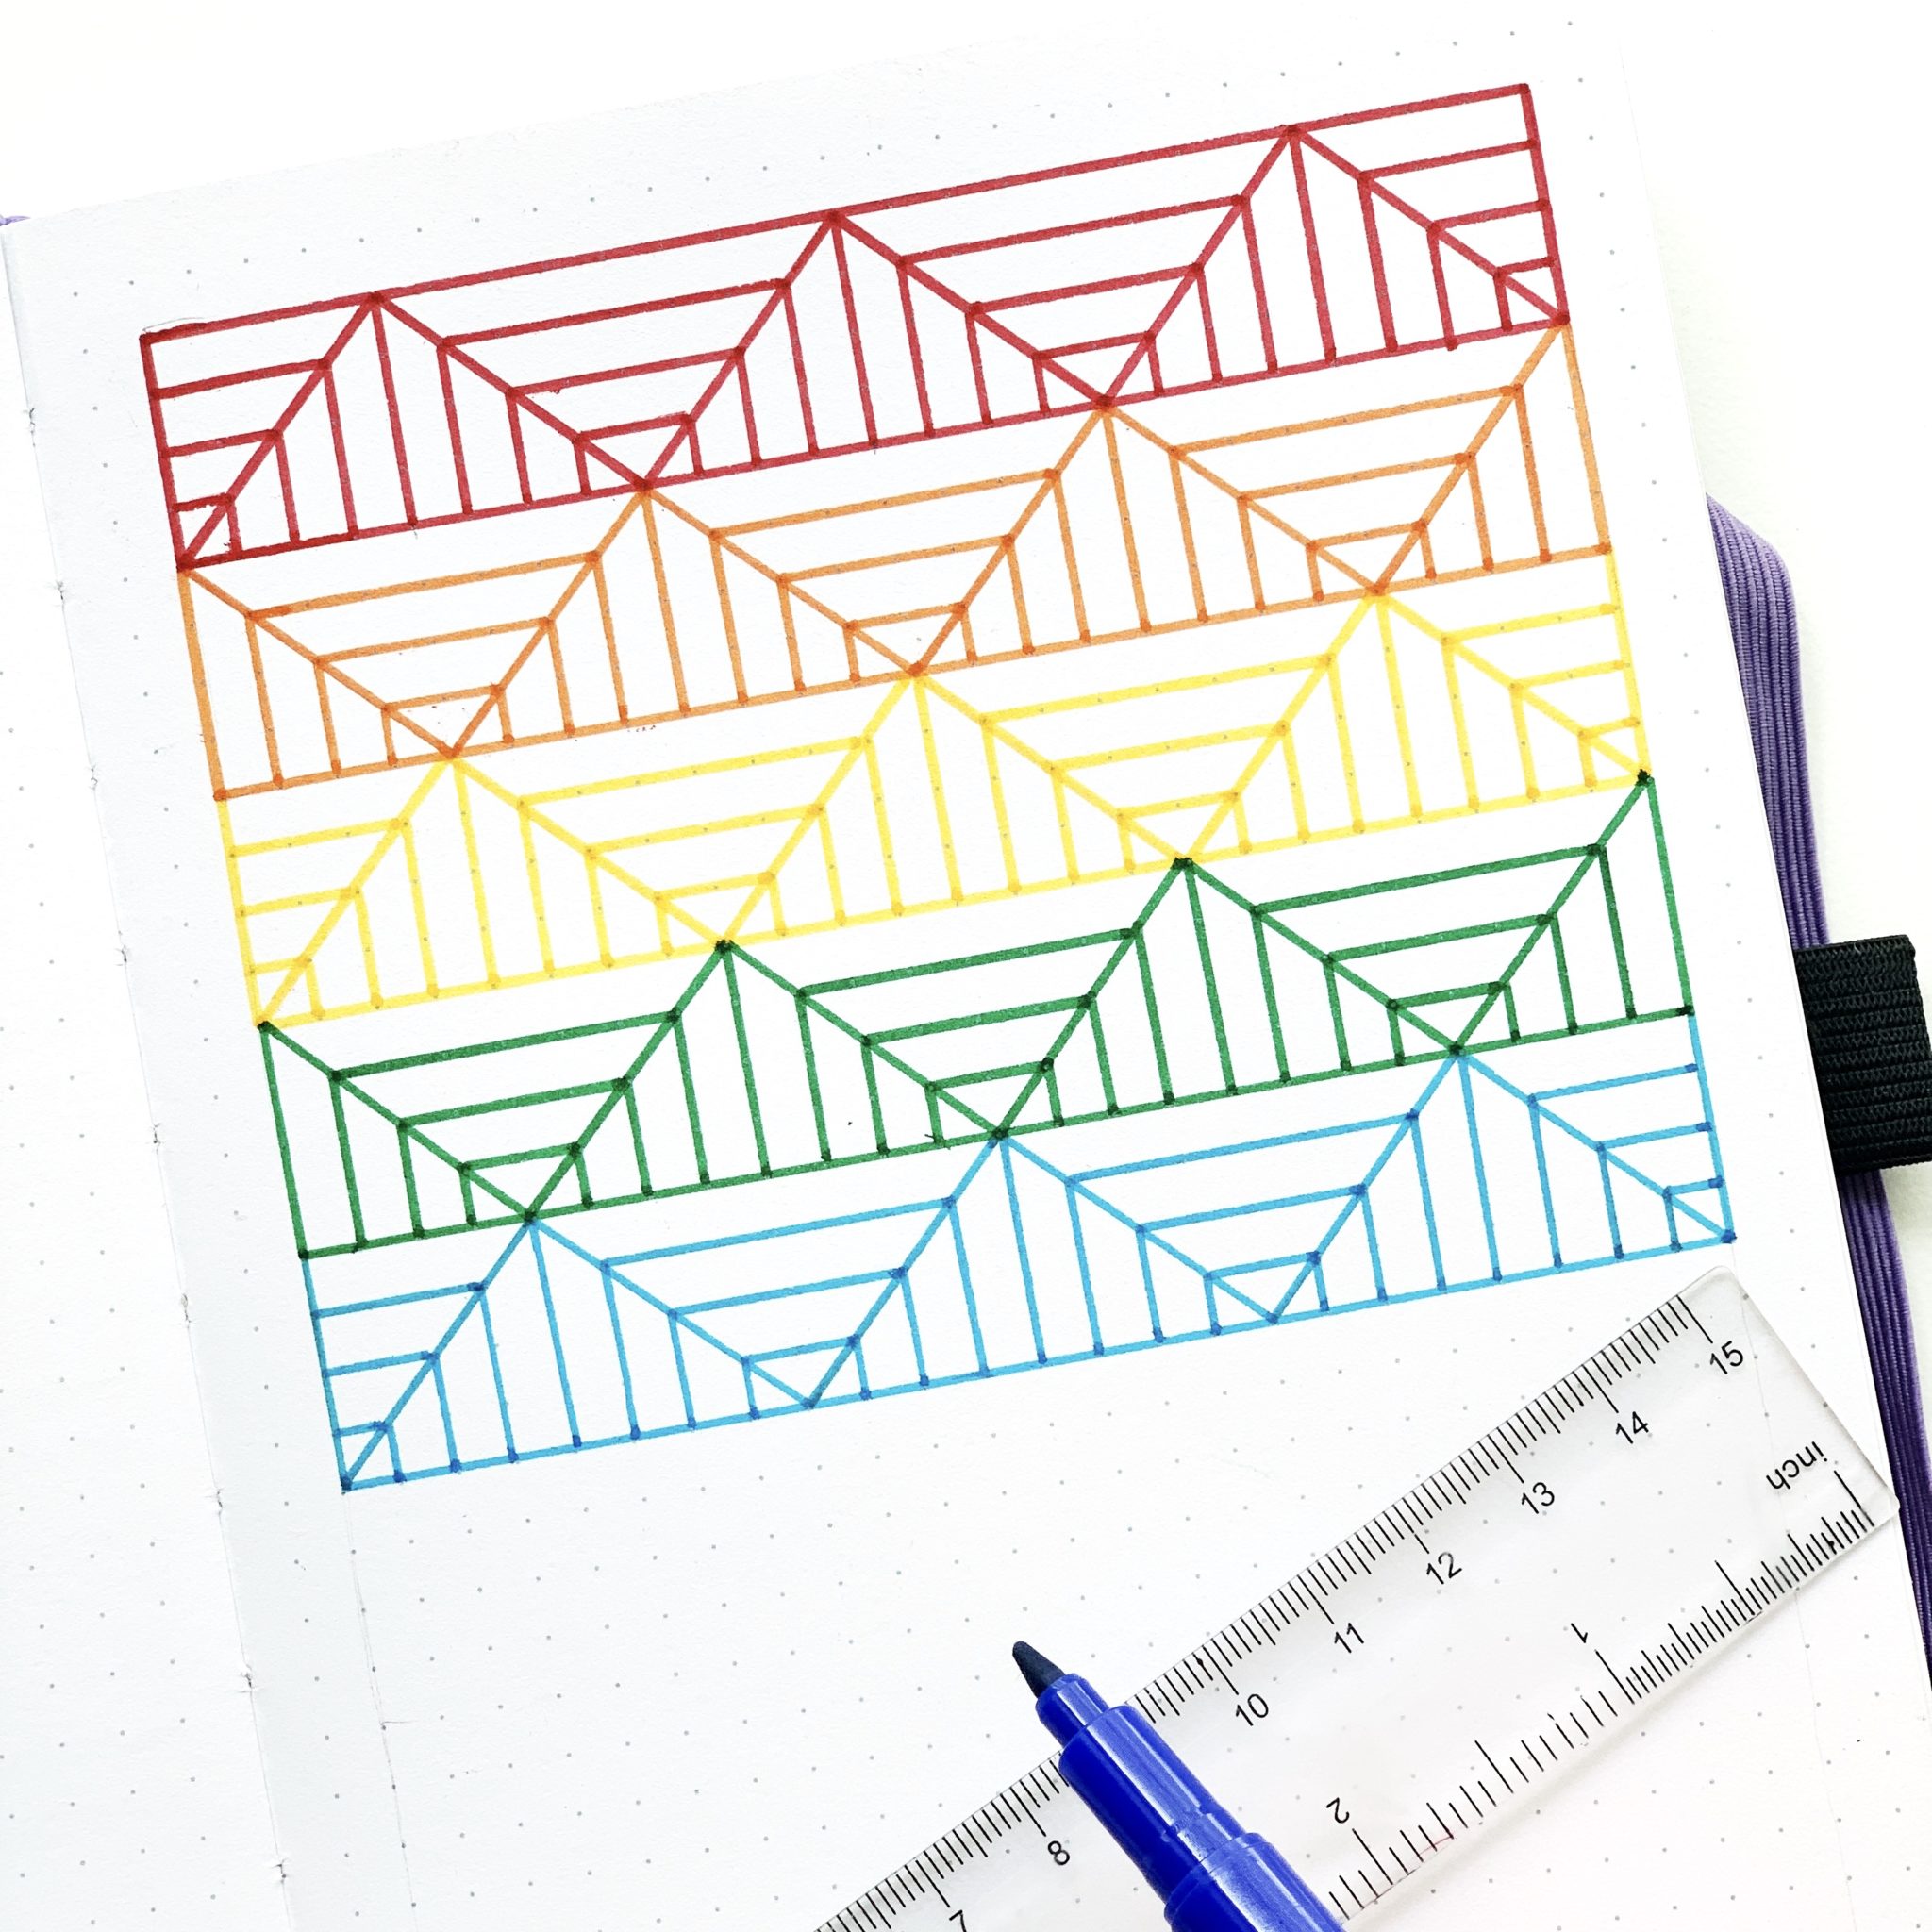
Now that you’ve got the hang of things, keep going with all the colors. Make sure to reverse the pattern with every row! I only had enough room for nine rows on this page, so I picked nine colors from the Twin Tone Rainbow 12-Pack to use!
Step 8
Once you get all the way to the bottom of the page, you’re done! The great thing about these markers is they are dual-tipped, so you can create some really cool patterns with thick and thin lines!
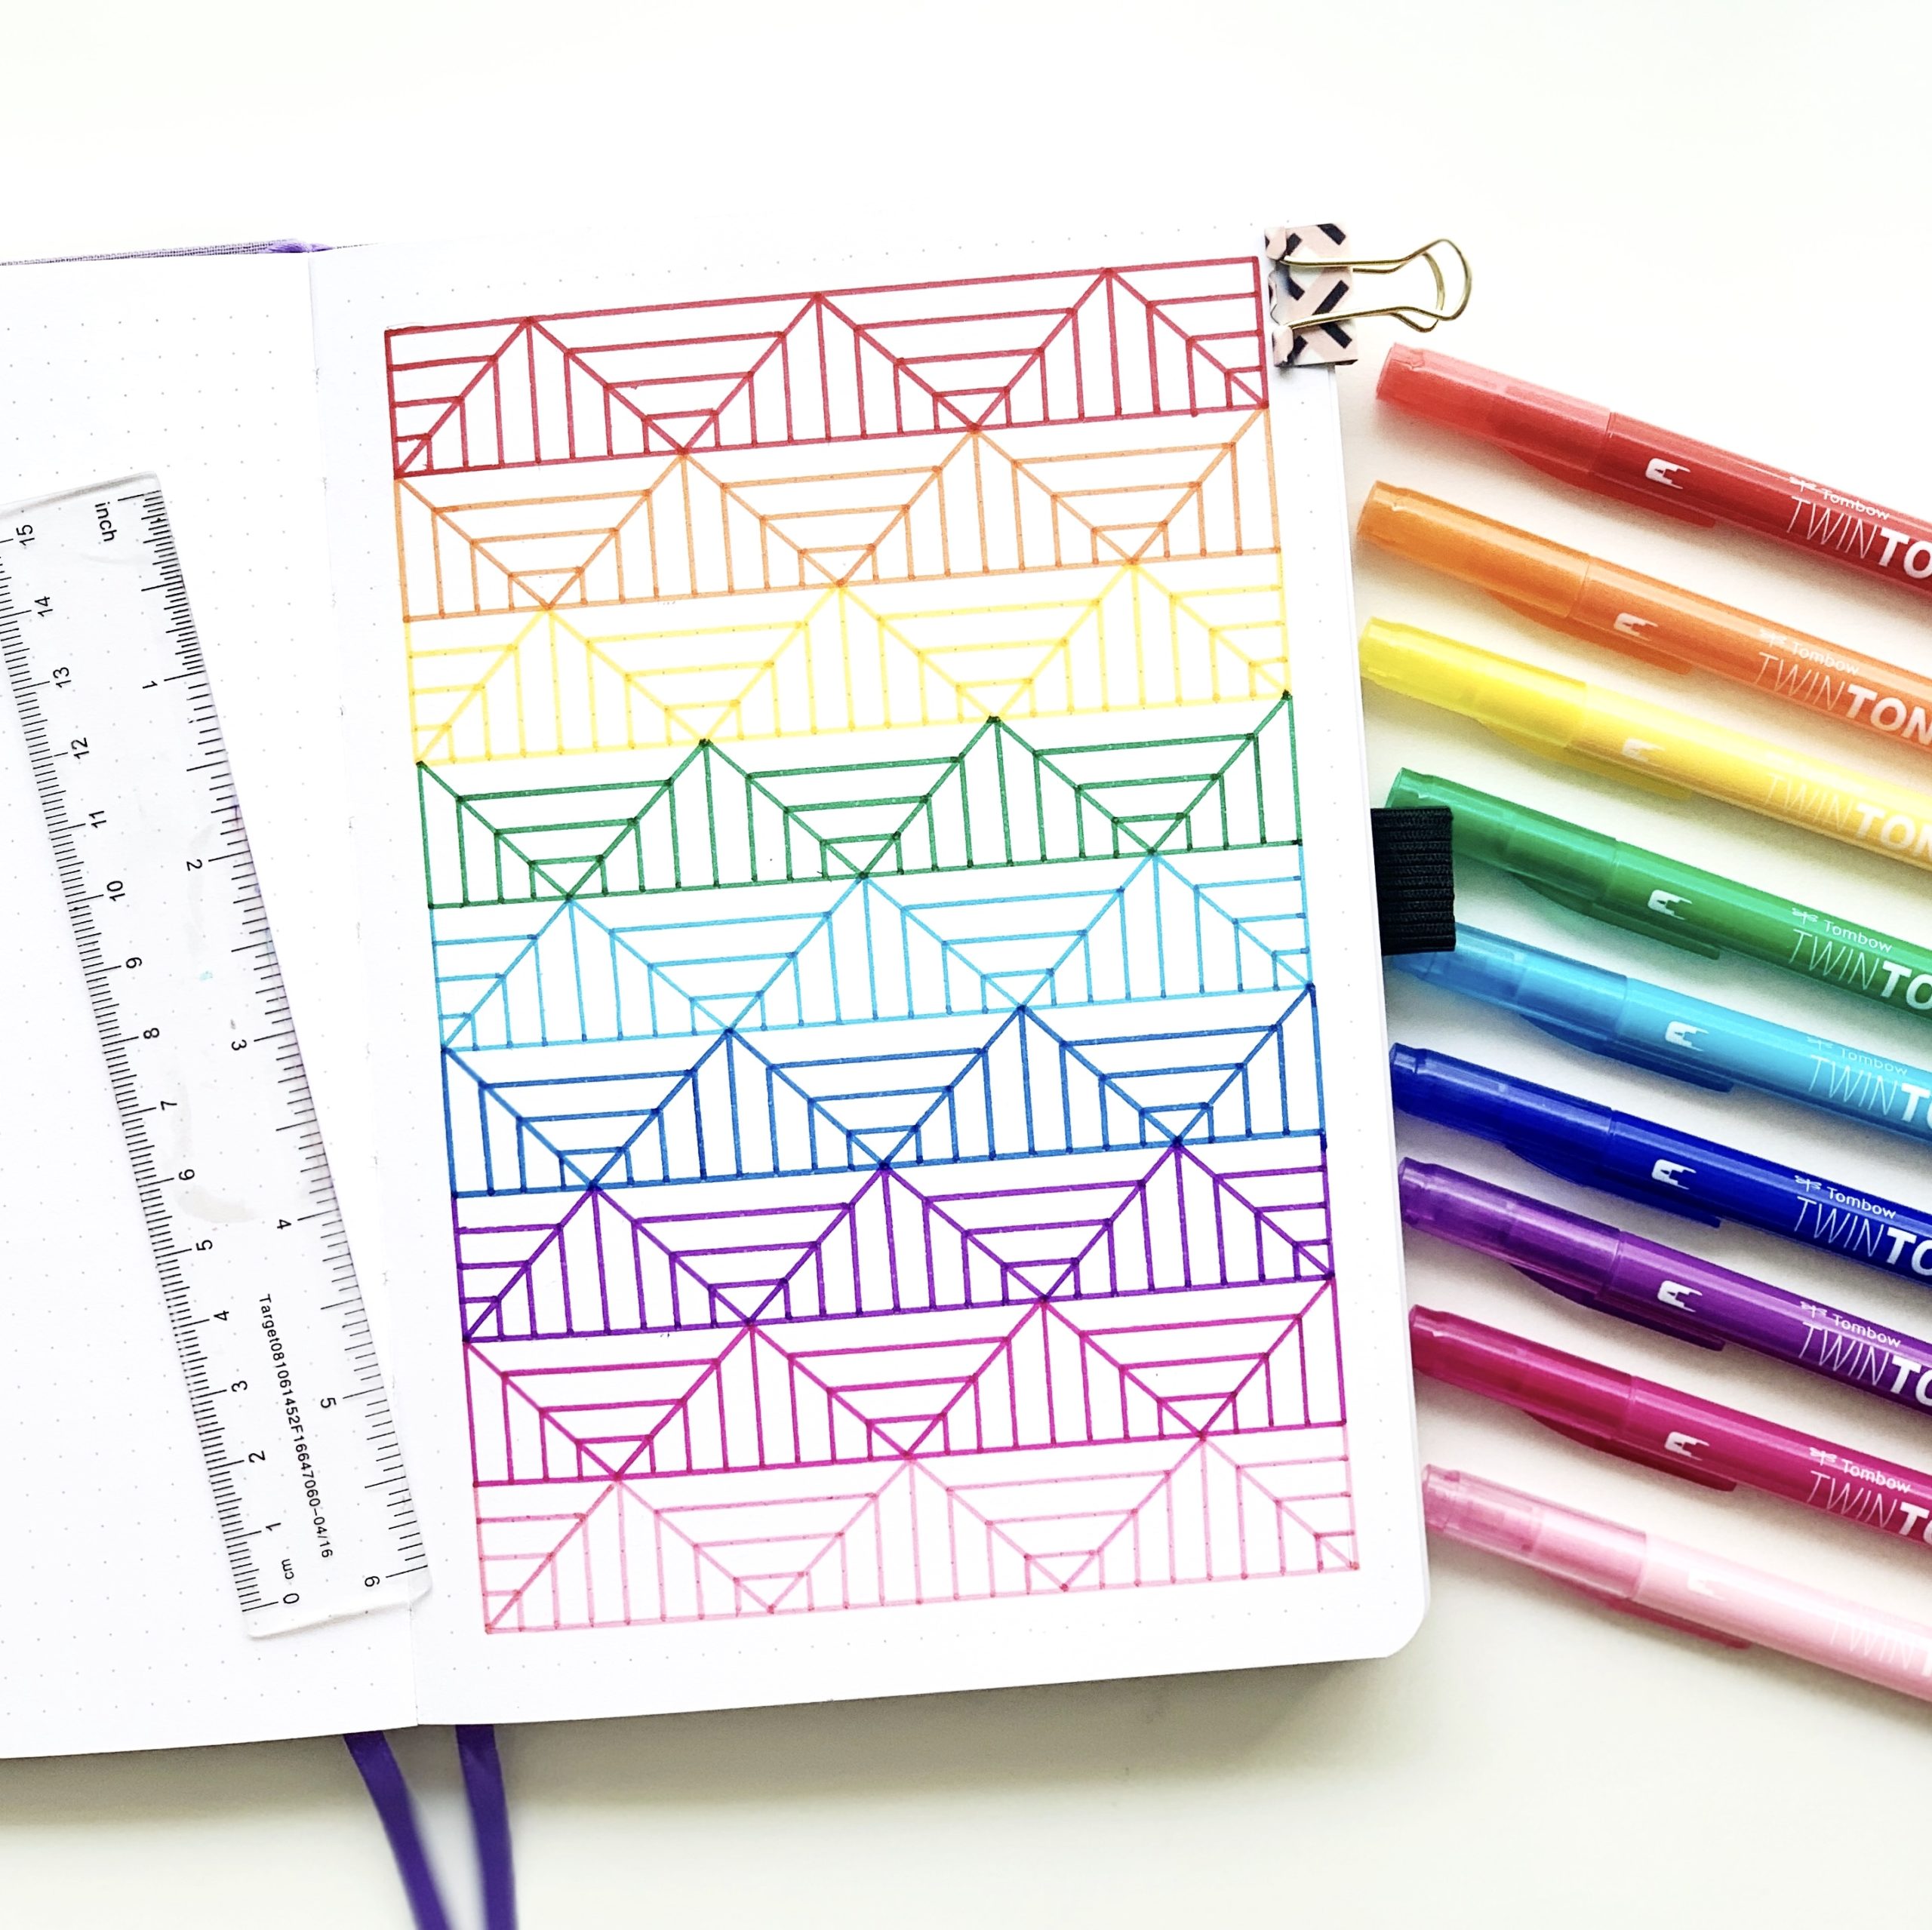
I hope you found this geometric tutorial helpful. For more inspiration like this, make sure to follow me @studio80design!
Yes i really like it and it helps a lot
Lovely example! I found that I needed to add a layer of masking tape under the ruler in order to prevent bleeding under it.