Hello Tombow fans, Serena from @SerenaBeeCreative here with a look at the ABT PRO Alcohol-Based Marker Gray Palette 12-Pack. Let’s get into it!
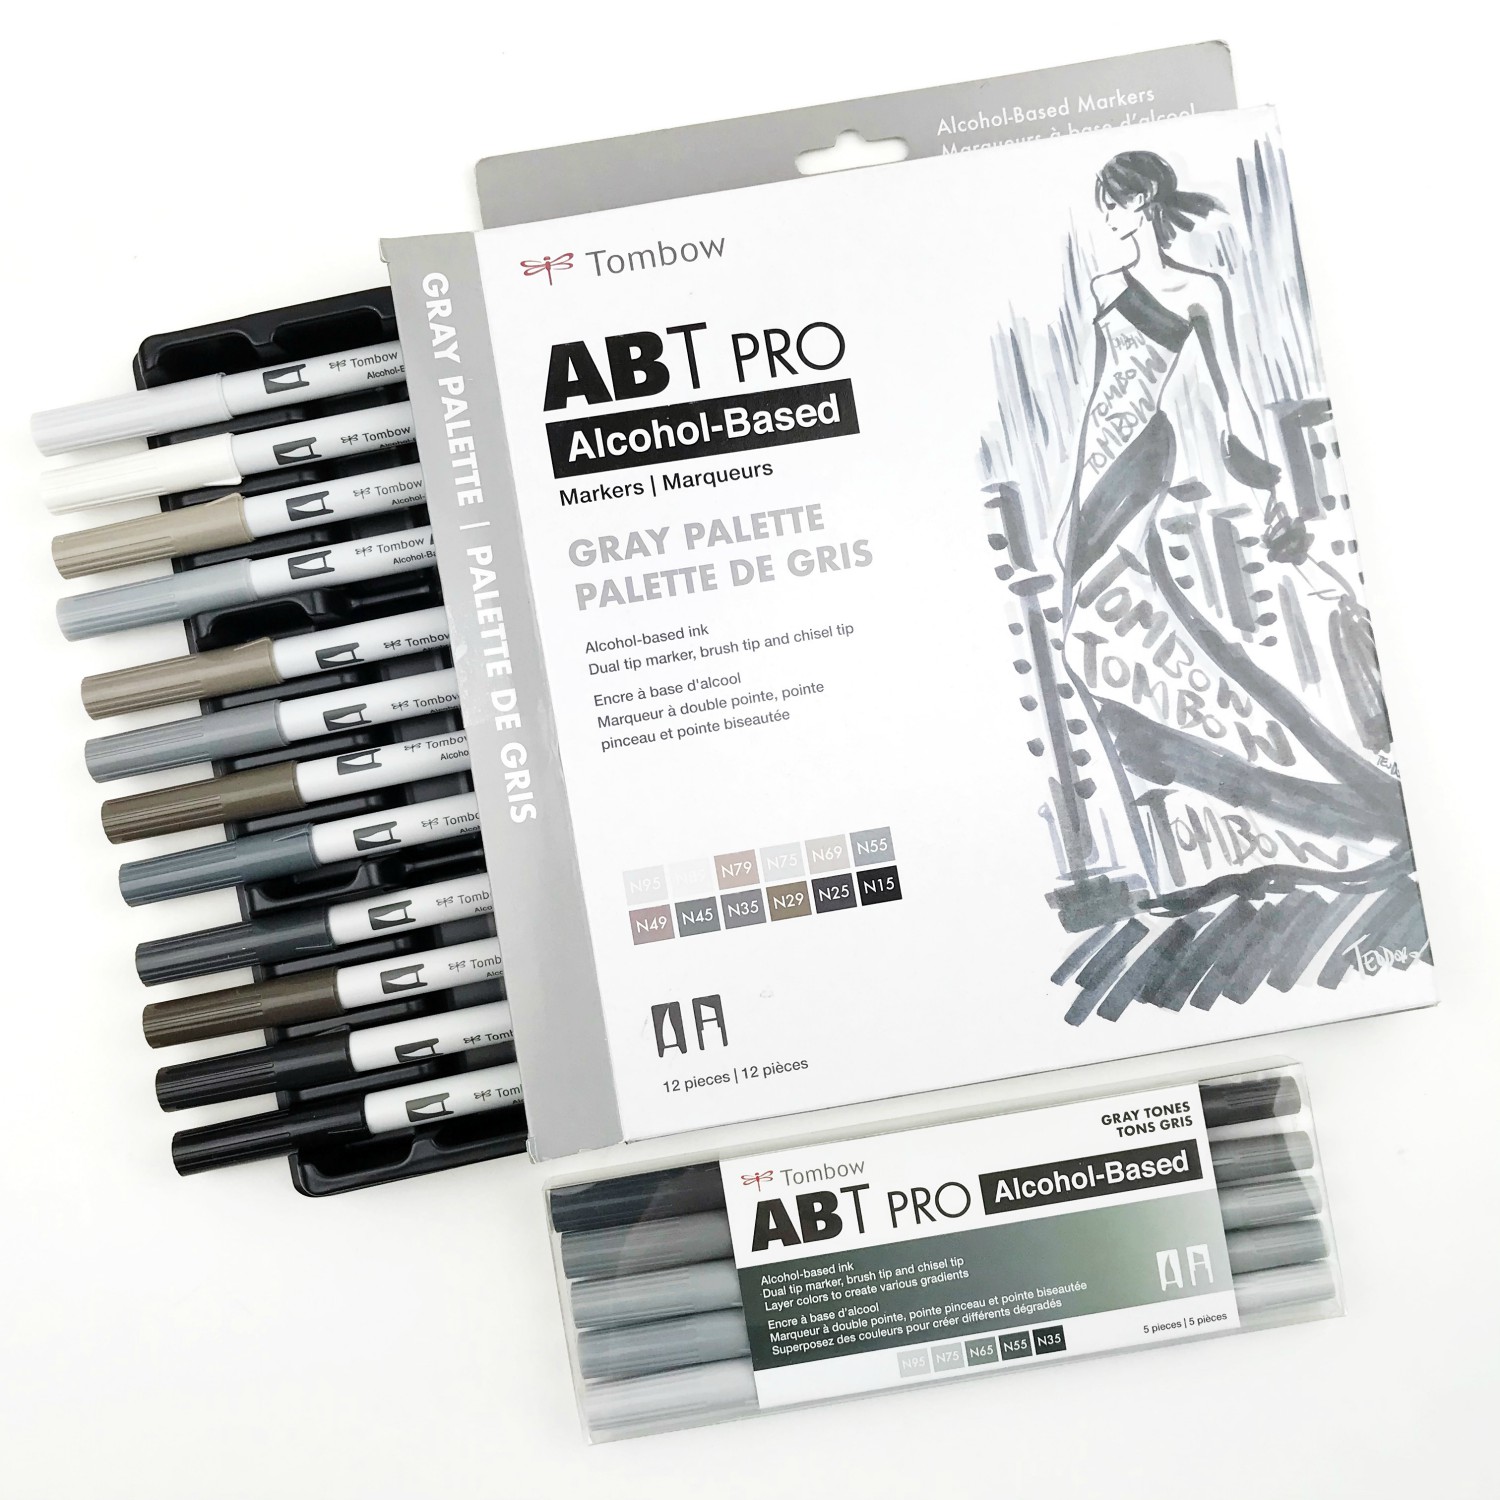
ABT PRO Alcohol Markers:
Before we get into talking about the Gray Palette, I’d like to share some information about the ABT PRO Markers in general.
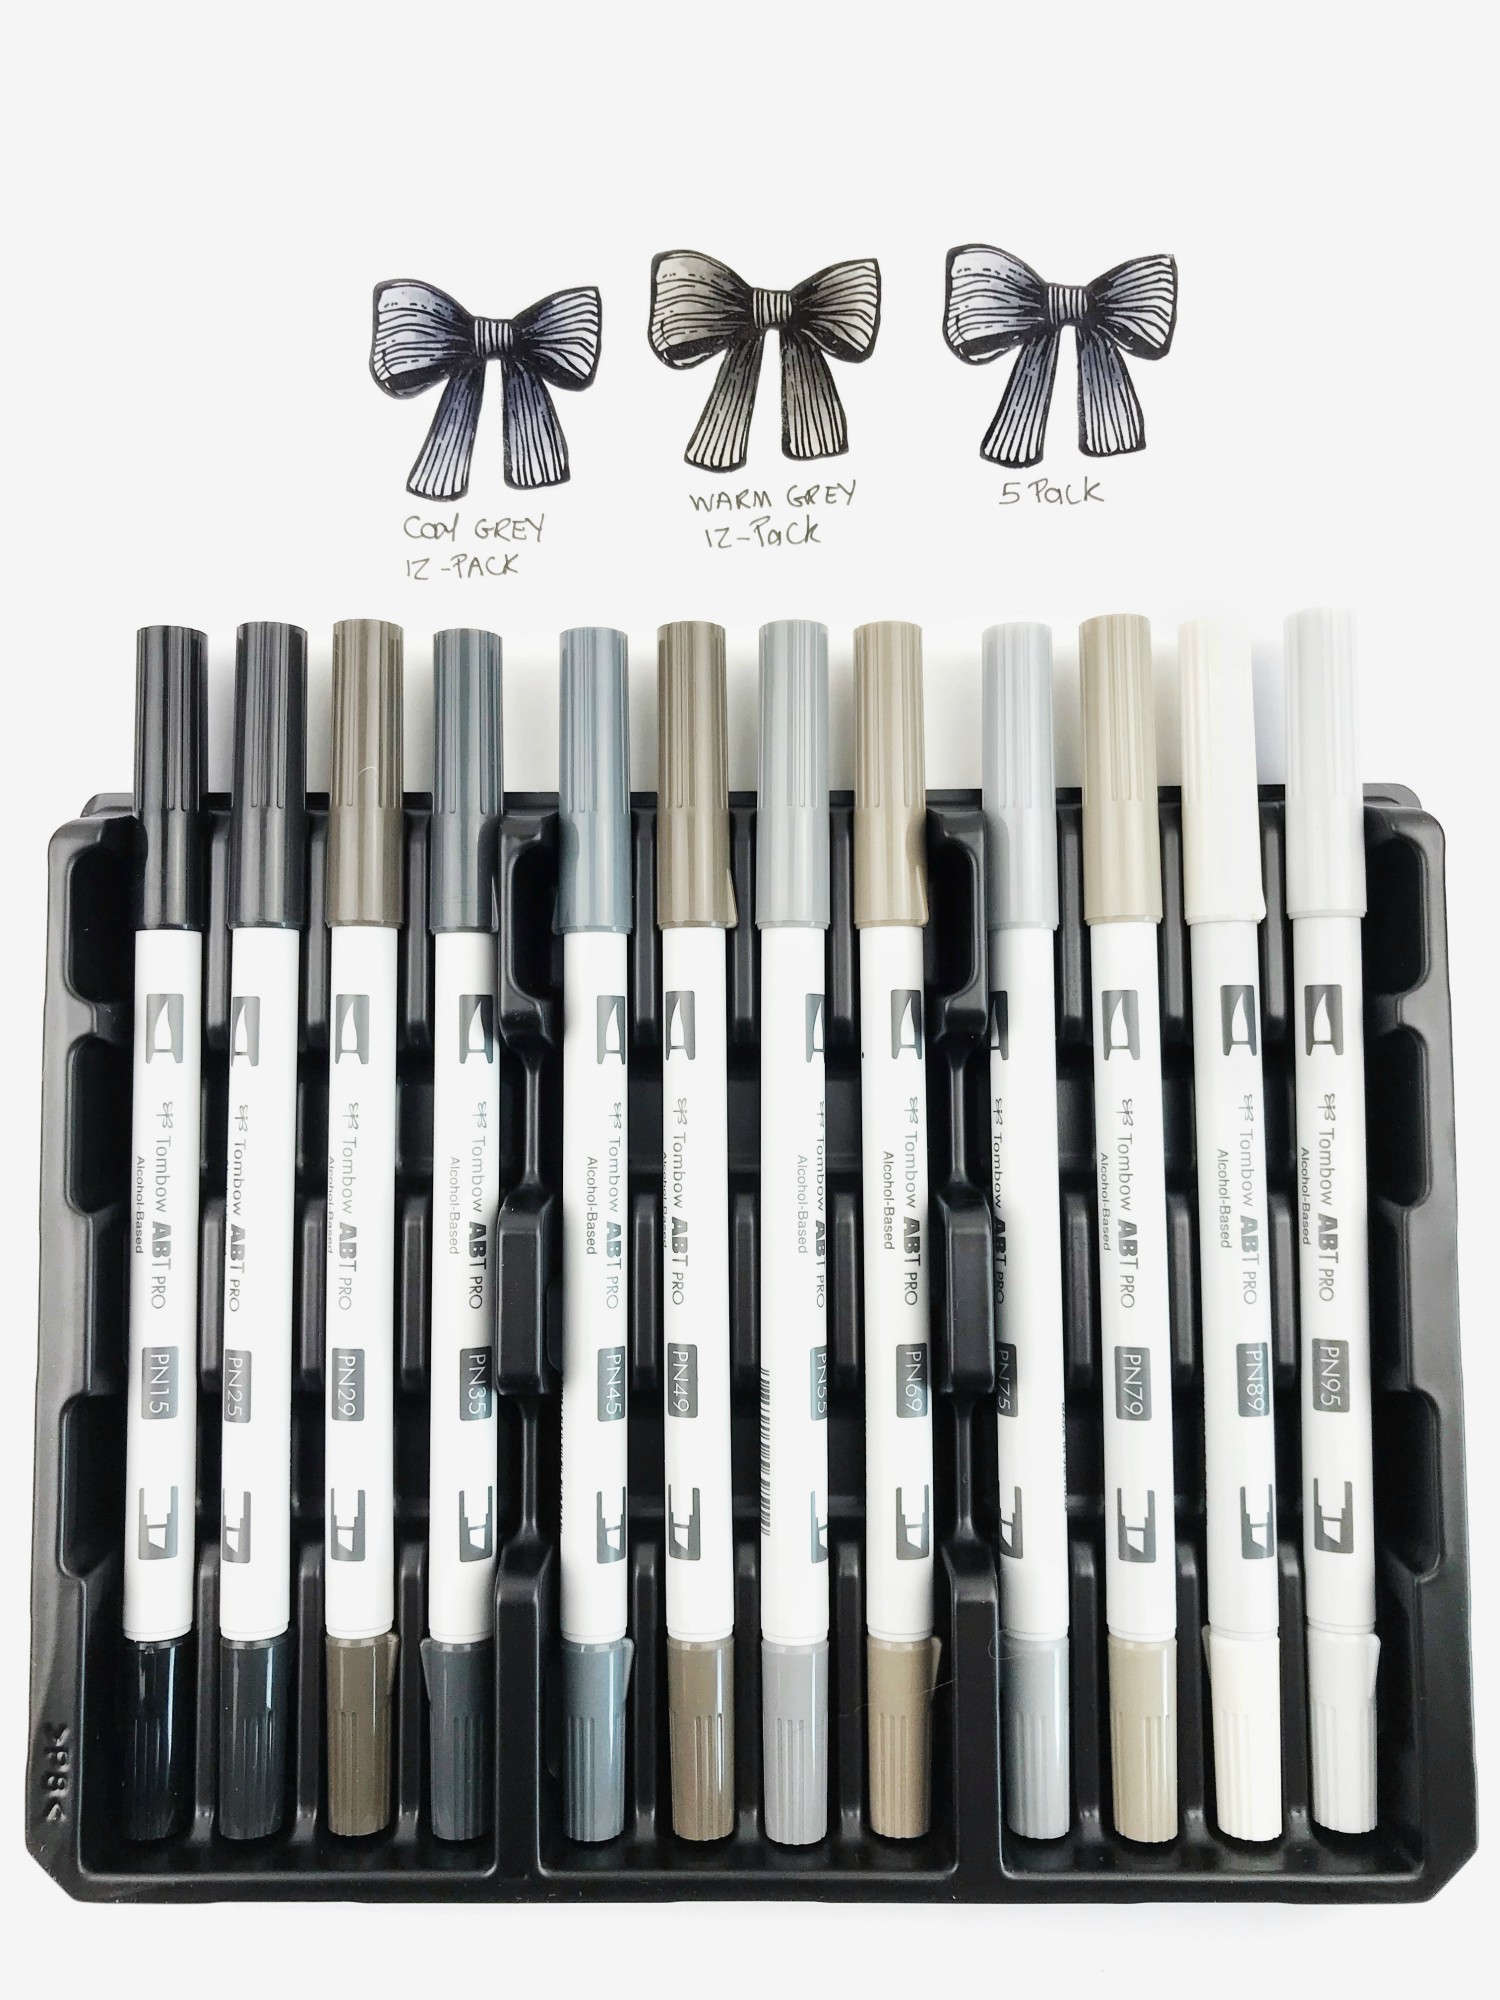
The ABT PRO Markers are permanent and alcohol-based with two tips: a brush and chisel tip. The 12-Pack of ABT PRO Markers come in a reusable and stackable tray.
The barrel is one of my favorite features because they are round and slender which provides a comfortable grip, allowing for long periods of coloring without cramping in your hands or fingers.
Lastly, the ABT PRO Markers are perfect for all artists, designers and crafters alike!
ABT PRO Marker- Gray Marker Packs:
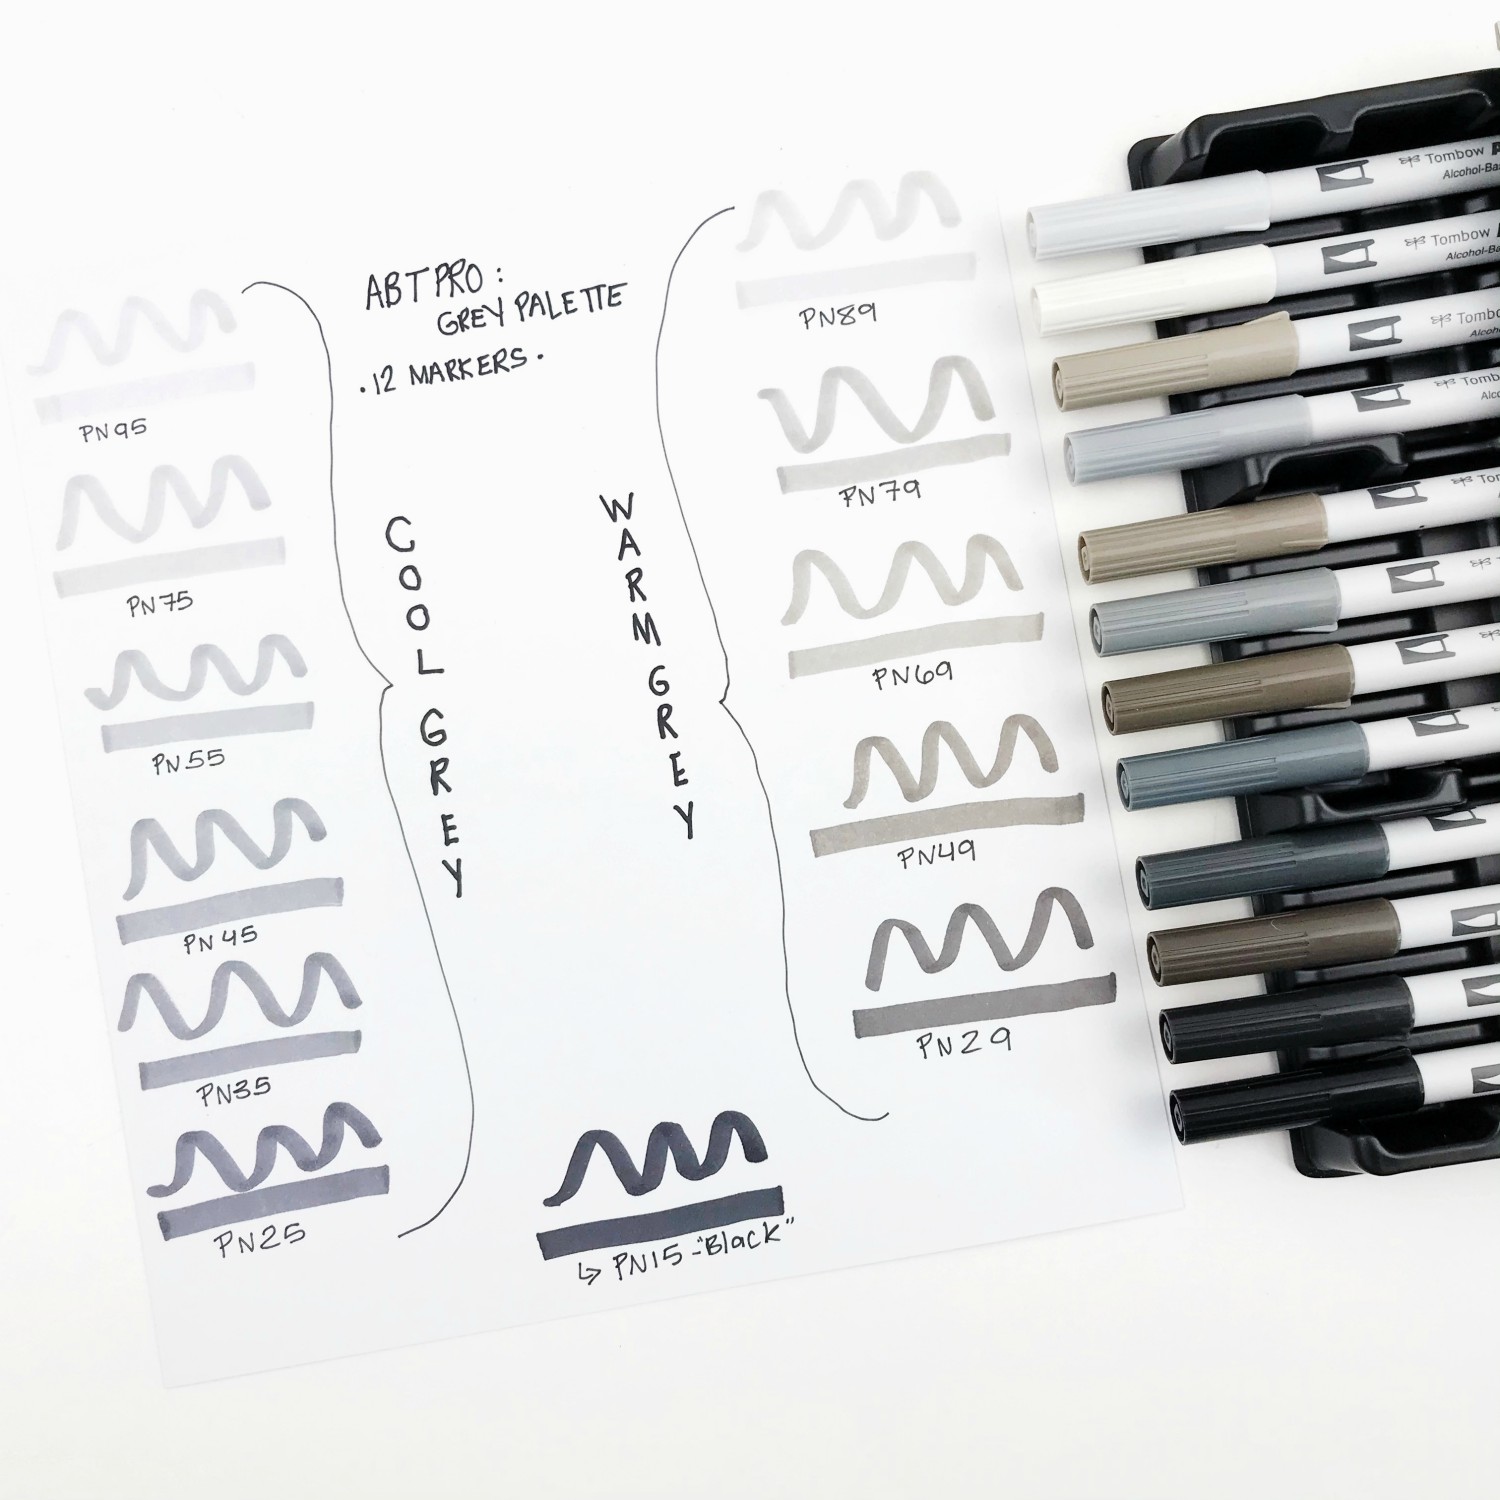
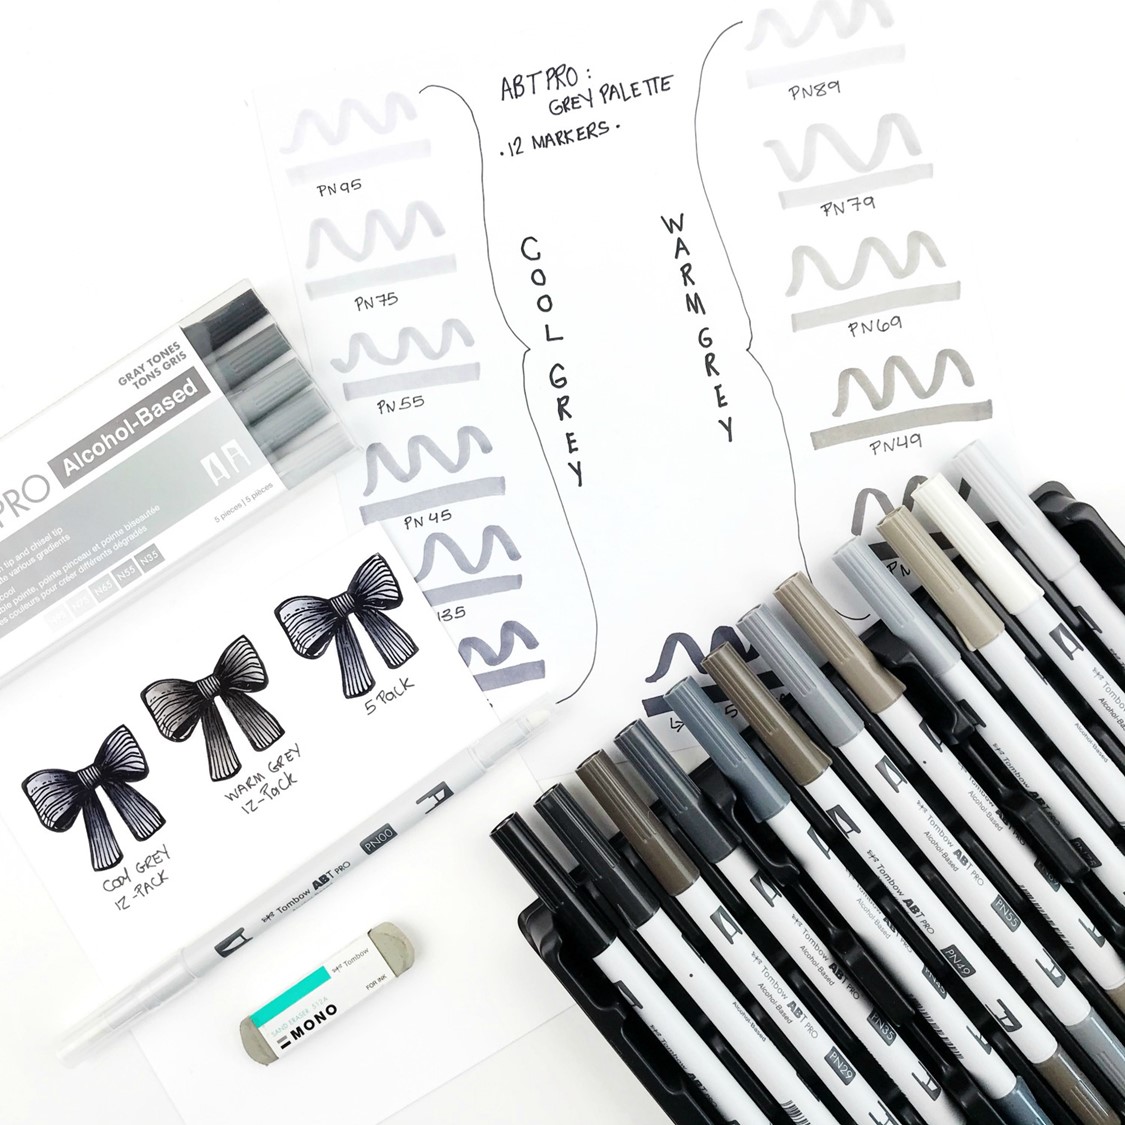
The ABT PRO Alcohol-Based Marker Gray Palette 12-Pack comes with cool gray and warm gray markers. Here’s a cool tip (pun intended) for distinguishing between cool and warm gray: the cool colors all end with the number 5 and the warm colors end with the number 9!
Also, the higher the number of each marker, the lighter the color.
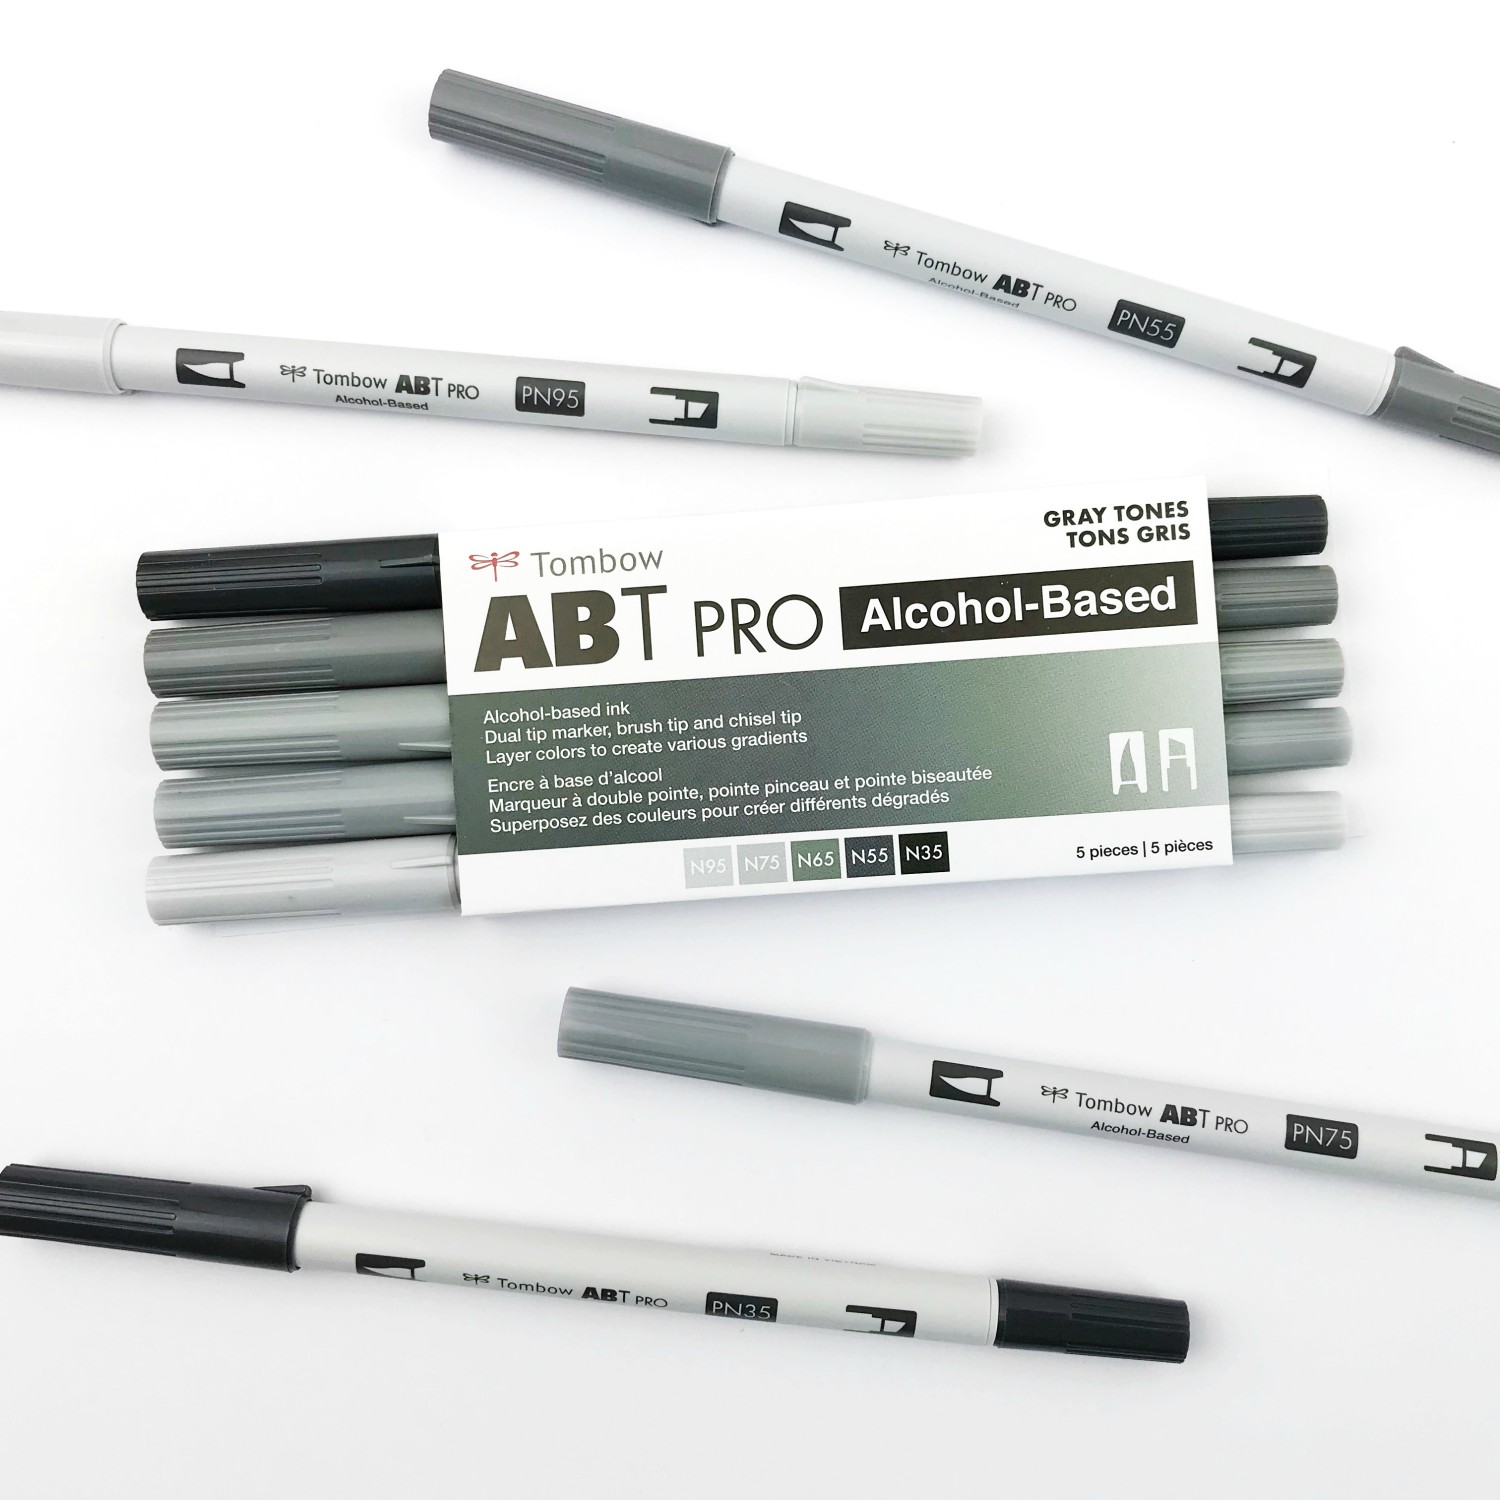
The ABT PRO Alcohol-Based Marker Gray Tones 5-Pack is the perfect way to get started, whether you are new to using the Tombow ABT PRO Markers or using alcohol markers in general.
The Gray Tones 5-Pack comes with a color that is not in the 12-Pack and that is PN65.
The 12-Pack of ABT PRO Markers comes with two more darker cool gray shades: PN25 and PN15. PN15 is essentially the black marker in the whole ABT PRO collection of markers.
If you are coloring or illustrating anything that is meant to be black, then this is the color palette needed. Gray tones help create layers which give your images more depth and dimension, versus simply coloring with a black marker and leaving your images flat.
Coloring Tips:
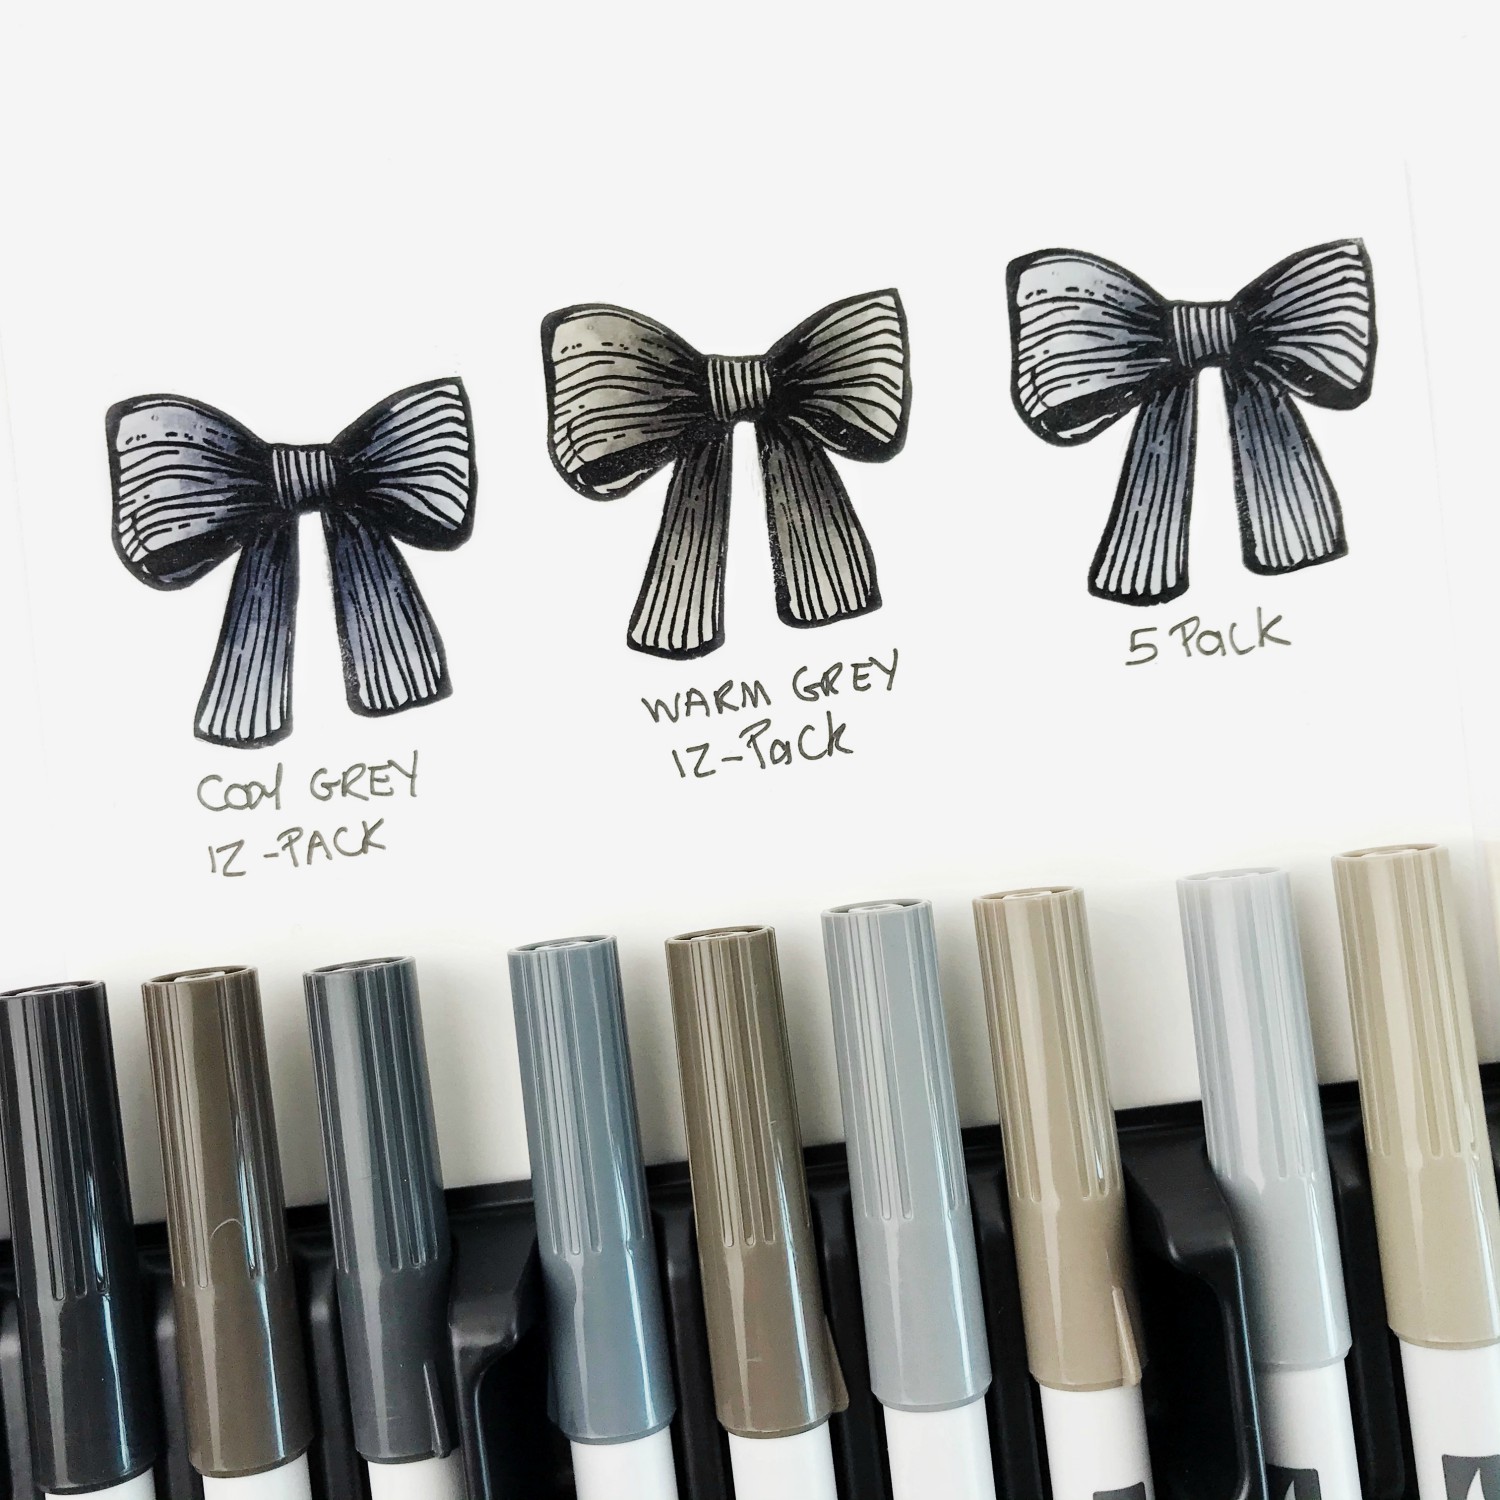
When coloring with alcohol markers, it is best to have a light hand and use a flickering motion.
I prefer to go from the lightest to the darkest color, as I have found it gives me the most control when coloring.
Begin with your lightest color, making sure not to saturate the full image in the light color. Also, leaving some white space creates a “highlight” when you are done blending all the colors together.
Then, go to your second lightest color. If you are using the cool grays from the ABT PRO Alcohol-Based Marker Gray Palette 12-Pack, that would be PN75. Continue to add the next color in the palette, until the darkest one. The idea is to add layers of color over each other. Essentially, this blends all the highlights and shadows created together.
When you are done blending with the last dark color, you then need to use the lightest color you began with and apply it over your full colored image. In order to create a smooth blend, make sure to cover all the dark shadows and the white space you left at the beginning.
Important Supplies:
PAPER: When using alcohol markers, the type and quality of paper is very important. The best paper I found to work with alcohol markers for stamped images is ultra smooth thick weighted white cardstock, usually 100-120lbs.
Essentially, the smoothness of the paper allows the colors to blend easily together. Alcohol markers tend to blend, this is why a thicker cardstock is preferred.
STAMPING INK: When coloring stamped images with the ABT PRO Markers, the type of stamping ink used is the second most important supply.
You need an ink that will not bleed when coloring. For example, dye ink, archival ink or hybrid ink. My absolute favorite that I have been using for years is the memento dye ink in tuxedo black. This ink dries fast and never bleeds when I color with my ABT PRO Markers.
EXTRAS: I recommend the Tombow MONO Sand Eraser and the Colorless Blender Pen.
The MONO Sand Eraser is one of my not so secret supplies because I just love talking about it! The MONO Sand Eraser is a grit eraser which helps remove colored pencil and ink marks. For example, it removes ballpoint, rollerball and some markers. I use it to remove smudges or ink mistakes when stamping with my dye ink.
Lastly, the Colorless Blender Pen has colorless ink which is perfect for smoothing out color fields and creating gradations.
It’s also perfect for when some color bleeds over the stamped lines. Simply use the Colorless Blender to gently “push” the color back into the stamped image.
A white gel pen is also handy to have around to add highlights and to also help cover ink mistakes.
I hope you enjoyed this look at the ABT PRO Alcohol-Based Markers. I would to see how you use the. Make sure to tag @serenabeecreative and @tombowusa!
For more ABT PRO Marker projects, check out the following posts:
If you’d like to see more from me, check out my Youtube channel or join my Crafty Rebelles Community!
Much love,
Serena Bee
I am thrilled to have discovered this helpful website. It provides me with a great deal of interesting information about everything, notably the content of the preceding article.
Thanks for the useful information from your article