Summer crafts are some of my favorite crafts to make. Probably because it means I get to stay out of the heat and craft in my cool craft room. Did you know that crafting with Tombow supplies is super easy? Let me show you how to make this watercolor popsicle banner with some of my favorite Tombow USA products. 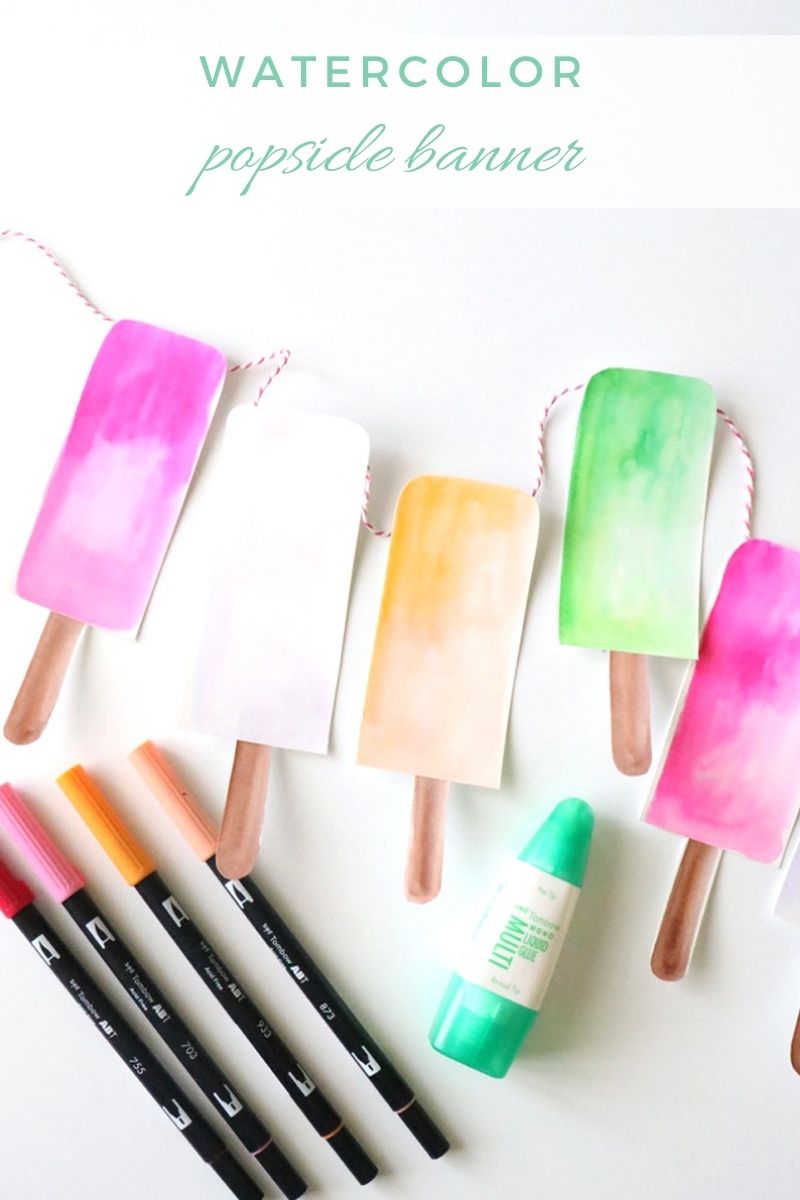
To make a DIY Popsicle Banner You Will Need:
- Watercolor Paper
- Scissors
- Twine
- Tombow Dual Brush Pens
- Tombow Water Brush
- Tombow MONO Multi Liquid Glue

I recommend using watercolor paper for this project. Especially, if you are going to be doing the watercolor effect with the Tombow Dual Brush Pens and Water Brush. It will hold the water better when it comes to making the popsicles.

Add some color to your watercolor paper. I used two different shades of similar colors and added color in different ways to hopefully add some variation to my popsicles.

Use the Water Brush to add water to the colors and spread the color around. Mix the two shades together to get a watercolor look for your popsicles. I wanted a more boxy style popsicle, so I tried to stay with a rectangular shape.

When you are all done blending your colors for your popsicles, you will have something that looks like this. Don’t forget to make a couple popsicle sticks as well. I probably should’ve used a darker purple for my purple popsicles, but we are going to go with it.
How to Make a Popsicle Banner
The first thing you are going to do is cut out all your pieces. I cut out all my popsicles in a rectangle and then rounded the top corners to make them look more like popsicles. Then, cut out the popsicle sticks with a rounded bottom. Add a bit of the MONO Multi Liquid to the top of the popsicle sticks and attach them to the back of the popsicles.

Once all the popsicle sticks are attached to the popsicles, turn them over and add a line of the MONO Multi Liquid Glue along the tops of the popsicles. Place the twine across the glue and gently press down. Make sure to have an even amount of space between the popsicles.

Let the glue dry for a bit and then your watercolor popsicle banner is ready for hanging!

This project can be adjusted to fit your style in so many ways. Choose the colors that you love to make your popsicles. Shape the popsicles in your favorite popsicle shape. Make the popsicles bigger or smaller. Can you imagine a mini popsicle banner? That would be so cute!
Happy crafting!
Liz
Pingback: How to Get a Watercolor Effect with Dual Brush Pens - Tombow USA Blog