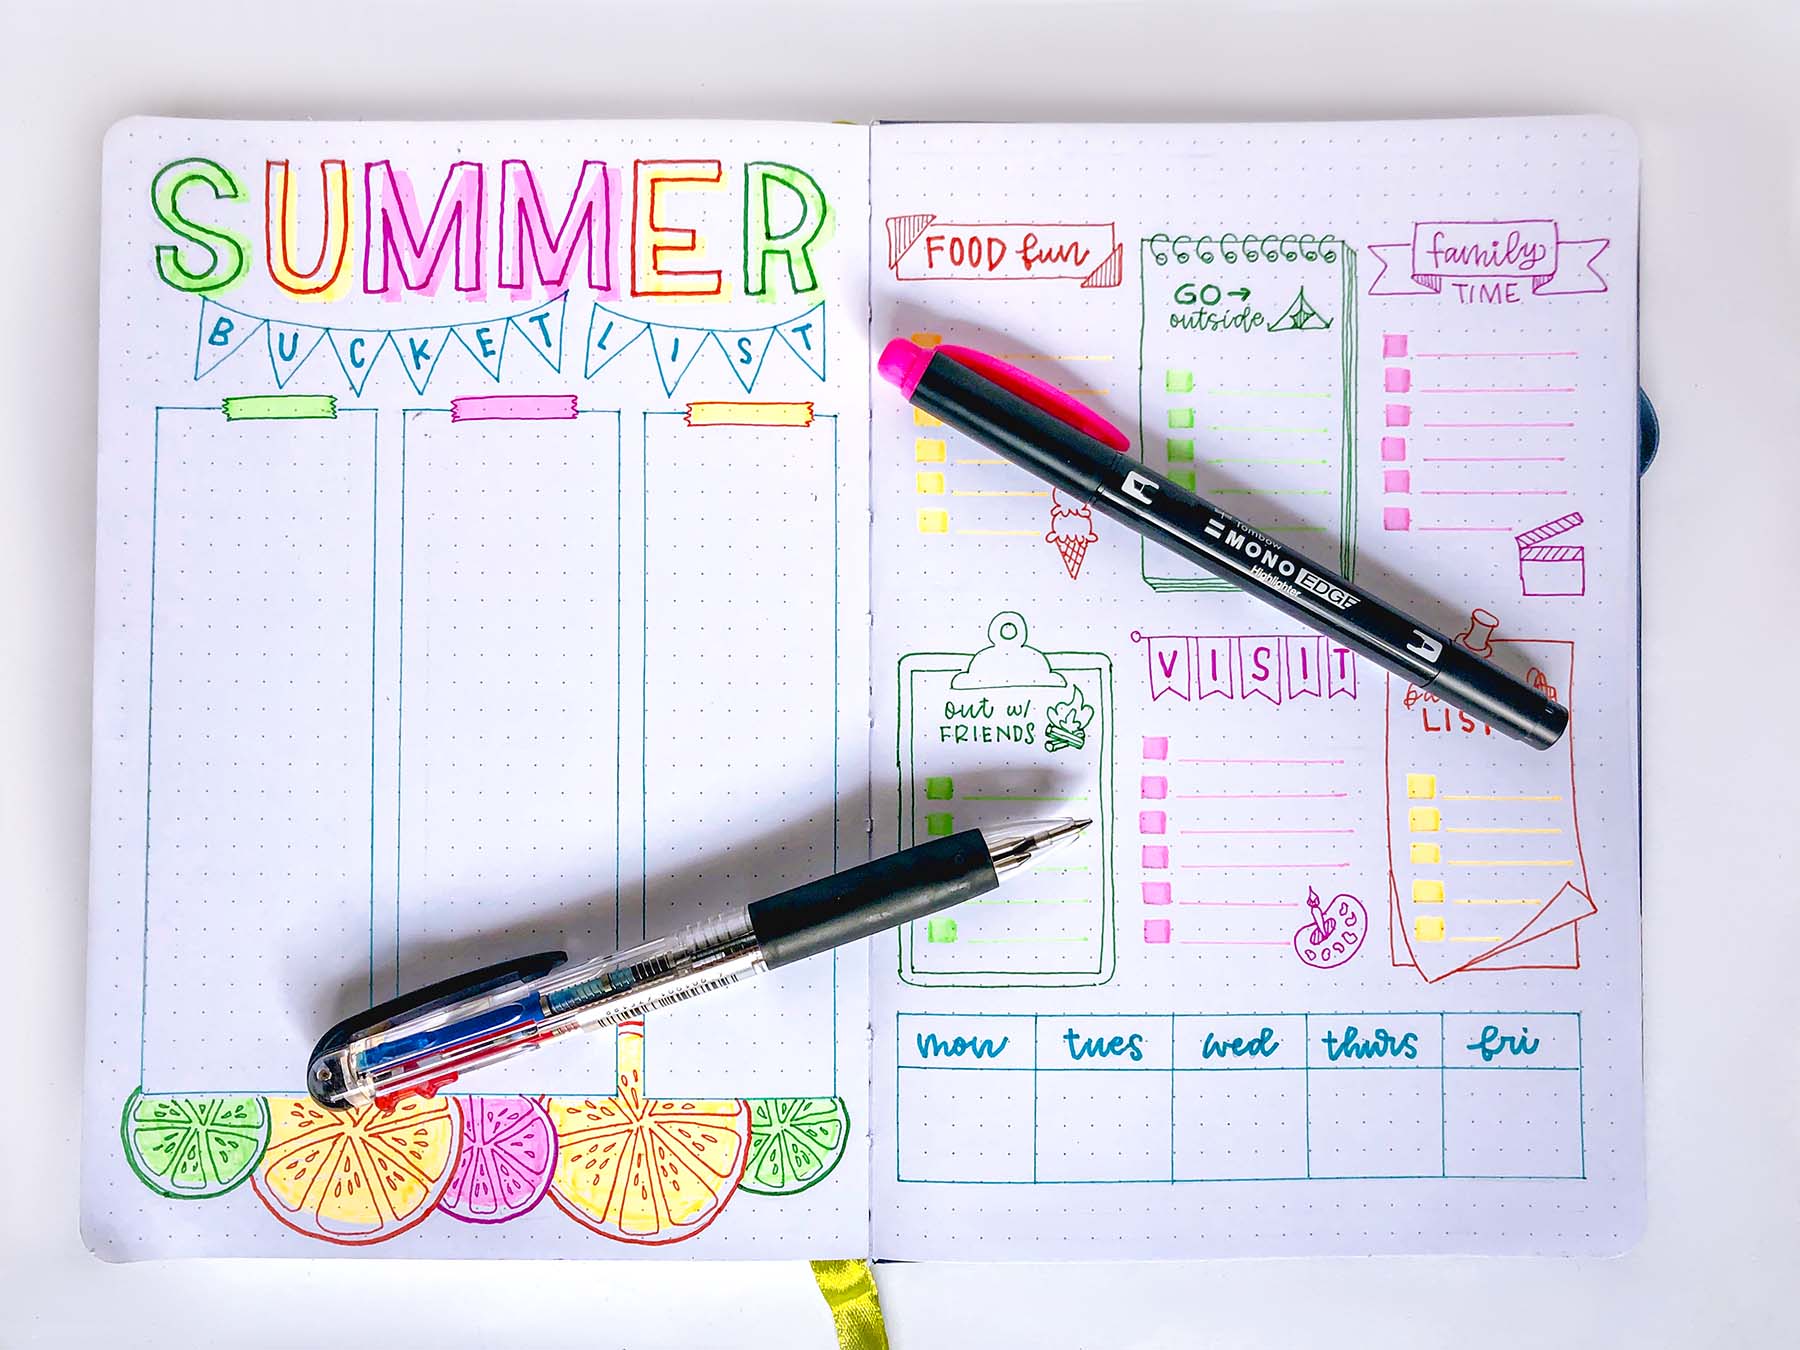
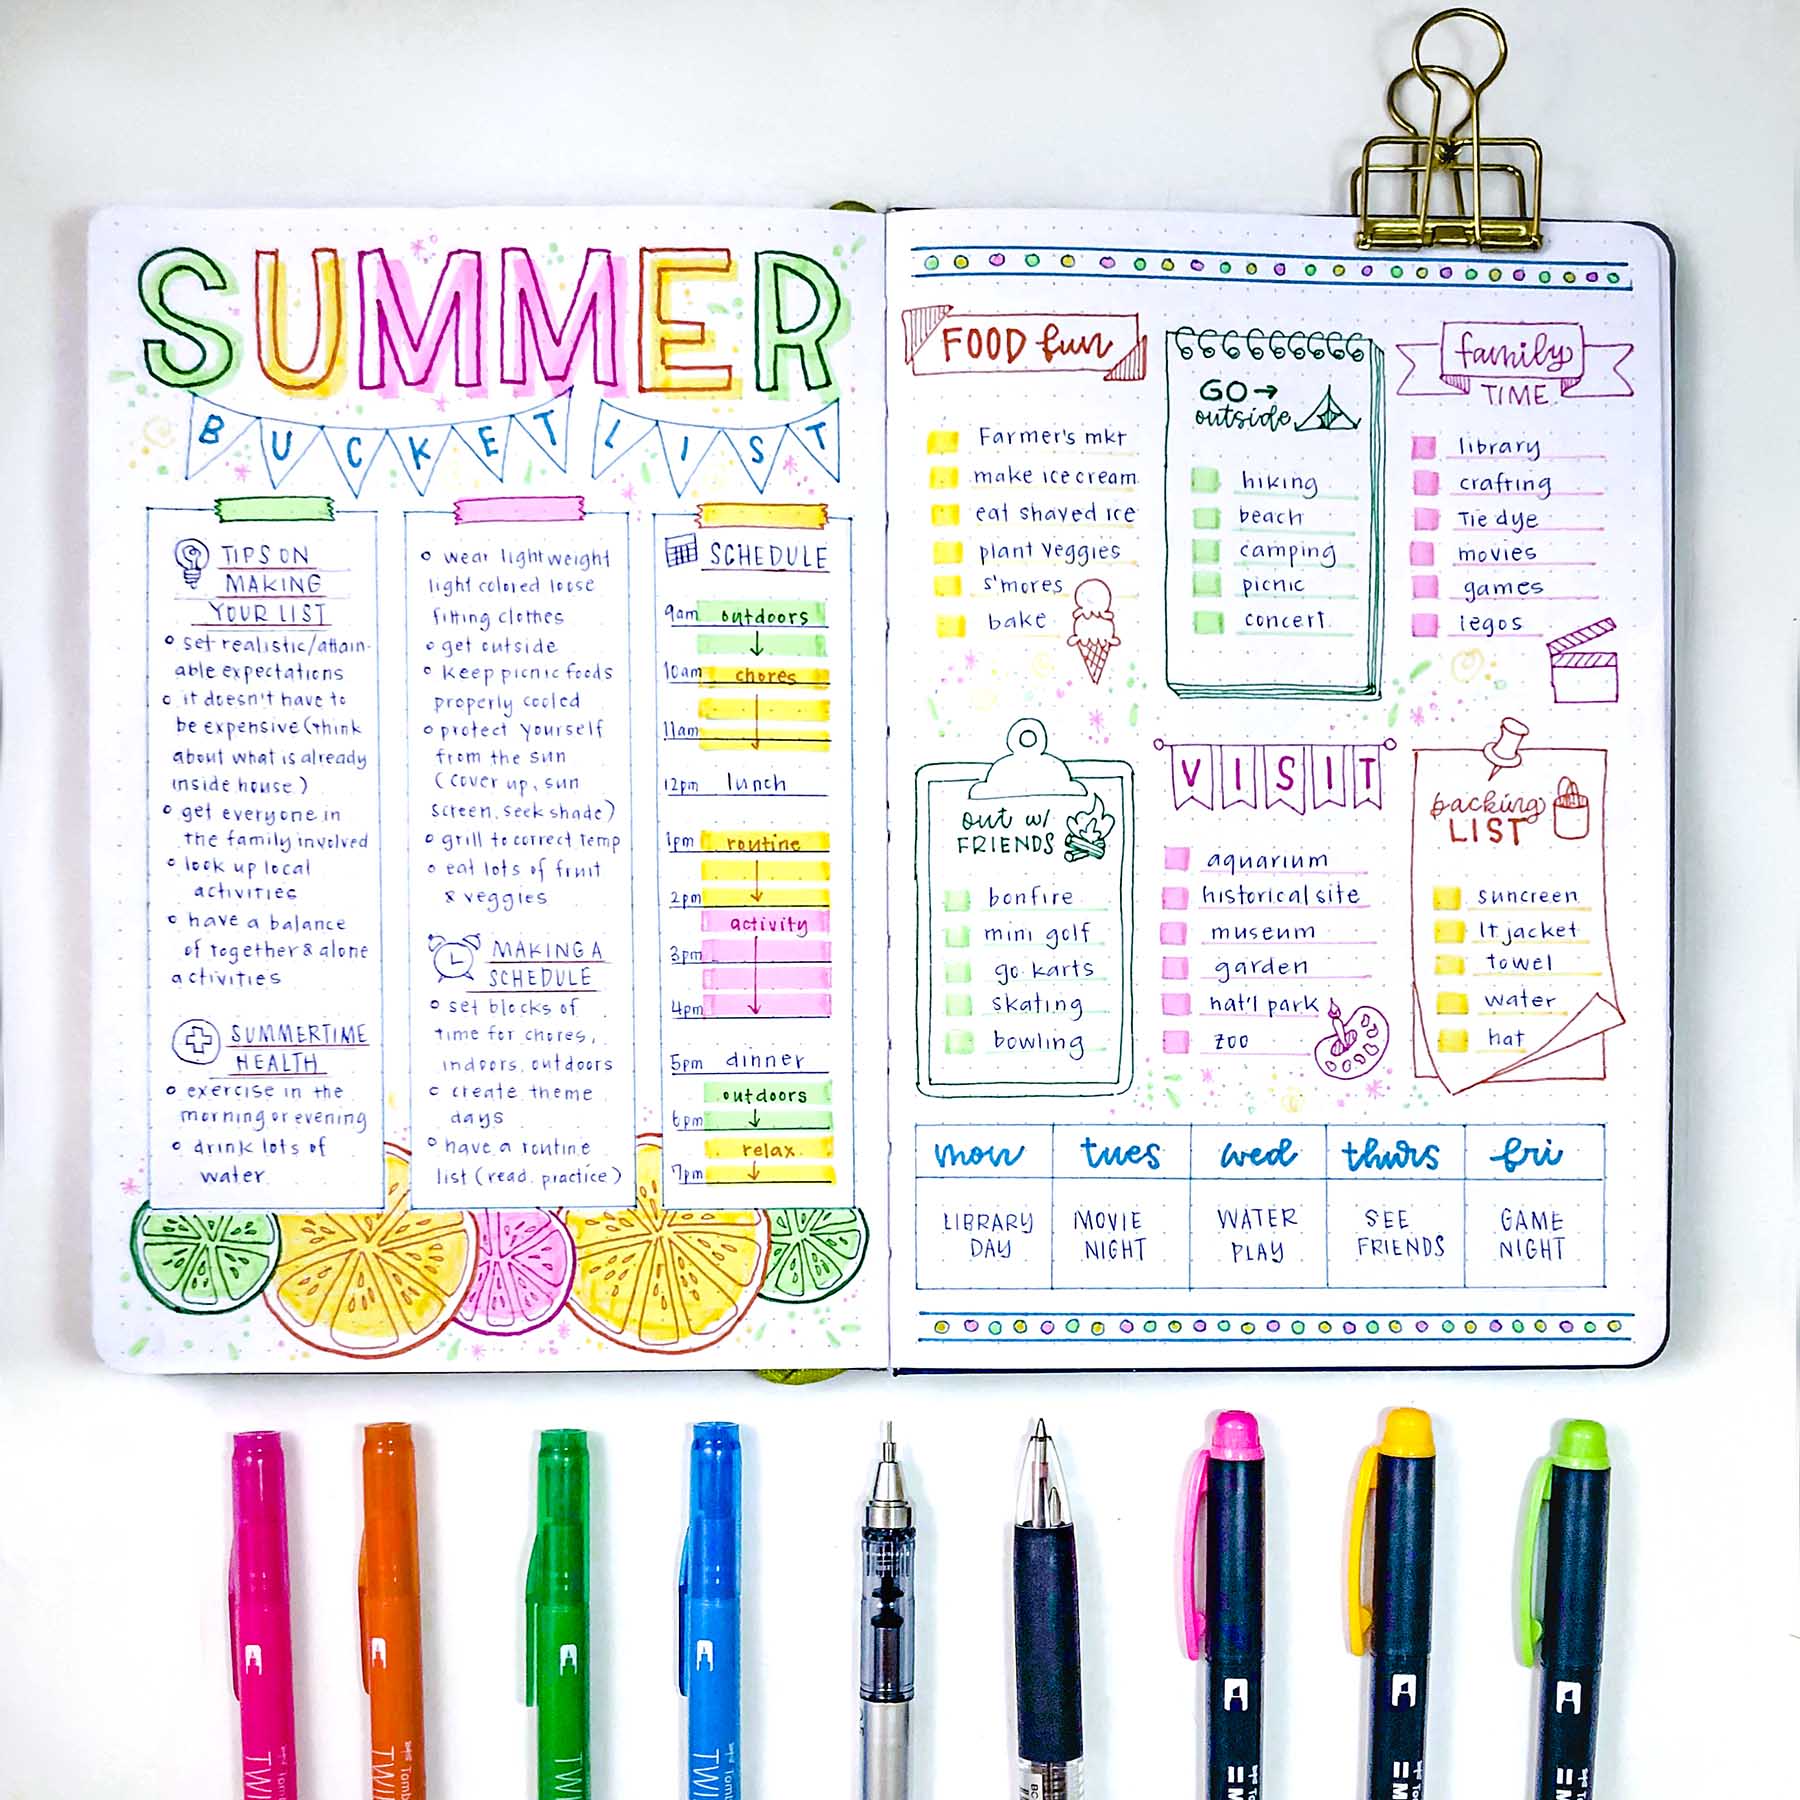
Hello! This is Makiko from Maki.Creates. Summer is here, and what better way to make the most of it than by creating a summer bucket list. I’m going to show you how you can make a two-page layout in your planner or notebook using the Tombow Creative Notetaking Kit.

Supplies:
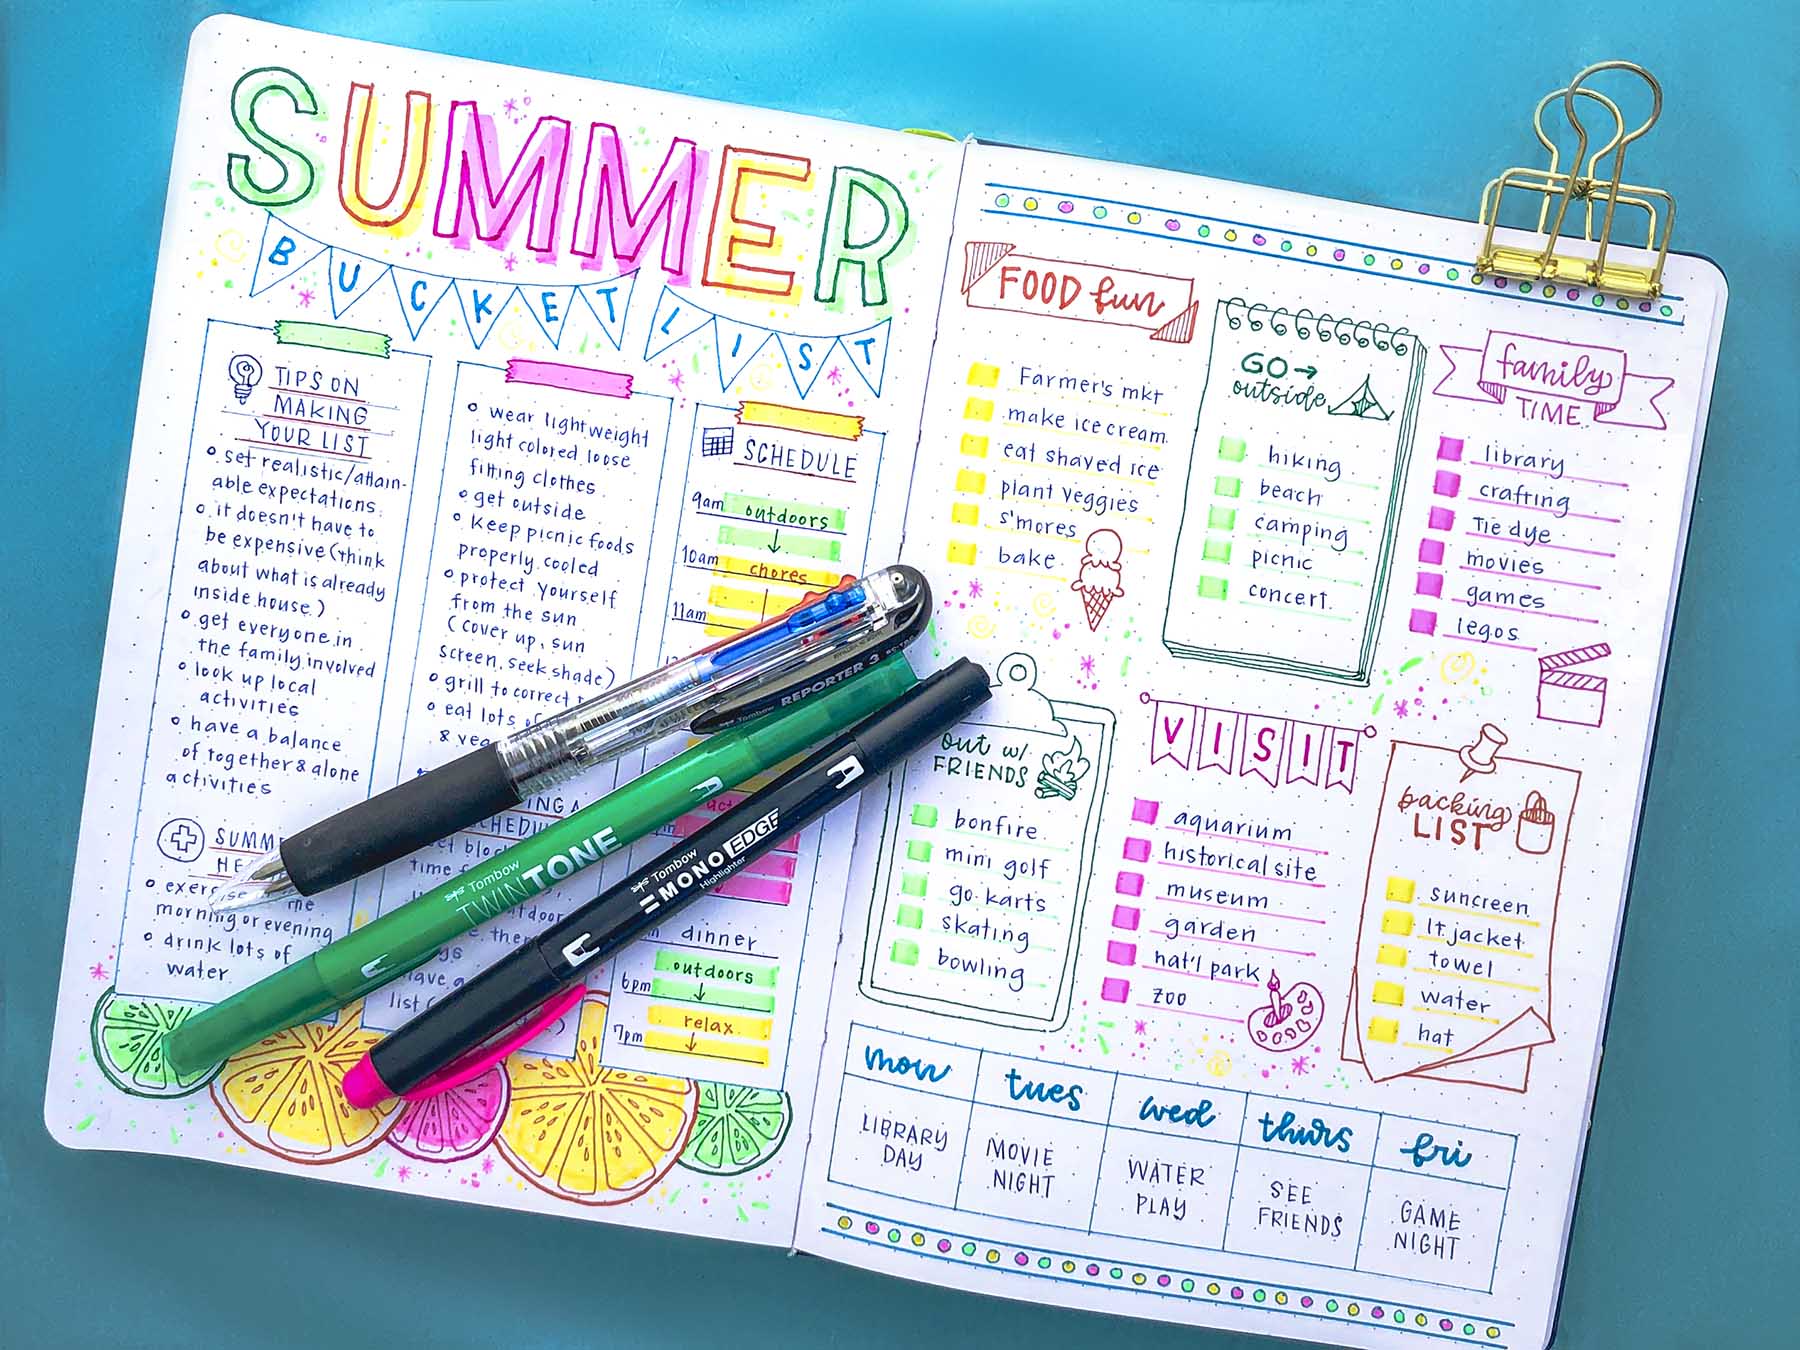
- Tombow TwinTone Markers in Cherry Pink, Carrot Orange, Green and Turquoise Blue
- Tombow MONO Edge Highlighters in Golden Yellow, Pink and Yellow Green
- Tombow MONO Graph Mechanical Pencil, Silver
- Tombow Reporter Ballpoint Pen, Clear
- Ruler
- A5 dot grid notebook
- Roll of washi tape
Step 1:
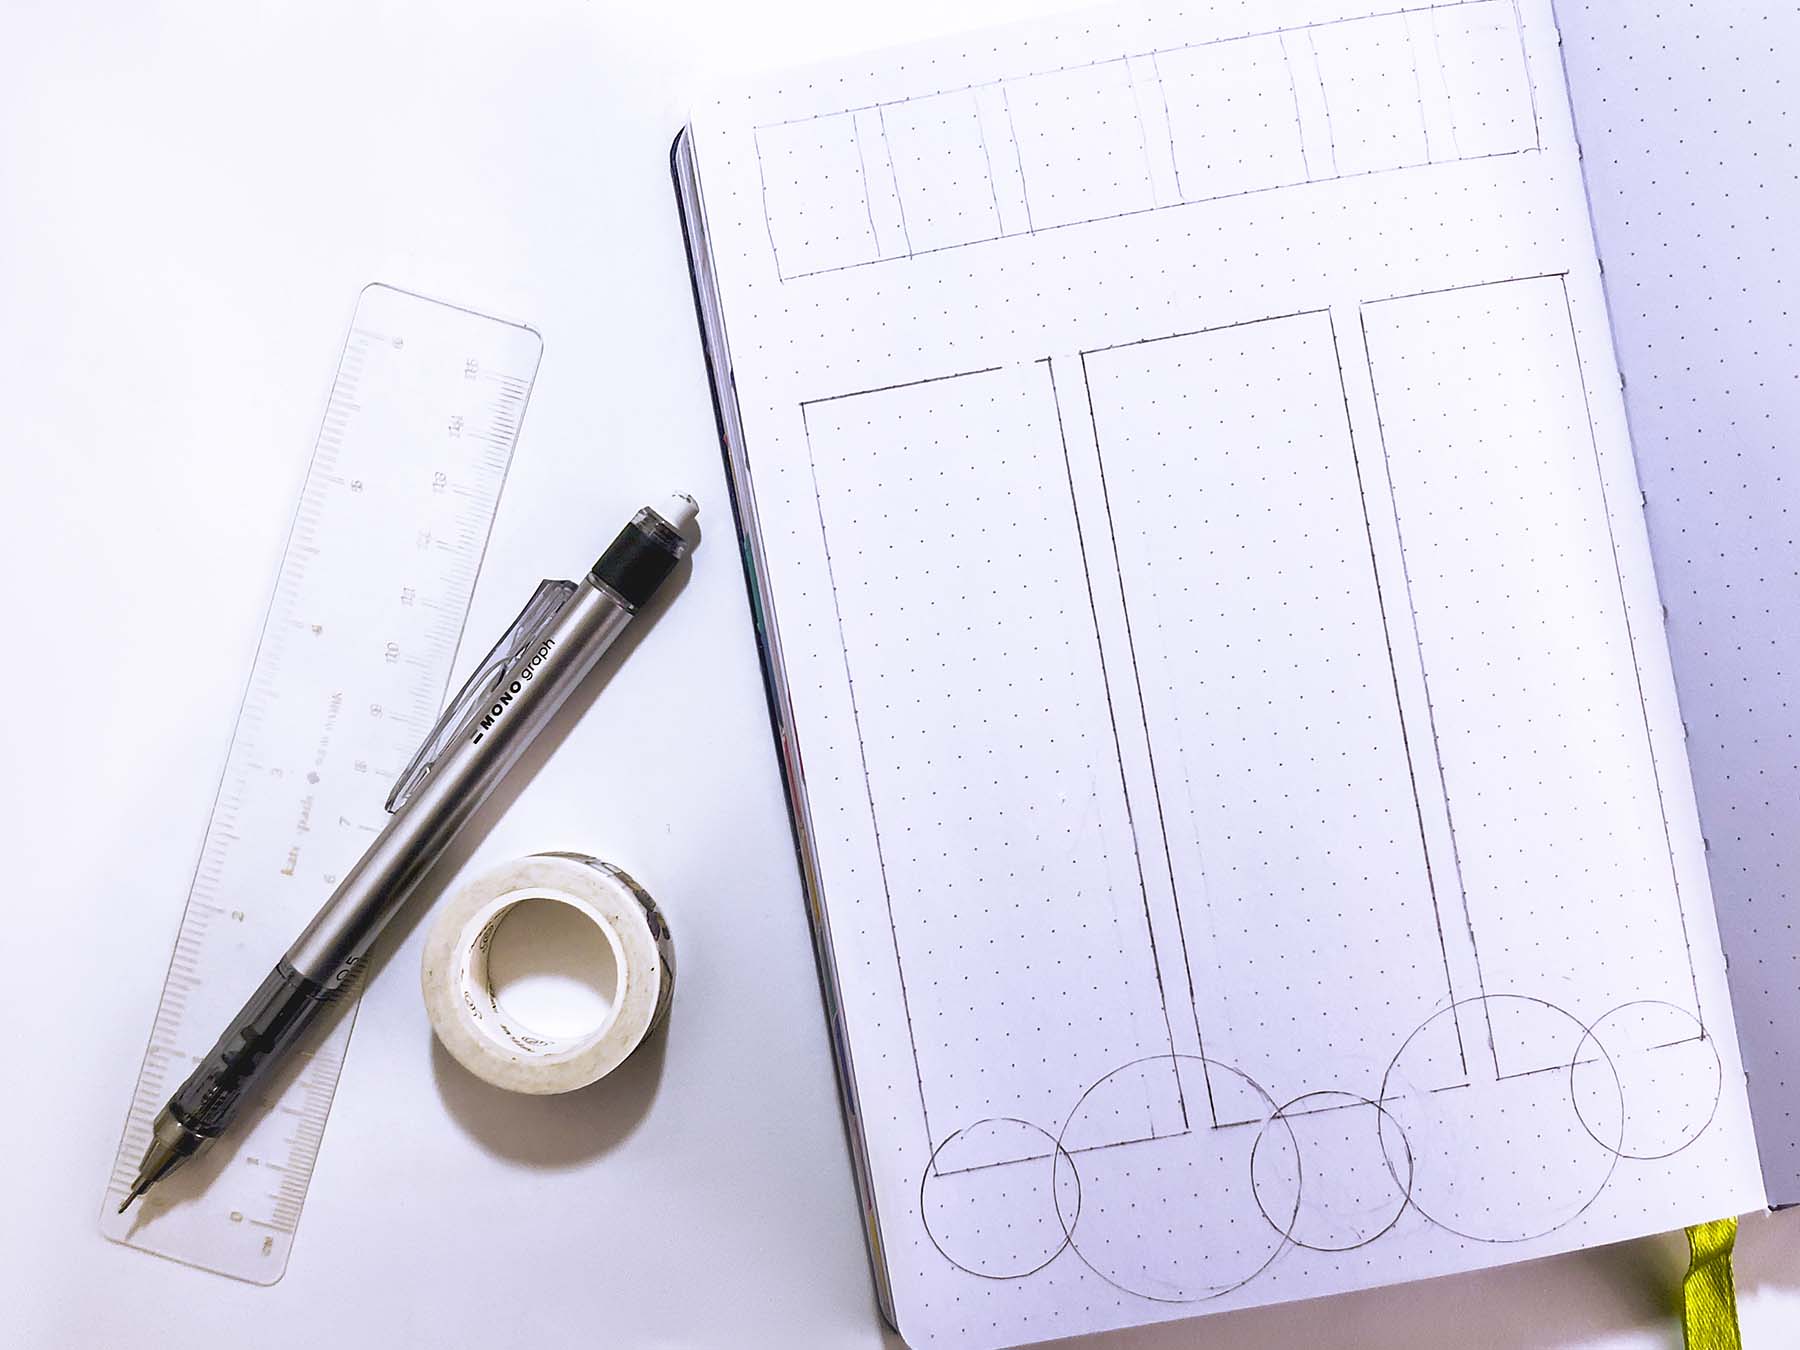
The left-hand page will include the title, some space for taking notes, and some fun doodles. I used the MONO Graph Mechanical Pencil to draw a horizontal line with ten space widths from the top and another horizontal line with five space widths from the bottom. These areas will be used for the title and doodles. Now, we’ll split the remaining middle section into three columns. There are 26 dots horizontally in my journal, so I made my column widths 8, 8, and 7, with one space in between the columns. In the title space, I made box guidelines for the word “summer”. My boxes are five spaces high and three wide. The “Ms” are a little wider at four spaces. On the bottom, I used my washi tape as a stencil to create big circles (use the outside of the washi tape roll) and small circles (use the inside of the washi tape roll) to create some overlapping circles. These will eventually become fruit slices.
Step 2:
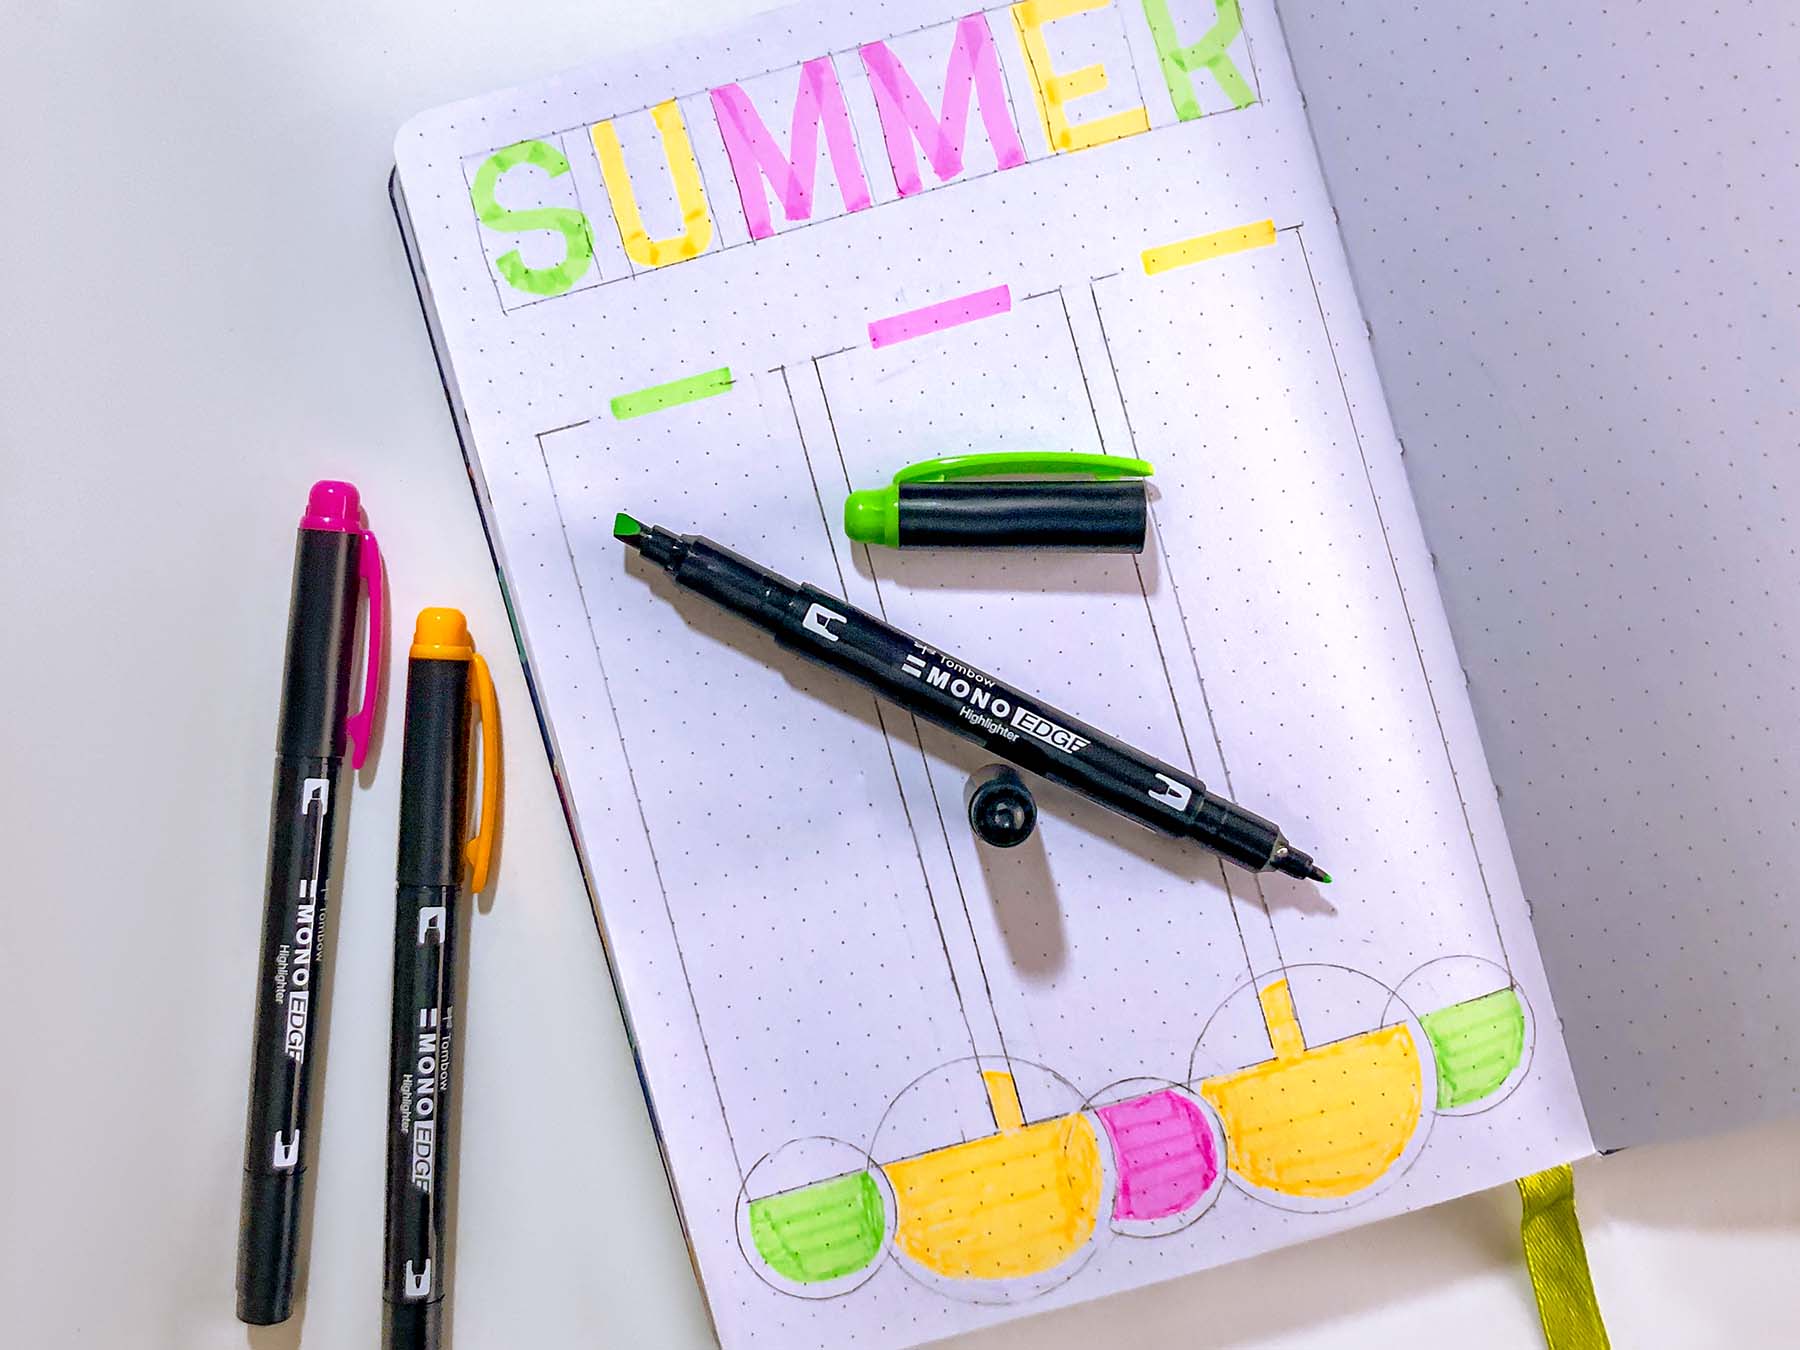
Use the chisel tip end of the MONO Edge Highlighter to write the word “summer” in your boxed guidelines. Color the insides of your circles, but be careful not to color inside your notes columns. Remember to leave a little bit of white on the edge of your fruit circles for the rind. (I used the chisel tip to color in the big areas and the extra-fine bullet tip to color closer to the edges). I also added three horizontal lines using the chisel tip at the top of my columns to mimic pieces of tape.
Step 3:
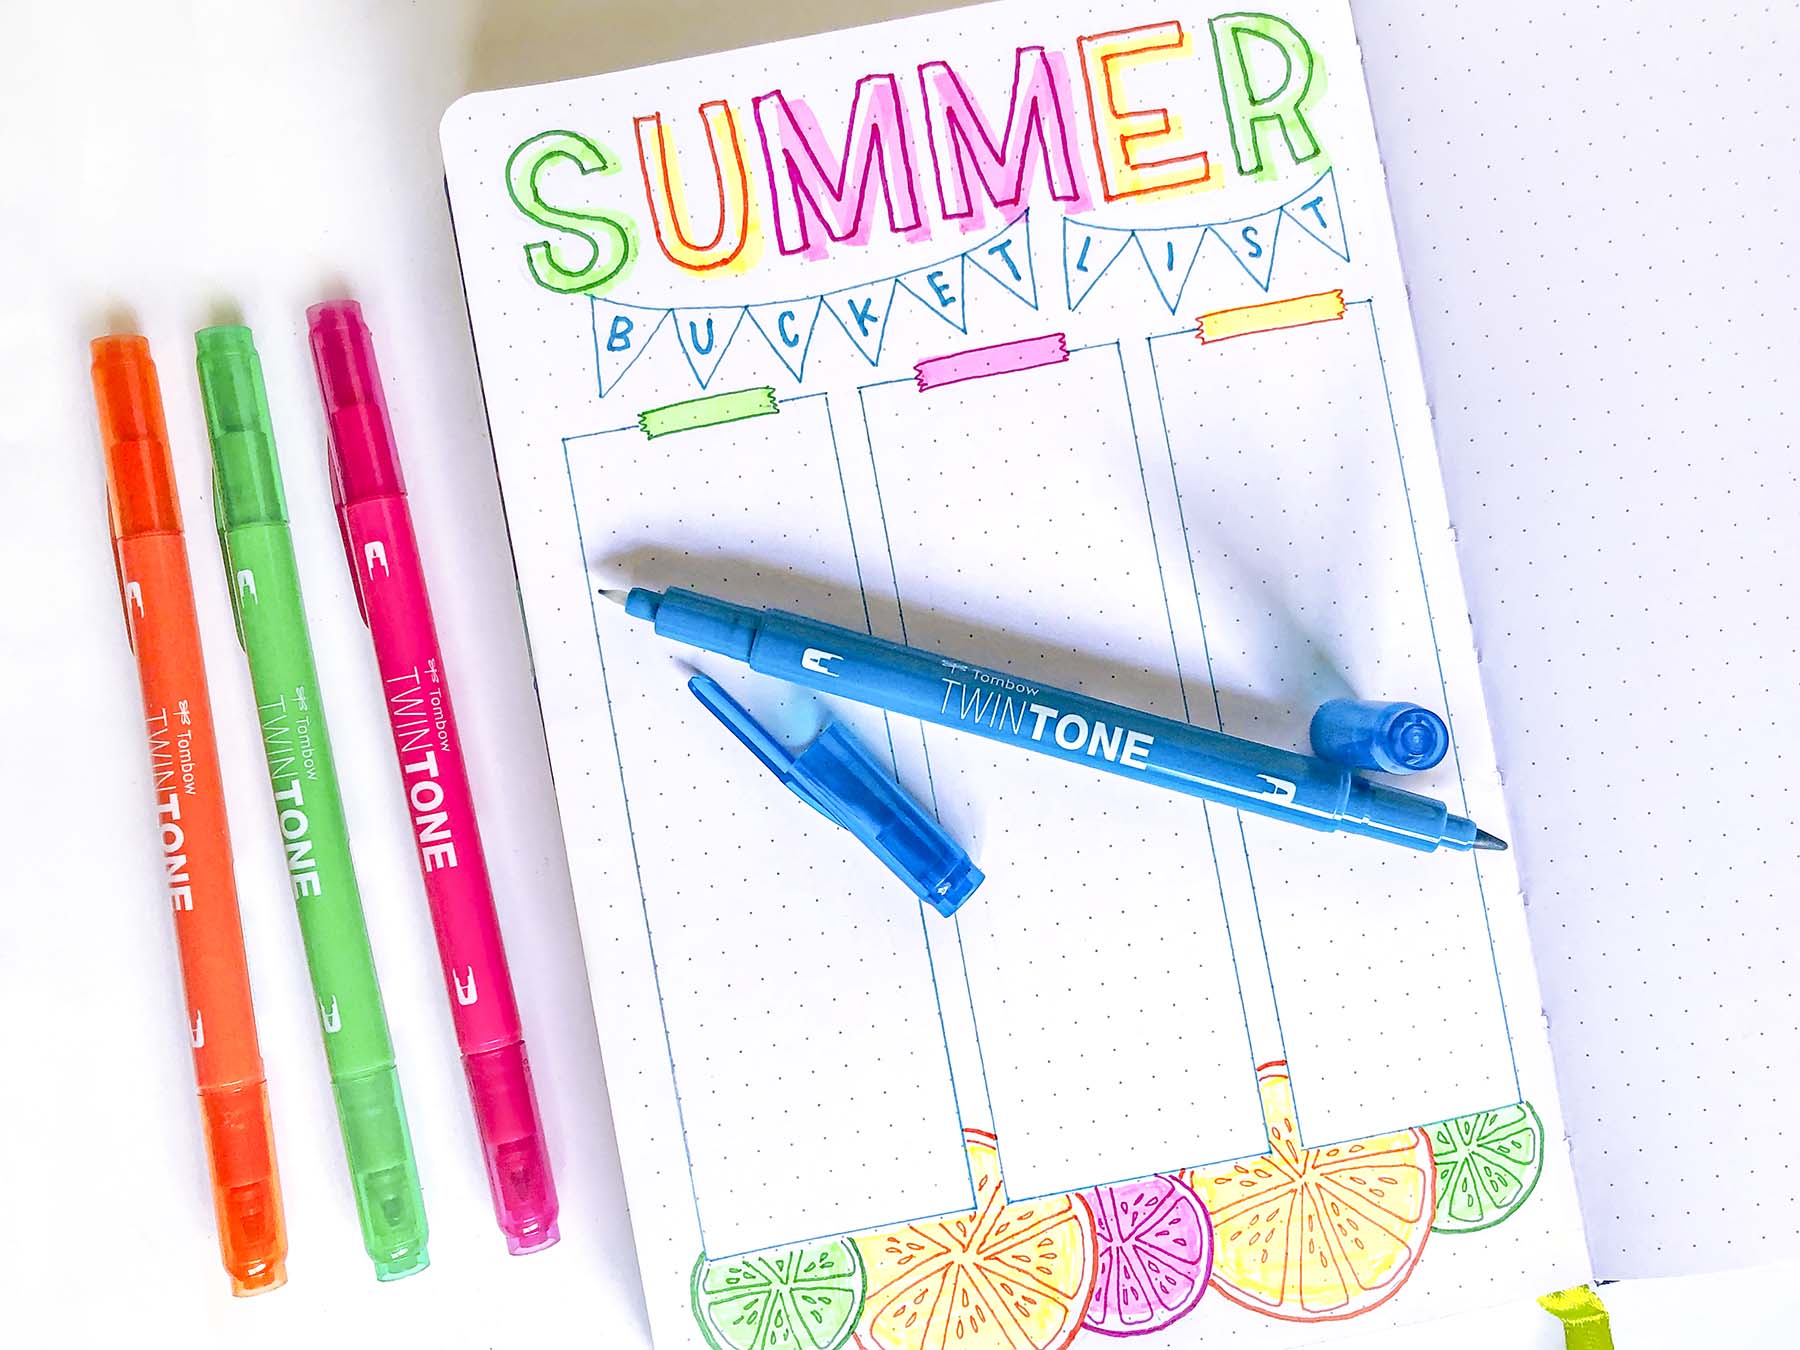
Use your Twin Tone Markers to add outlines and details. I like to offset the letter outlines slightly to the top and to the left to create a fun lettering effect. Don’t worry about the fruit segments being perfect — they never are in real life either!
Step 4:
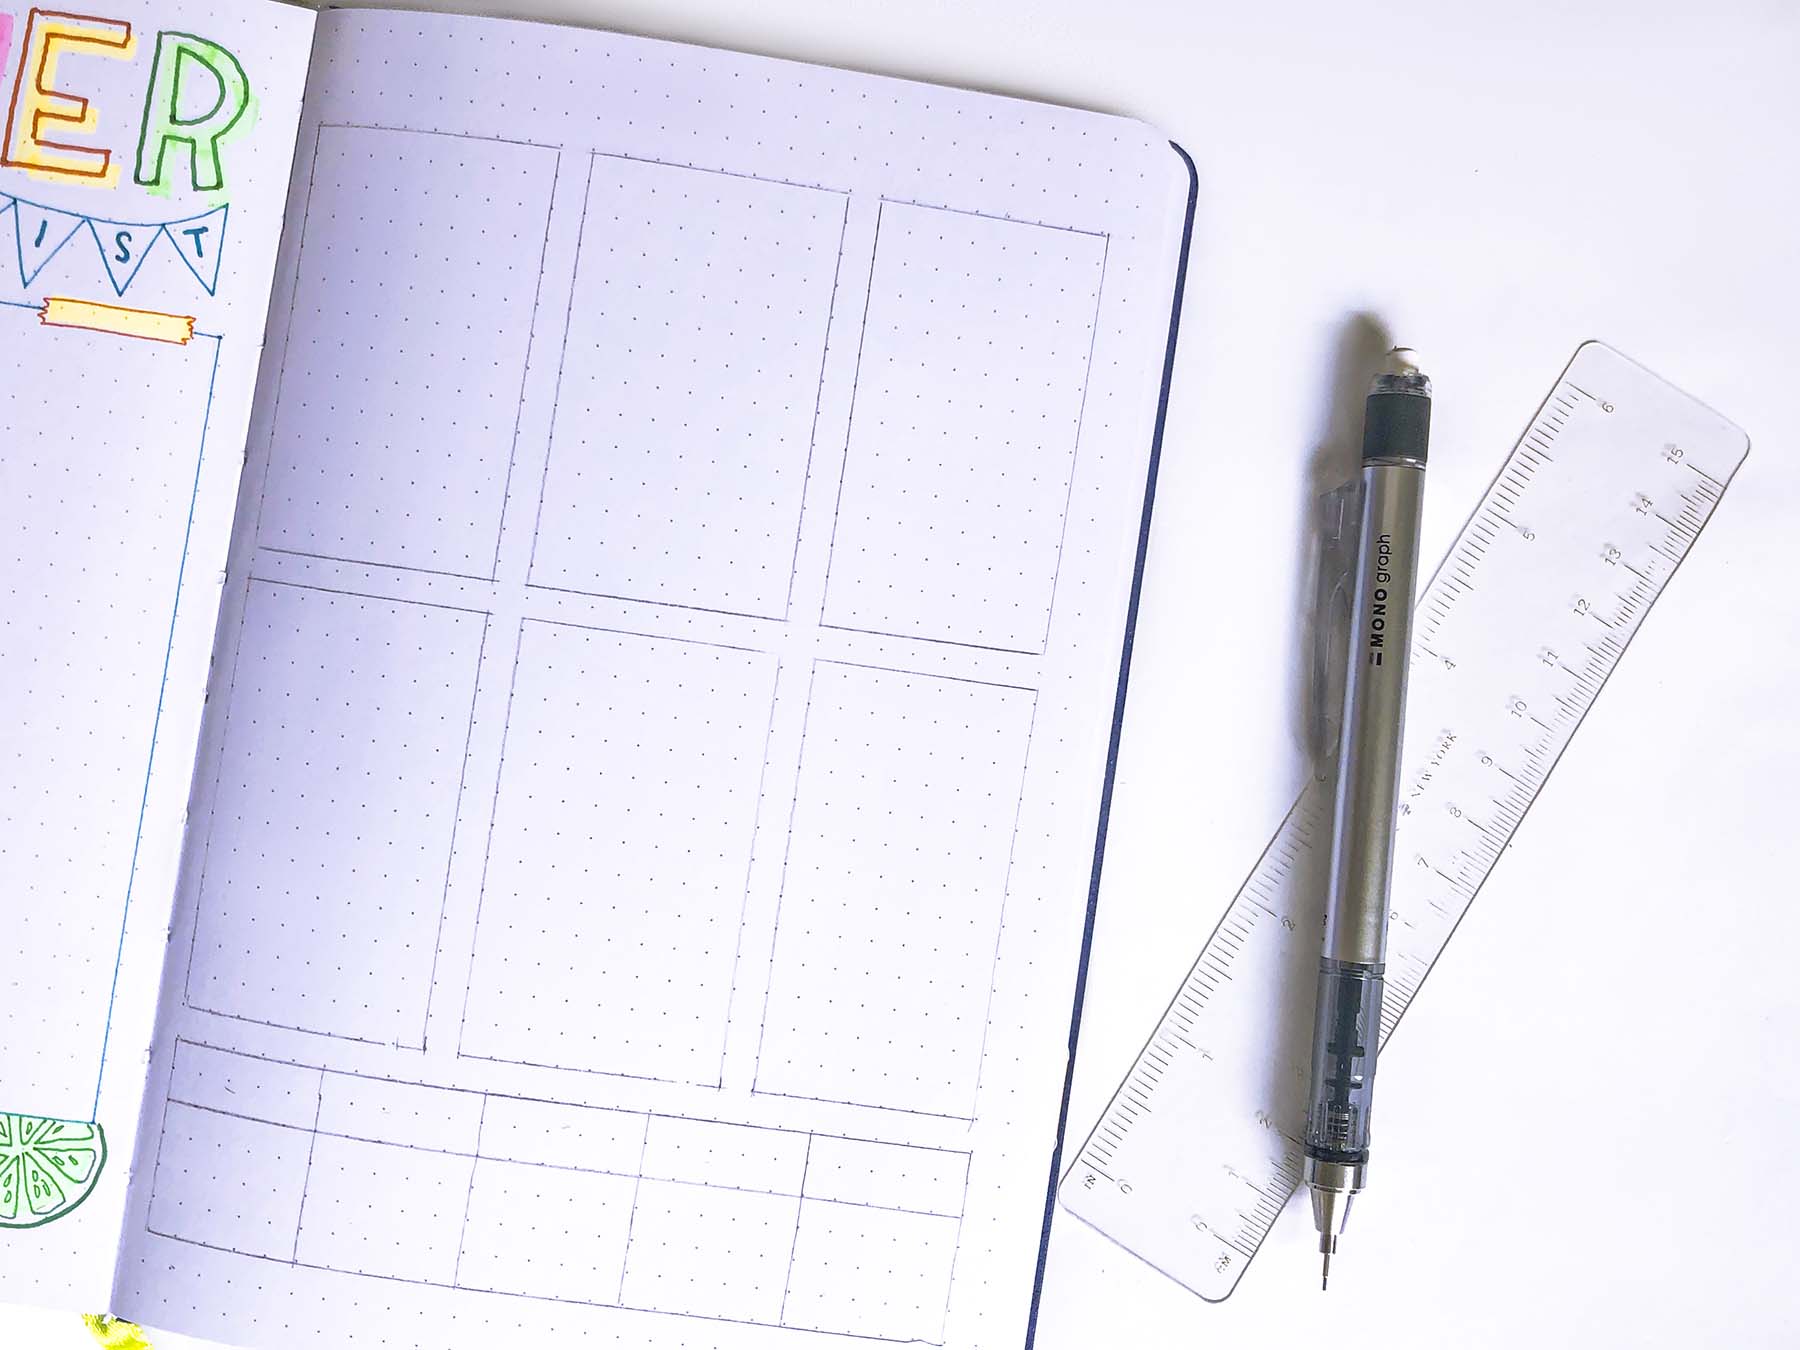
Next, we will use the MONO Graph Mechanical Pencil to draw the grid lines on the right-hand page. At the bottom, we are creating a five-day weekly schedule. Each day is five spaces wide and six spaces high. (two spaces for the day of the week and four spaces for the daily theme.) The rest of the page will be used to make six spaces for lists. Just like we did for the left-hand page, I created three columns of 8, 8, and 7 spaces wide with spaces in between. I drew the bottom horizontal line one space above my weekly calendar and the horizontal line for the top about three spaces from the top of the page. I then split each of the columns into two smaller columns with space in between.
Step 5:
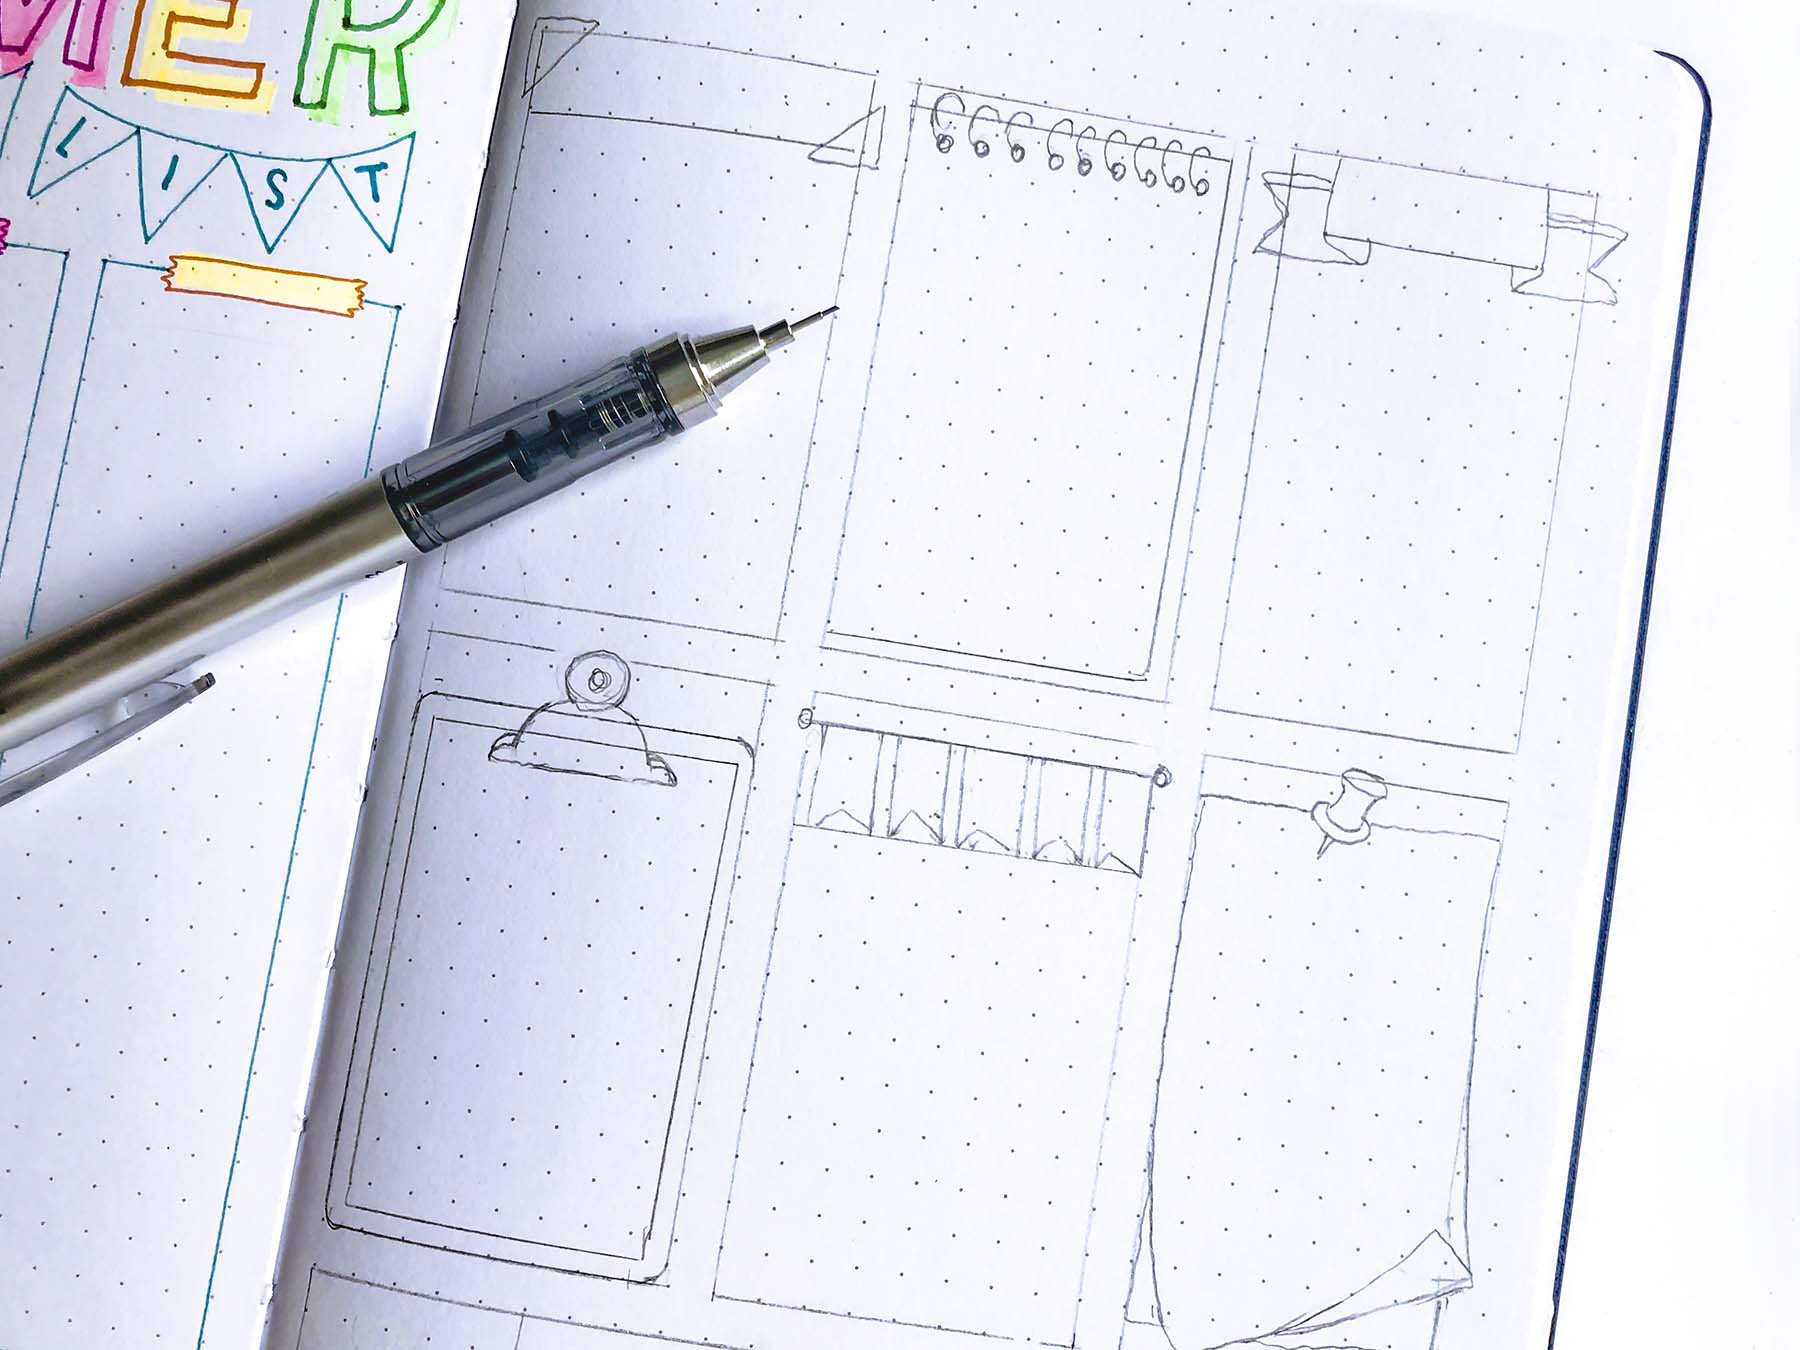
Now that I have the six spaces for my list boxed out, I can go ahead and sketch in some fun details in pencil. I decided I wanted three lists with just headers and three lists that will be inside the doodles of a steno pad, a clipboard, and a pinned piece of paper.
Step 6:
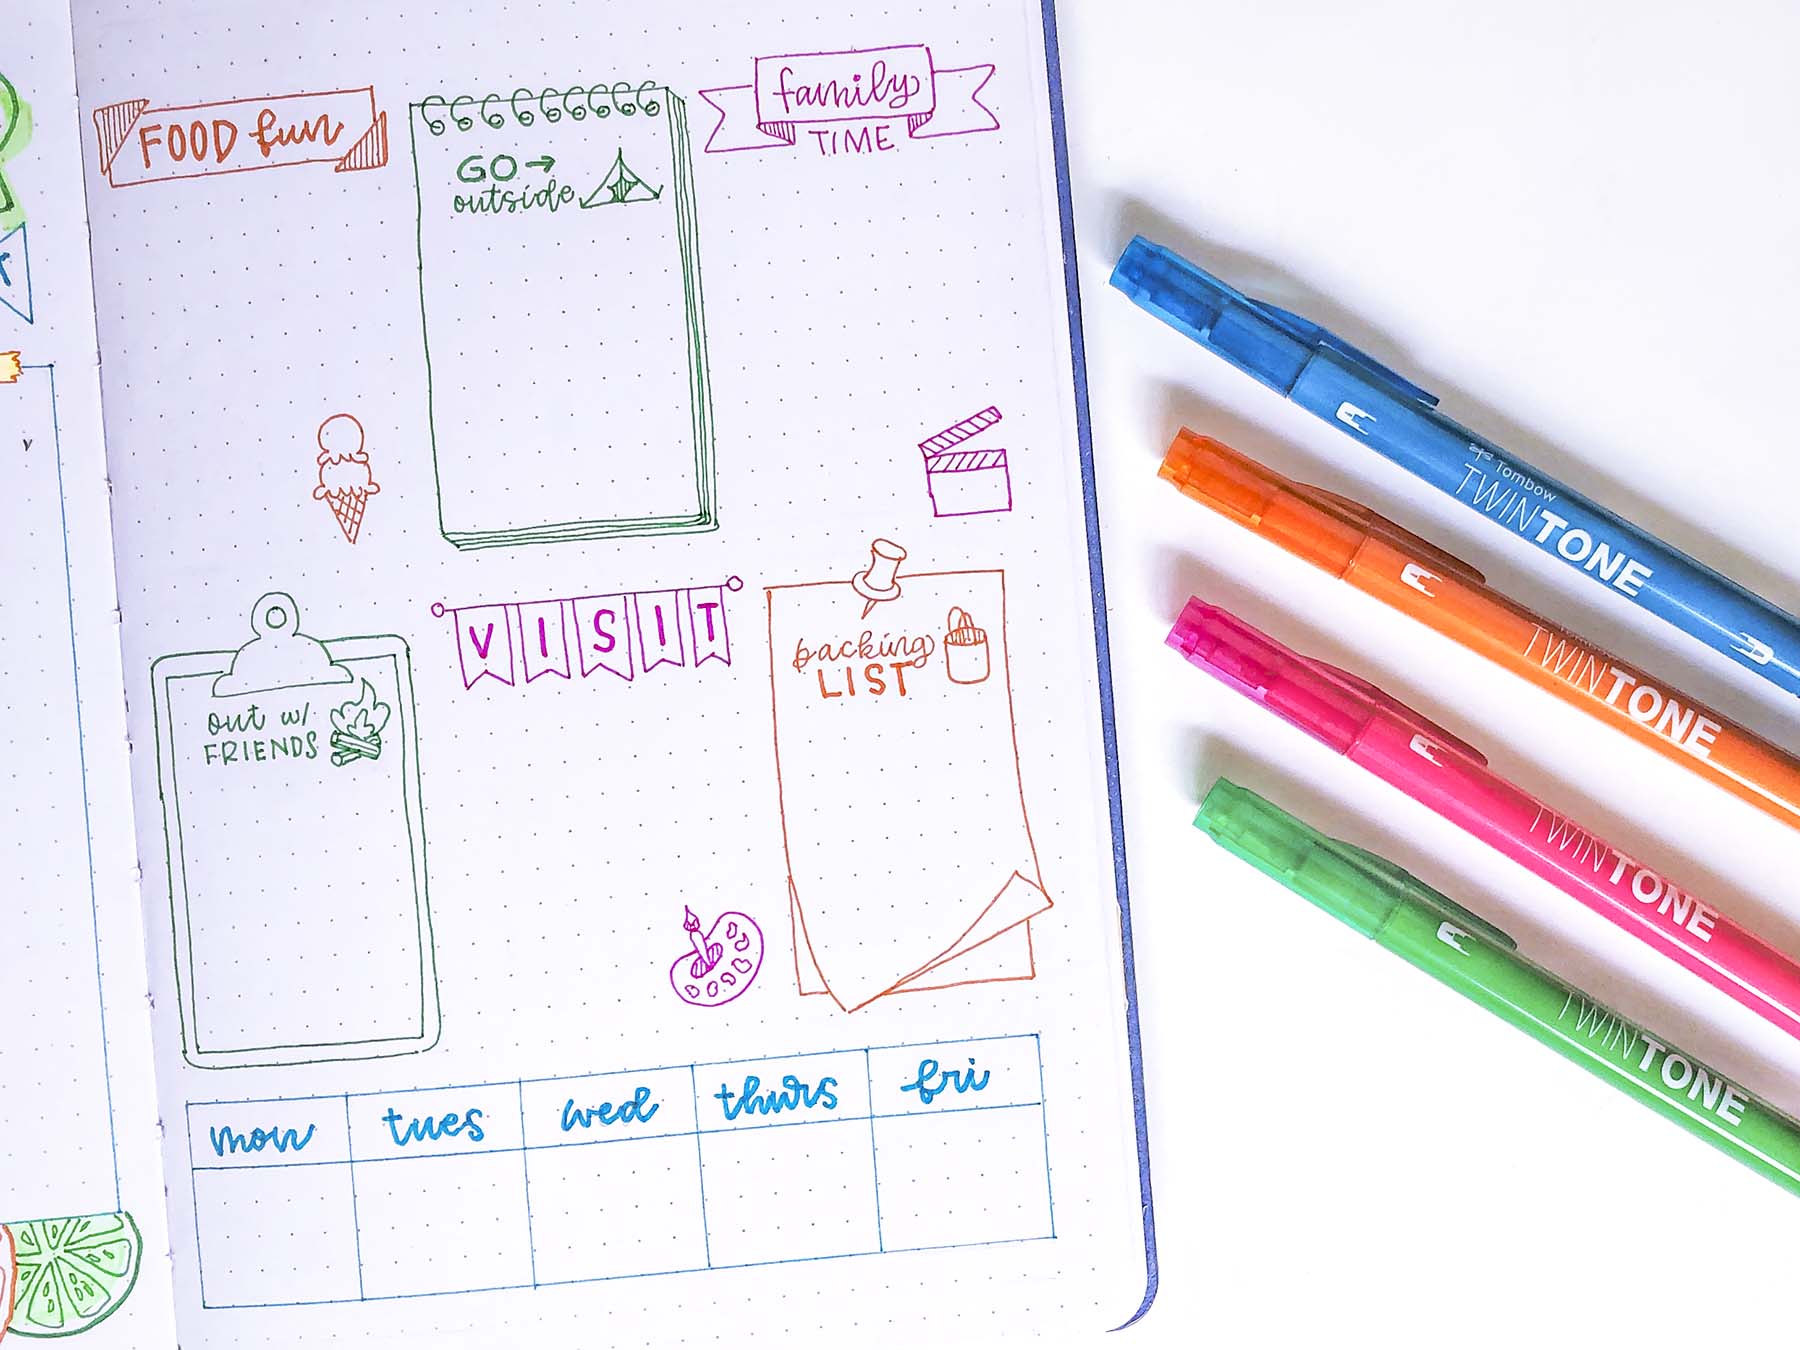
Once you are happy with your sketches, use your Twin Tone Markers to outline and add detail. Make sure to use both the broad and extra-fine tips to create some contrast and visual interest. I also added some list-specific doodles since I already knew how I wanted my lists to be titled.
Step 7:
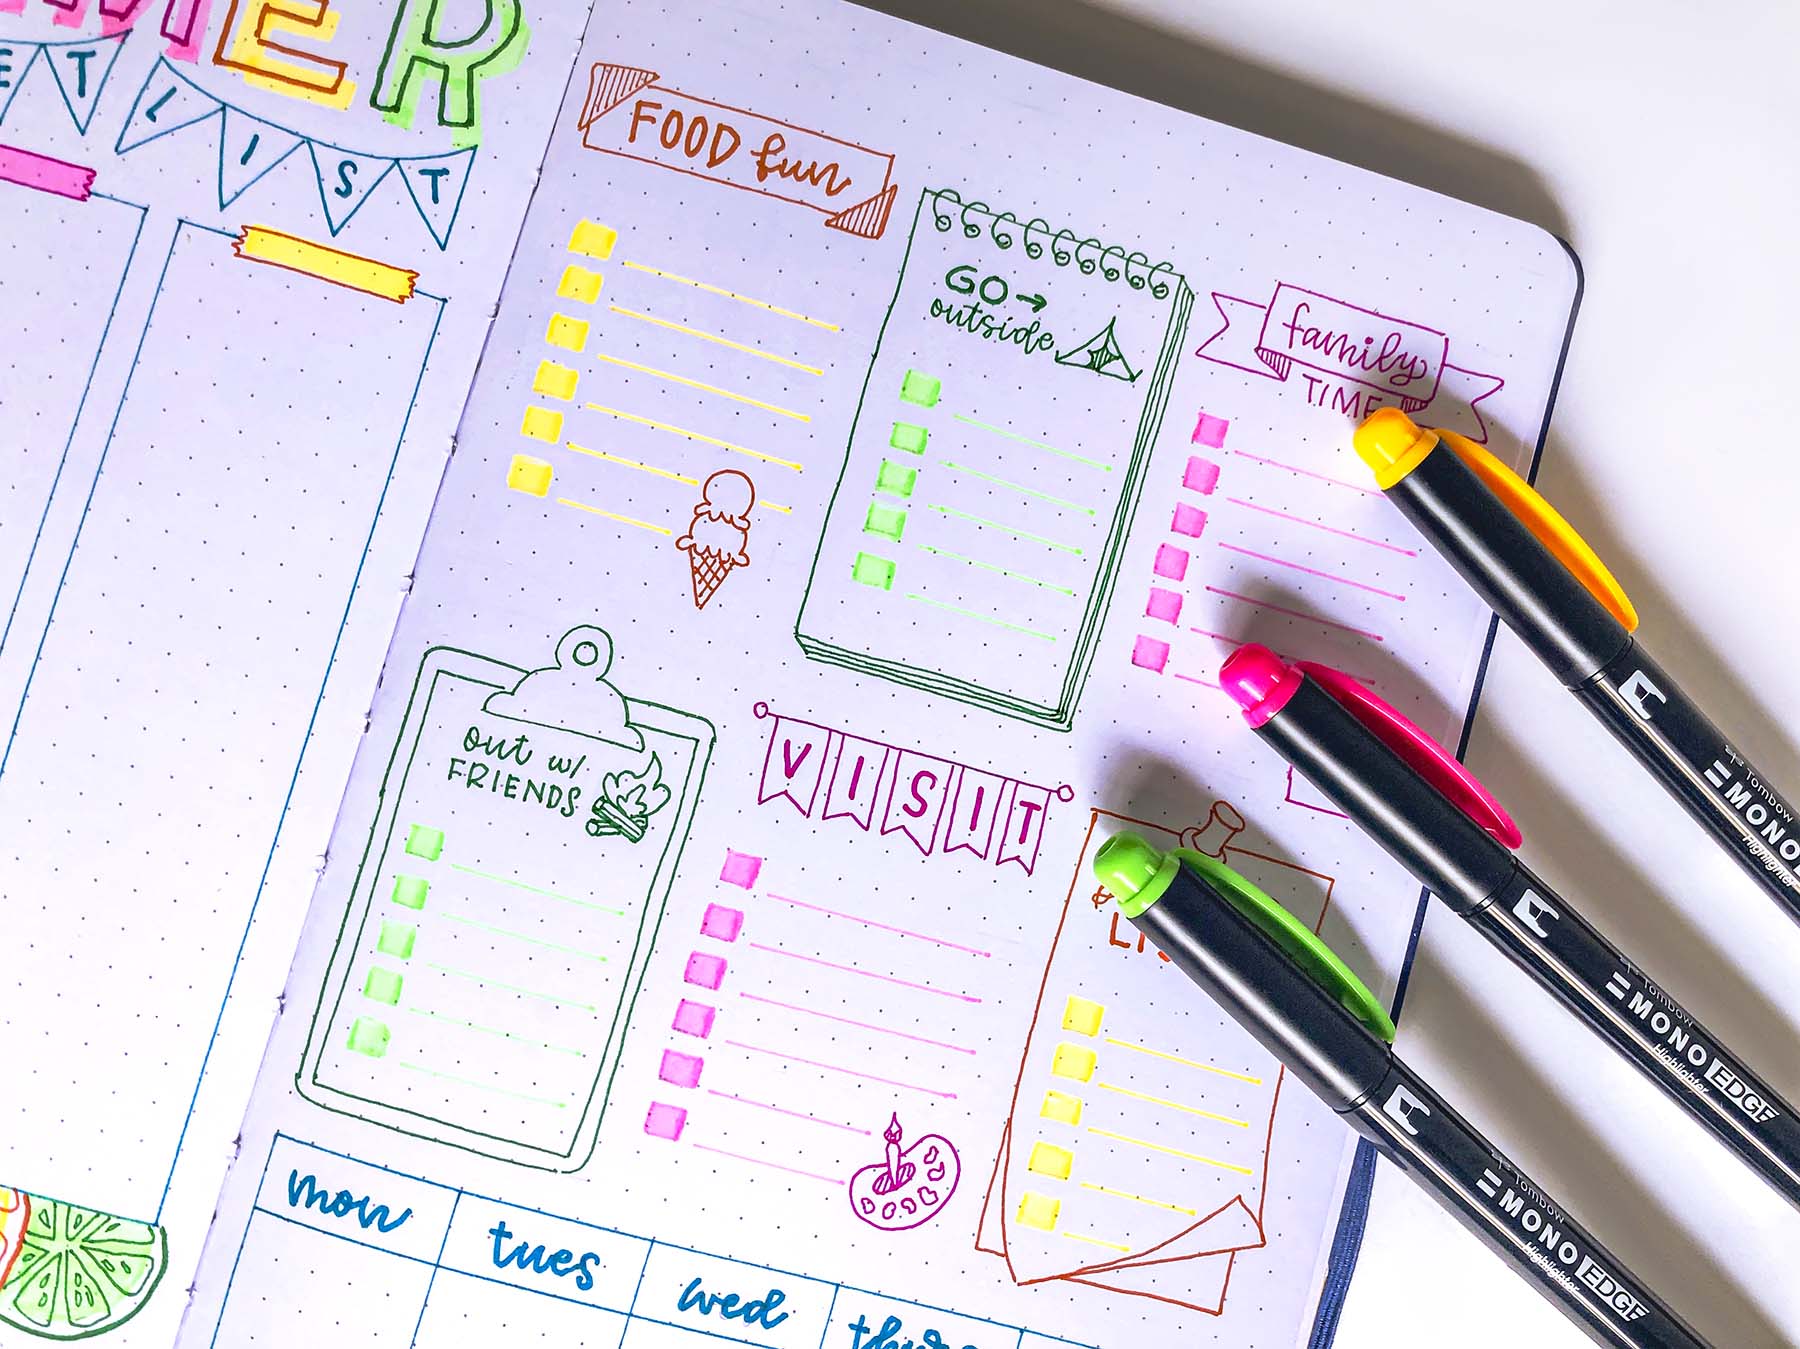
Your lists wouldn’t be complete without checkboxes. The MONO Edge Highlighters are the perfect tool for this. Just draw a very short line with the chisel tip to create the checkbox and use the extra-fine tip to create a line for the list item.
Step 8:
Now you are ready to fill out your layout. I did a quick internet search for tips on how to make a bucket list and what kind of items to include. I also looked up scheduling tips and created a simple sample schedule to help me break out my day. Lastly, I decided I should probably include some summertime health tips to make sure I would be ready for anything summer threw my way.
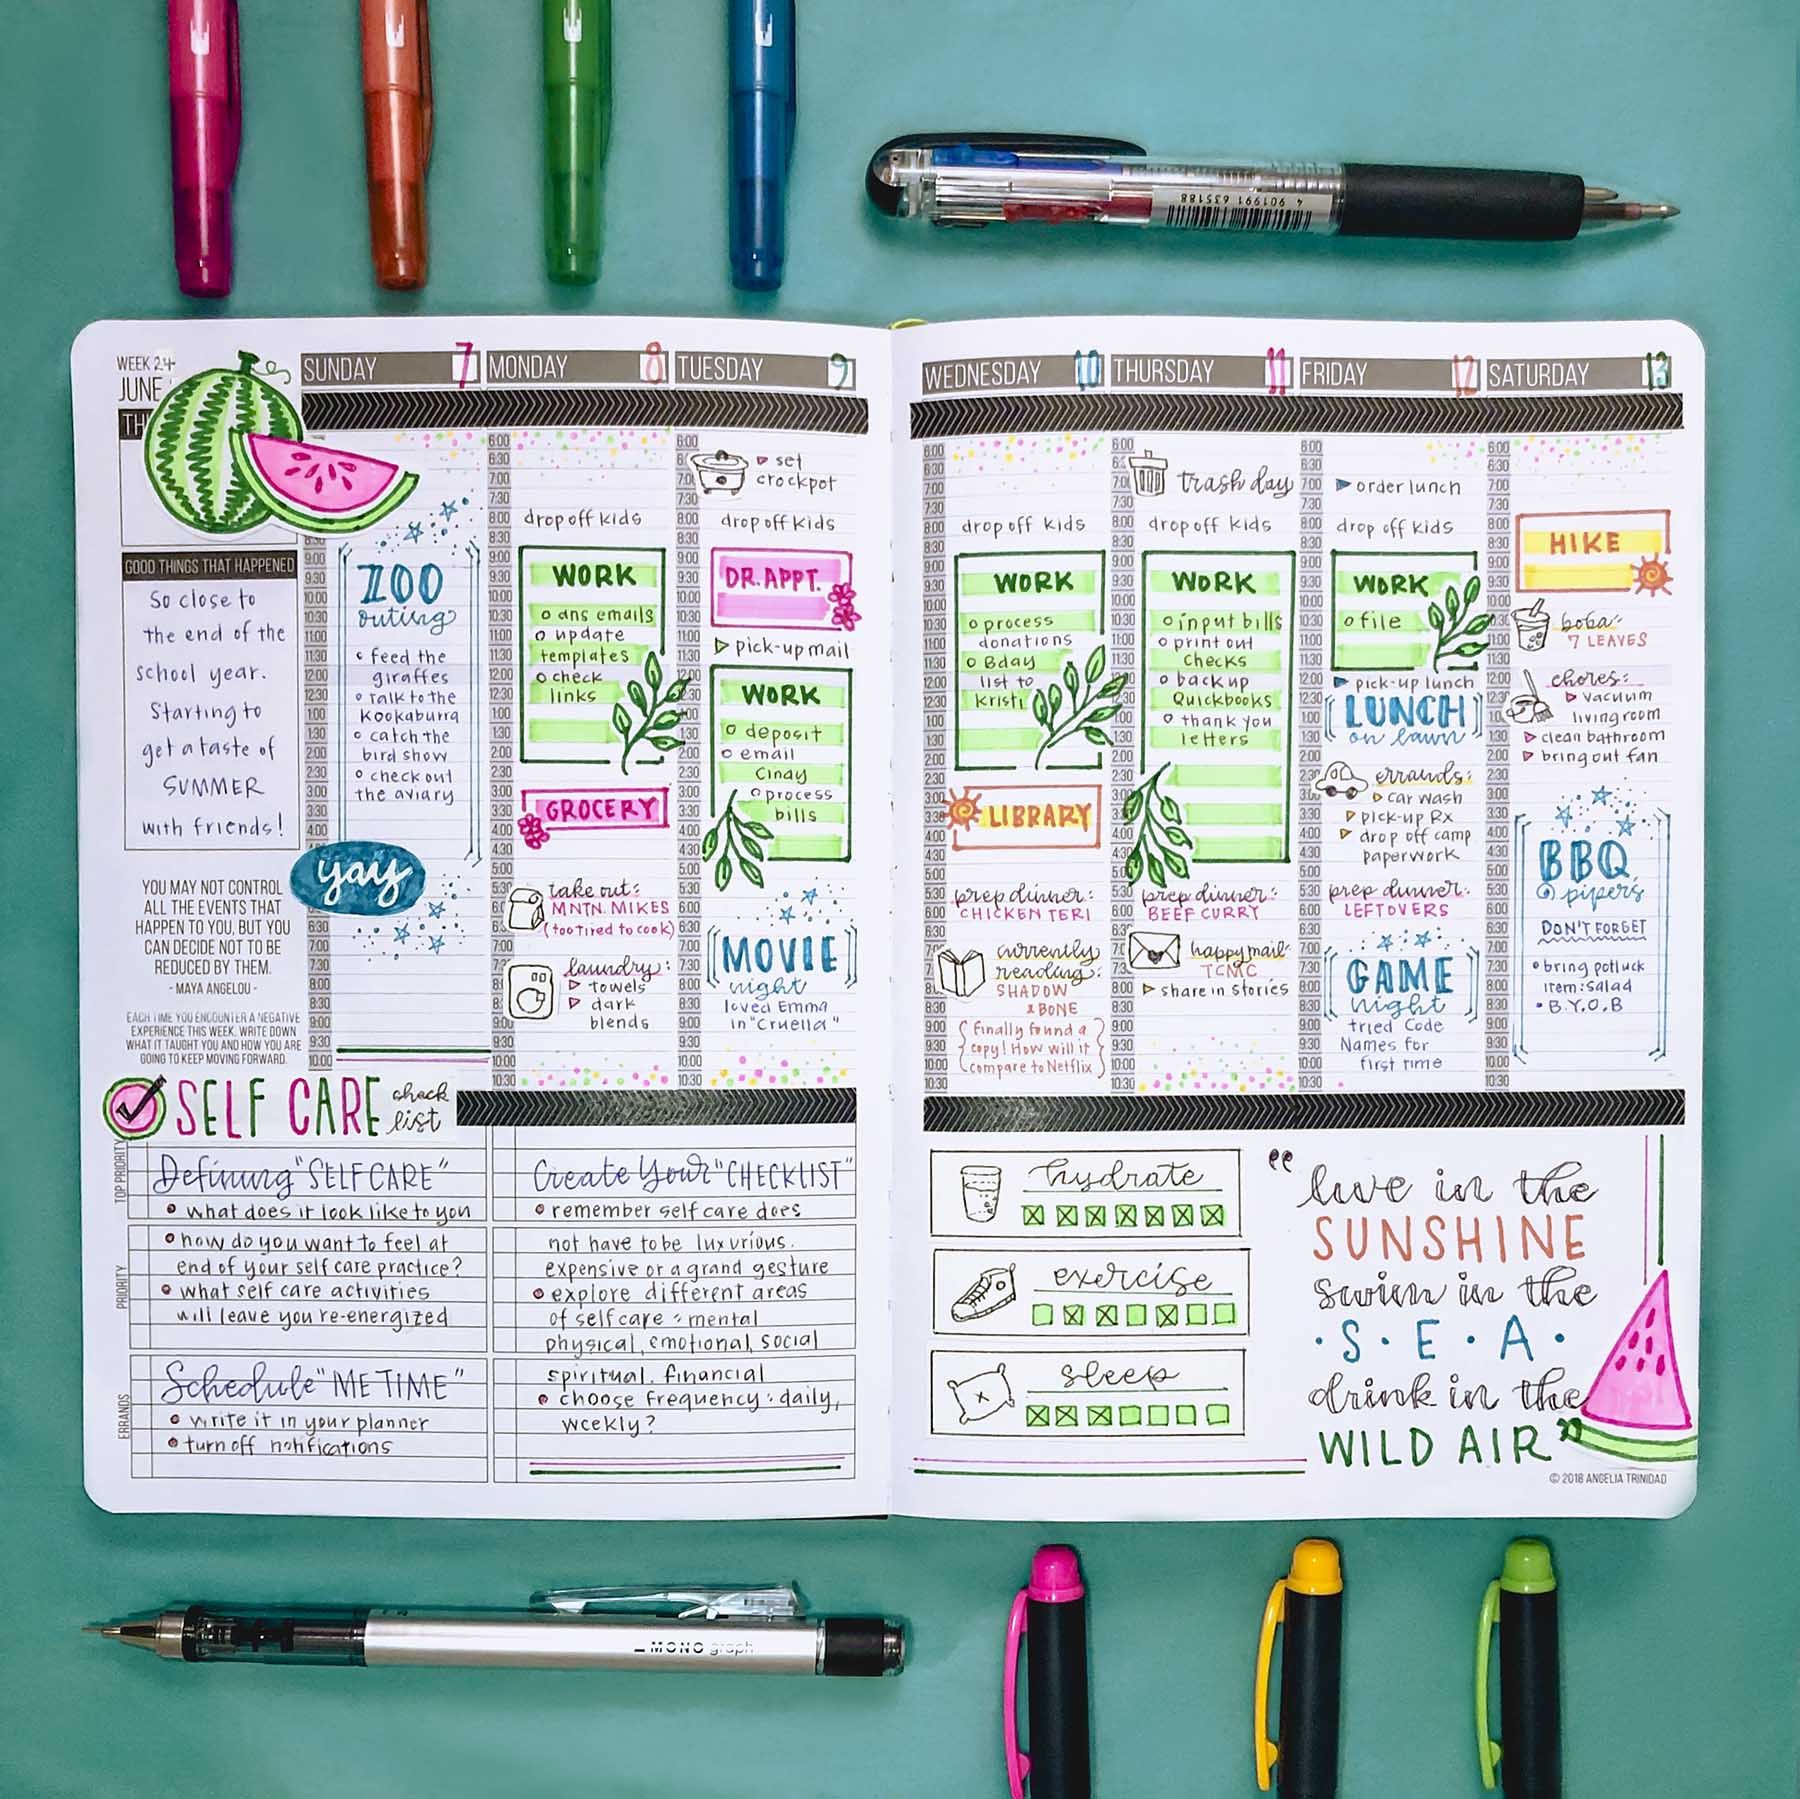
Thanks for following along! I know having a plan in place will definitely help me from falling into the summertime blahs. Another way to use the Creative Notetaking Kit and stay organized this summer is through your planner! Here’s an example of a spread from my planner this month.
Pingback: Candy Themed Gratitude Journal - Tombow USA Blog
I can’t plan my day properly because I suffer from insomnia and constantly oversleep all the deadlines. What to do about it?