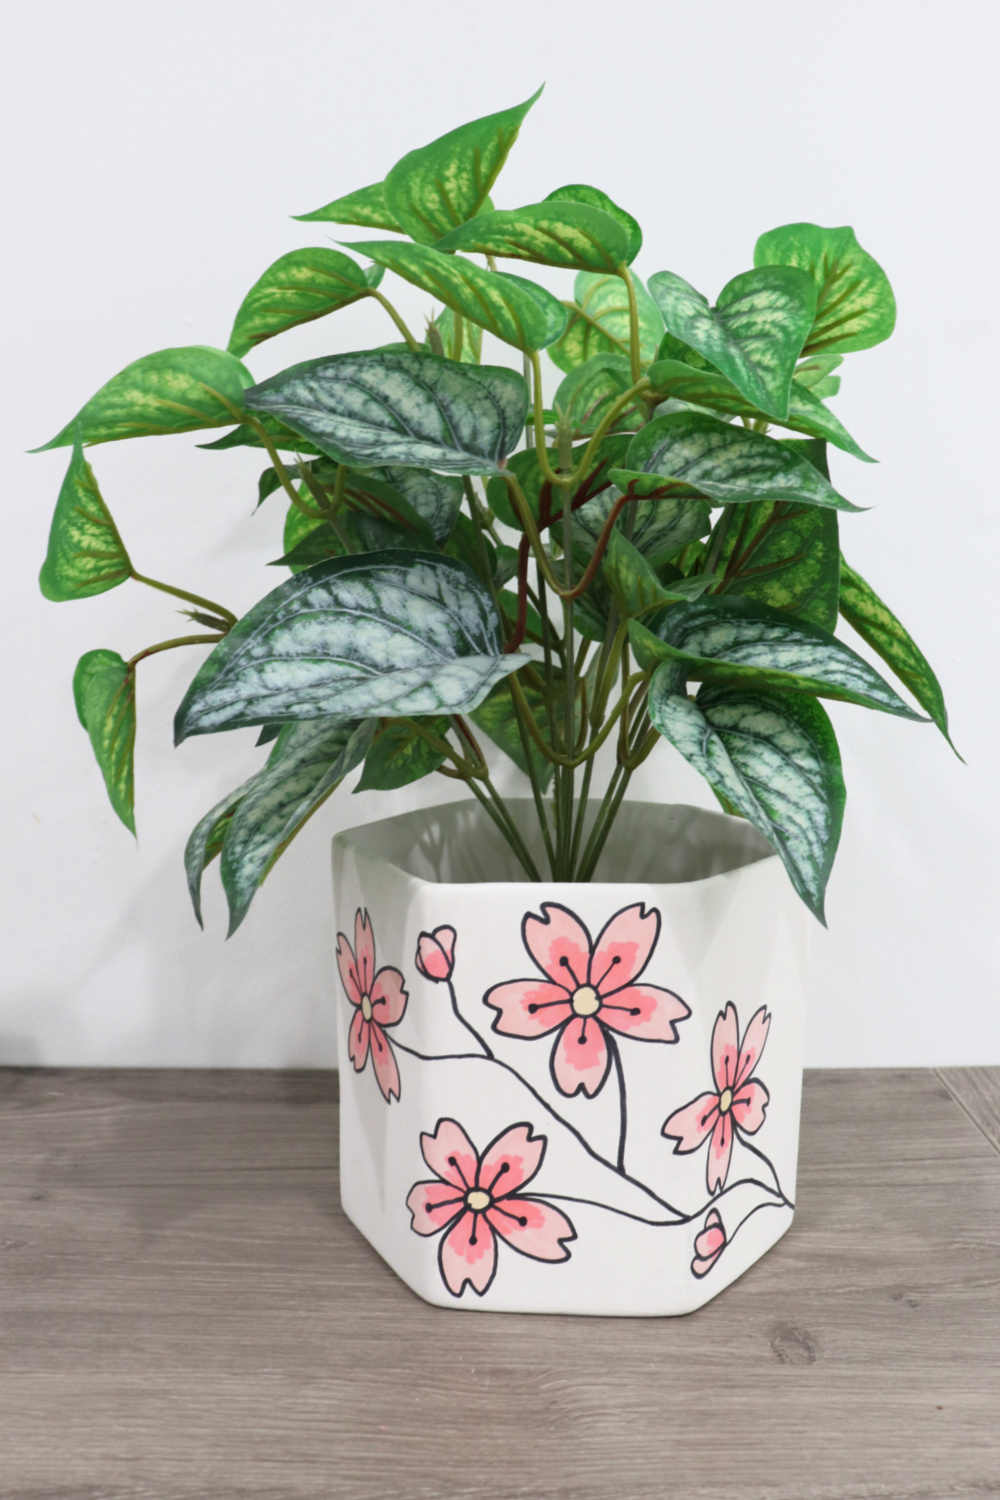
No matter where you live, there’s something unique about spring. I’m Amy, from Amy Latta Creations, and for those of us living in the Maryland/Washington DC area, the first sign that spring has arrived is the Cherry Blossom Festival! Here in the nation’s capital, the stars of the season are the 3,000 cherry blossom trees gifted from Japan that line the Tidal Basin, National Mall, and Arboretum. The pretty pink blooms last for 14 days and attract visitors from all over the country. To celebrate the start of spring and these iconic flowers, let’s make our own Cherry Blossom Planter!
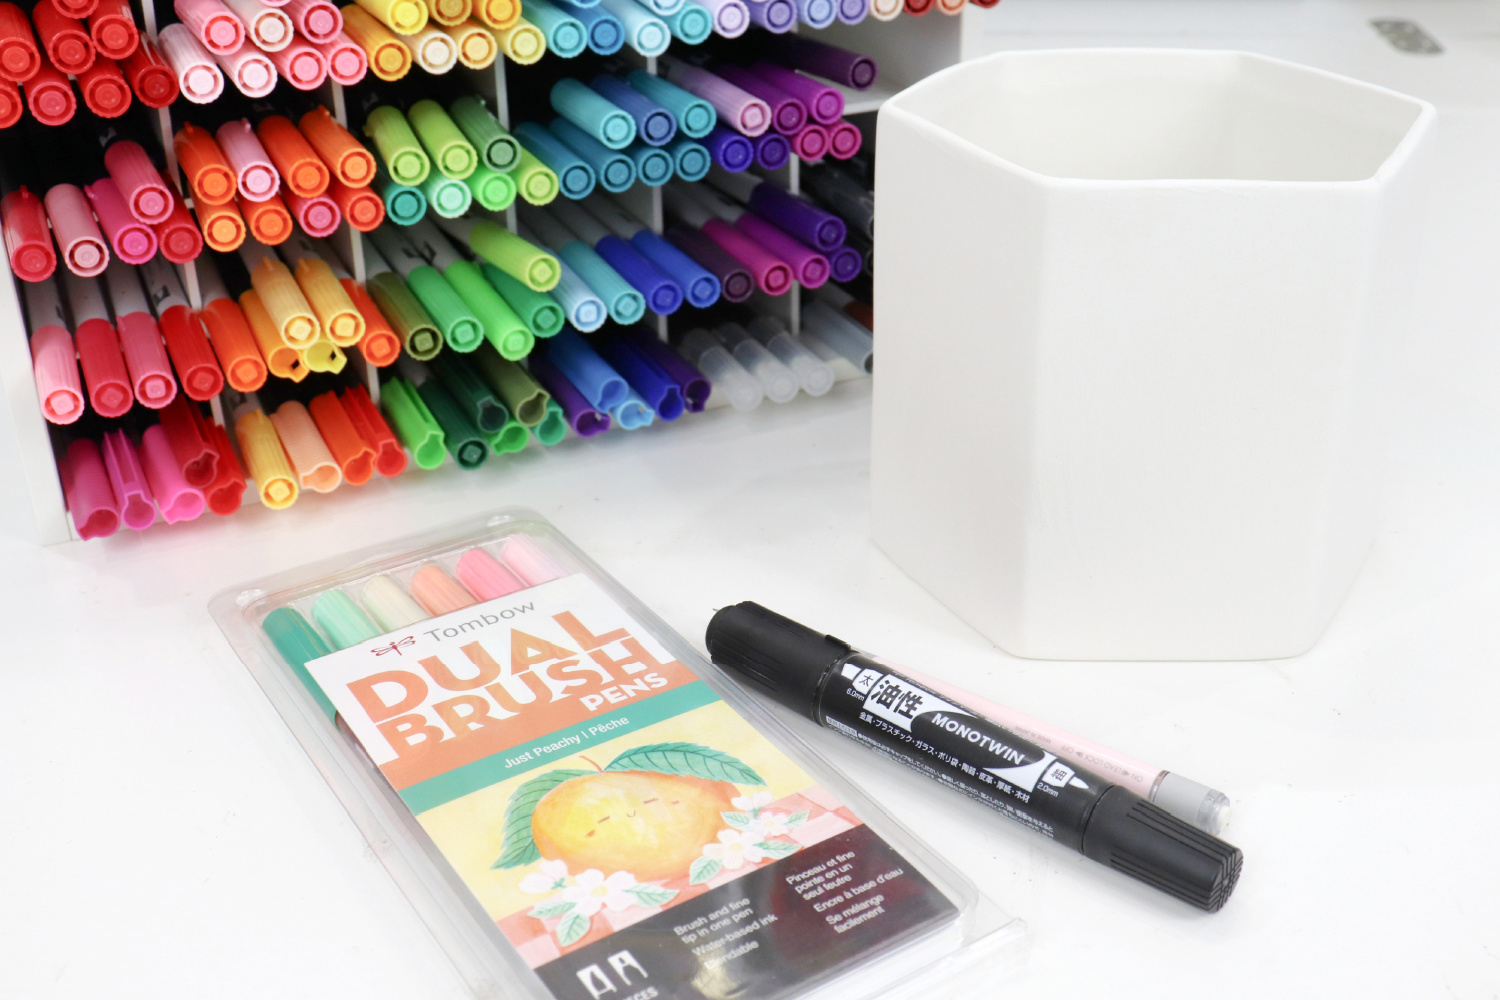
Materials:
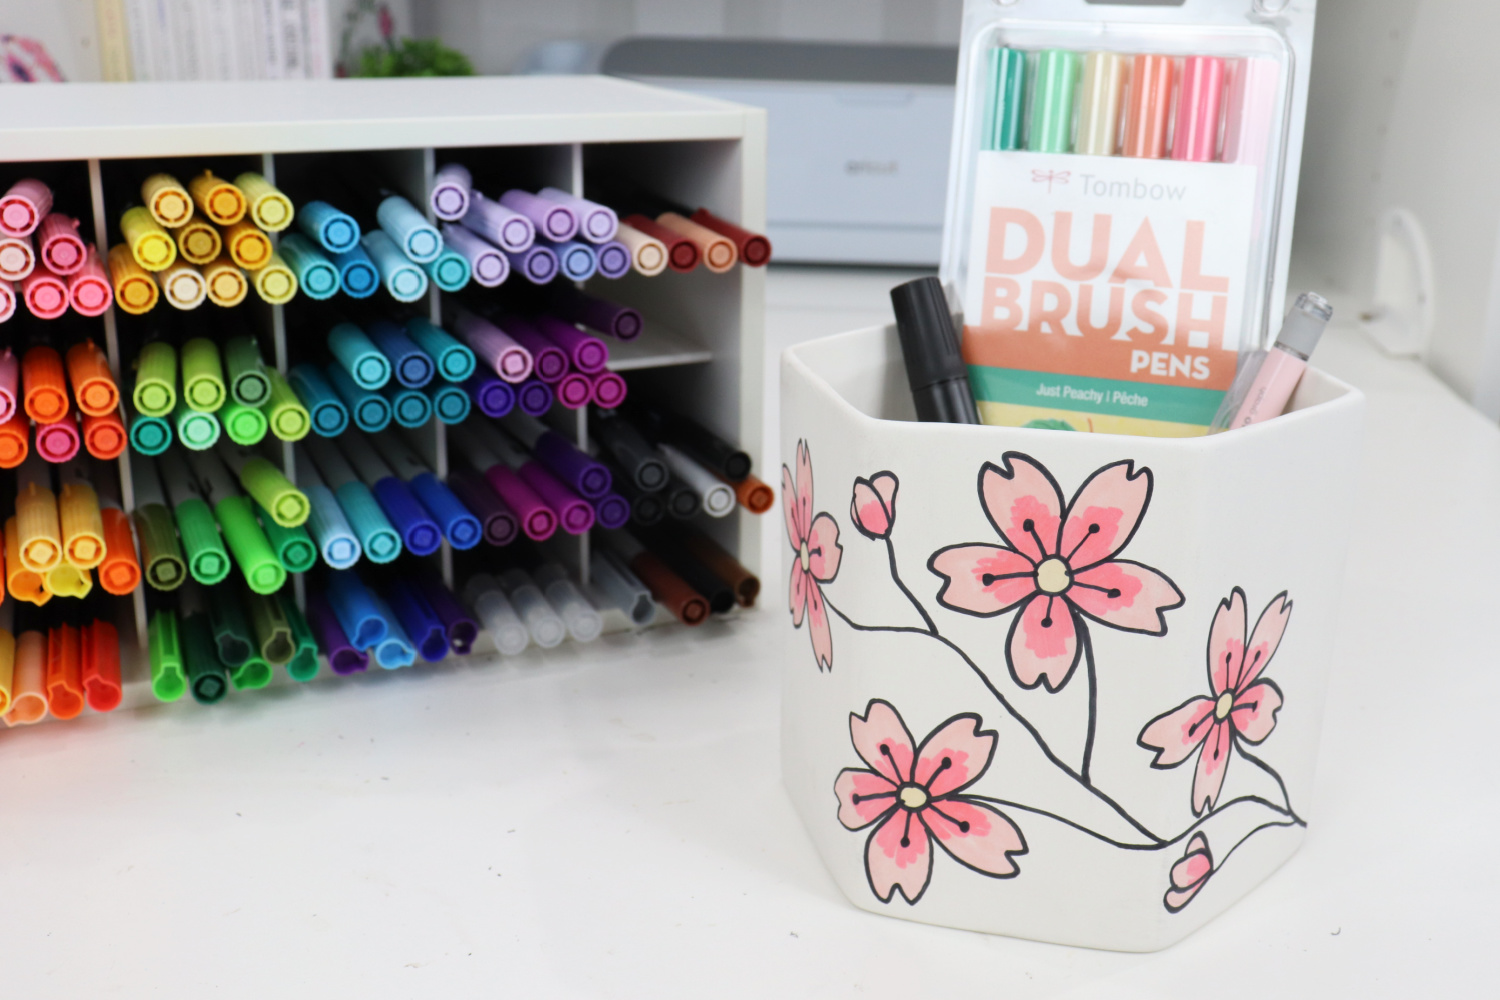
- white unglazed ceramic planter
- Tombow MONO Graph Mechanical Pencil
- Tombow MONO Eraser
- Tombow MONOTwin Permanent Marker, Black
- Tombow Dual Brush Pens, Just Peachy 6-Pack
- sealer (optional)
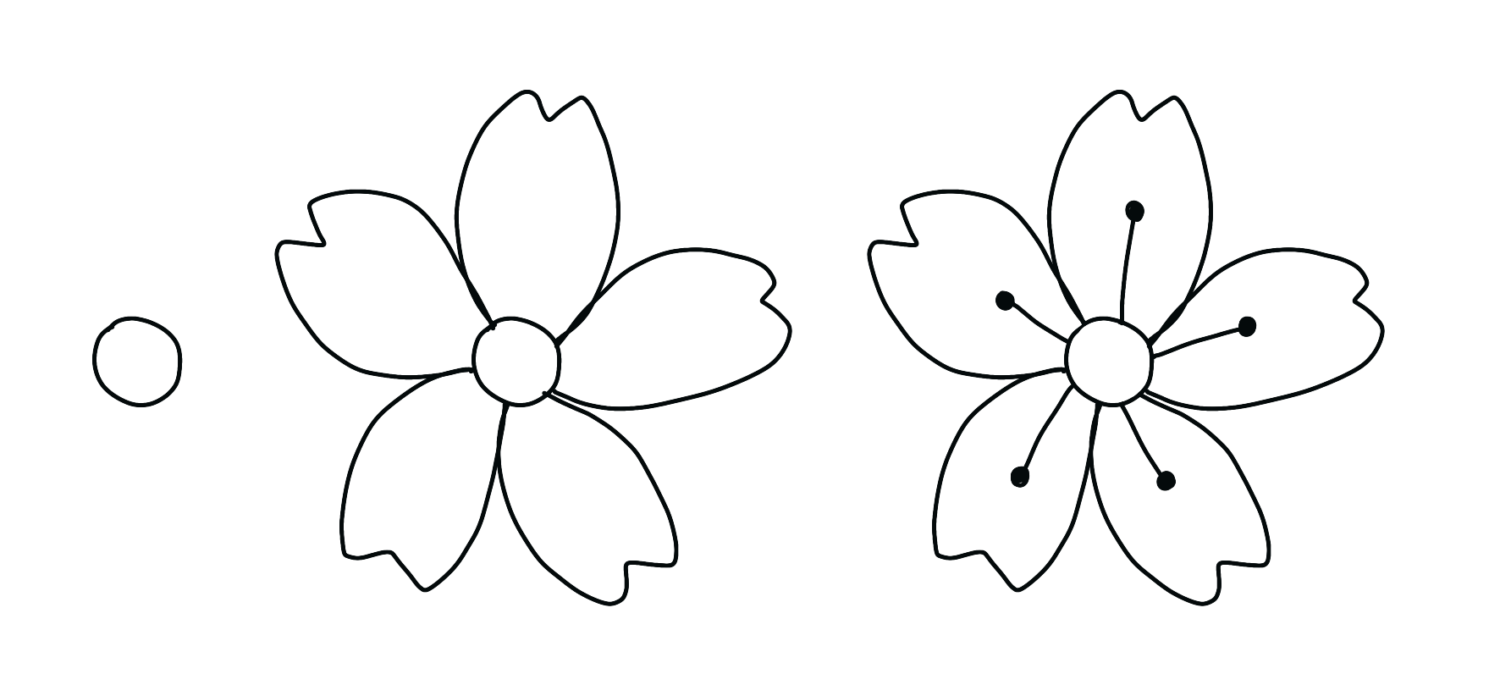
How to Draw a Cherry Blossom
This pretty little flower is fairly simple to draw. Like any illustration, just break it down and think about it in terms of basic shapes. Start with a circle for the center, then draw five petals. For the petals, sketch a lemon shape with a little “v” missing from one end. Then, draw a short line with a dot at the end extending from the center and through the middle of each petal. That’s all there is to it! Practice this a few times in your sketchbook or on a piece of scratch paper to get the hang of it, then let’s move on to creating our planter.
How to Create a Cherry Blossom Planter
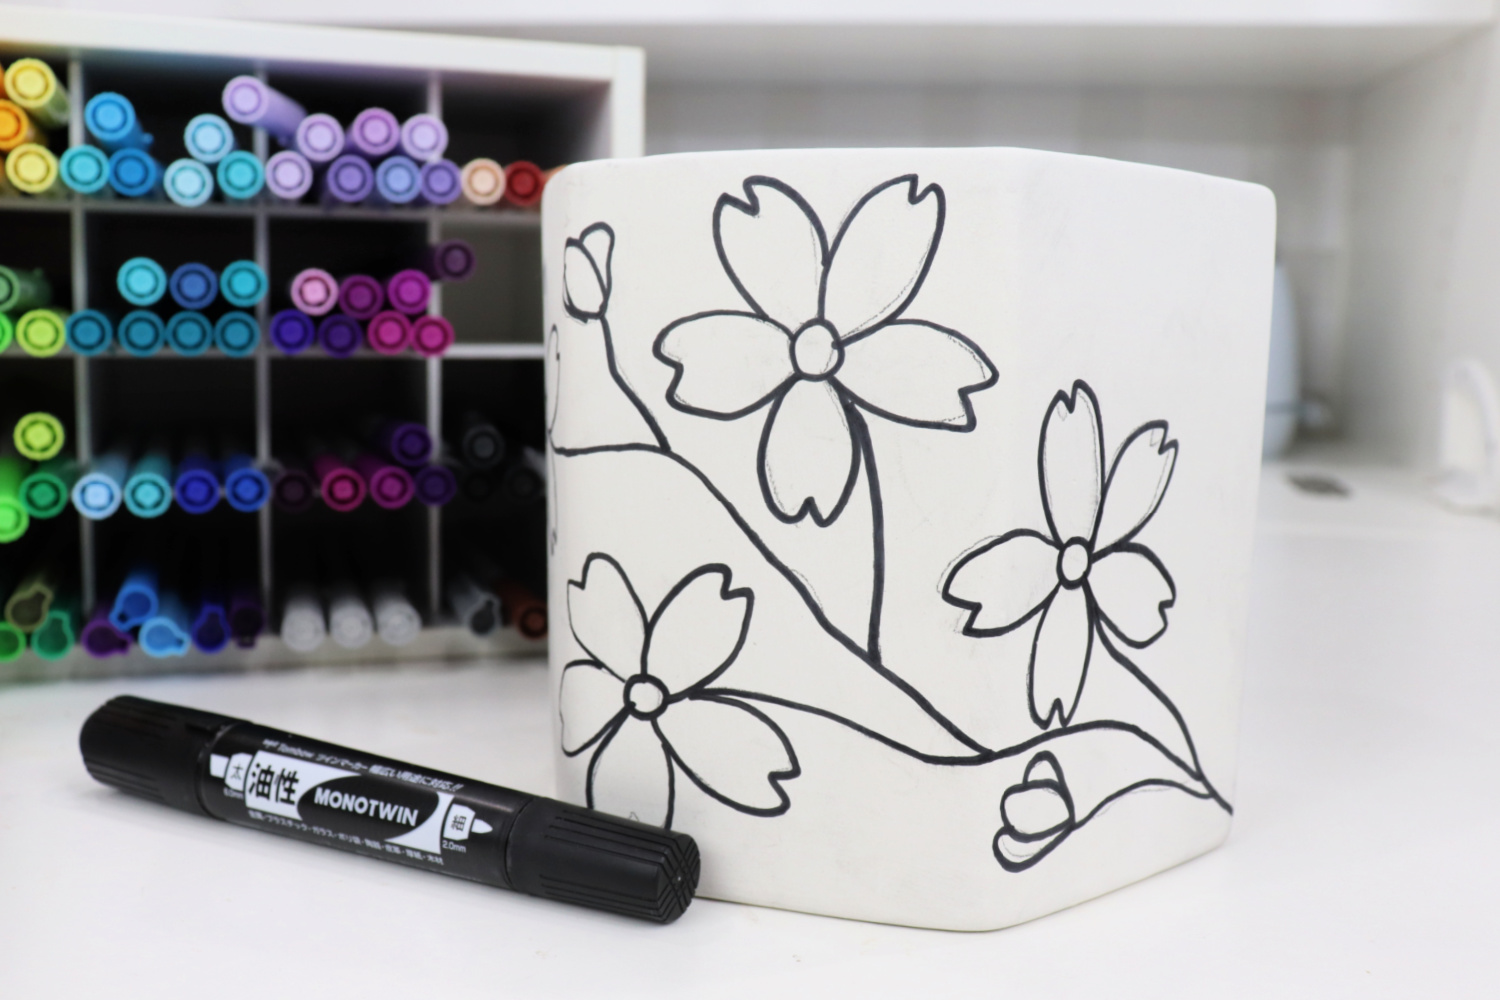
Sketch several cherry blossoms on the sides of your planter using your MONO Graph pencil.
I drew four large flowers, as well as two buds, then drew a line extending from each one to represent a branch. There’s no wrong way to do this, just sketch them in any pattern you like.
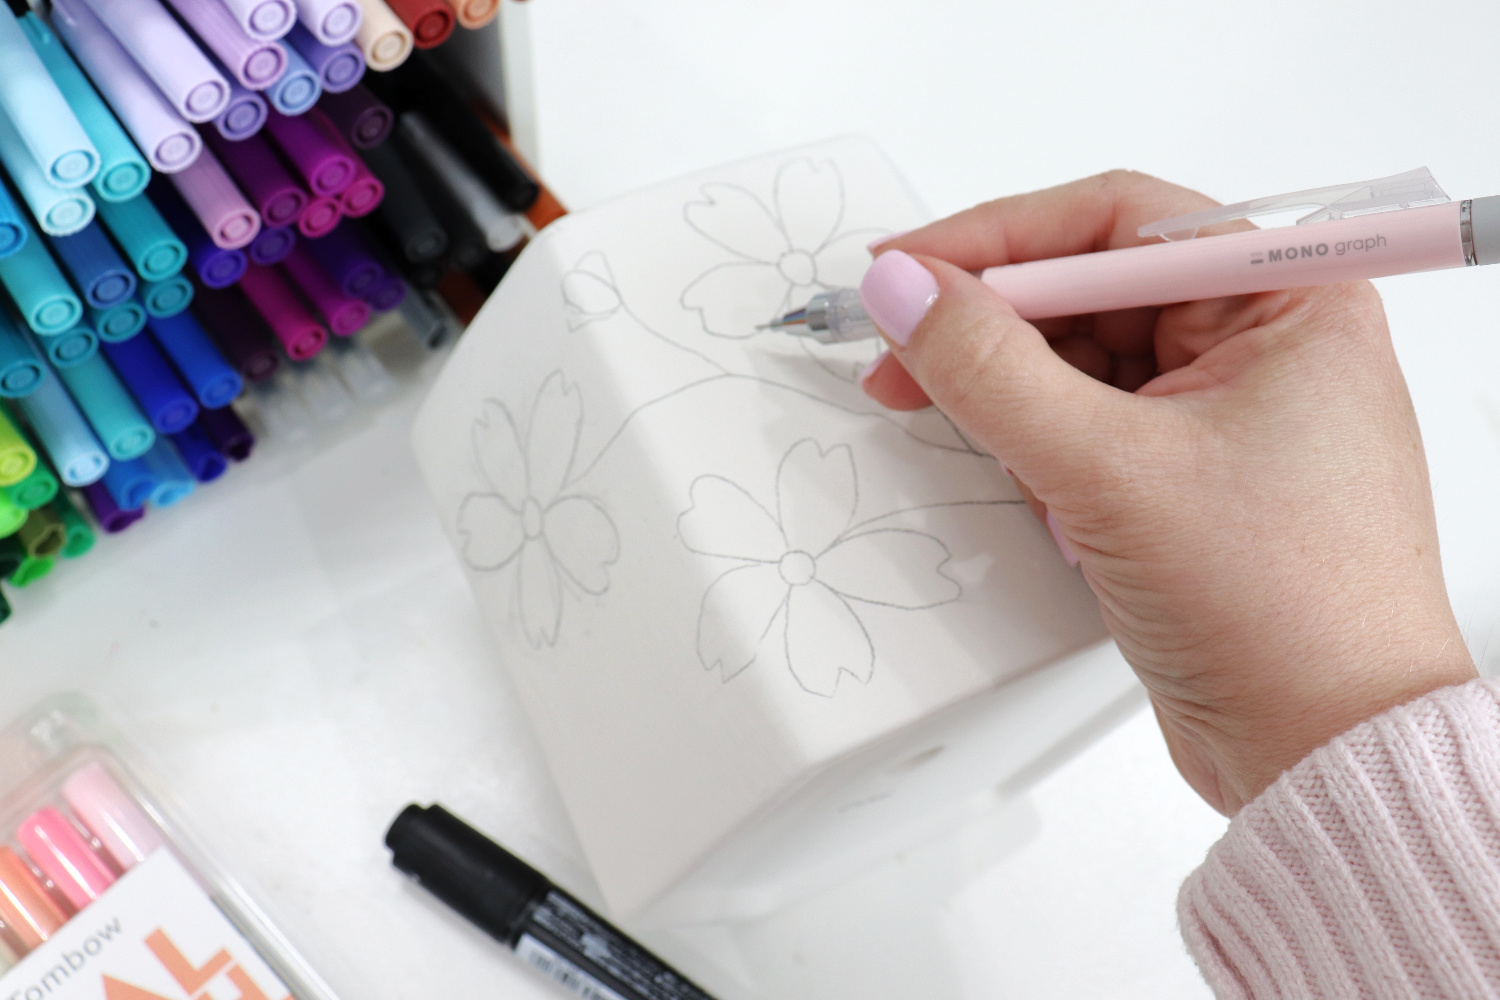
Trace over your sketch with the MONOTwin Permanent Marker.
I used the 2mm fine bullet tip end to get smooth, smear-proof lines. Because the MONOTwin works on paper, metal, plastic, glass, vinyl, porcelain, leather, and wood, it’s the perfect choice for projects like this one.
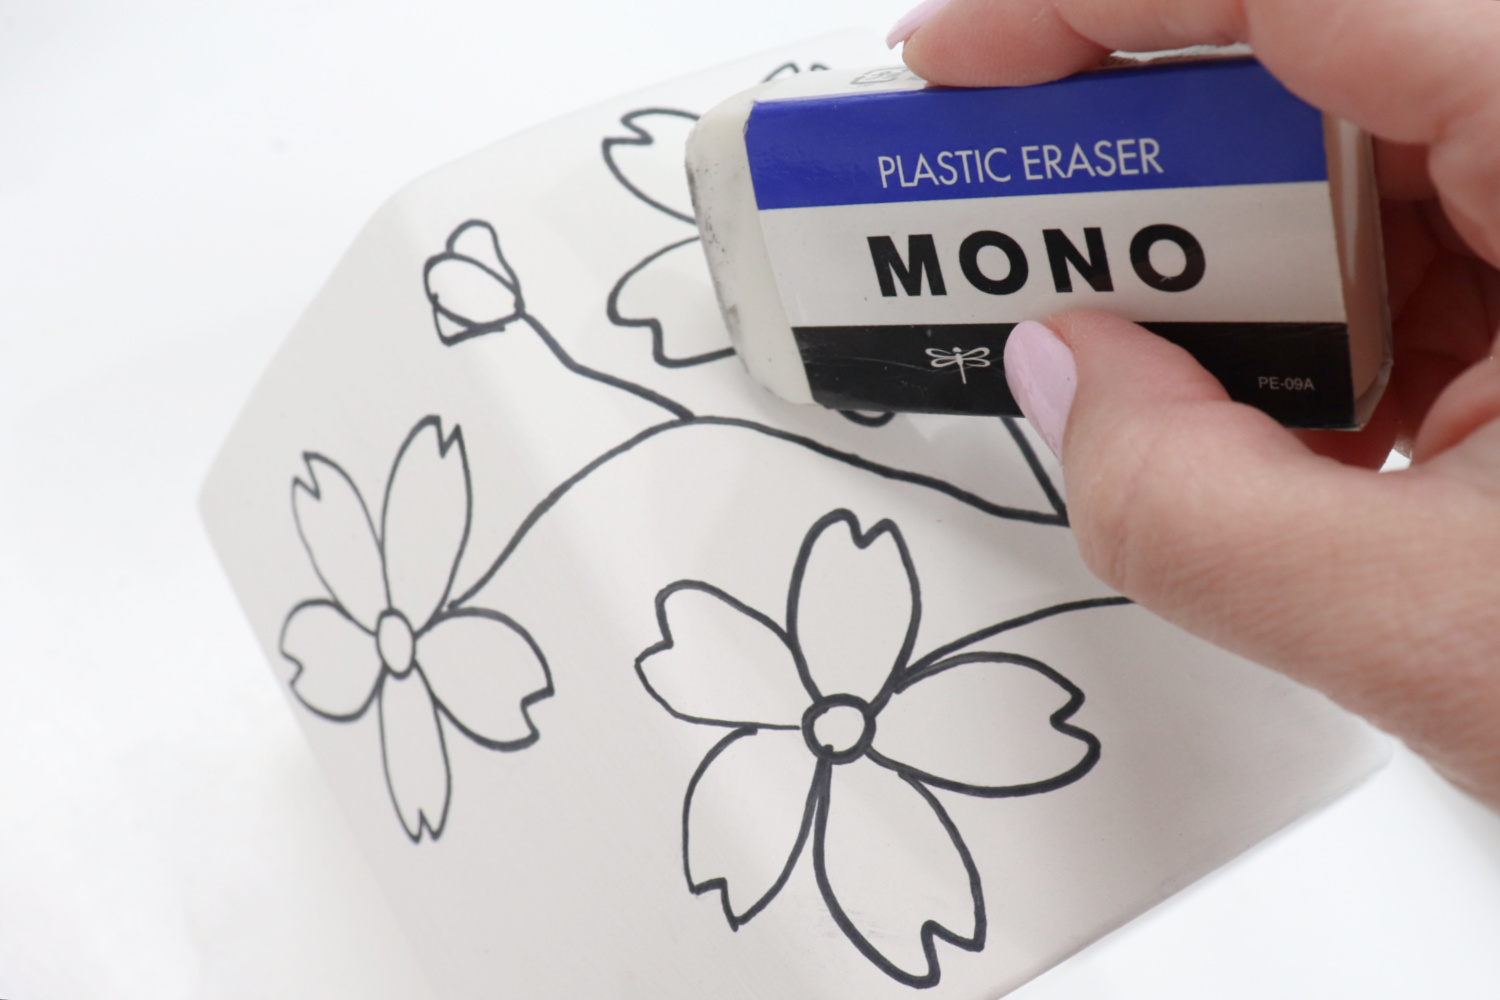
Erase your pencil lines.
Use the MONO Eraser (I went for my Jumbo size one!) to get rid of any sketch lines that are still visible. They will erase completely, leaving you with just the clean black outline of your floral design.
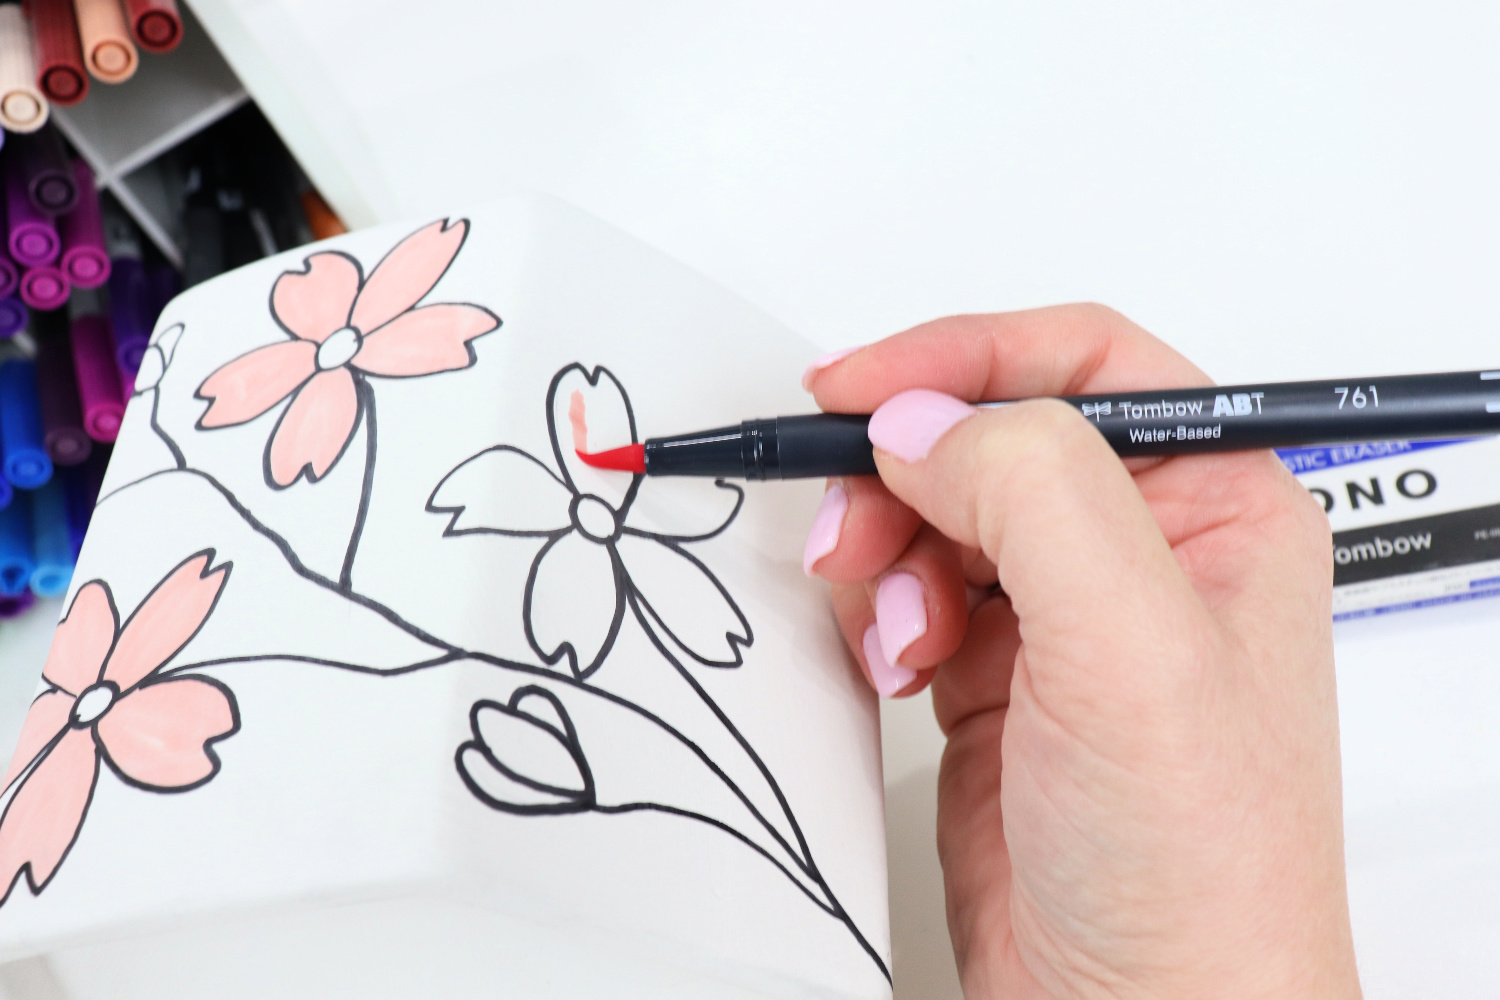
Color your flowers with a light pink Dual Brush Pen.
I used number 761, Carnation, from the Just Peachy 6-pack. The flexible brush tip is not only perfect for brush lettering, it’s also ideal for filling in large spaces like these petals with color.
PRO TIP: Since these markers are dual-tipped, the best way to store them is horizontally! This way you’ll get even, consistent ink flow every time, no matter which tip you use.
Disclaimer: Using Tombow Dual Brush Pens on surfaces other than paper may result in a shortened lifespan of your markers and potential fraying of the tips. While markers are primarily designed for use on paper, using them on alternative surfaces such as fabric, plastic, or rough textures can accelerate wear and tear.
Add shading with a darker Dual Brush Pen.
I used 803, Pink Punch, which is also in the Just Peachy pack, and colored the bottom section of each petal. Dual Brush Pens are available in 108 colors, so it’s easy to find the perfect shades for every project.
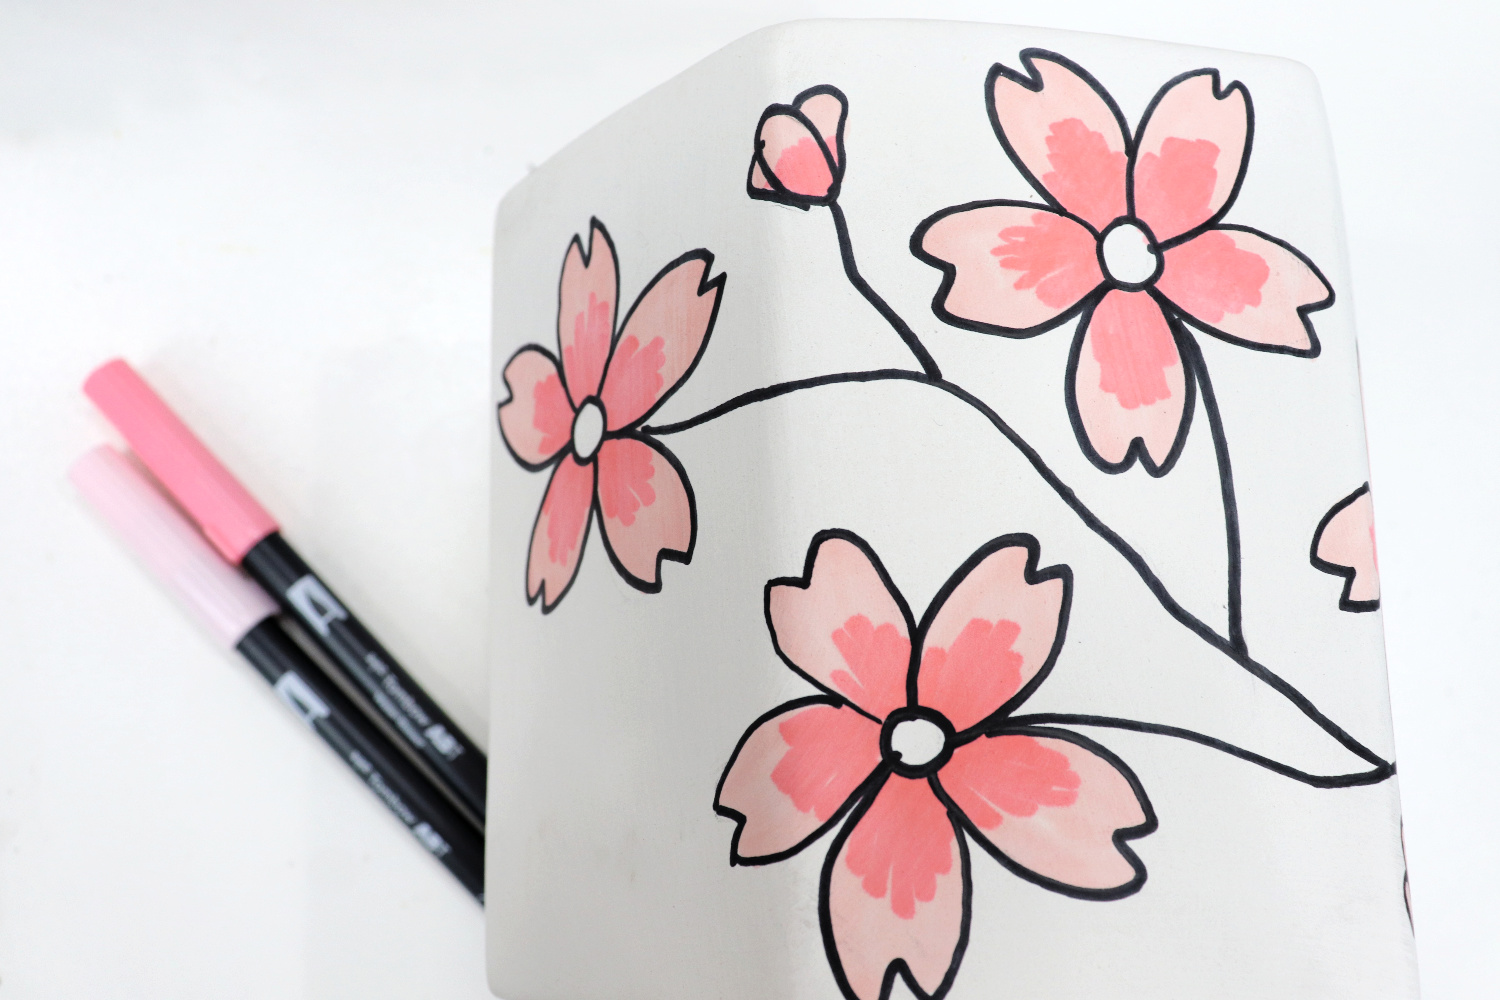
Color the flower centers, then add detailing.
I used 020, Peach, to color the center of each flower, then used the MONOTwin to go back and add the short lines and dots inside each petal.
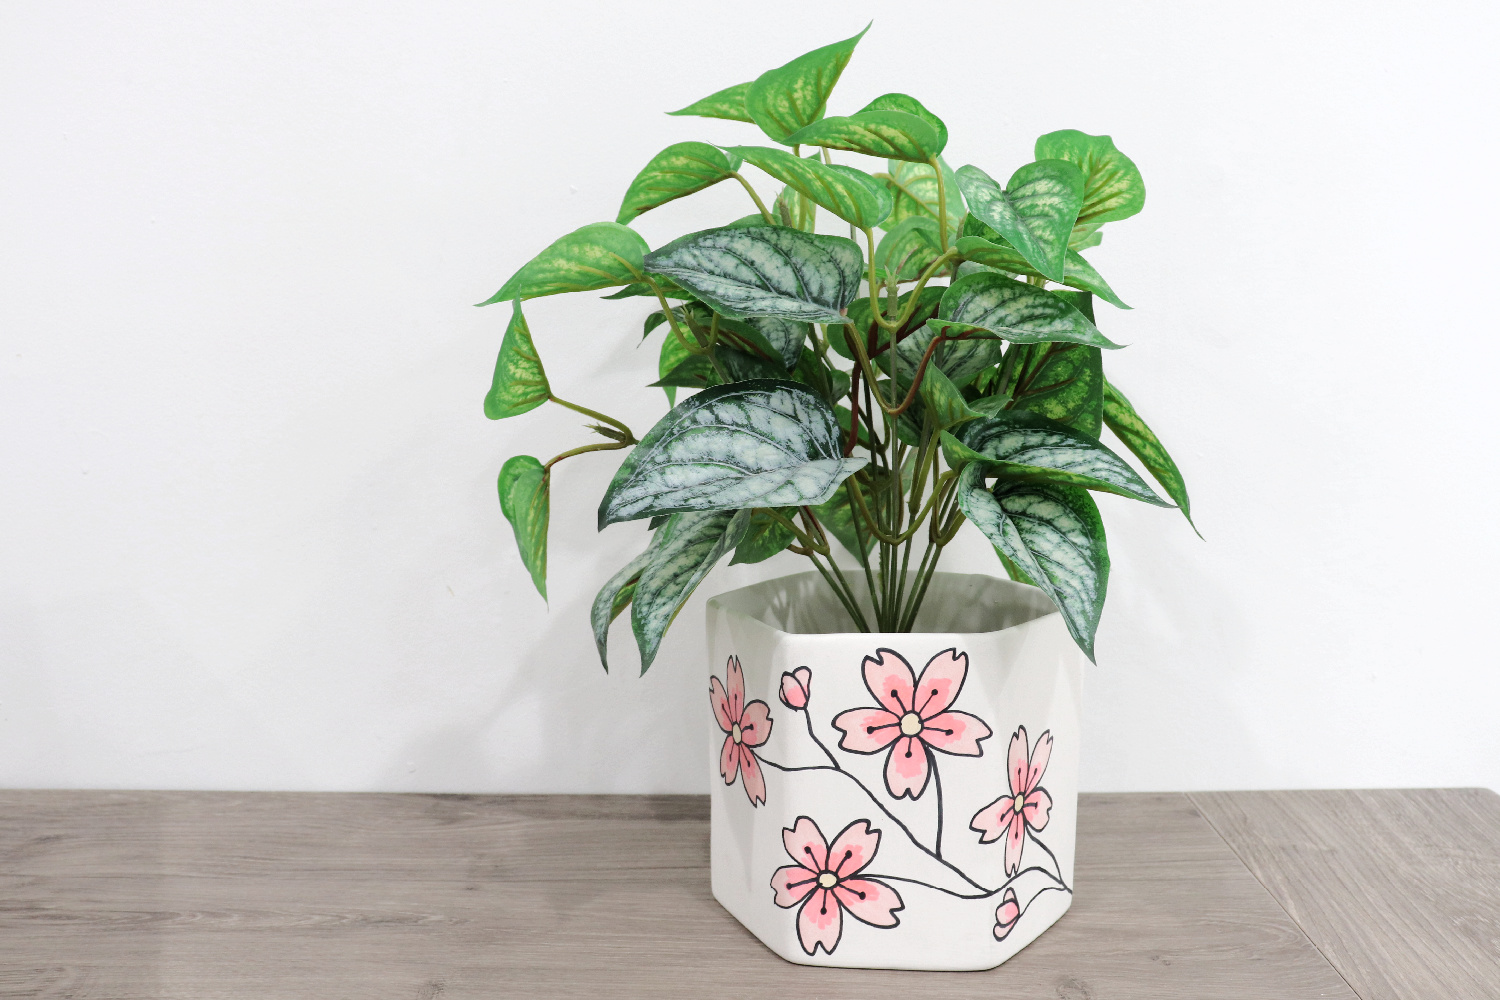
If you like, you can apply a sealer to the project to protect your work once all the ink is dry. You’ll particularly want to do this if you plan to place a live plant inside. I’m using a faux plant (I have a black thumb, not a green one!), so I left mine as is.
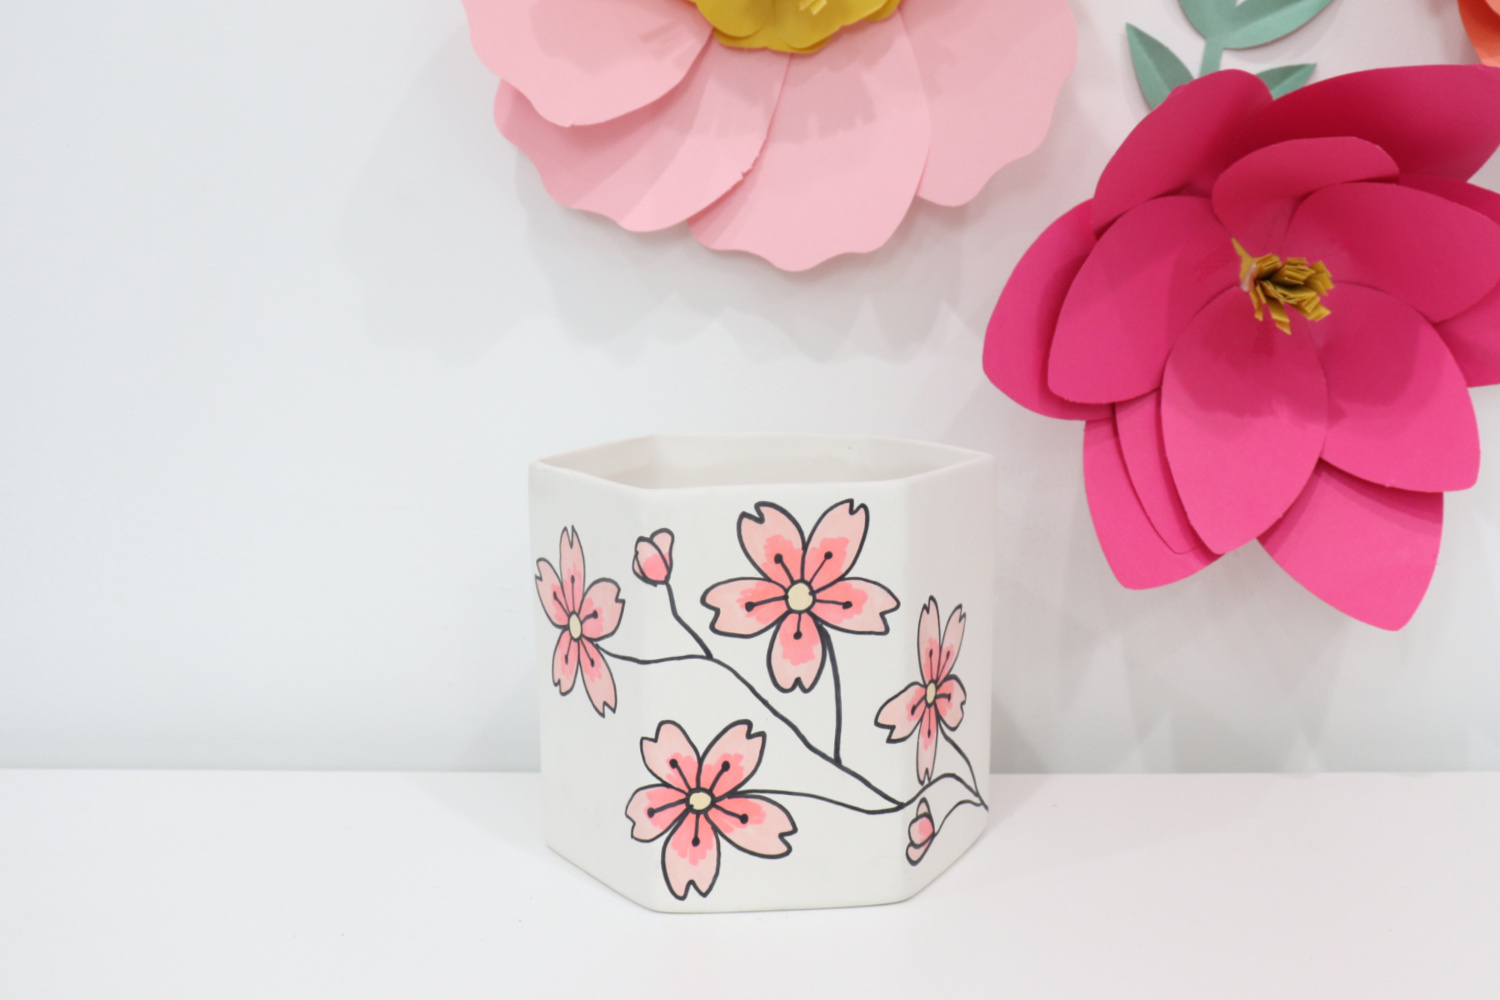
Now, all that’s left to do is add a flower or other plant and enjoy your creation! I love the cheerful touch of spring and the pop of color this planter brings to my crafting space.
What about you? What makes spring special where you live? If you try this project, or create a unique one of your own, we’d love to see! Be sure to tag us at @tombowusa and @amylattacreations when you share your artwork so we can all be inspired by each other.
More Spring Projects
Looking for more spring projects? Check out these other posts by the Tombow Creator Crew.
Spring Banner with Rolled Flowers
Pingback: Cherry Blossom Planter - Amy Latta Creations