One thing that never fails to brighten any day is receiving “happy mail!” When I get a card or a package from a friend, it’s sure to make me smile, and I bet the same is true for you. In this digital age, when it’s so easy to text or send an email, reaching out and sending something tangible is so incredibly meaningful. Here’s a fun way you can decorate your happy mail envelopes to really make them stand out in the mailbox and bring some joy!

How to Make a Sunflower Envelope
There’s no wrong way to decorate an envelope or a package, and adding your handmade touch always makes it that much more special. Today, I’m going to walk you through doodling a sunflower envelope, because I can’t think of a more cheerful flower! Just grab the supplies listed below, and let’s get started.
Materials:
- white envelope
- Tombow MONO Graph Mechanical Pencil
- Tombow MONO Drawing Pen, 05
- Tombow Dual Brush Pens, assorted shades of yellow, green, and blue
- Tombow Fudenosuke, Hard Tip
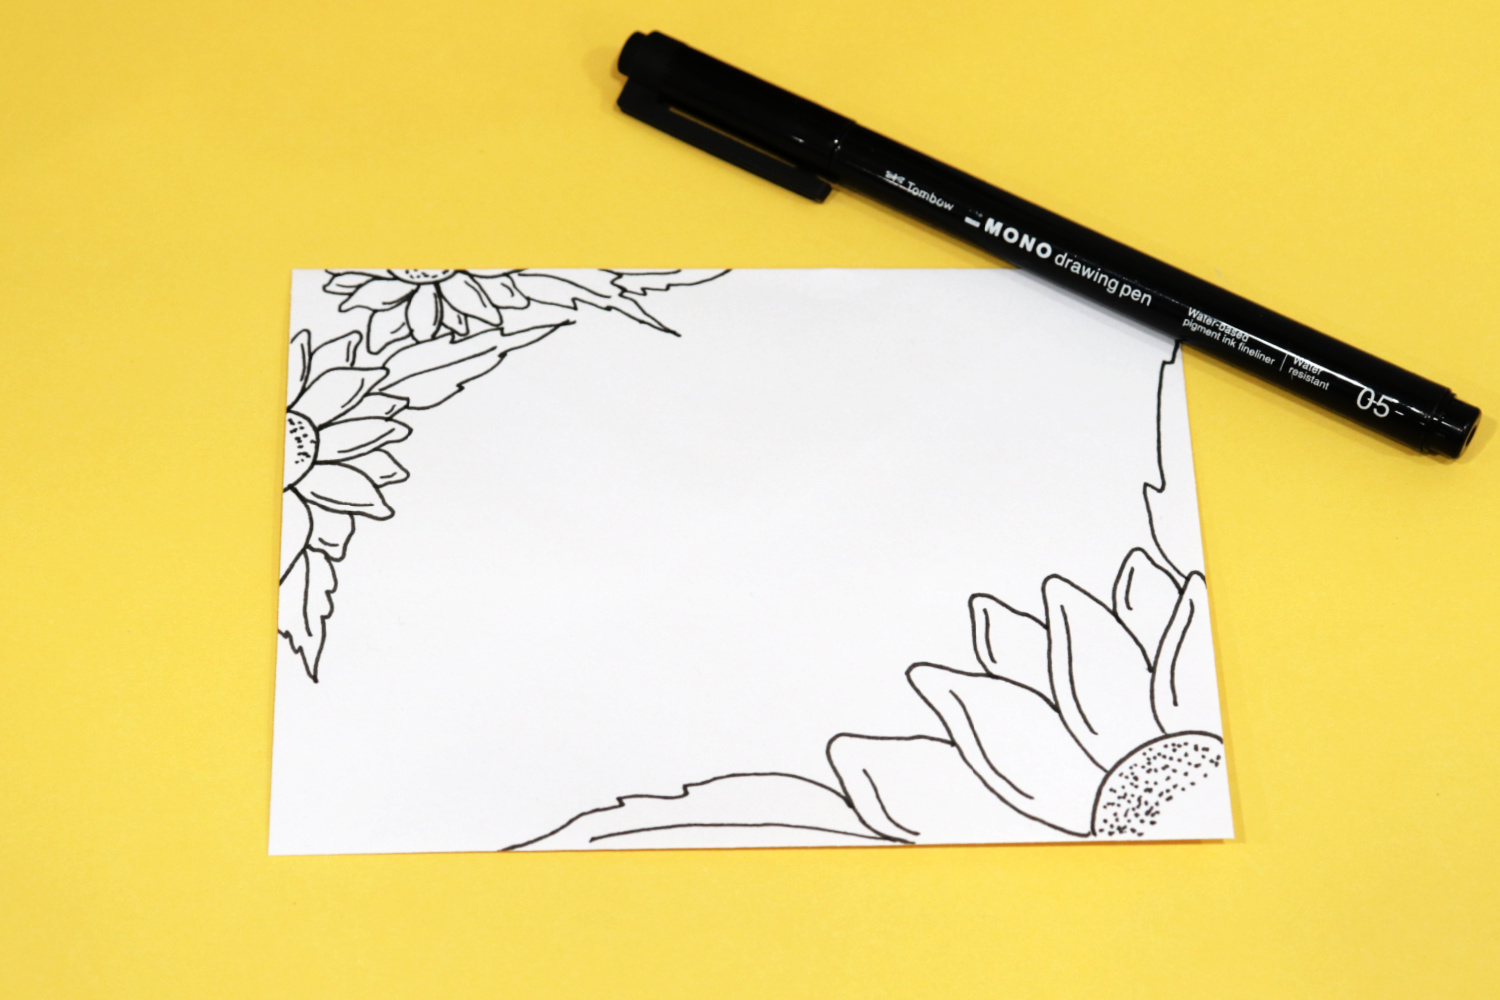
Step 1: Sketch your flowers in pencil.
Here’s a quick look at how I draw my sunflowers. Start with a circle, then sketch a set of slightly pointed petals around it. Next, add a “v” shape between each pair of petals to create a second layer. Finally, add details like dots in the center and a texture line in each petal. On the envelope, I drew partial flowers, extending from the corners and edges of the envelope, and added a few leaves.

Step 2: Trace your doodles with a MONO Drawing Pen.
These monoline pens come in seven different sizes: 005, 01, 02, 03, 04, 05, and 08. The larger the number, the thicker the tip, and therefore your lines, will be. I like using the 05 for this project, because it gives a nice, dark line that still leaves plenty of room to color inside your shape. The MONO Drawing Pens dry instantly with no smudging, which means they’re perfect for outlining doodles you want to color.
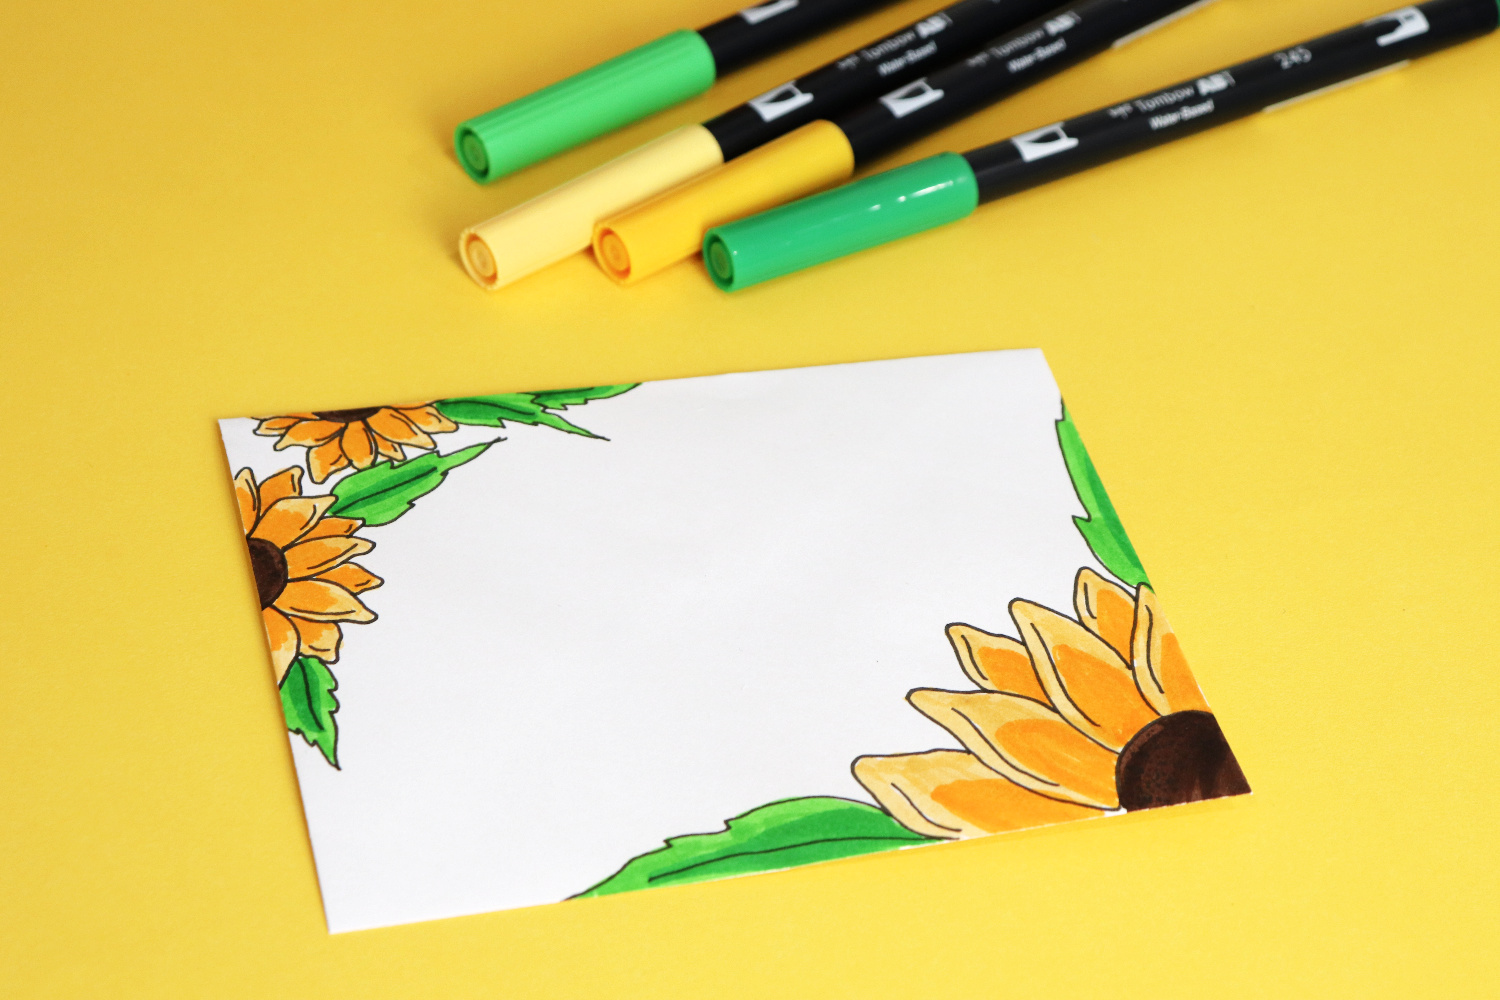
Step 2: Color your sunflowers using Dual Brush Pens.
I started with the petals, coloring them a pale yellow (991), then adding golden accents (985) in the center of each petal.
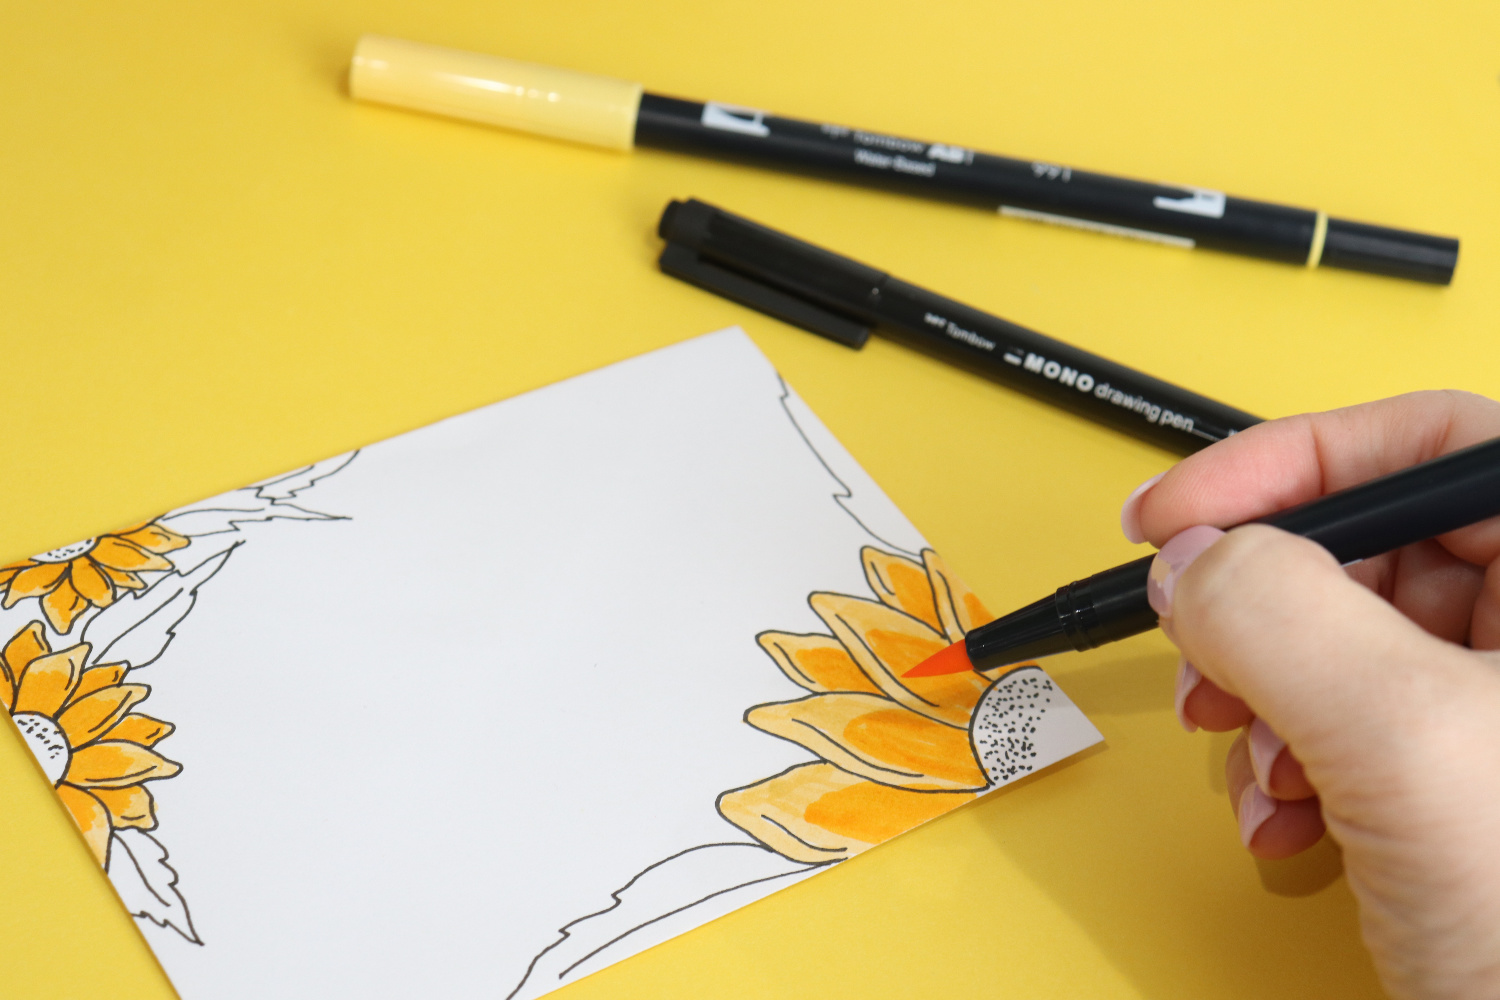
Then, I colored the centers dark brown, and the leaves with two shades of green. First, I colored the whole leaf with the lighter shade (195), then added the darker color (245) in the center around the vein.
Step 3: Use a straight edge and your pencil to lightly create three horizontal lines across the front center of the envelope.
This will help you line up your recipient’s name and address.
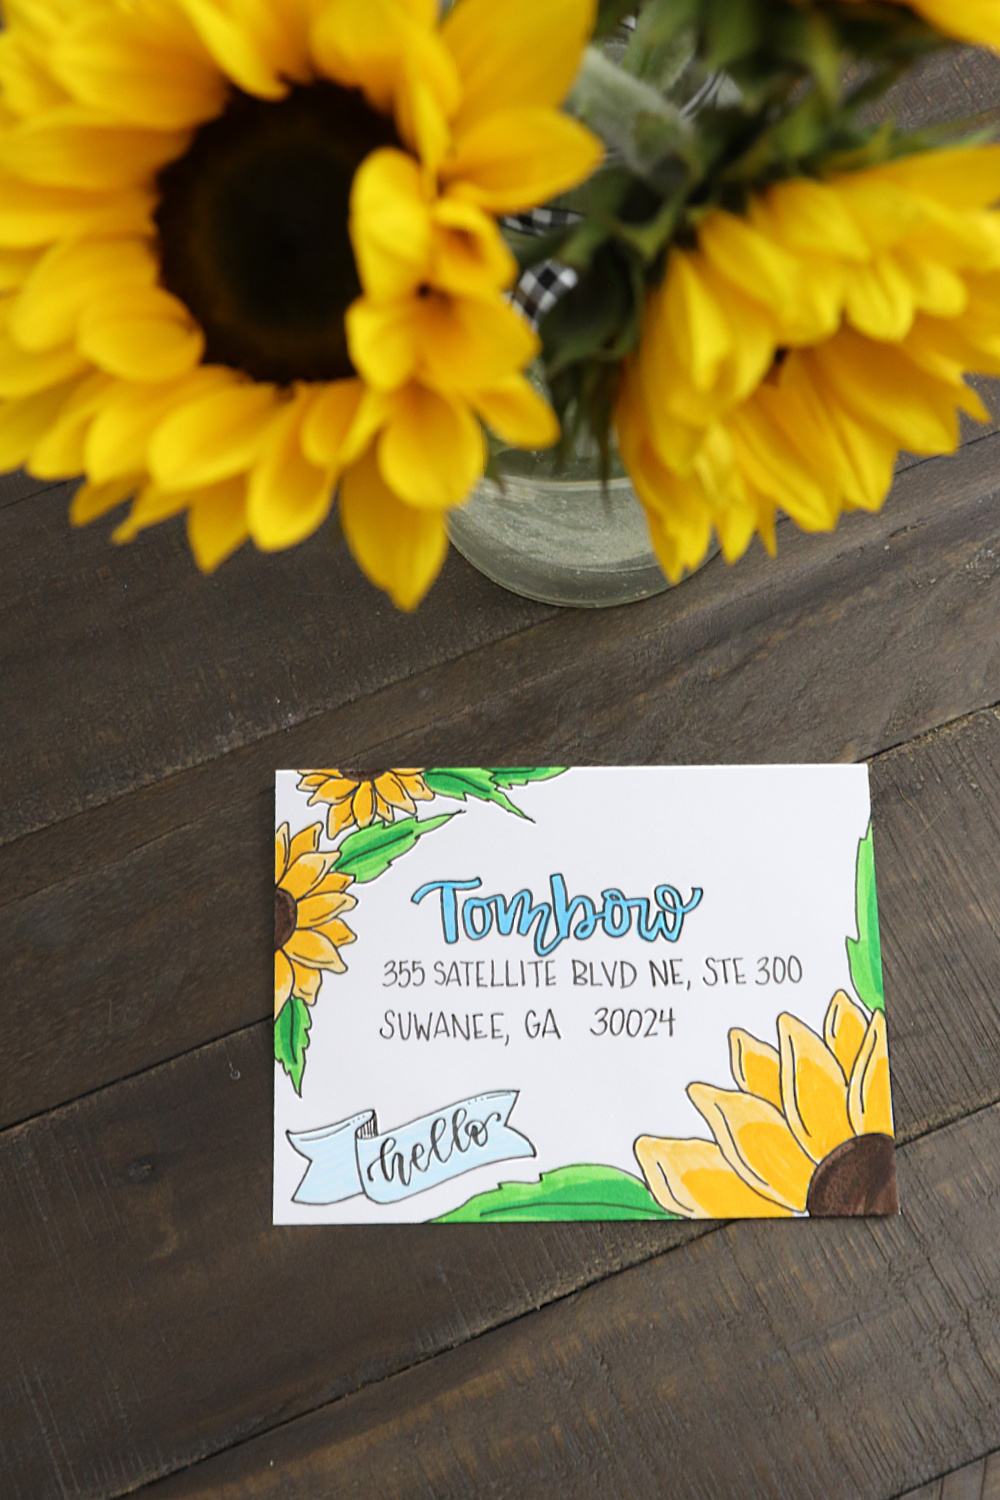
Step 4: Address your envelope.
I used a Dual Brush Pen to write, “Tombow,” in brush script, then outlined my letters using the MONO Drawing Pen for a bold effect. Then, I printed the address in all caps with the MONO Drawing Pen. You can use any style of lettering you like to make your envelope unique. Once your ink is dry, erase the pencil guide lines.
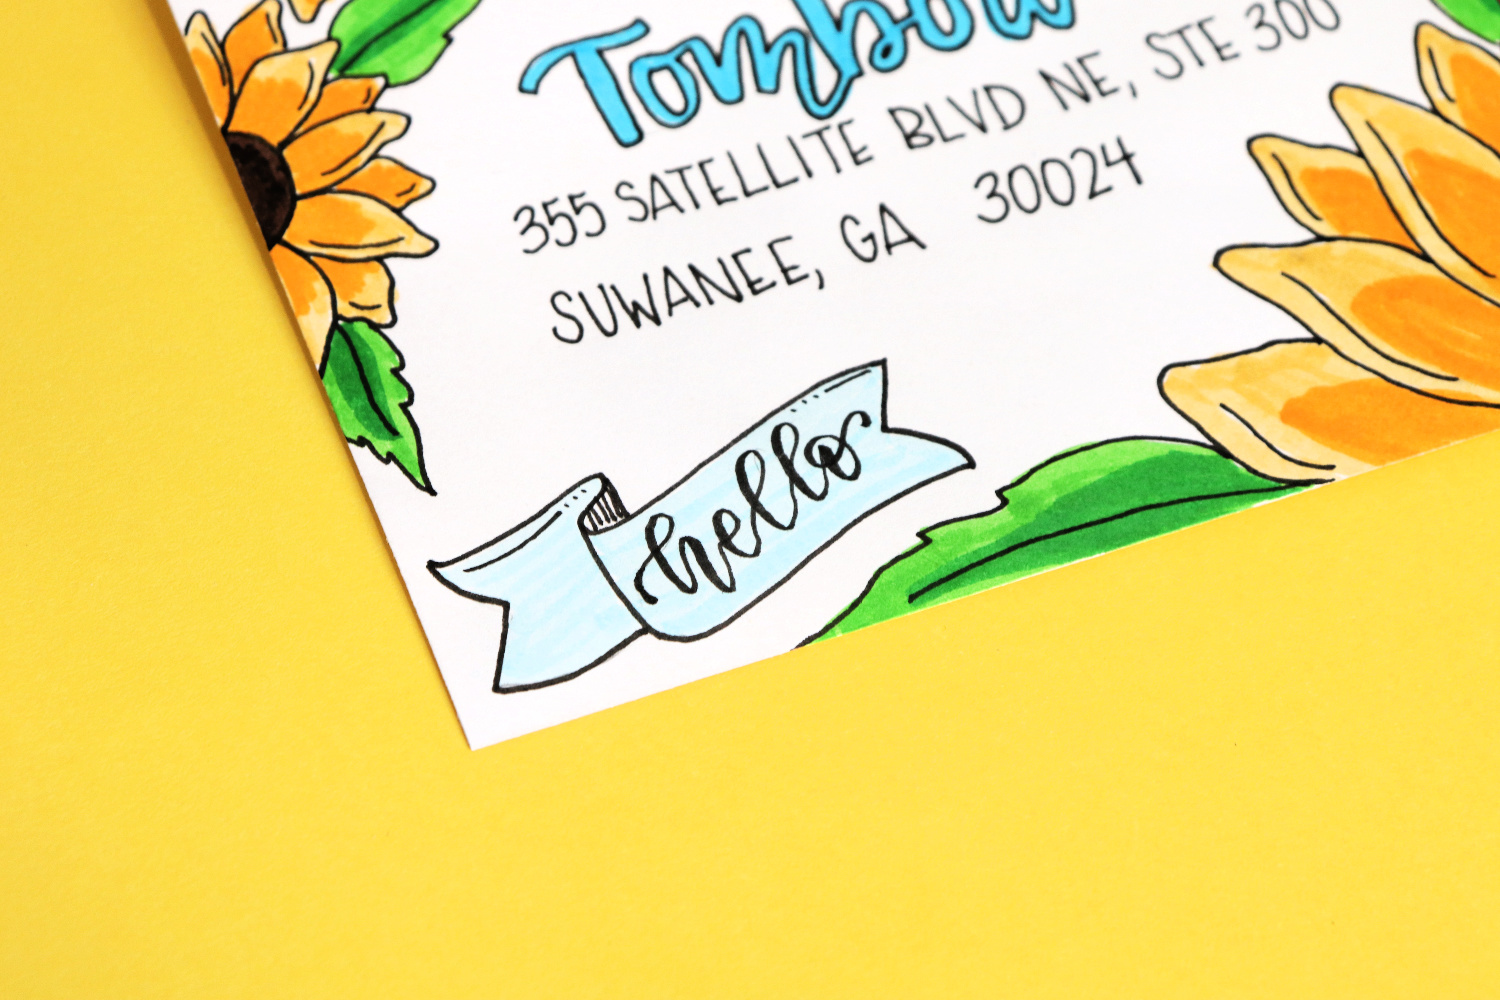
Step 5: Sketch a banner in the lower left corner.
If you like, you can do this in pencil, then trace it with the MONO Drawing Pen before coloring it in with a Dual Brush Pen (I used 451).
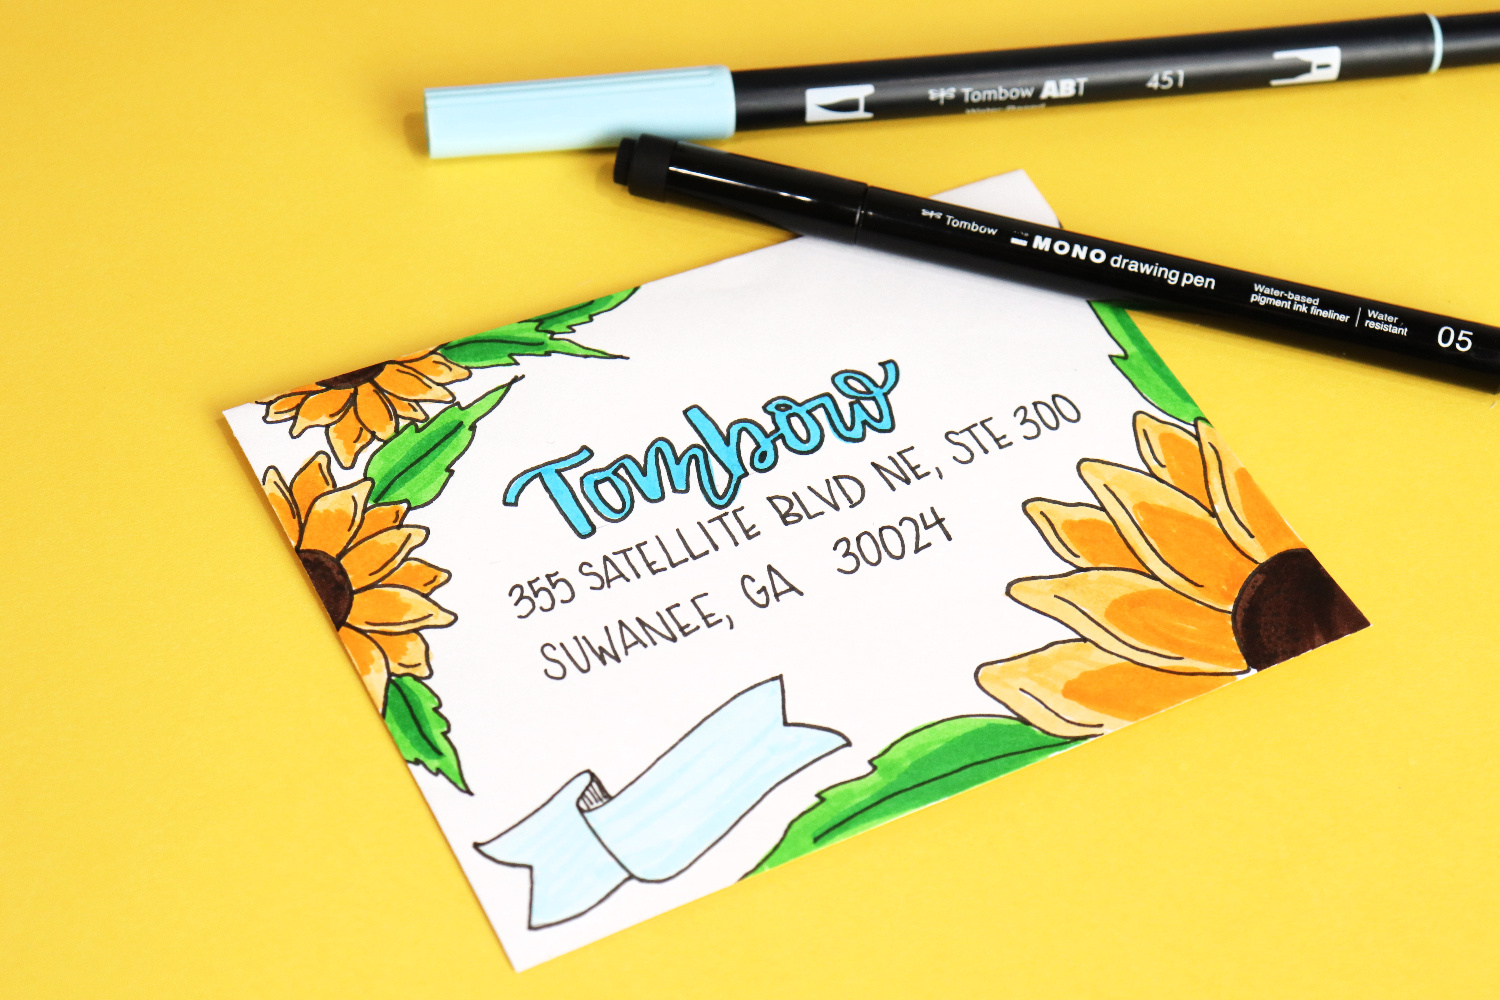
Step 6: Finally, write a message inside the banner.
I chose, “hello,” but you can substitute any other message you want to use. For this step, I used the Fudenosuke to write in brush script.
Once your envelope is finished, you can stuff it with your letter or card and share some “happy mail”! Can you imagine how fun it would be to pull this out of your mailbox?
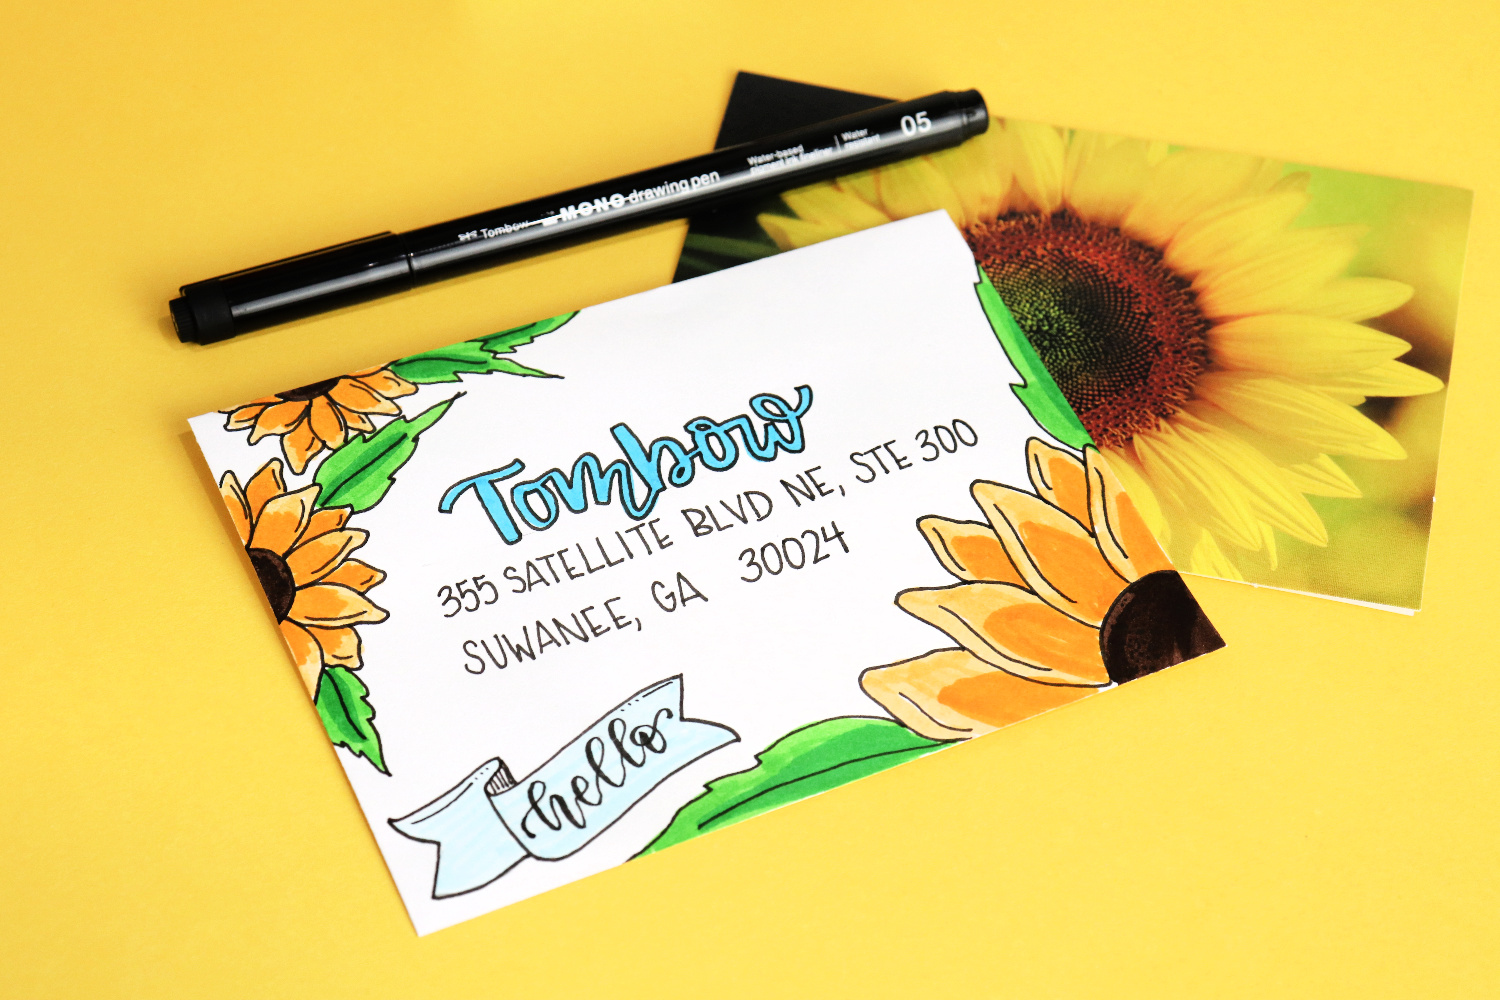
It’s so much fun to give and receive physical correspondence in this digital age. Who’s the first person you’d love to send this to? If you create your own decorative happy mail, be sure to tag @tombowusa and @amylattacreations on socials so we can see and enjoy it too!
Here are some other ideas to try for making your own decorative cards and envelopes:
Gee’s Bend Quilt Inspired Cards
Happy creating!