A Front Porch Worthy Lettered Pumpkin in 5 Steps 2


Lauren Fitzmaurice of Renmade Calligraphy shows you how to create a handlettered pumpkin that is covered in foil polkadots and burlap bow in this quick and easy 5 step tutorial using Tombow USA supplies. For more tips and tricks with letterIng and crafting goodness at renmadecalligraphy.com.

Have you been trying to find the perfect front porch worthy pumpkin? In this tutorial I’ll be showing you how to create a super cute decorative pumpkin in only 5 steps with high quality Tombow USA products! Hey, y’all!! It’ Lauren of Renmade Calligraphy back to share some fun  crafty and lettery goodness with you! There is just  something I love about the fall season and all of the decor. I love pumpkins  the best!  They come in all shapes,  colors, and sizes and are  super fun to decorate. Check out the next  5 steps to see  how to create a fun pumpkin that is perfect  to set out on the porch or  show off inside the home.

WHAT YOU’LL  NEED


Lauren Fitzmaurice of Renmade Calligraphy shows you how to create a handlettered pumpkin that is covered in foil polkadots and burlap bow in this quick and easy 5 step tutorial using Tombow USA supplies. For more tips and tricks with letterIng and crafting goodness at renmadecalligraphy.com.

1. LETTER THE  PUMPKIN

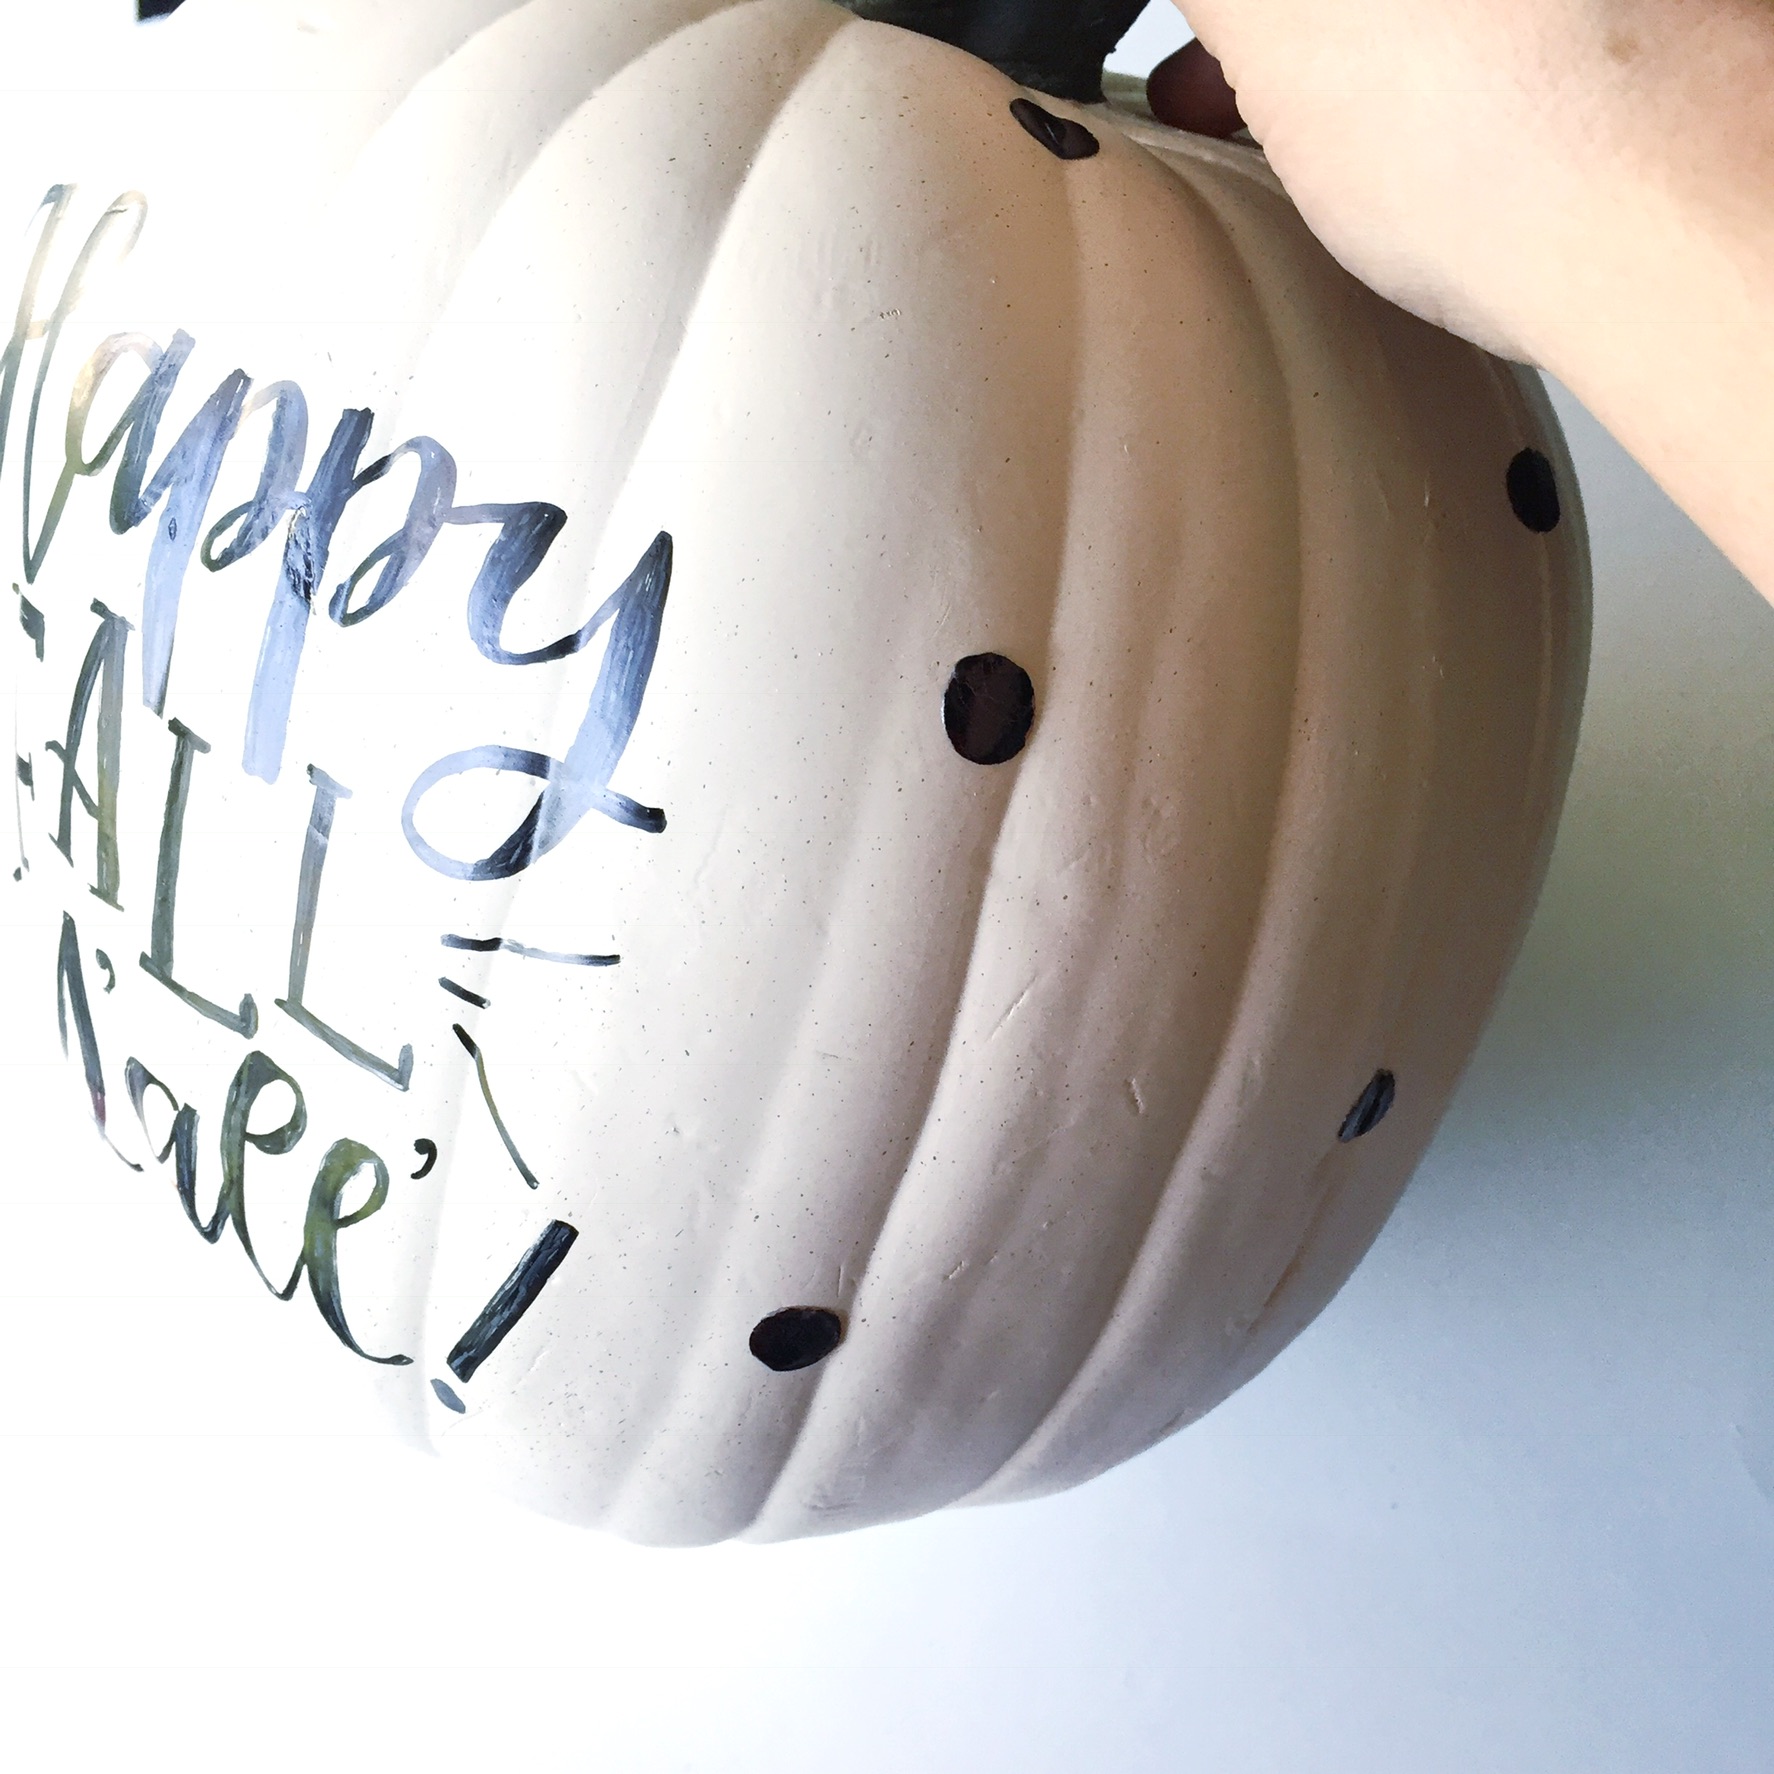
Start by adding a fun fall phrase onto your pumpkin  using a  Tombow MONO Twin Permanent Marker.  Letter it and then create faux calligraphy with  the broad  tip of the marker, making the downstrokes thicker.

Lauren Fitzmaurice of Renmade Calligraphy shows you how to create a handlettered pumpkin that is covered in foil polkadots and burlap bow in this quick and easy 5 step tutorial using Tombow USA supplies. For more tips and tricks with letterIng and crafting goodness at renmadecalligraphy.com.


Lauren Fitzmaurice of Renmade Calligraphy shows you how to create a handlettered pumpkin that is covered in foil polkadots and burlap bow in this quick and easy 5 step tutorial using Tombow USA supplies. For more tips and tricks with letterIng and crafting goodness at renmadecalligraphy.com.

2.     ADD TOMBOW ADHESIVE DOTS TO CREATE POLKA DOT PATTERN

One of my favorite things about the Tombow MONO Adhesive Dots is that they are round and able to be used with foil… perfect for creating your own polka dot pattern! Simply peel off one of the plastic backings and scatter the dots around the lettering until the entire pumpkin is covered.  Leave  one plastic backing on  during the placement..

Lauren Fitzmaurice of Renmade Calligraphy shows you how to create a handlettered pumpkin that is covered in foil polkadots and burlap bow in this quick and easy 5 step tutorial using Tombow USA supplies. For more tips and tricks with letterIng and crafting goodness at renmadecalligraphy.com.


Lauren Fitzmaurice of Renmade Calligraphy shows you how to create a handlettered pumpkin that is covered in foil polkadots and burlap bow in this quick and easy 5 step tutorial using Tombow USA supplies. For more tips and tricks with letterIng and crafting goodness at renmadecalligraphy.com.

3. APPLY FOIL TO THE TOMBOW ADHESIVE DOTS

Now apply foil to the Tombow MONO Adhesive Dots. Peel off the plastic backing and place the foil dull side down onto the adhesive. Lift and  repeat until each dot is completely foiled.

Lauren Fitzmaurice of Renmade Calligraphy shows you how to create a handlettered pumpkin that is covered in foil polkadots and burlap bow in this quick and easy 5 step tutorial using Tombow USA supplies. For more tips and tricks with letterIng and crafting goodness at renmadecalligraphy.com.

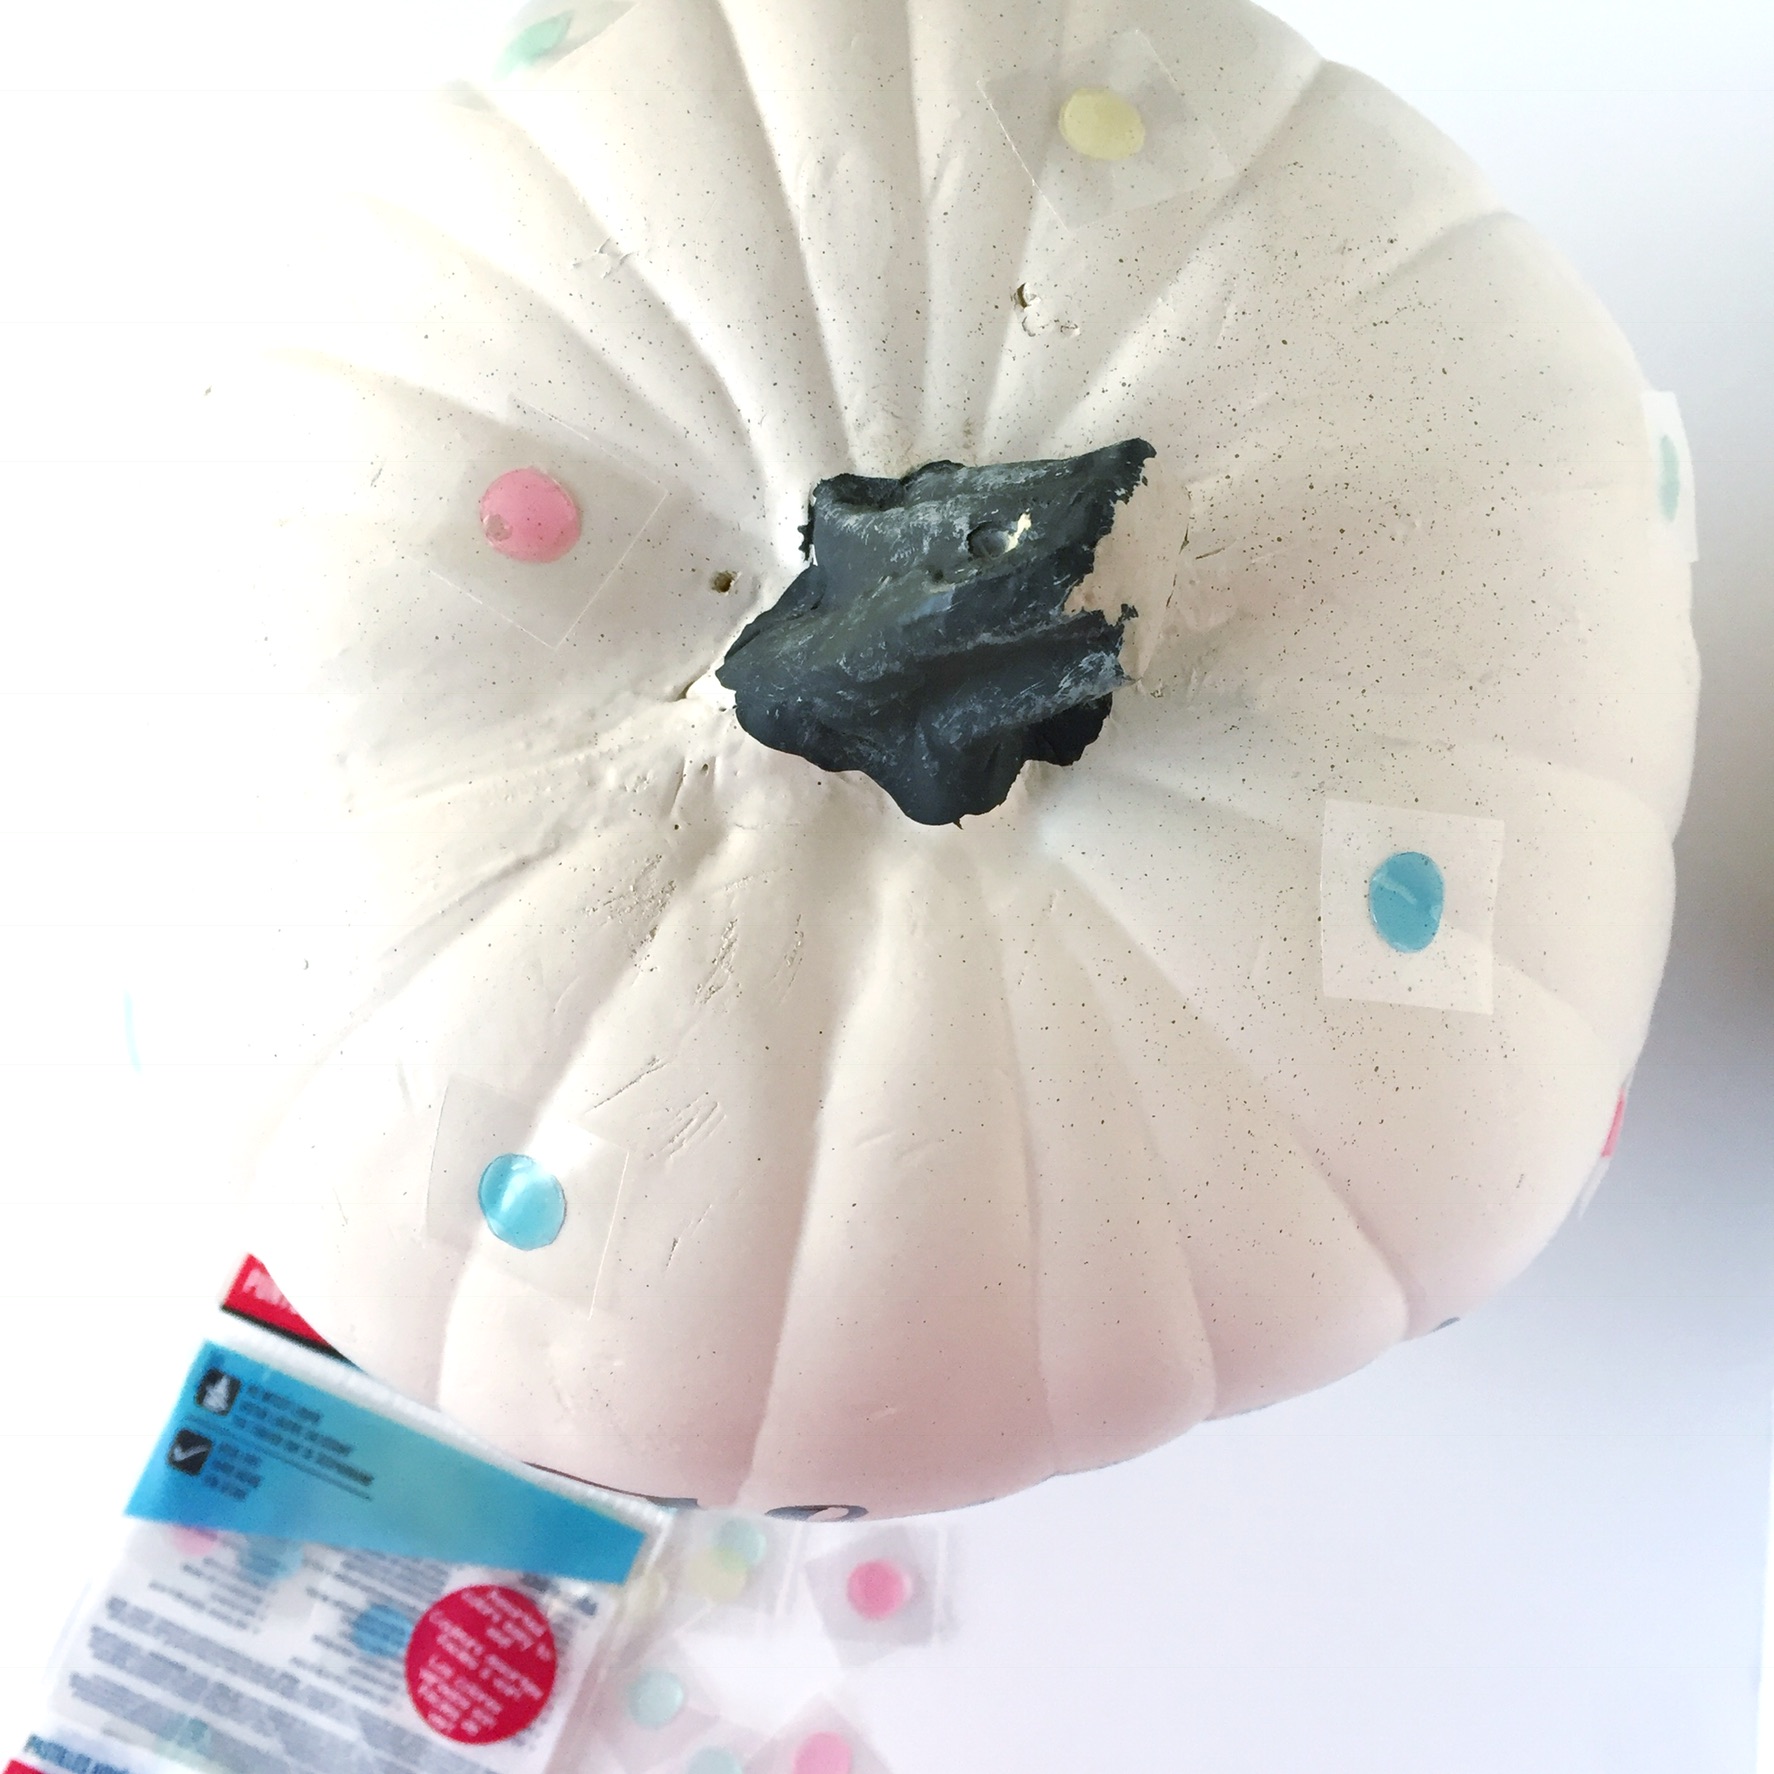
4. APPLY  TOMBOW XTREME ADHESIVE TABS TO THE TOP OF THE PUMPKIN

Place 3 to 5  Tombow Xtreme Adhesive Tabs to the top of the pumpkin, above the lettering. Peel off the paper backing.

Lauren Fitzmaurice of Renmade Calligraphy shows you how to create a handlettered pumpkin that is covered in foil polkadots and burlap bow in this quick and easy 5 step tutorial using Tombow USA supplies. For more tips and tricks with letterIng and crafting goodness at renmadecalligraphy.com.

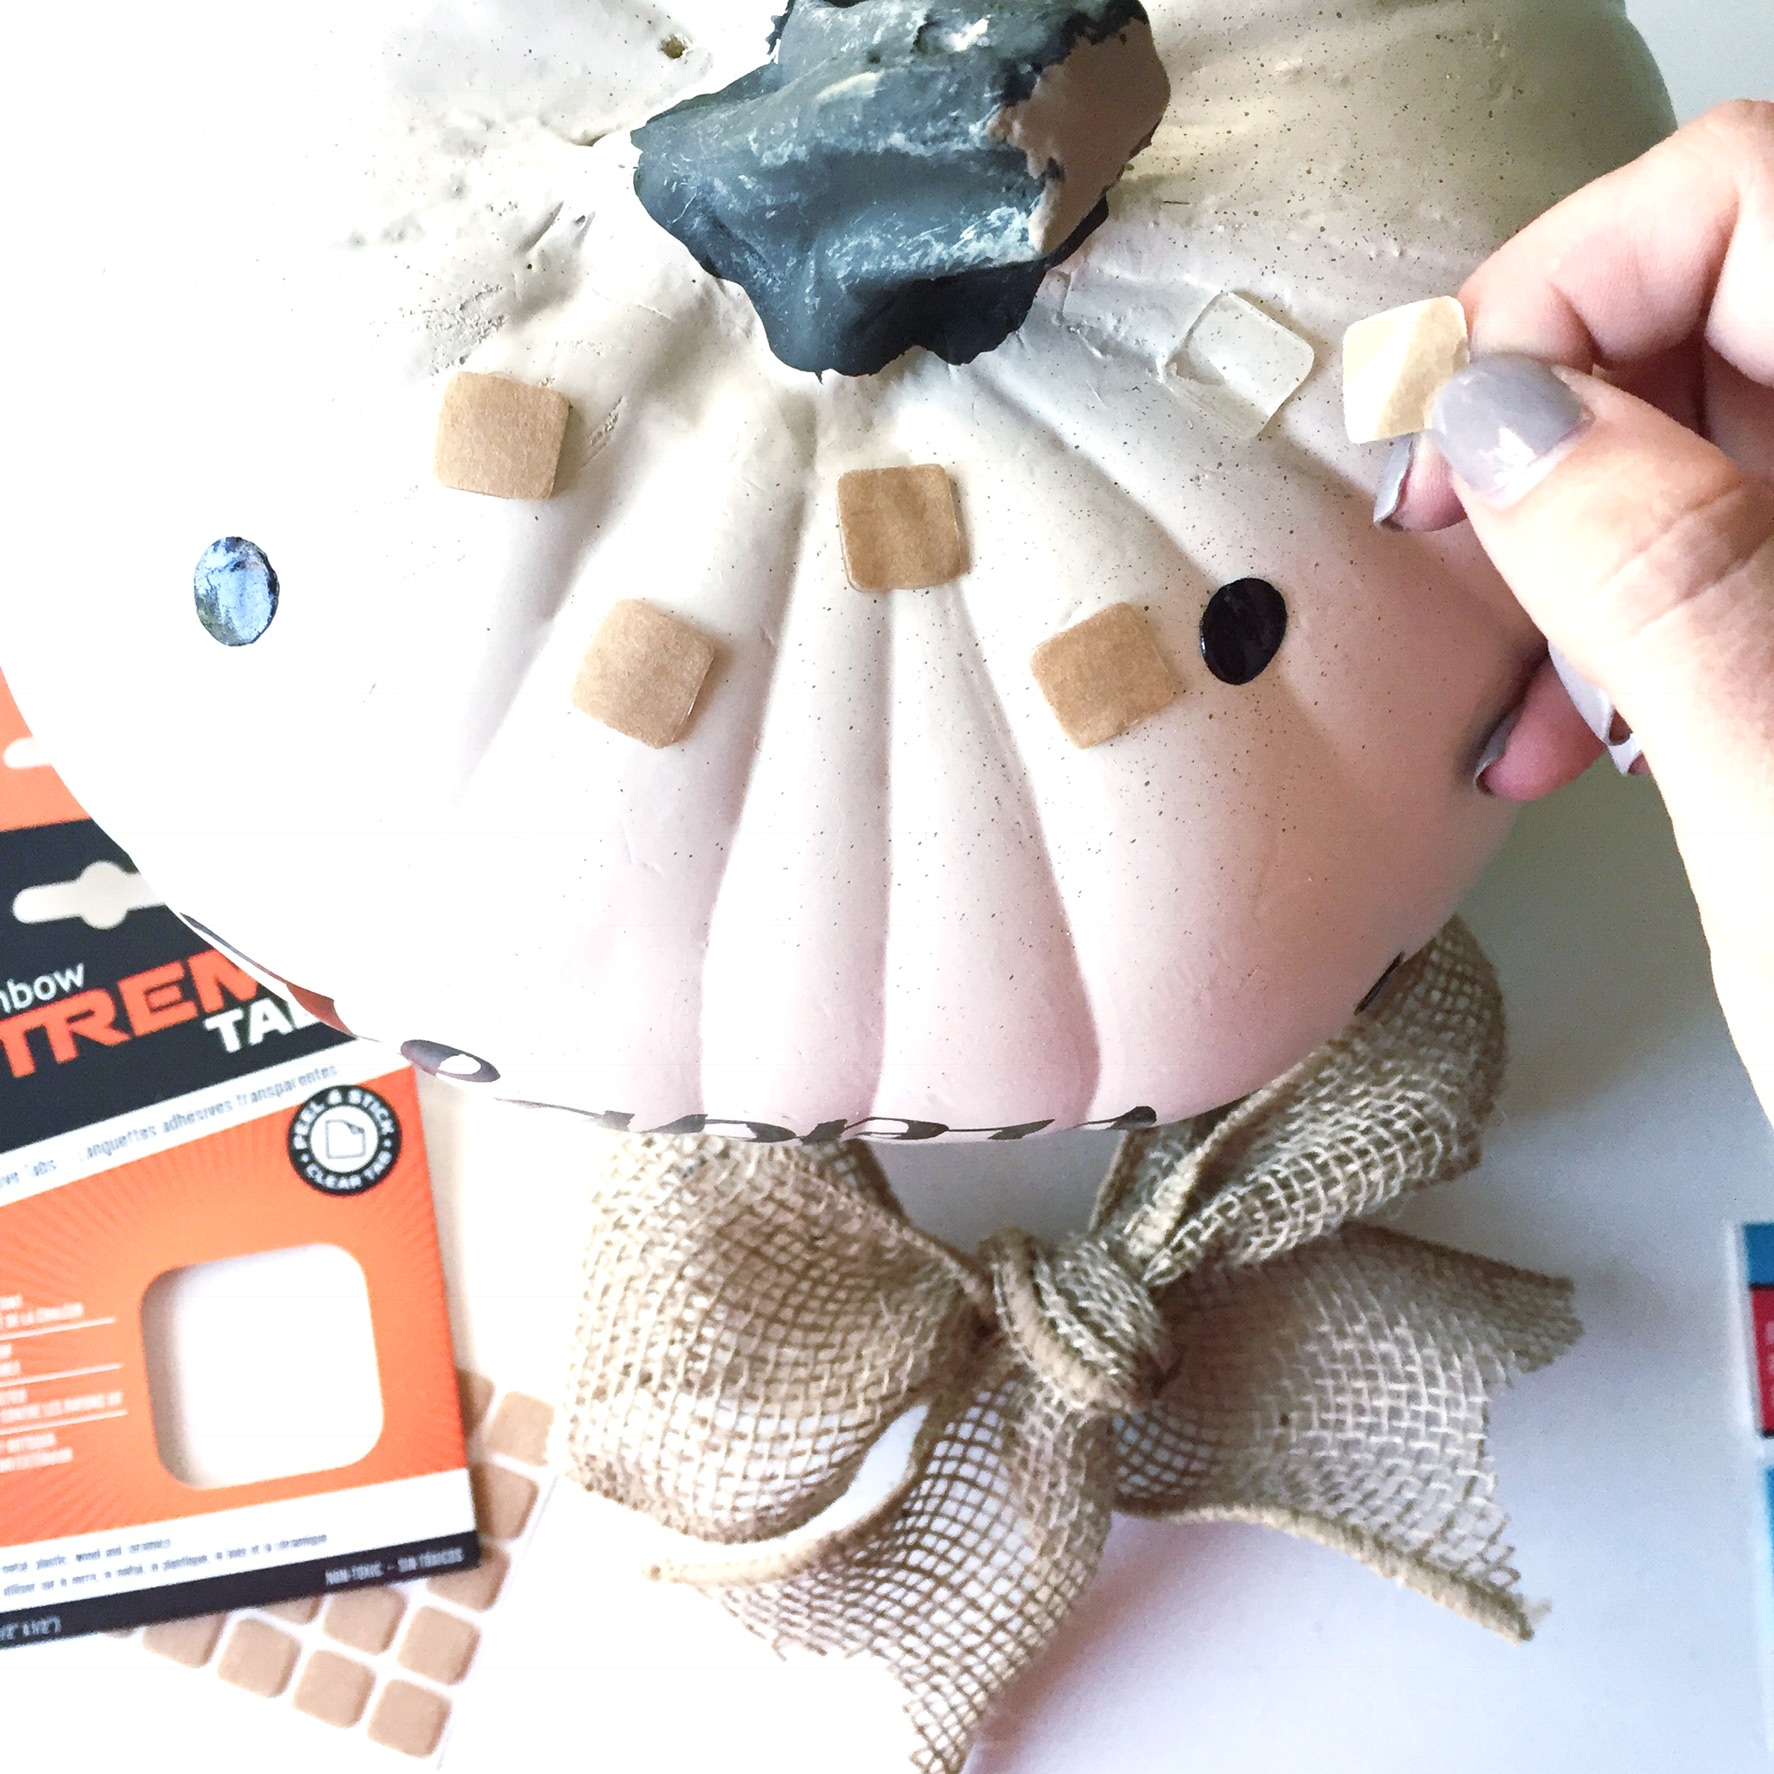
5. CREATE BOW AND PLACE AT  THE TOP OF THE PUMPKIN

Tie a ribbon and then attach to the top of the pumpkin, pressing firmly onto the Tombow Xtreme Adhesive Tabs until the bow is secure.

Lauren Fitzmaurice of Renmade Calligraphy shows you how to create a handlettered pumpkin that is covered in foil polkadots and burlap bow in this quick and easy 5 step tutorial using Tombow USA supplies. For more tips and tricks with letterIng and crafting goodness at renmadecalligraphy.com.

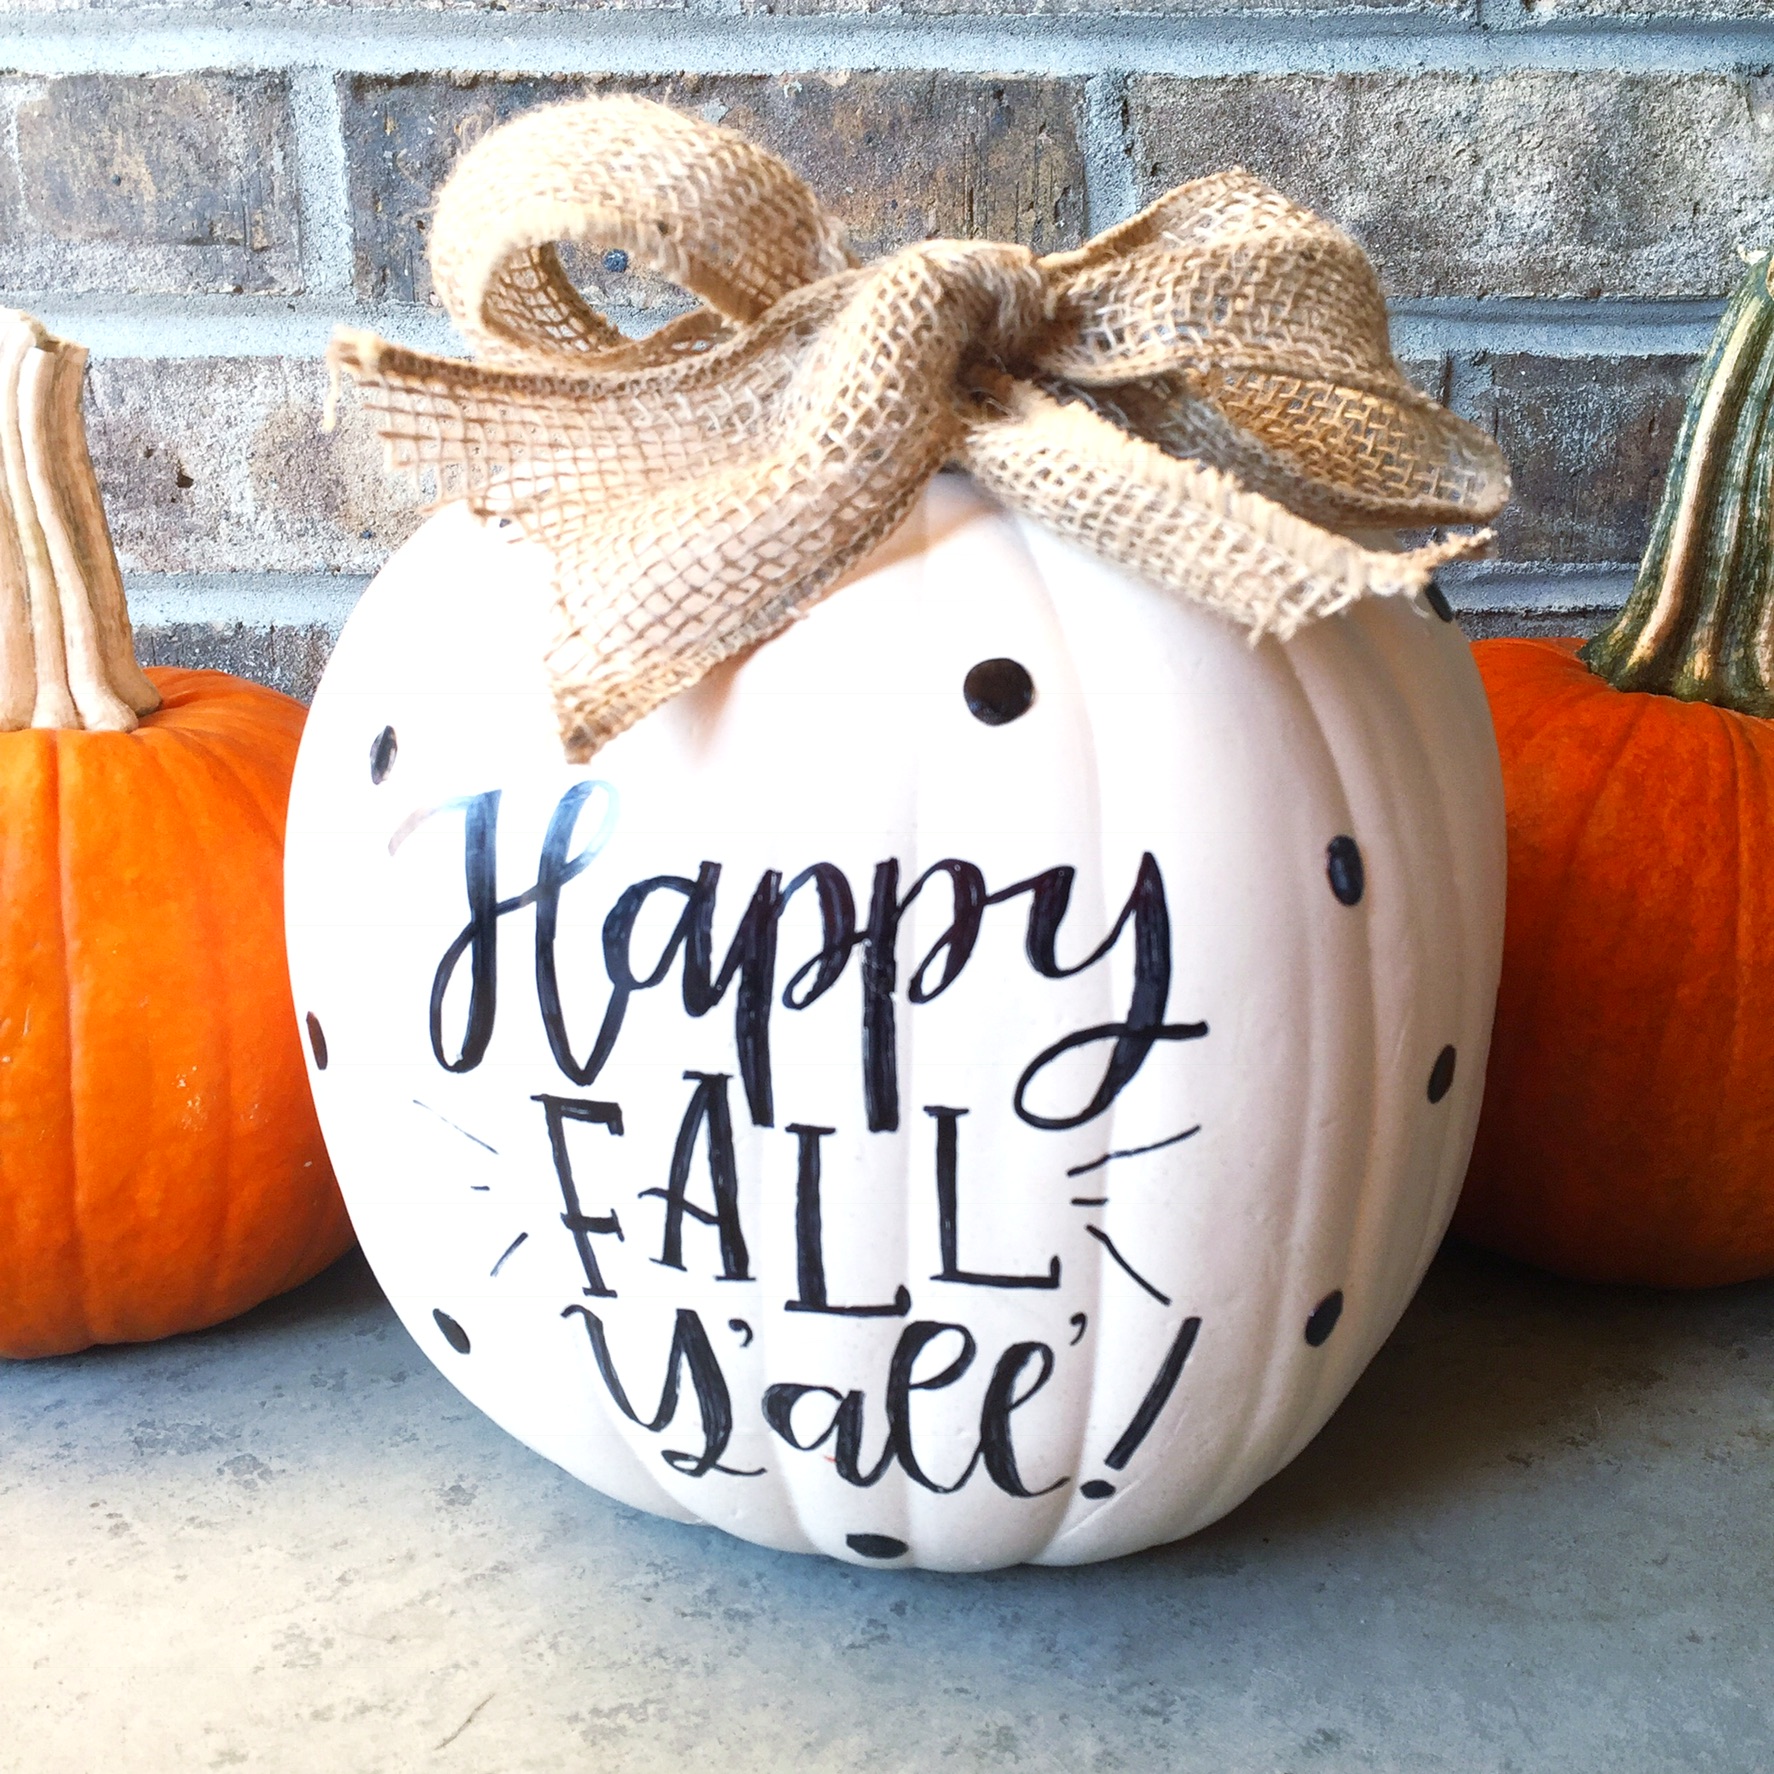
POLKA DOTTED AND PORCH READY

And there you have it:  a perfectly polka dotted pumpkin ready to add to your fall decor.

Lauren Fitzmaurice of Renmade Calligraphy shows you how to create a handlettered pumpkin that is covered in foil polkadots and burlap bow in this quick and easy 5 step tutorial using Tombow USA supplies. For more tips and tricks with letterIng and crafting goodness at renmadecalligraphy.com.

I’d love to see you create a pumpkin of your very own! Go over to Renmade Calligraphy on Instagram and say hello! Make sure to tag me and @tombowusa in anything you create!

Happy Lettering!

Lauren

Tombow Design Team Member Lauren Fitzmaurice


Leave a comment

2 thoughts on “A Front Porch Worthy Lettered Pumpkin in 5 Steps