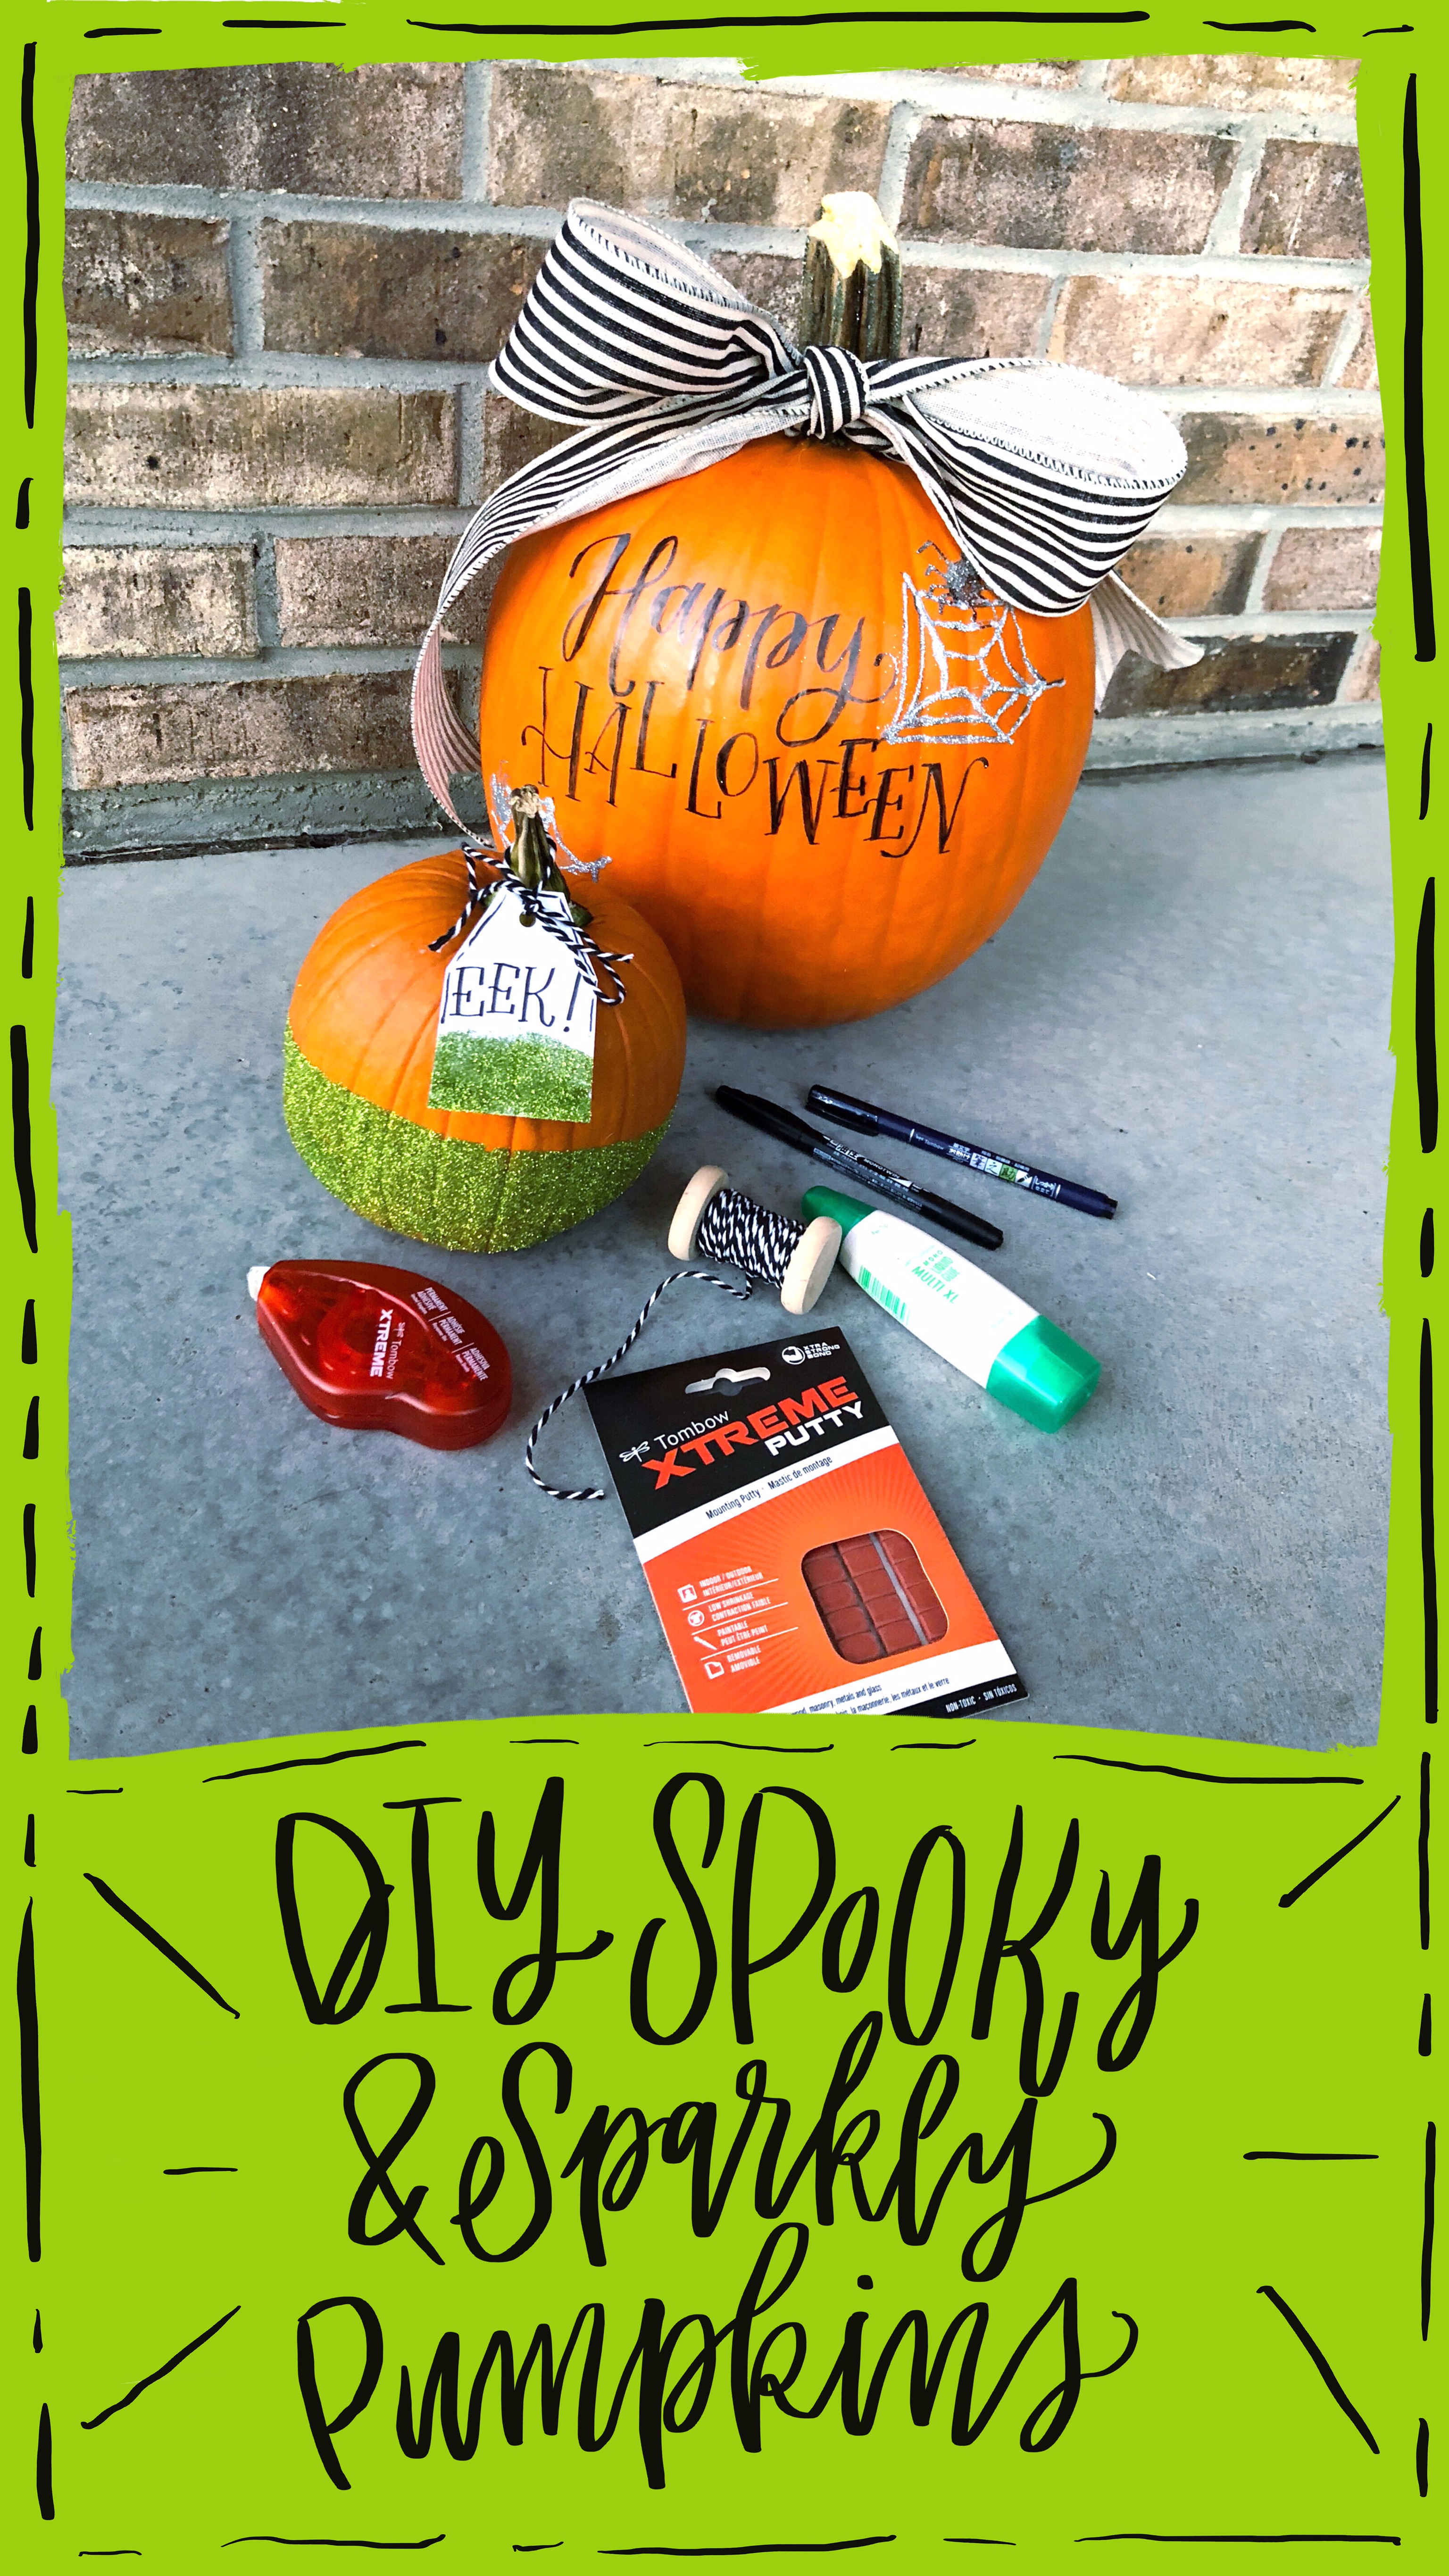
Hello lovelies, it’s Lauren of Renmade Calligraphy and I am so excited to show you two different ideas for creating spooky and sparkly pumpkins using my favorite Tombow USA Supplies and a little glitter… or maybe a lot. These sparkly pumpkins are perfect for your covered porch or would look lovely inside a space too.
WHAT YOU’LL NEED
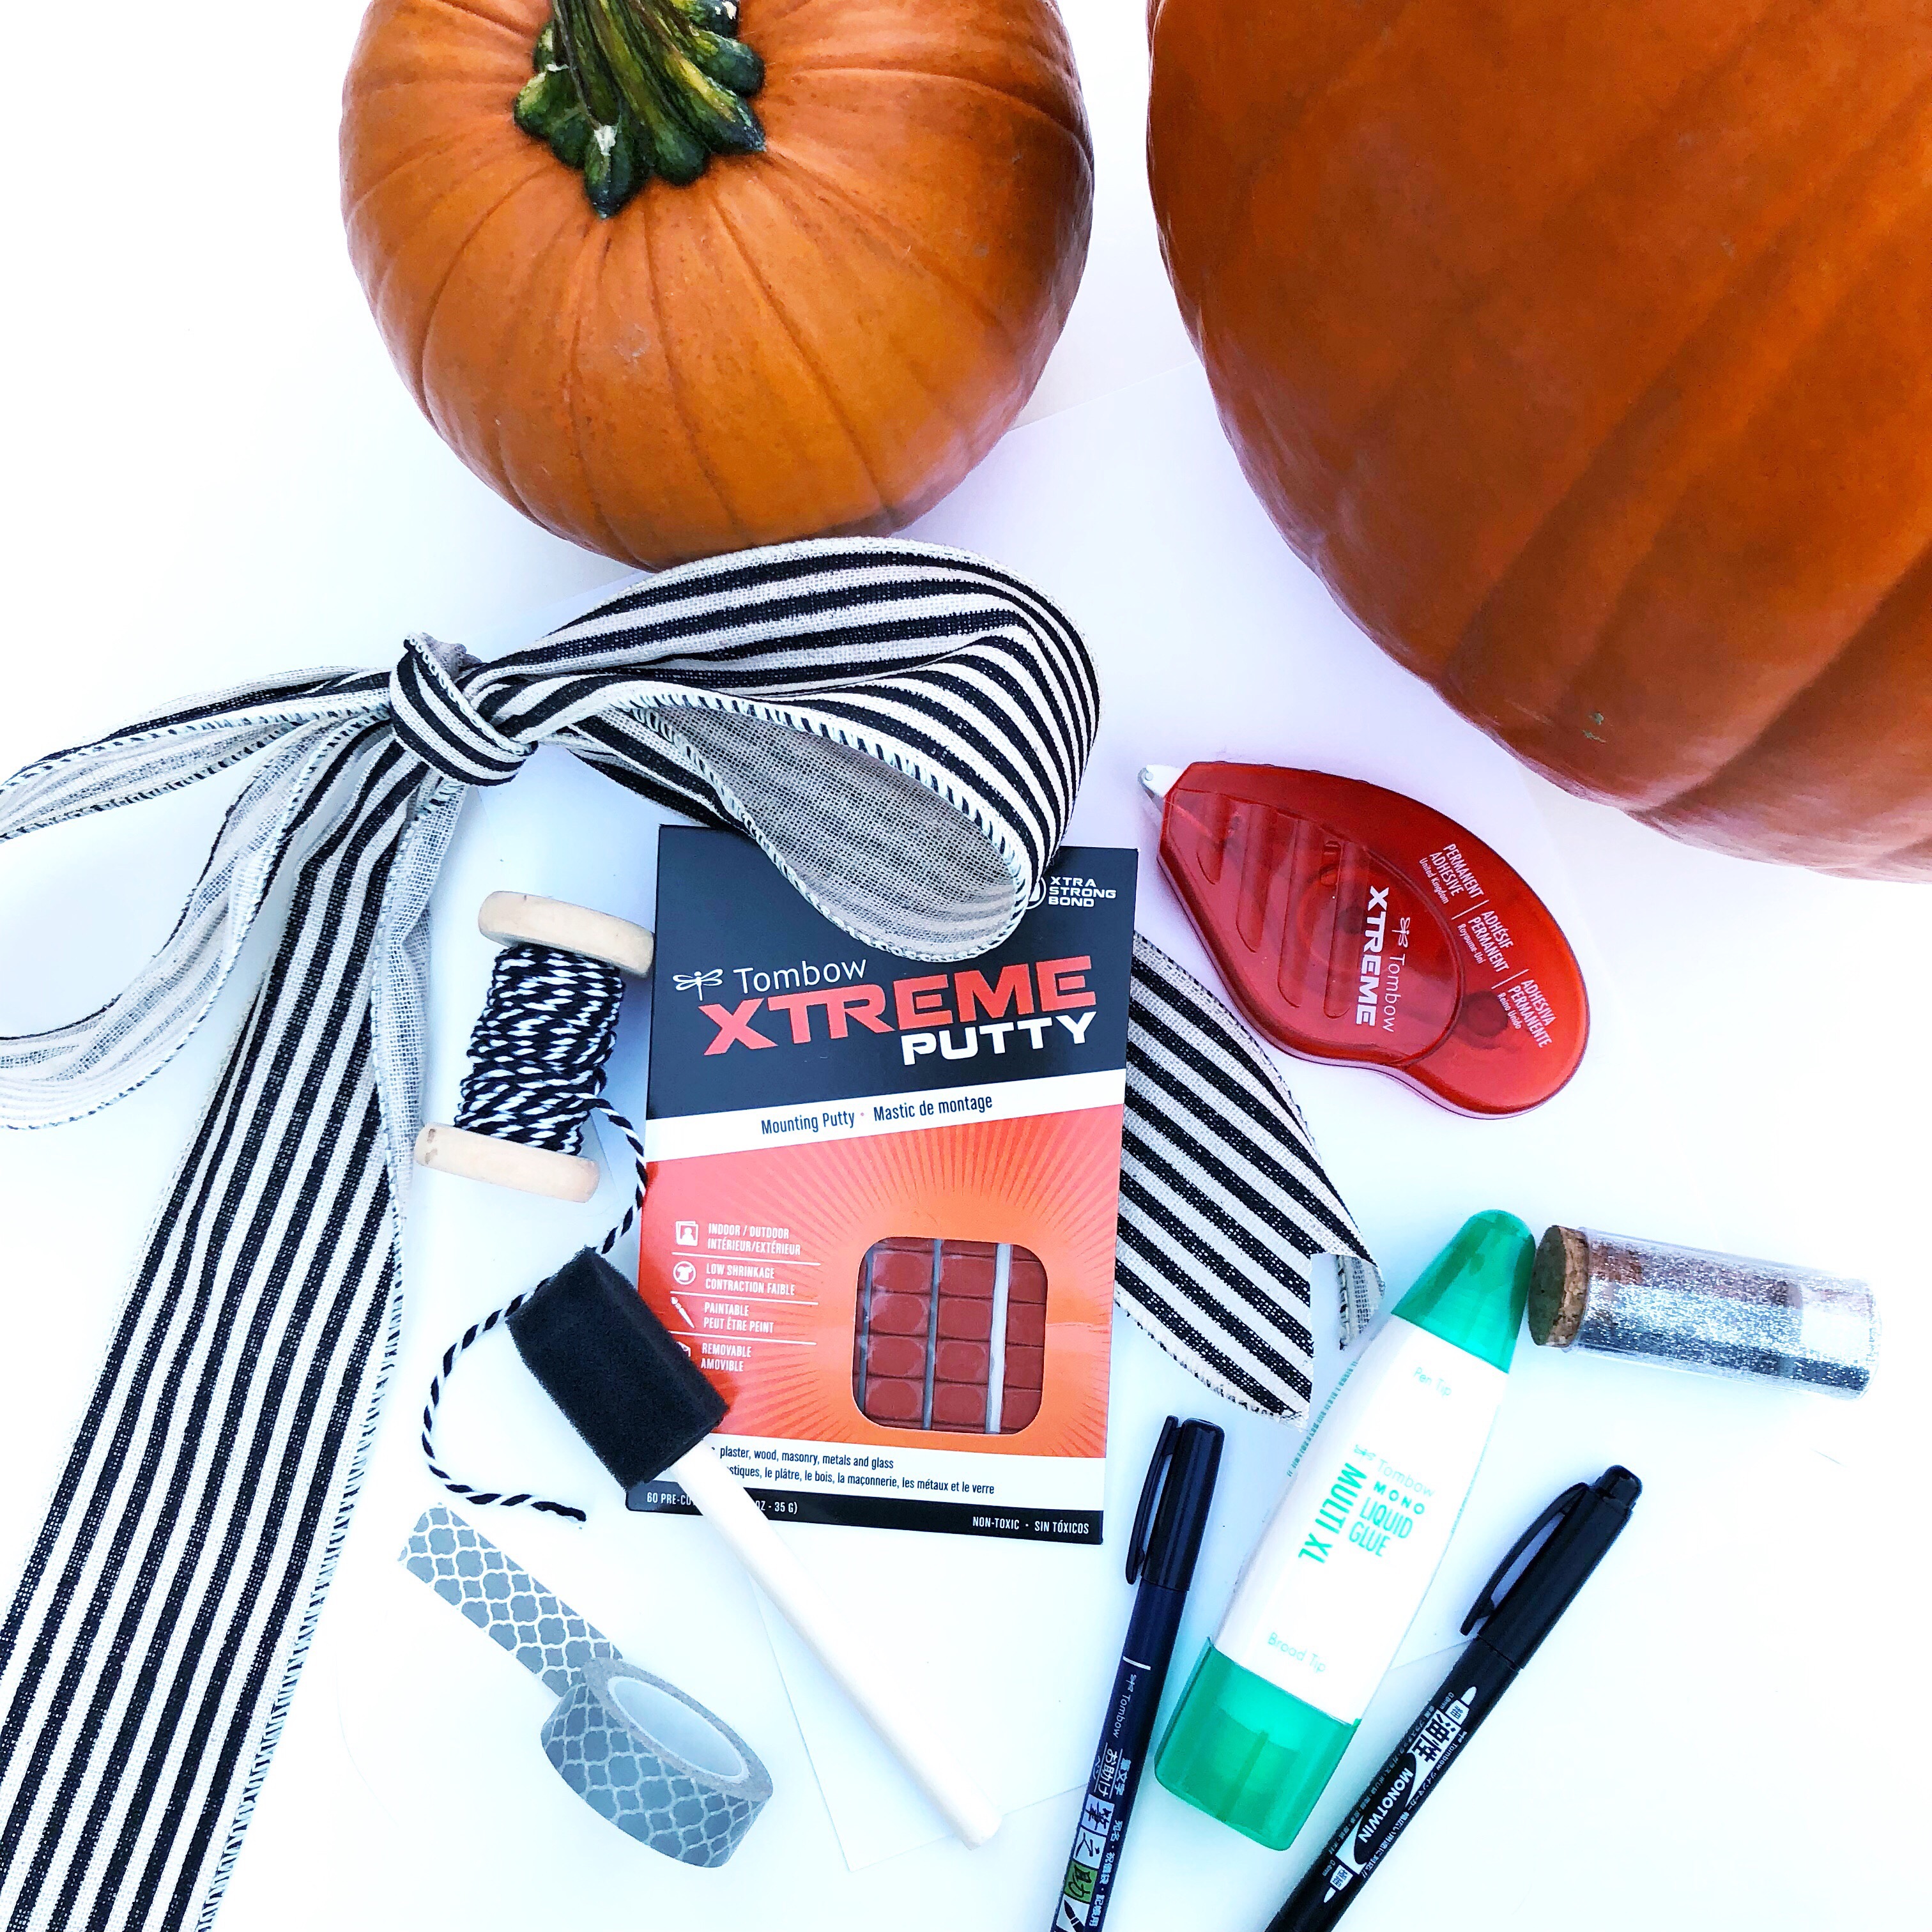
- A large and small pumpkin
- Washi tape or painters tape… any paper-based tape that’s easy to peel
- Tombow MONO Multi XL Liquid Glue
- Foam Brush
- Card stock and baker’s twine
- Tombow Fudenosuke Hard Tip Brush Pen
- Tombow MONO Twin Permanent Marker
- Festive Colored Fine Glitter
- Decorative Ribbon
- Tombow Xtreme Adhesive
- Tombow Xtreme Mounting Putty
1. COLOR BLOCK GLITTER PUMPKIN
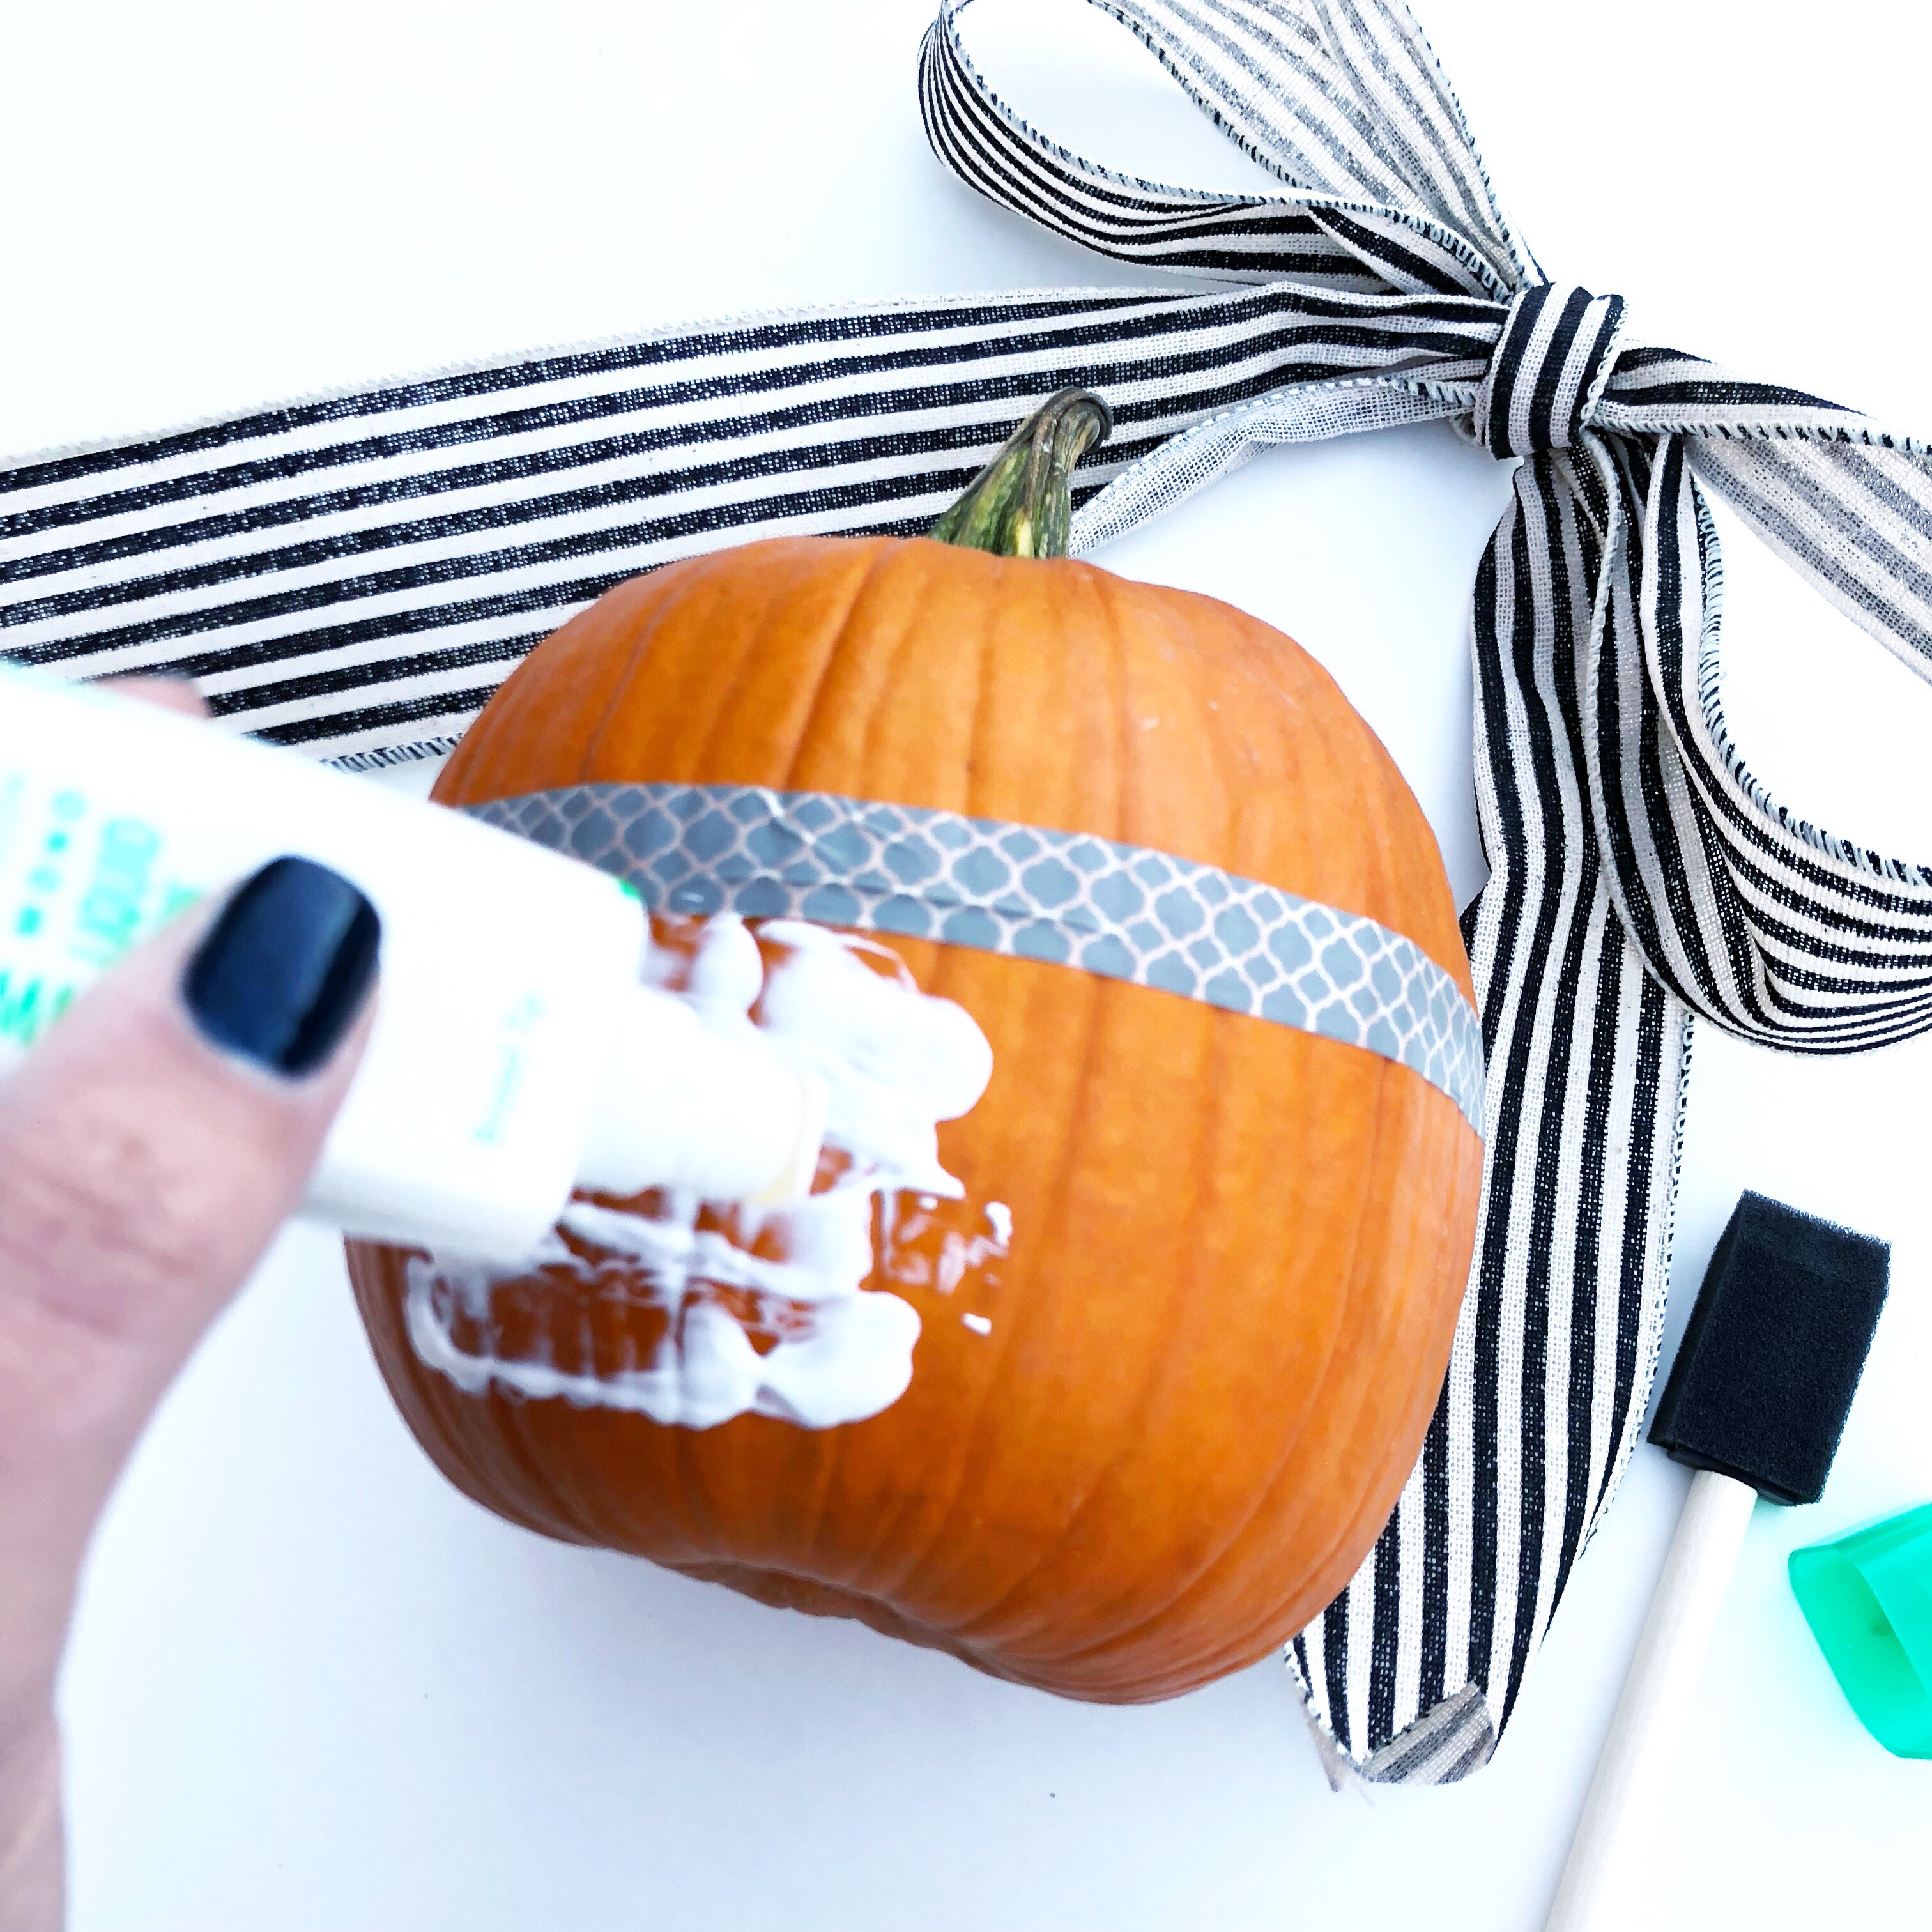
It’s so easy to create a cute color block pumpkin. Start by placing tape around the middle of a small pumpkin. Then using the broad tip of the Tombow MONO Multi XL Liquid Glue. Smooth the glue out with a foam brush so that it’s even.
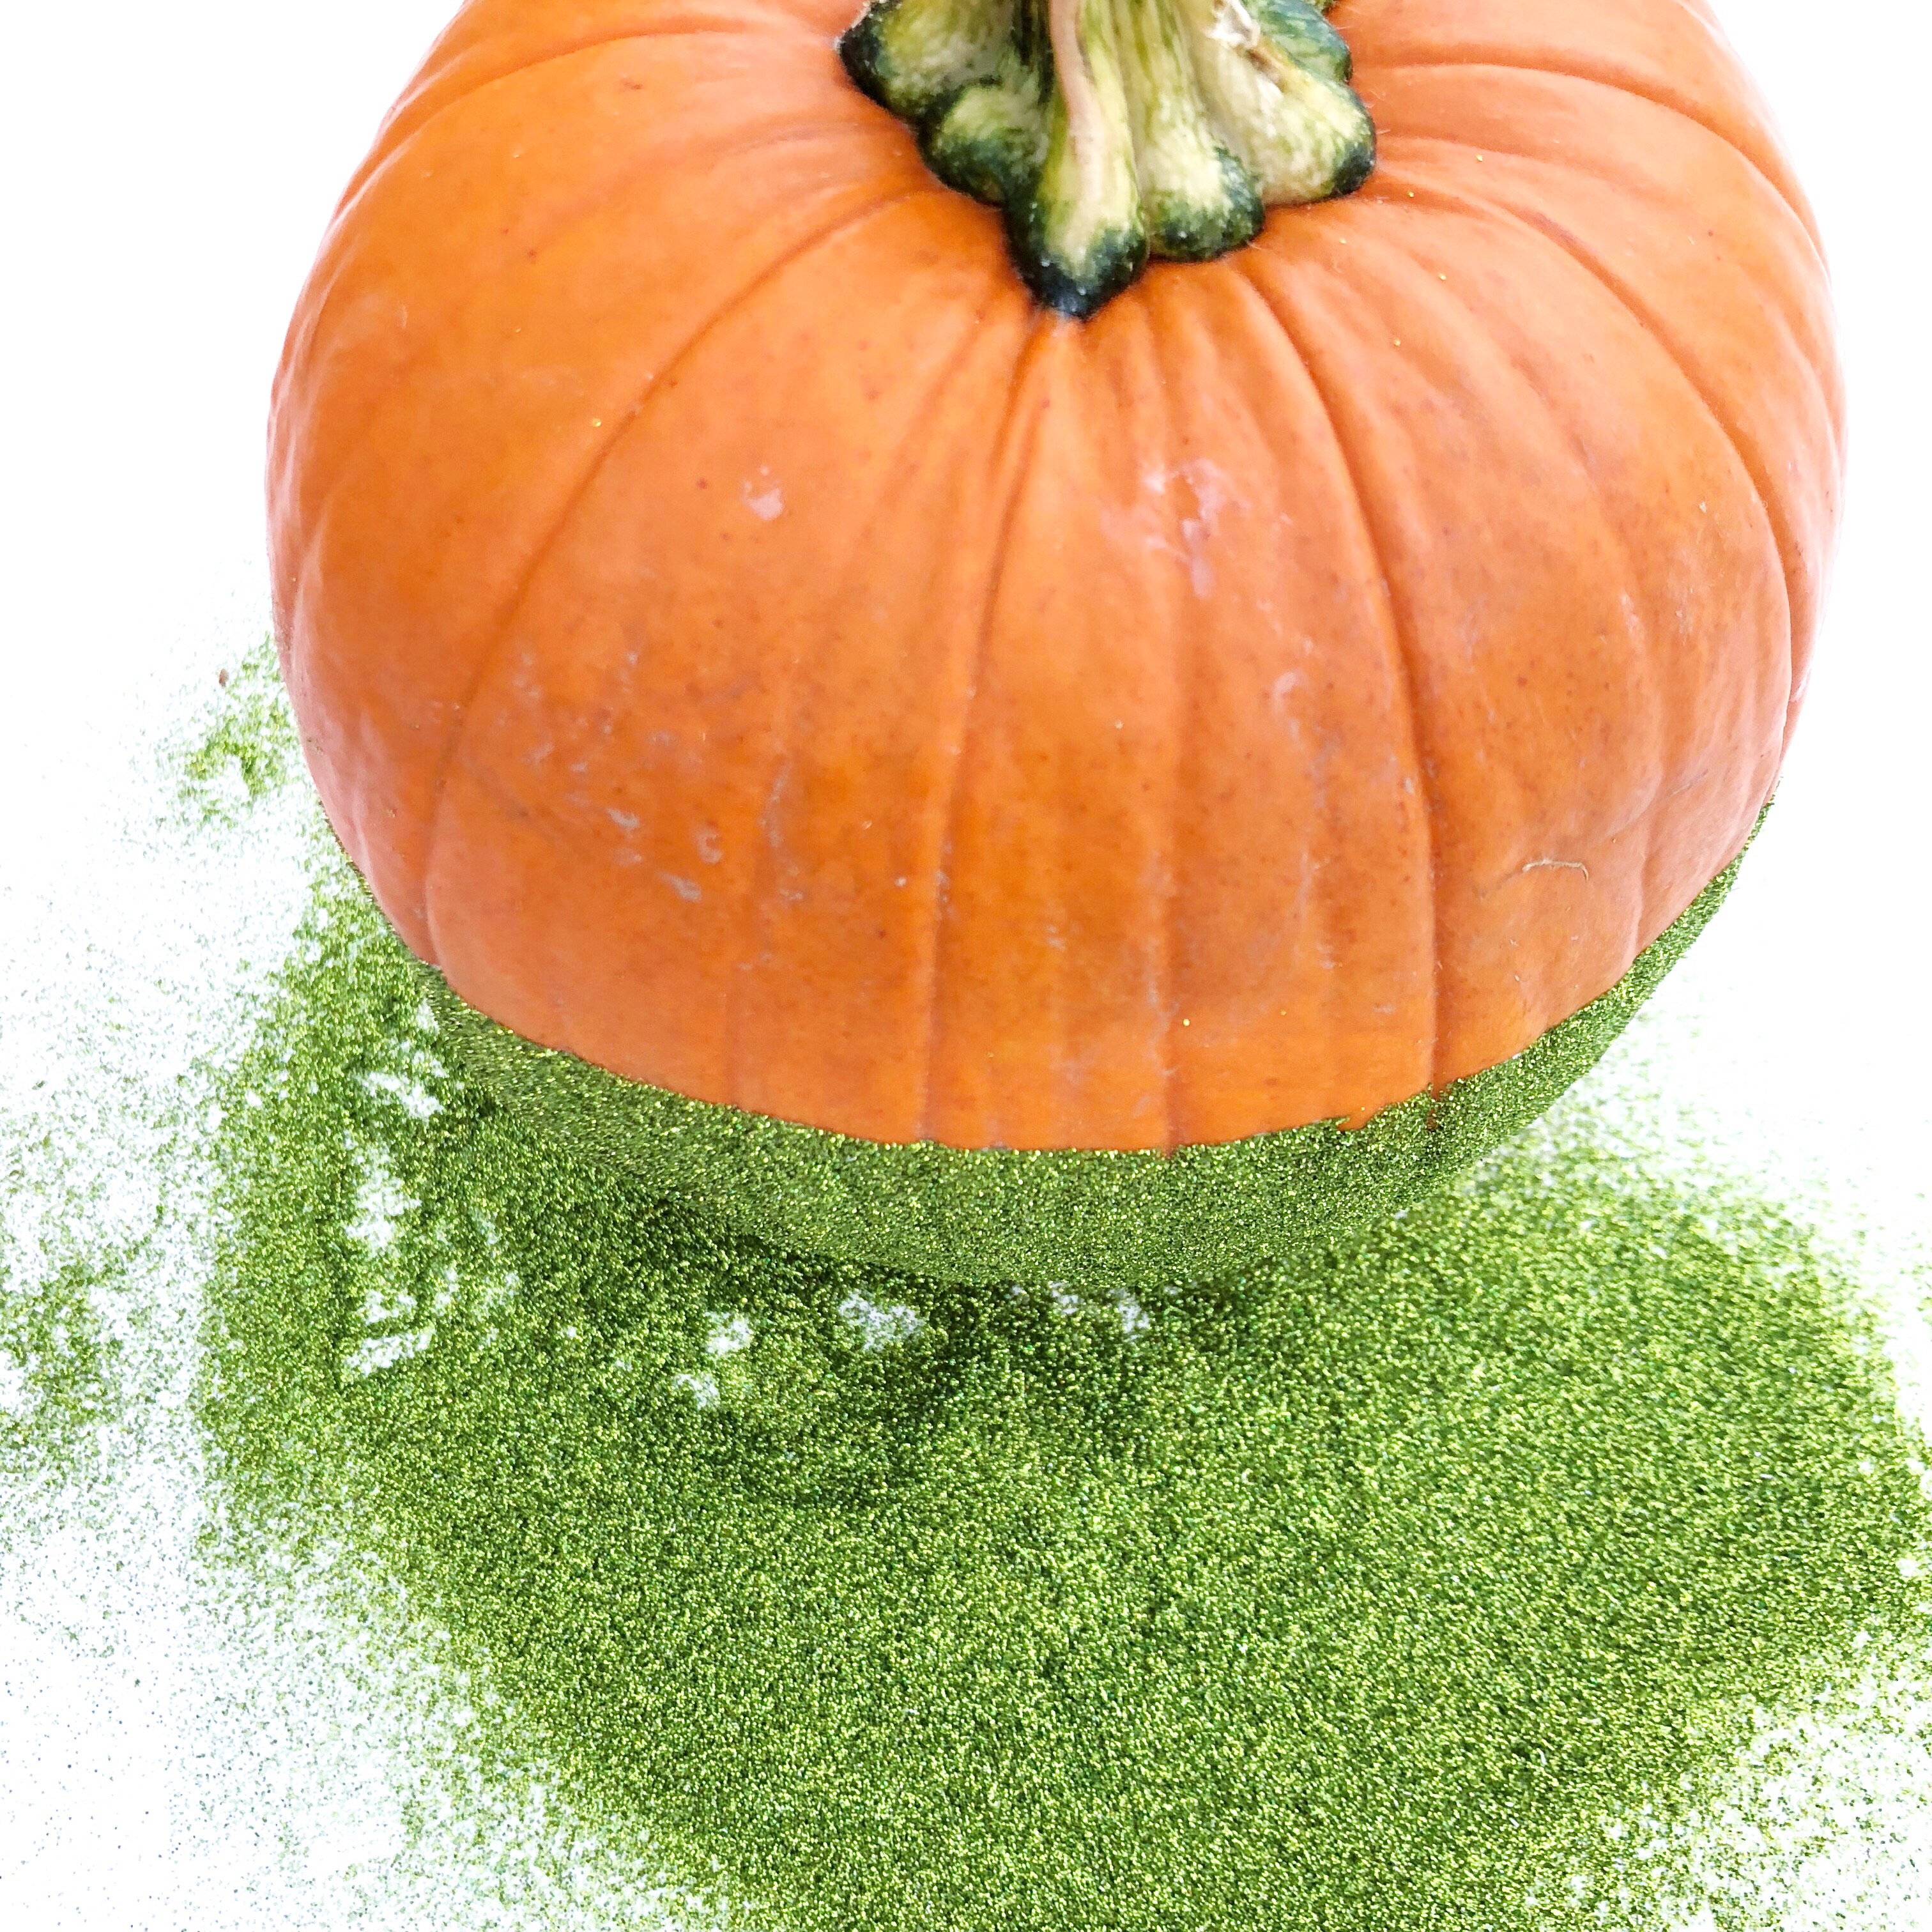
Then apply a spooky colored fine glitter to the bottom of the pumpkin and peel off the tape to reveal a super fun and sparkly color block pumpkin.
Create a simple tag by cutting a small shape out of white cardstock and punching a hole for baker’s twine. Use a foam brush to apply a little more Tombow MONO Multi XL Liquid Glue to the edge of the tag. Apply more fine glitter to match the pumpkin.
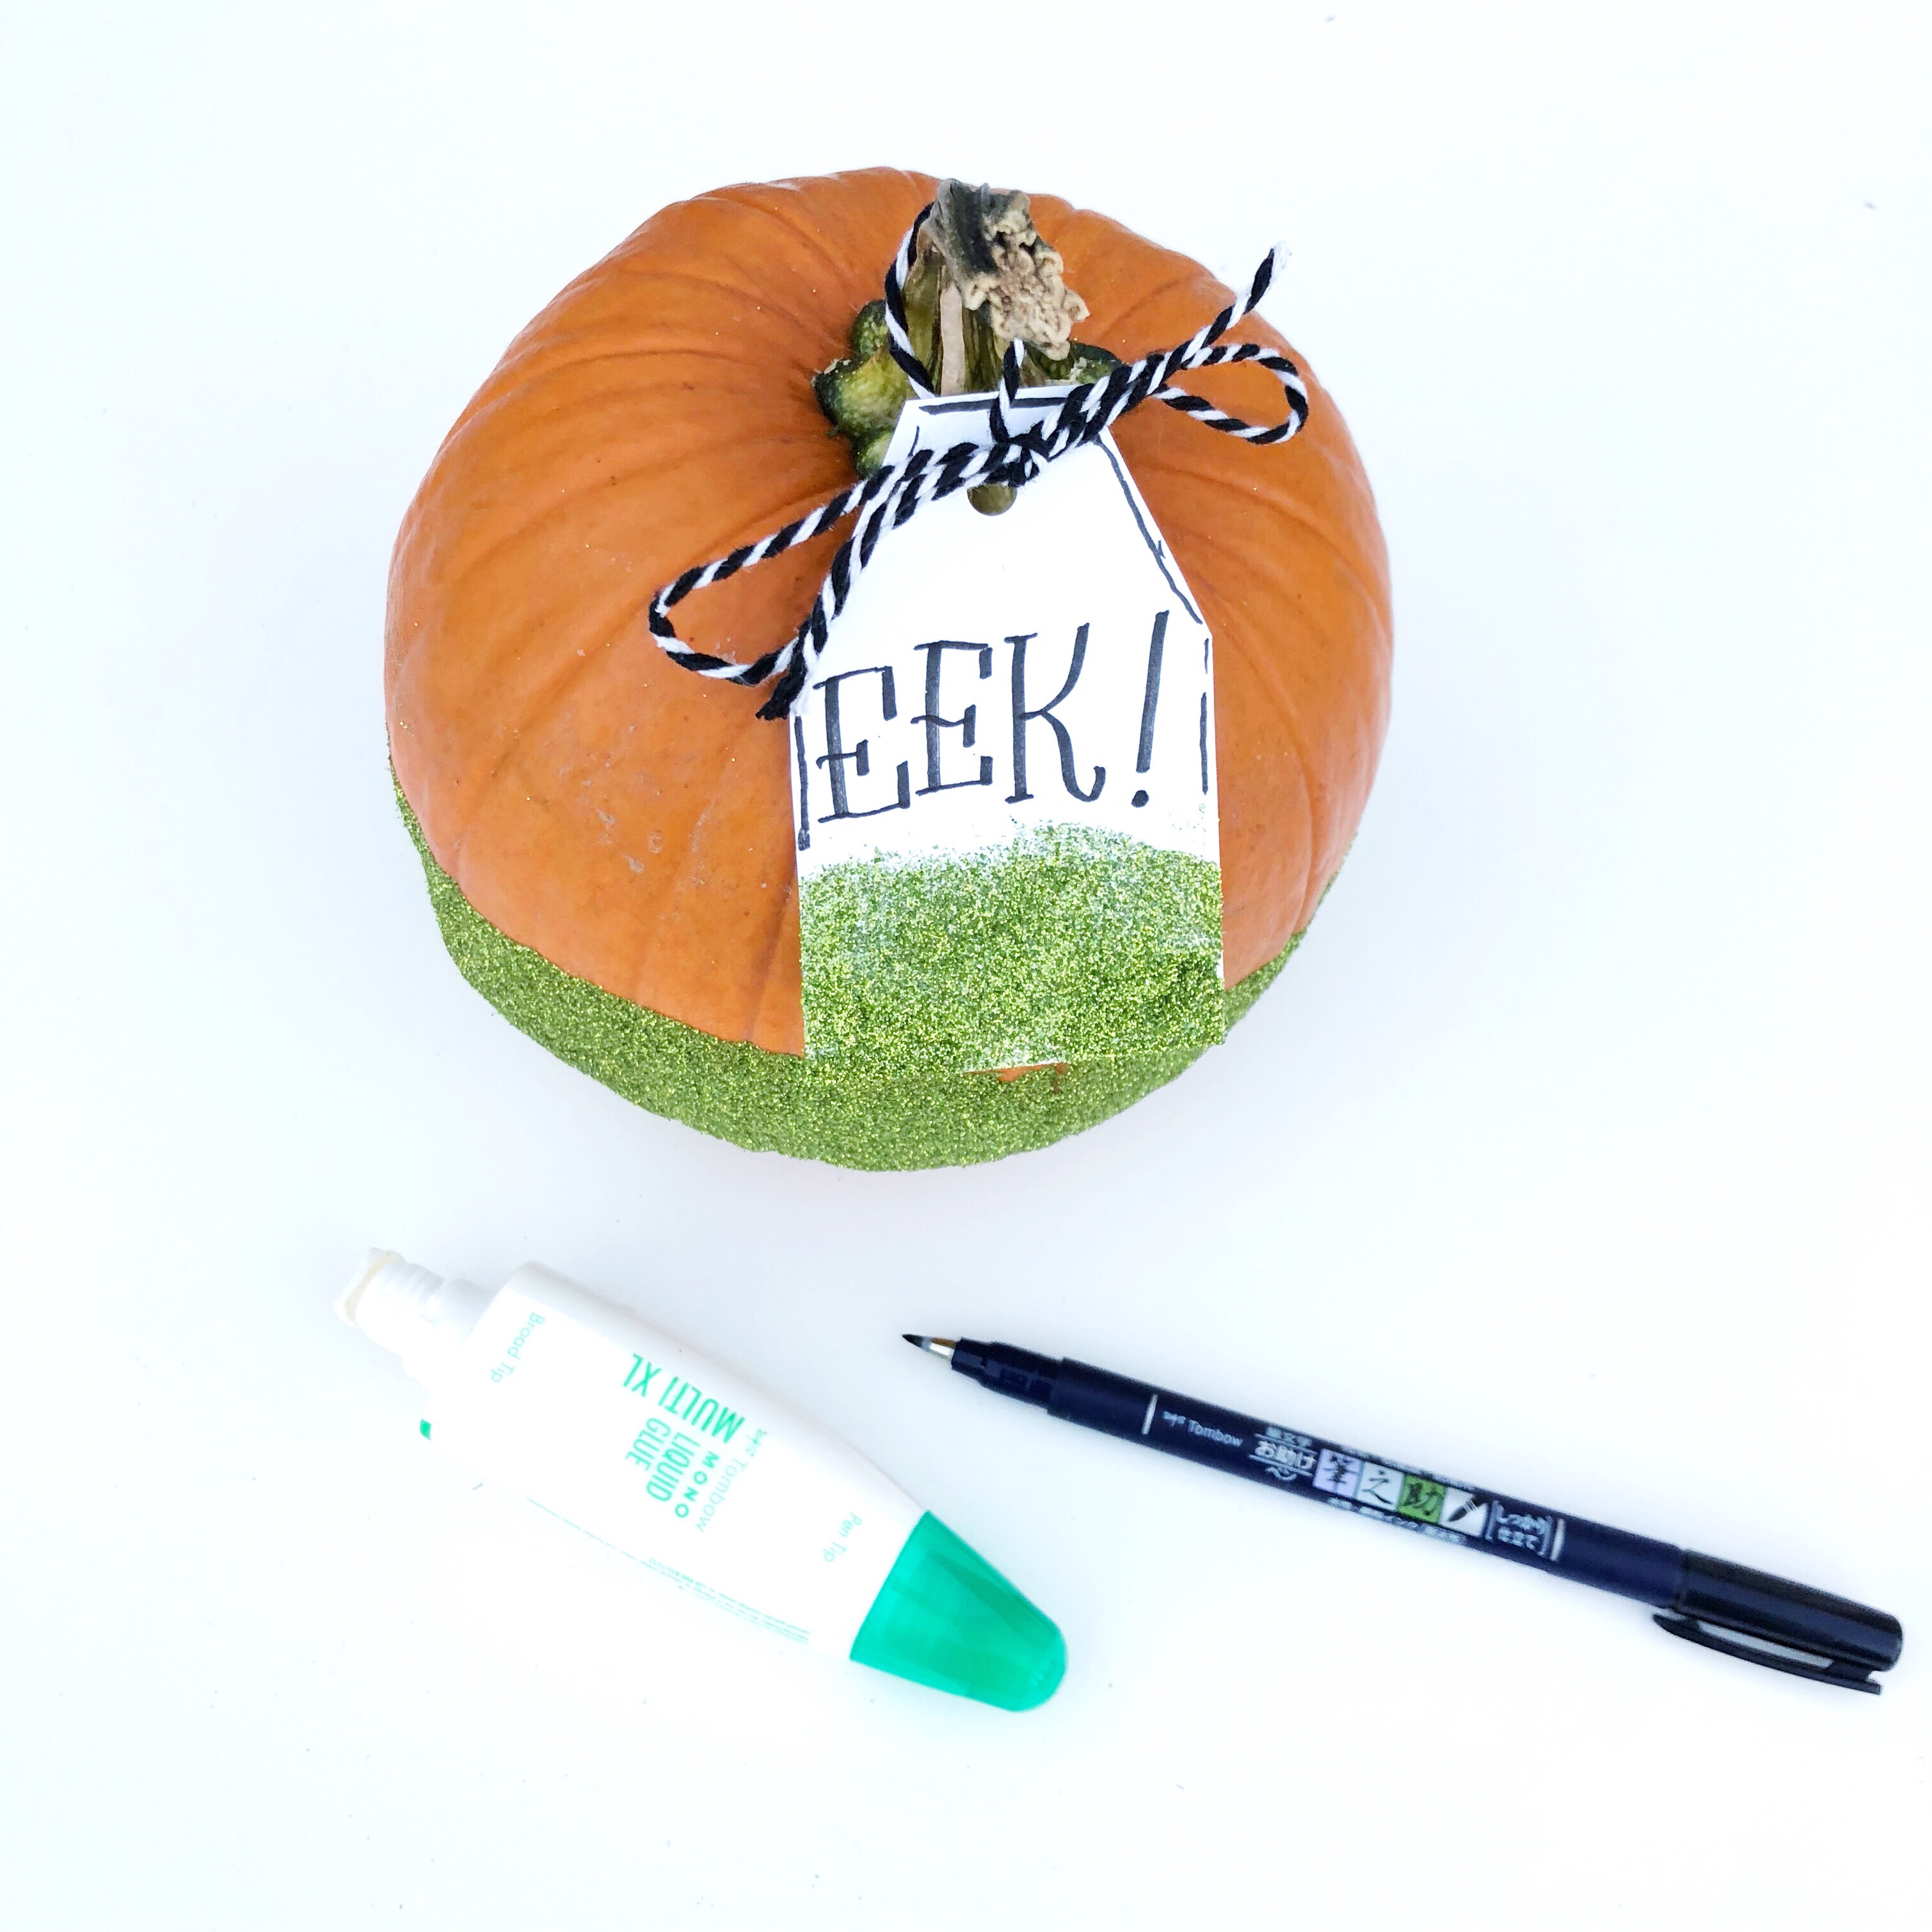
Letter a spooky word or phrase with the Tombow Fudenosuke Hard Tip Brush Pen. Attach the tag to the stem of the pumpkin. This little decorative gem is perfect to set on a small table or shelf or goes great pairs with a bigger pumpkin.
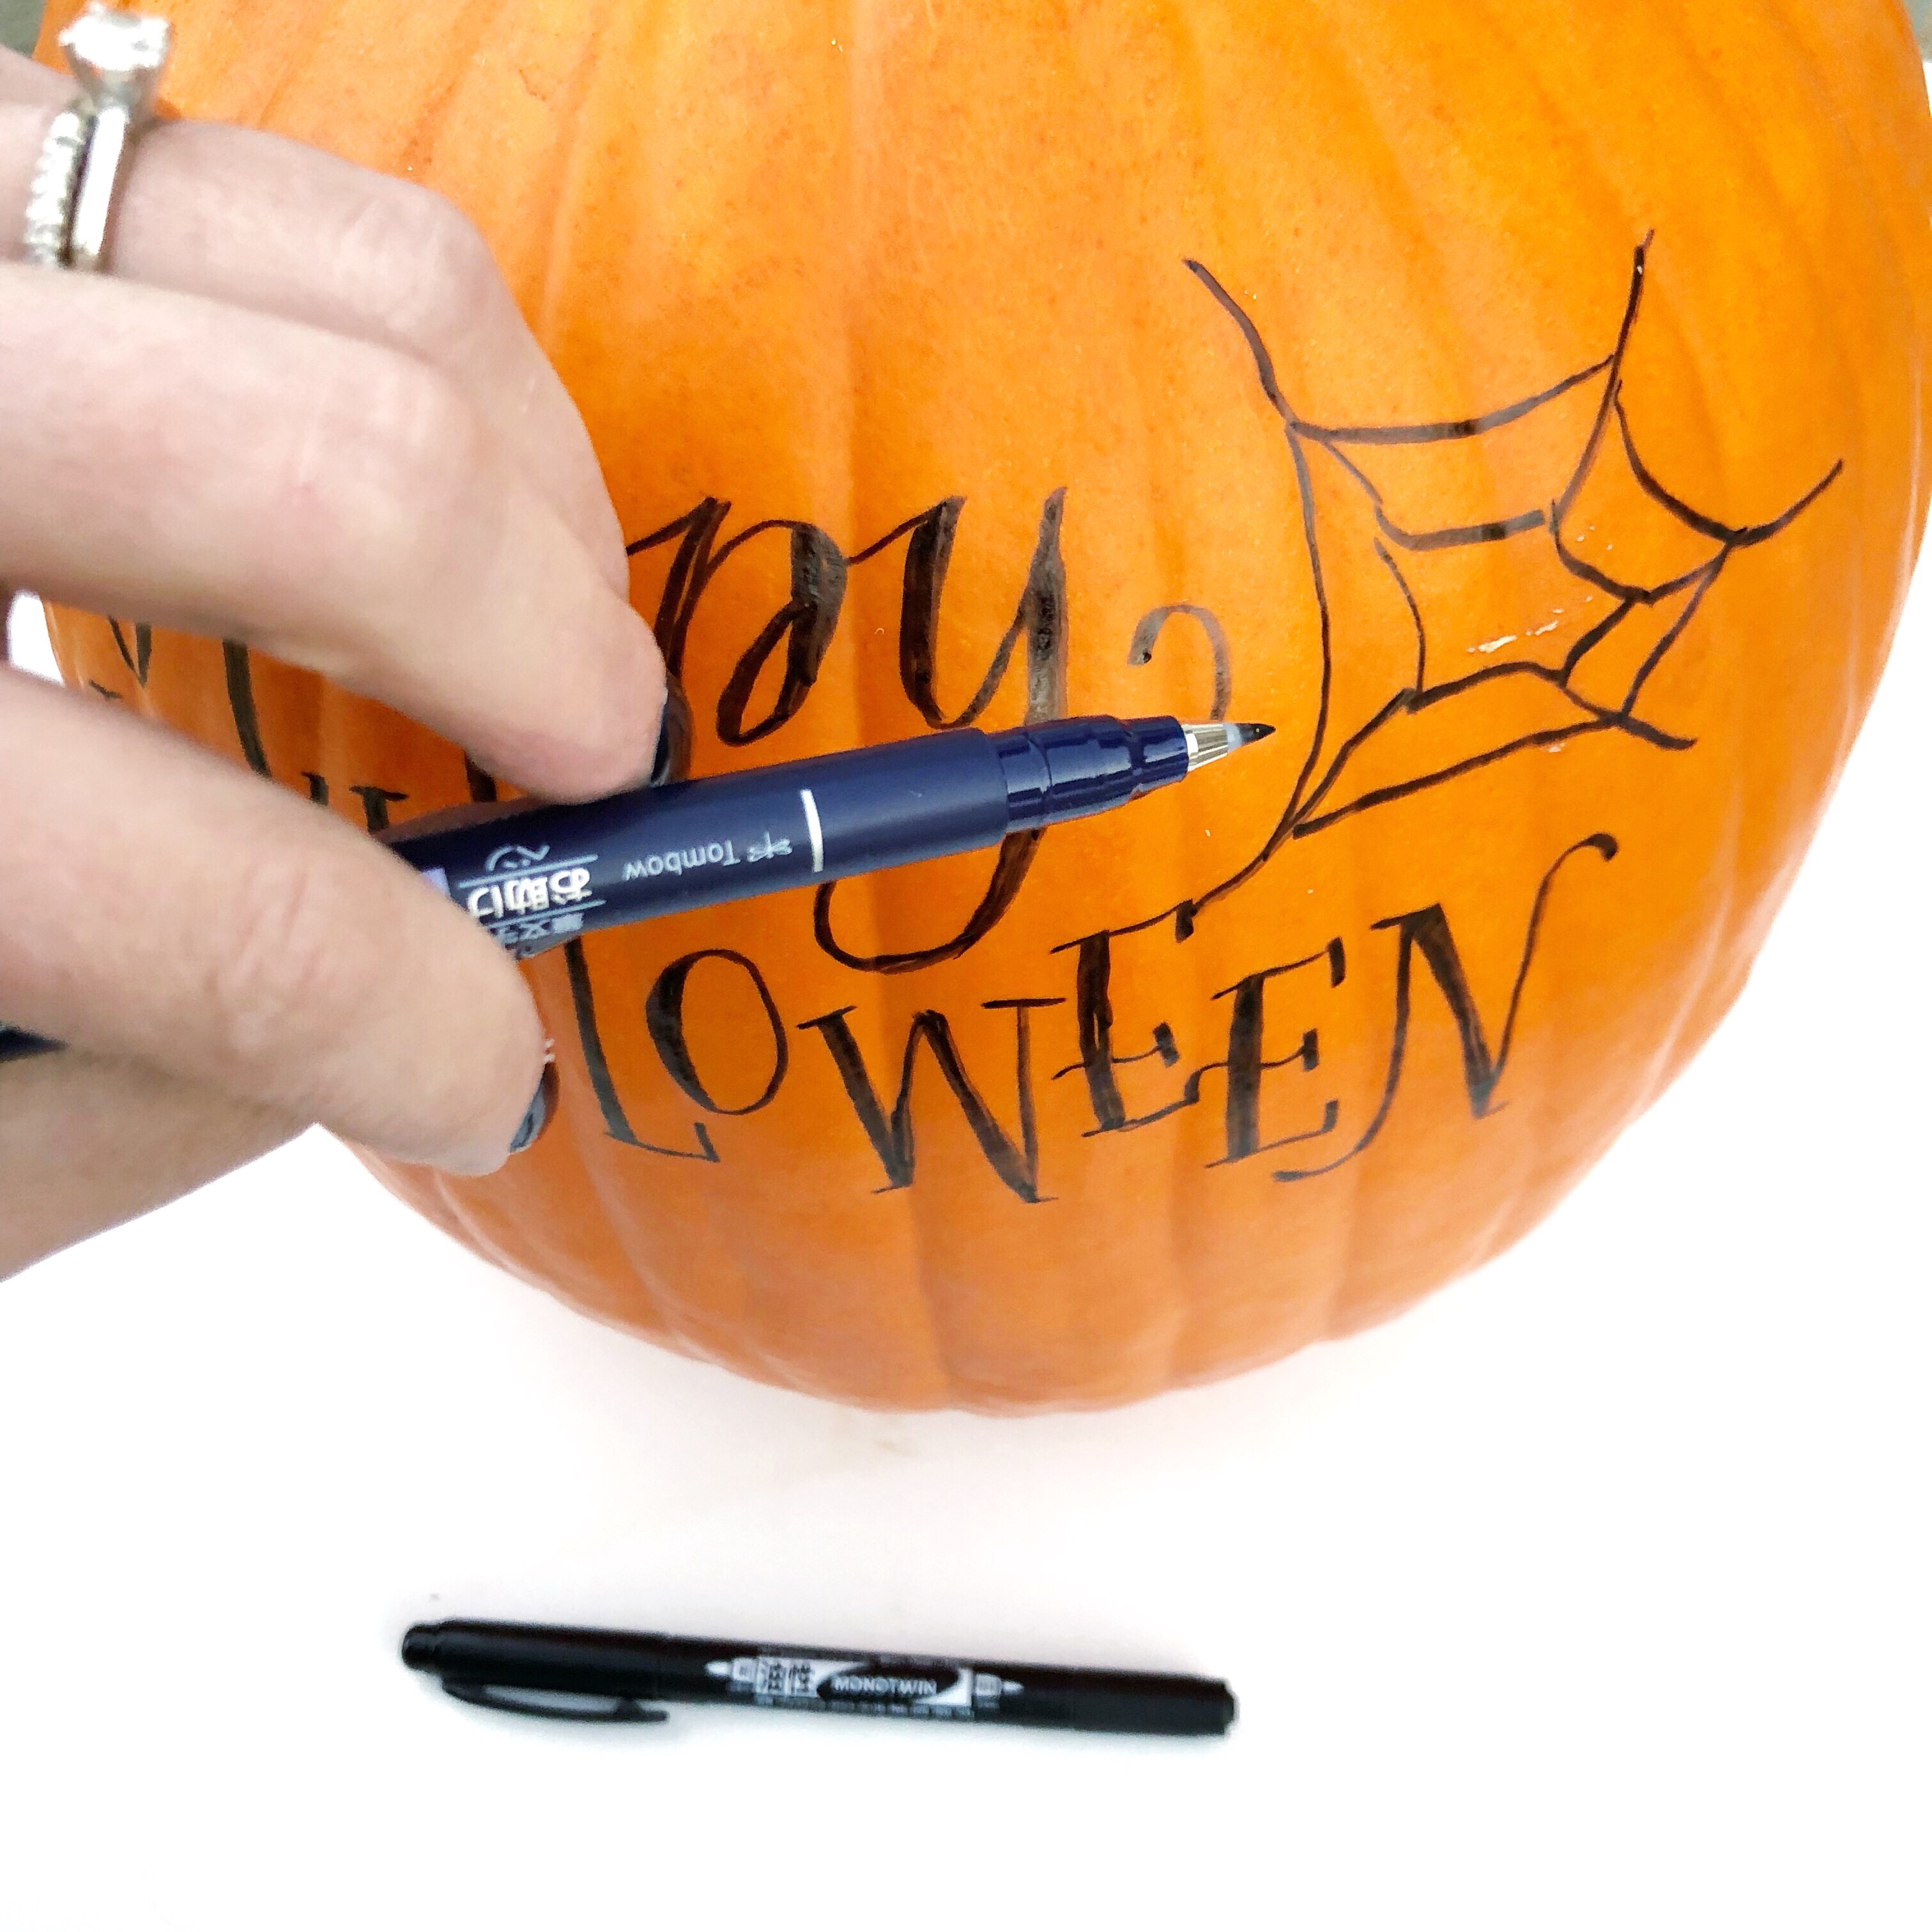
2. LETTERED PUMPKIN WITH GLITTER SPIDER WEB
When lettering on pumpkins I have learned that not every pumpkin is created equal. Artificial pumpkins do fabulous lettered with the Tombow MONO Twin Permanent Marker as well as do many live pumpkins, but I have also found that the Tombow Fudenosuke Hard Tip Brush Pen will also work on both and sometimes works better when lettering on a real pumpkin as long as the pumpkin is going to be displayed inside or in a covered area.
Start by lettering Happy Halloween or your preferred phrase on the front of a pumpkin and add doodles of spider webs and a spider.
Using the pen tip, trace the spider webs with Tombow MONO Multi XL Liquid Glue.
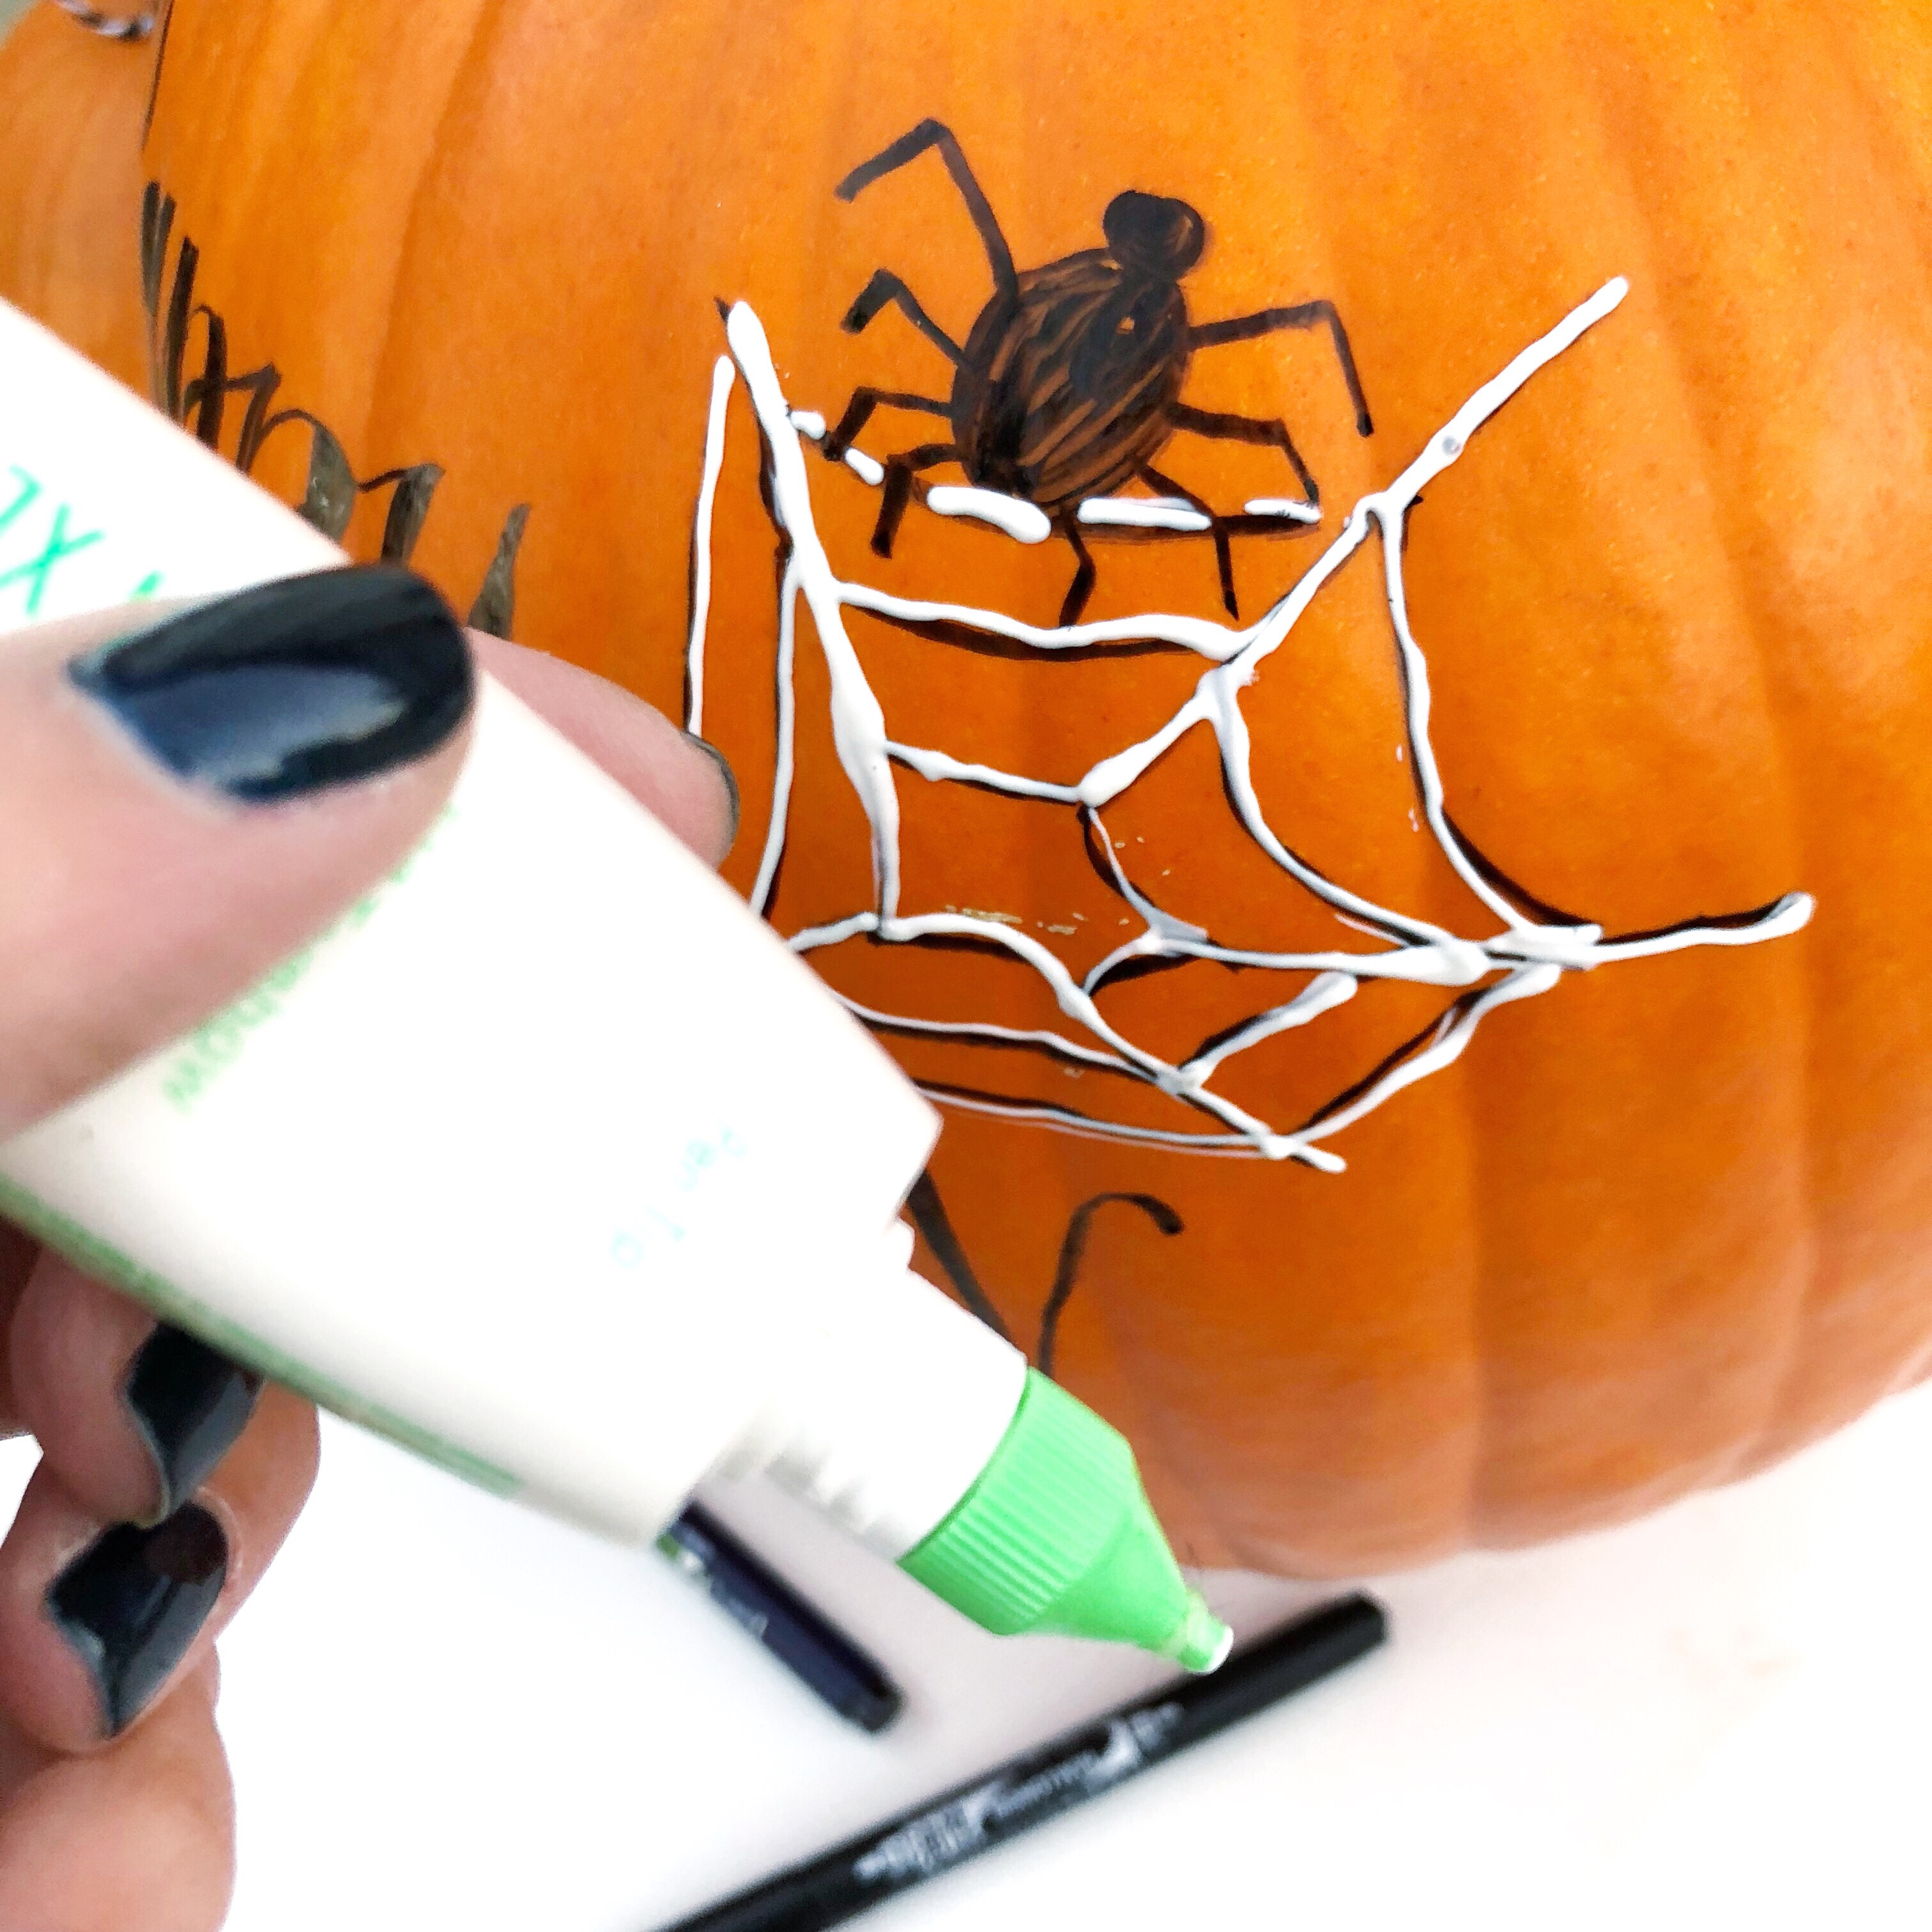
Add silver glitter carefully so that it does not get on the lettering. The glitter will cling to lettering on a real pumpkin. The drawn spiders look cool when the glitter sticks to the them.
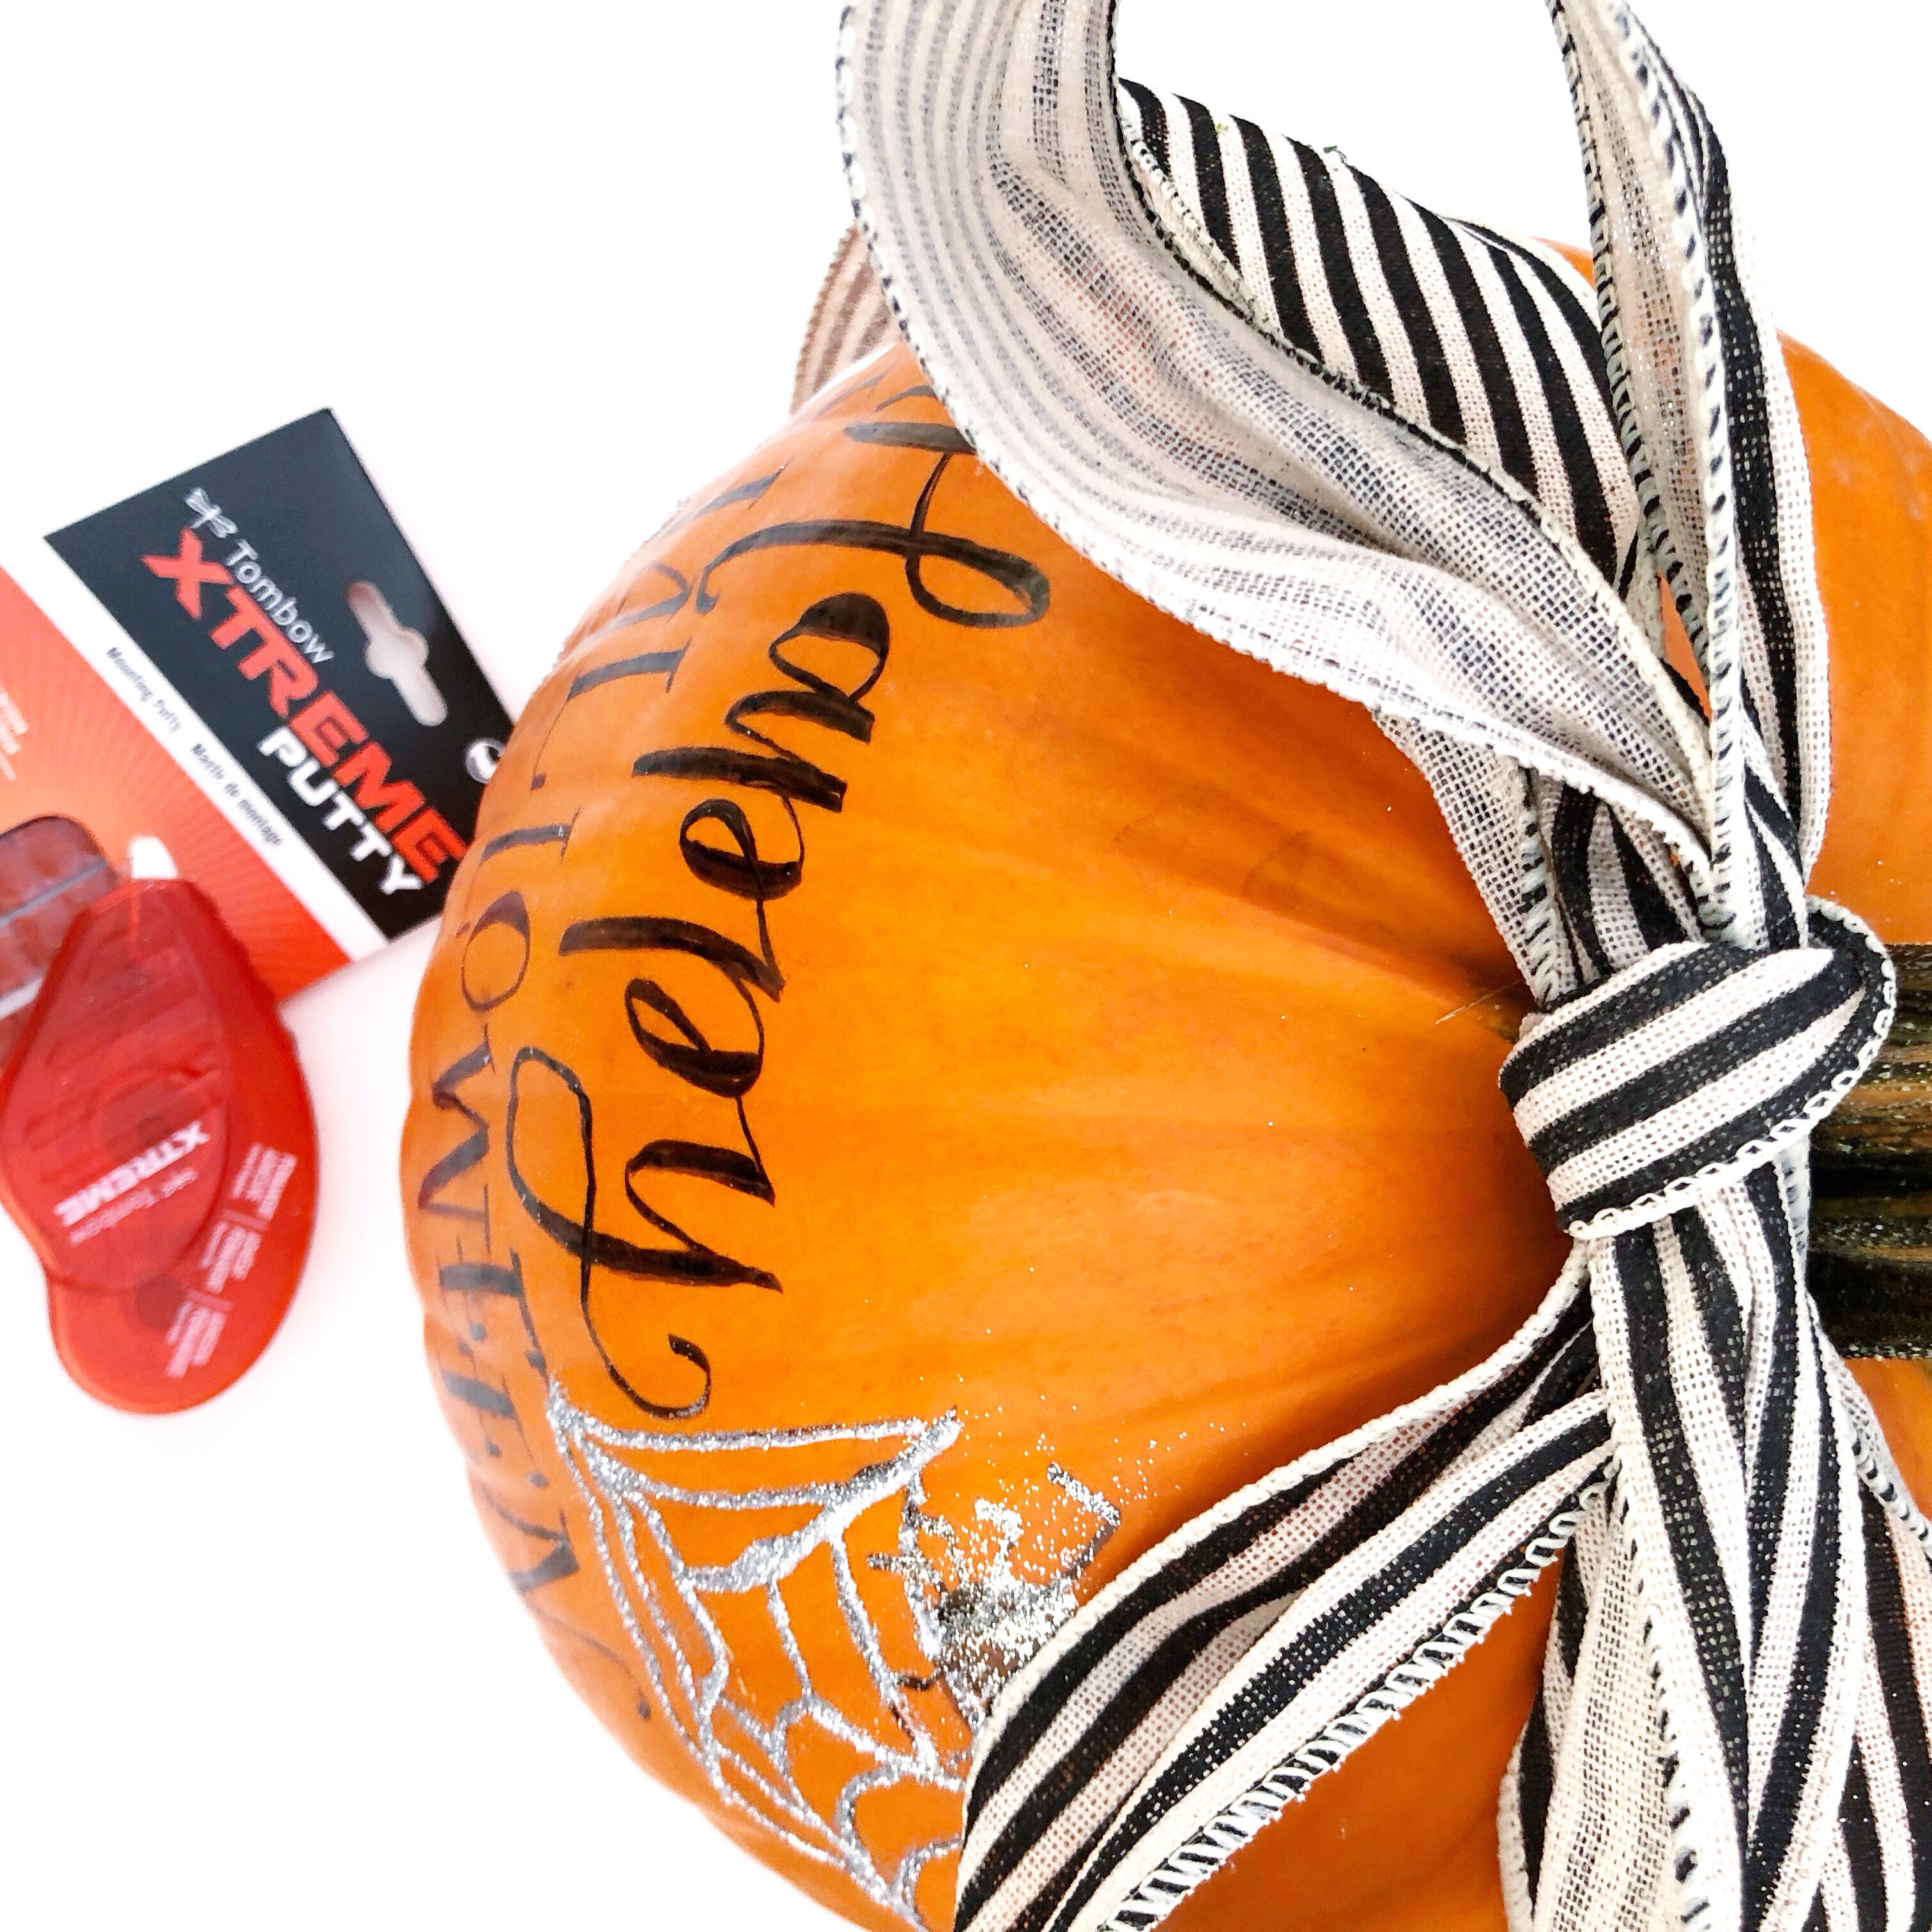
Add a fun bow using Tombow Xtreme Adhesive or Tombow Xtreme Mounting Putty, depending on the kind of ribbon you use. Both of these adhesives will hold up well.

Finally you will have two amazing and sparkly pumpkins that are ready to add to your Halloween decor! For more information about the supplies I used, check out TombowUSA.com. Also, hop on over to Instagram or my blog for more lettering and crafty goodness and tips.
Happy Halloween and Happy Lettering!
Lauren Fitzmaurice