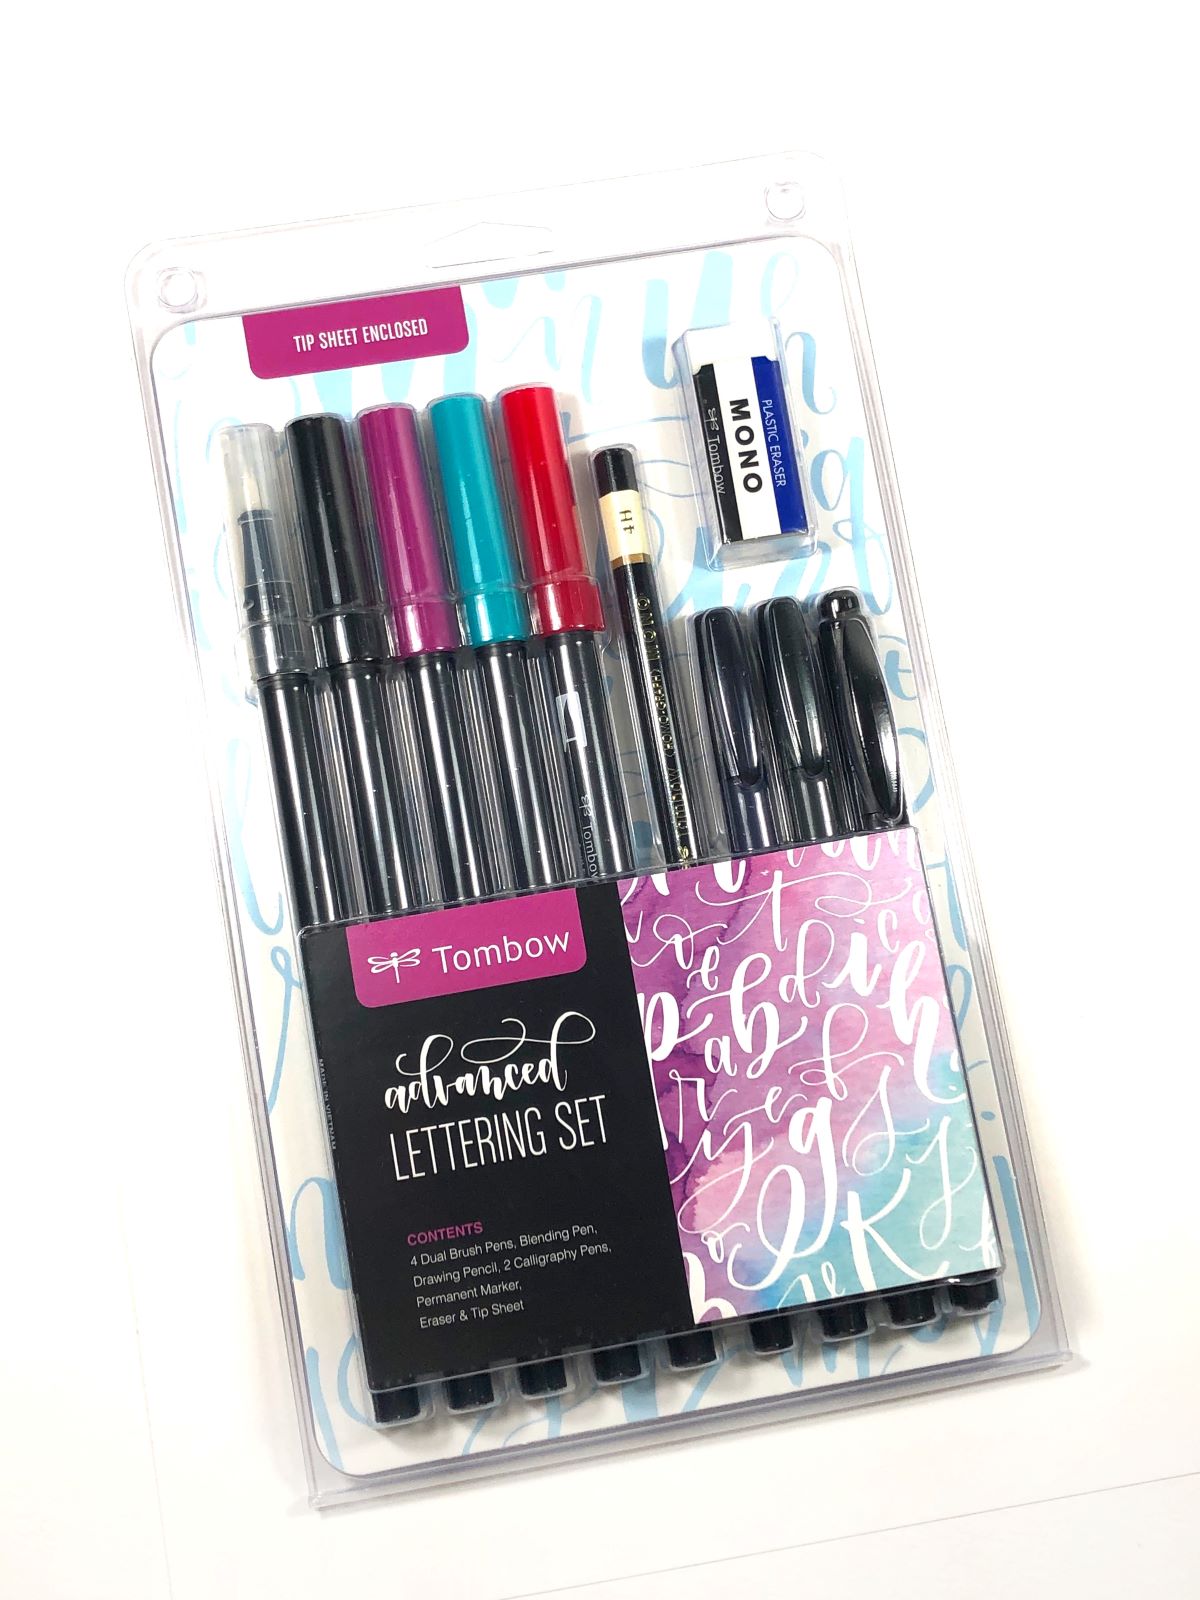
Are you an advanced hand letterer looking to amp up your style? It’s Mandy from @a_heartened_calling! Today, I’m showing you two ways to use the Advanced Lettering Set like a pro! The Advanced Lettering Set has everything you need to create stunning artwork! Let’s gather our materials and get started!
MATERIALS
- Tombow Advanced Lettering Set
- Two pieces of mixed media paper
PROJECT #1 – Lettering, Banner & Embellishments
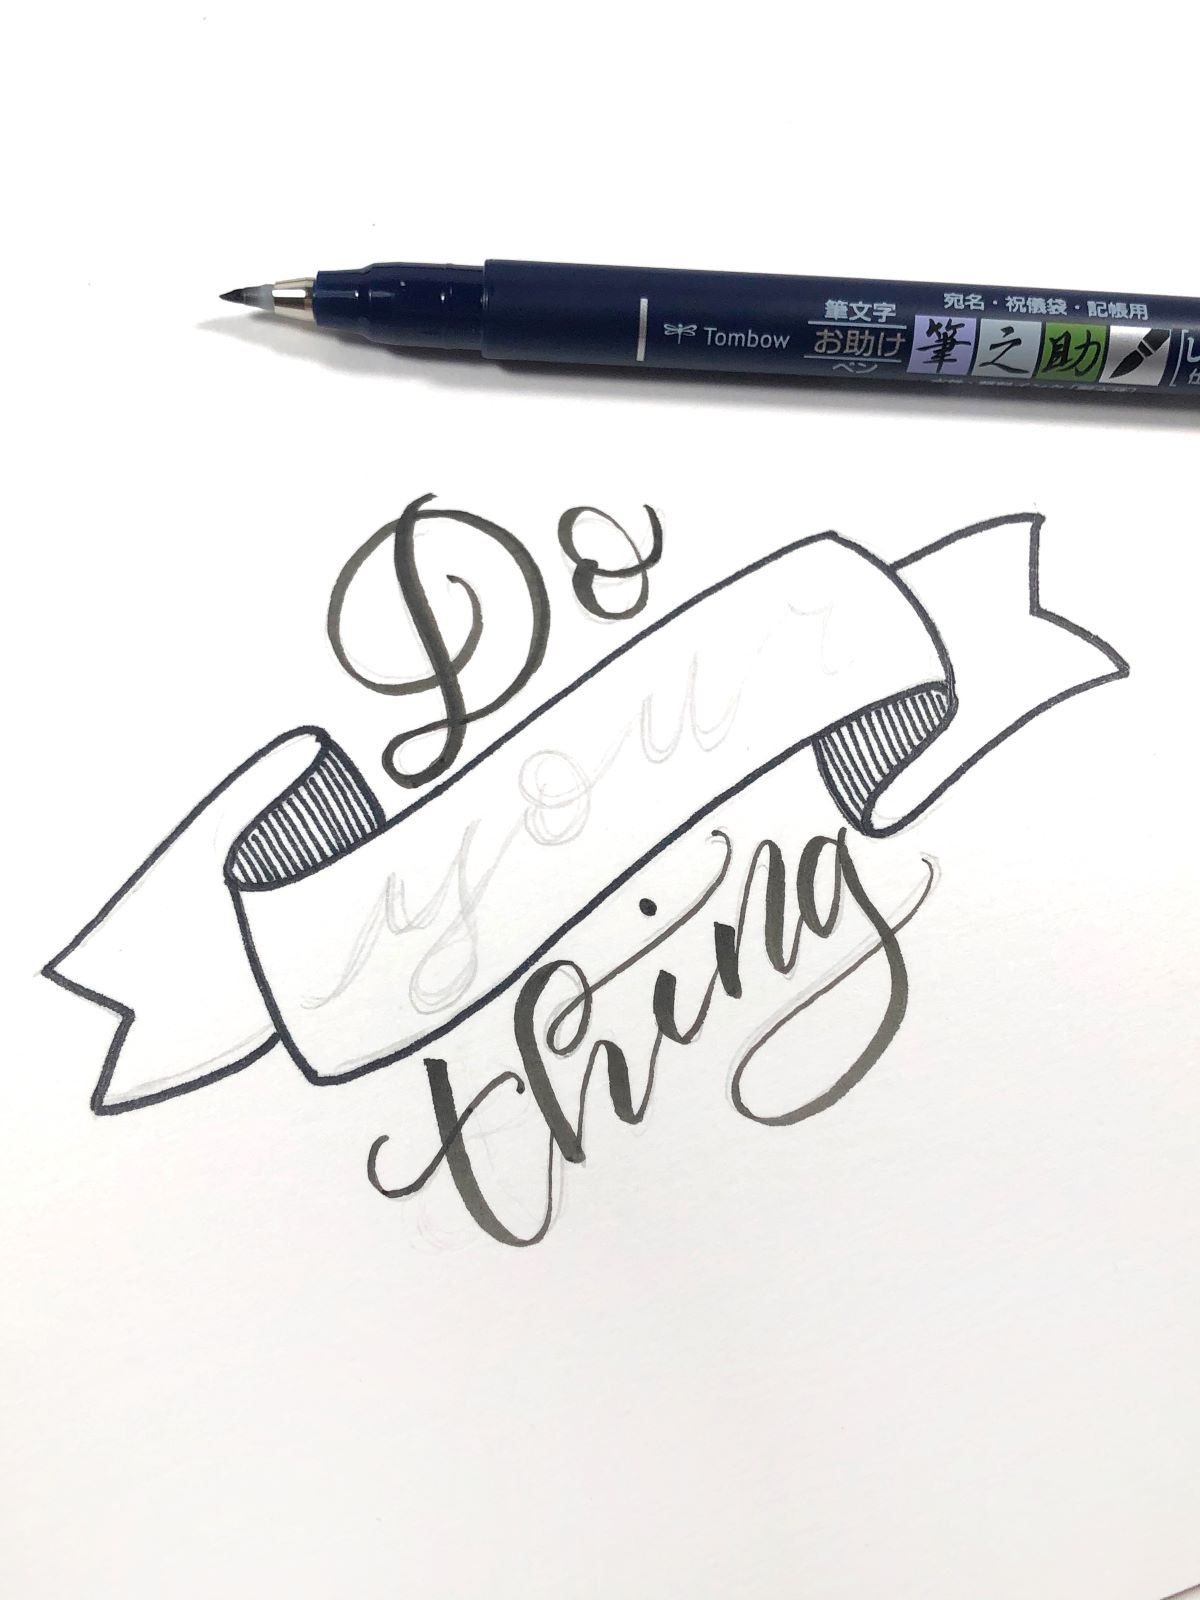
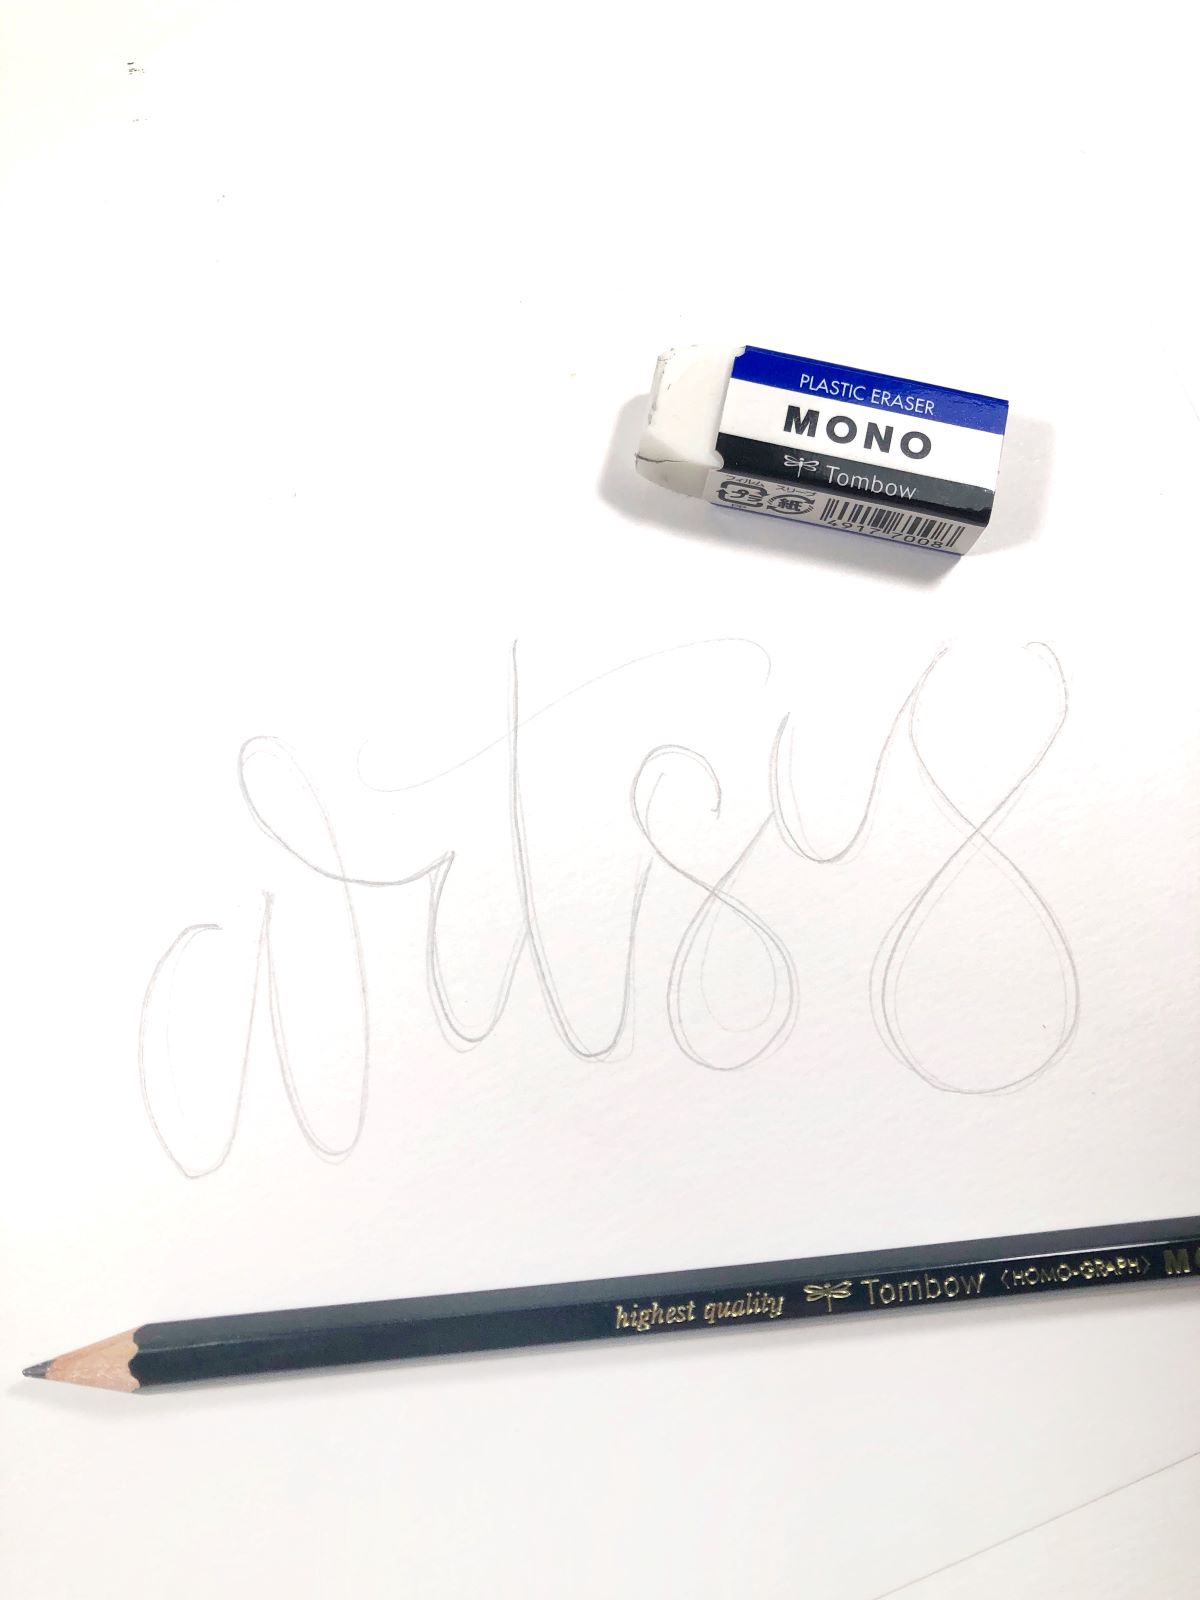
To begin, sketching is an important part of the process. This set includes a 4H MONO Drawing Pencil. The lead is the perfect hardness for sketching. It shows up light enough to be erased perfectly, but dark enough for you to see it. (For more about the different grades of pencils, check out this post: MONO Drawing Pencil Set Basics). It also comes with a MONO Eraser to help with erasing anything in your sketching process and for erasing any remaining pencil marks once your project is done. Let’s start our first project using the 4H MONO Drawing Pencil.
Sketch out your banner on your first piece of mixed media paper. Sketch out “Do” on top of the banner. Inside the banner, sketch out “Your.” Underneath the banner, sketch out “Thing.” I angled my lettering to follow the banner shape. I also used a flourish on my H for the word “Thing” to help fill in the space between the banner and lettering. It’s ok for sketches to be a little messy! The MONO Eraser will help later on! Next, use the 0.8mm tip of the MONO Twin Permanent Marker to trace your banner. Then use the 0.4mm tip to create shadow lines inside the curl of the banner.


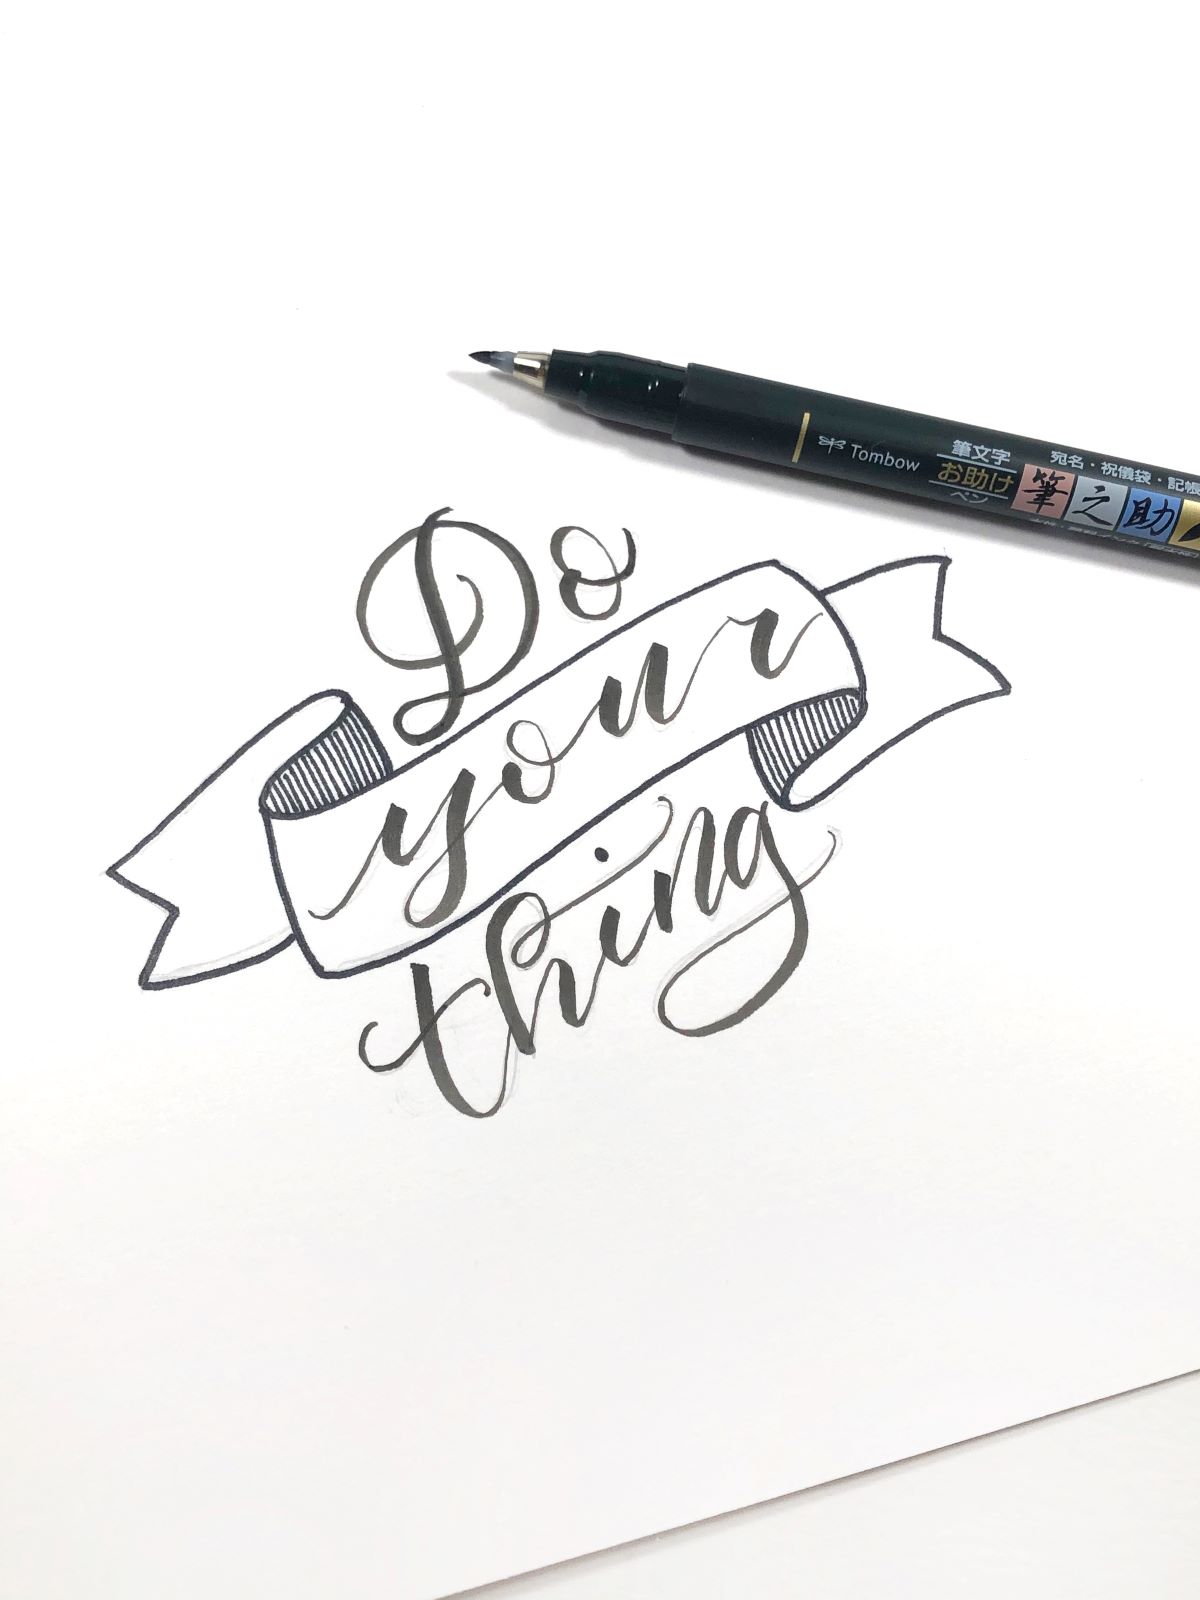
Next, use the Hard Tip Fudenosuke Brush Pen to trace over “Do” and “Thing.” Then use the Soft Tip Fudenosuke Brush Pen to trace over “Your.”
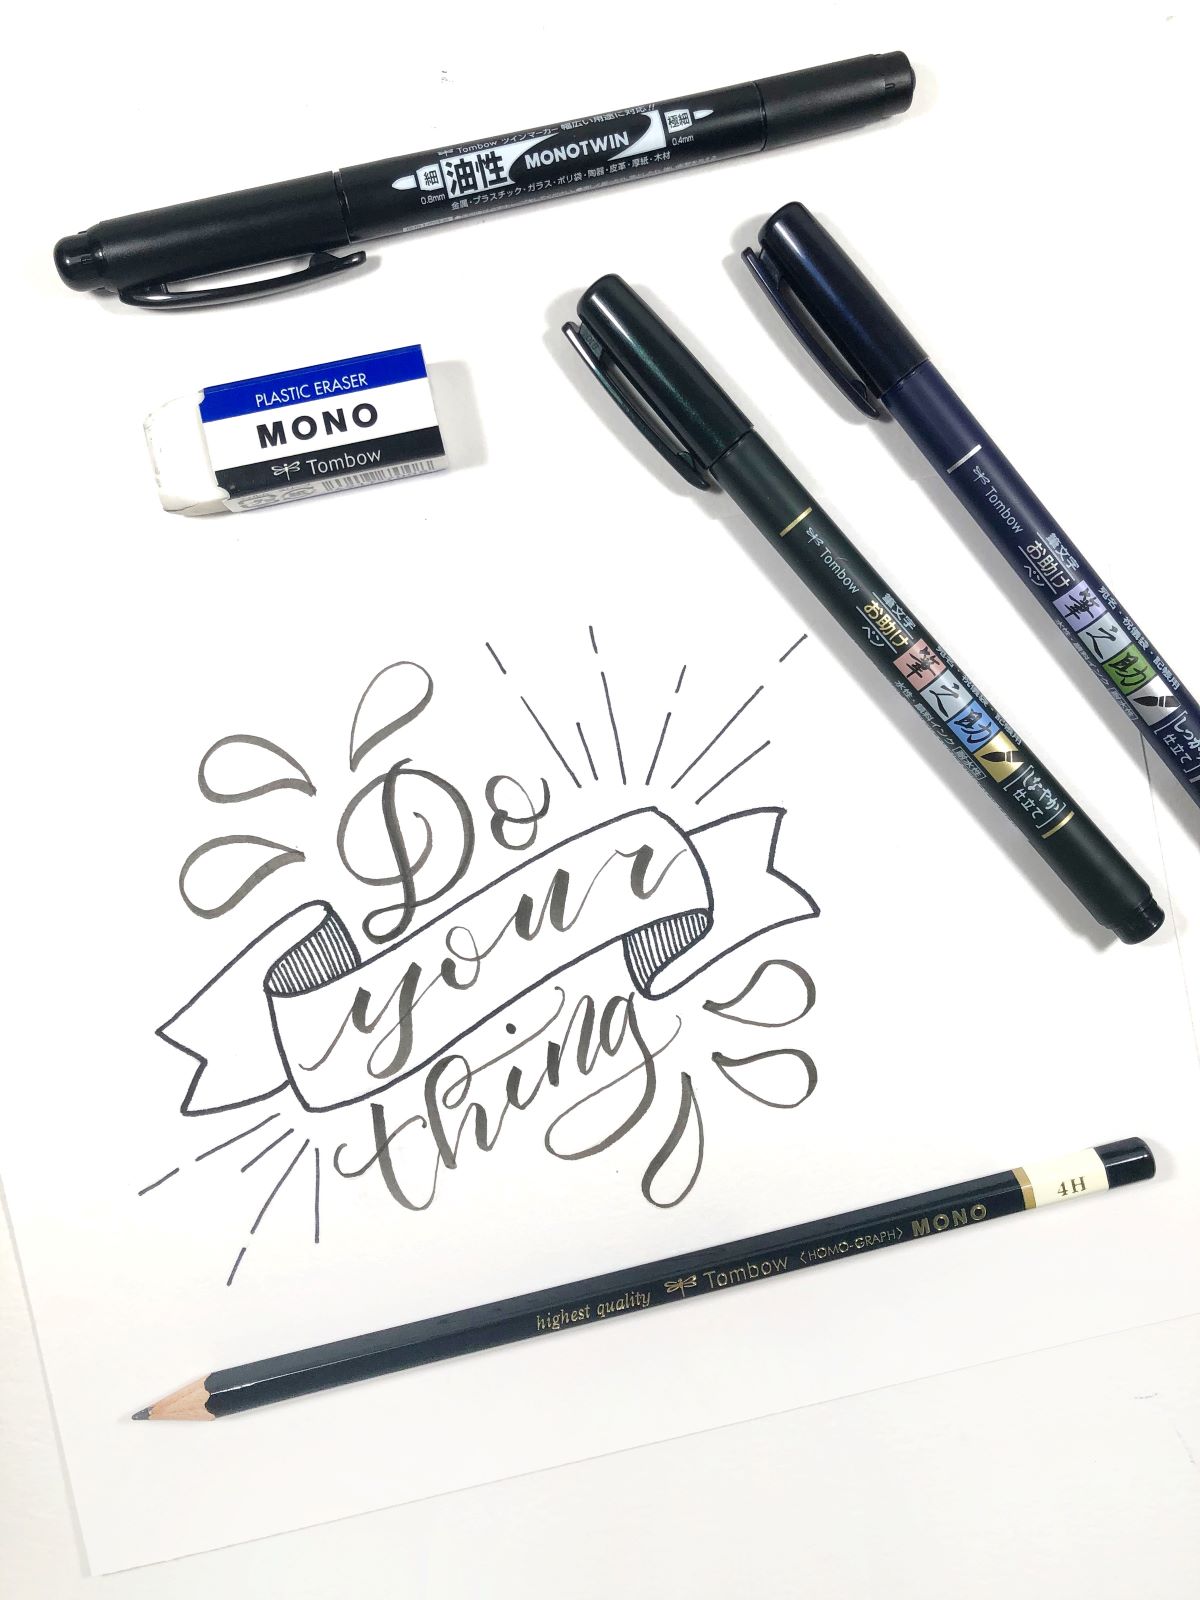
The last step is creating the embellishments. Using the Hard Tip Fudenosuke Brush Pen, create six tear shaped bubbles coming out from the left side of “Do” and the right side of “Thing.” Then use the 0.4mm tip of the MONO Twin Permanent Marker to create dashes extending out from the corners of the banner. Use the MONO Eraser to erase any remaining pencil lines. Project #1 is done!
PROJECT #2 – Blending
On your second piece of mixed media paper, use the MONO Drawing Pencil 4H to sketch out “Artsy” (or you can use any word you’d like!).
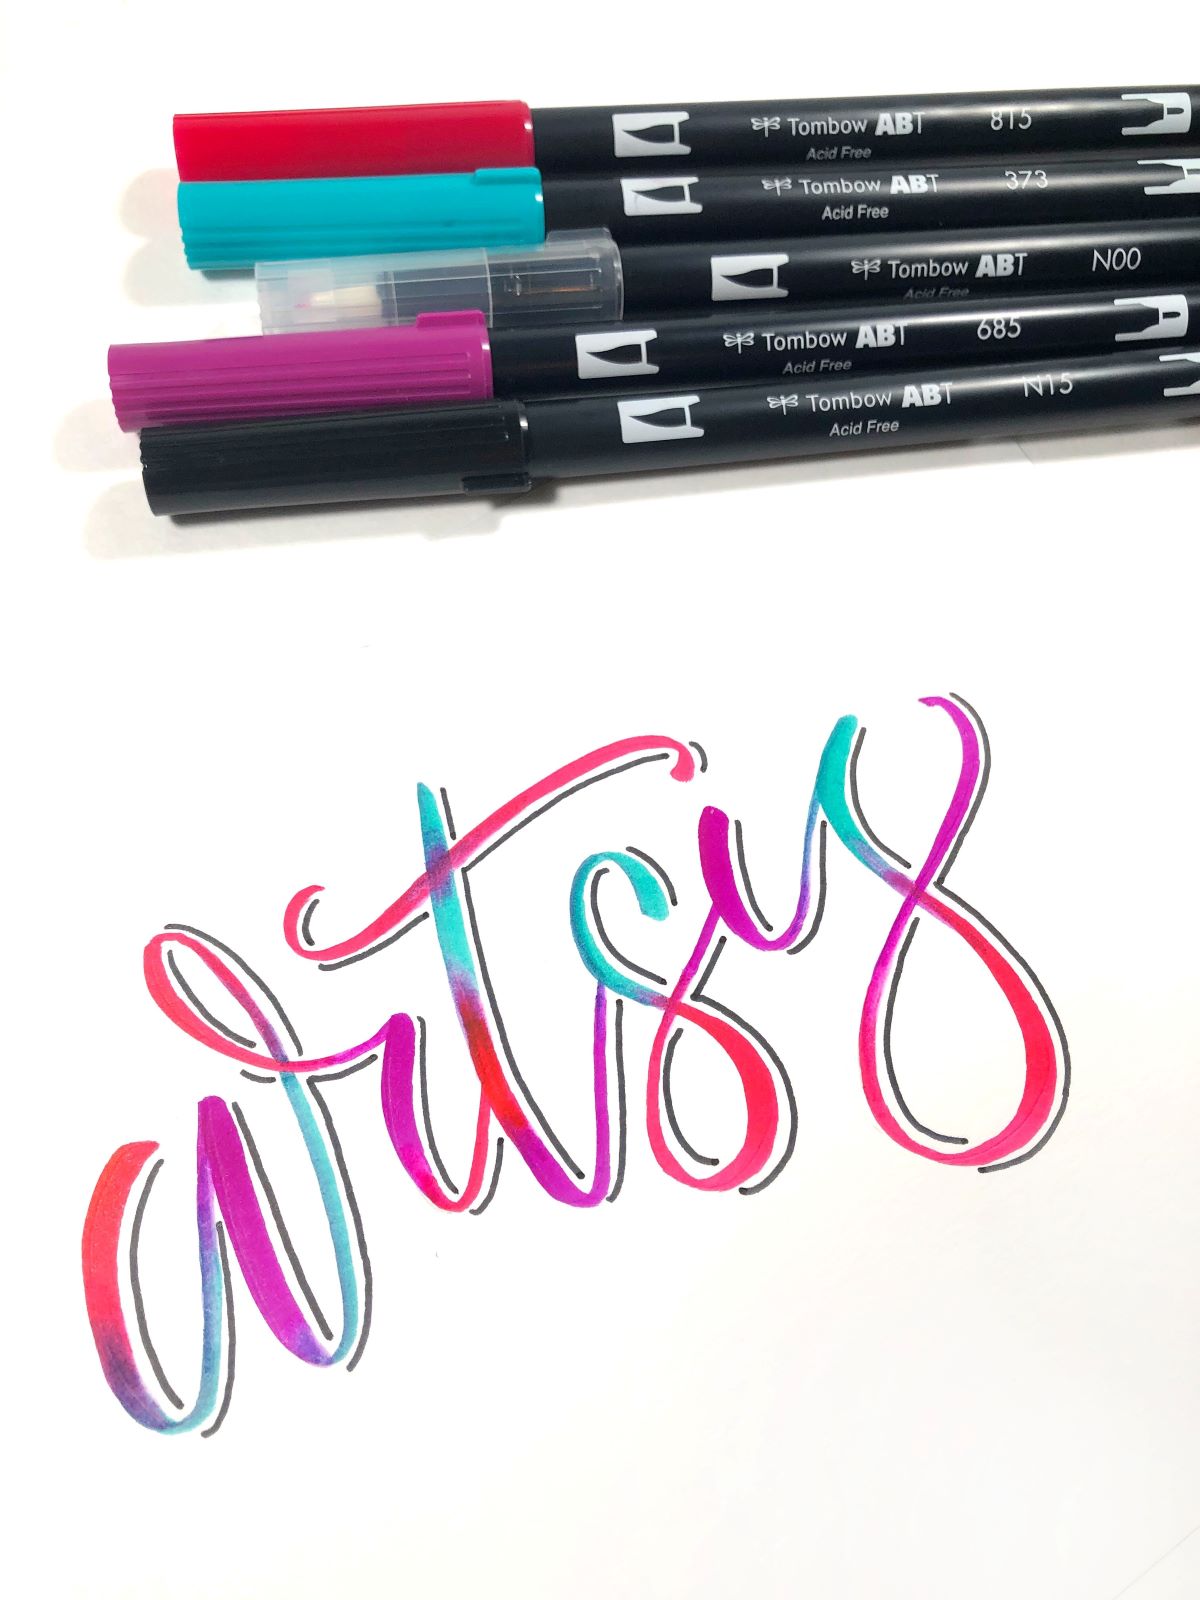
Using the brush tip of Dual Brush Pens 815, 373, and 685, add color to the “A” in random spots. When adding separate colors, overlap them. Next, use the Colorless Blender N00 to blend the separate colors together. This pen will pick up a lot of the ink when blending, so keep a piece of scrap paper handy to scribble off the ink. Blend quickly with light strokes, until it looks like a natural gradient.


Repeat this process for each letter. There is no right or wrong way on where to add the color with this technique. You want the colors to be as random as possible! When you’re done, it should look similar to this:
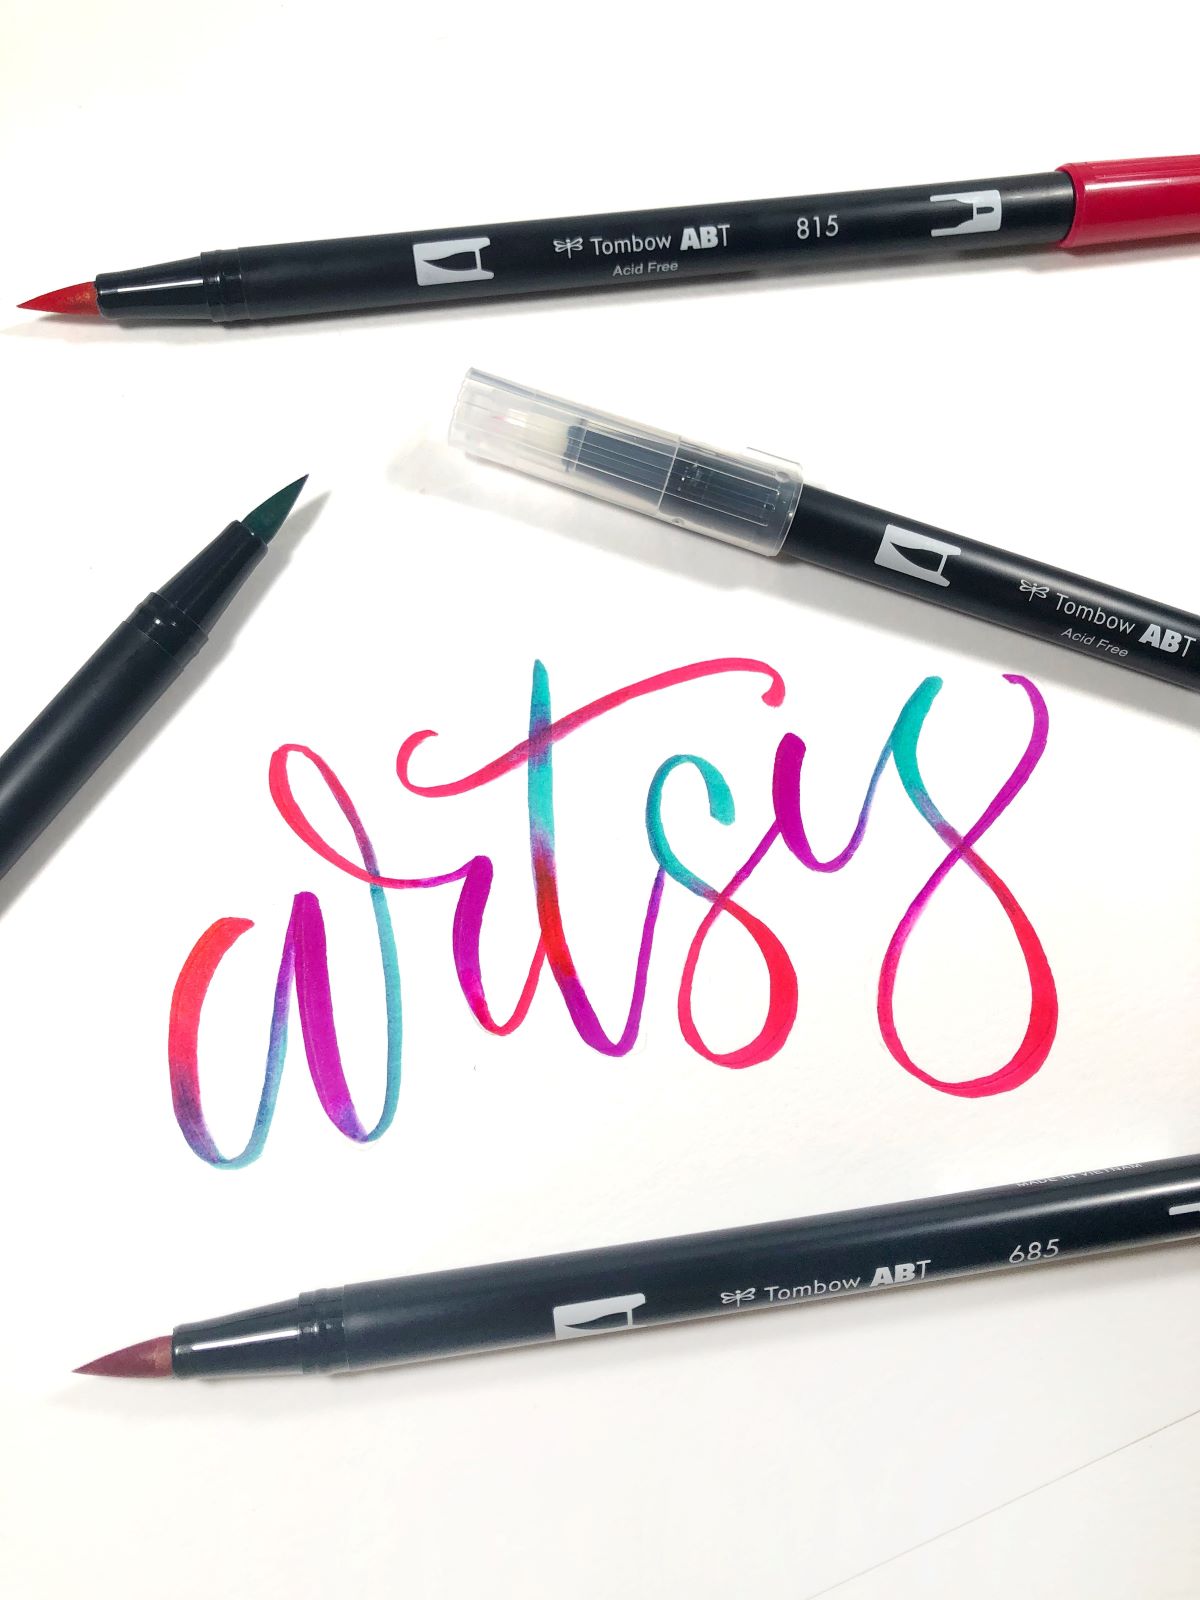
For the last step, use the bullet tip of Dual Brush Pen N15 to create a shadow on the right side of your letters.
Project #2 is done! Just like that, you created two projects like a pro! If you give these projects a try, be sure to tag @tombowusa and @a_heartened_calling so we can see your amazing work!
For more inspiring projects, check out these posts!
- 3 Tips for Purposeful Lettering Practice with Lauren
- 5 P’s of Brush Calligraphy and Hand Lettering with Grace
- Harry Potter and the Basic Lettering Tips with Jennie
Thanks for following along, see you next time!
Mandy