Hi friends, Serena from @serenabeecreative here with a fun artist trading coins tutorial! I love making artist trading coins. They are the perfect size to trade and to leave behind for others to find for the #sharingartmatters campaign!
Sharing Art Matters
Sharing Art Matters is the brilliant movement created by Tombow to help more crafters, artists and hobbyists share their work with the world! Sharing Art Matters helps others to not be afraid to share and express their unique style and voice. For more information on how you can join the movement, visit: https://www.tombowusa.com/sharing-art-matters
Sharing Art Matters to me because it’s how I leave my mark in the world. It’s how I can reach people over oceans and continents and inspire them to live and document their truths. It’s a way I can express my creativity and the message I have within with the world. It’s a way to share my passion with like minded individuals and build a sense of community and form true connections.
Now let’s create some artist trading coins!!
Supplies
- Dual Brush Pens: colors: 452, 535, 623, 636, 725
- Blending Kit
- MONO Drawing Pen- Size 02
- 1500 Series Colored Pencils
- MONO Multi XL Liquid Glue
- Mixed media card stock or watercolor paper
- Optional: die cutting machine and circle dies, stencils, iridescent medium, label maker, stamp sets
Creating The Background
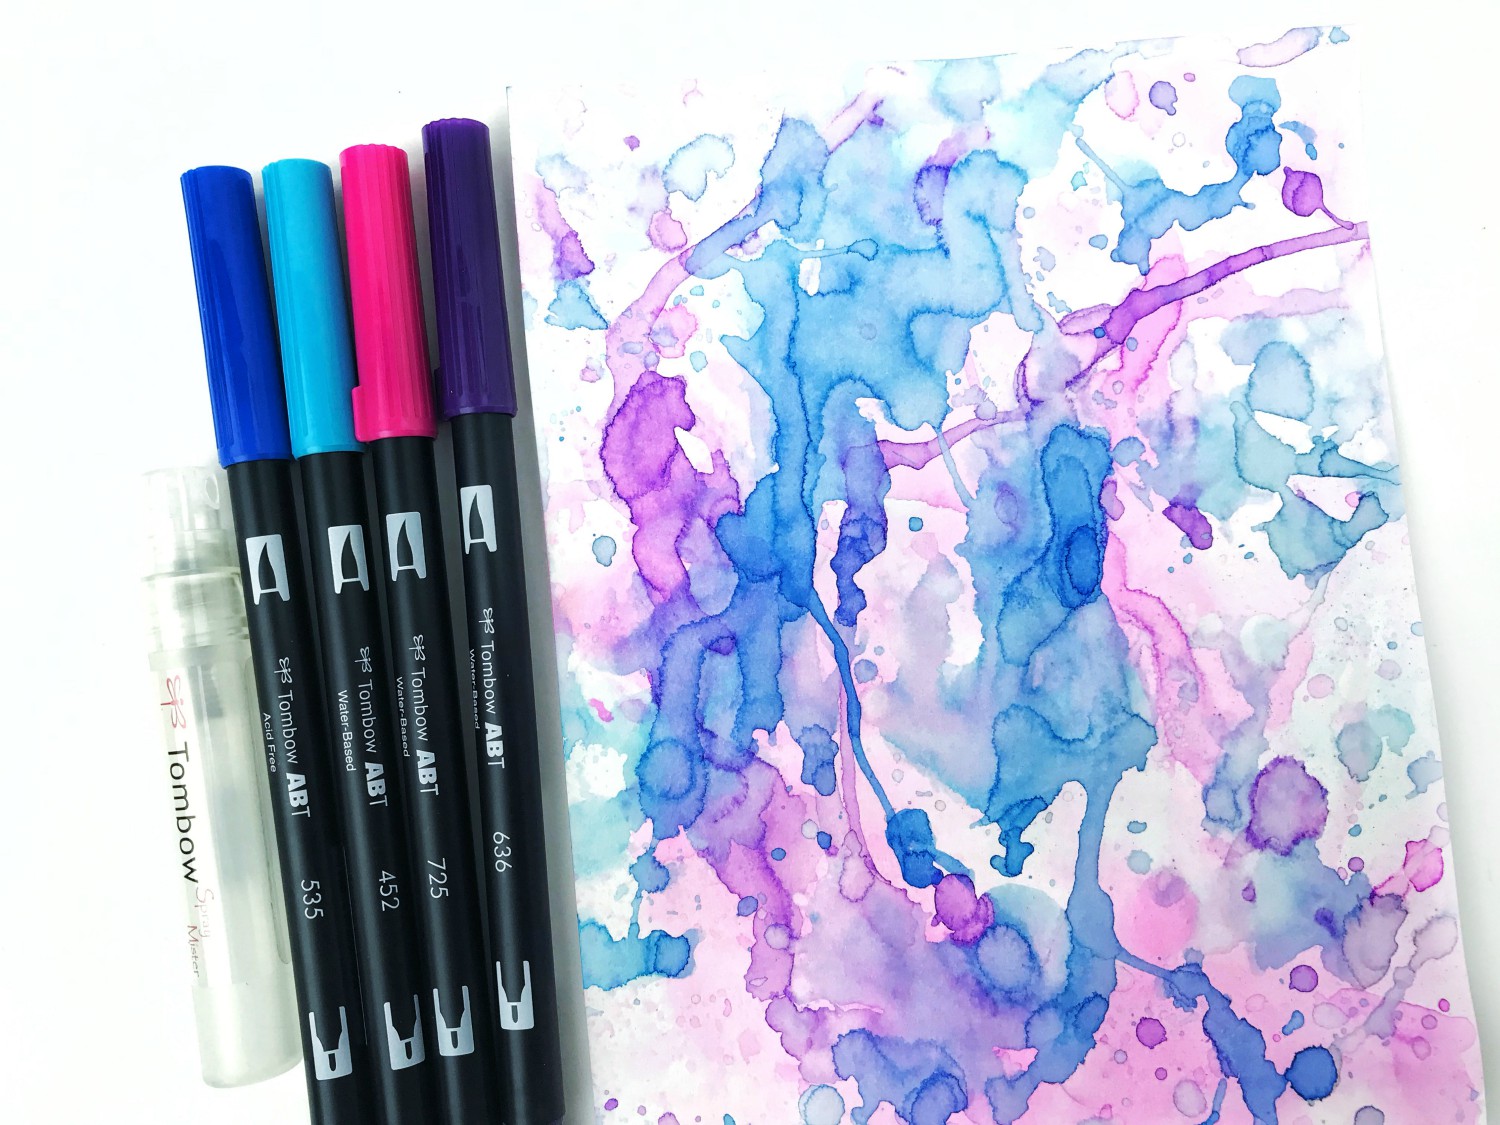
To create a watercolor background, you will need a few colors of Dual Brush Pens. I’m using purple, pink and blue (452, 535, 623, 636, 725).
You can watch my full process in the short video tutorial below!
Start by grabbing your mixed media card stock or watercolor paper. Scribble some color on the Tombow Blending Palette (found in the Blending Kit). Using the mister (also found in your Blending Kit), spray some water on to your Blending Palette and your card stock. Next, smush the Blending Palette directly onto your card stock. Let air dry or use a heat tool to help speed up the drying process. Continue to build up your background with colors and water as you see fit. Once you are done with this step, you will have a gorgeous watercolor background!
Assembling and Decorating
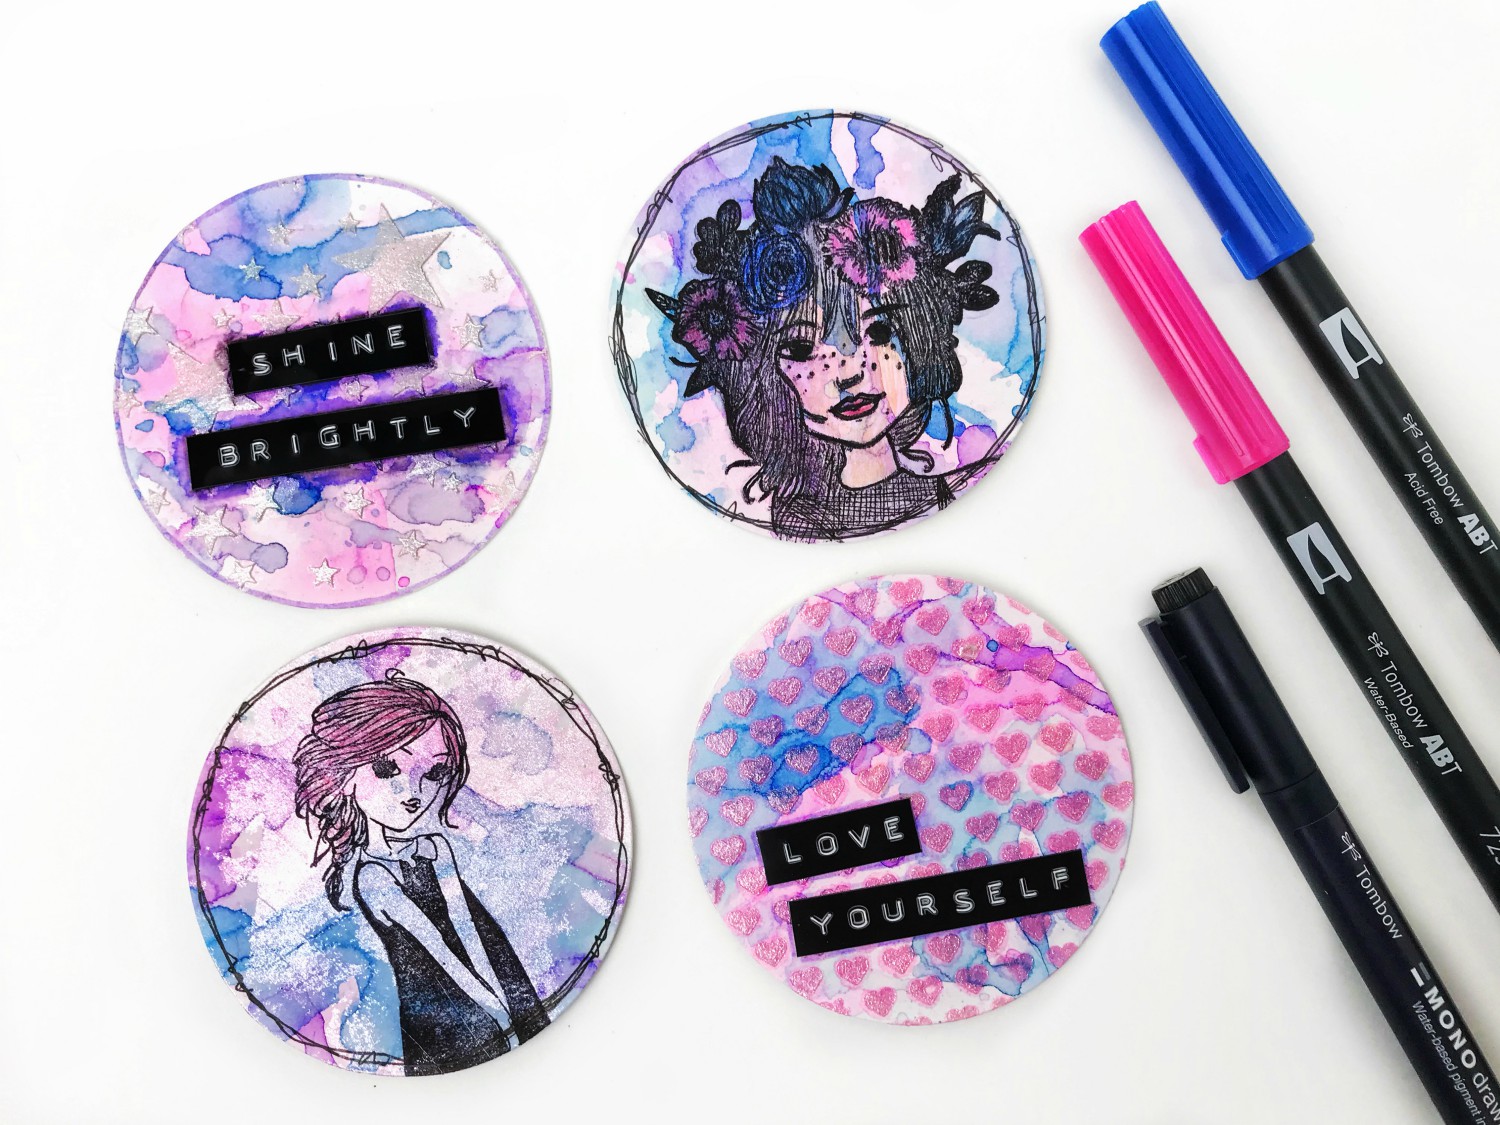
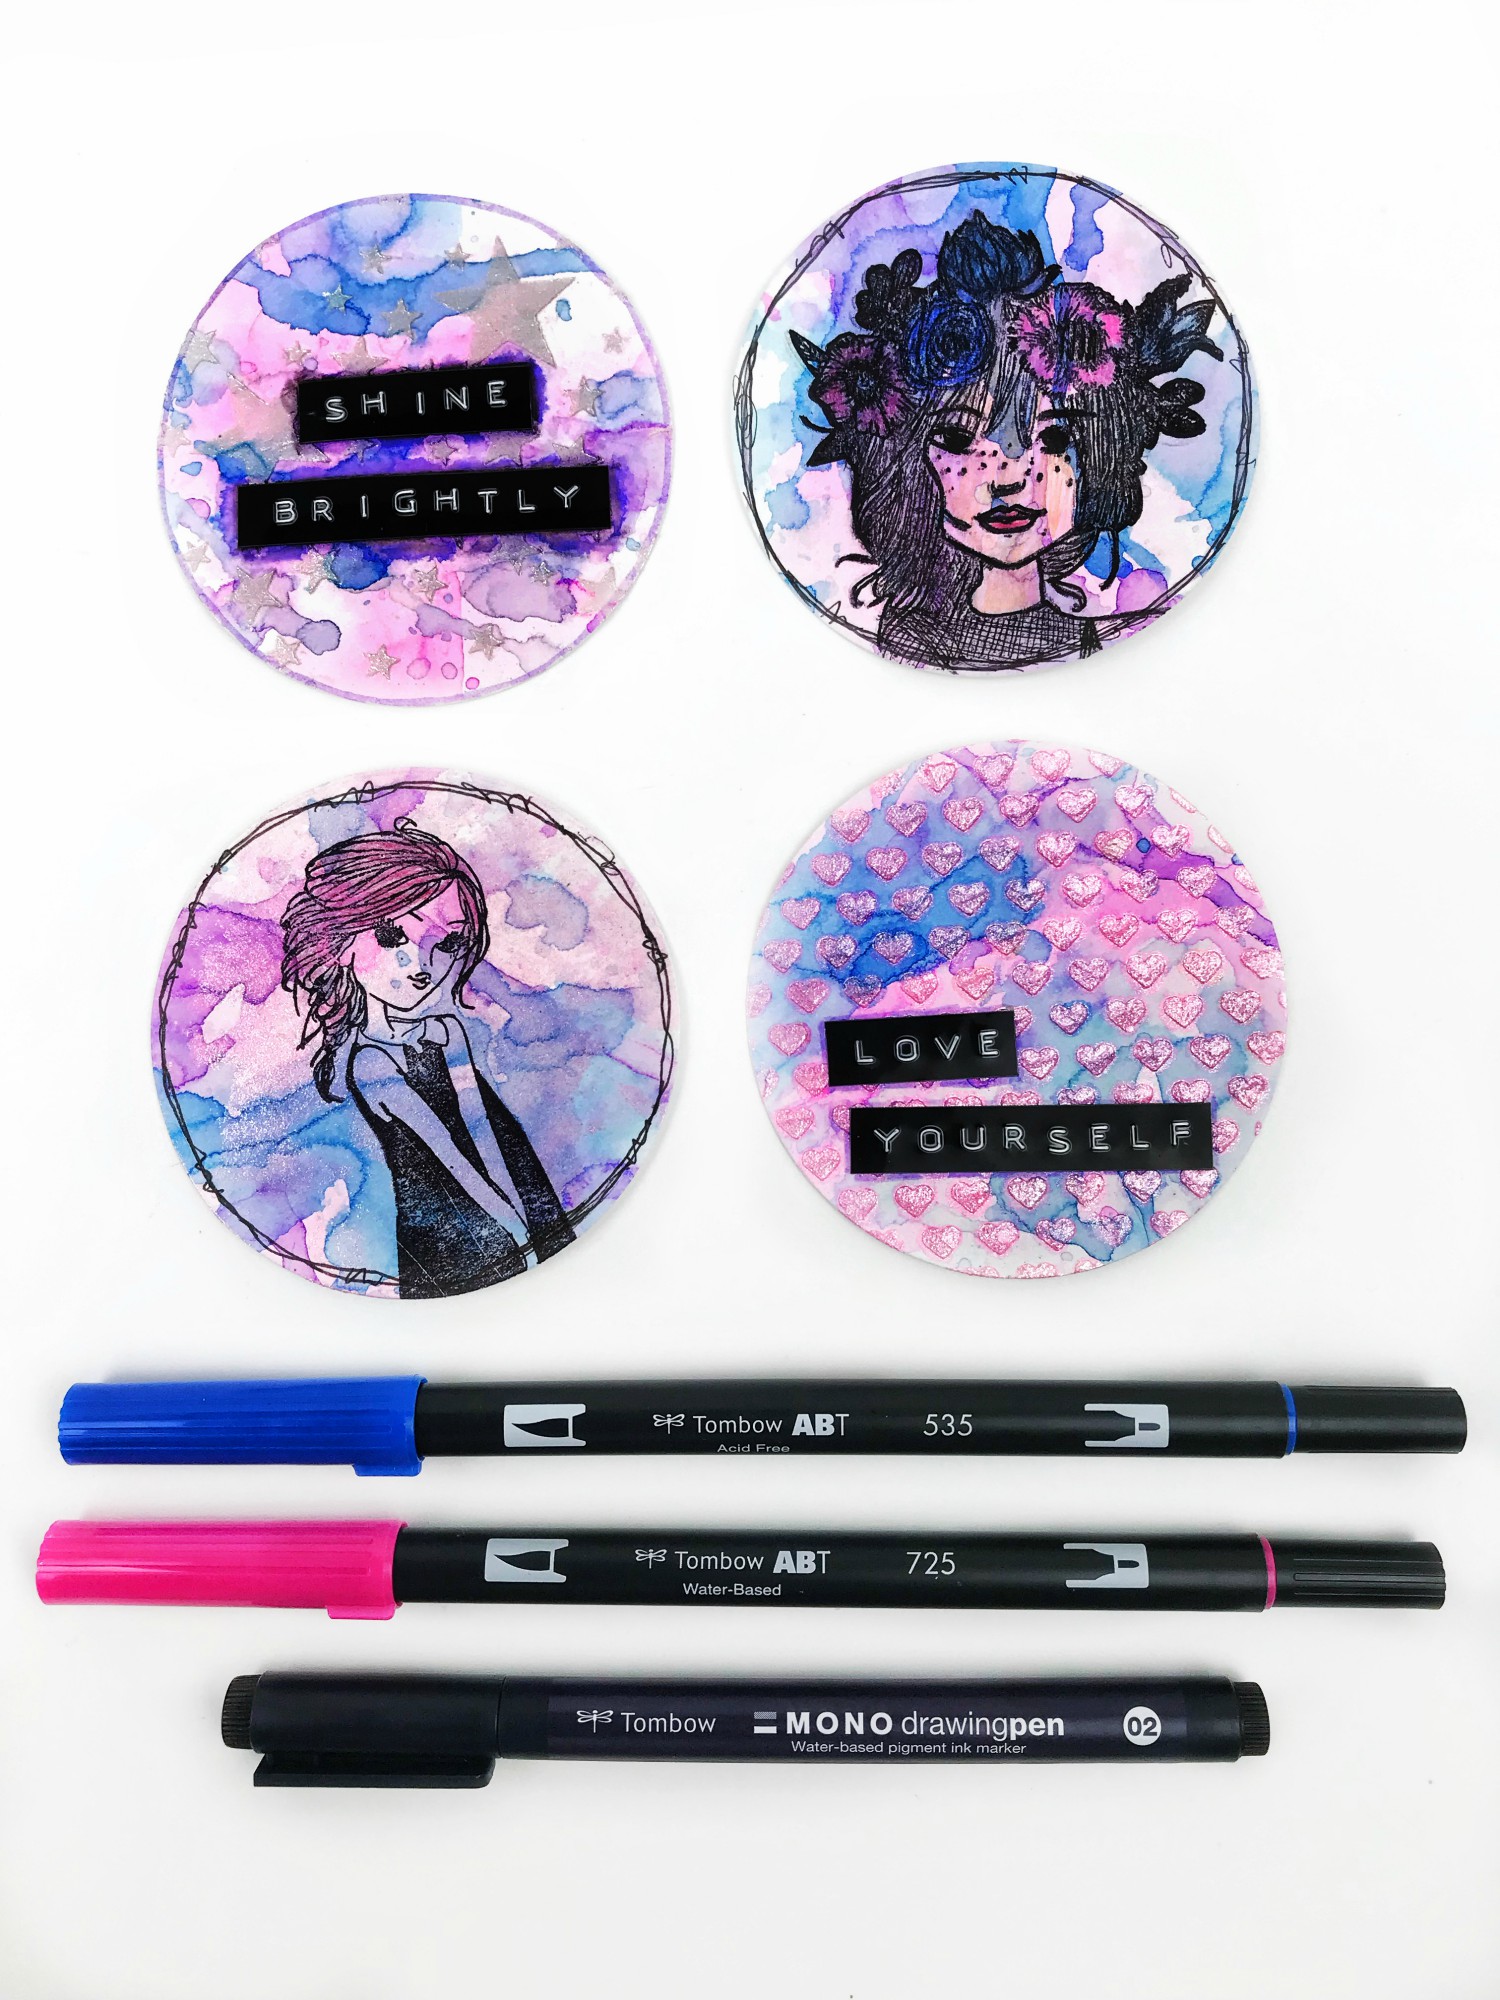
To create our artist trading coins, you will need to cut circles out of the background we just created. To do this, I used my die cutting machine and circle die. If you don’t have a die cutting machine, find a jar or shape you can trace to create your coins.
In this video, I share my complete process on how I assembled and decorated my artist trading coins.
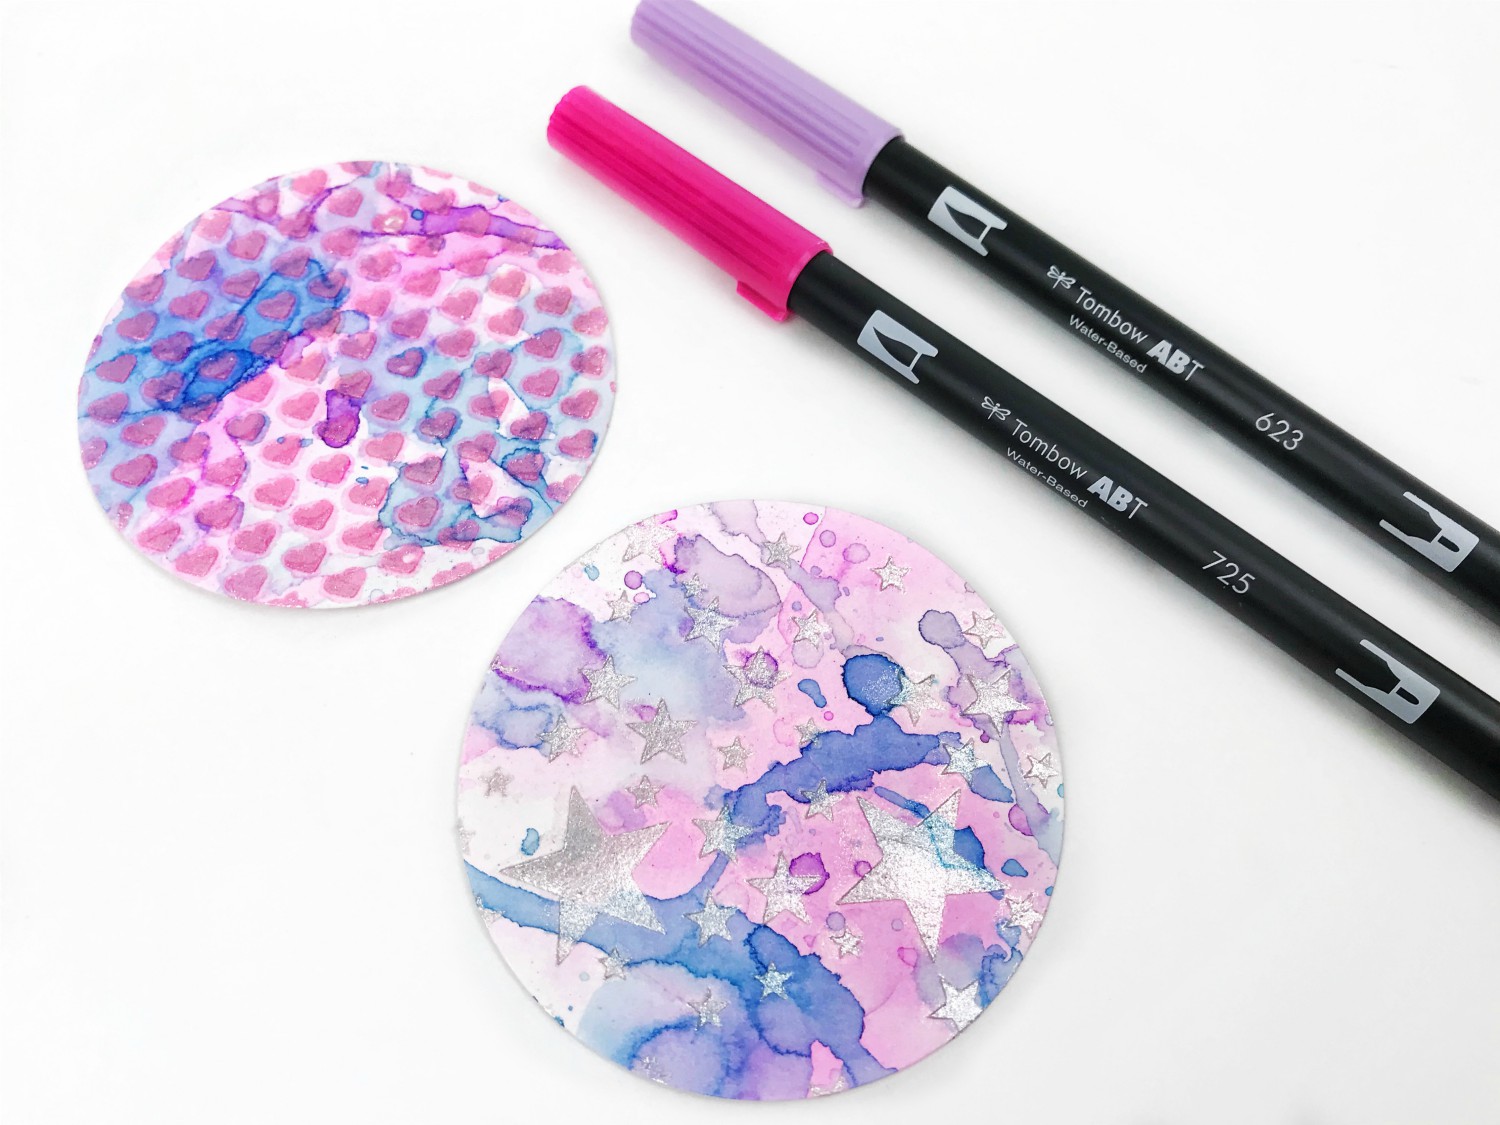
Once you have your coins cut out, it is time to decorate. I’m mixing some iridescent medium with a Dual Brush Pen (color 725). You can see this step in my video tutorial above. Once all mixed up, use a stencil to add some texture to your artist trading coins.
To further decorate, I am using my dymo label maker to add a simple sentiment over the artist trading coins. For my other two coins, I am stamping using a couple of picket fence stamps (Kiki and BFF Girl Avery). Next, I used the Tombow 1500 Series Colored Pencils to color in her hair, flowers, and skin. I also created a messy border around my coins using MONO Drawing Pen 02. I love the detail this added to the coins!
I hope you enjoyed this artist trading coins tutorial and give it a try! If you do, please tag @serenabeecreative and @tombowusa, so we can see your beautiful creations! These are perfect for sharing in the #sharingartmatters movement!
If you’d like to see more from me, check out my Youtube channel or join my Crafty Rebelles Community!
Much love,
Serena Bee