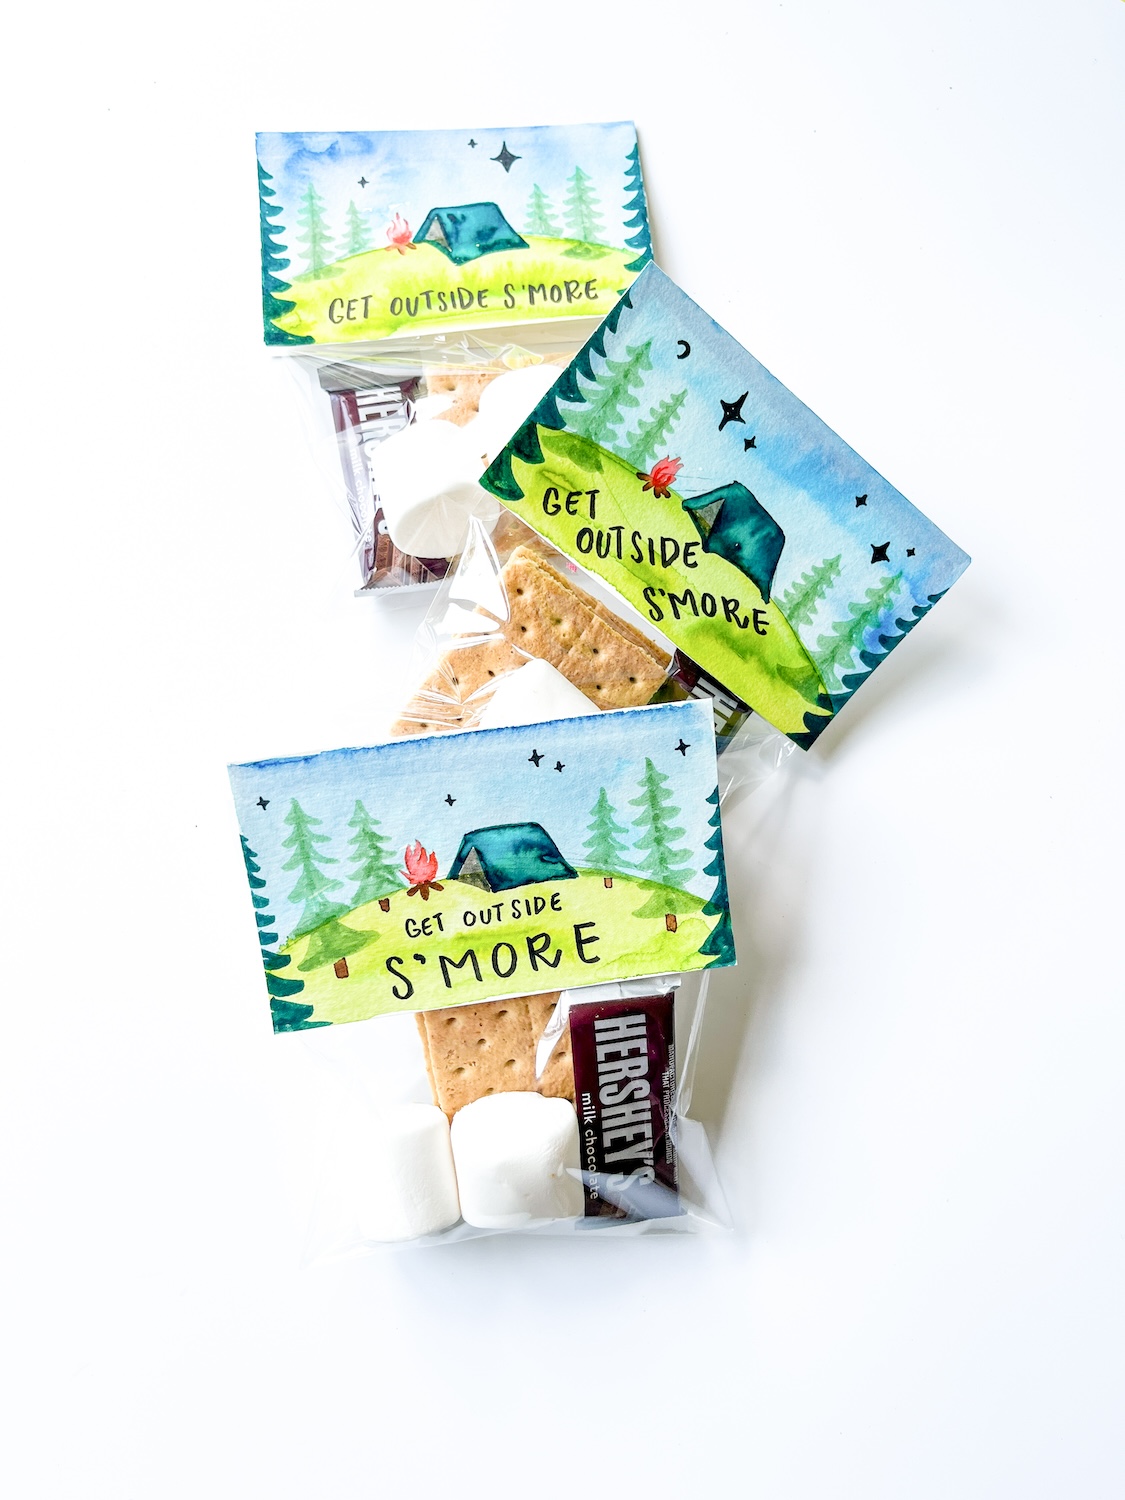
Hello Tombow friends! It’s Katie here and today I want to show you how you can make some CUTE DIY S’mores Packs that you can give out this Summer using only a few supplies! Camping is one of my favorite things to do in the Summer, and you can’t go camping without having s’mores, right?? Let’s make some:
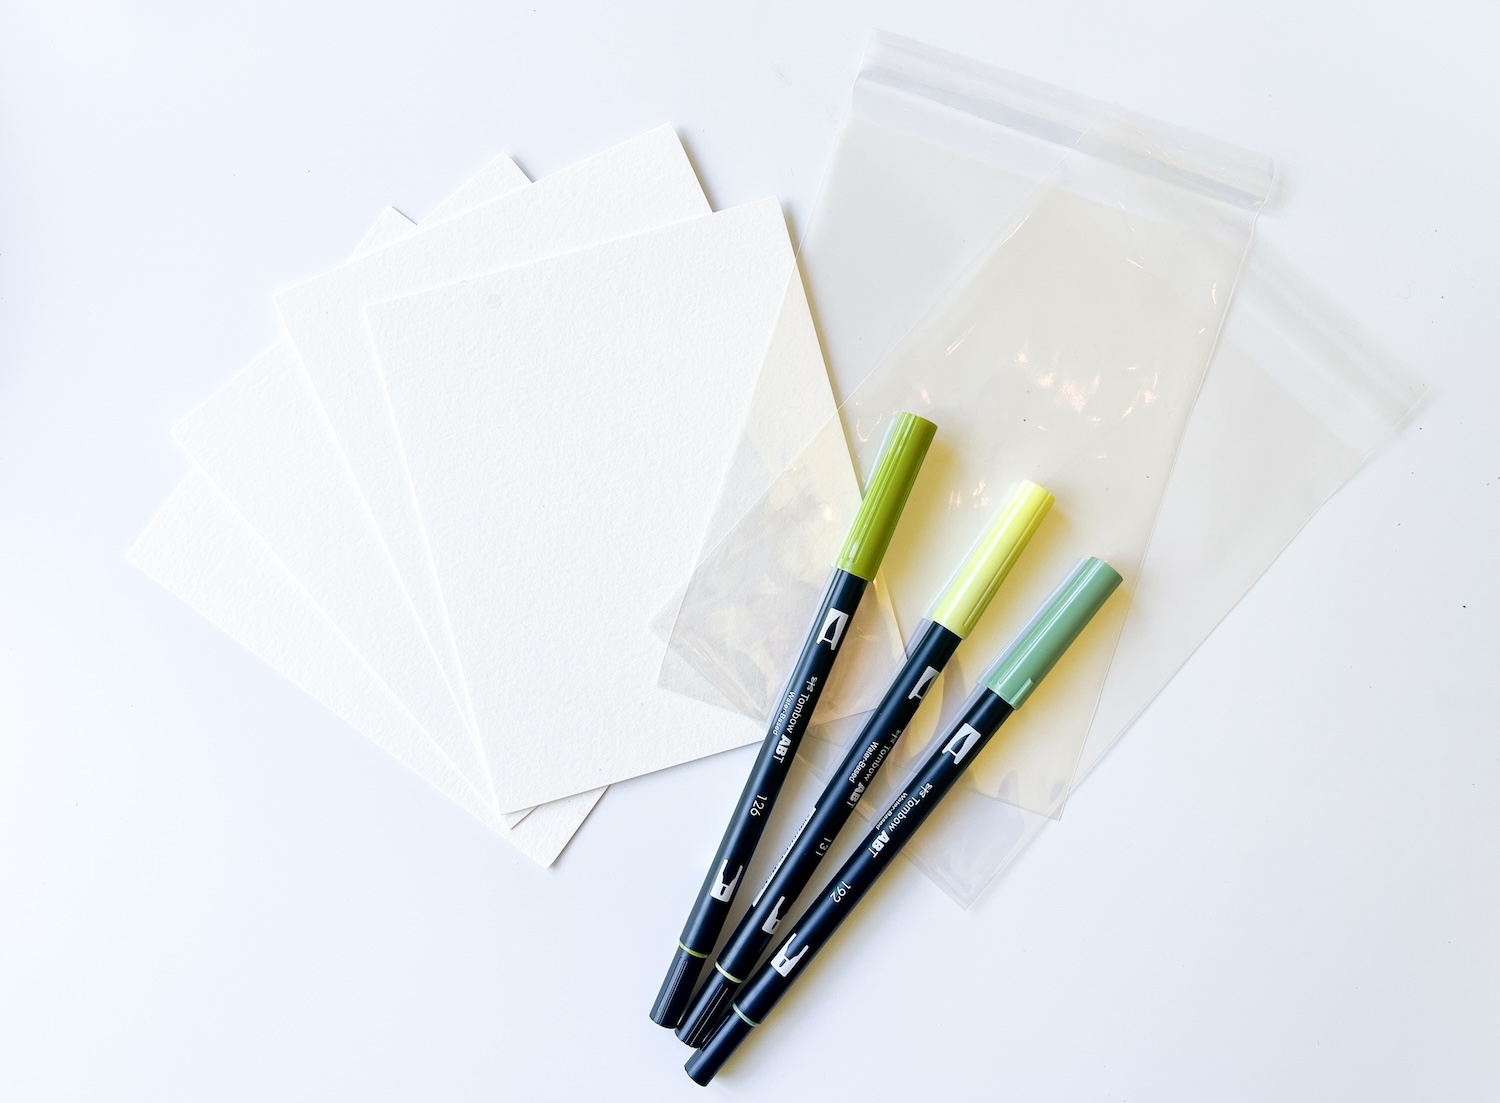
Supplies:
- Watercolor Paper
- Tombow Dual Brush Pens Landscape 10-Pack
- Tombow Fudenosuke Brush Pen Soft Tip Black
- Paint Brush + Water
- Tombow MONO Drawing Pencil
- Tombow MONO Eraser
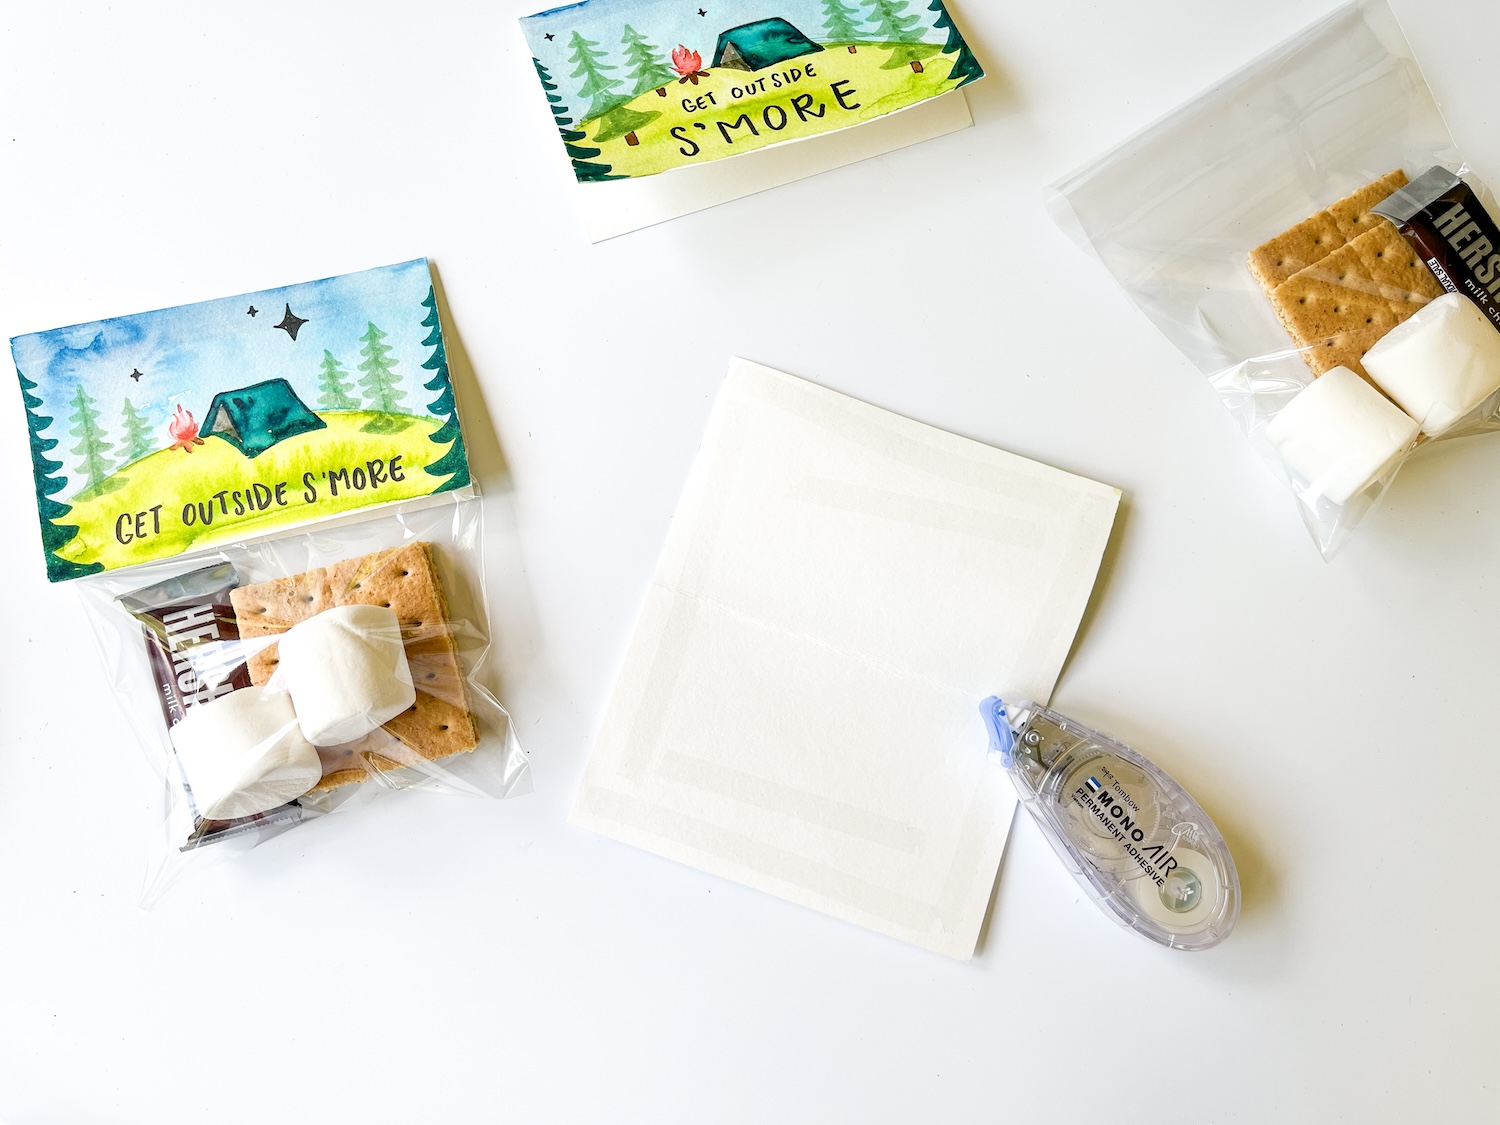
- Small cellophane bags or zip bags (fun idea: You can get eco compostable cellophane bags for this to reduce the plastic waste!!)
- Tombow MONO Air Touch Adhesive
DIY S’mores Packs:
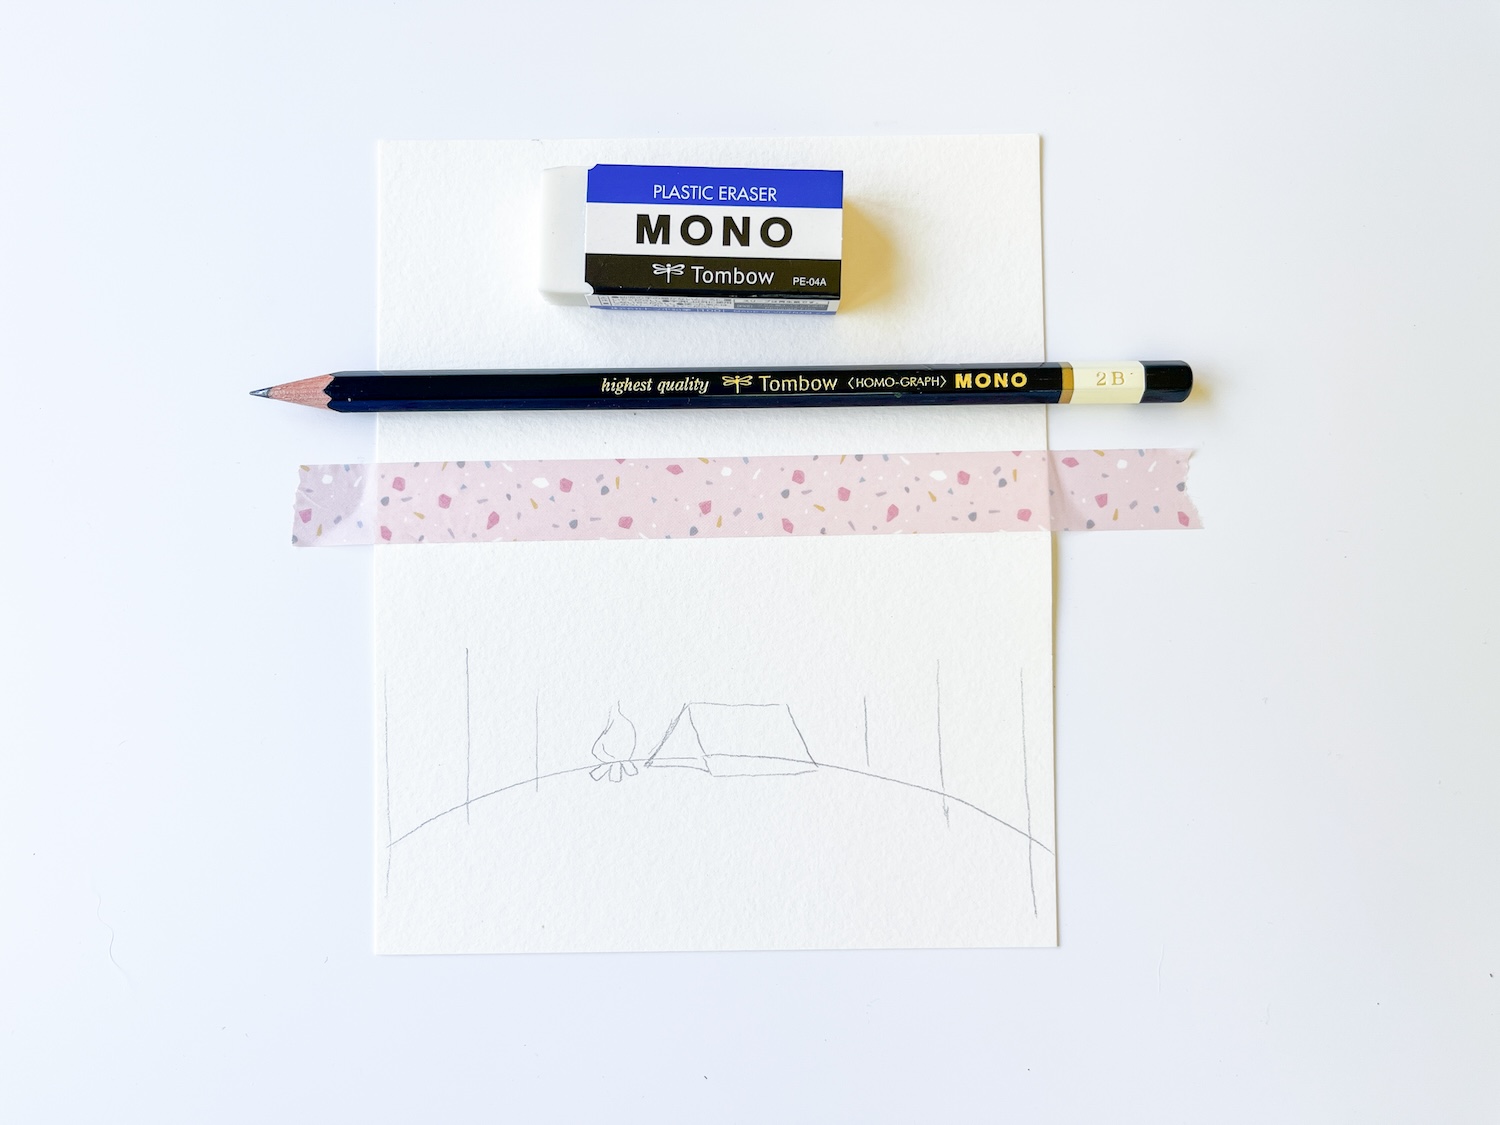
Step one:
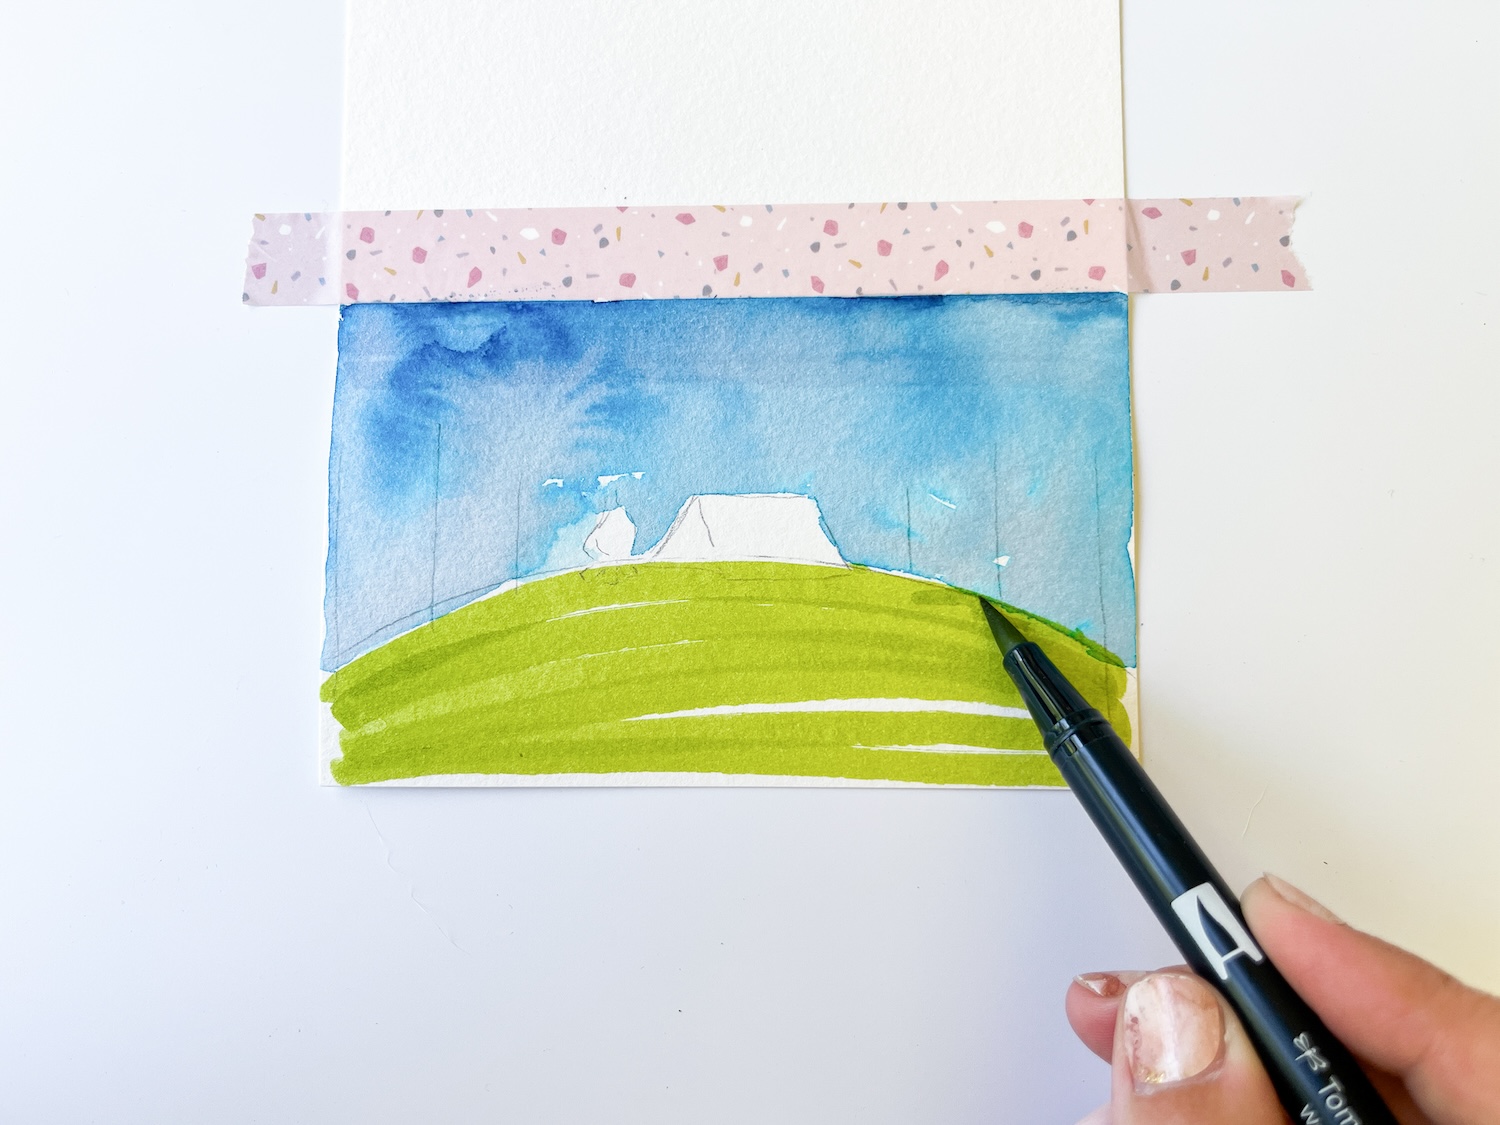
Start by cutting your watercolor paper down. I cut mine to 5″x6″, as my cellophane bags are 5″ wide. Use washi tape to tape off the bottom half of your paper, this will be on the “front” of your bag.
Use your MONO Drawing Pencil to sketch out a small landscape, with a little tent and campfire, onto the paper.
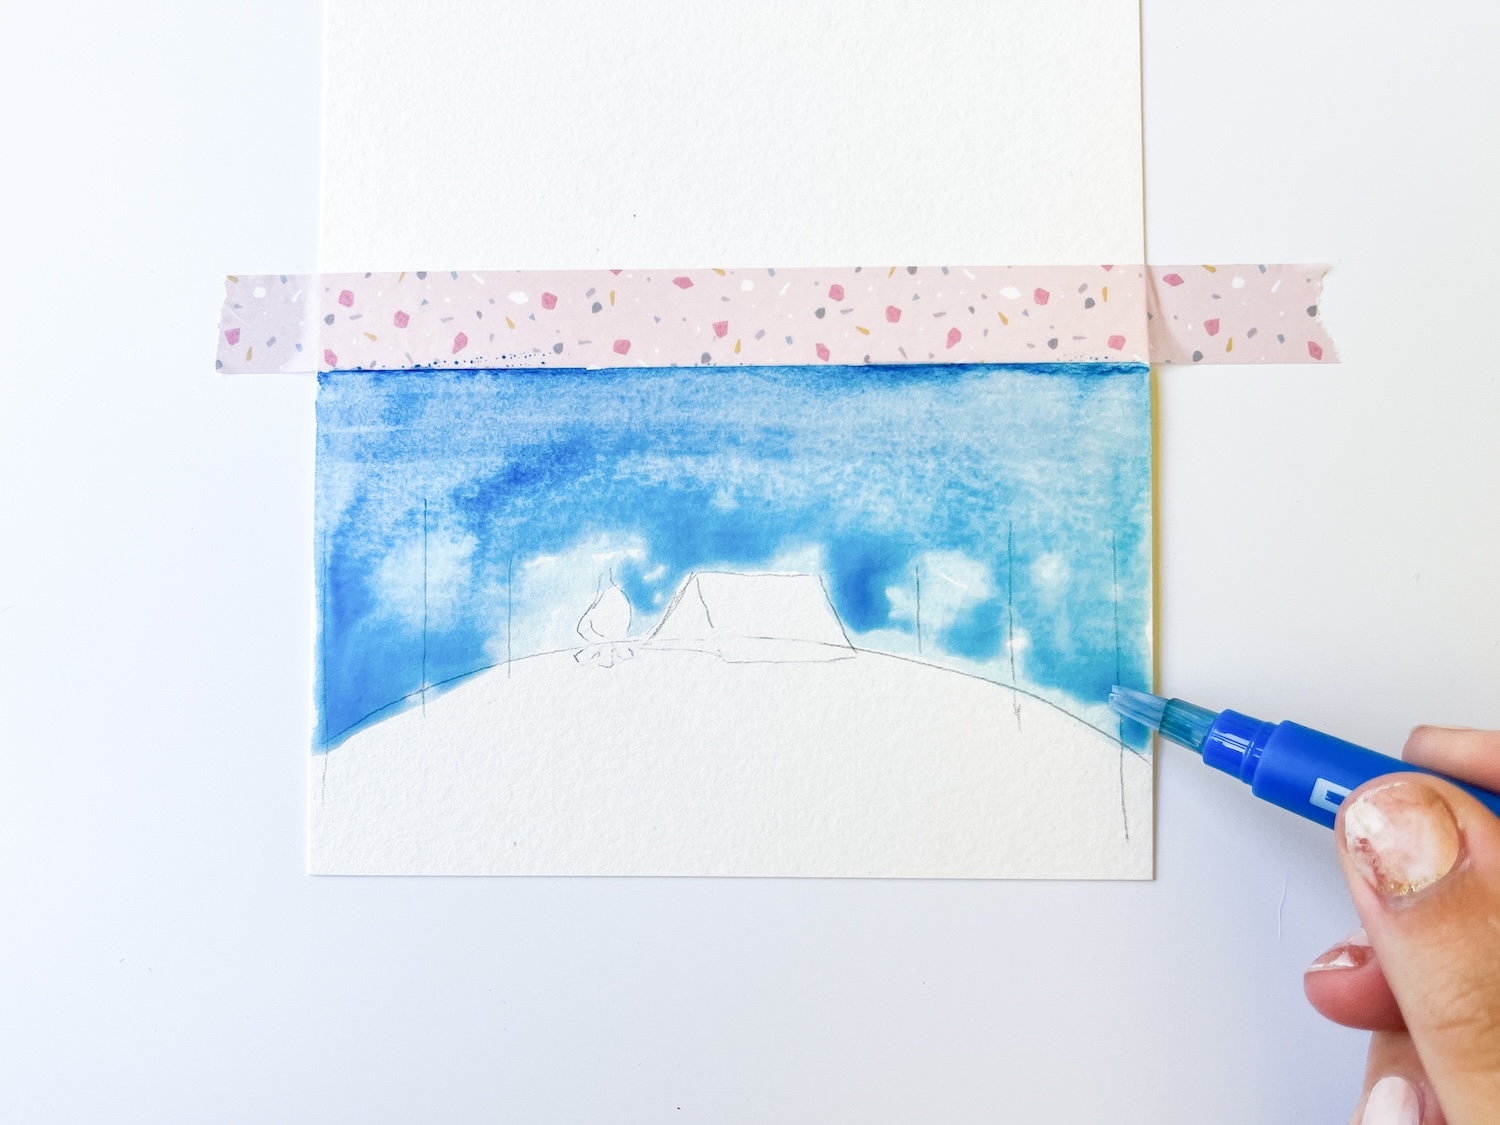
Step two:
Color the top third of the sky with 526, and use a paintbrush + water to pull the color down to fill in the entire sky. Let dry.
Step three:
Use 126 to fill in the bottom of the landscape and repeat the process of brushing over it with water to activate the ink and make it act like watercolors. I love using this technique with Dual Brush Pens, because you can get such a soft watercolor effect with the blending!
Step four:
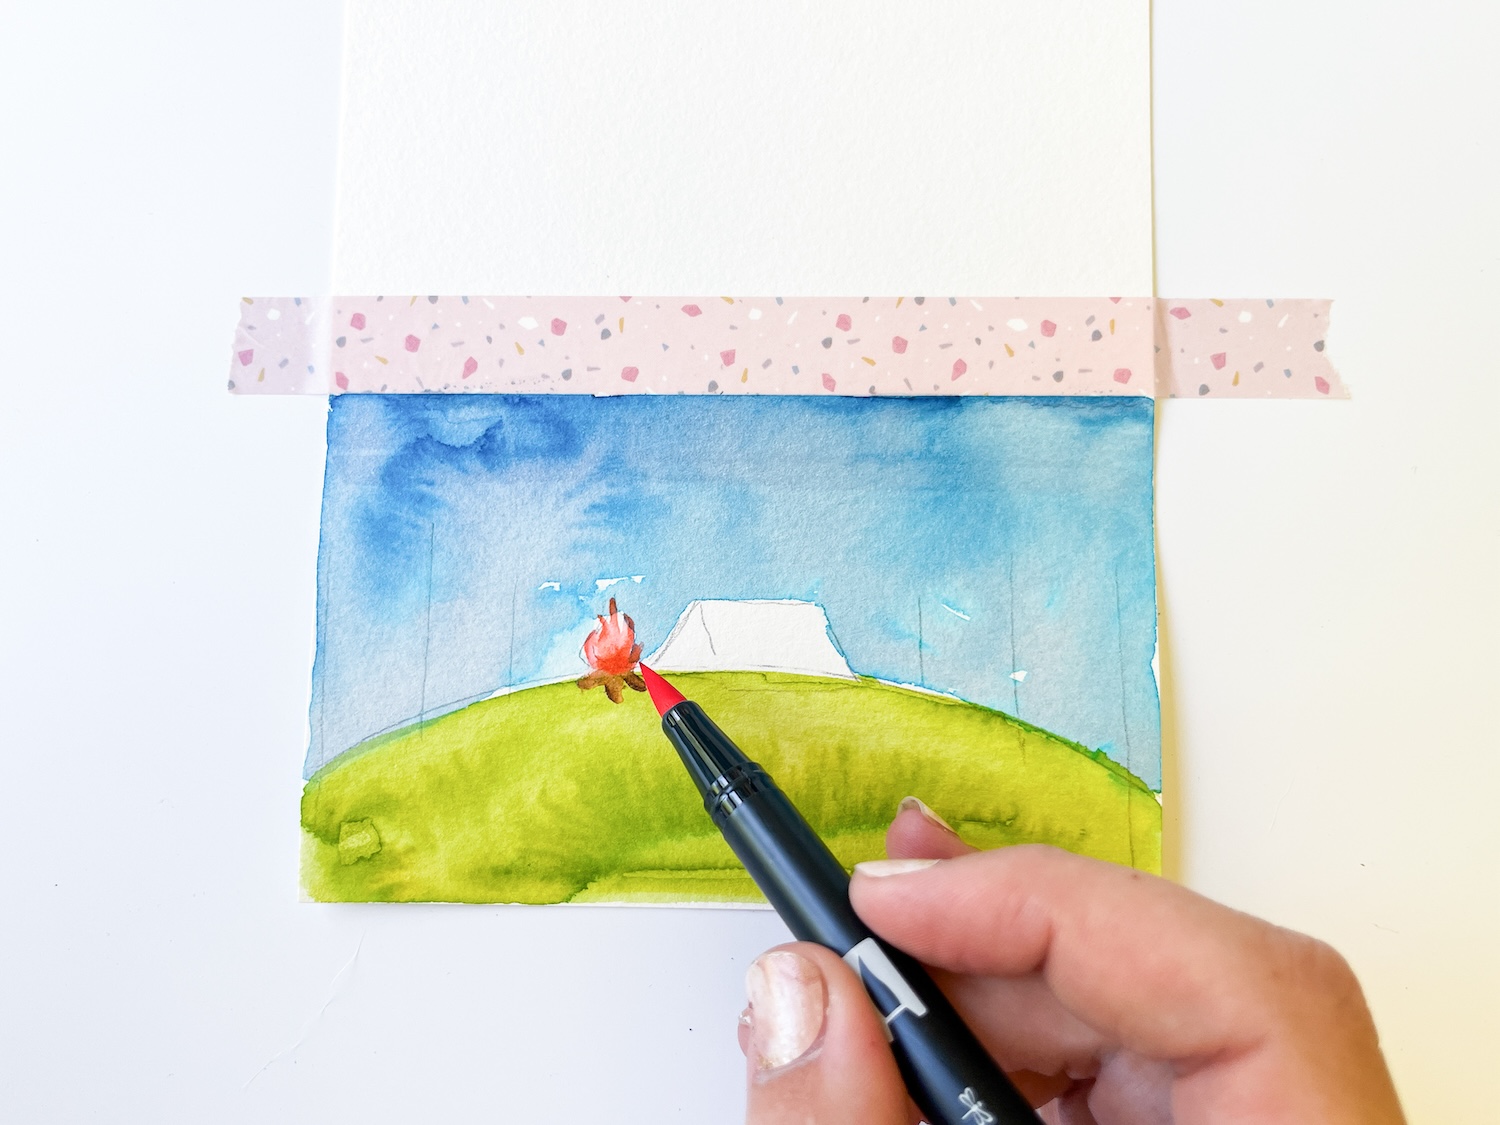
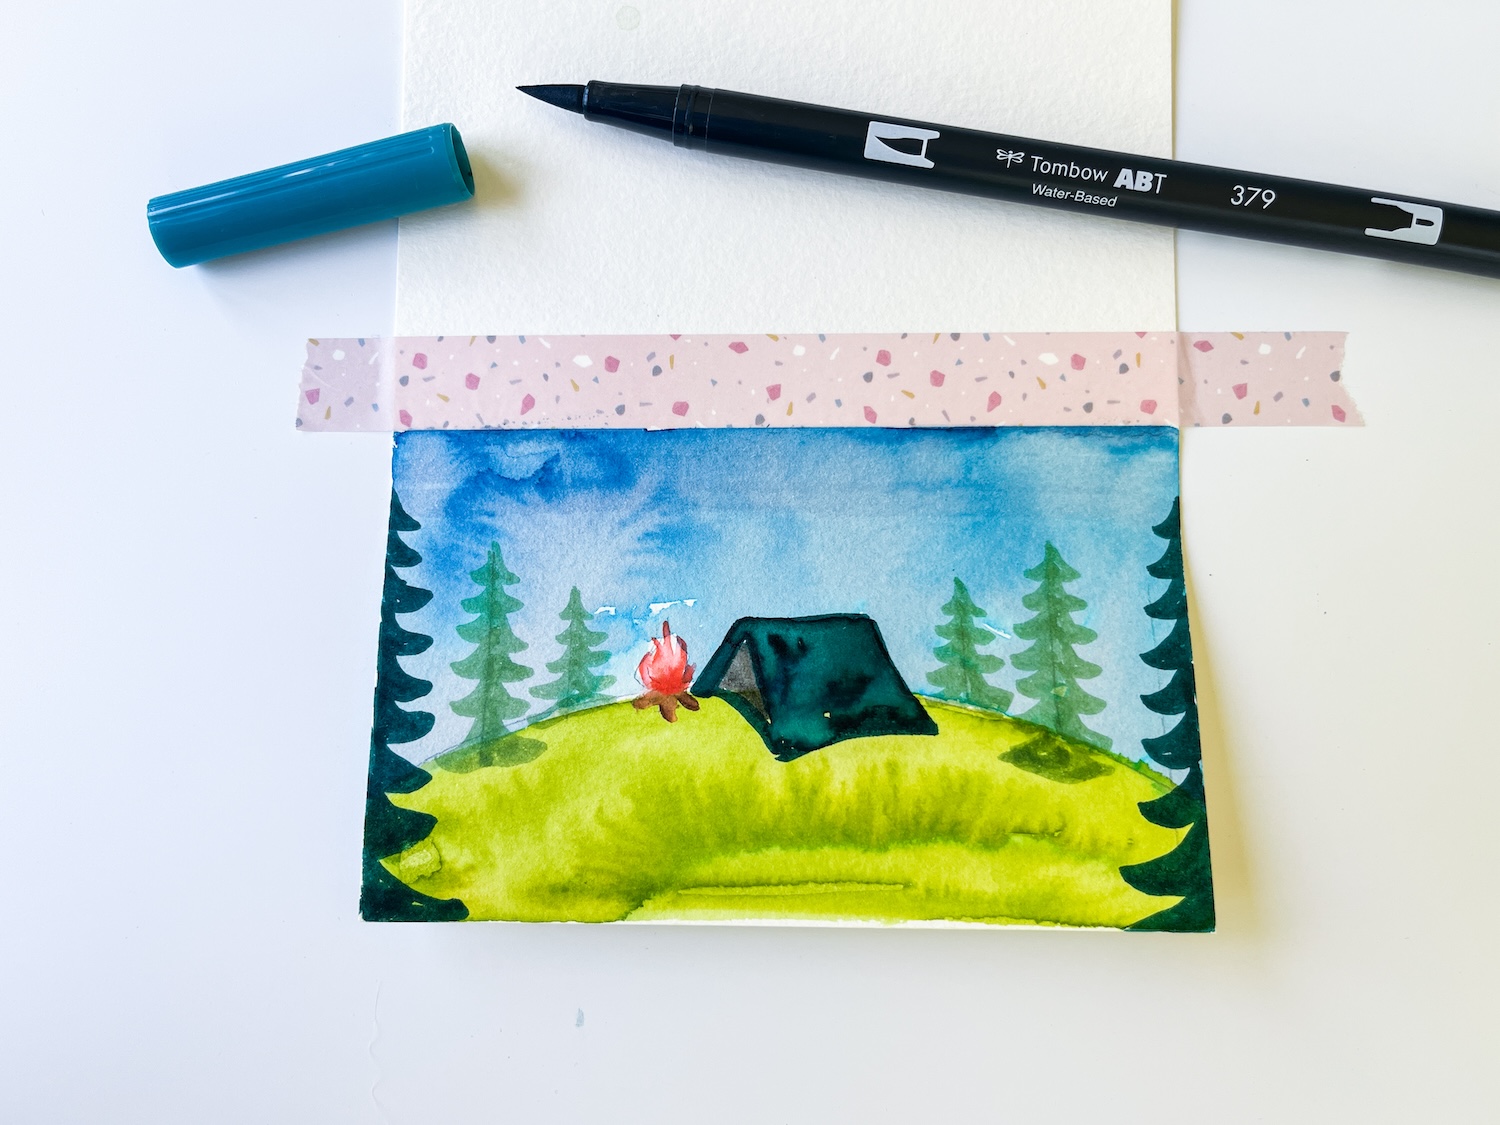
Repeat these steps to fill in the rest of your landscape design, filling in the tent, fire, and trees, making sure to let the ink dry in between so you don’t get muddy colors.
While the Landscape 10-pack does not come with an orange, I pulled Dual Brush Pen #905 out of my stash and used it alongside the beautiful Landscape set to create the campfire.
Step five:
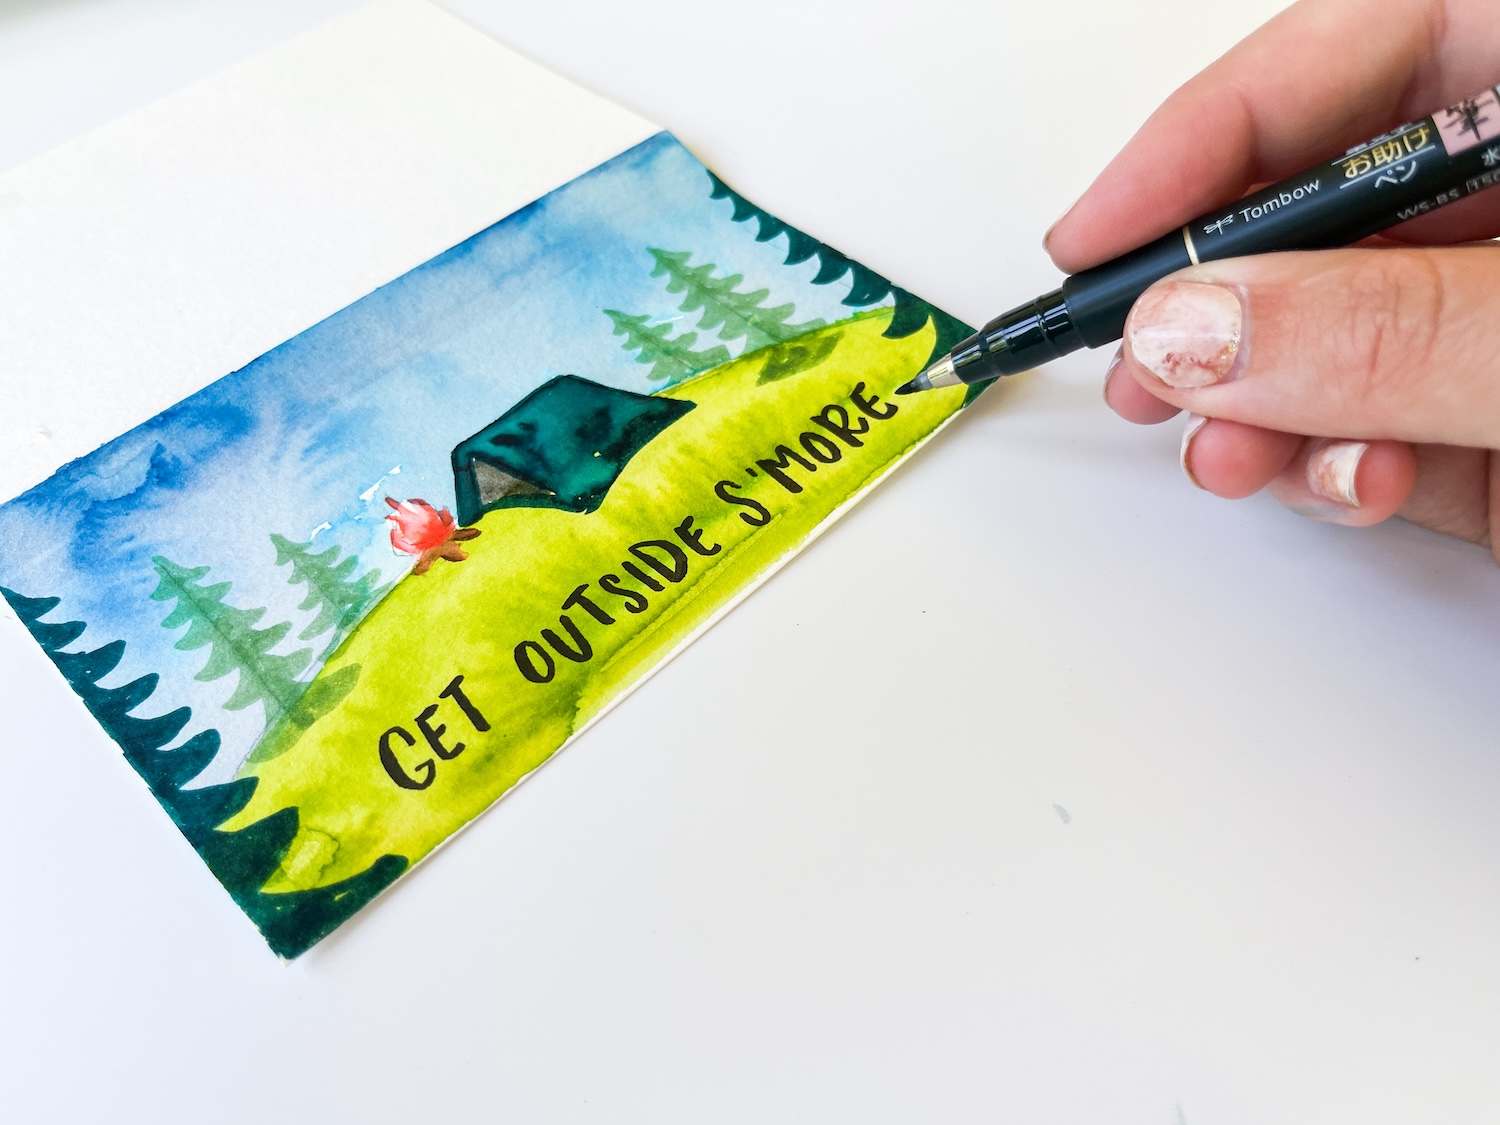
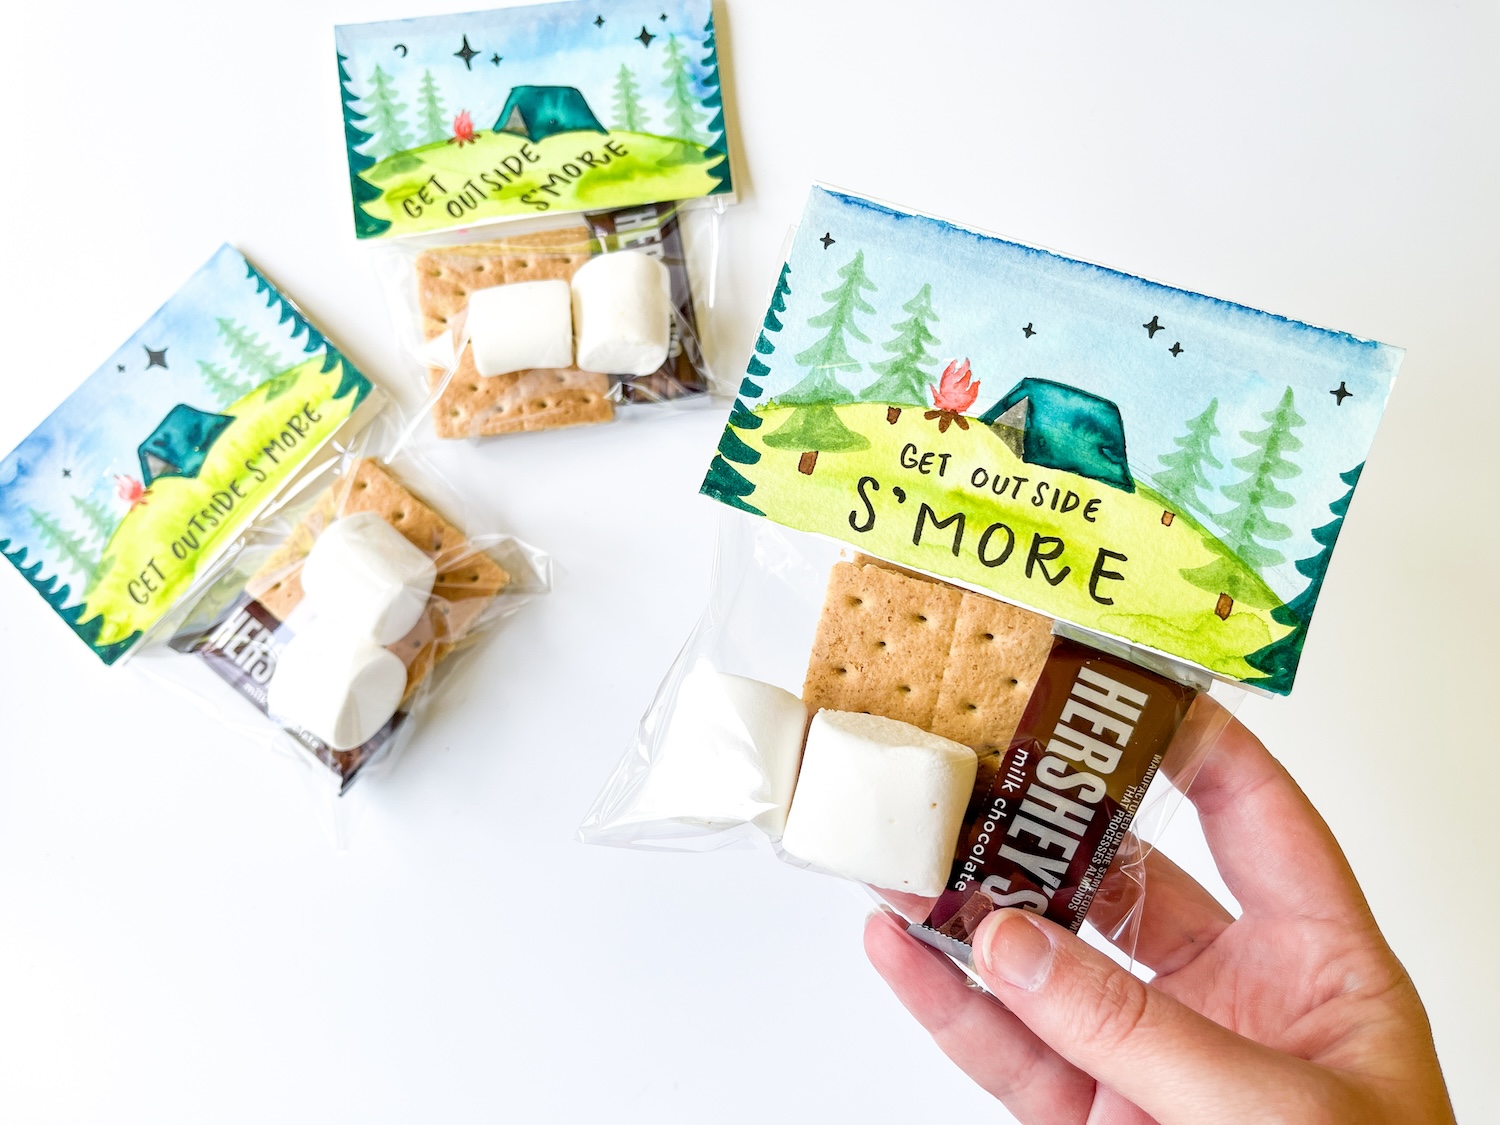
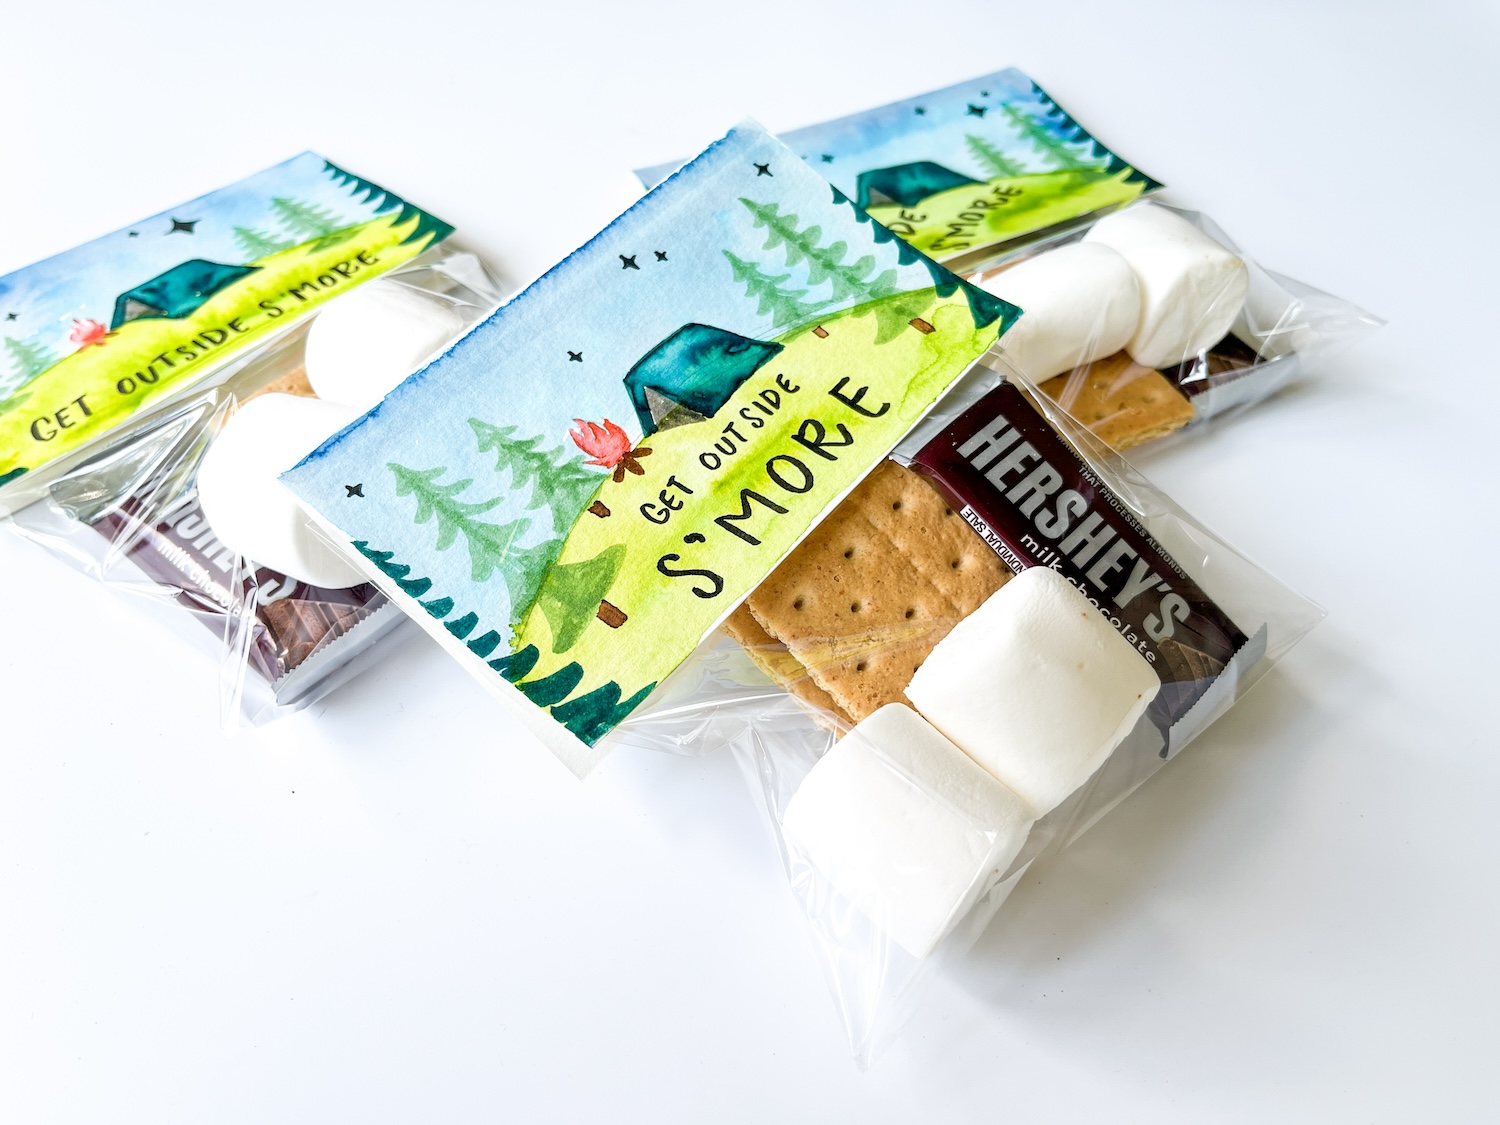
Use a Fudenosuke Brush Pen to write out a cute s’mores pun, such as “Get outside s’more” into the bottom of the landscape!
Step six:
Add your s’mores goodies to each bag! Then, Apply Tonbow’s MONO Air Touch Adhesive around the edges of the backside of your watercolor paper, then fold it in half around the top of your s’mores bags top top them off!
I love this adhesive runner because it’s easy to use, but strong enough to hold even this heavy weight watercolor paper. As a bonus, it’s refillable, so that’s less plastic I have to throw away! I love when I can craft sustainably!
and that’s it! I hope you have fun making these DIY S’mores Packs and having a campfire with friends this Summer!
If you do make your own, we’d love to see it! Make sure to tag @tombowusa and @studio.katie in your project photos on instagram so we can all see!
Before you go, make sure to check out these other fun projects for the Summer from the Tombow blog:
Putting together a Travel Journal Kit
Travel Journaling with Irojiten Colored Pencils