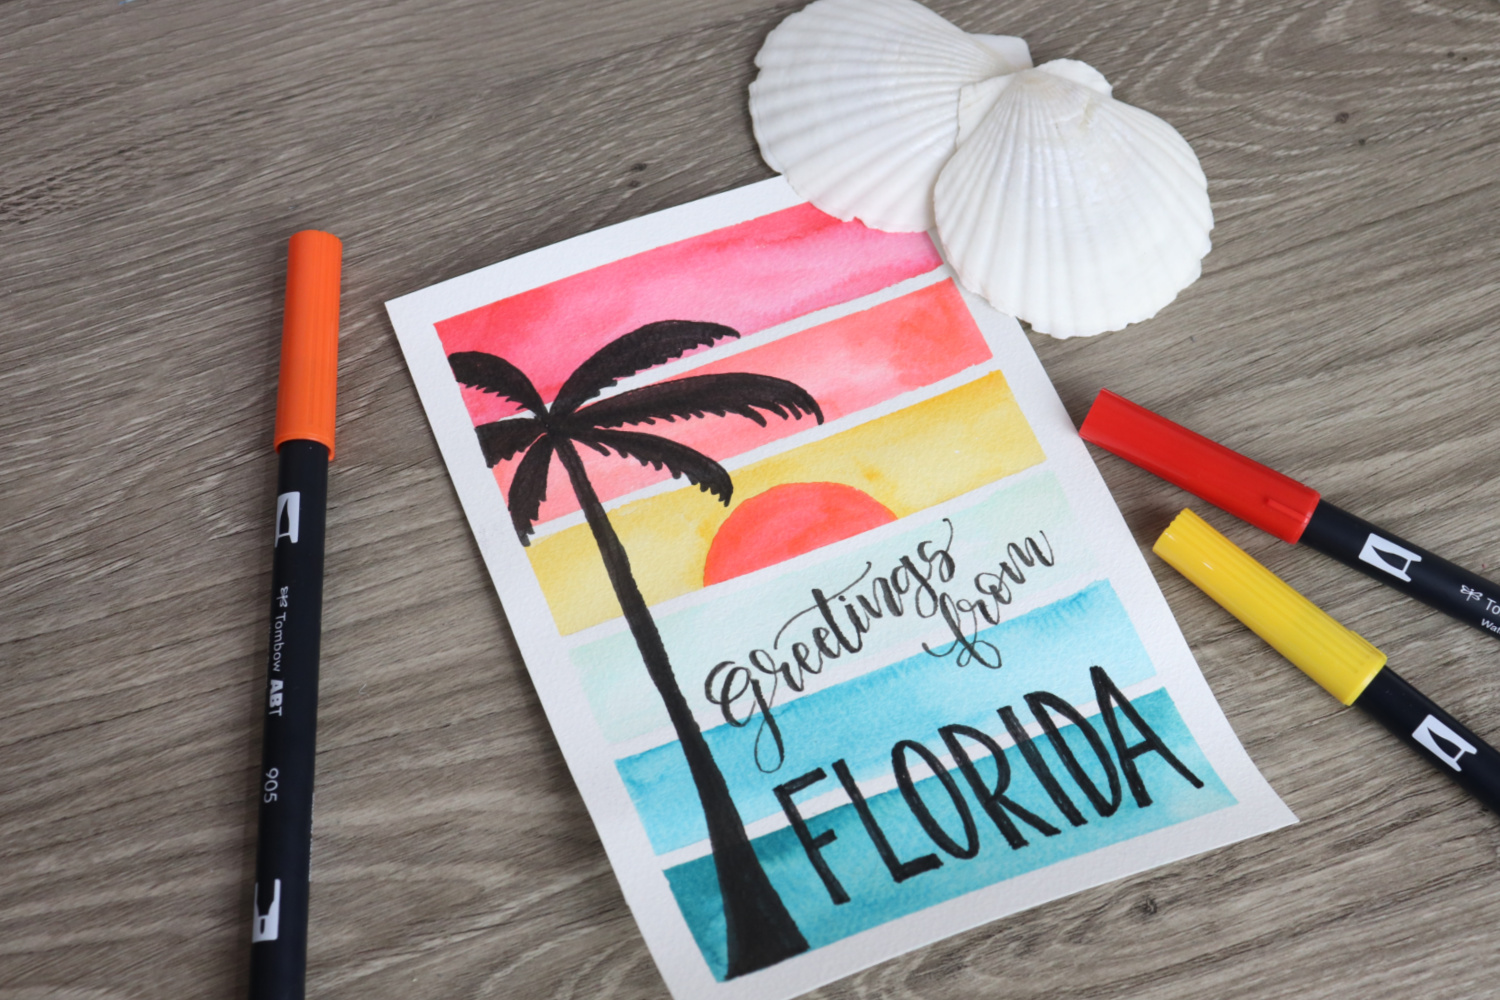
This summer, why not send a handmade postcard from your favorite vacation spot? I’m Amy from Amy Latta Creations, and today I’m excited to walk you through how to make a Vintage Sunset Postcard that you can customize for any destination you visit.
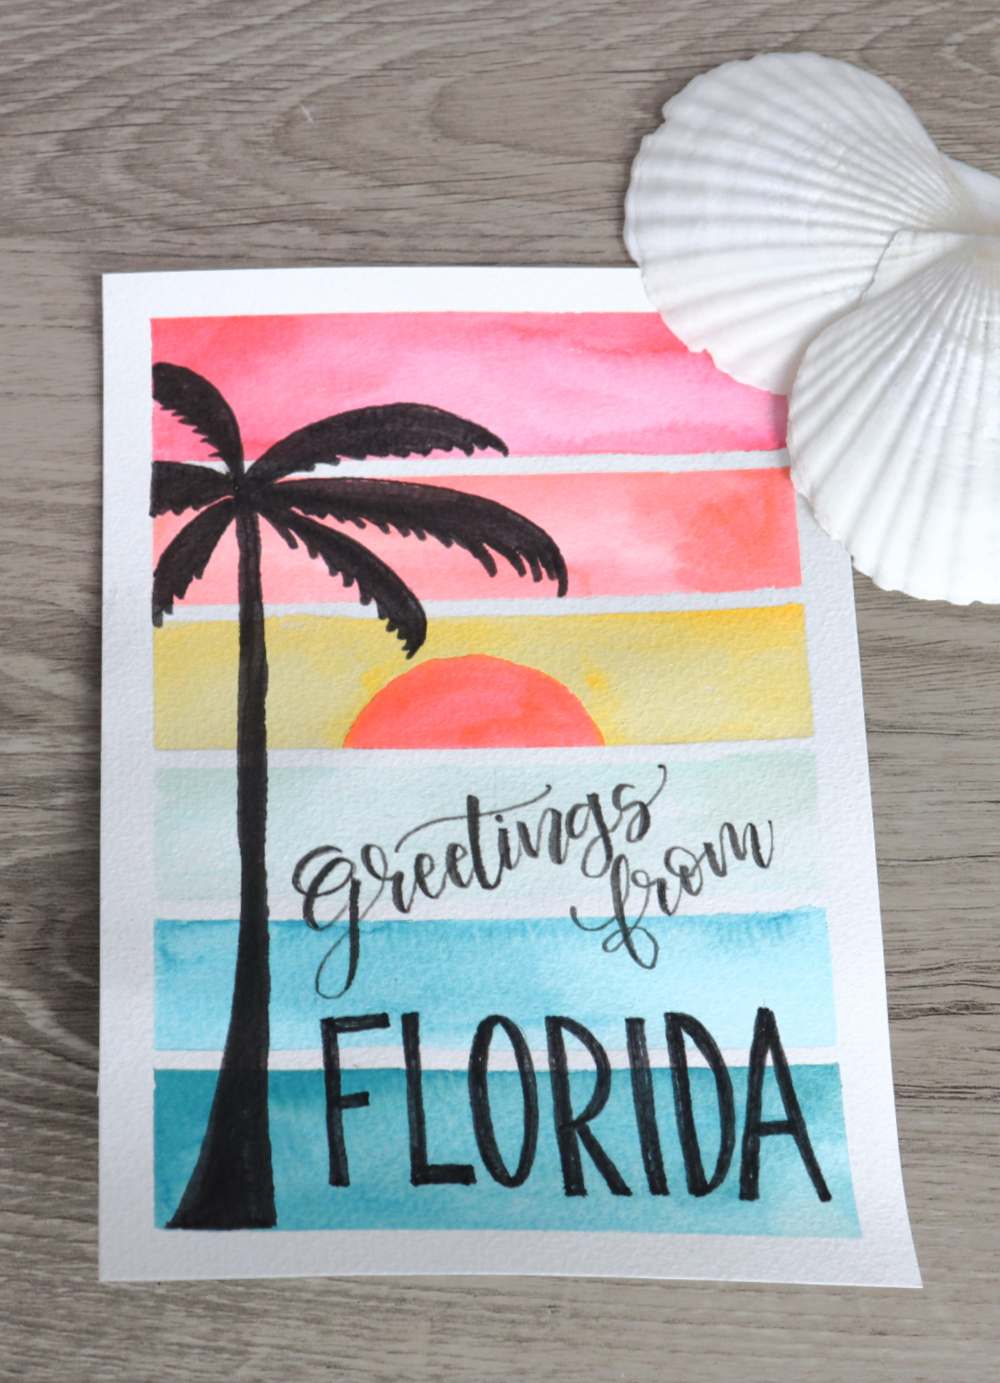
How to Make a Vintage Sunset Postcard
We’re going to create a sunset by dividing our postcard into horizontal stripes and filling in each one with a different color from the Tropical Dual Brush Pen pack. However, rather than just coloring normally with our markers, we’re going to use the ink with a wet paintbrush to create a watercolor effect! Here’s how to create your own vintage style postcard using this fun technique.
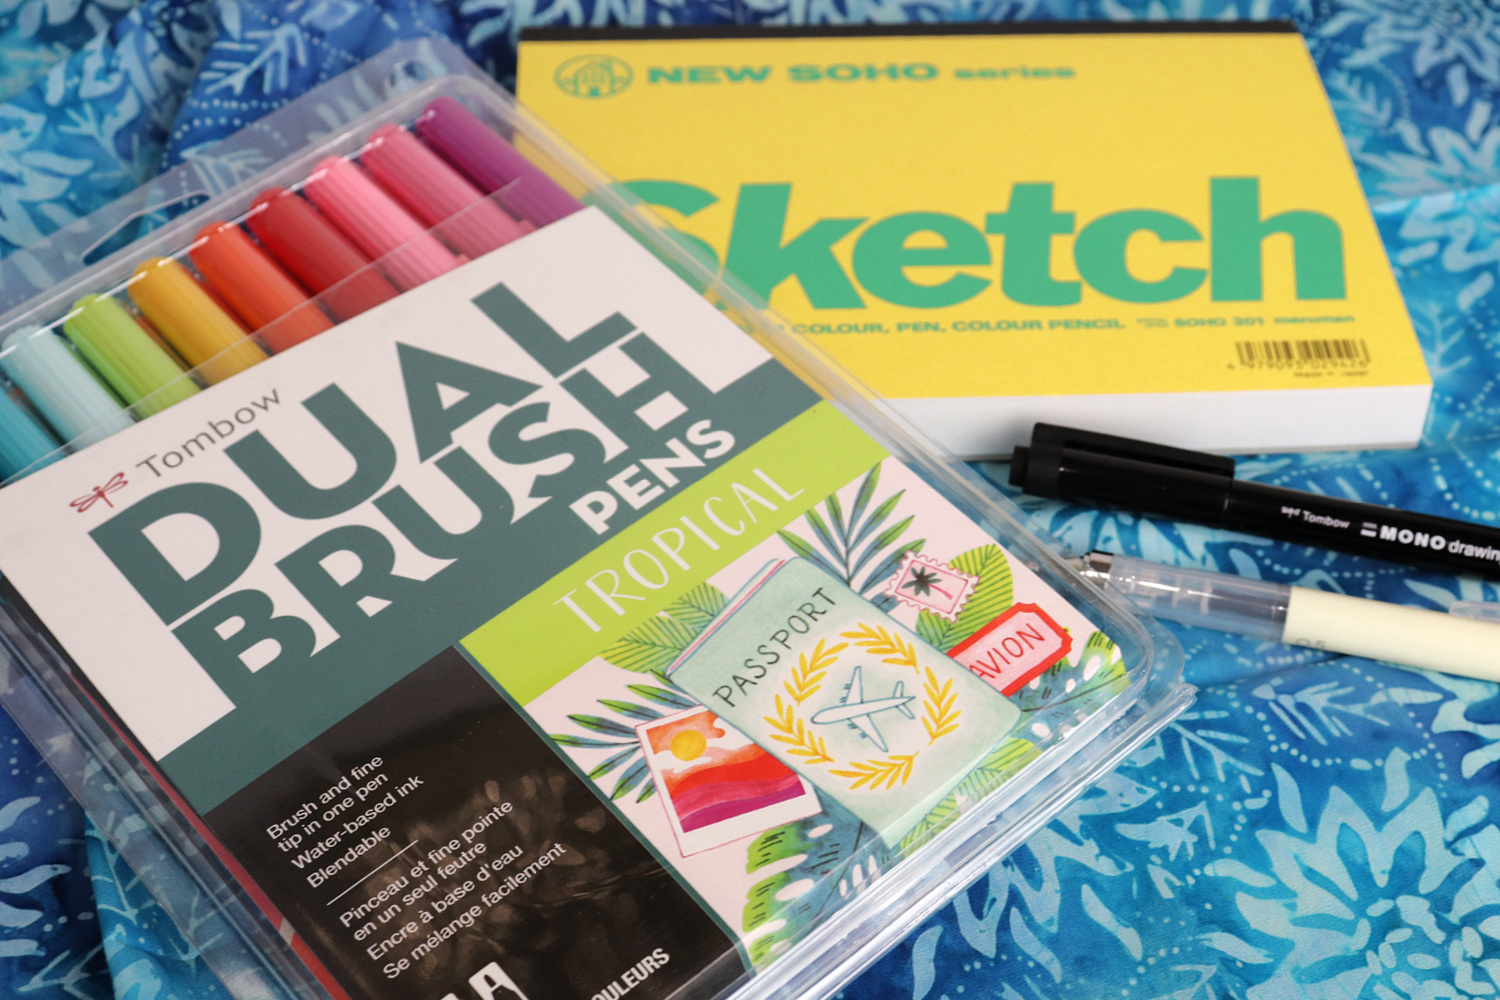
Materials
- Maruman New Soho Series Sketchbook – B6
- Tombow Dual Brush Pens: Tropical 10-pack
- Tombow MONO Drawing Pen, 06
- Tombow MONO Graph Mechanical Pencil
- Tombow Fudenosuke Brush Pen, Soft Tip
- Washi Tape (3mm, 8mm)
- Paintbrush and water
- Non-absorbent surface, like a Blending Palette or a plastic baggie
- Ruler
Instructions
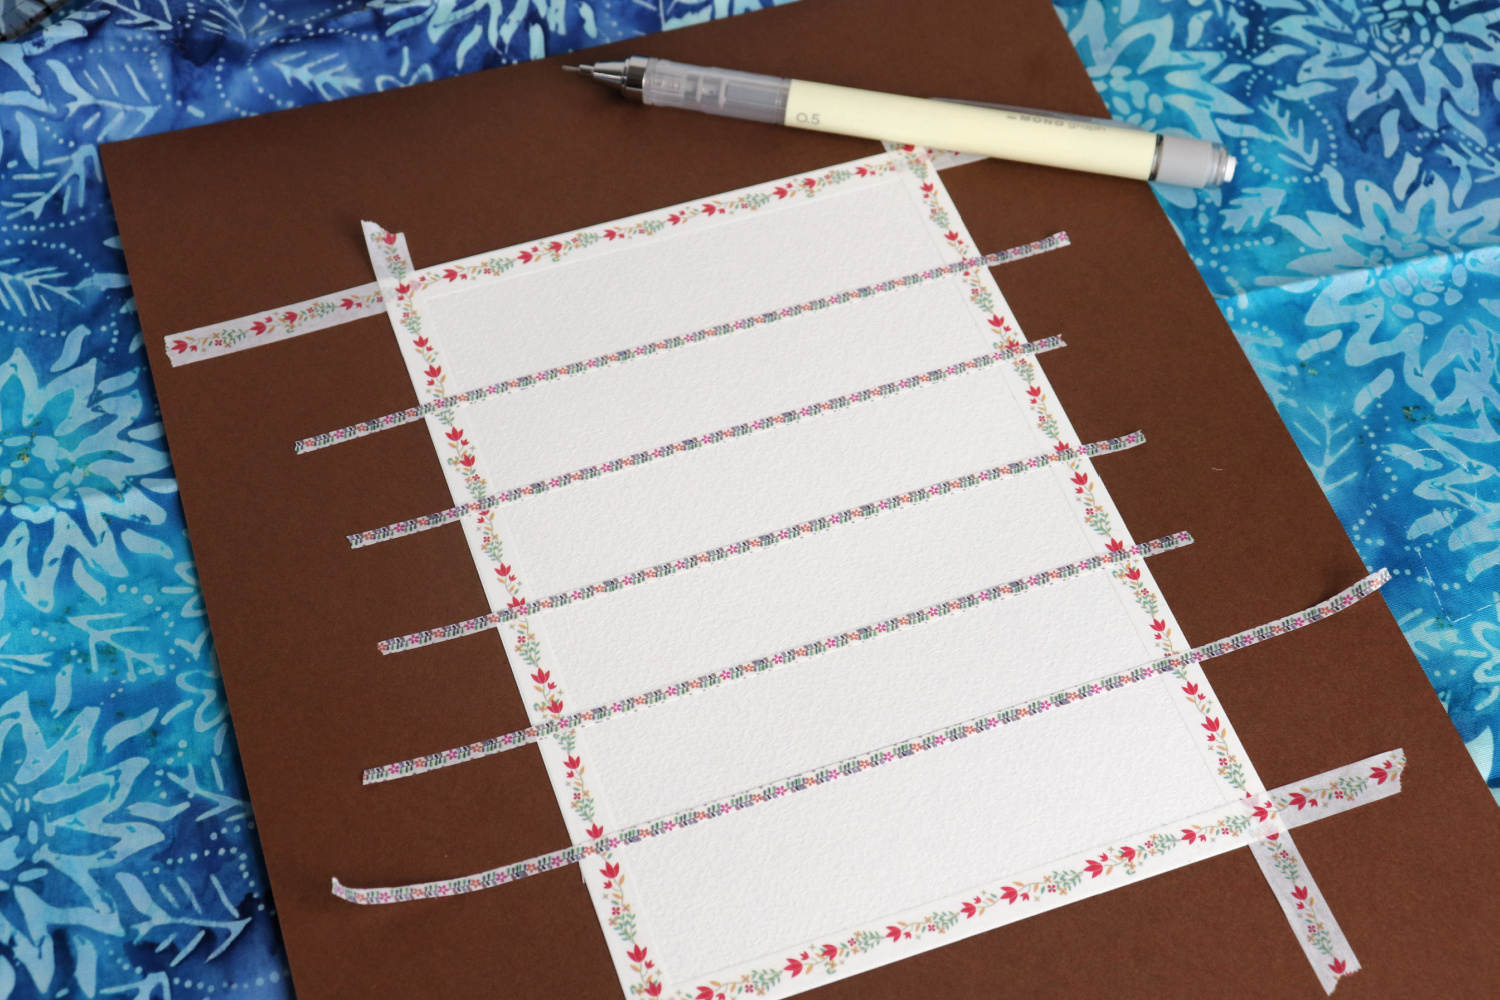
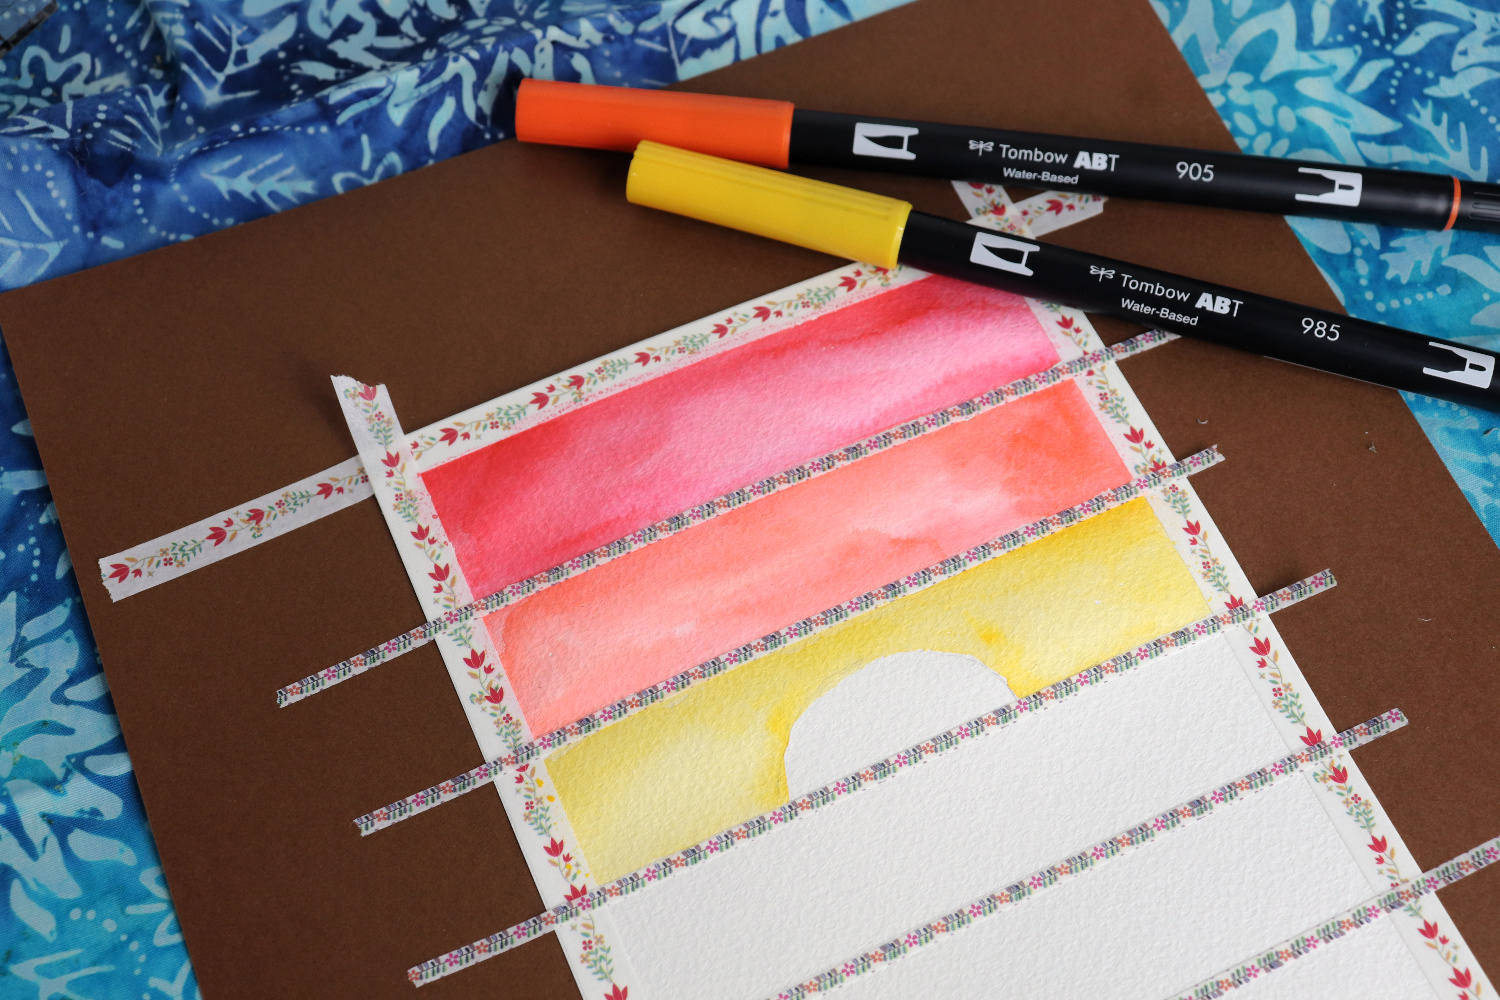
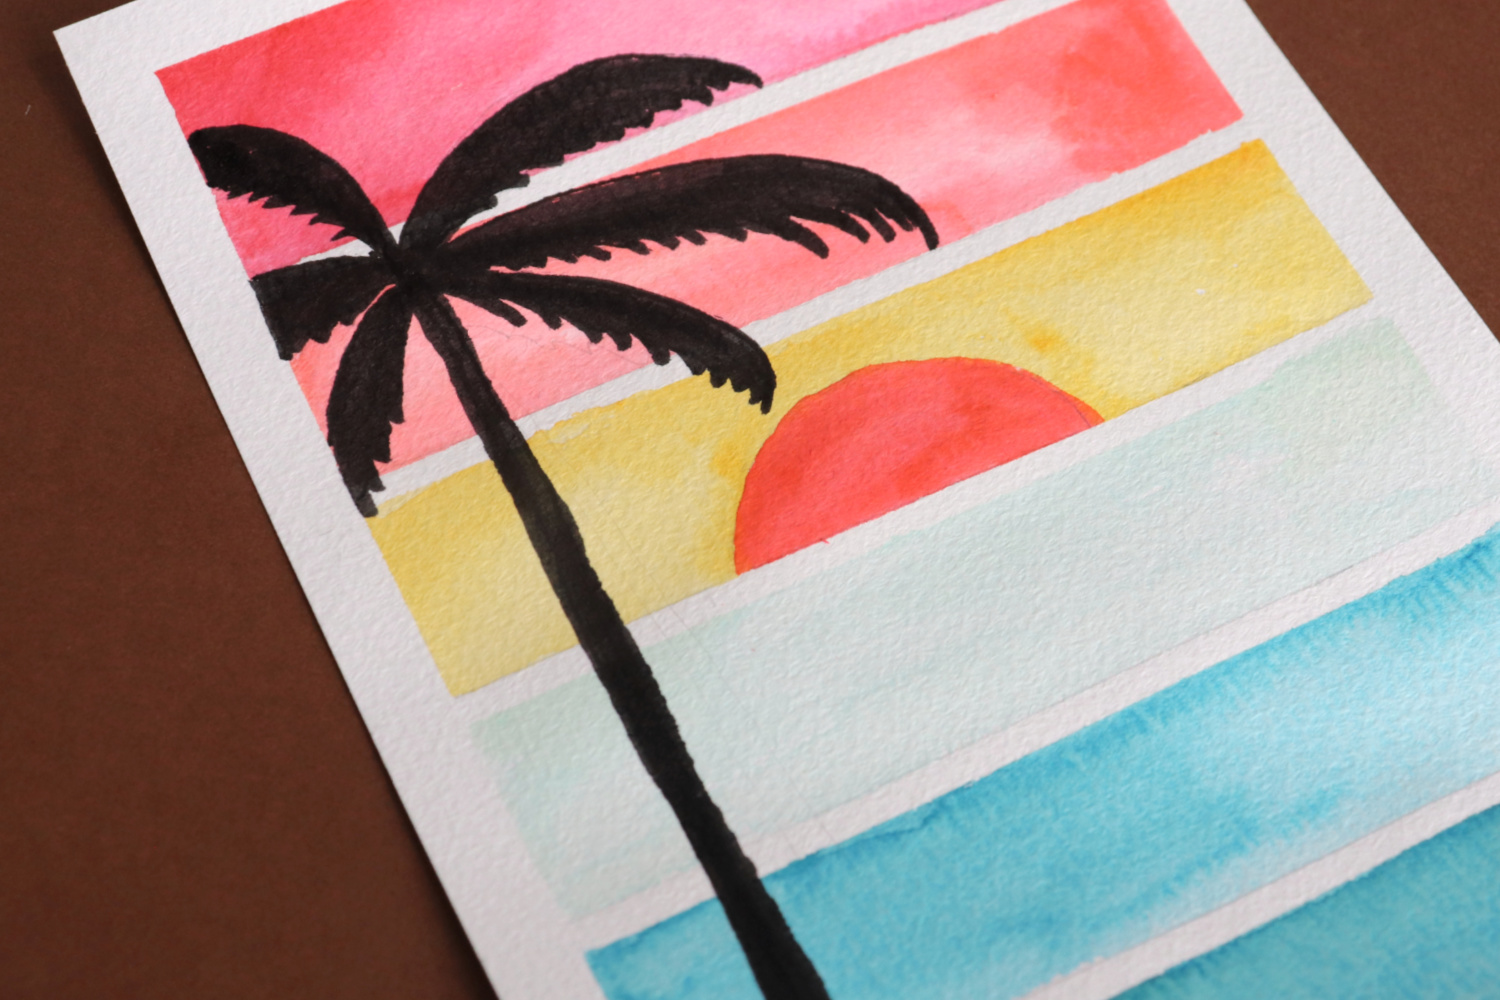
Step 1: Divide your postcard into six sections with a border using washi tape.
Applying washi tape creates a mask, which means anywhere you place it will remain white while the rest of the paper gets colored. The paper from my Soho Series Sketchbook is already the perfect size for a postcard, so the first thing I did was use 8mm washi tape to create a white border around the edges and secure my paper to a piece of cardstock. Then, I used a ruler and my MONO Graph mechanical pencil to lightly mark six even horizontal sections. Then, I applied strips of 3mm washi tape across the pencil lines. Make sure to press the tape down securely so that the color can’t bleed underneath.
Step 2: Use Dual Brush Pens and a wet paintbrush to create a watercolor effect in the first two sections.
To do this, you’ll scribble ink from the brush end of the marker onto a non-absorbent surface, like a palette or even a plastic sandwich bag. Then, dip your wet paintbrush into the ink and transfer it to your paper. Repeat the process until you have enough ink to fill the entire section. Can you believe how easy it is to paint with markers? I used colors 856 and 905 from the Tropical 10-pack.

Step 3: Paint the third section yellow, leaving a semicircle for the sun.
Sketch a semicircle with your pencil, then apply the yellow ink (985) all around it using the same watercolor technique.
Step 4: Paint the sun.
Apply orange ink (905) to the semicircle. You can repeat the same watercolor process, or you can color a bit of ink directly onto the paper, then blend it with the wet paintbrush. This technique will make the sun a bit darker.
Step 5: Fill the bottom three sections with color using the watercolor technique.
I used the three shades of blue in the Tropical 10-pack, starting with the lightest (291, 407, 379).
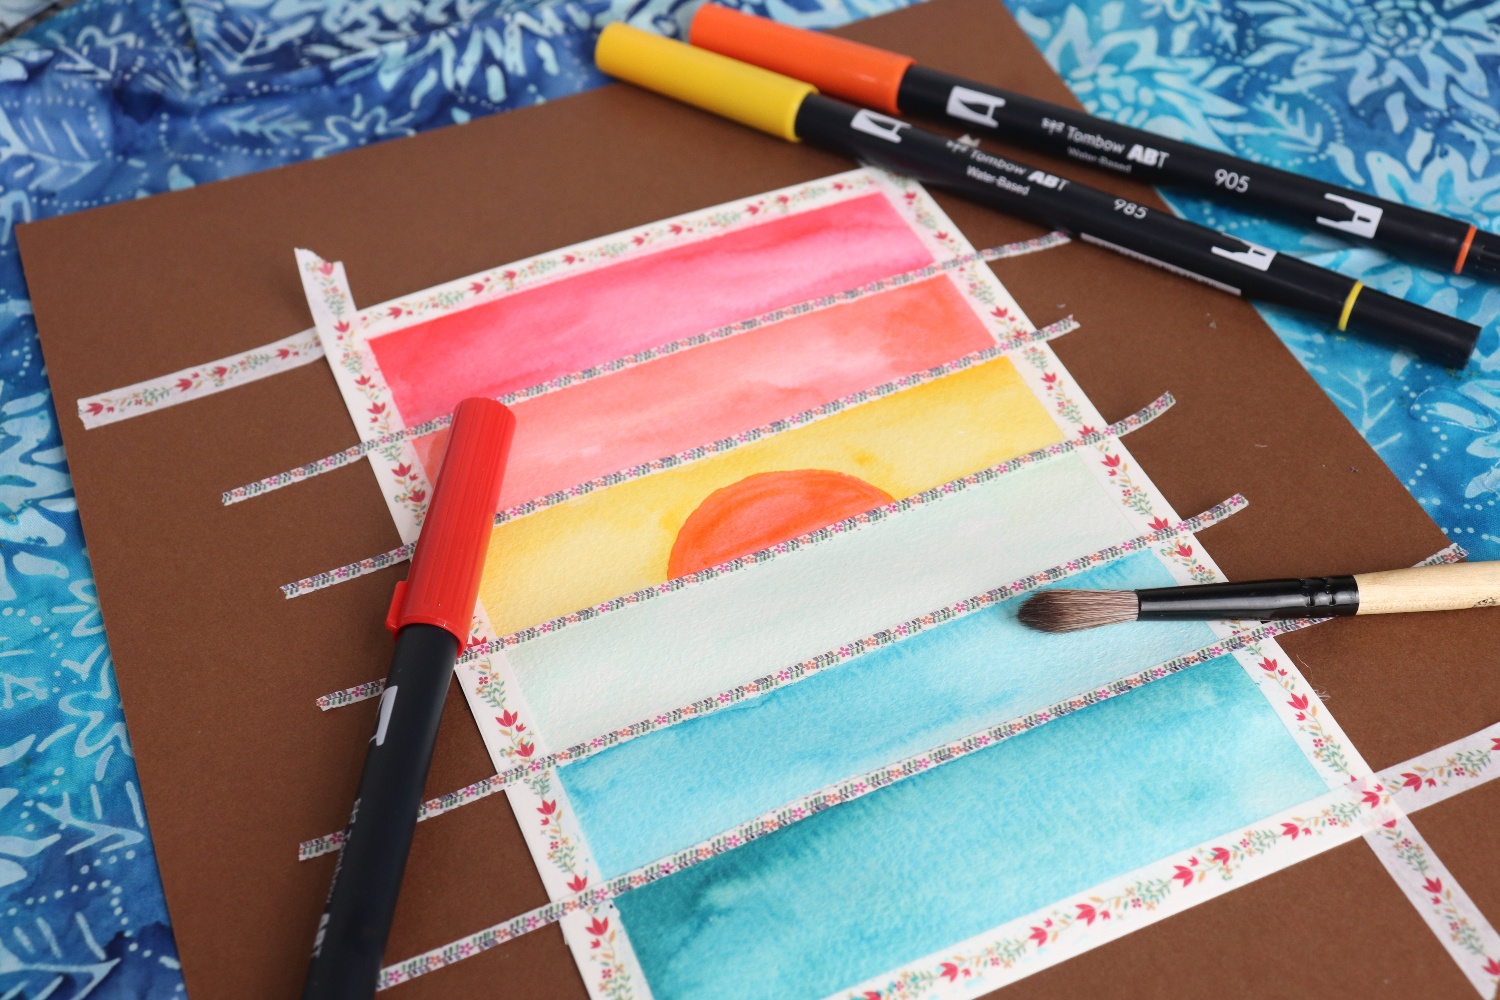
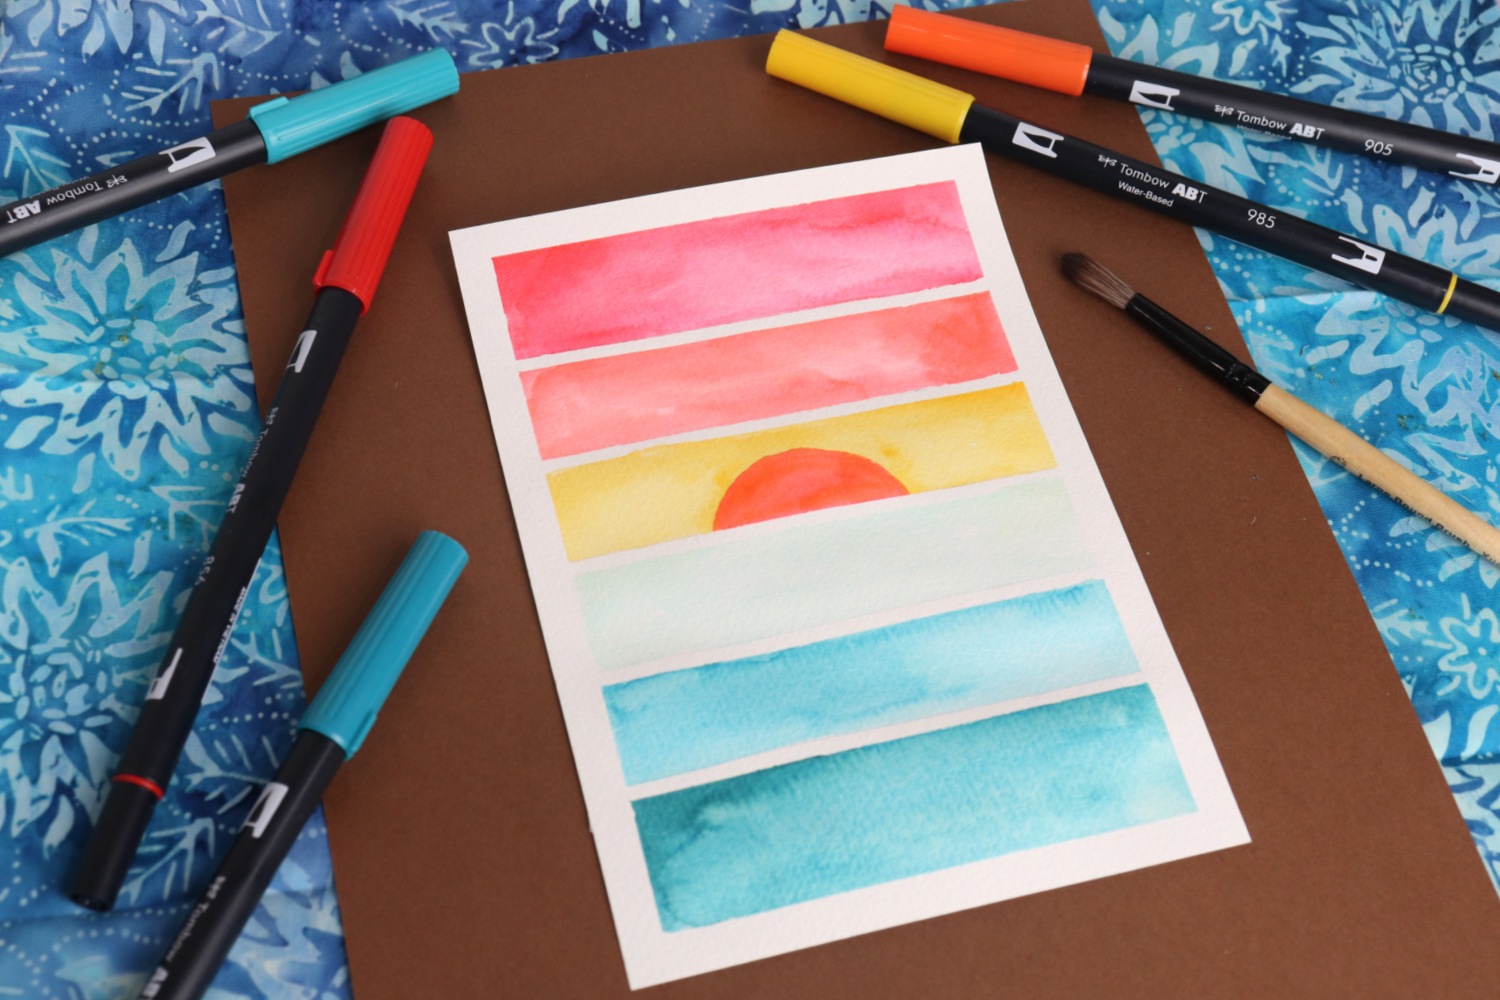
Step 6: Remove the washi tape.
Carefully peel the tape from your paper, then let your postcard dry before moving to the next step.
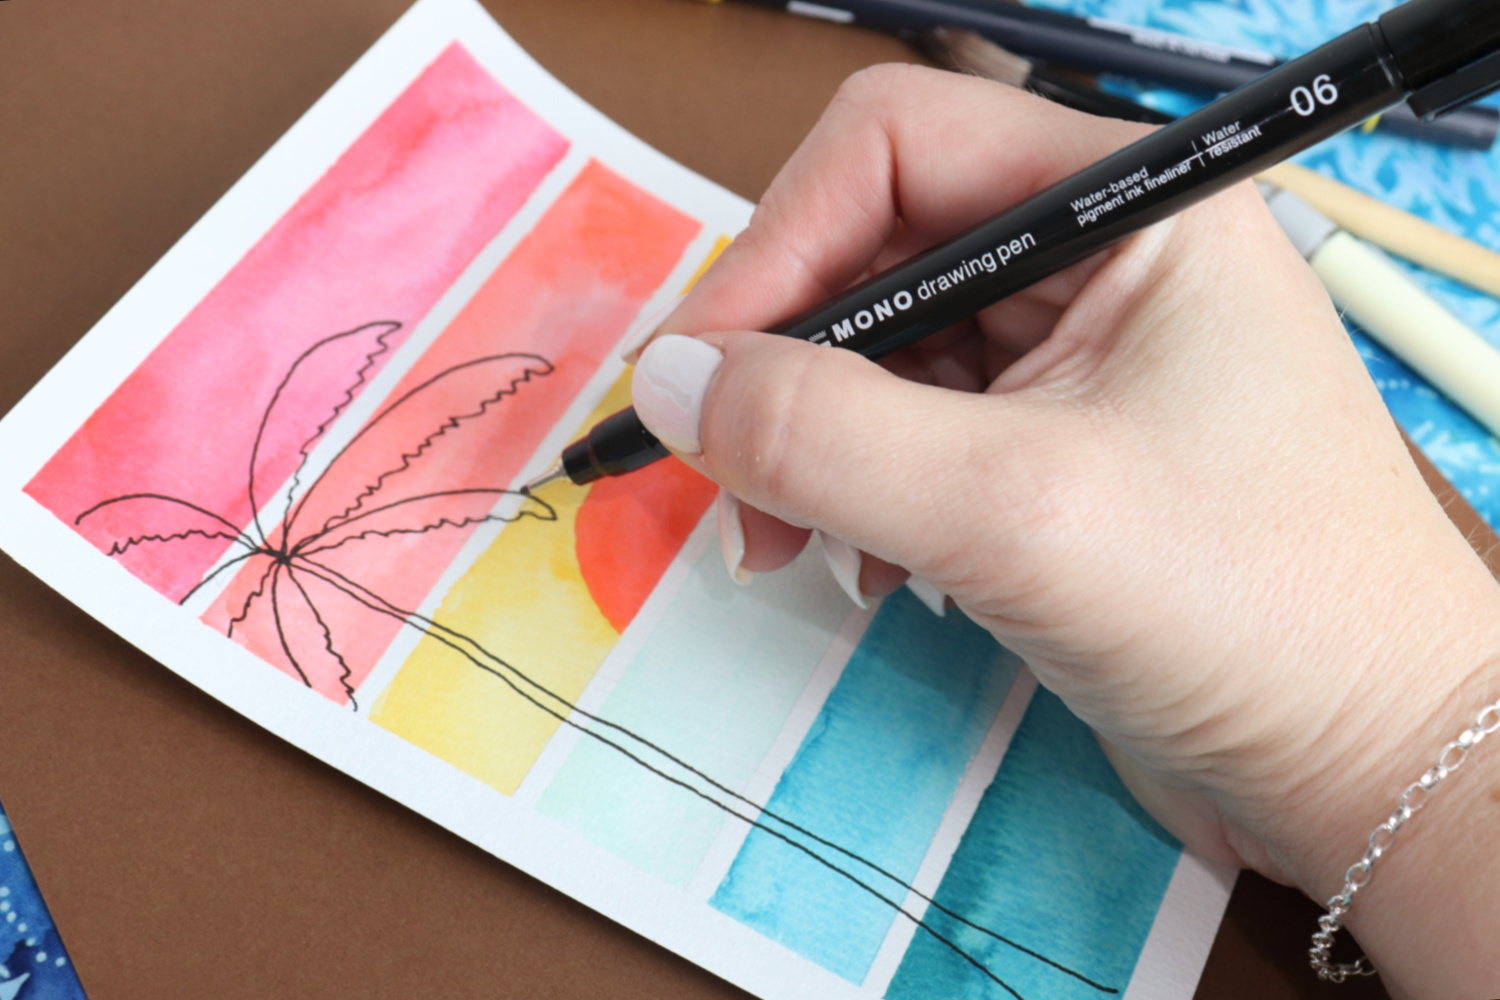
Step 7: Sketch the outline of a palm tree.
I recommend doing this lightly in pencil first, then tracing your sketch with a MONO Drawing Pen. Because this pen contains pigment ink, it won’t smear even if your background isn’t totally dry. MONO Drawing Pens come in a variety of sizes from 005 through 08. I chose to create my outline with the 06, but you can use whatever thickness you like best.
Step 8: Color the palm tree black to create a silhouette effect.
You can use the MONO Drawing pen or a black Dual Brush Pen for this step.
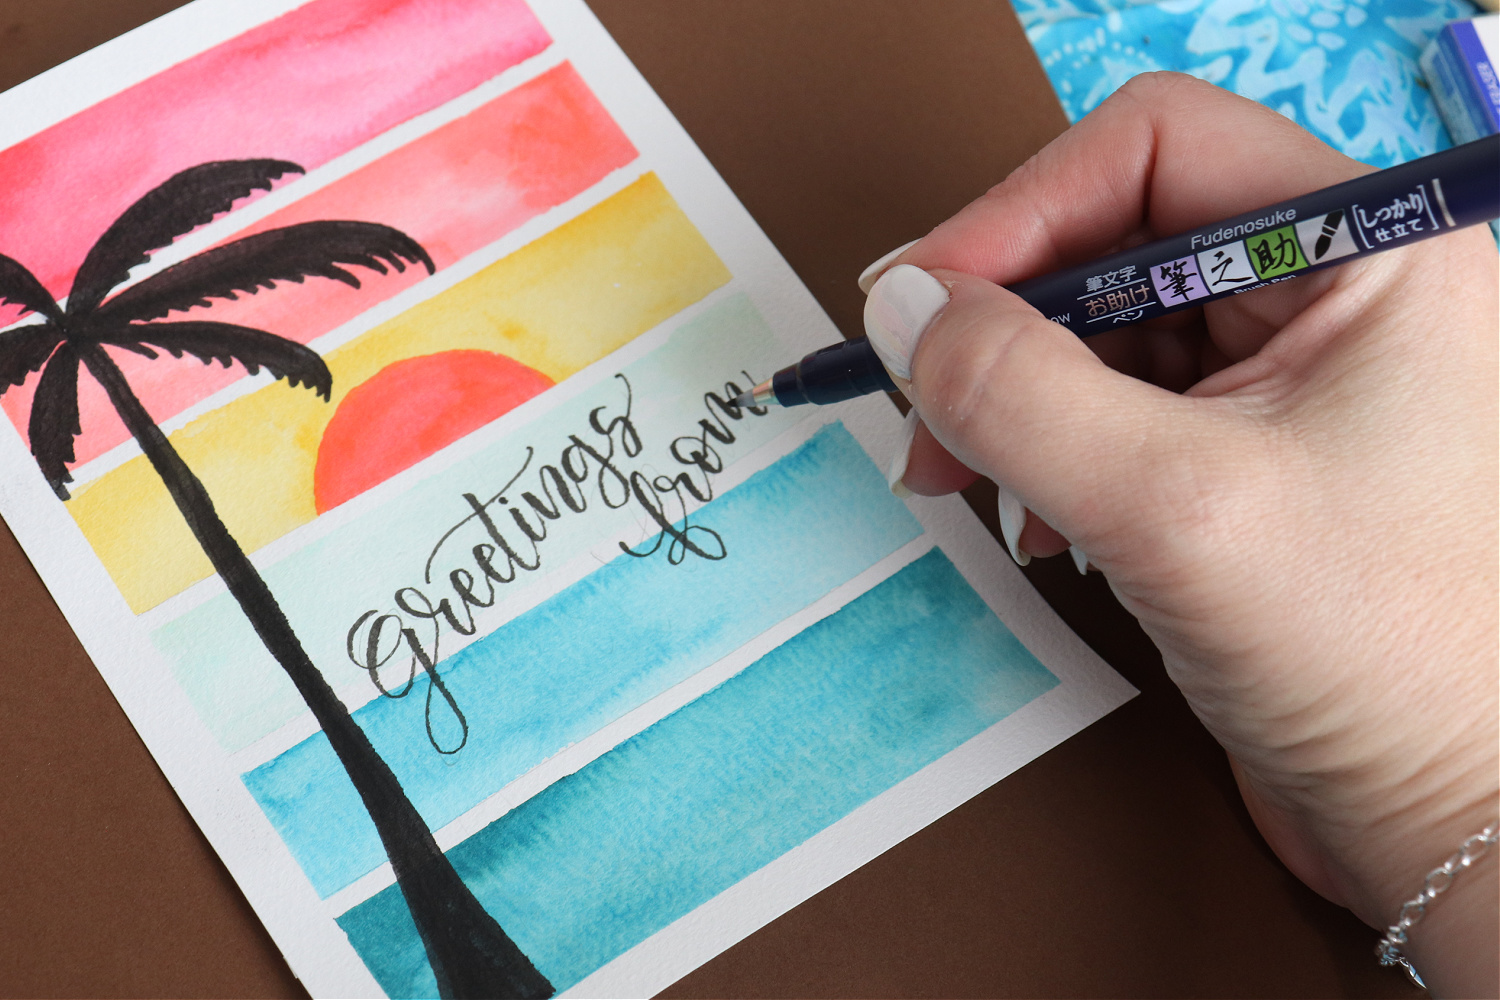
Step 9: Write your message.
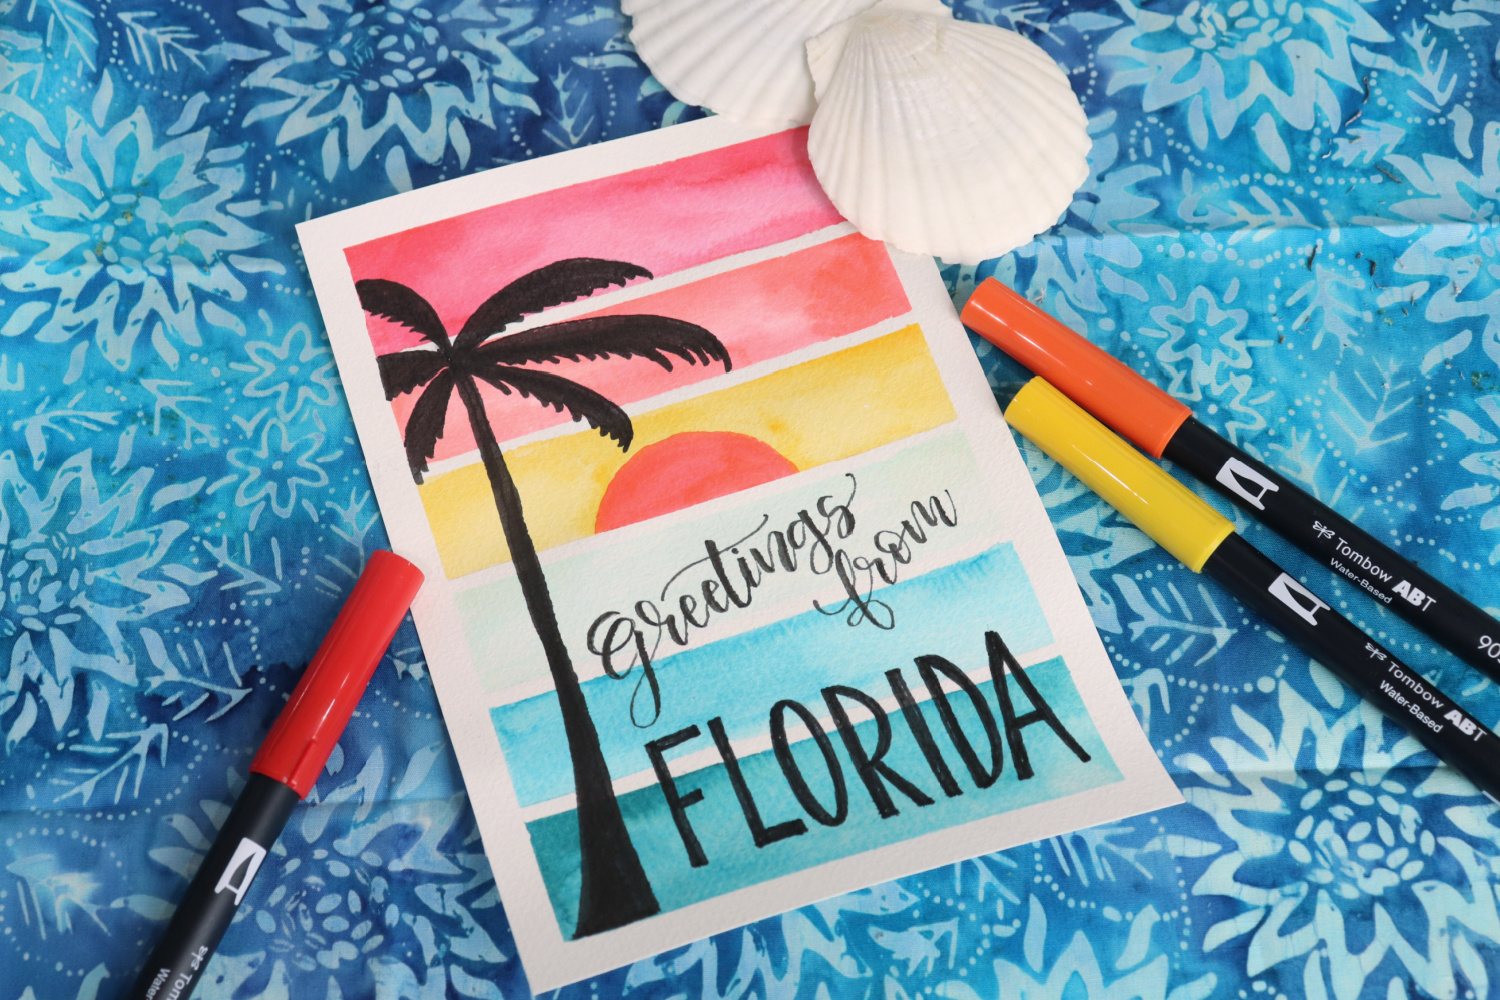
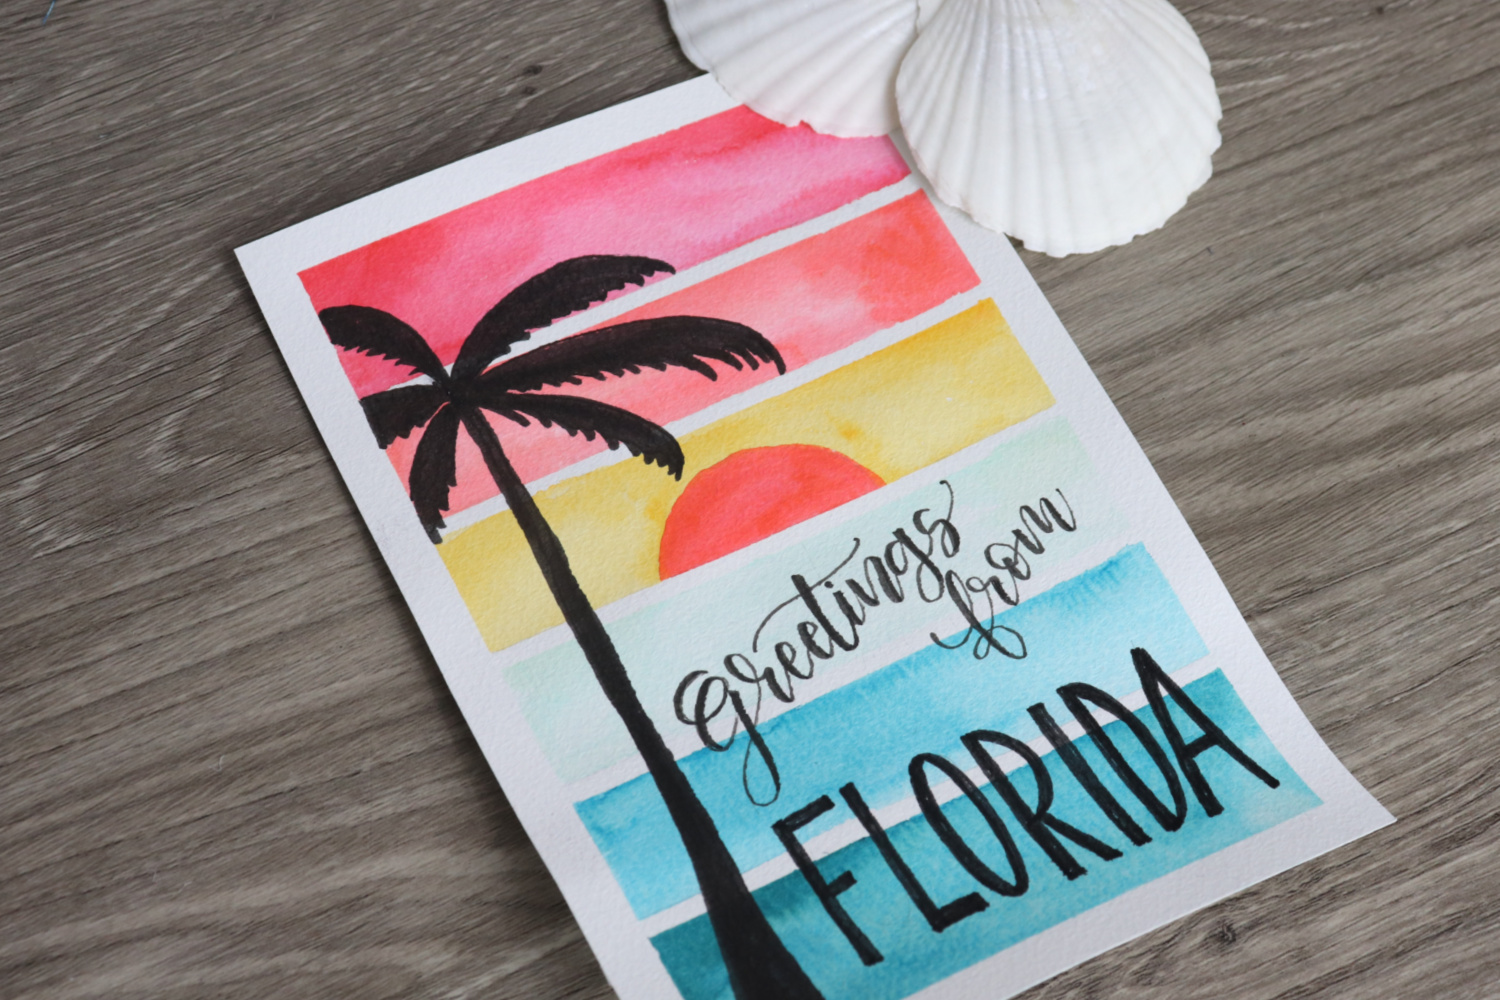
I chose to write “Greetings from Florida,” but your postcard can say whatever you like. I used the Tombow Fudenosuke to write the first part in brush script, then printed the rest with the bullet tip end of a Dual Brush Pen.
Now, your postcard is ready to send! Not headed to Florida? Just change the location to wherever your tropical destination may be. Headed to a colder climate? Replace the palm tree silhouette with a pine tree or something else that represents where you’re vacationing.
Ready to create your own vintage postcard? We’d love to see how it turns out! Make sure to tag us @tombowusa and @amylattacreations on social media so we can all inspire one another.
Also, be sure to check out these other project tutorials from the Tombow Design Team using the same watercolor technique with Dual Brush Pens! Happy creating!