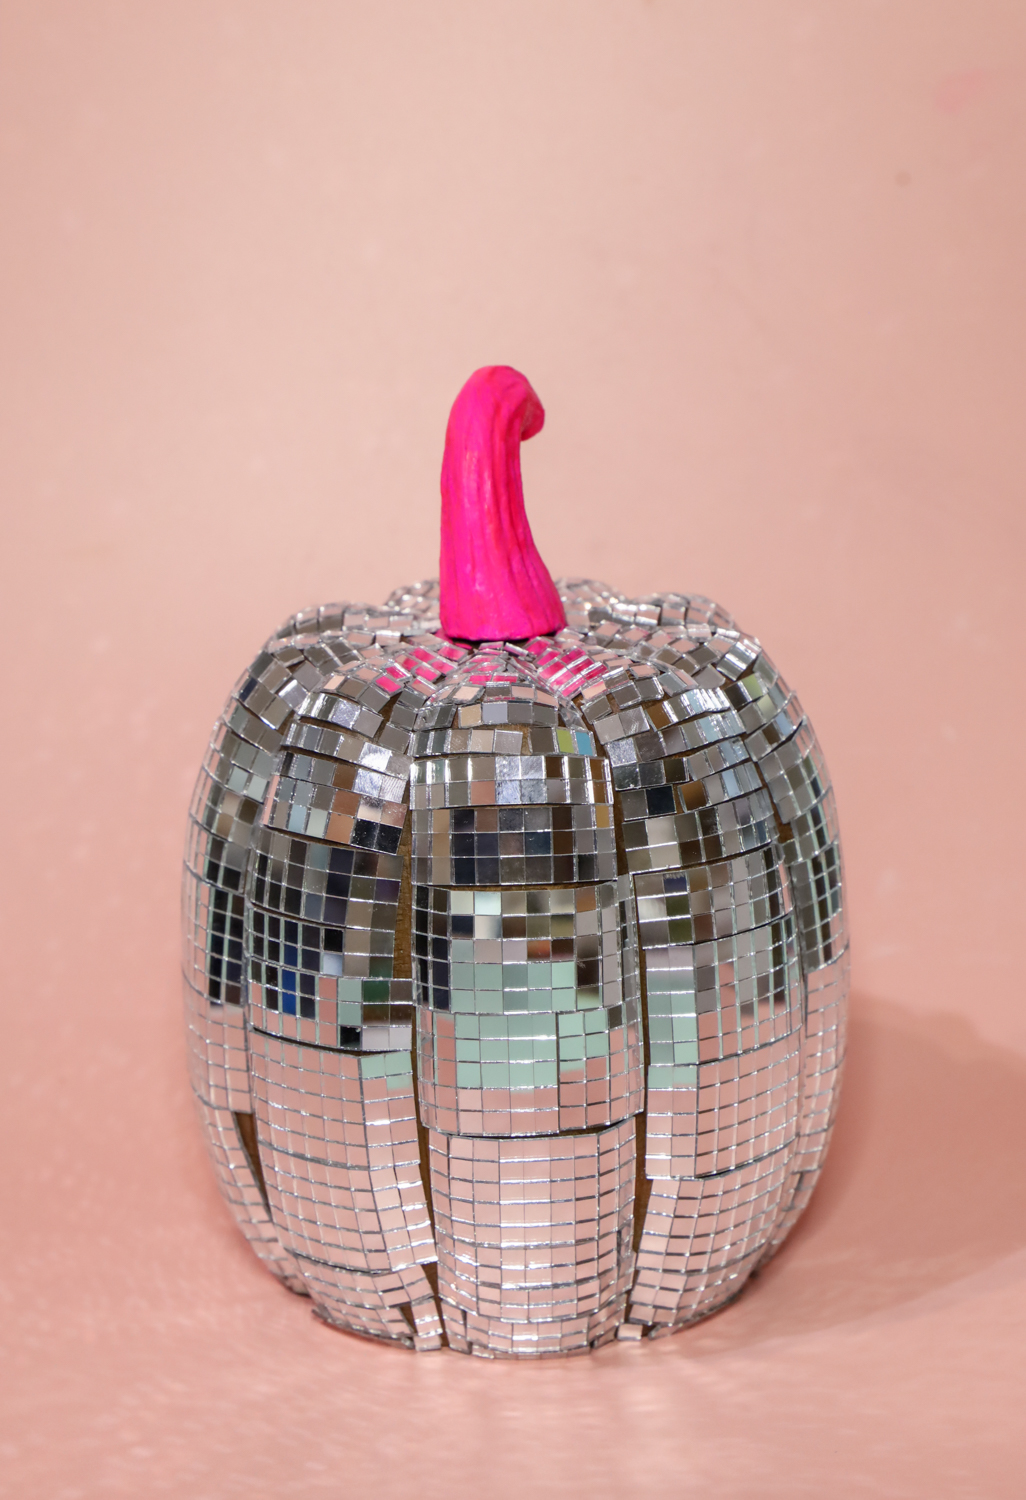
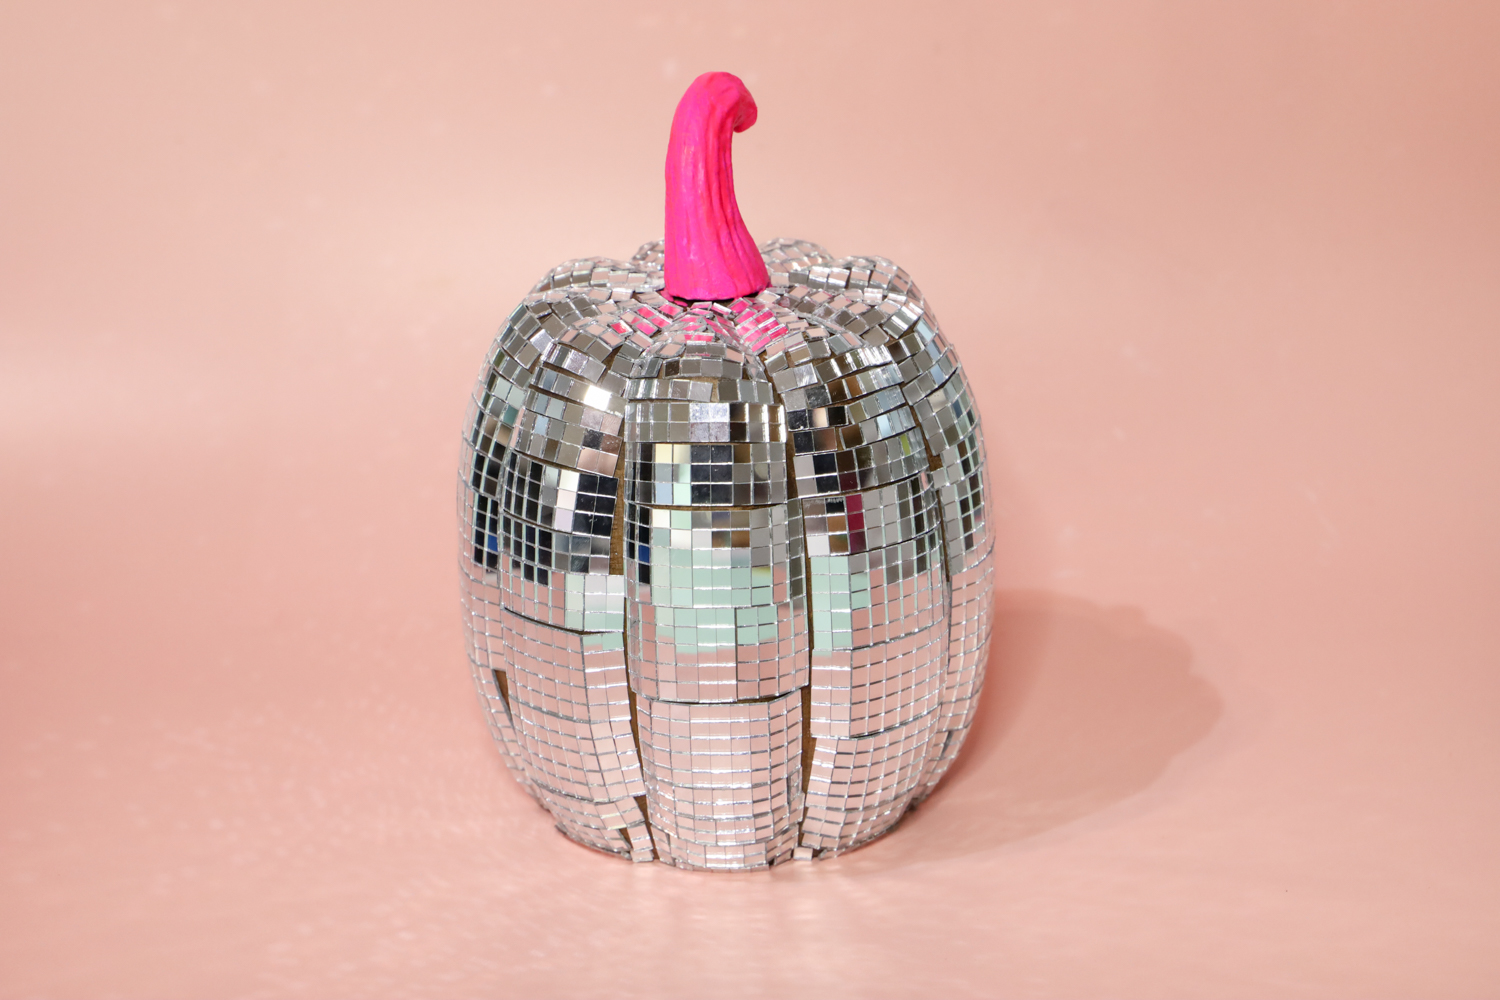
Hey everyone, Katie here with a fun DIY- a Disco Ball Pumpkin!
Now that it’s October, and the start of the holiday season, it’s officially my favorite time of the year for everything crafty. I wanted to make some fun, bright Halloween decorations for my tiny house, so I upcycled this wooden pumpkin I had into a trendy disco ball. Keep reading to follow along and make your own!
Supplies:
- Faux pumpkin – I’m using a wooden pumpkin, but a foam pumpkin should work just as well!
- Tombow MONO Multi XL Liquid Glue
- Disco Tiles – You can get them individually or on a roll!
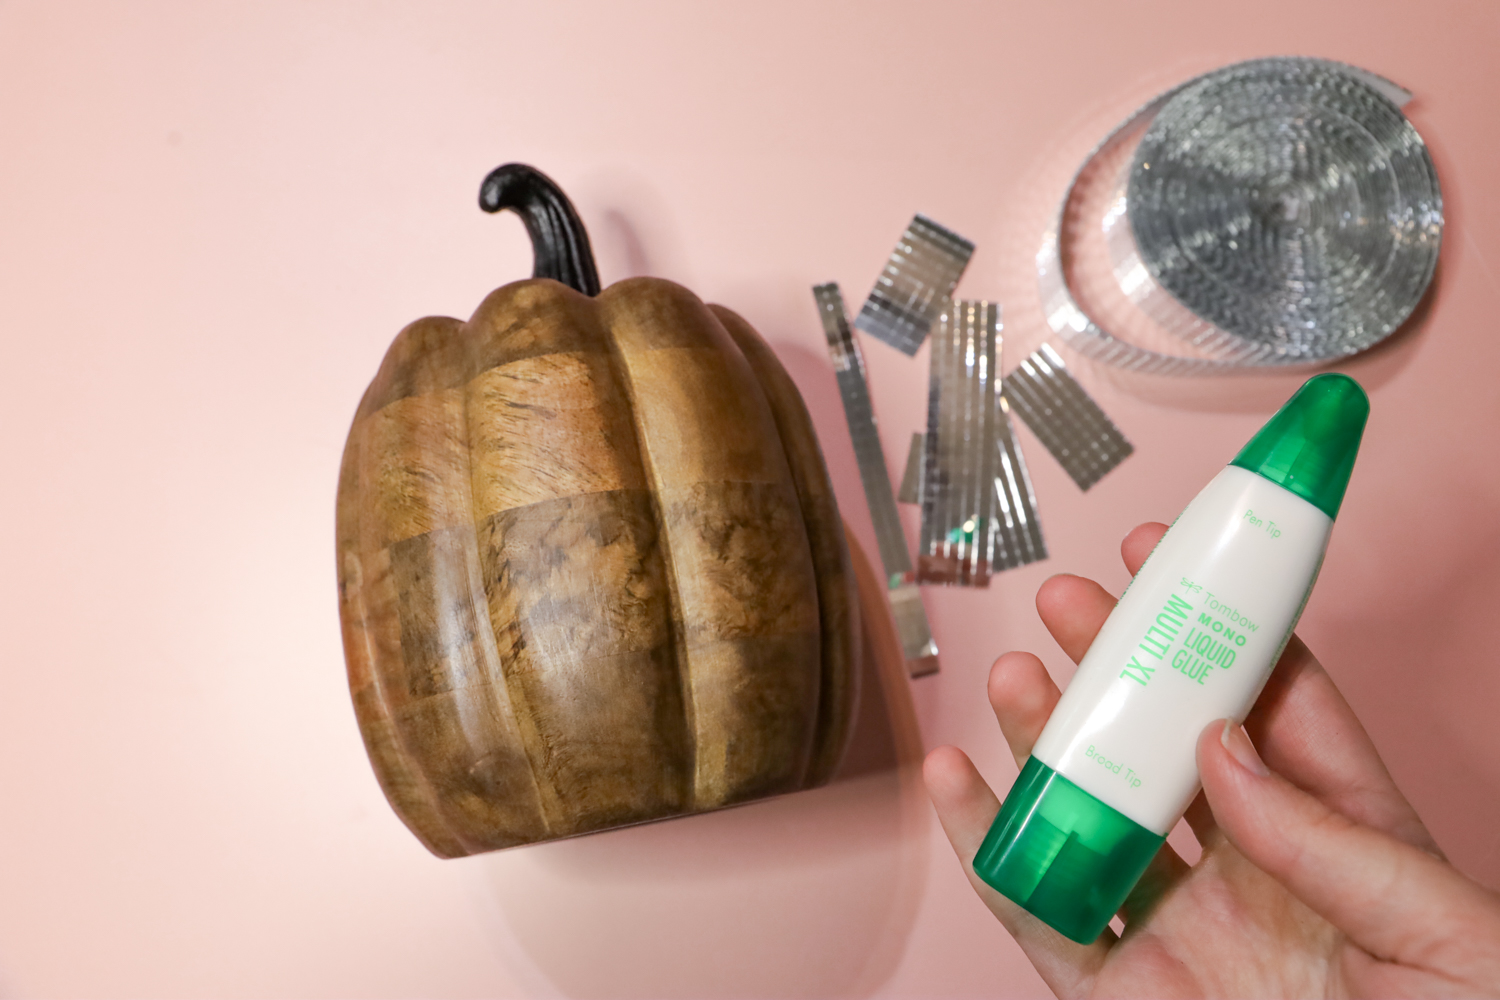
(I chose to leave my pumpkin wood colored because once the tiles are all on, you don’t really notice the wood through the gaps, but you could also paint it silver!)
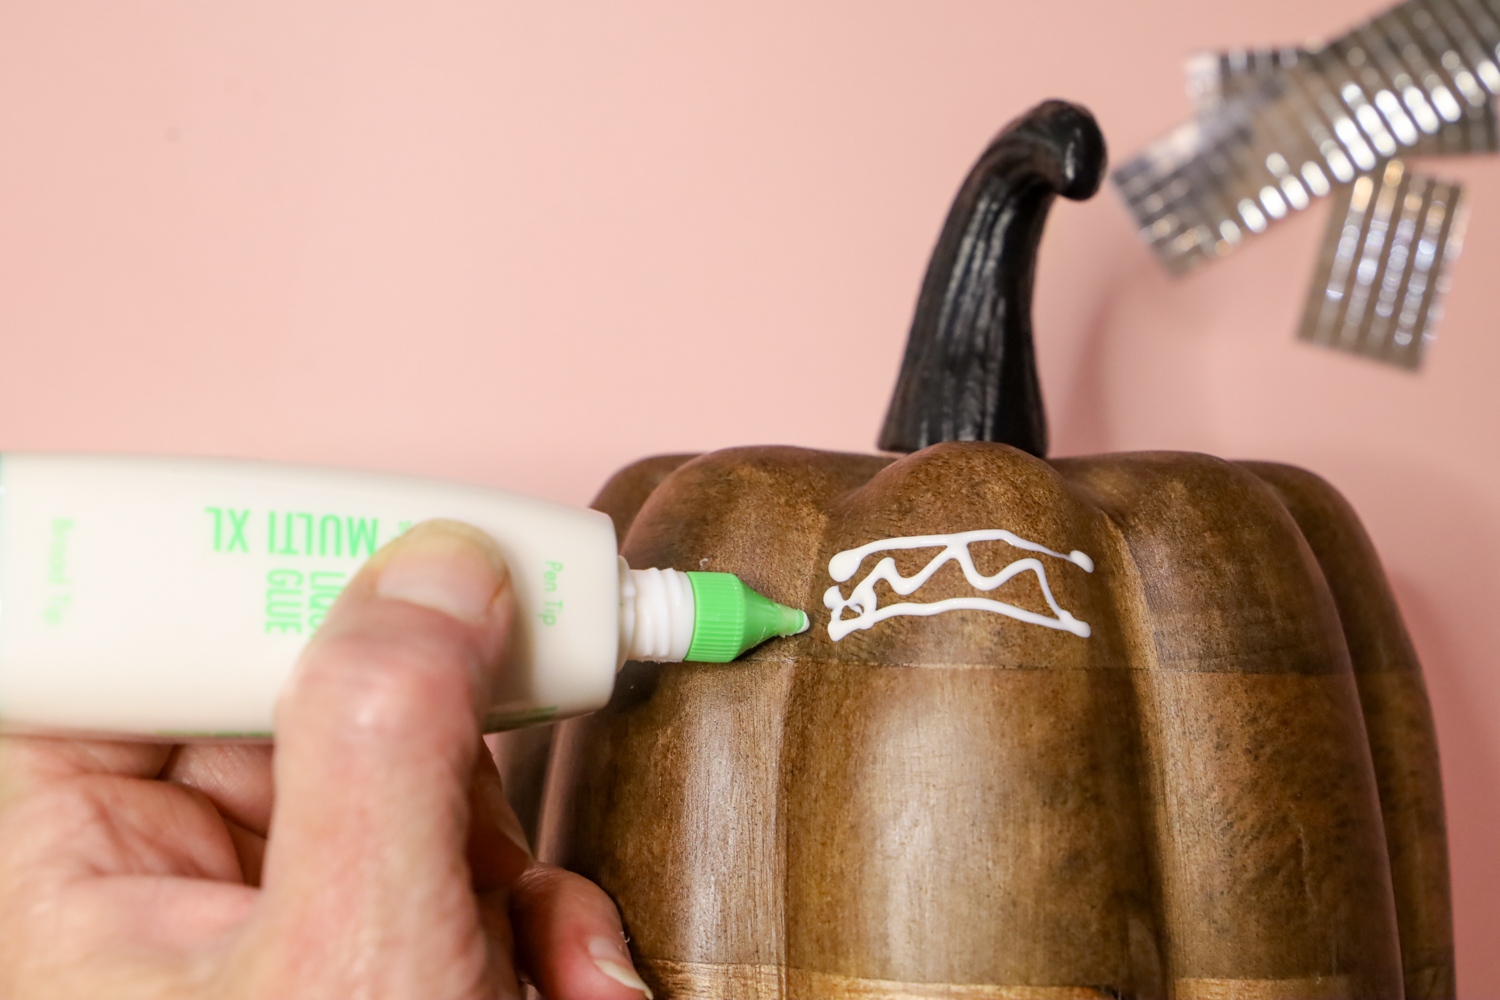
Step one:
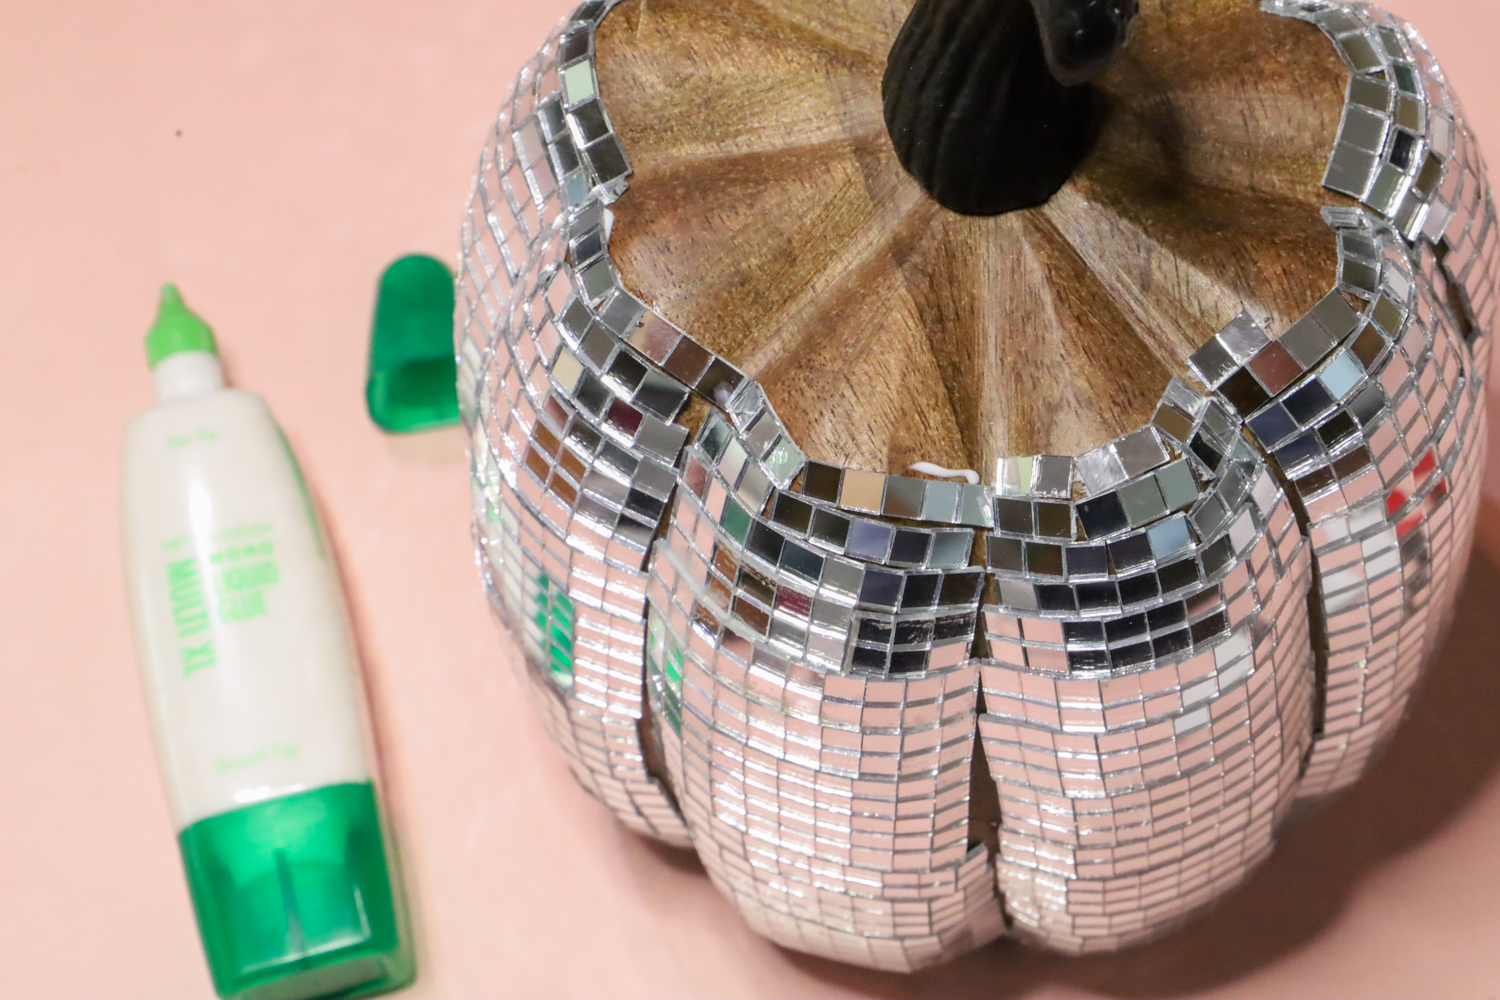
Working in small sections of the pumpkin, and working horizontally, Use the MONO Multi Liquid Glue to spread a small amount of glue onto yout pumpkin.
My tiles are actually self adhesive – however the adhesive that comes on them is not very strong at all, and I didn’t want glass tiles falling off everywhere, so we’ll be using the MONO Multi Liquid Glue to adhere them securely! It’s perfect for crafts like this.
Working horizontally instead of vertically with your tiles will help minimize the gaps in between the strips of tile. I also did all of the sides first, and saved the top for last.
I do recommend cutting the tiles into thin strips, instead of big chunks of tile. This will help them bend around the curves better.

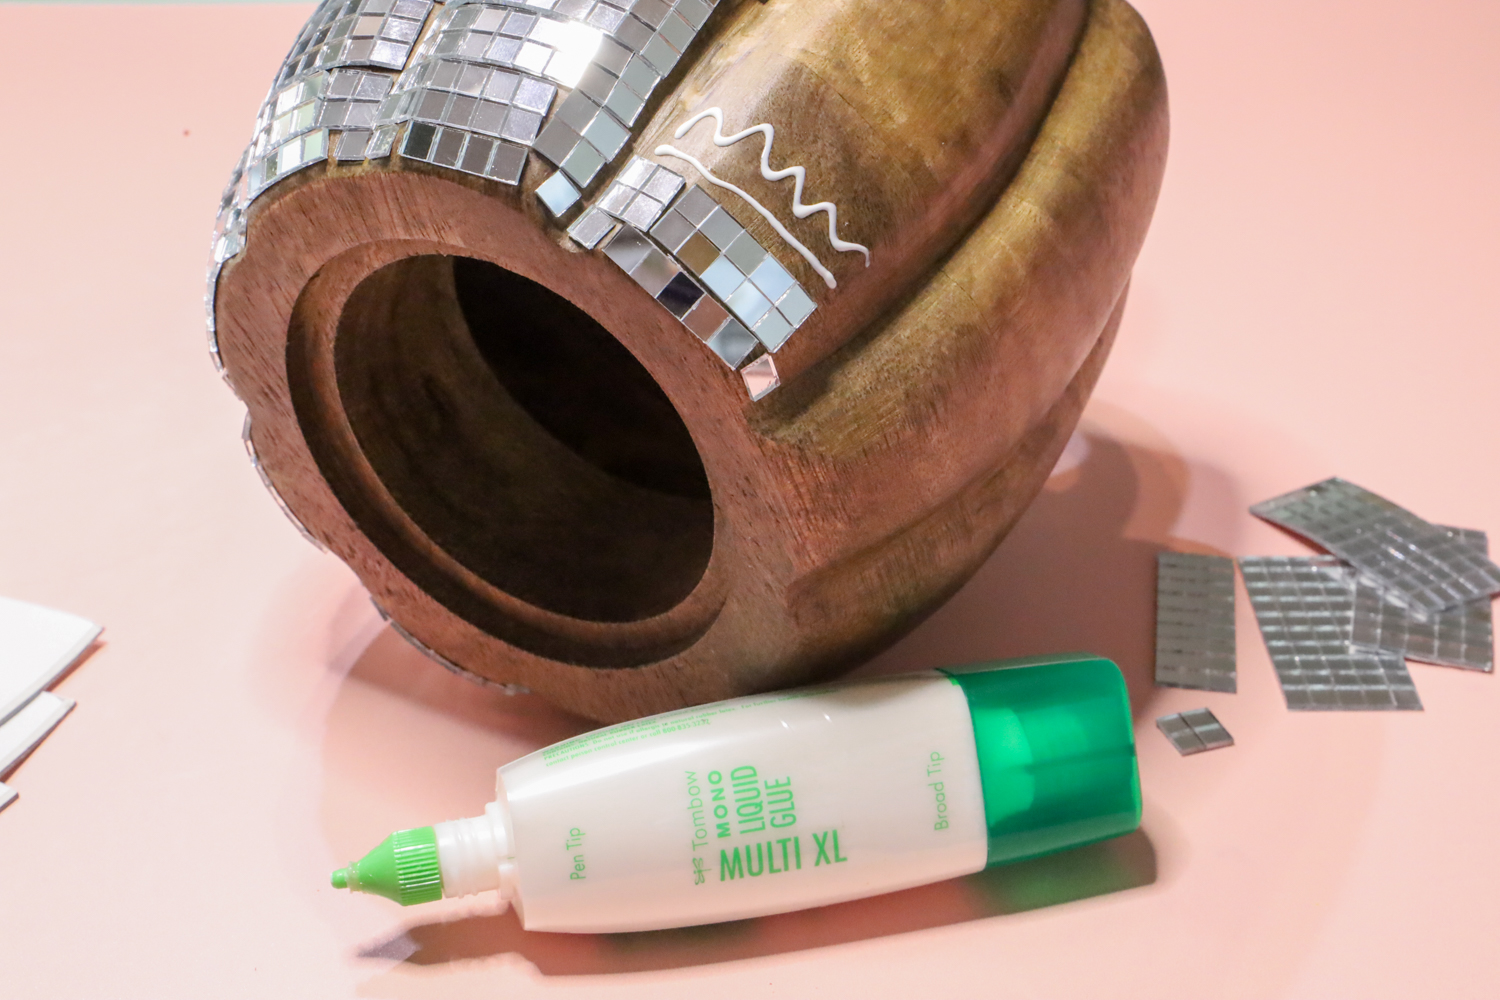
Step two:
Continue working in sections of the pumpkin, applying small amounts of adhesive and sticking the tiles down on top of it.
Optional step:
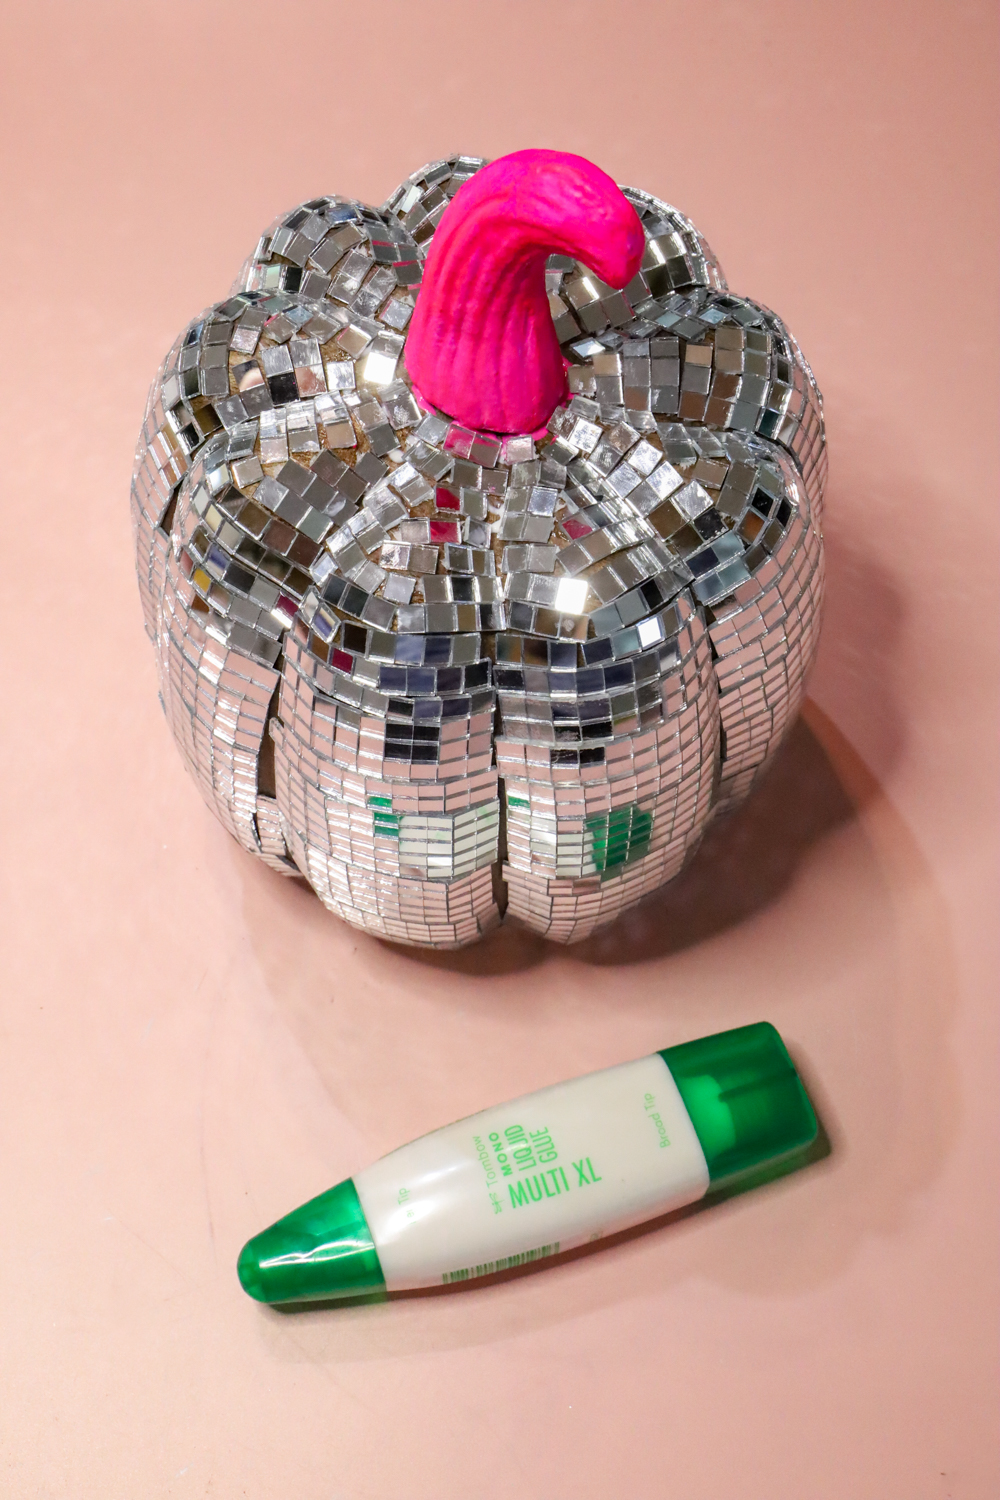
At this point you can also paint your stem if you want! I love the color pink, so I decided to add a pop of fun color by painting the stem neon pink.
Step three:
When you get to the top, I found it easier to cut the tiles up into even smaller strips, so only 1-3 tiles per strip. This helps go around the curves! Continue until you’ve completely covered your pumpkin!
And that’s it! I hope you enjoyed this tutorial, and if you make your own version, feel free to tag us on instagram, @tombowusa!
If you have leftover disco tiles and are looking for another fun project using Tombow adhesives, check out these Disco Ball Snowflakes on the Tombow instagram!
Or if you’re just looking for other cute Halloween crafts, make these Easy DIY Potion Bottles for your Halloween Display!