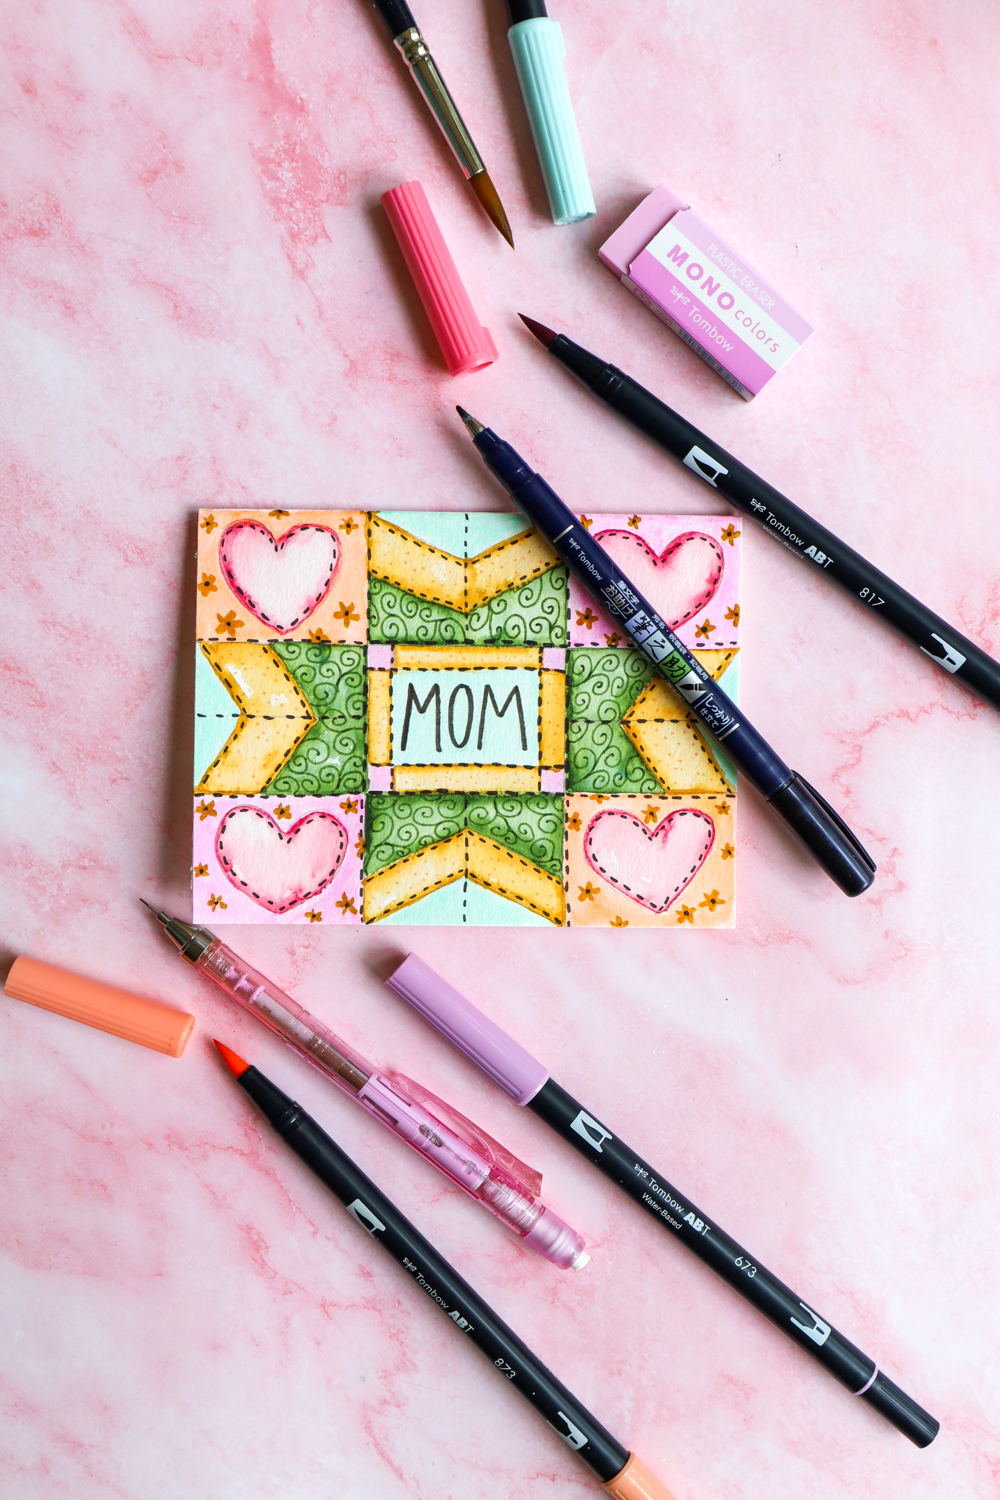
Hey everyone, Katie here, and today I wanted to show you how to draw a quilted Mother’s Day card!
My mom creates the most beautiful quilts, so she definitely inspired this design and I hope she loves it.
Supplies:
- Tombow MONO Graph Mechanical Pencil (I love my rose colored pencil from the Shimmer Stationery Set!!)
- Tombow MONO Colors Eraser
- Watercolor Paper
- Tombow Dual Brush Pen Art Markers, Teatime, 6-Pack
- Water + Paintbrush
- Ruler
- Tombow Fudenosuke Brush Pen, Hard Tip
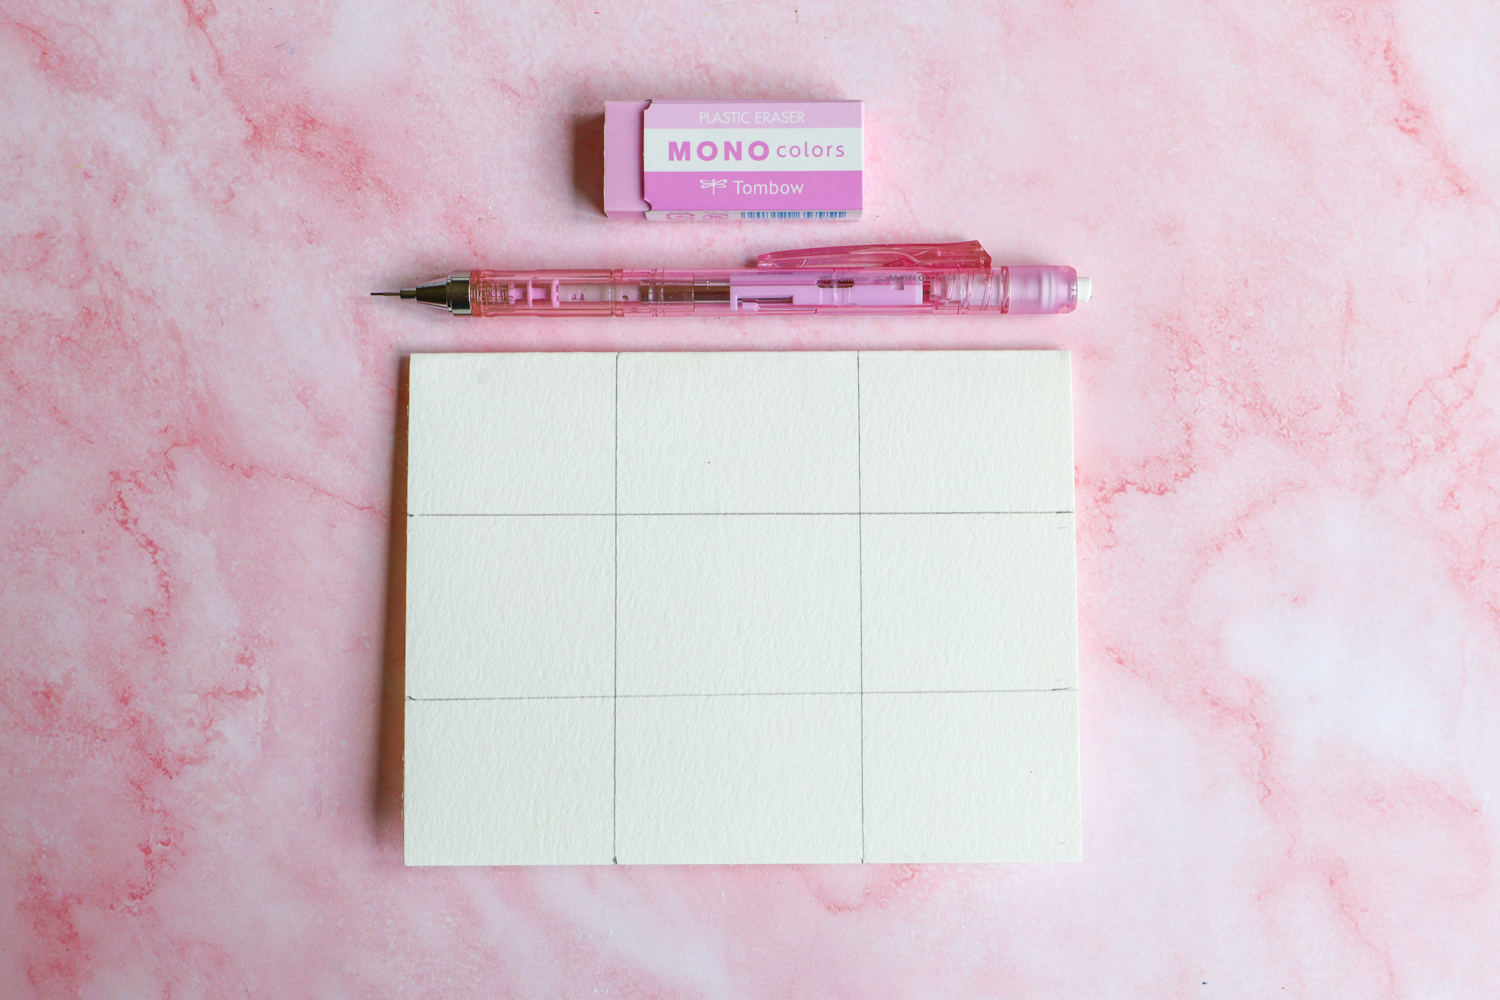
Step one:
Start by folding your watercolor paper in half and cutting it to your desired card size (mine is 4.25×5.5″)
Then, use a ruler to divide the front of your card into a grid of 9.
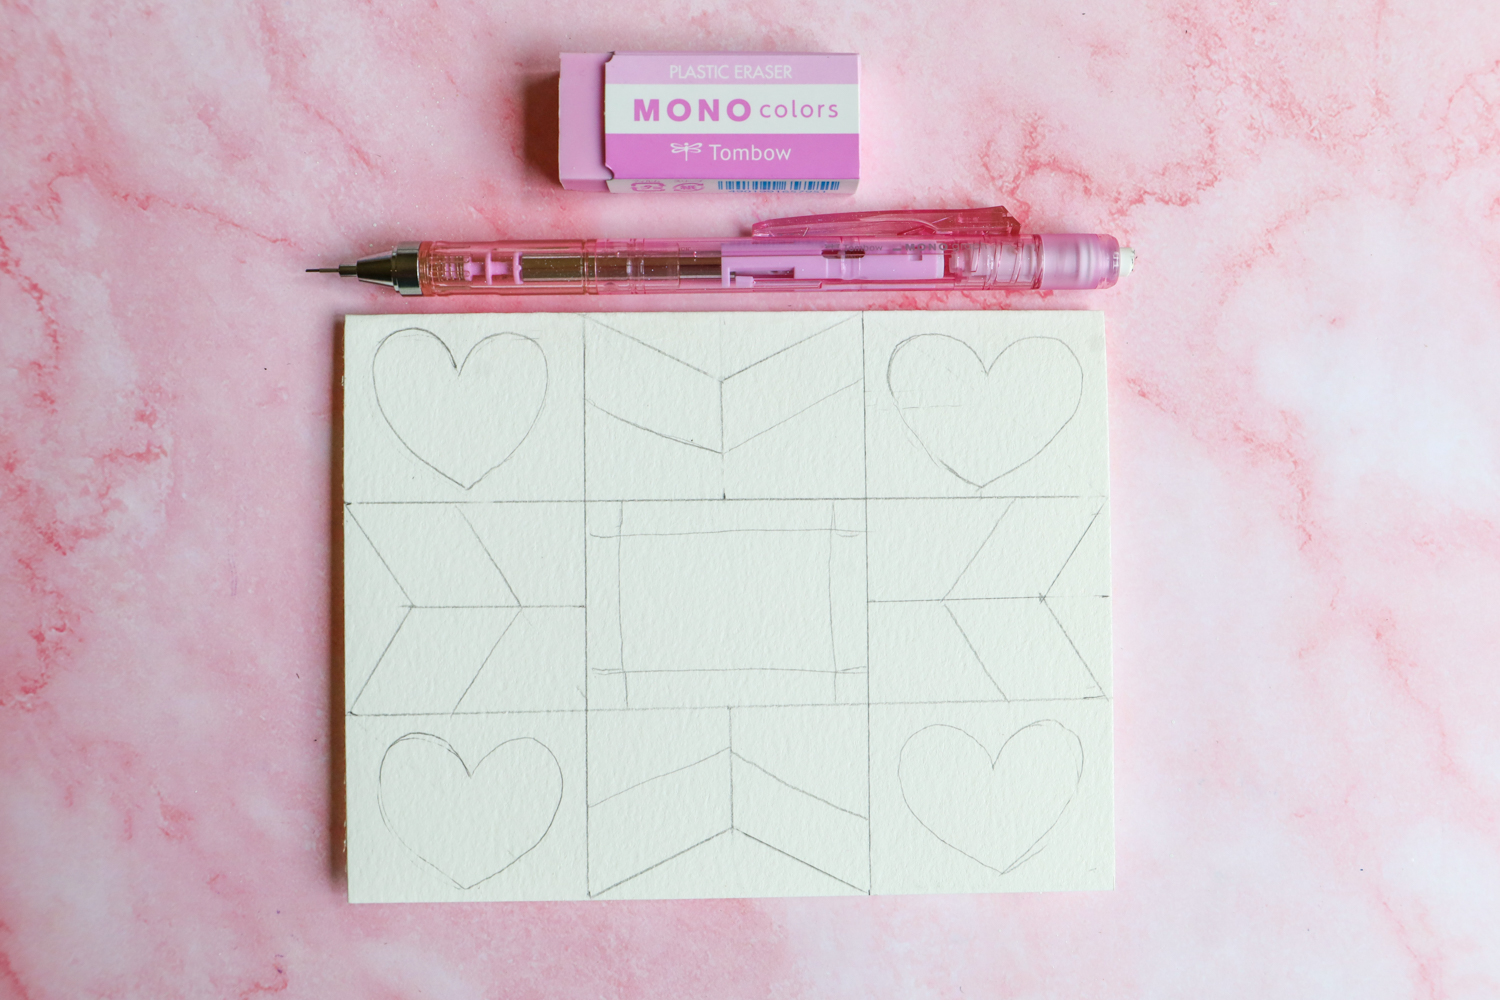
Step two:
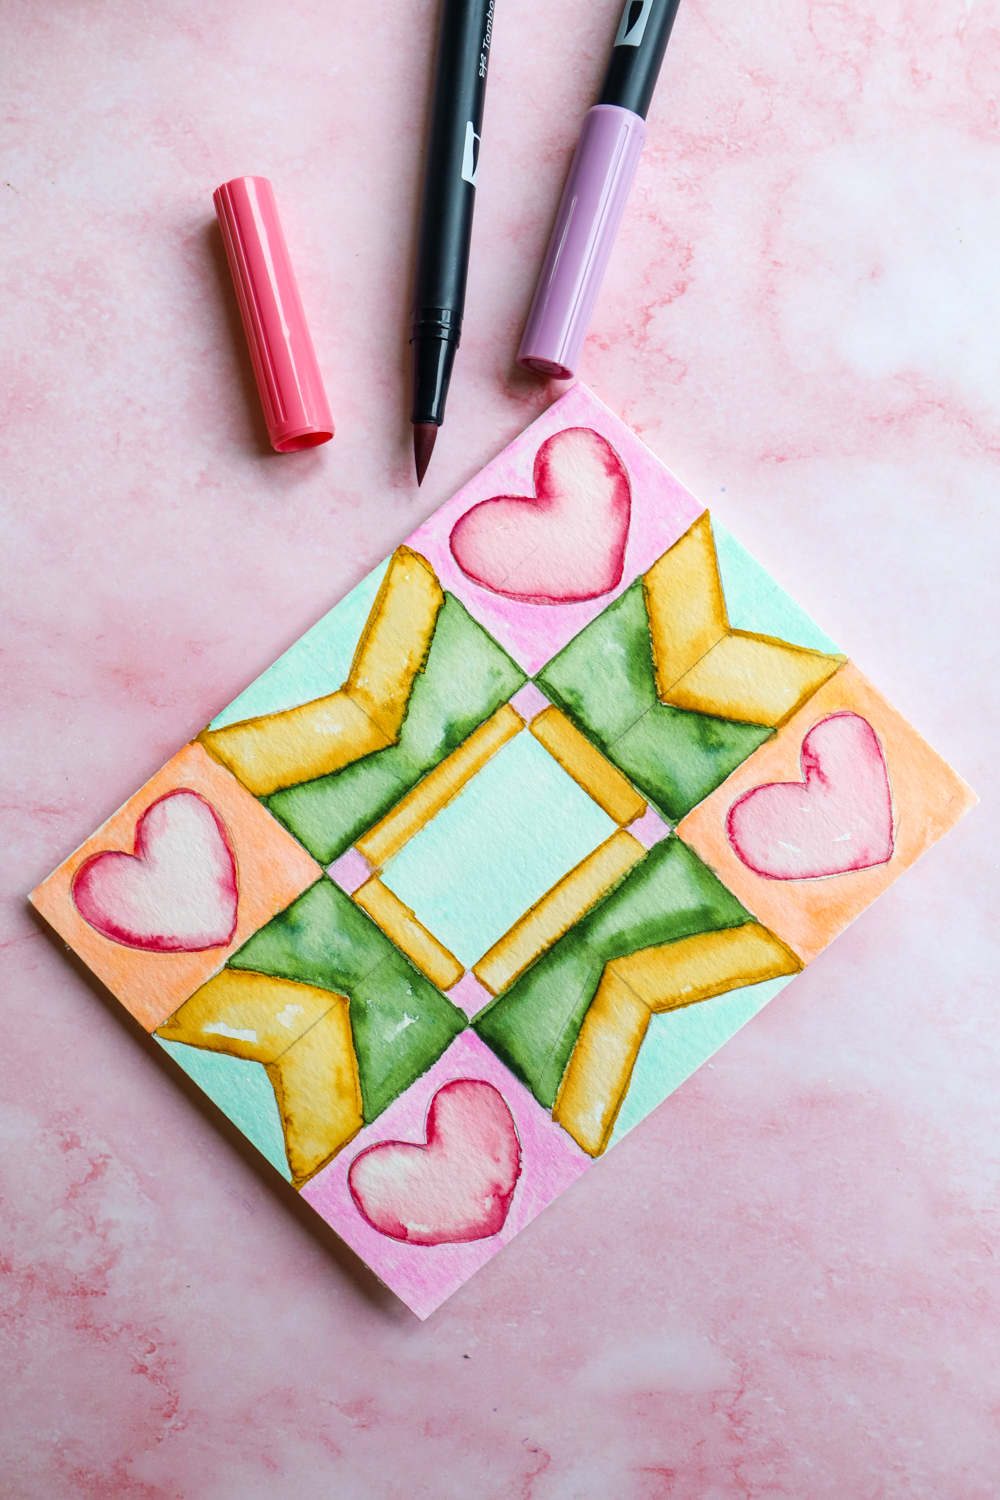
Now that we have our grid, it’s easy to build our quilt design! Just fill in the grid however you want, but try to keep it symmetrical so that it looks like a quilt block!
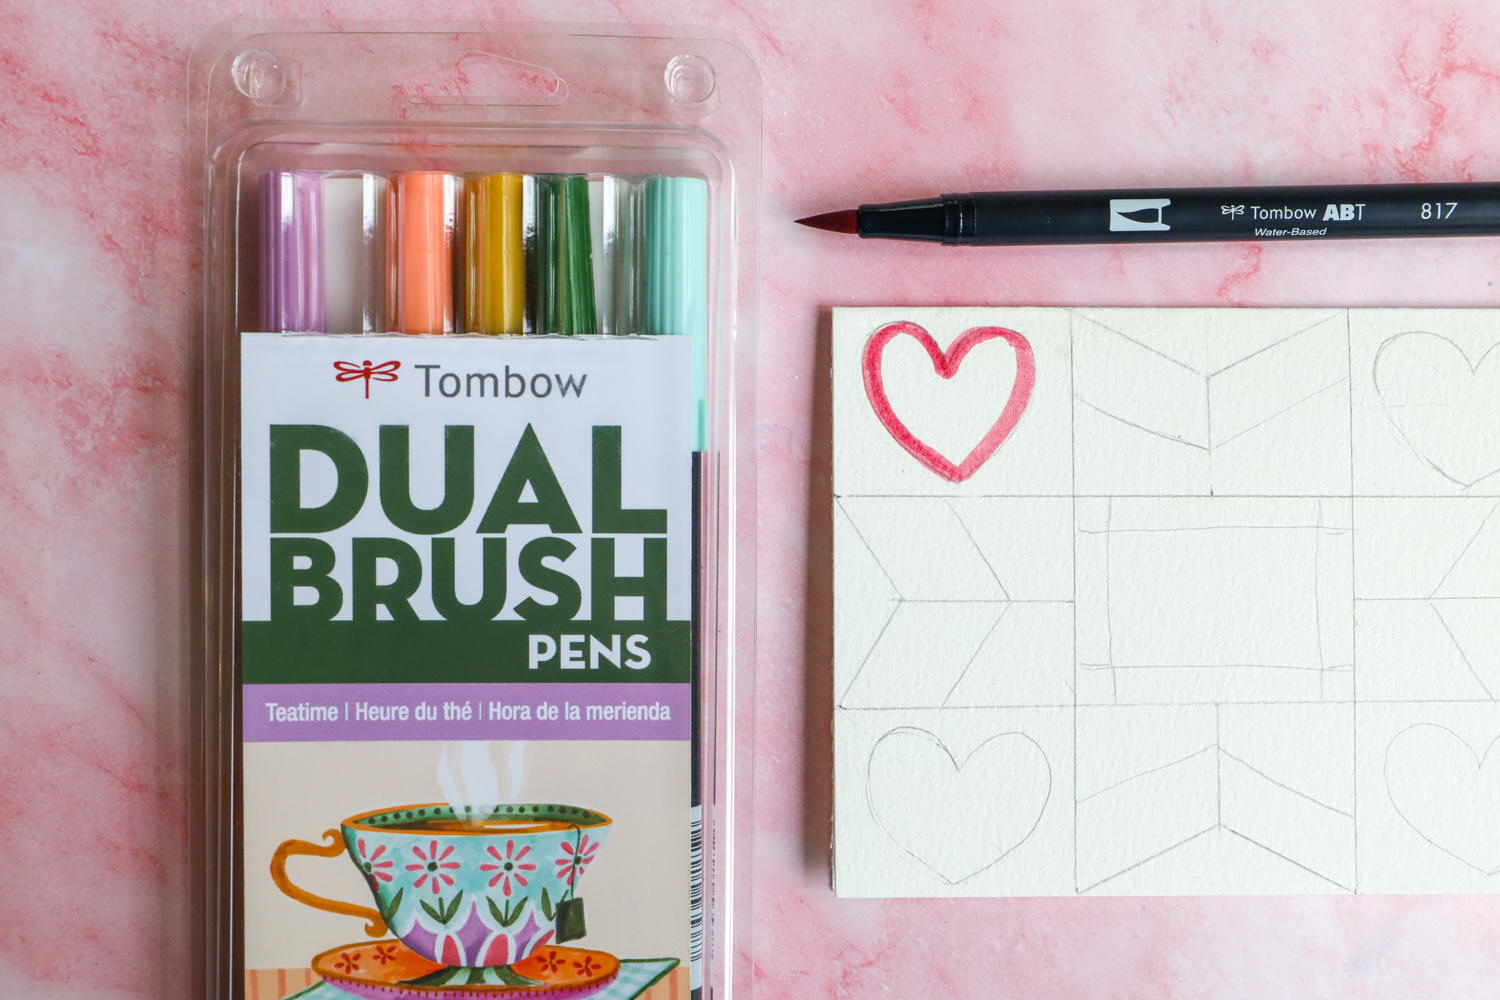
Step three:
One you have your design sketched in, it’s time to break out the Dual Brush Pens & add some color! To do this, I’m actually just outlining my shapes with the Dual Brush Pens, and then using a slightly wet paint brush to blend & spread the ink into the shape.

Step four:
Continue until you have your quilt all colored in!
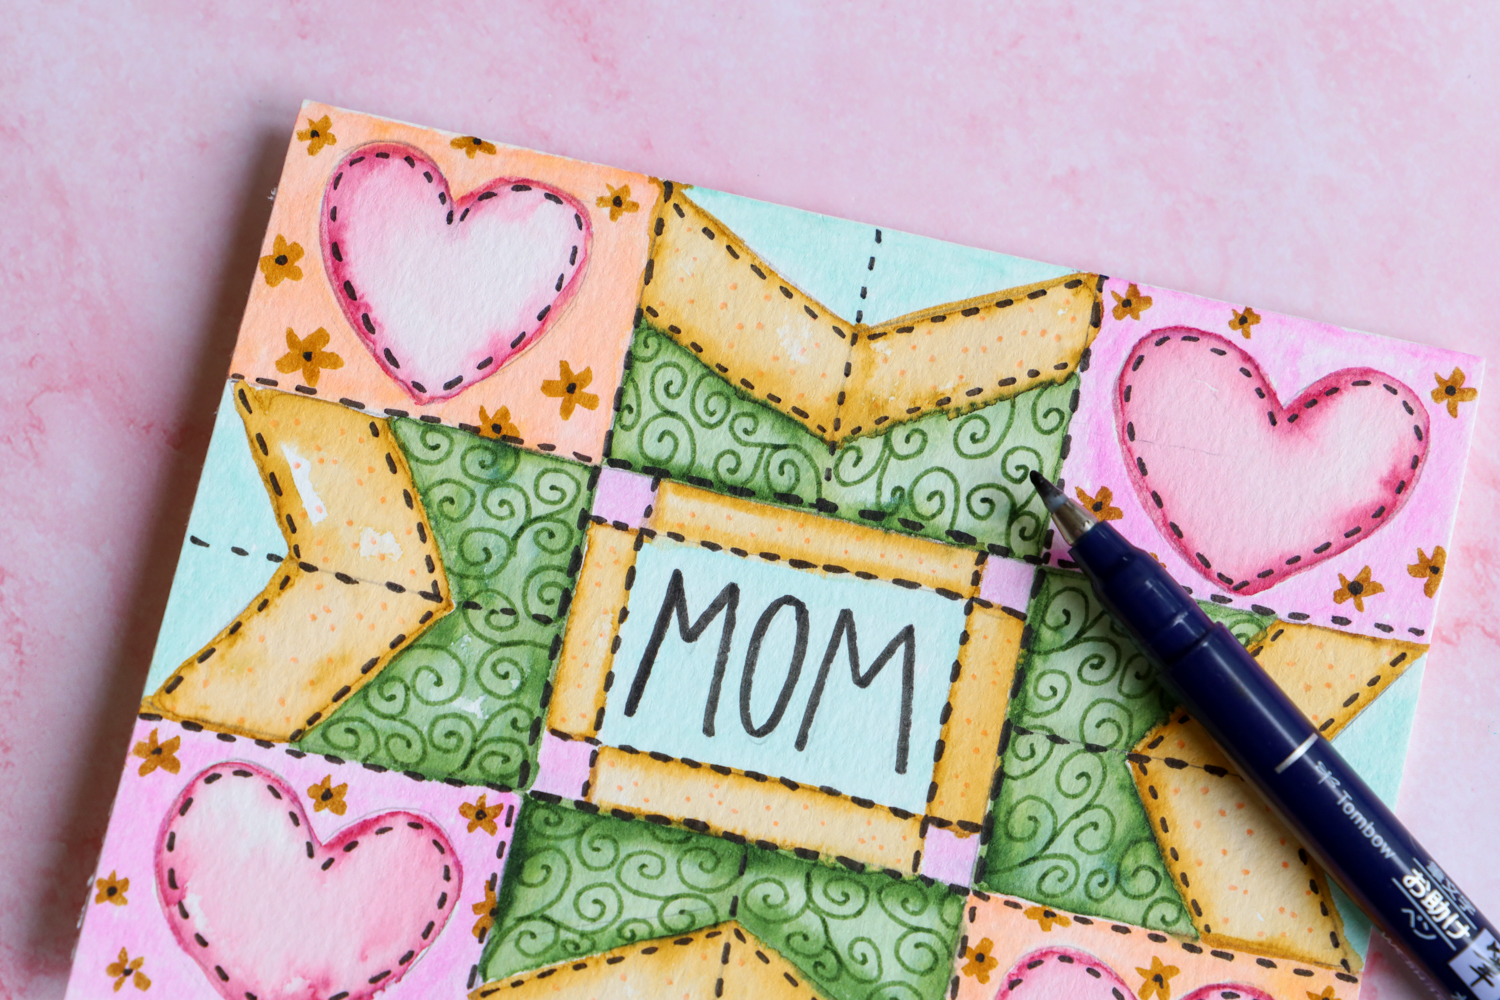
Step five:
Now it’s time to add the finishing touches! You can use the bullet tip of the Dual Brush Pens to add details to your colors, I like to think of this as adding fun patterns to the “fabric” of the quilt!
I also used my Fudenosuke Brush Pen to write out “MOM” in the center block, and add stitches (dashed lines) around my quilt block to really give it that quilted feel.
And that’s it! If you created one too, I hope your mom loves it! I know she will!
If you’re looking for more Mother’s day ideas, check out these posts from the Tombow blog:
- DIY Hand Lettered Mother’s Day Bouquet Wrap
- DIY Custom Mother’s Day Tea Gift Bag
- Easy Waterfall Card for Mother’s Day