
These simple but bold quilled rings are fun to make and wear! I used ring bases, tools and quilling paper strips from my friends at Quilled Creations and Tombow adhesives to make them.
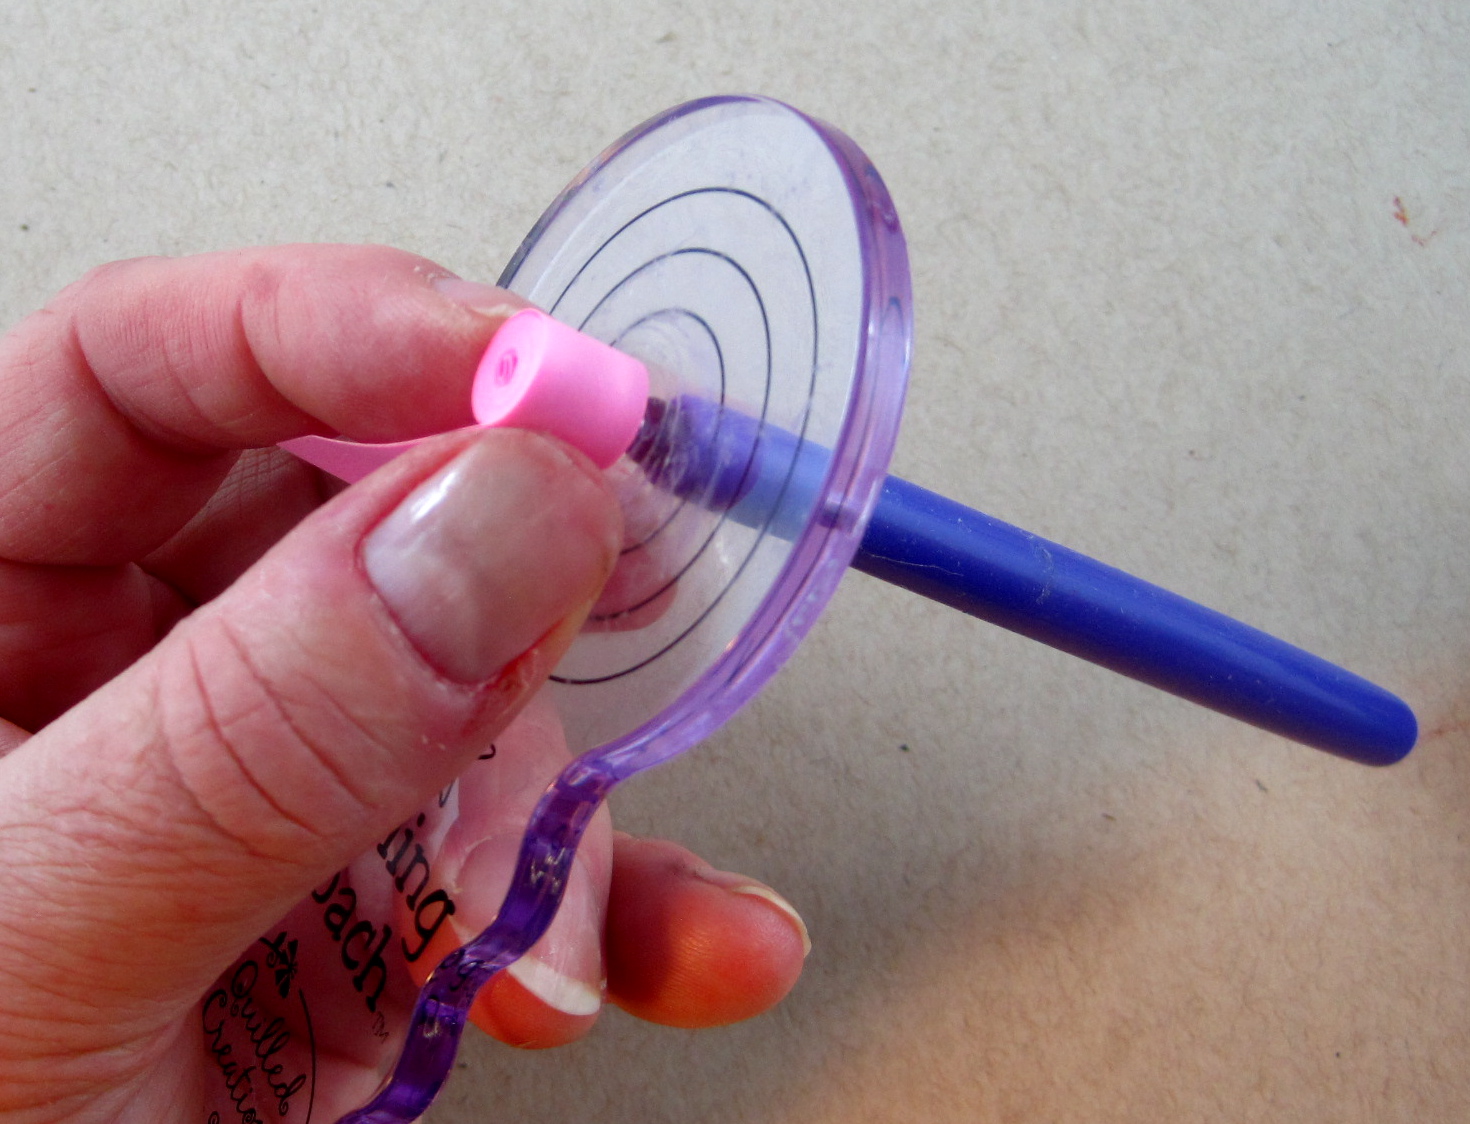
Start by choosing five different colors of 3/8″ quilling strips. Starting with the color for the middle of the target design. Use the slotted quilling tool and a curling coach that I recommend highly for beginner quillers and quill a tight roll. Add a tiny bit of MONO Multi Liquid Glue to the end of the coil and attach the next color. You only need a touch of glue to make an instant and secure bond. Keep on adding the colored strips and rolling. Be careful not to roll too tightly or it will be a little harder to remove from the quilling tool.

When you have finished with all the colored strips, remove the target from the quilling tool. Place a Power Tab in the middle of the ring. Add a thin line of MONO Multi Liquid Glue to the inside rim and place the target into the ring base. Push down firmly for an instant and permanent bond. Use the MONO Multi to add a rhinestone to the middle of the target to finish this bold ring.

![]() http://www.facebook.com/tombowusa and
http://www.facebook.com/tombowusa and ![]() http://twitter.com/#tombowusa
http://twitter.com/#tombowusa