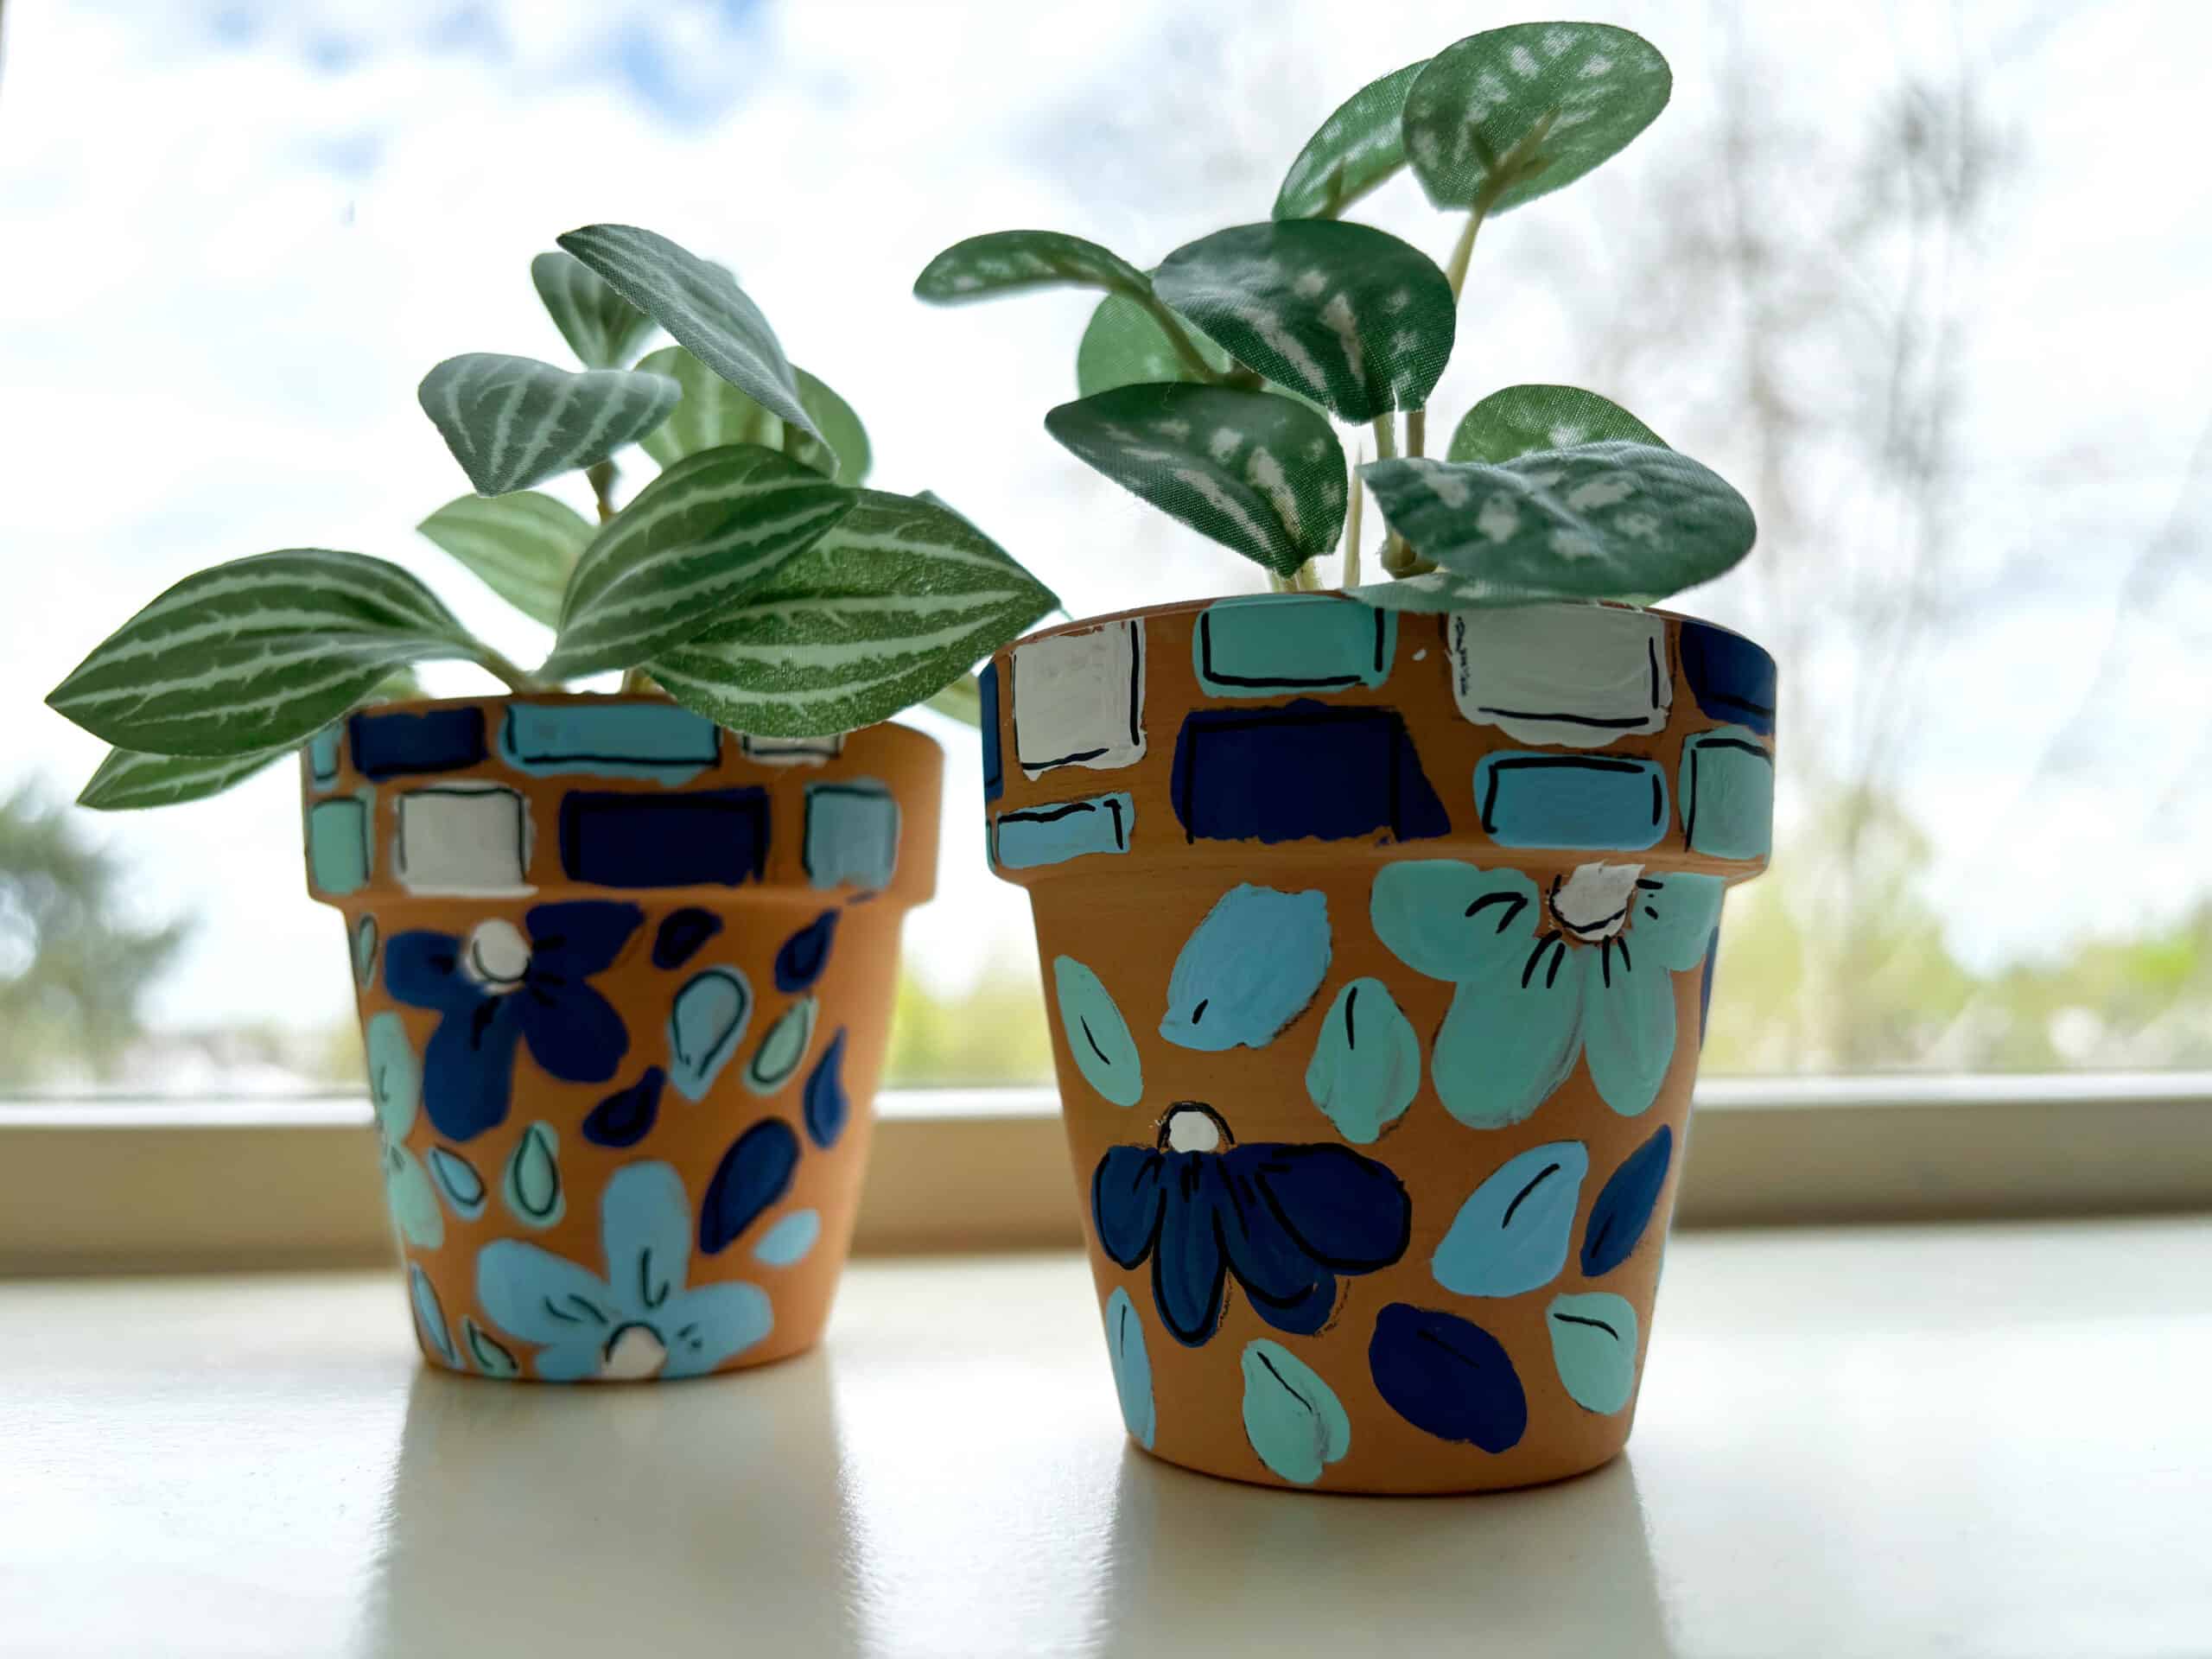
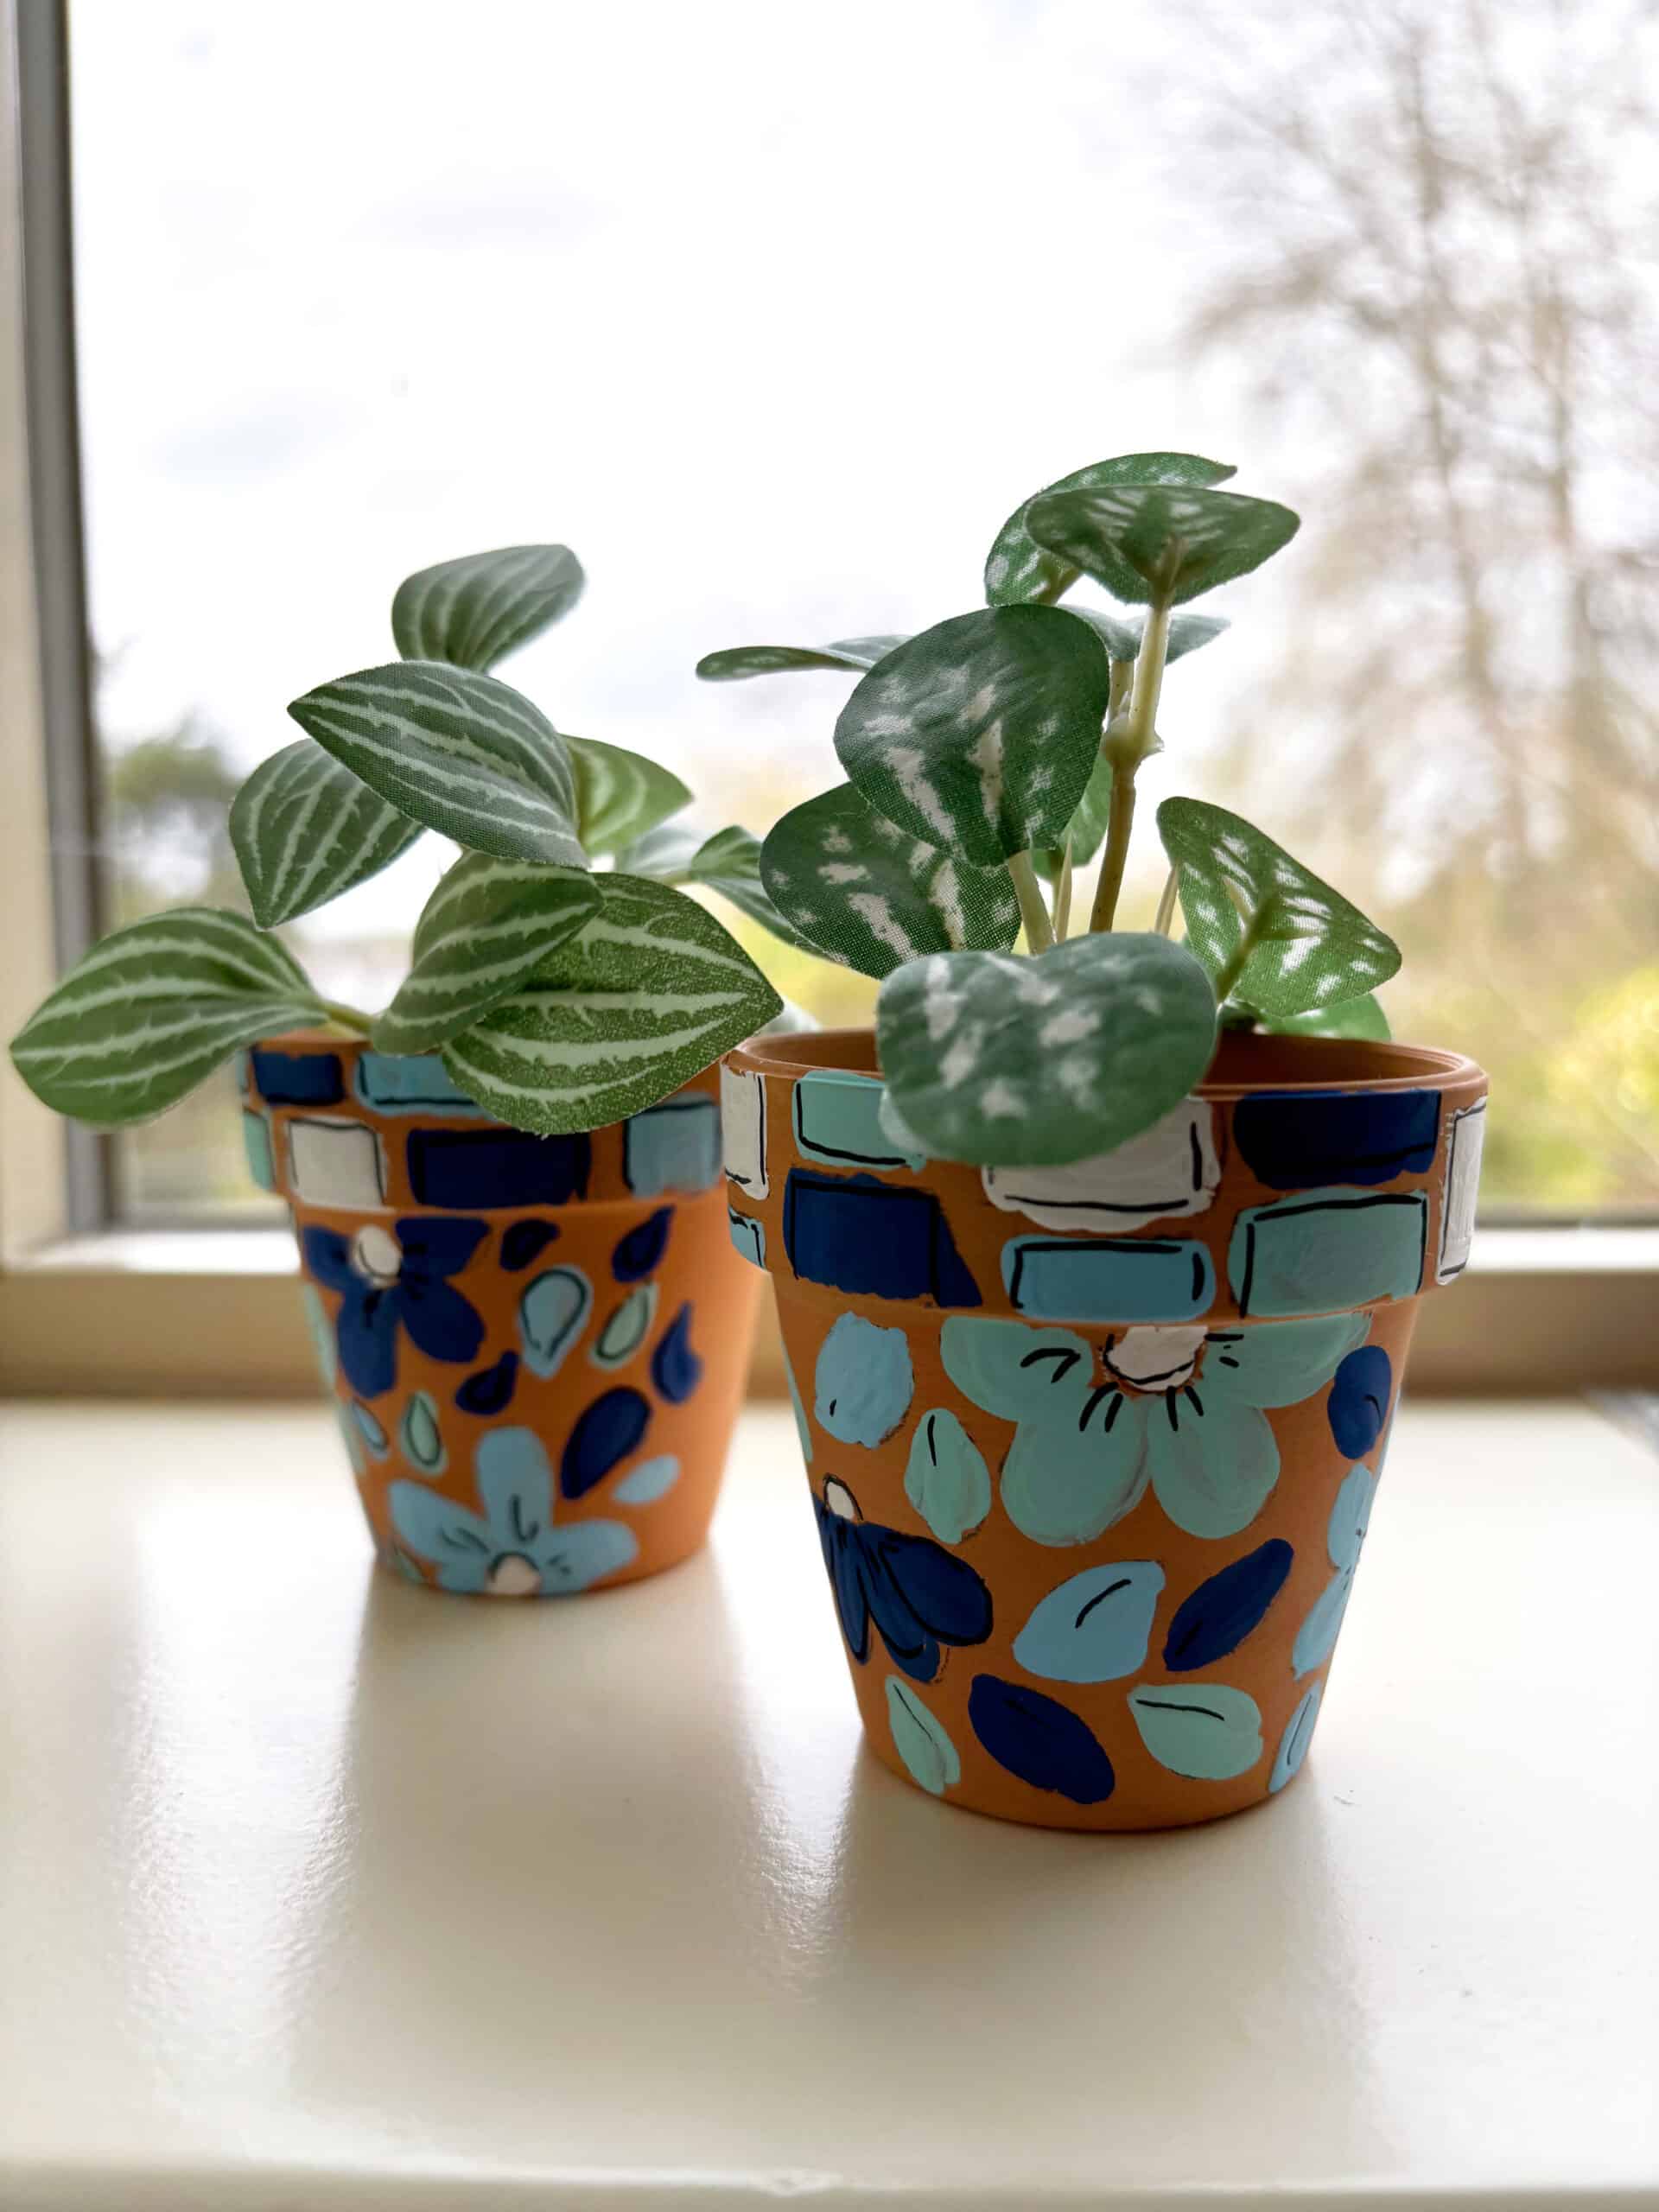
Hi friends, it’s Carola and in this post, I’m going to share a step-by-step tutorial on creating faux mosaic style designs on plant pots. This is an easy and fun project you can do to add vibrancy to your garden this season. I love painting clay pots to put new flowers in and this year, my aesthetic is a mosaic style. To create a faux mosaic design using paint and a few stationery supplies, read on.
Supplies Used:
- MONO Drawing Pencil, 6B
- MONO Twin Permanent Marker
- Clay plant pots
- Paint brush
- Acrylic paint (any you have on hand would work)
Step-by-Step Process To Creating A Faux Mosaic Design on Plant Pots:
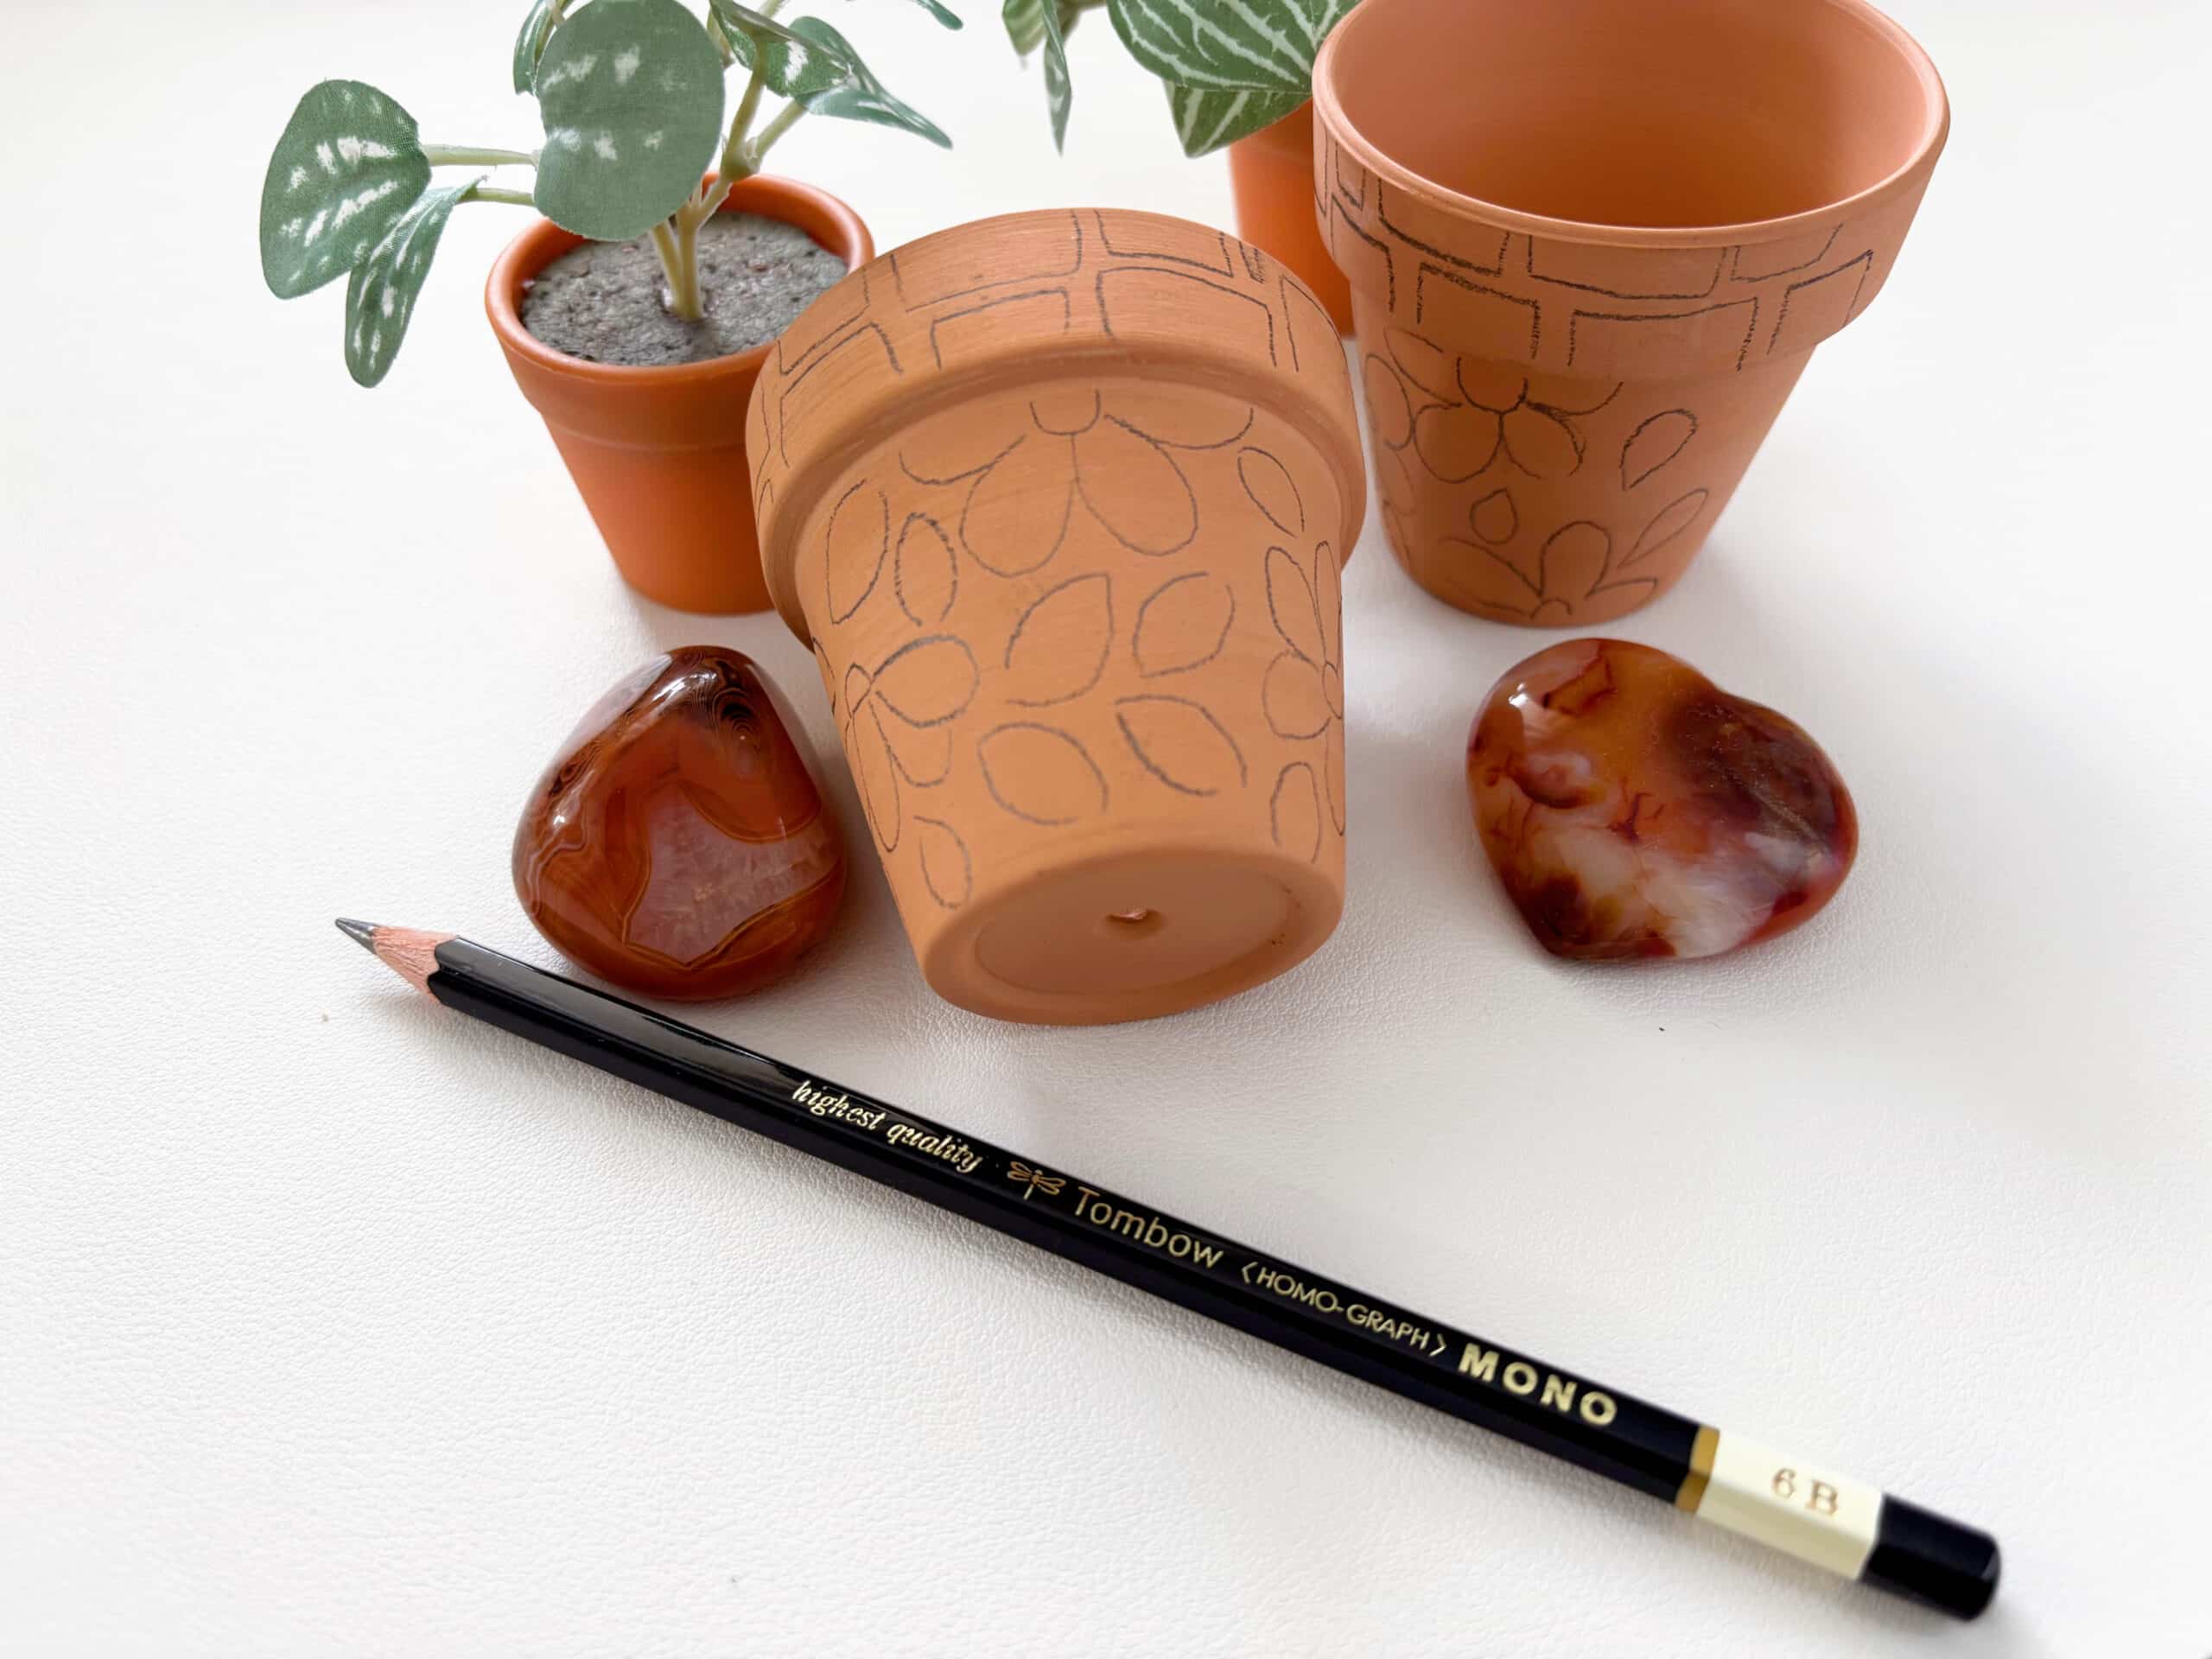
Step 1: Using a MONO Drawing Pencil, draw flower outlines on the clay pot. I prefer the 6B pencil because it’s soft enough to make legible marks on clay.
Fill in gaps with wide leaf shapes and create a border of uneven rectangles on the top of the pot.
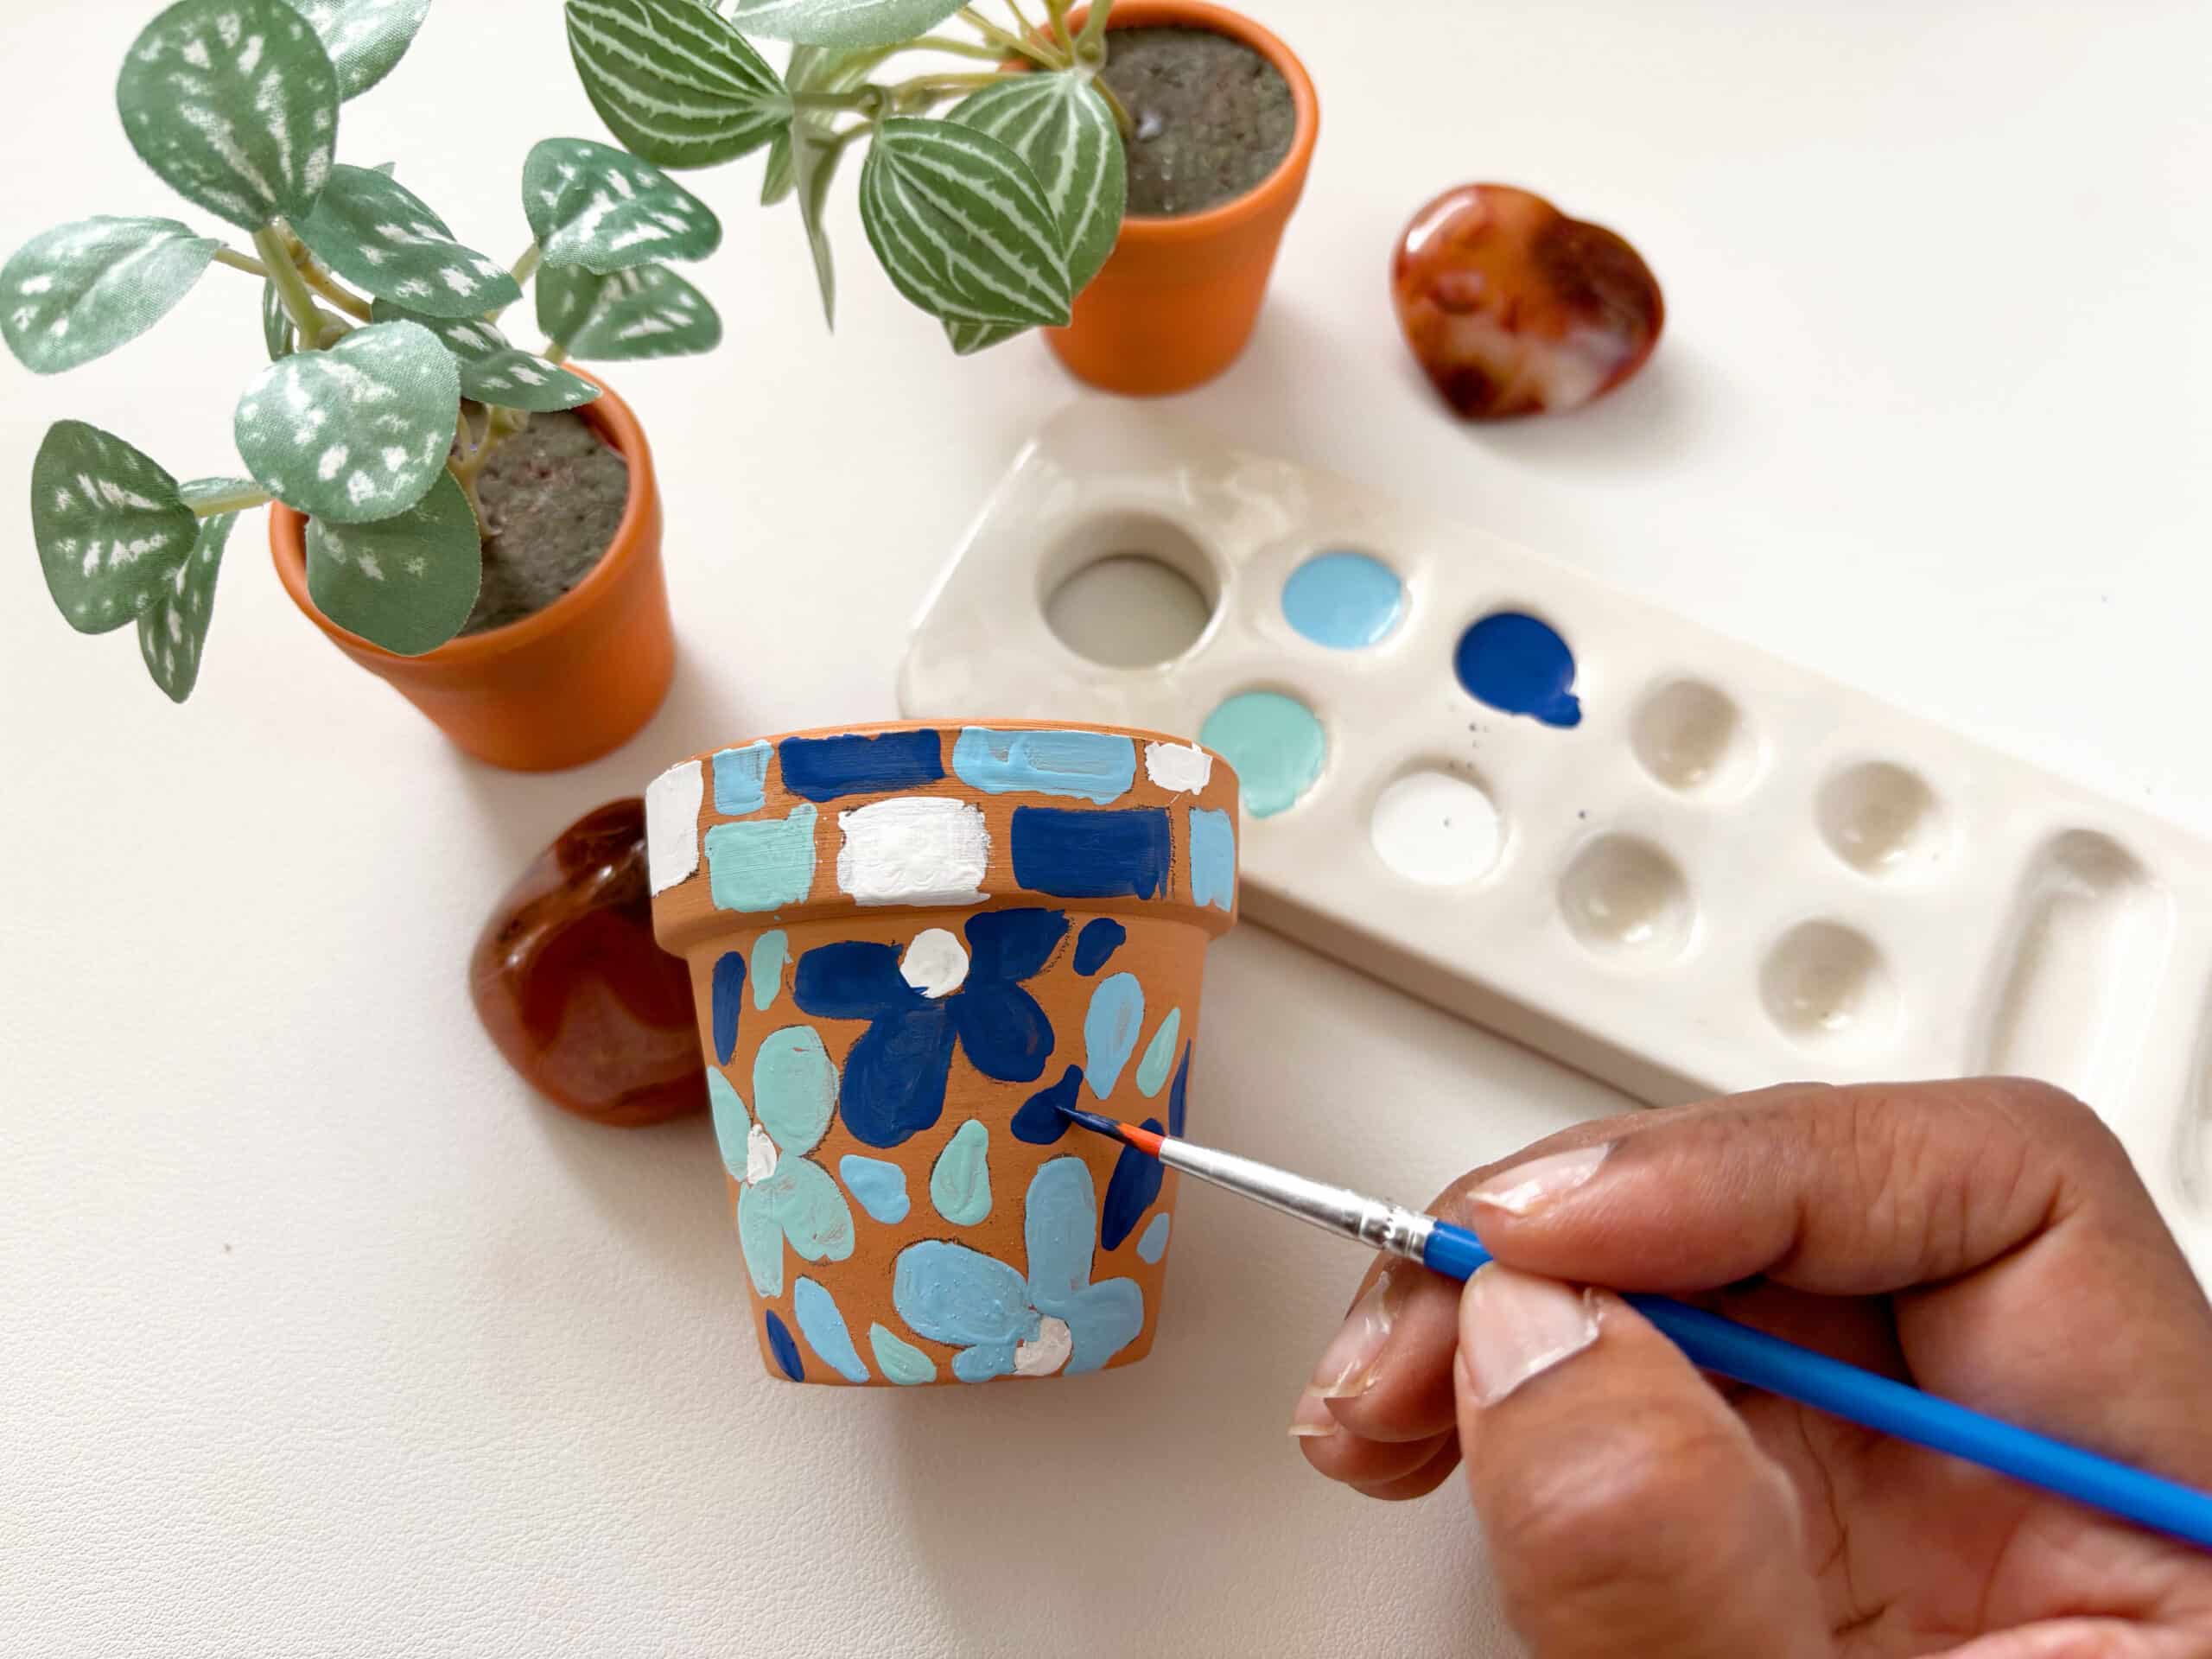
Step 2: Paint over the outlines with any acrylic paint you have on hand – the brighter, the better. I personally love blue, so I went with 3 shades of blue as well as a white. Cover up the pencil lines as best as you can.
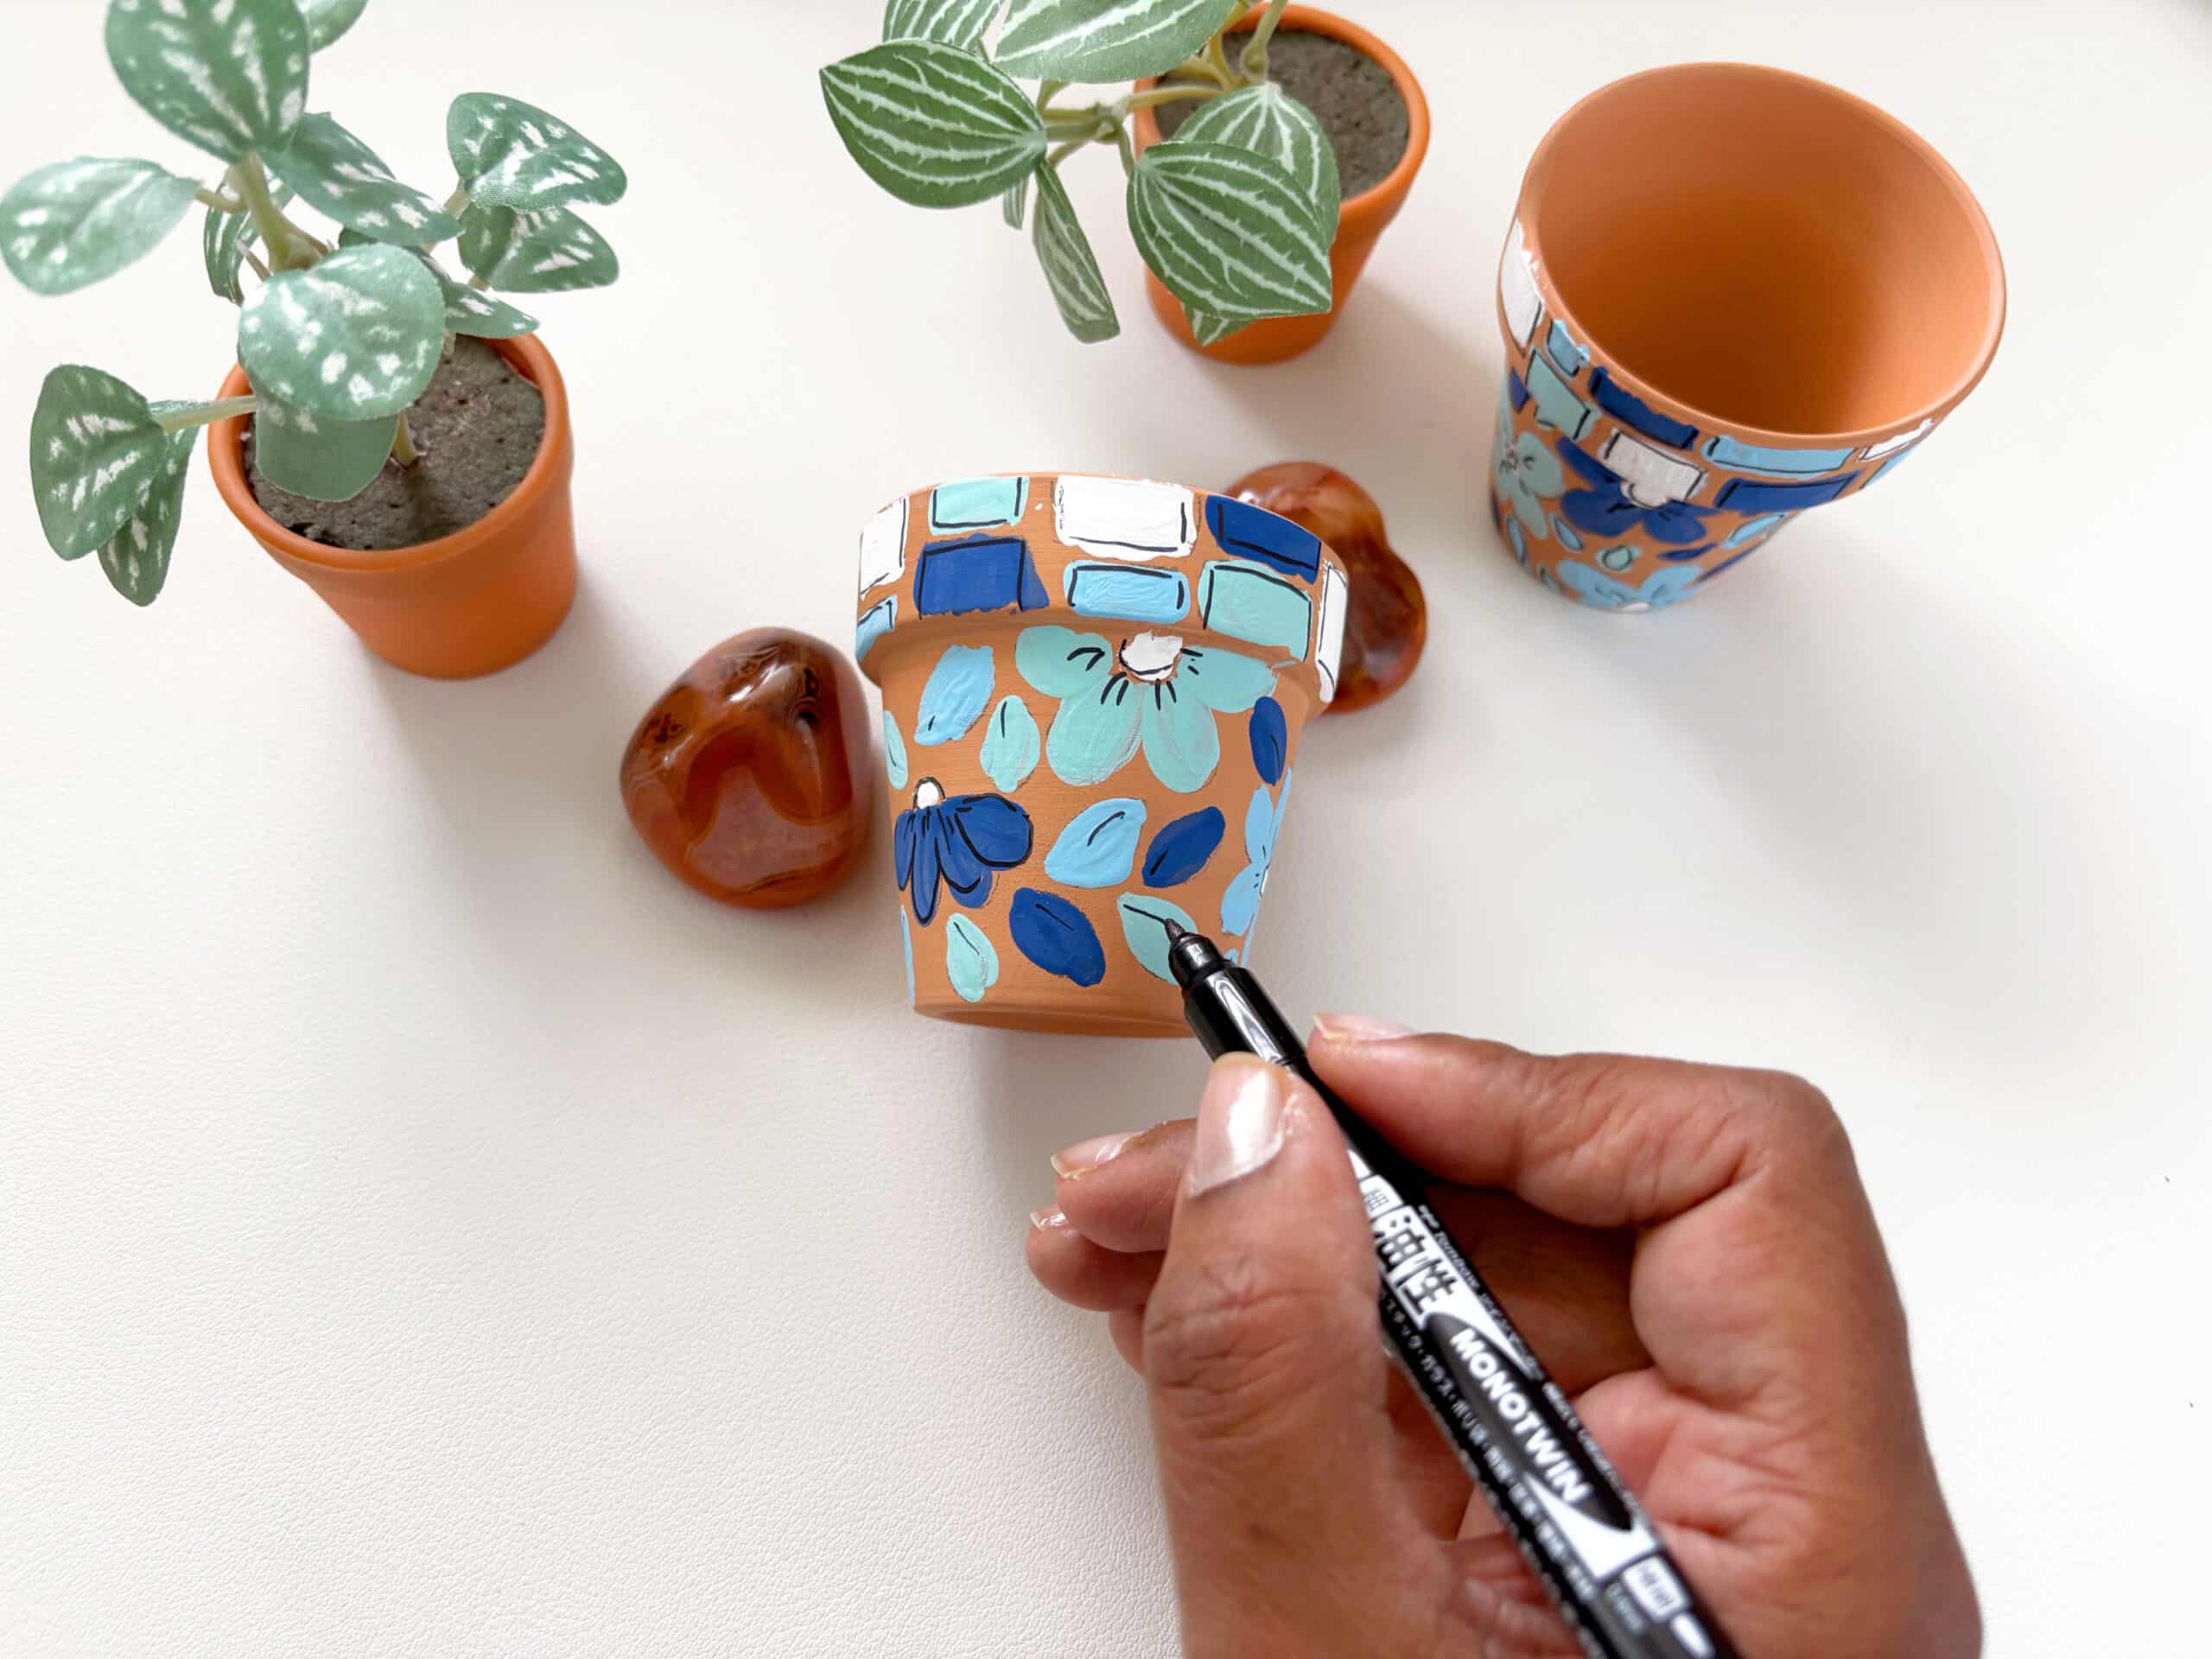
Step 3: Allow the paint to dry. Then, using a MONO Twin Permanent Marker, add detail to flowers and leaves. Outline the rectangles as well to make them look like tiles.
Optional: add uneven lines to make them look like broken shards of ceramic.
That’s it! You can now fill the plant pots with soil and plants or flowers. Happy gardening!
If you design your own plant pots, we would love to see it! Share it with us by tagging @TombowUSA and @FromCarola on Instagram.
If you want to try out more fun craft projects, take a look at this post on DIY Bedazzled Book.