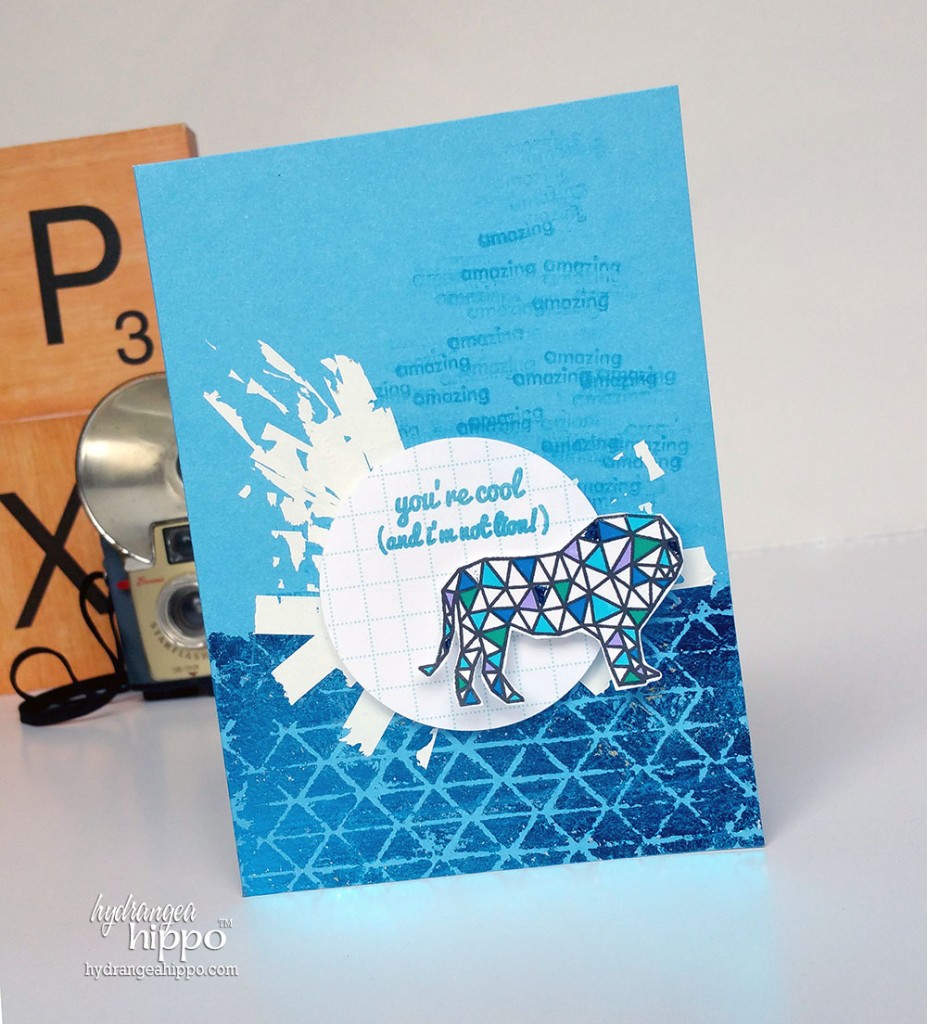
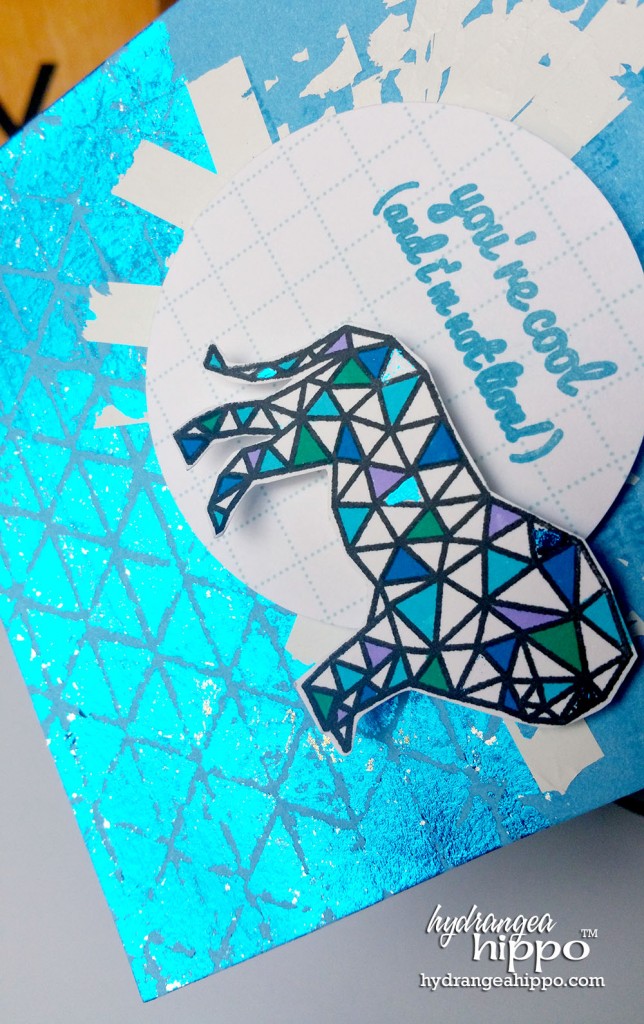
Last year we knew gold was going to be a hot trend but at the recent Craft and Hobby Association trade show, not only was gold foil a hot trend across all categories but foil in all colors was making a big comeback. I love the look of foil on craft projects but many of the methods for applying foils to projects involve costly equipment and specialty foils that are not available at your local craft store. What about foiling “for the rest of us”? I made this fun foiled card using Tombow adhesive to create a foil transfer without heat:
I recently received some amazing stencils by Ed Roth of Stencil1 and thought they would be excellent for creating foil patterns. But how? Then I remembered that Tombow MONO Multi Liquid Glue dries slightly tacky. To get the foils onto the paper, they need to “stick” to something. Lightbulb!
I applied a small dab of Tombow MONO Multi Liquid Glue to a scrap of chipboard. I dipped an old, flat brush into water and mixed it with the glue, to water it down slightly to make it easier to paint on. I laid the stencil in place and started painting the glue mixture through the stencil. To keep the stencil from moving, it’s a good idea to tape it in place but I just held it in place with my hand. If you apply a lot of the glue mixture at once, it may seep under the edges of the stencil. I like this “messy”, almost graffiti-like look but if you are going for perfection, don’t water-down the glue.
I remove the stencil and wiped the glue mixture from it with a household cleaning wipe. I allowed the glue mixture to dry on the card for about 3 minutes before applying the foil. The dry time may vary, depending on humidity. I removed a sheet of blue foil from a pack of Clearsnap’s Designer Foils and pressed the silver side into the glue pattern made by the stencil. The foil stuck to the adhesive design beautifully! To add contrast and a graffiti effect, I ran some lines of Tombow WideTrac Correction Tape onto the card front, rubbing some of the correction tape away with my finger for a “distressed” effect. Then I applied the sentiment to the card front using Tombow 3D Foam Tabs.
For more detailed areas, such as the sections of the lion stamped image I used on this card, I used the Tombow MONO Glue Pen to fill in the section of the image where I wanted the foil to be applied. Both the Tombow MONO Multi Liquid Glue and the Tombow MONO Glue Pen worked great for applying foils to paper, without heat!
After cutting out the lion image, I mounted it to the card front using Tombow 3D Foam Tabs.
Supplies:
- Tombow MONO Multi Liquid Glue
- Tombow MONO Glue Pen
- Tombow WideTrac Correction Tape
- Tombow 3D Foam Tabs
- Tombow Dual Brush Pens
- Card Base
- Stamps by Altenew
- Black Dye Ink by Clearsnap
- Foil Sheets by Clearsnap
- Paper Circle
Tools:
- Stencils by Stencil1
- Bone Folder
- Scissors
- Acrylic Stamping Block
Do you love the look of foils and gilding? Let us know in the comments if you think you’ll try this technique!
Thanks for stopping by,
– Jennifer Priest
Find more of my projects at hydrangeahippo


Pingback: Foil Transfer for the Rest of Us - A Craft On The Cheap - Hydrangea Hippo
This is GENIUS!! I LOVE THIS!!!
Pingback: Mixed Media Houses by Jennie Garcia - Tombow USA - Blog
Pingback: How to Foil on Fabric - Felt - Hydrangea Hippo