Hello! I’m super excited to share my super easy Pumpkin Treat Containers with you today!
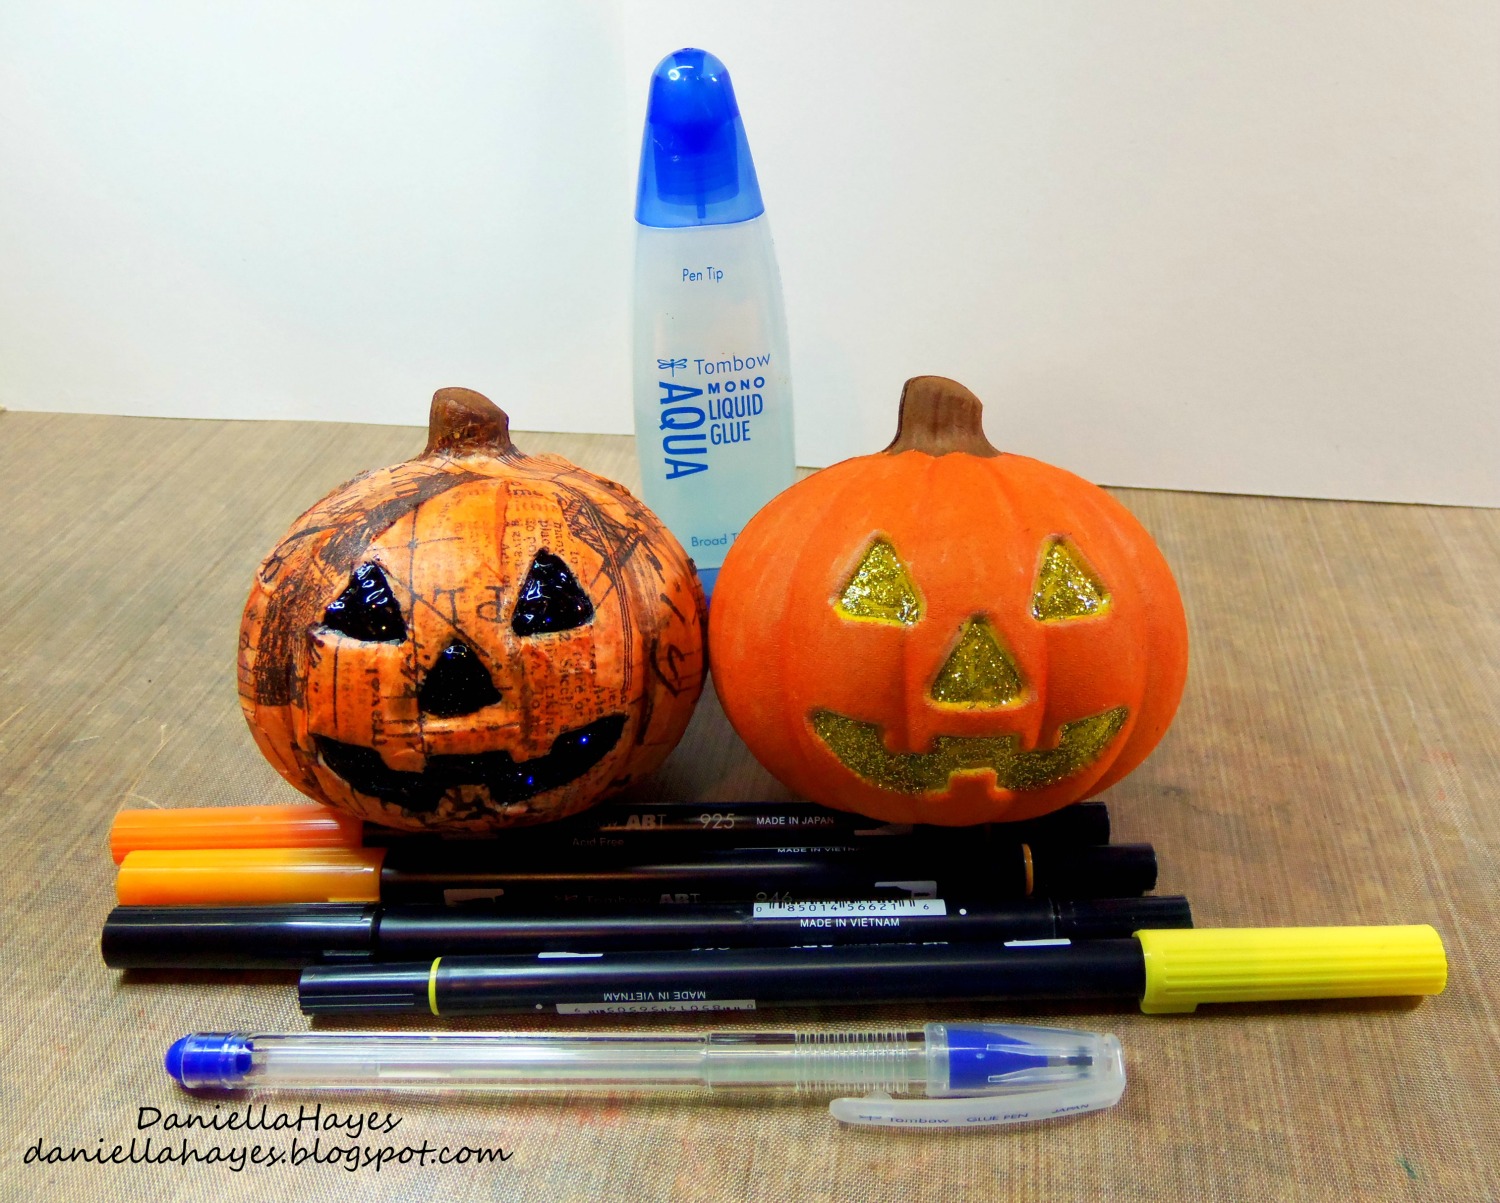
How fun are they! They were just cardboard pumpkin containers, but with some awesome Tombow Products, they became BOO-T-FULL!! *sorry, i couldn’t help myself :)* Pumpkin Treat Containers! There is a section in the craft store that is full of cardboard things like boxes and decorations. These pumpkins were so cute and so inexpensive I had to buy them for some special trick or treaters I know.

SUPPLIES:
- Tombow Mono Aqua Liquid Glue
- Tombow Mono Glue Pen
- Tombow Dual Brush Pens 055, 925, 933, 946, 977 and N15
- Tombow Blending Kit
- Cardboard Pumpkin Treat Containers
- Tissue Paper
- Glitter
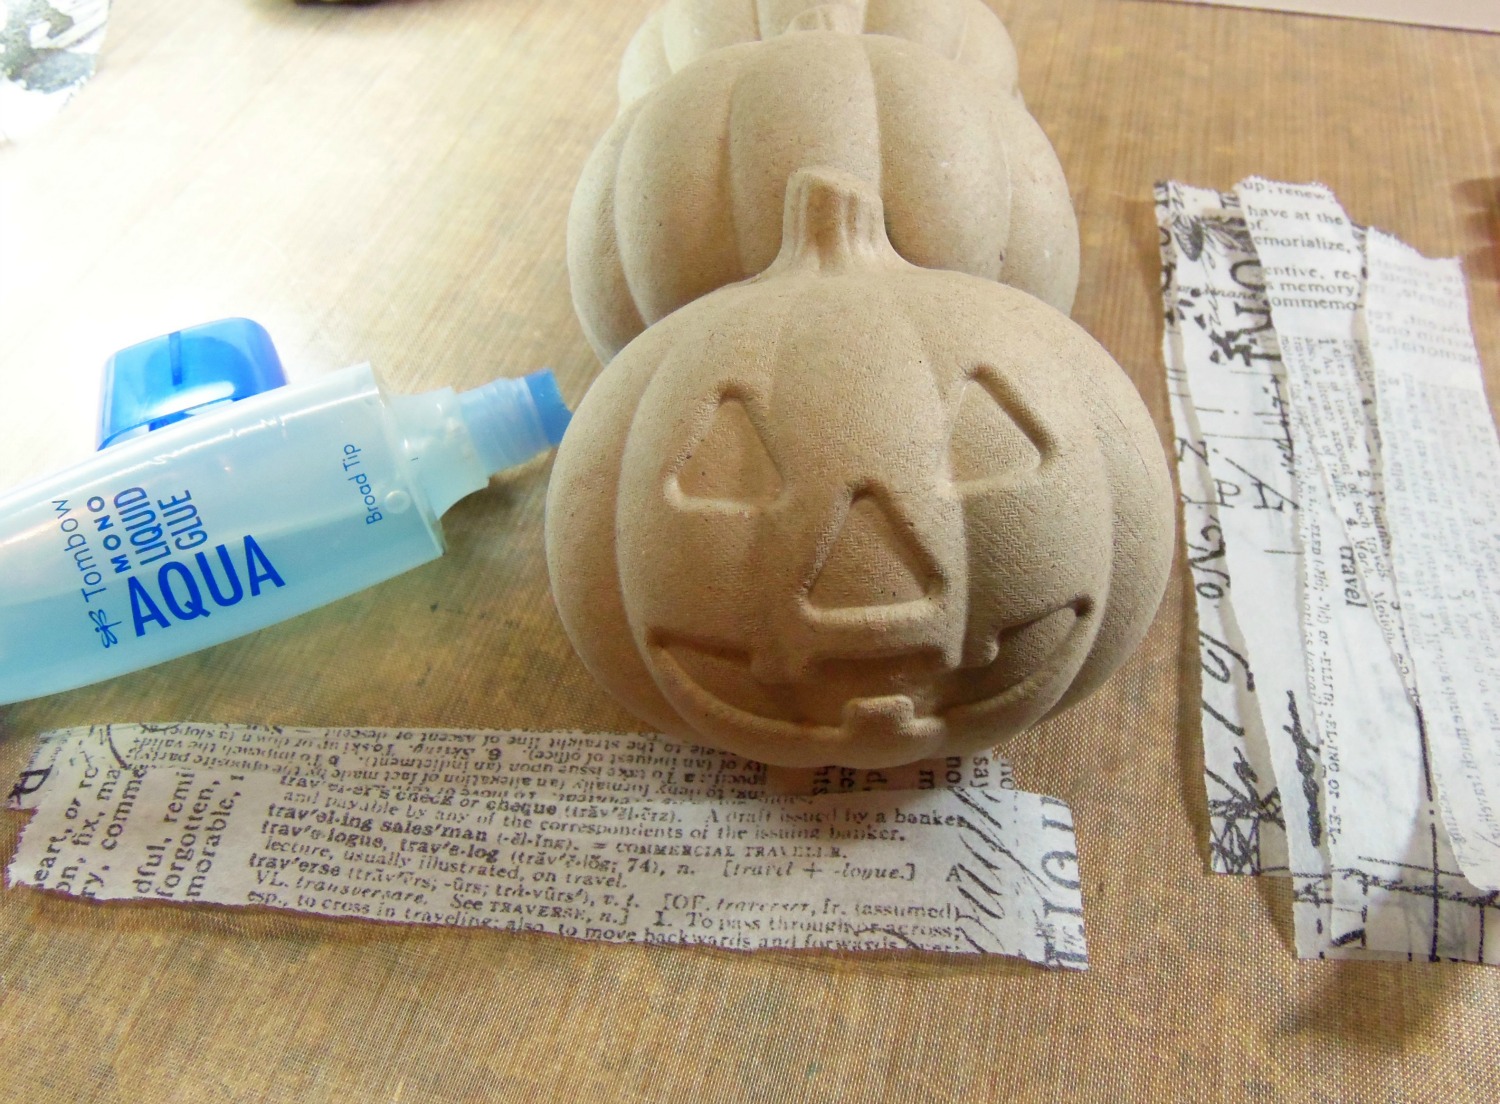
I decorated the treat containers 2 different ways. For the first one,I ripped strips of tissue paper and applied them to the pumpkin with Tombow’s Mono Aqua Glue. Mono Aqua Glue is awesome for paper to paper adhesion and decoupage techniques. I used the broad tip and ran it straight down the back of the tissue paper. Then, I applied it to the pumpkin. Be sure to use an embossing stylus or some other tool to push the paper into the designs in the container, like the eyes, nose, mouth and lines in the pumpkin.

I “watercolored’ a plain cardboard pumpkin and the decoupaged pumpkin with Tombow Dual Brush Pens and the Tombow Blening kit. You can make your own custom colors and paint with them by using these supplies. How cool is that?? I picked 3 shades of orange (925, 933, 946) and applied them to the Blending Pallet.
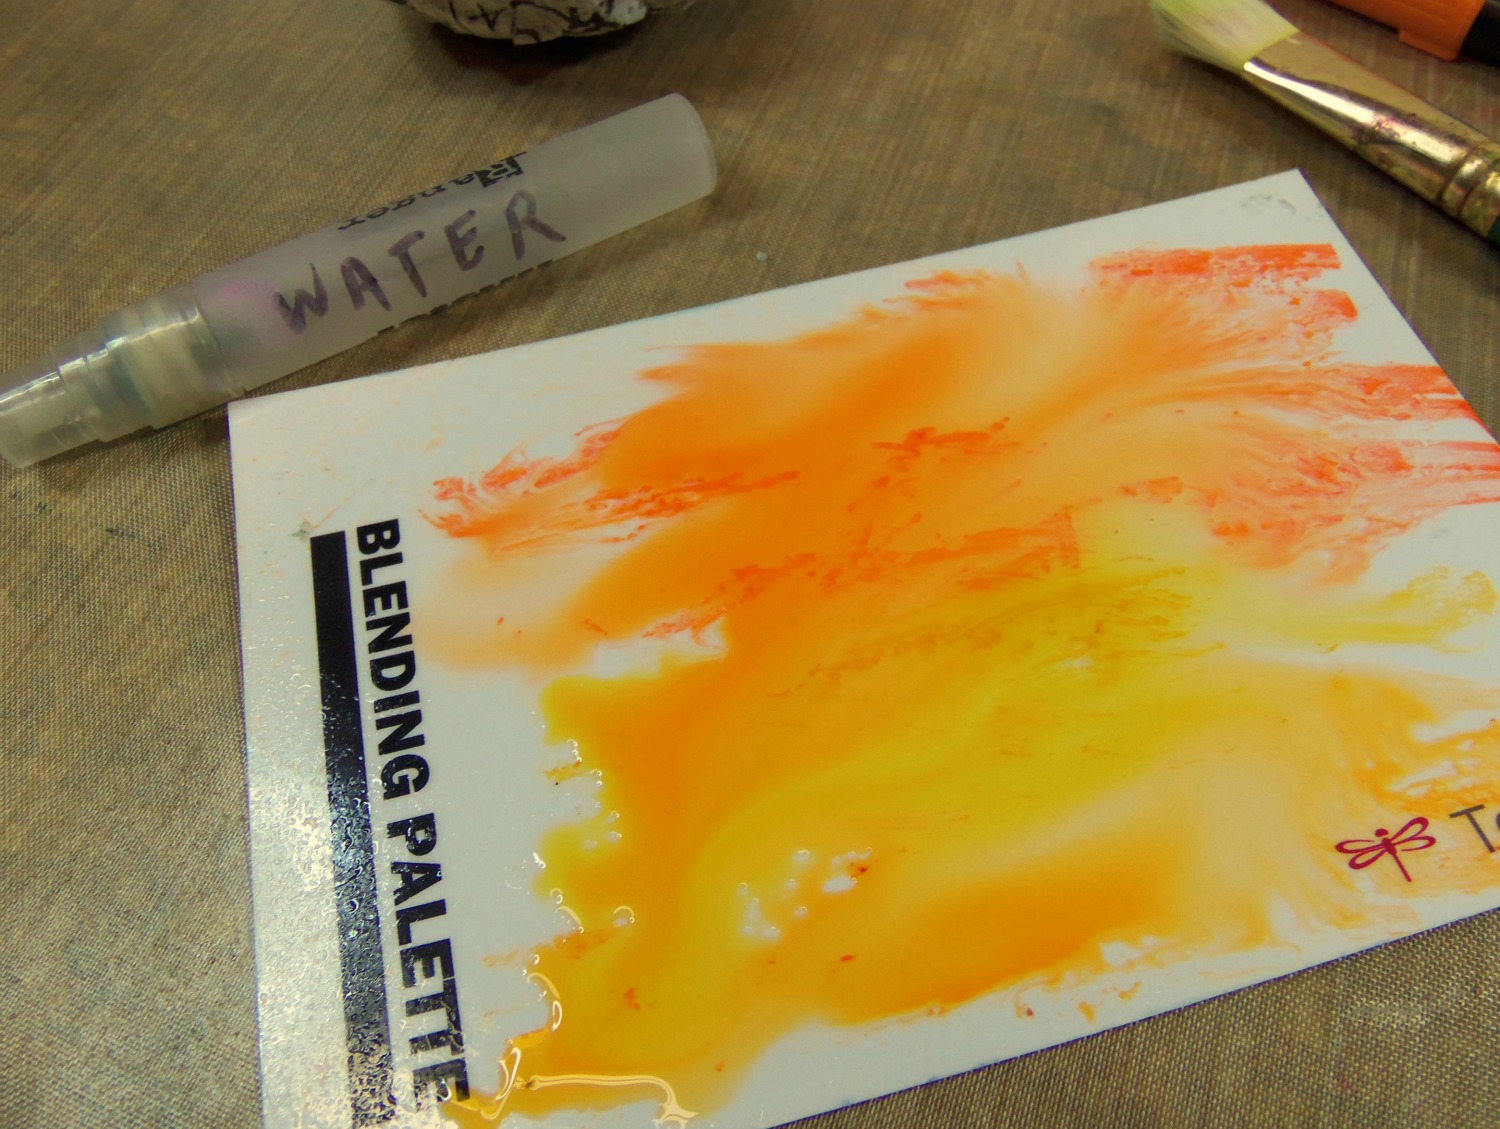
Then I added water from the compact spray mister that comes in the Blending Kit and I had instant custom watercolors! I applied the watercolors to both of my pumpkins. When they were dry, I colored the eyes, nose and mouth of one pumpkin black (N15), and the other pumpkin yellow (055) using the brush end of my Dual Brush Pens. I used my brown (977) Dual Brush Pen to color the stems.
I thought the pumpkins could use a little more awesomeness, so I used my Mono Glue Pen over the eyes, nose and mouth so I could add glitter! When the glitter was dry, I put a little Mono Aqua Liquid Glue on top to seal the glitter.
And that’s it! How easy was that?? DIY projects are always so much easier when you have the right tools. I made these pumpkins super fast, which is a great thing because I have 18 more pumpkins to finish! I LOVE how they turned out! I don’t know which one I like better. The pumpkin I decoupaged and gave black eyes? Or the pumpkin I watercolored directly and gave yellow eyes? What do you think??
Thanks for visiting! Make something awesome today!!

Don’t forget to use the code SPOOKY31 to get 31% off your purchase!
xxDaniella