Here’s a easy and fun blending technique using Tombow’s Dual Brush Pens and Blending Kit. This indirect blending technique can be done on most papers and will have you applying color like a pro! So if you love to make cards, are an avid colorist or just want to perfect your blending techniques you will find this tutorial very handy! You can also download the image for free!
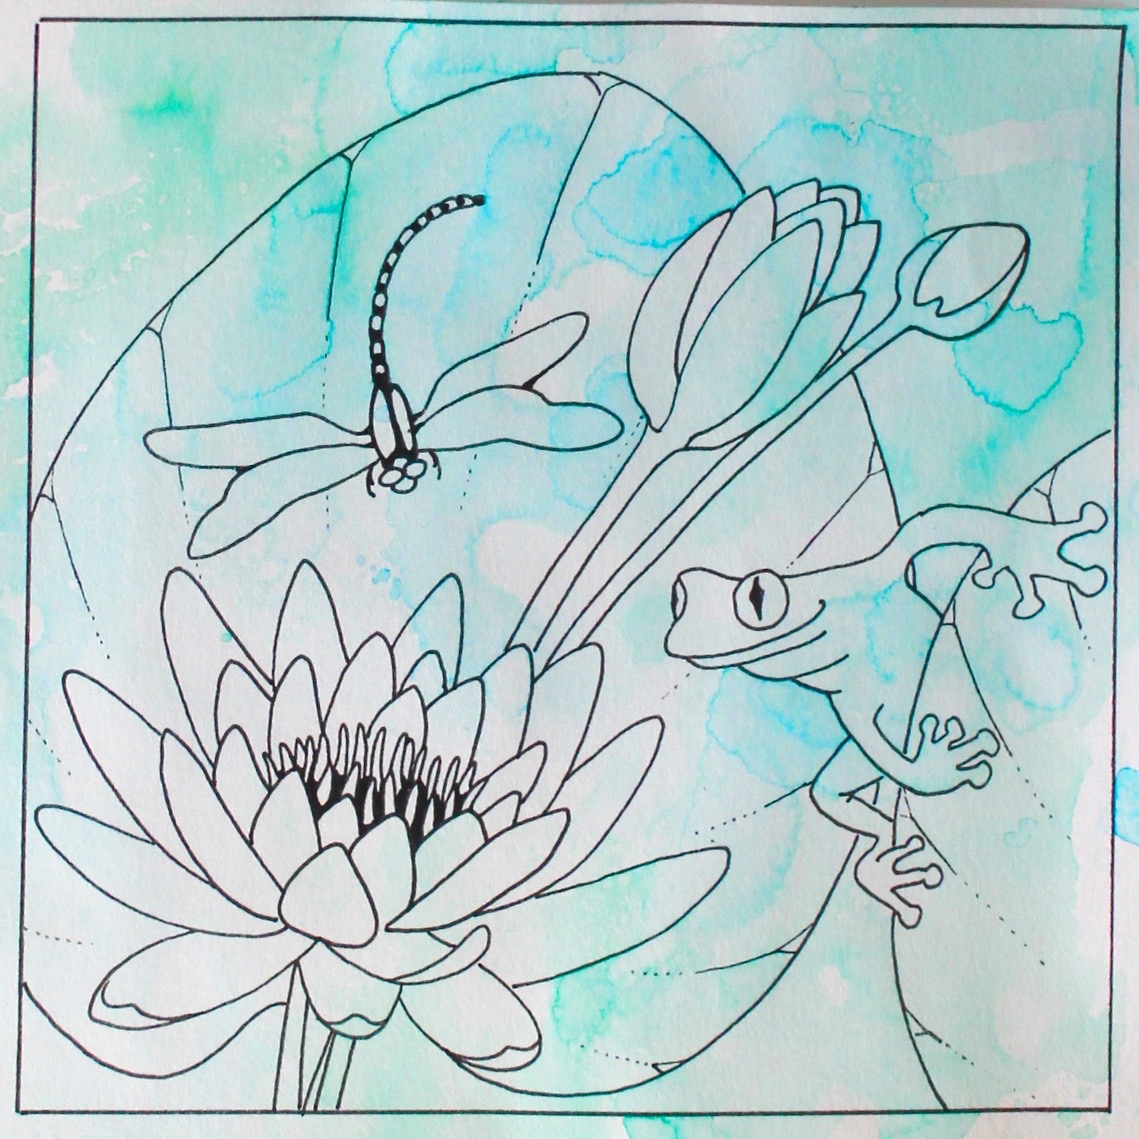
Step 1: Splash Background
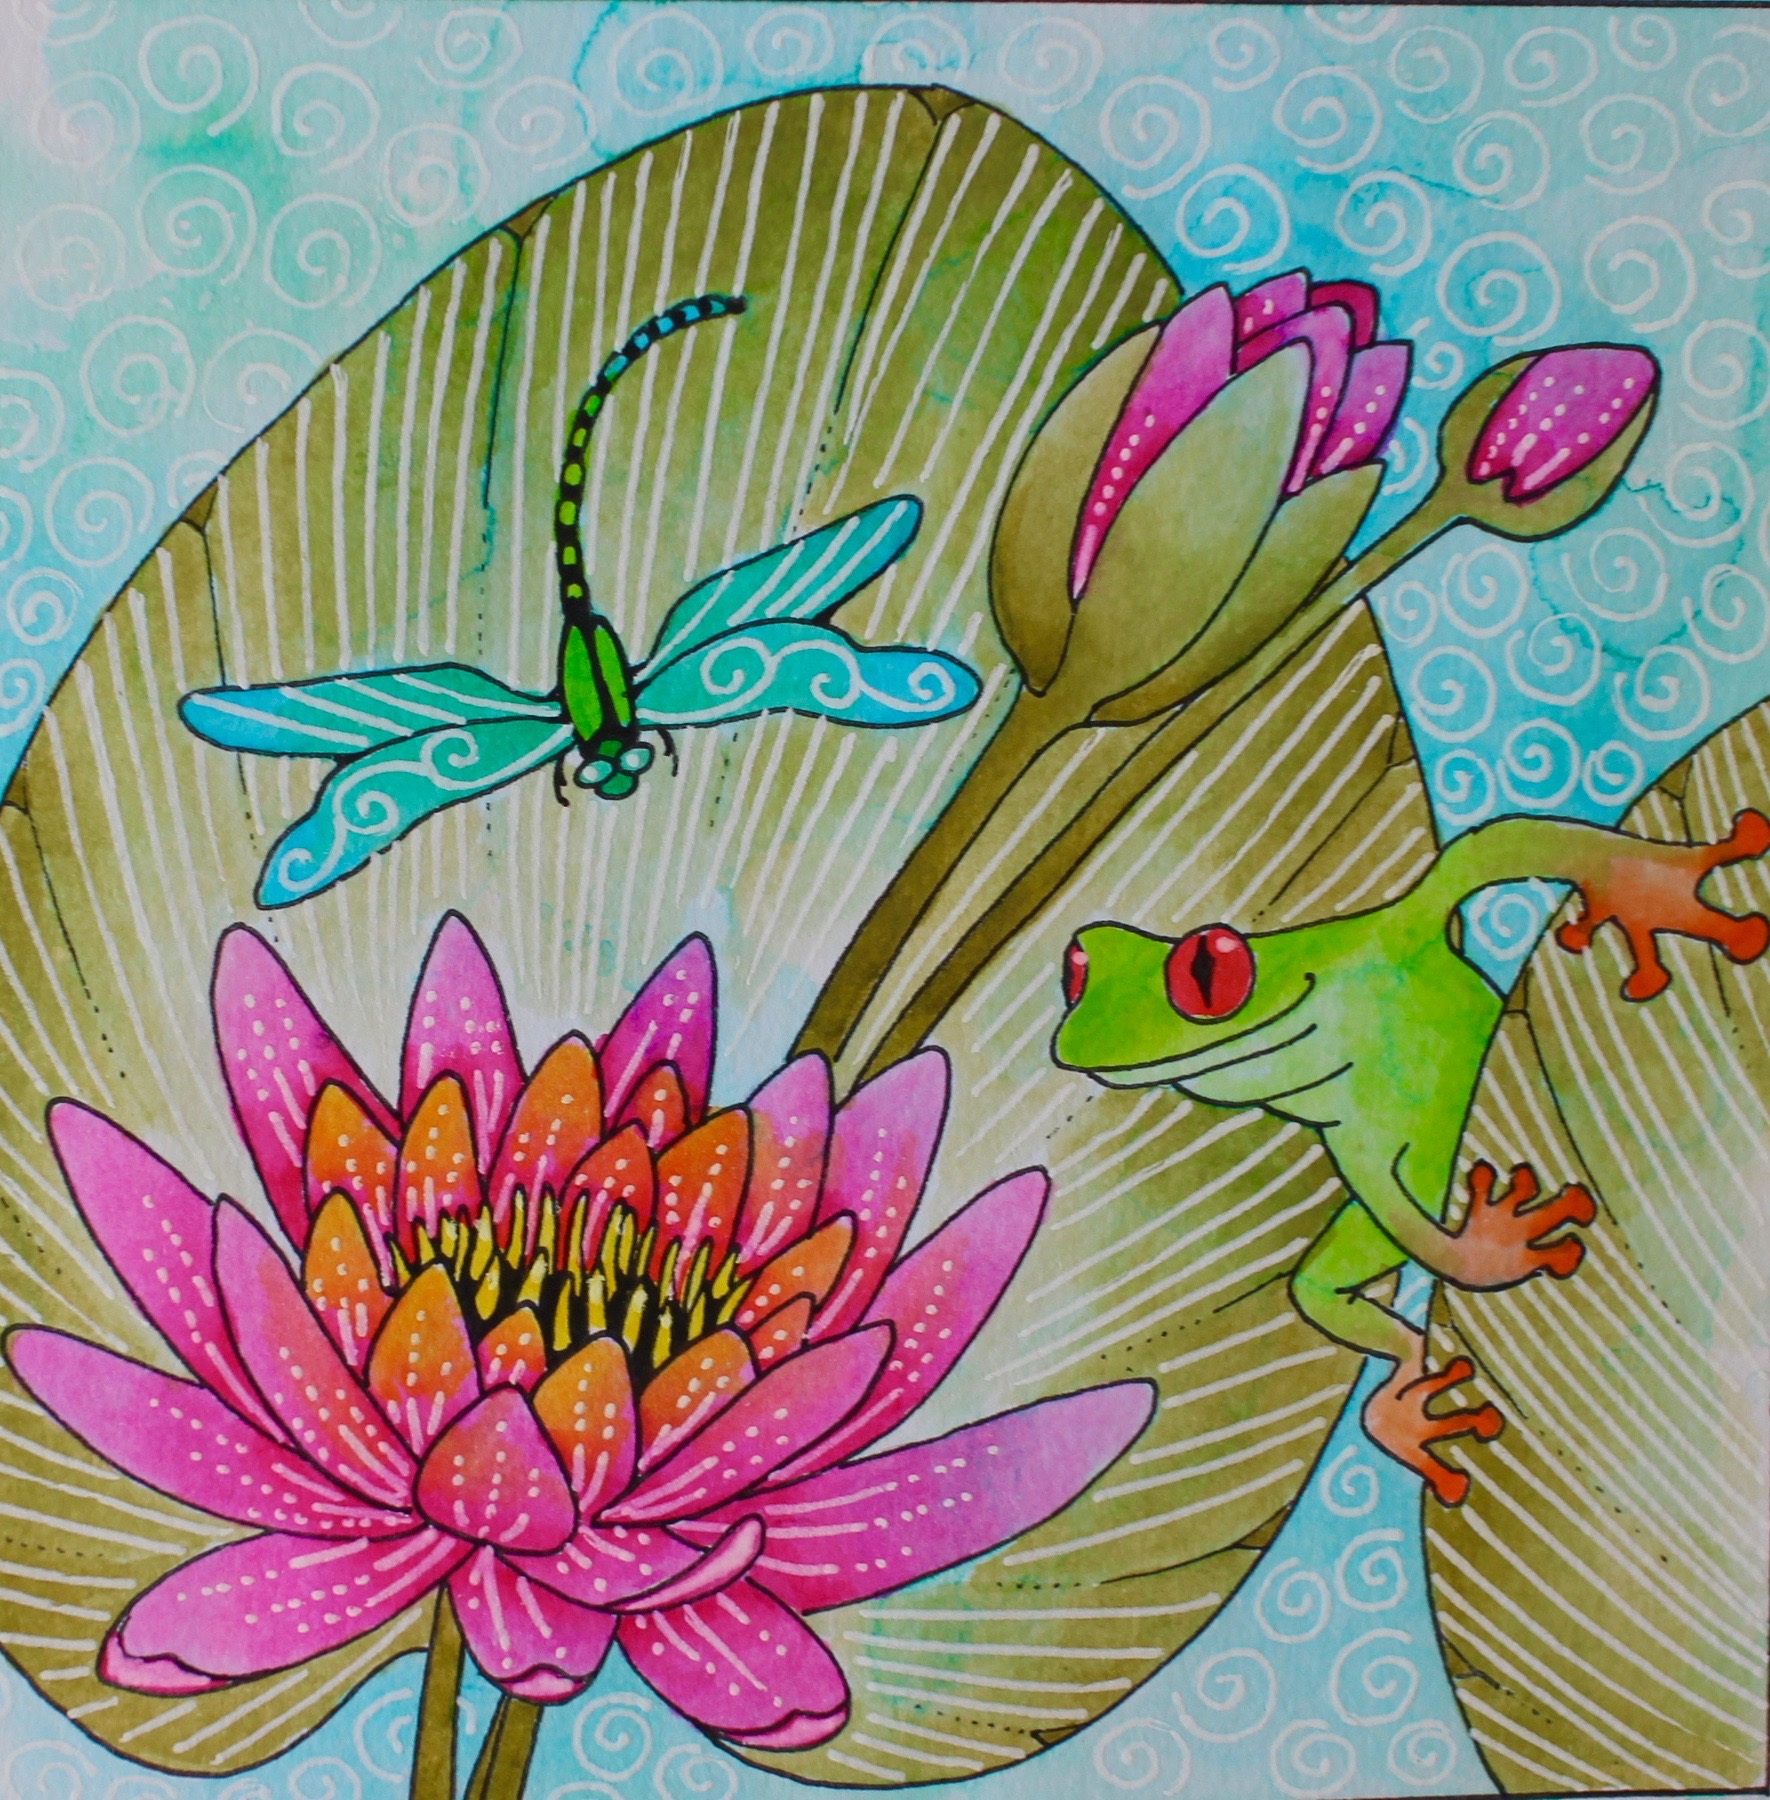
Begin with a light all-over background coloring. Using markers 452 Process Blue and 296 Green, cover the entire blending palette with color. With the mister filled with water, spritz the water onto the palette. To make this a light background, spritz a fair amount of water onto the surface. Turn over and place onto the image to create the background. At this point I sponged off the color on the lily with a paper towel to keep clear. Let dry. Repeat if necessary to create more color or to cover an area.
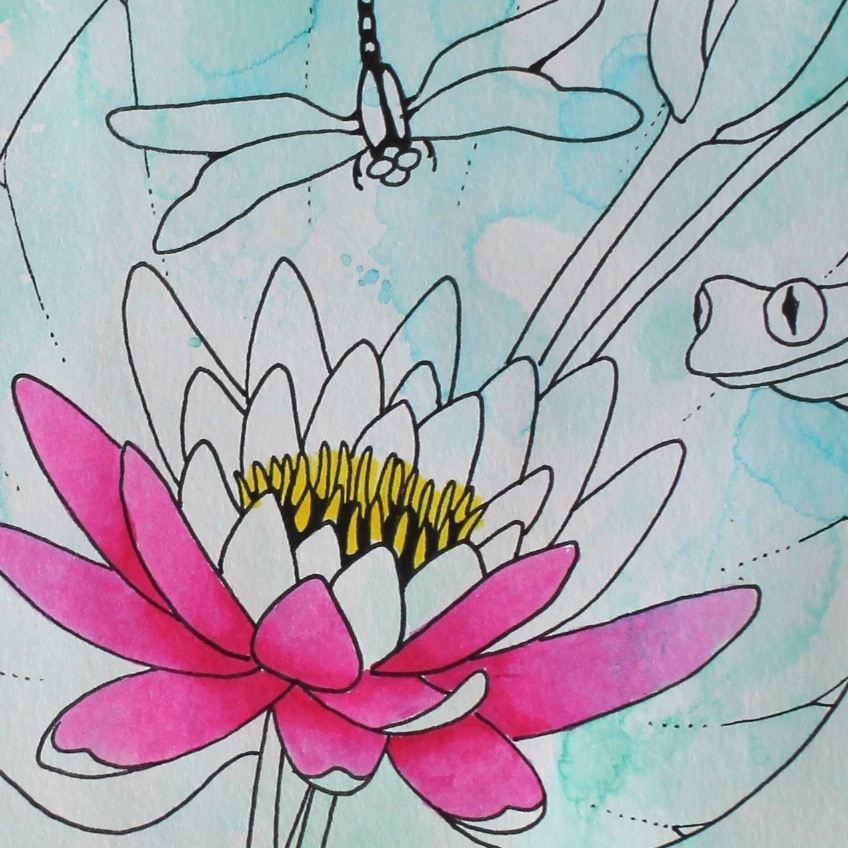
Step 2: Basic Blending Technique
Place marker colors 743 Hot Pink and 055 Process Yellow onto the blending palette. With the brush tip of the colorless blender, pick up the color, much like picking up color from a palette with a paintbrush.
Start to color were you want the darkest shades, at the base of the petals, and keep coloring to the end of the petal. This results in a perfect blend from dark to light as the marker runs out of color.
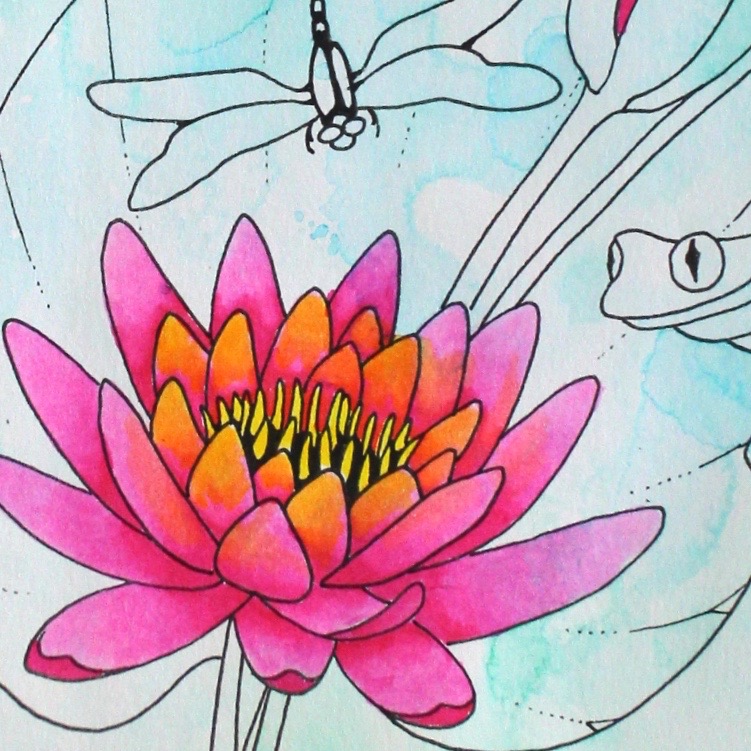
Step 3: Layering
To layer color, simply let the first color dry and then repeat the blending with the yellow marker on top of the pink layer. I layered only the inner petals of the lily, starting at the tip of the petals.

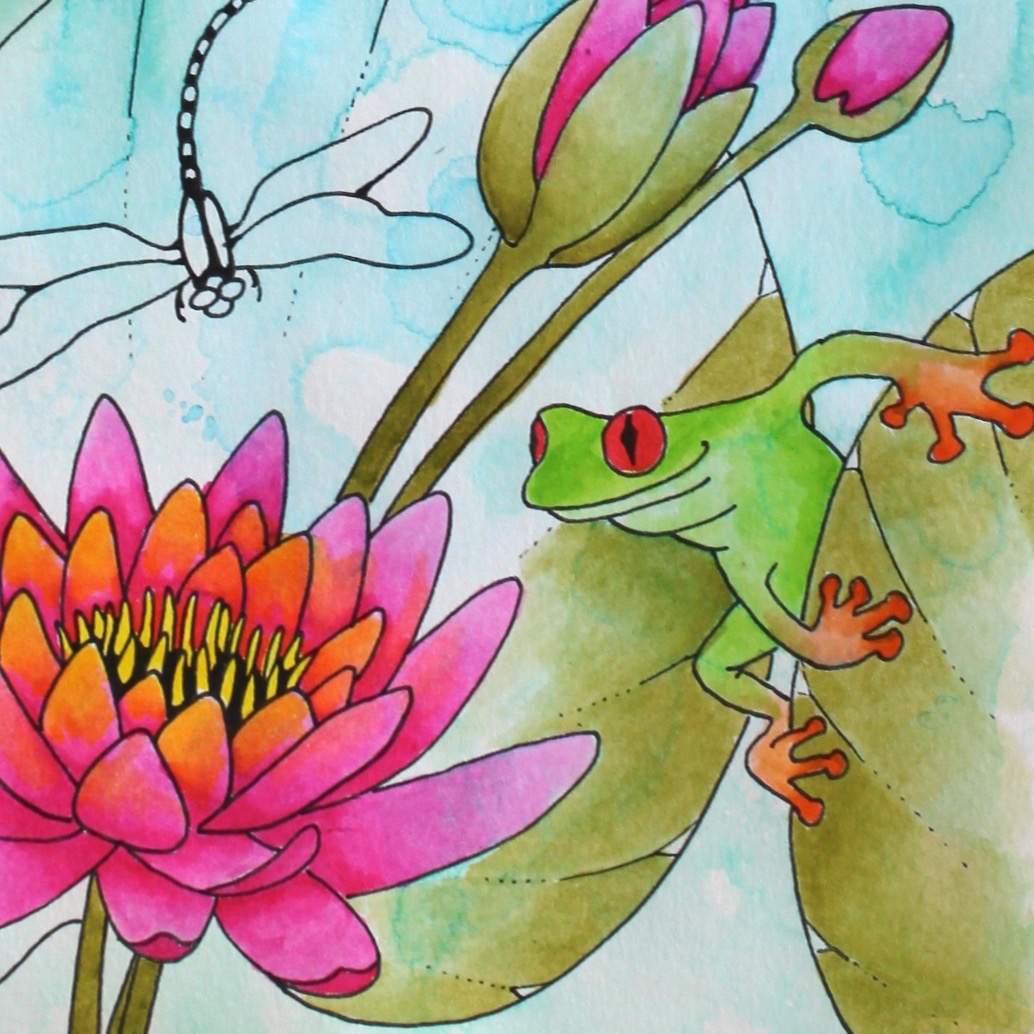
Step 4: Blending one color into another
For the frog, the green was blended into the orange. Place 925 Scarlet and 173 Willow Green onto the palette. Pick up the green and blend starting from the nose of the frog. If you wish a deeper tone, let dry and repeat.
Pick up the scarlet and starting at the frogs feet, blend into the green. Pick up fresh color for each foot.
The dragonfly was also blended in this manner, the blue from the tips of the wings and the green from the base of the wings.
Step 5: Blending large backgrounds
For larger surfaces, break the coloring into sections. I started blending from the outer edges of the lily pad into the center, following the drawn lines that break the pad into sections. Place a large amount of 098 Avocado onto the palette. Pick up a large amount of color and start blending from the edge of the lily pad. If you need the color to go further, do not start a blend in the middle, let dry and start from the beginning of the blend. This ensures that you get a nice, smooth dark to light blend. As you pick up color from the palette, it gets diluted. So periodically add more color to your palette.
Step 6: Adding Patterns
This step is optional but adds a beautiful pattern to your finished piece. Make sure your surface is completely dry and add a simple pattern to each section using a white gel pen. Keep the patterns simple for the best results. This added technique is great for beginners as it hides any blending errors!
Download and color for yourself here:

Marie Browning, Tombow Signature Designer
thanks for good cvv shop http://cvvshop.ws
Some excellent tips here! I really like the idea of using a sponge to pull back some of the moisture and color after performing a blend.
Have you ever run into any issues with the mister causing the paper to bend or warp? I could see that being an issue if your using a thinner paper stock.
Thank you for any other informative blog.
The place else may I am getting that kind of info written in such an ideal approach?
I’ve a venture that I’m simply now operating on, and I’ve been at the look out for such information.