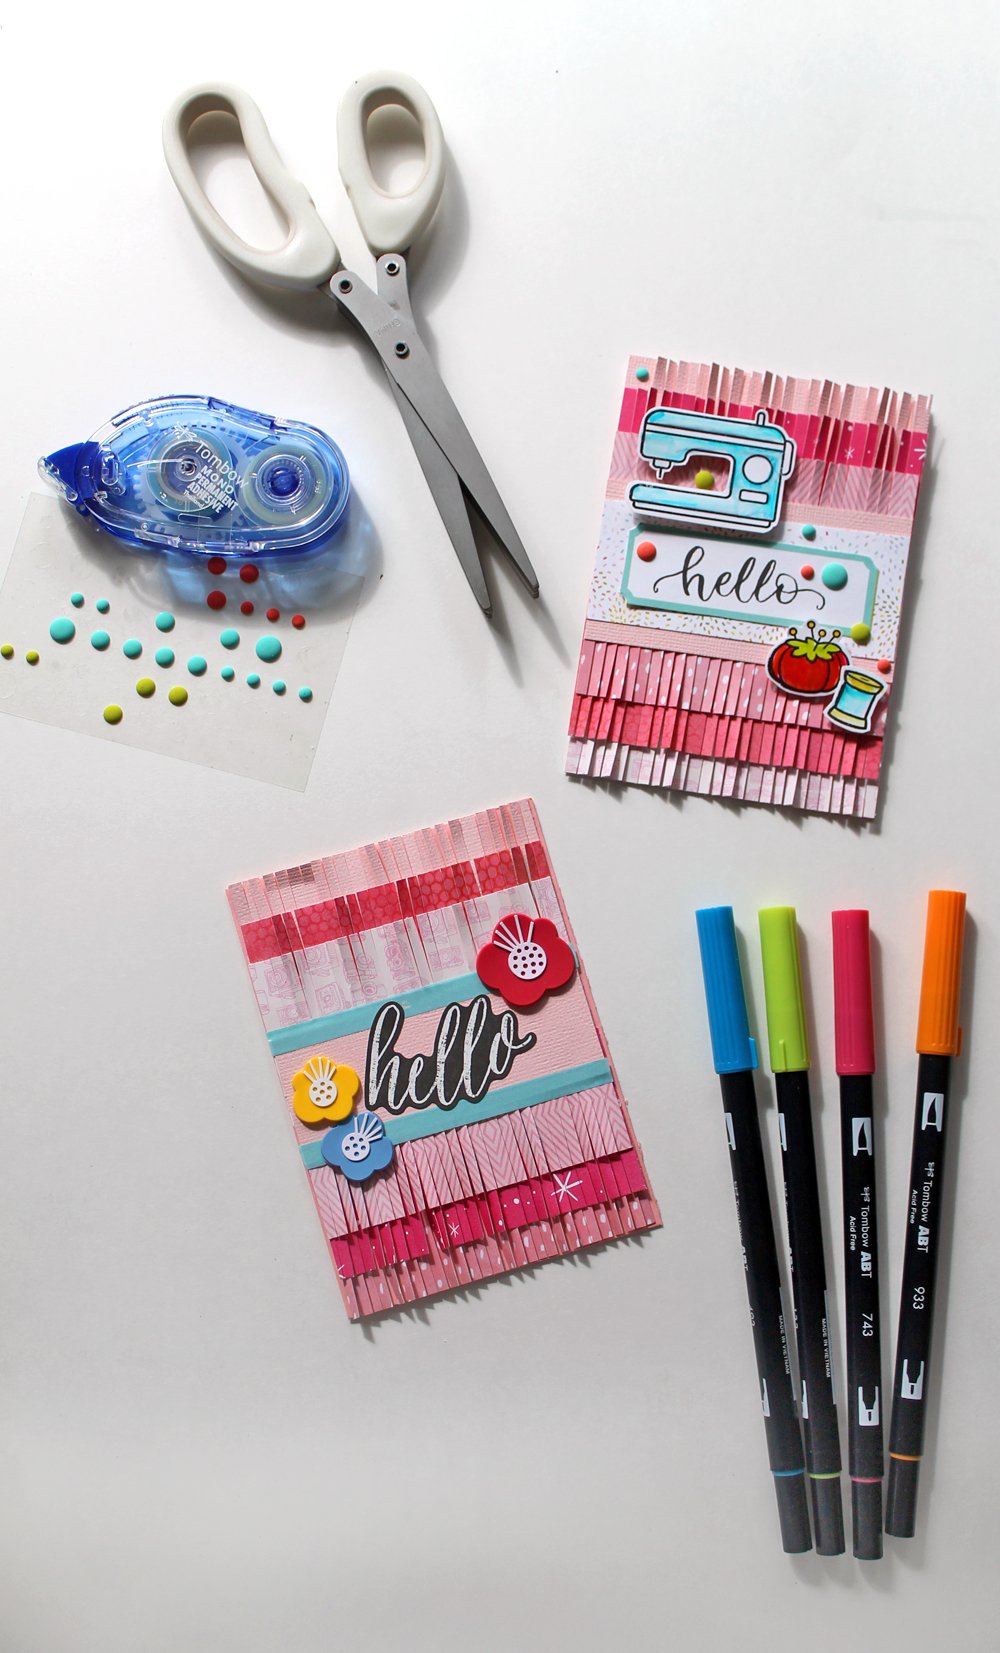
Hey y’all, it’s Katie here with a fun new project! Today I want to show you how to make fringed cards! Fringe and tassels are pretty trendy right now. I see a lot of them, especially on clothing, so I decided to fringe some paper for a unique 3D card!
How to Create a Paper Fringe Card:
Let me show you how I made these cards!
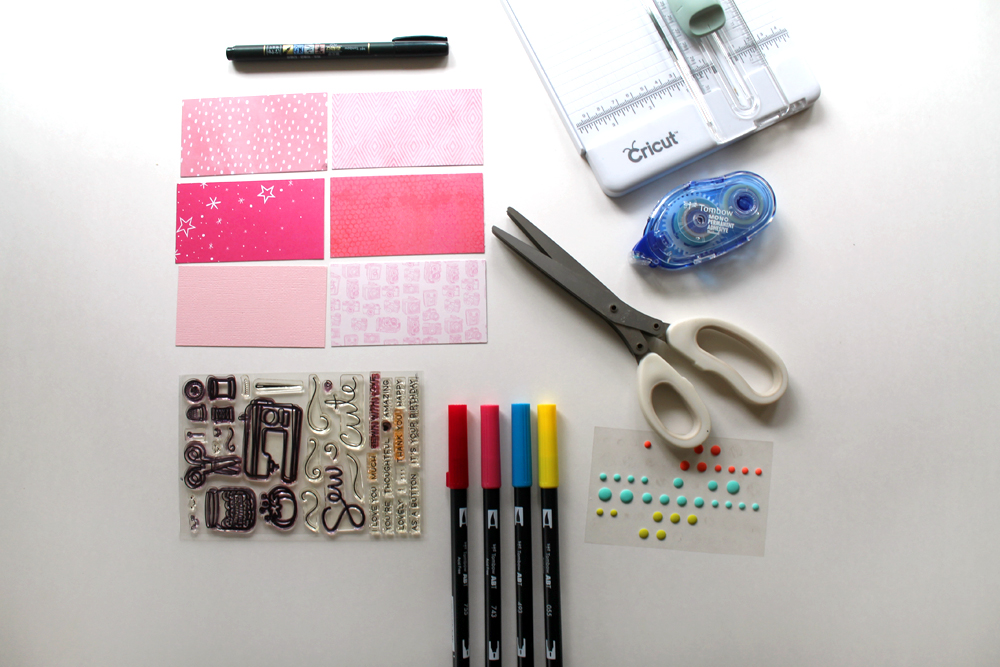
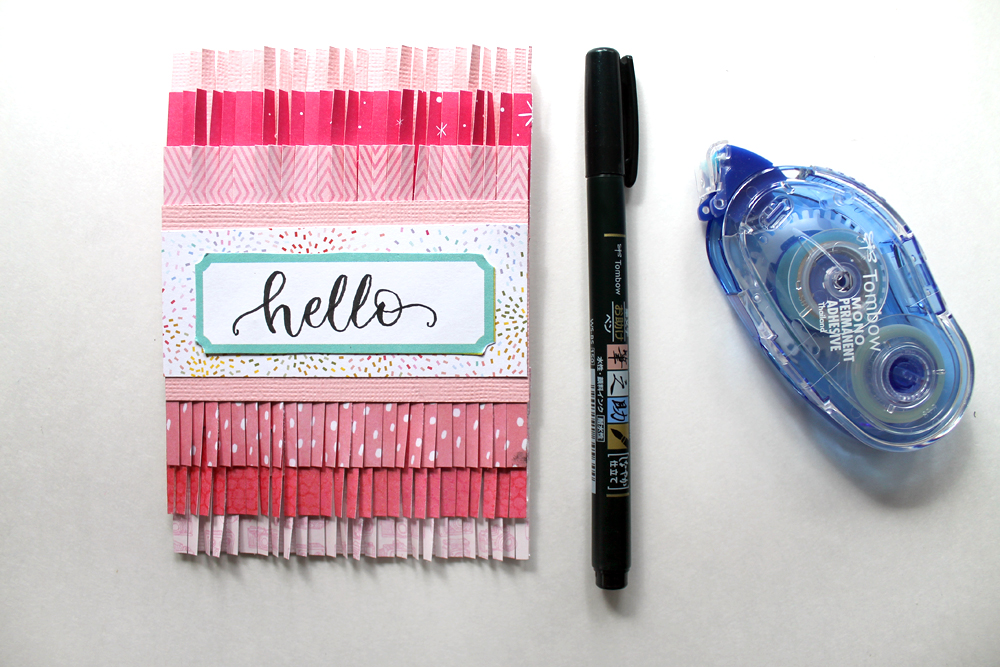
Supplies:
- Tombow MONO Adhesive+ Permanent
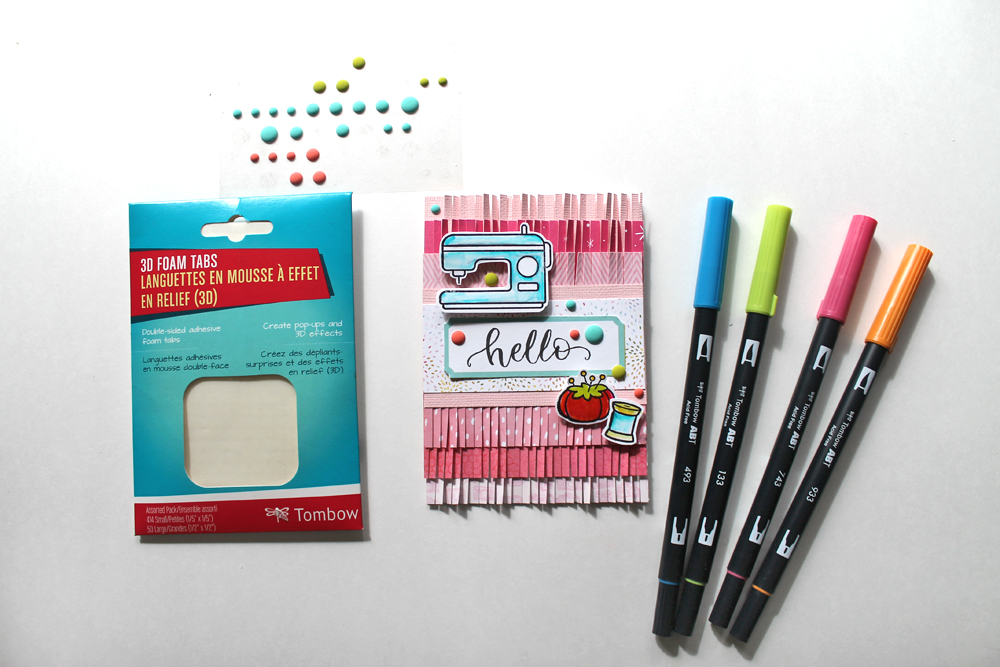
- Tombow Foam Tabs
- Patterned Scrapbook Paper
- Fringe Scissors (You can use regular scissors instead, but the fringe scissors make this project 1000x quicker!)
- Tombow Fudenosuke Brush Pen, Hard Tip
- Tombow Dual Brush Pen Bright Set
- Stamps & Ink
Step 1:
Begin by trimming your patterned paper down. My cards are 4×6″, so I cut 6 2×4″ rectangles of patterned paper for each card.
Step 2:
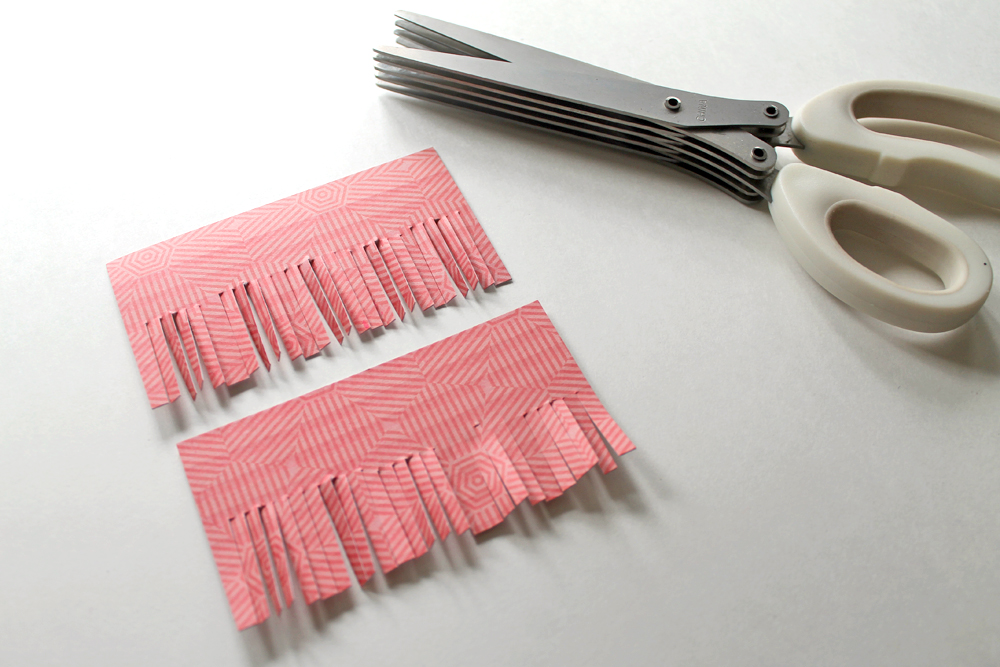
Time to fringe! I fringed the bottom 1″ of each of my paper rectangles. If you don’t have fringe scissors, you can totally use regular scissors and make cuts every 1/8th” along the bottom of your paper, it just takes a little bit longer.
Step 3:
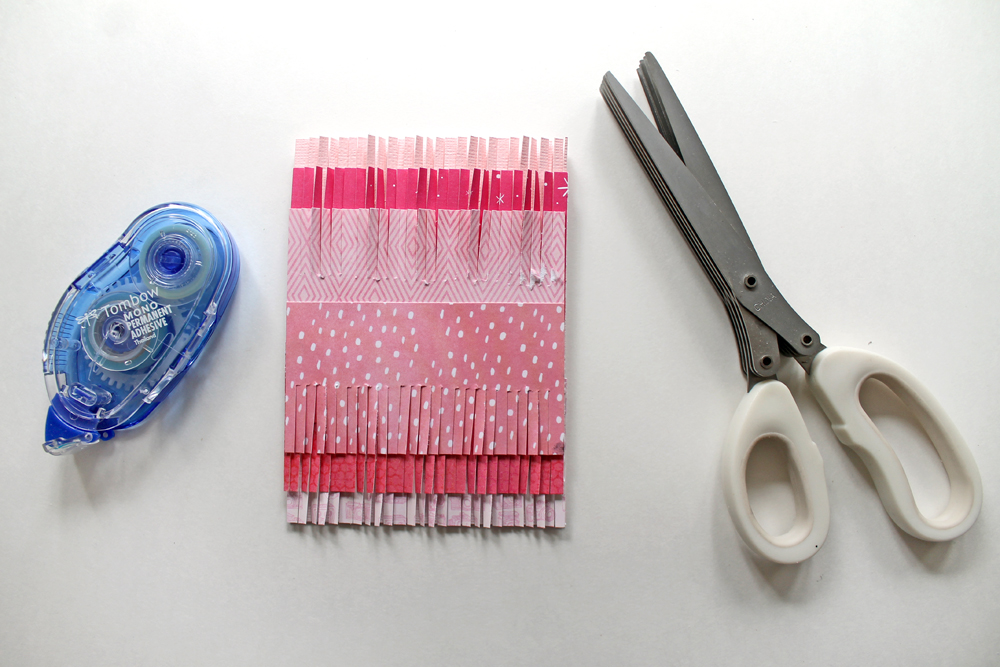
Apply MONO Adhesive+ Permanent to the back of the patterned papers and adhere them to the card base, placing 3 of them at the top, and 3 at the bottom. I only applied the adhesive to the uncut portions of the patterned paper, that way the fringe is loose and can stand up, but the papers are secure because of the strength of the MONO Adhesive+!
Step 4:
Cut 2 more pieces of patterned paper, one that is 2×4″ and one at 1.5×4″ and use the MONO Adhesive+ to adhere them onto the center of your card, between the fringe.
I also used a Fudenosuke to letter my sentiment onto a label sticker and placed it onto the middle of the card.
Step 5:
Continue adding any additional embellishments that you want. I liked the look of these sewing stamps, so I colored them in using the Dual Brush Pen Bright Set and popped them up with the 3D Foam Tabs to add even more dimension to the card, which layers nicely with the fringe.

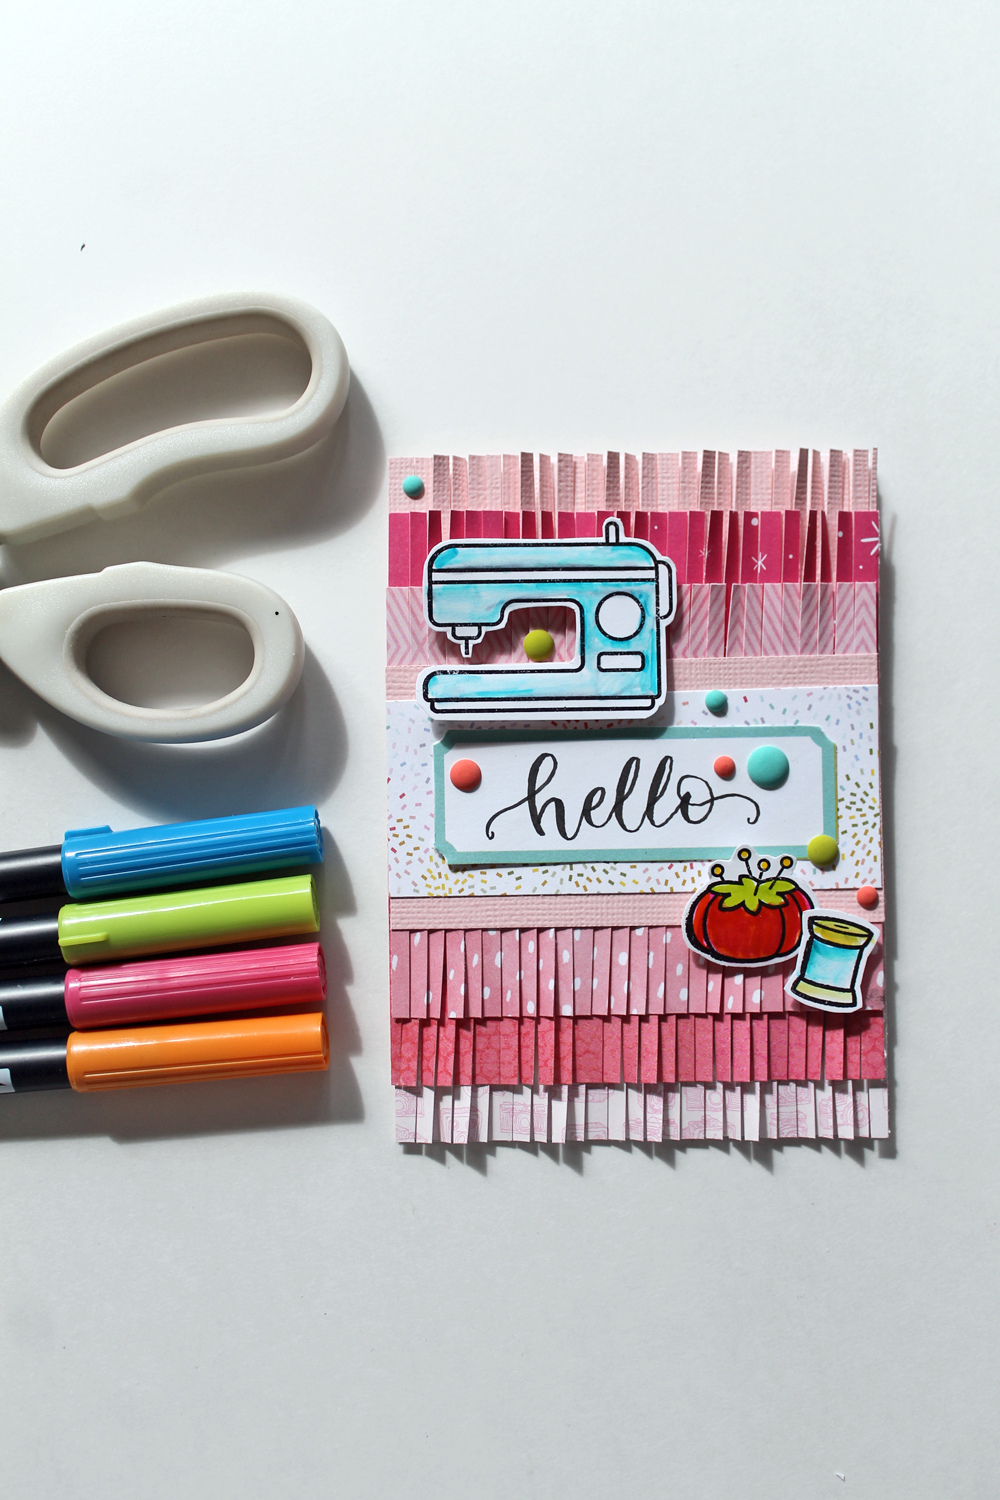
I send out a lot of handmade cards and I love trying out new techniques like this, so I hope you’ve enjoyed learning how to make paper fringe! If you’re looking for another fun card, check out these beautiful Floral cards by Smitha!