Spring is finally here! Hey everyone, it’s Mandy from @a_heartened_calling! Today, I’m showing you how to create a tulip inspired spring watercolor wreath using Tombow’s Dual Brush Pens. When I think of spring, I am instantly reminded of the many years I anticipated my tulips springing up from the ground. Each year, I plant a different variety (Queen of the Night is my favorite!), and I’m always excited to see new colors make their springtime appearance. So for today’s project, I’m using tulips as my inspiration. I’m choosing a really pretty spring palette for our colors: different shades of pink and a little red. I’ll also show you three basic shapes to create as a base for our wreath. Let’s grab our materials and get started!
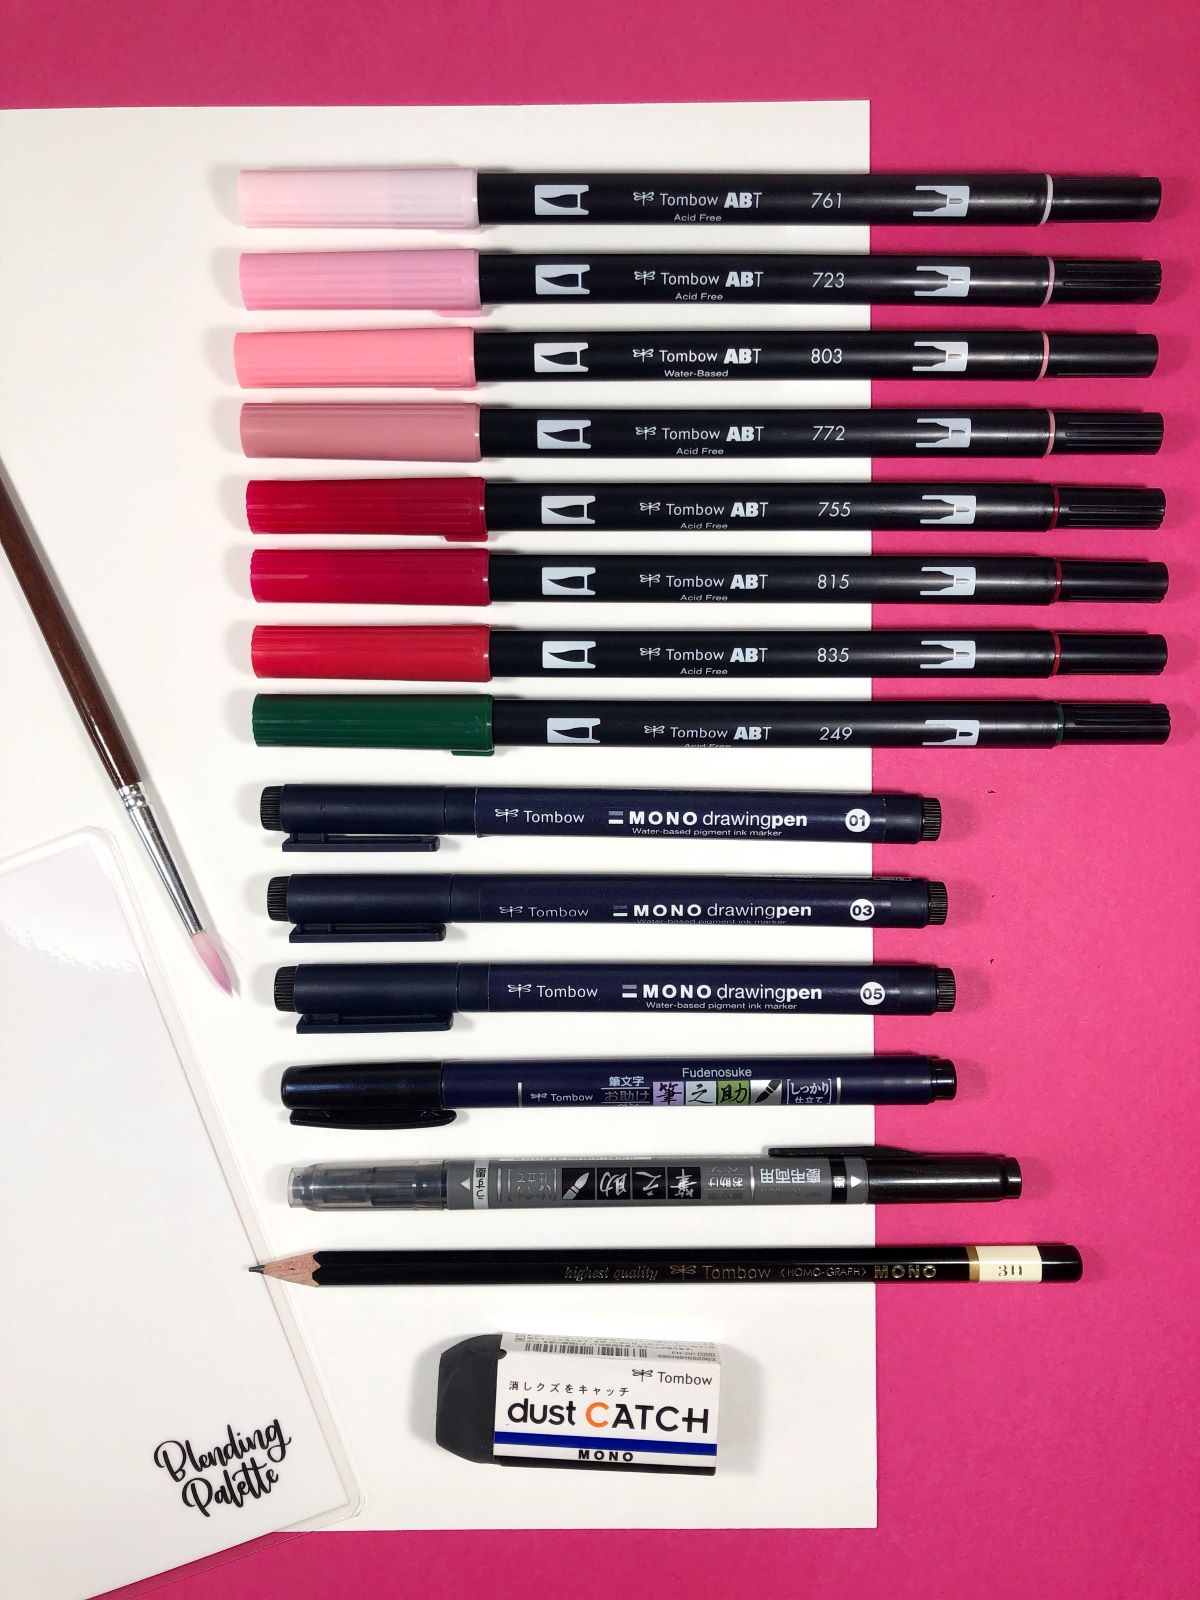
MATERIALS
- Piece of watercolor paper
- Tombow Blending Palette
- Paint brush, 6 round
- Cup of water
- Tombow Dual Brush Pens 761, 723, 772, 803, 755, 815, 835 and 249
- Tombow Fudenosuke Hard Tip and Fudenosuke TwinTip
- Tombow MONO Drawing Pen Set
- Tombow MONO Drawing Pencil 3H
- Tombow Dust Catch Eraser
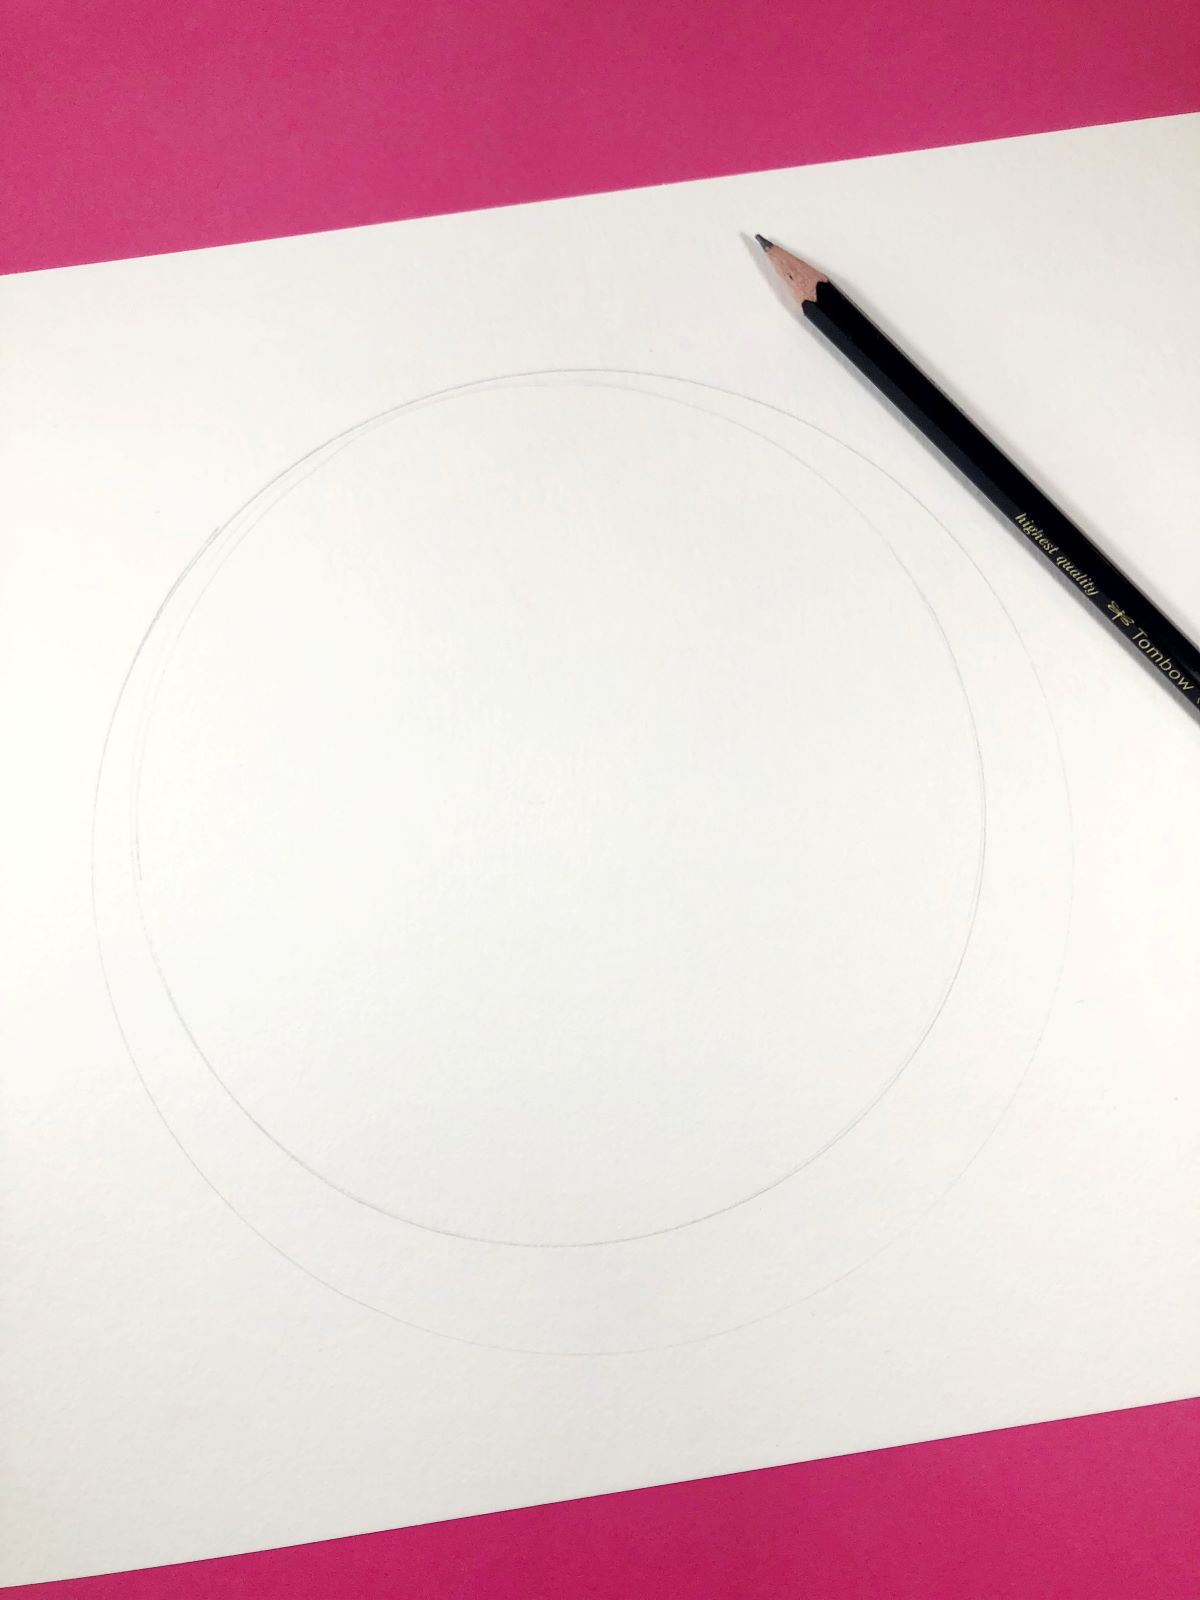
STEP 1 – Sketch It Out
To sketch out our wreath, I’m using the MONO Drawing Pencil 3H. We will be lightly erasing our pencil lines, so you’ll want to use a pencil with a harder lead. Any of the lower scale H grade pencils will work (2H, 3H or 4H). These have the hardest lead, show up the lightest and erase much easier. If you’d like to learn more about the different grades of pencils, check out this post: MONO Drawing Pencil Set Basics with Beth.
With your 3H pencil, trace a bowl onto your watercolor paper. I traced a second bowl that was slightly larger around than the first and brought the bottom down just a tad. I wanted my wreath to look a little more full on the bottom.
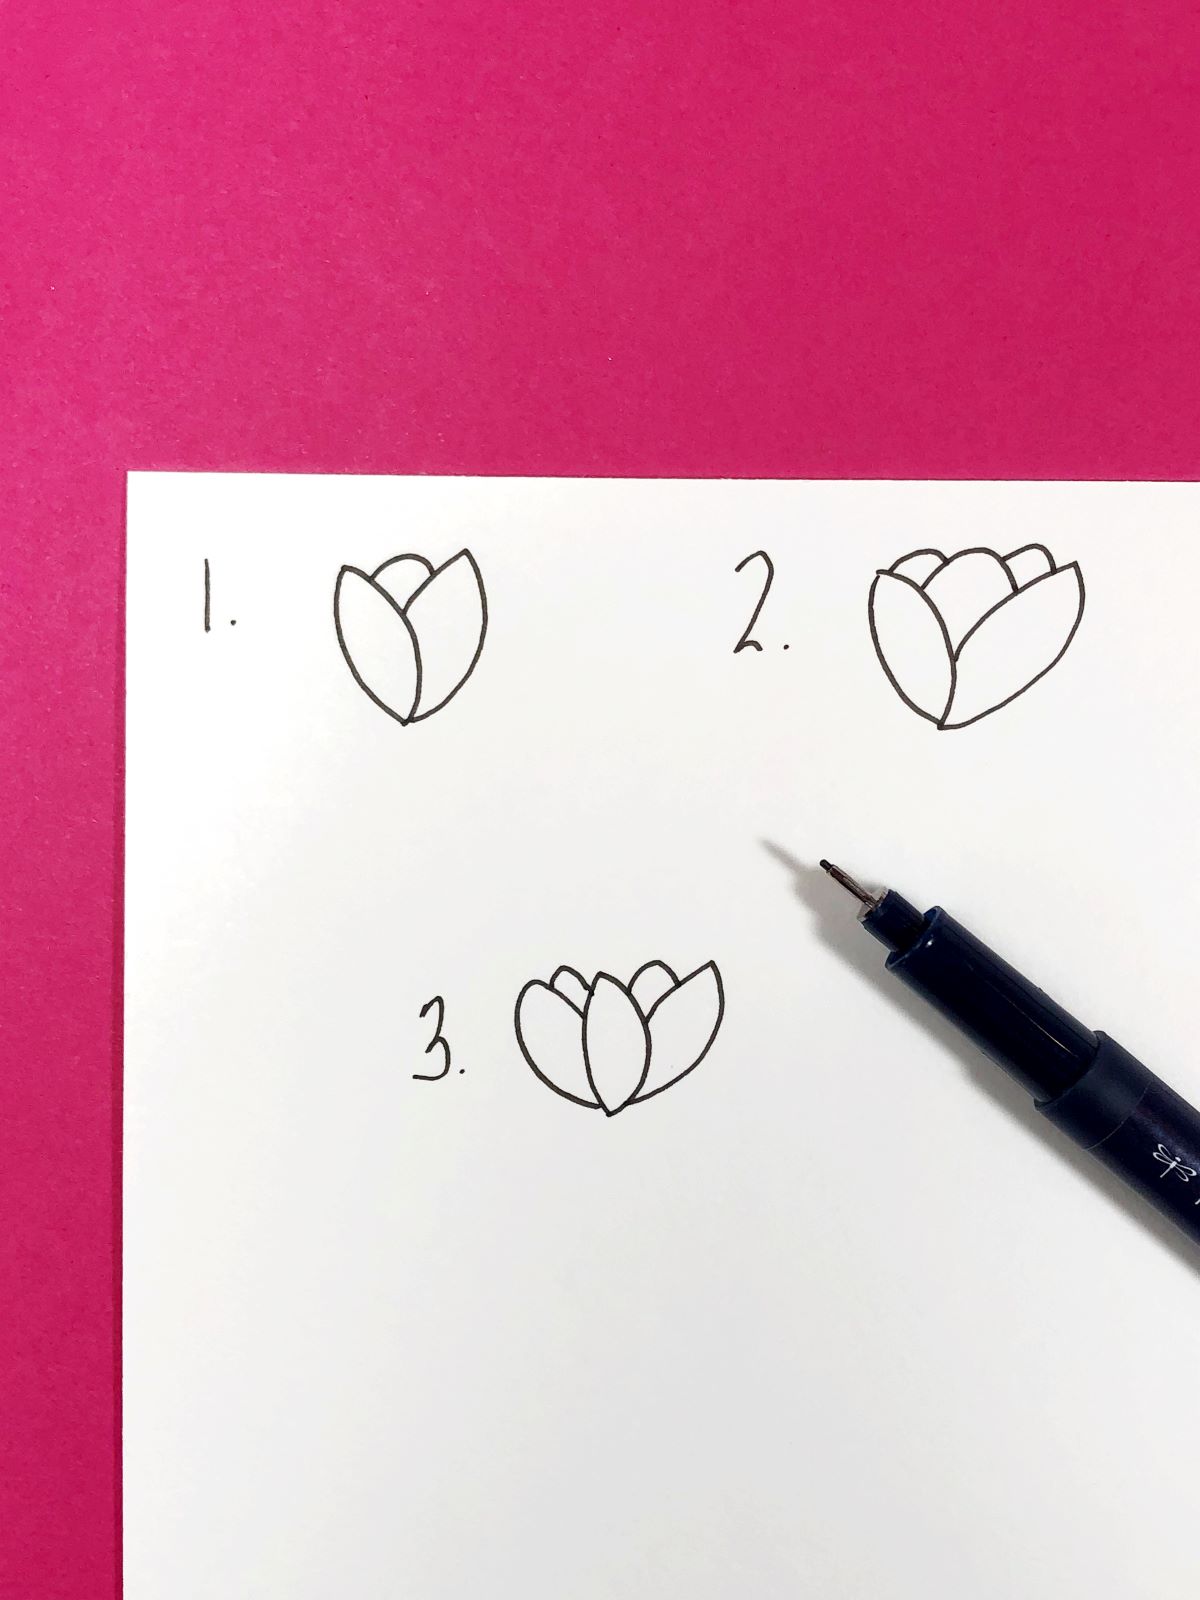
Tulips can look complicated to draw, so below are three really easy basic shapes. We don’t need to make these flowers complicated. Just simple shapes will create a beautiful flower! If you don’t feel comfortable drawing tulips, practice creating these shapes!
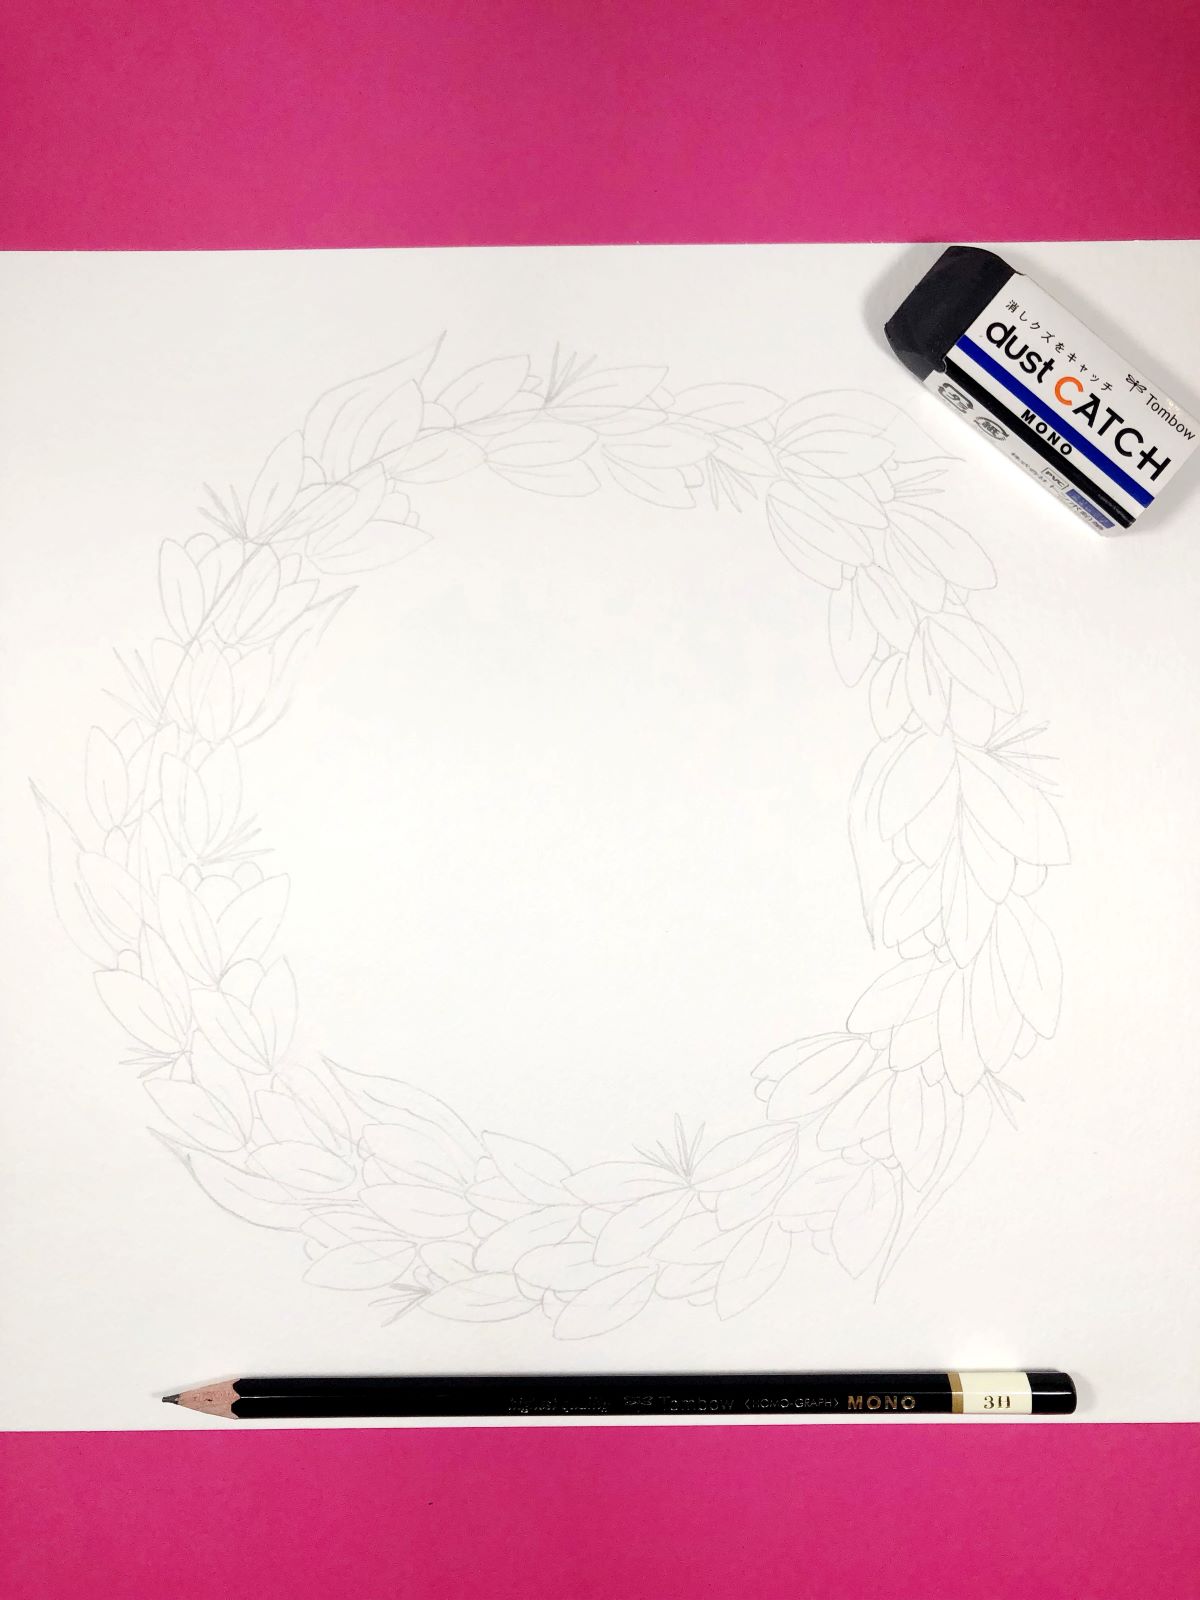
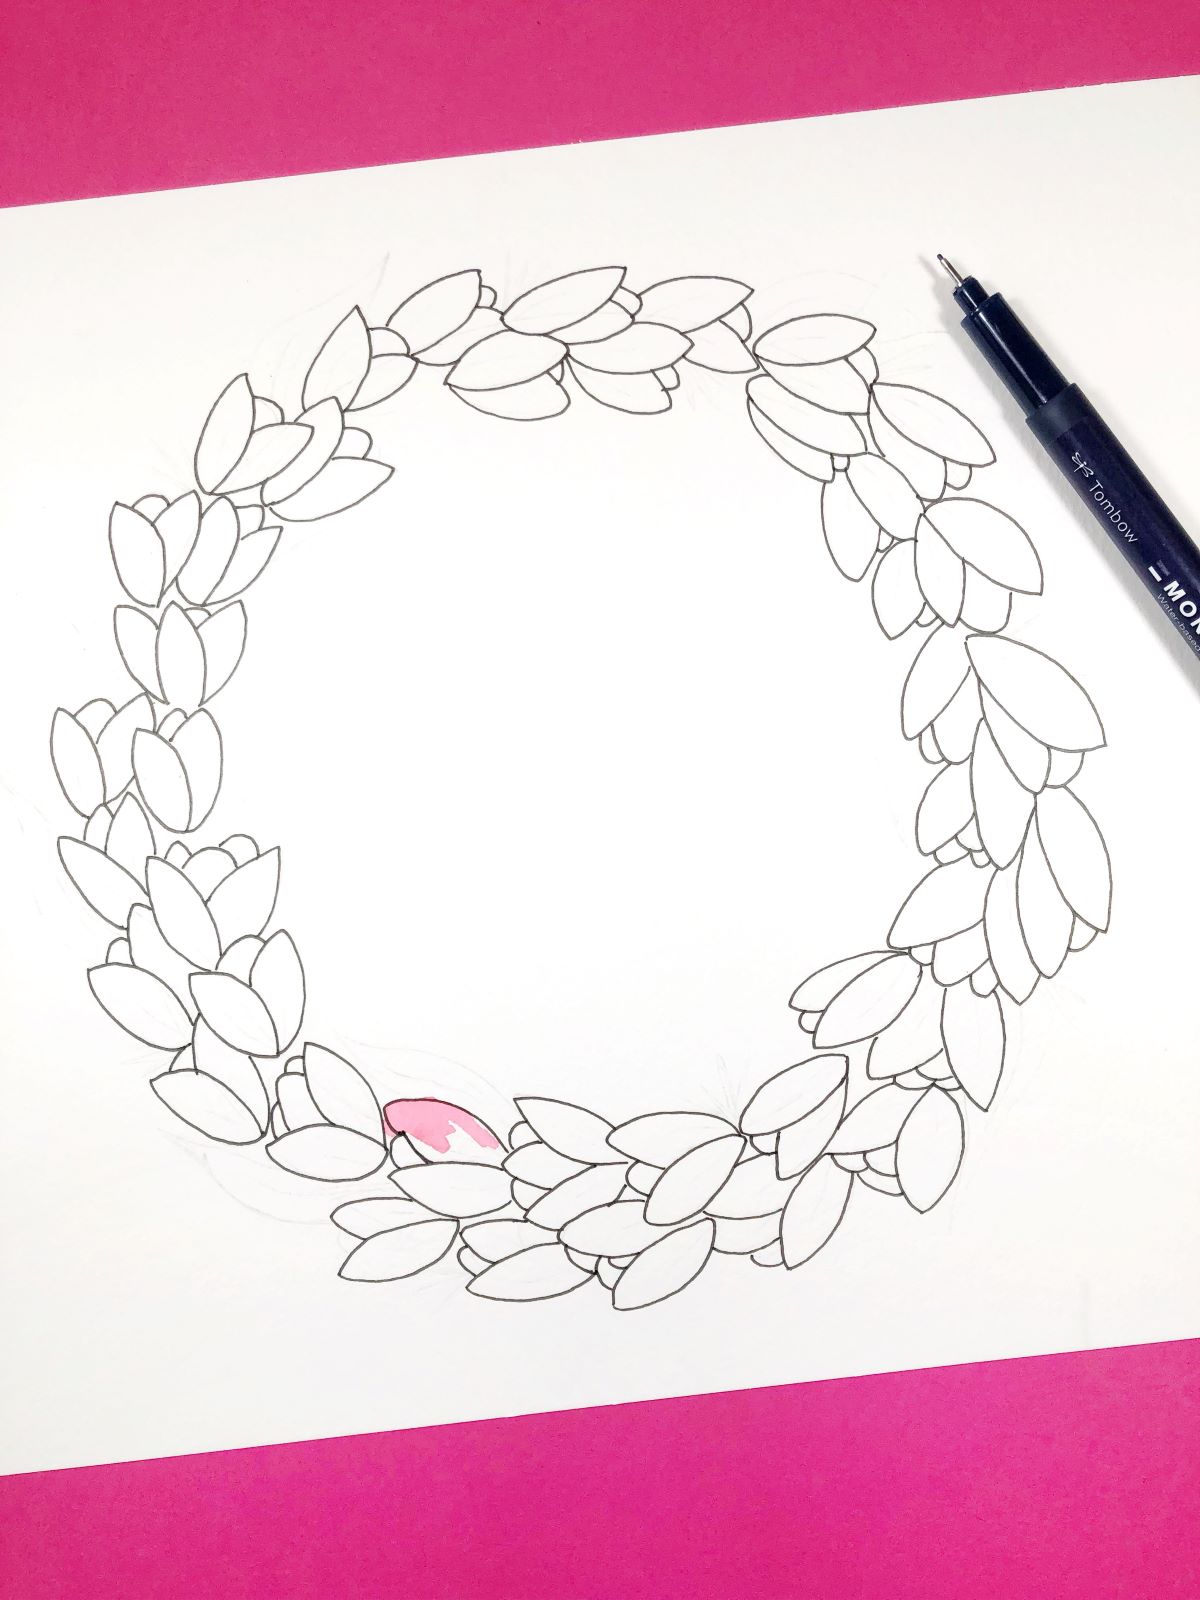
Now that you’ve practiced, sketch out your tulips along the 2 circles. Draw the tulips going in one consistent direction. Add leaves and shoots of grass in random spots to add some greenery. Then LIGHTLY erase your pencil lines with the MONO Dust Catch Eraser. You want to erase the dark parts of your sketch but still be able to see your guide lines.
STEP 2 – Add Watercolor
Before we begin, I want to show you a quick tip. This wreath is not a loose floral wreath. It will have detail and we will be outlining all our florals. Because of this, if you were to paint over your pencil lines, you wouldn’t see them very well (especially with the darker colors as you can see below).
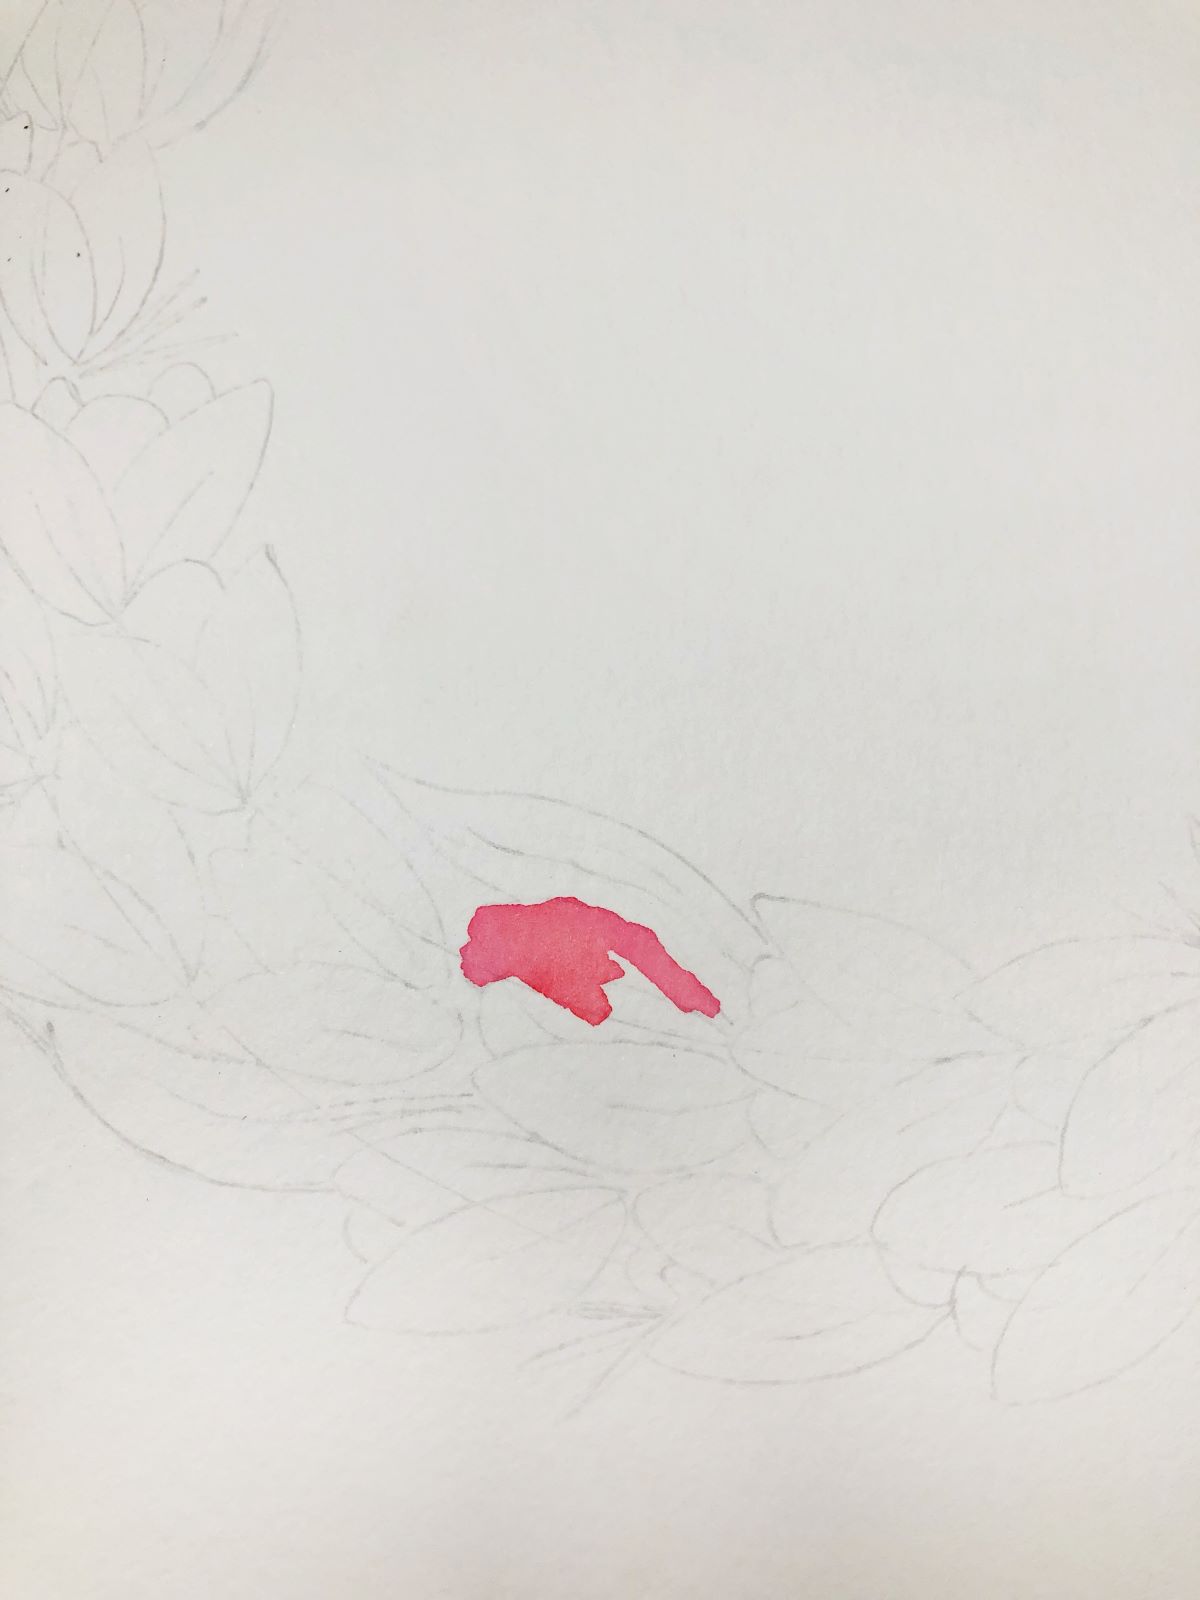
To avoid this, trace over your tulips with the MONO Drawing Pen 05 or 03. Give it a few minutes to dry. These pens are water based, so if it doesn’t dry completely it will bleed when you add water to your tulips. Now you can see your tulips much better!
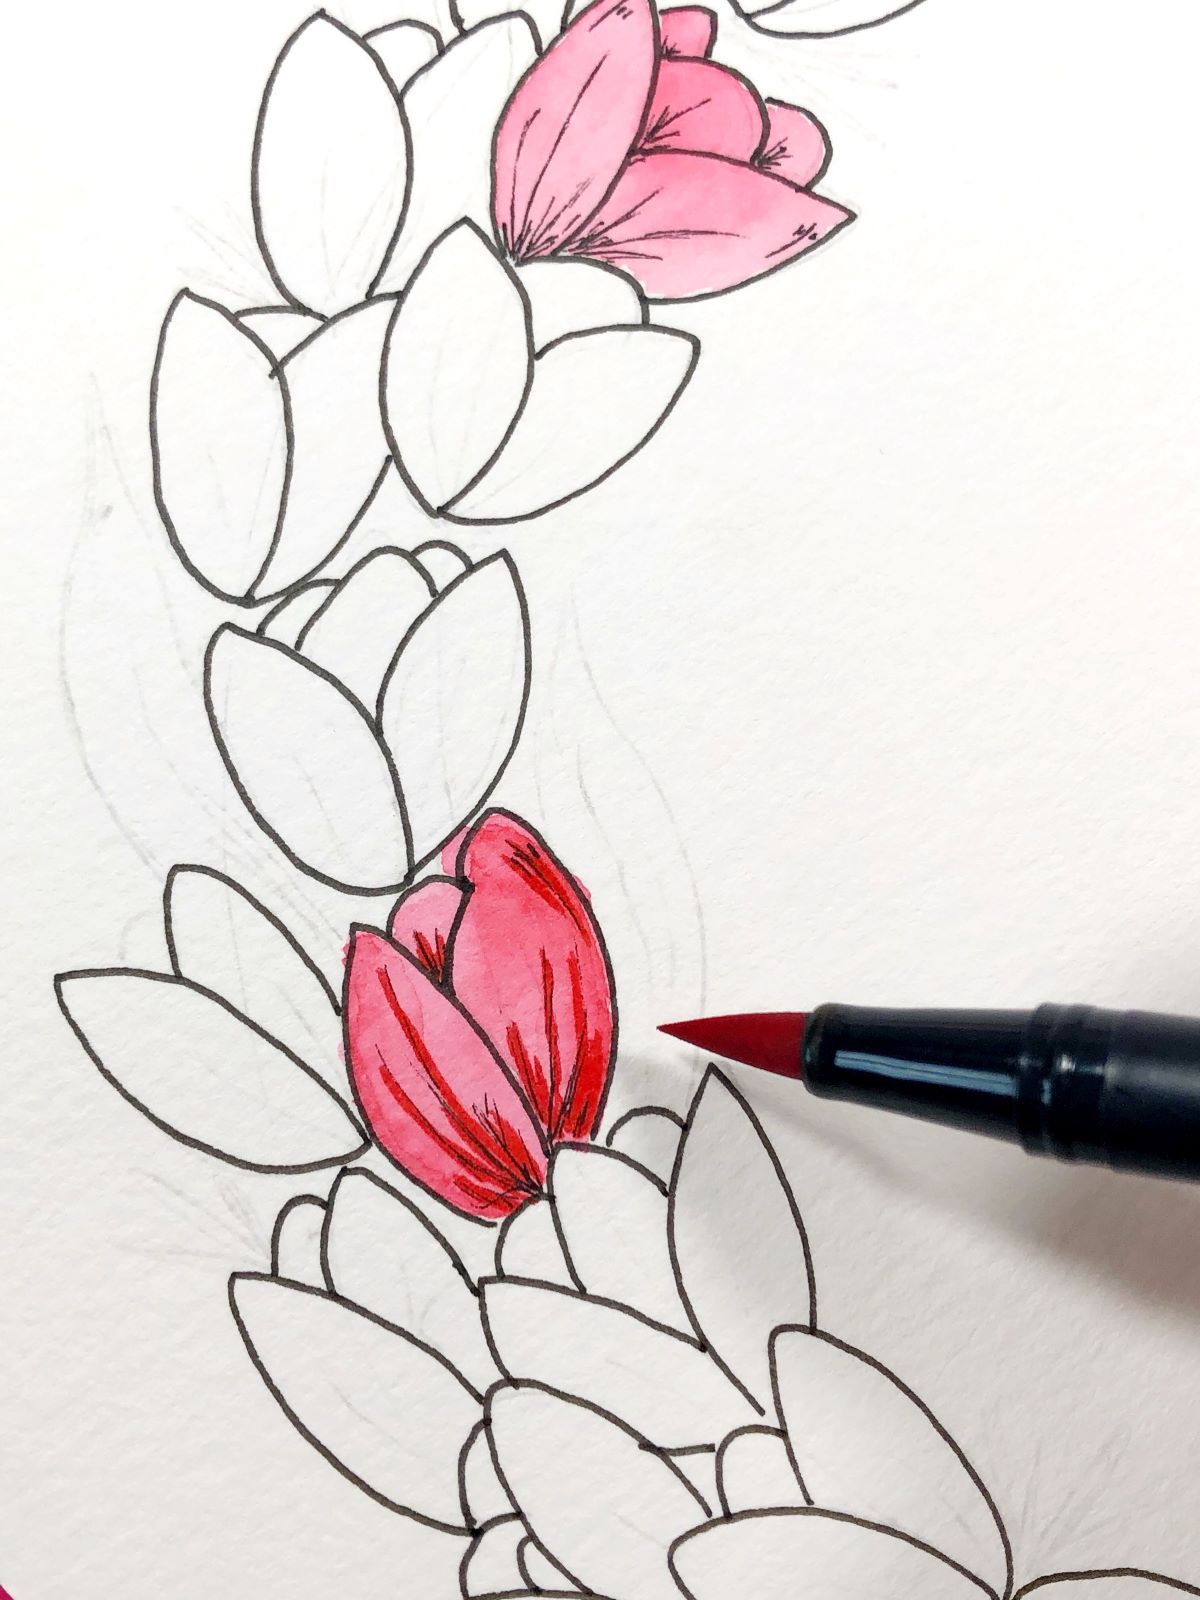
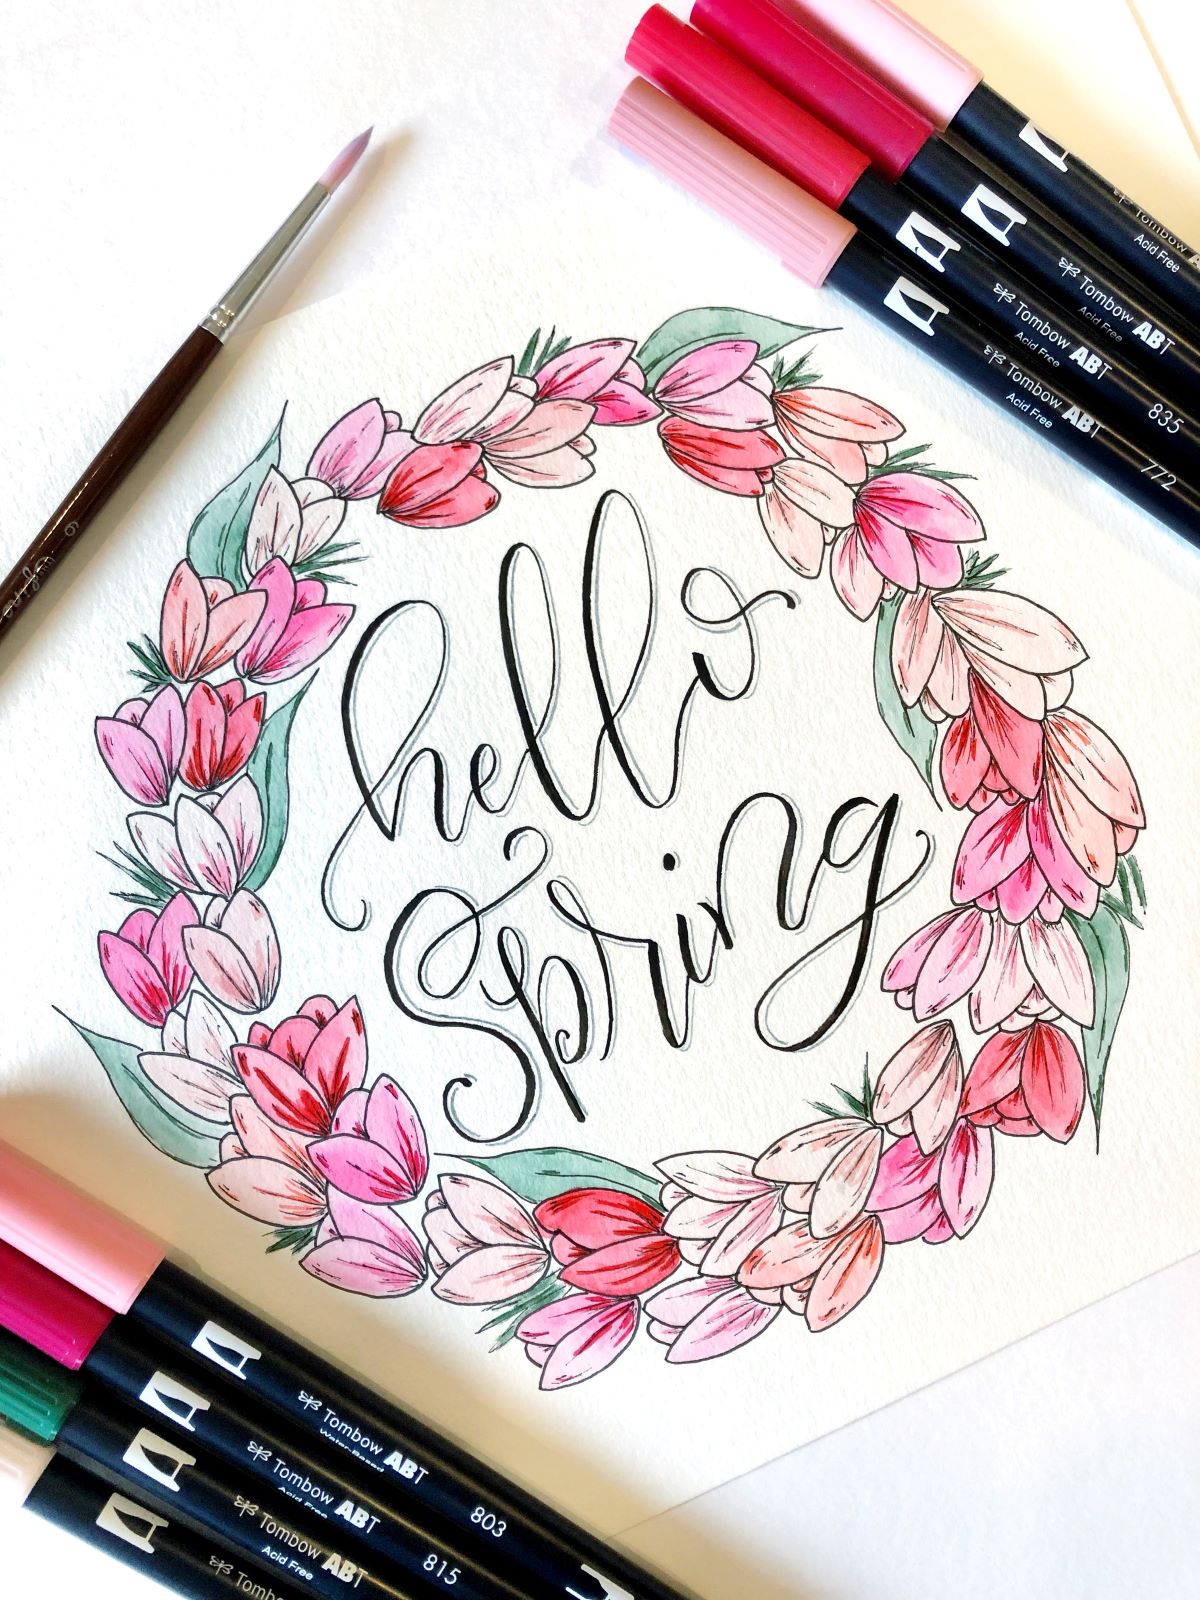
We are going to start with our darkest color first, then work our way up to the lightest color. Using Dual Brush Pen 835, scribble ink onto the Blending Palette. Using a wet paint brush, pick up the ink and paint in random flowers. It’s up to you how much you want the darker colors diluted with water. I didn’t dilute the two darkest colors as much, since I wanted to have a nice pop of darker color in the wreath. A tip with water: dip your paint brush in water then quickly dab it onto a paper towel to remove just a tad of the water. This will help keep the color.
Once the color has dried, use MONO Drawing Pen 01 and add shadow detail to your tulips. It works best to do really quick flicks upward, following the shape of each petal.
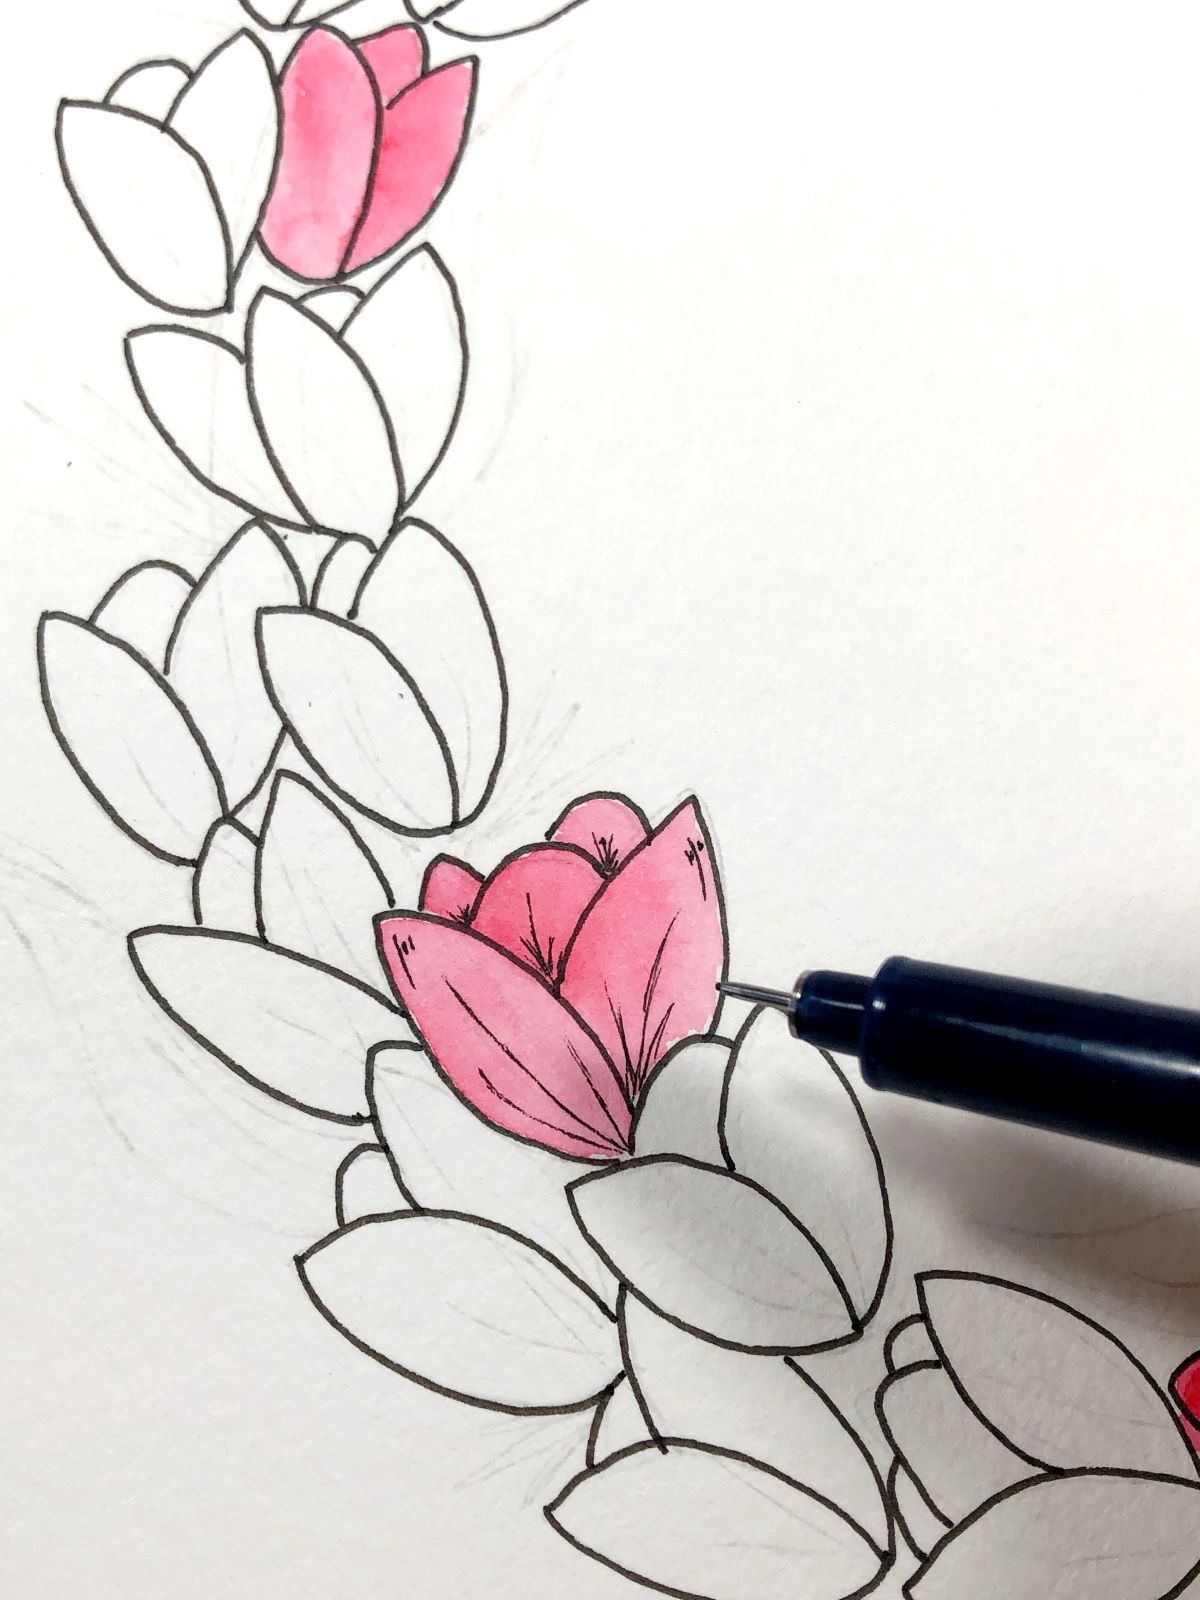
Then use the brush tip of the same color Dual Brush Pen 835 to add some color depth. Try to use the very tip of the pen to do quick flicks upward, starting from the bottom.
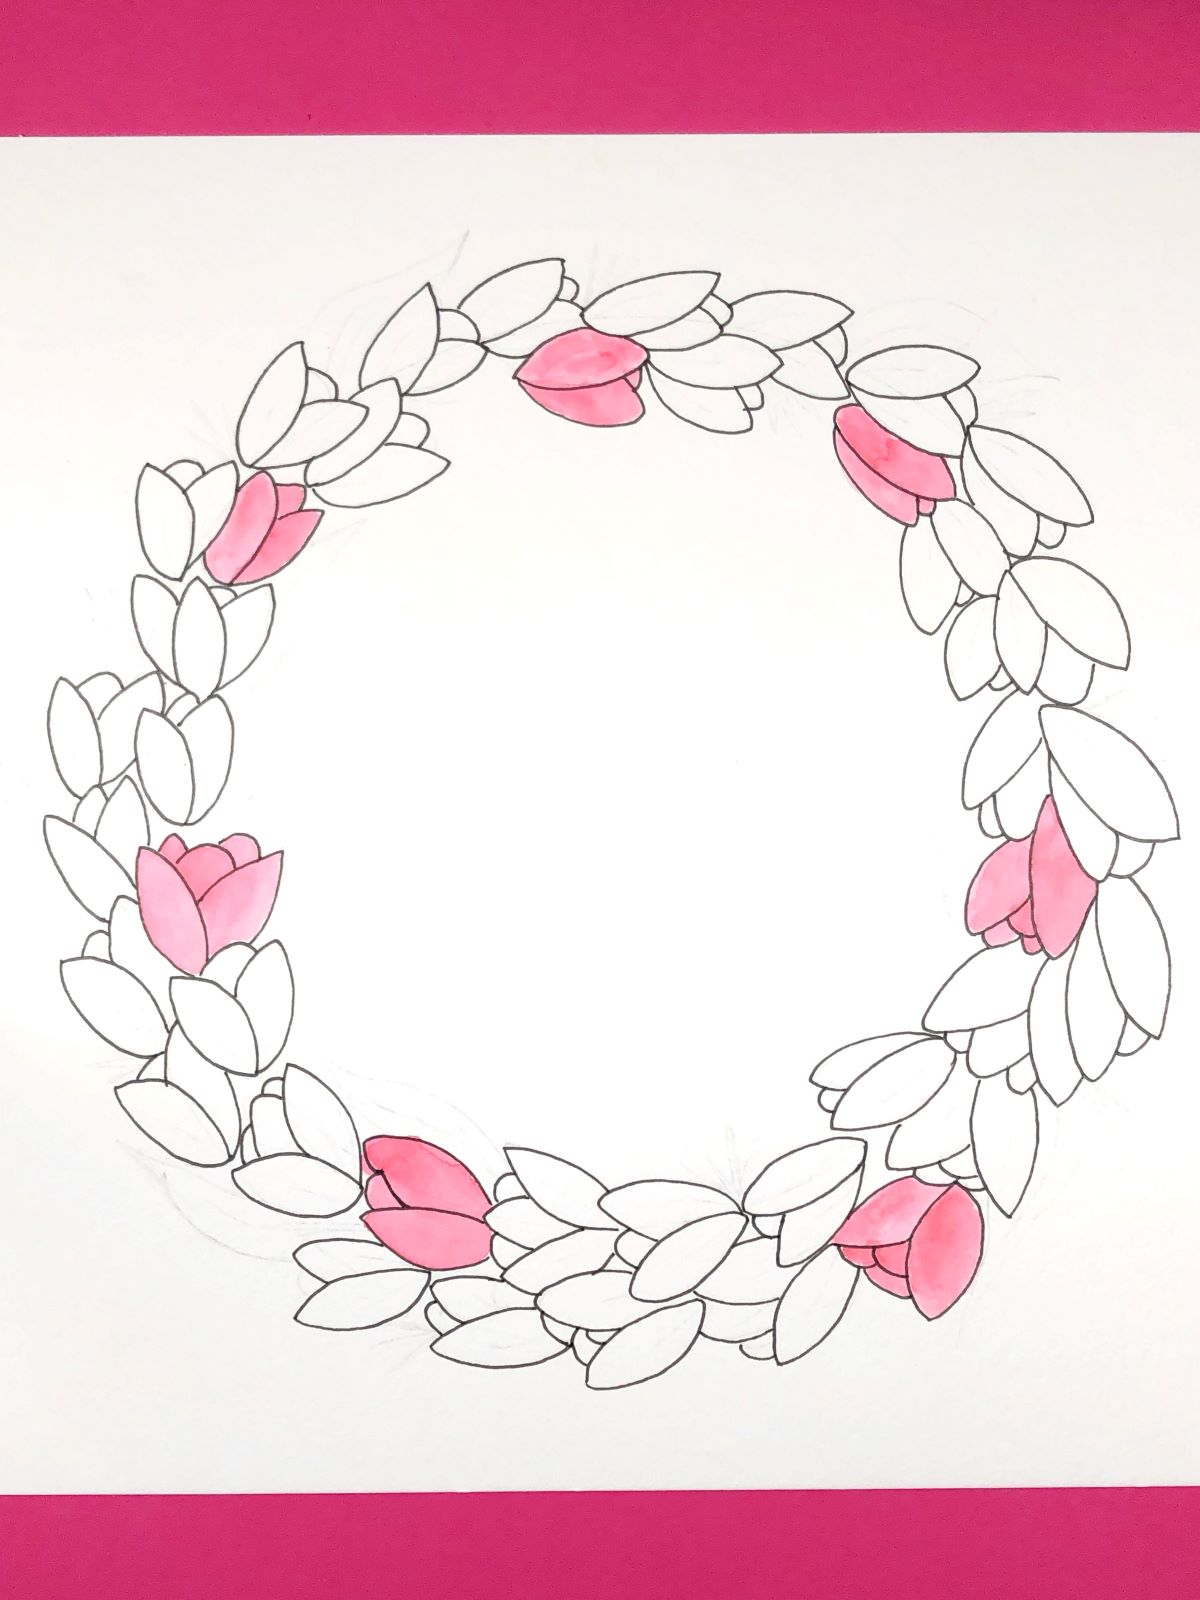
STEP 3 – Repeat For Each Color
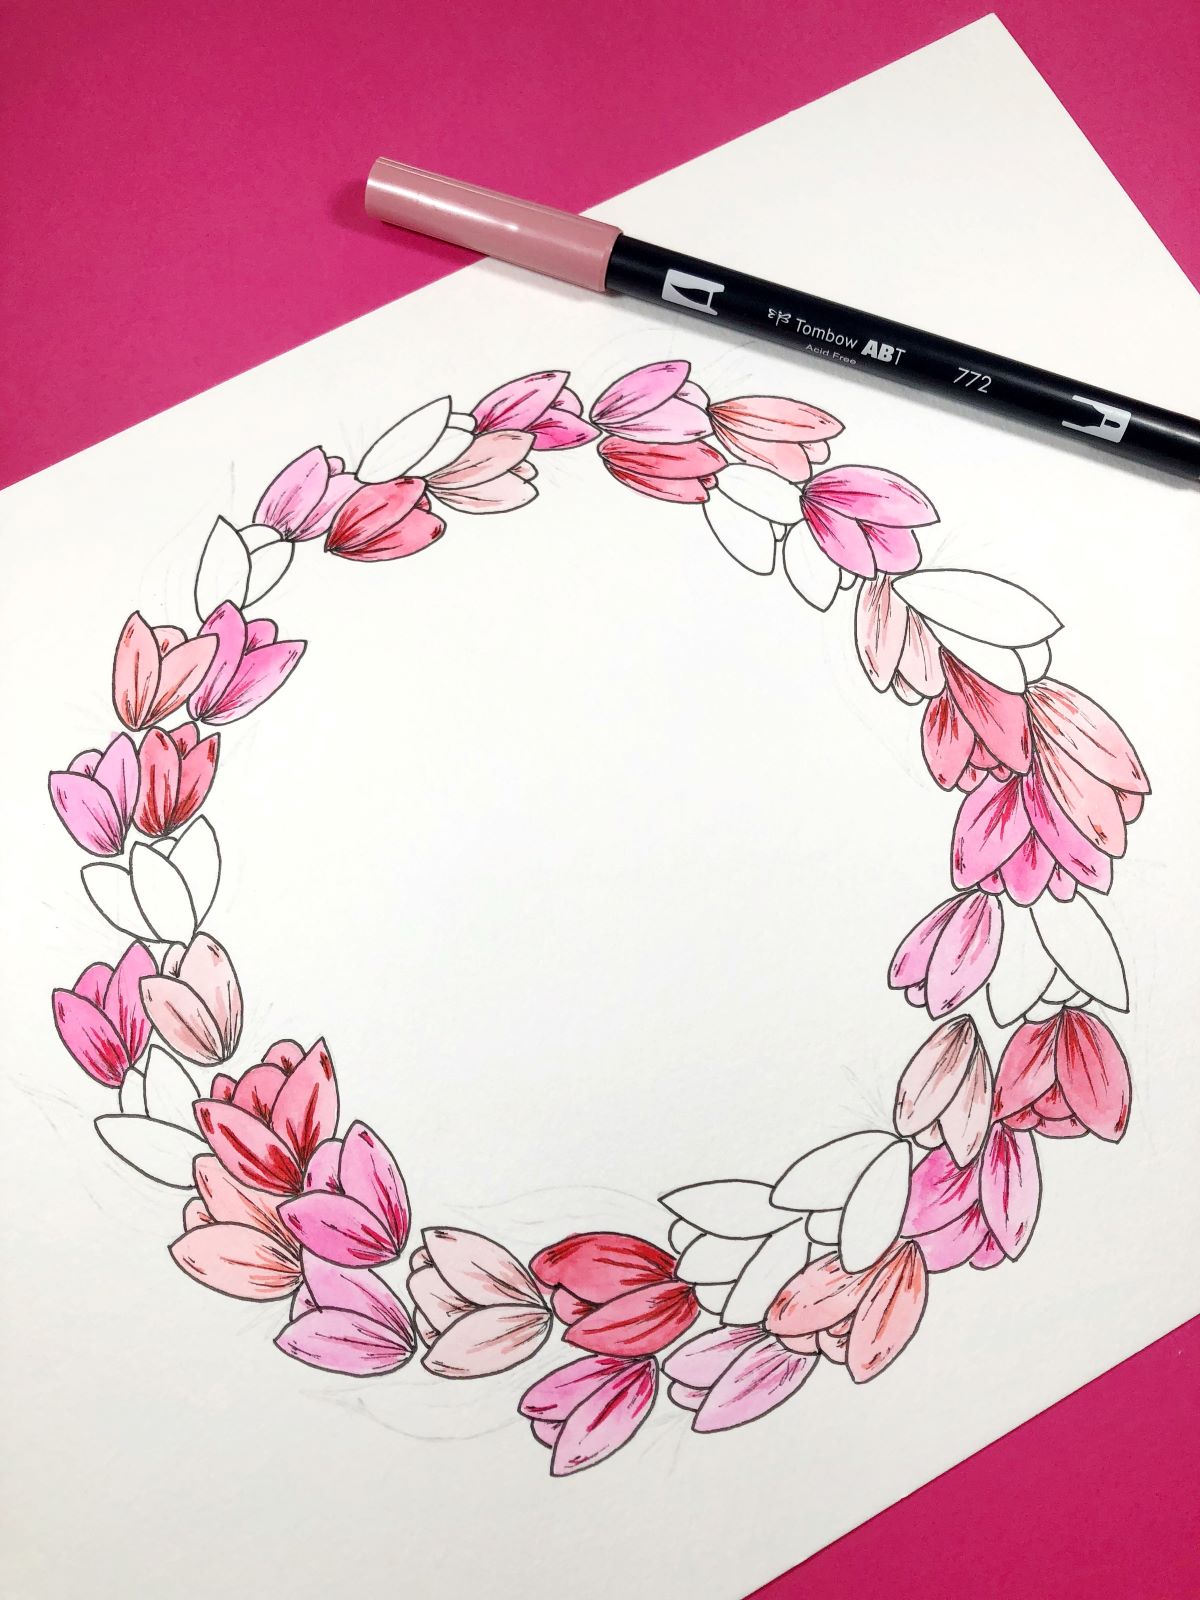
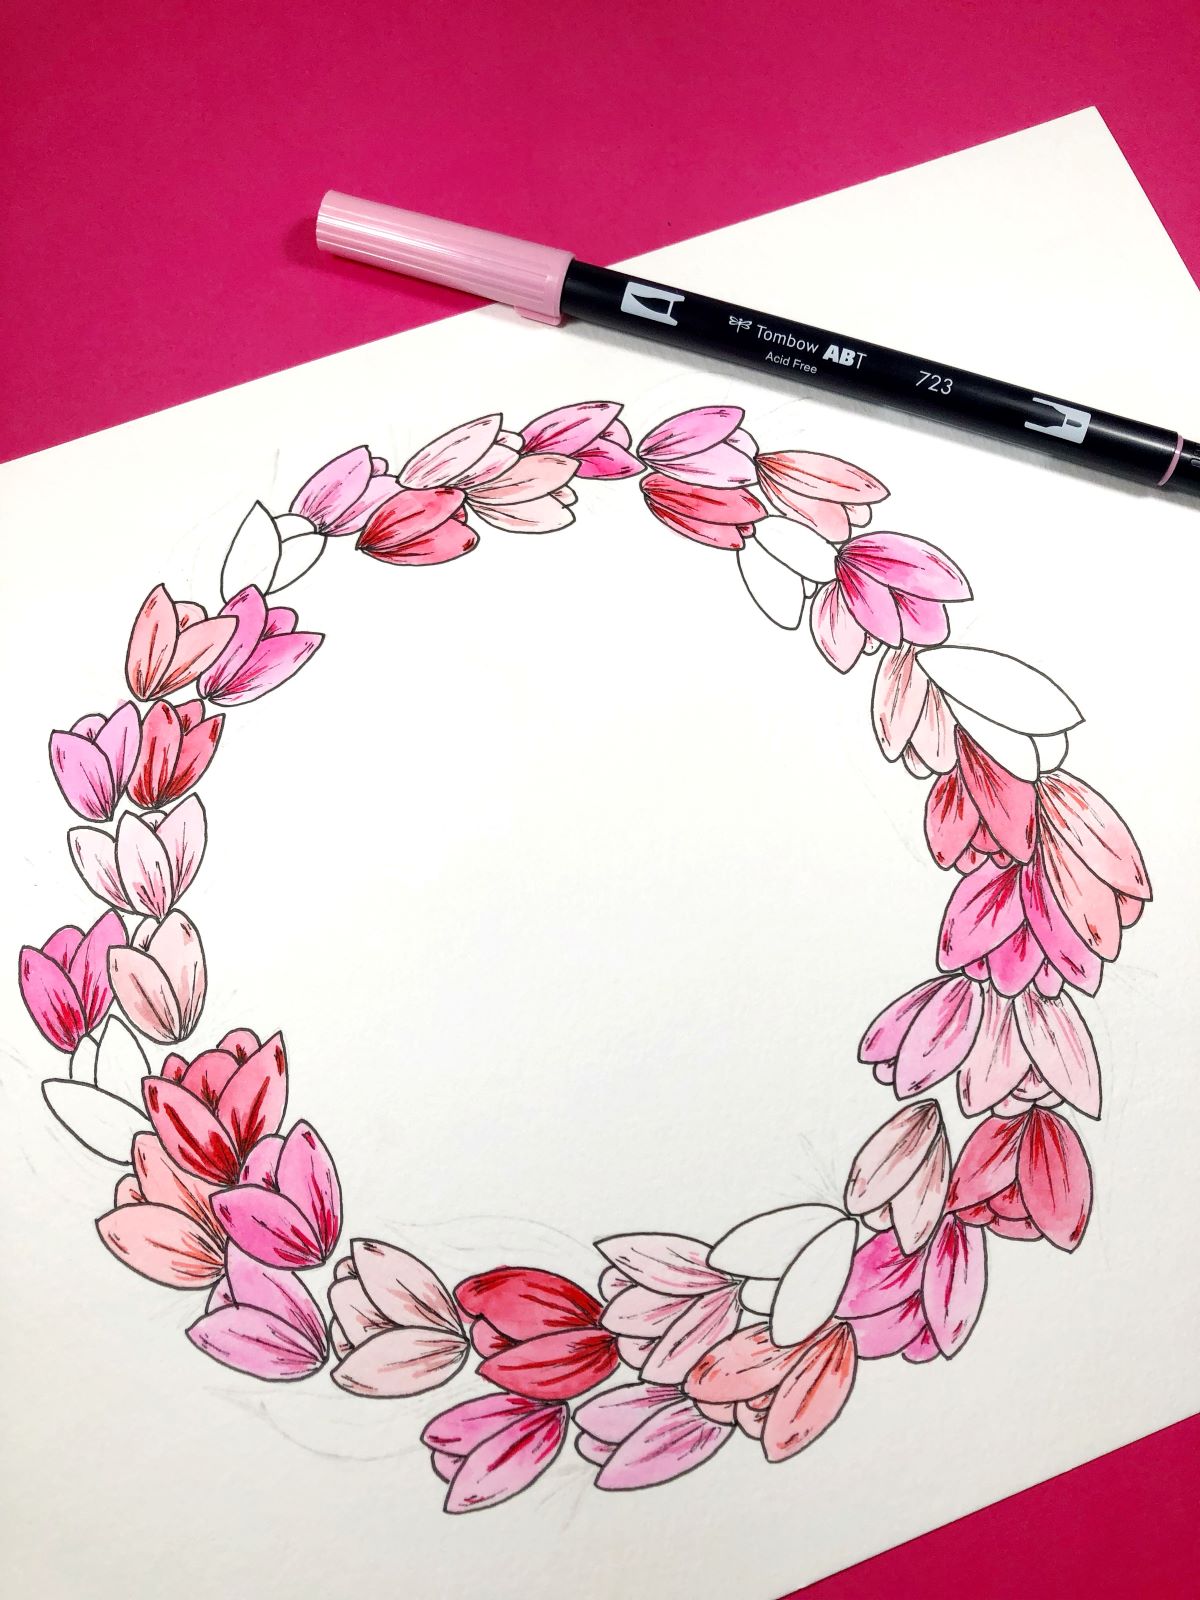
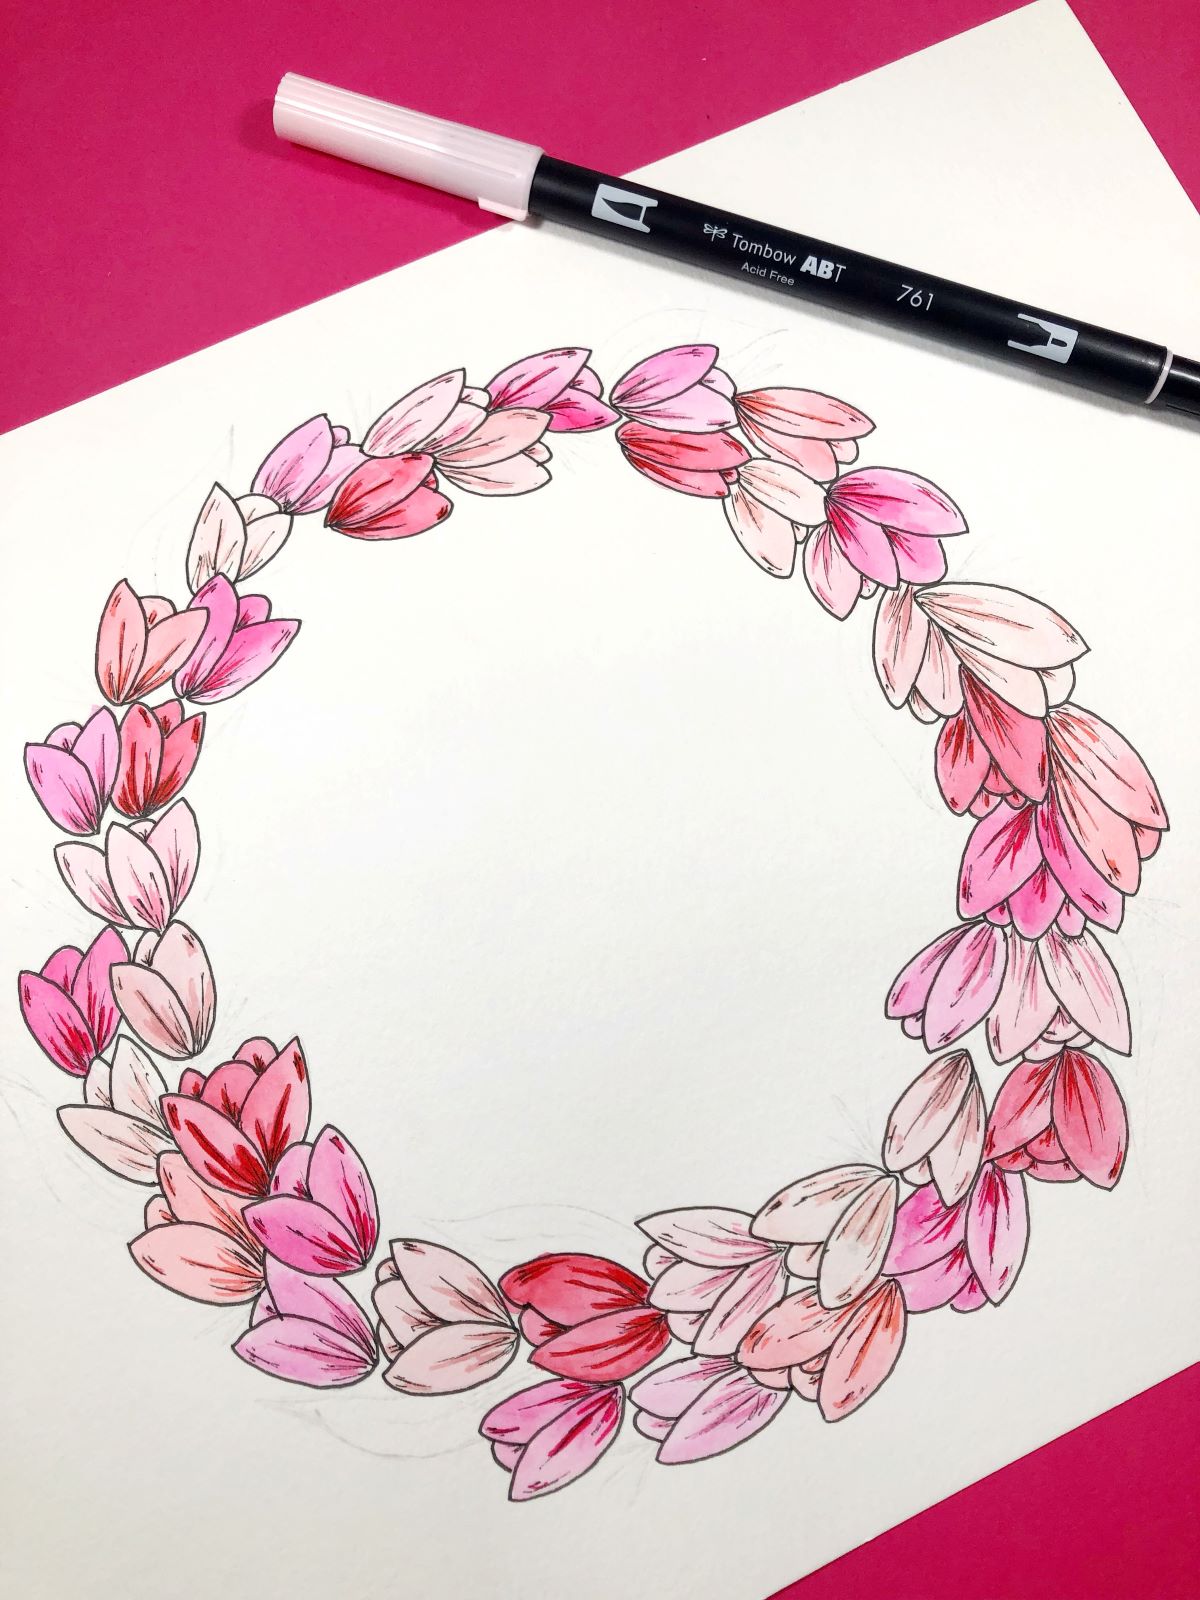
Now that one color is done, repeat this process for all the other Dual Brush Pen colors until all your tulips are painted in. Here are the progress shots after each color was added and details were drawn in.
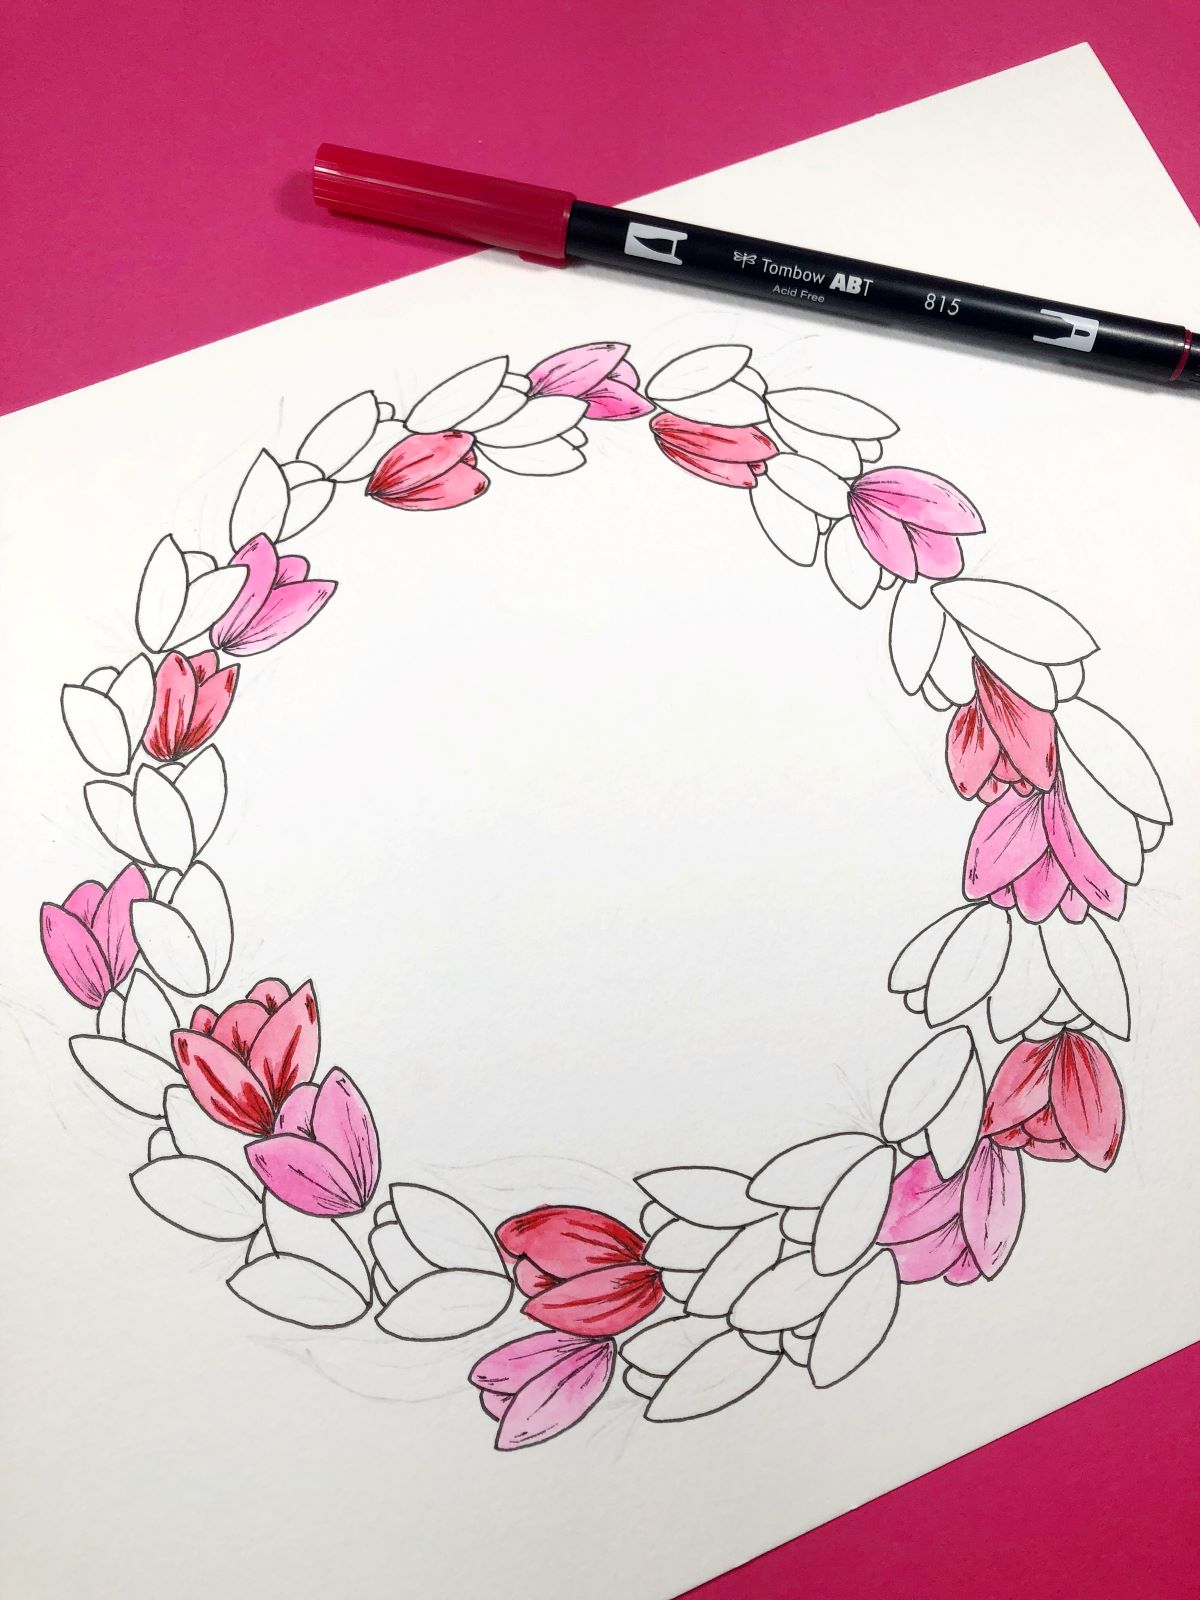
Adding Dual Brush Pen 755. I actually diluted this color a bit. This color can look similar to the above color 815, so I added a bit more water to make it look lighter.
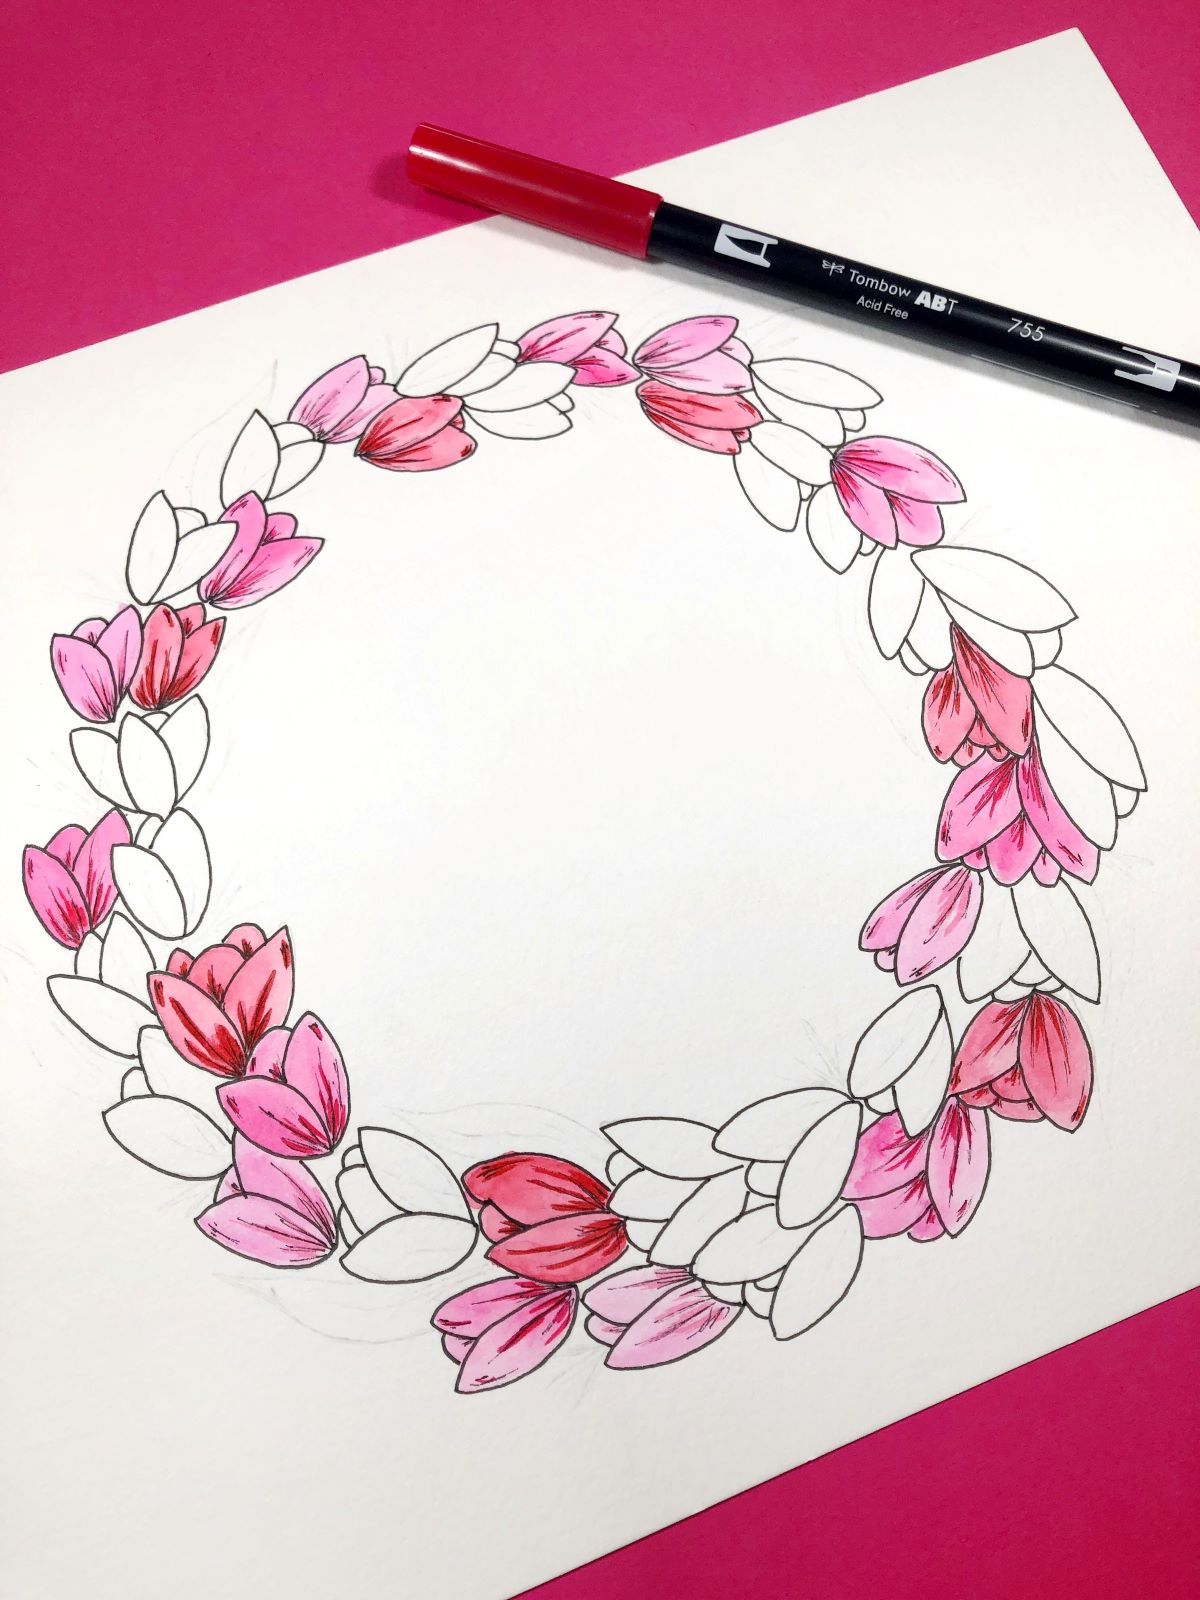
Adding Dual Brush Pen 803…
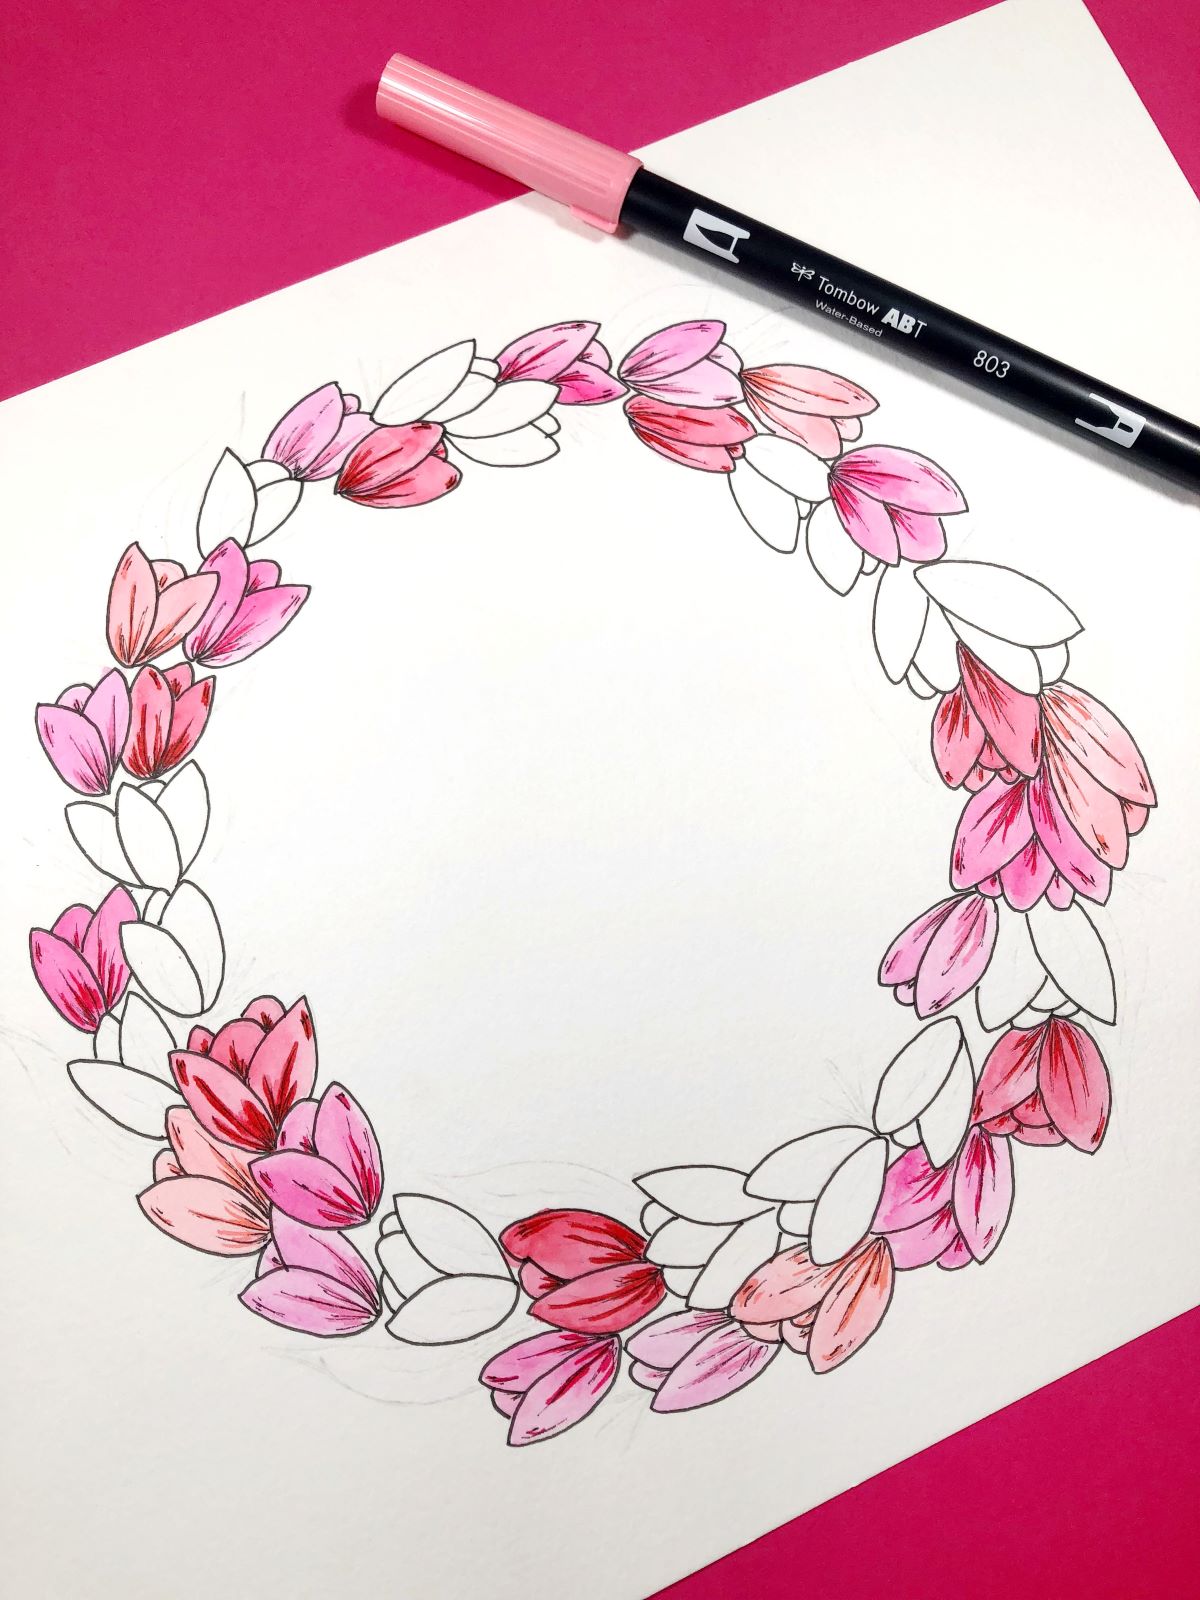
Adding Dual Brush Pen 772…
Adding Dual Brush Pen 723…
Adding Dual Brush Pen 761…
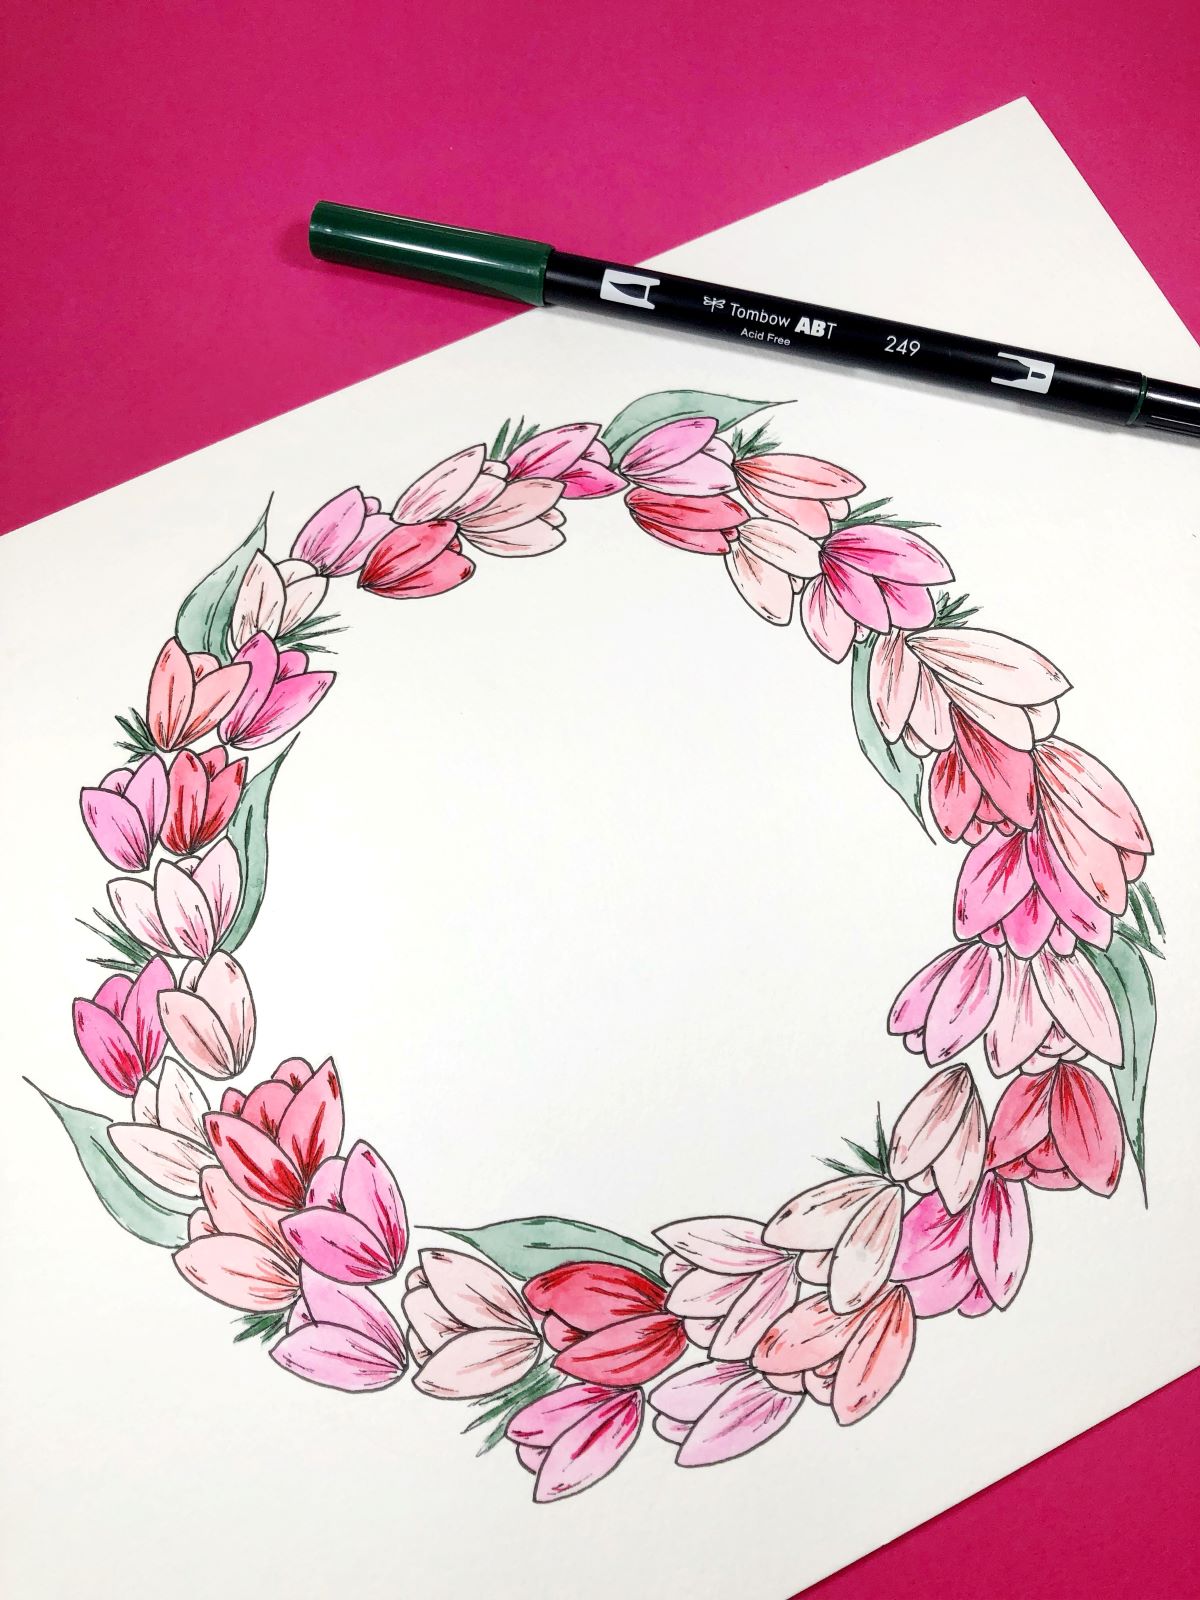
Once your tulips are all painted, use MONO Drawing Pen 01 to trace over your leaves and grass shoots. Let the ink dry for a bit. Scribble ink from Dual Brush Pen 249 onto the Blending Palette. With a wet paint brush, pick up the ink and paint your leaves and grass. Once dry, use the brush tip of the same Dual Brush Pen 249 to add short strokes along the leaves.
STEP 4 – Add Lettering
To finish our spring wreath, letter in “Hello Spring” inside the wreath with the Fudenosuke Hard Tip Pen. Then add a shadow to your letters using the Fudenosuke Twin Tip. Erase any leftover pencil lines with the Dust Catch Eraser.
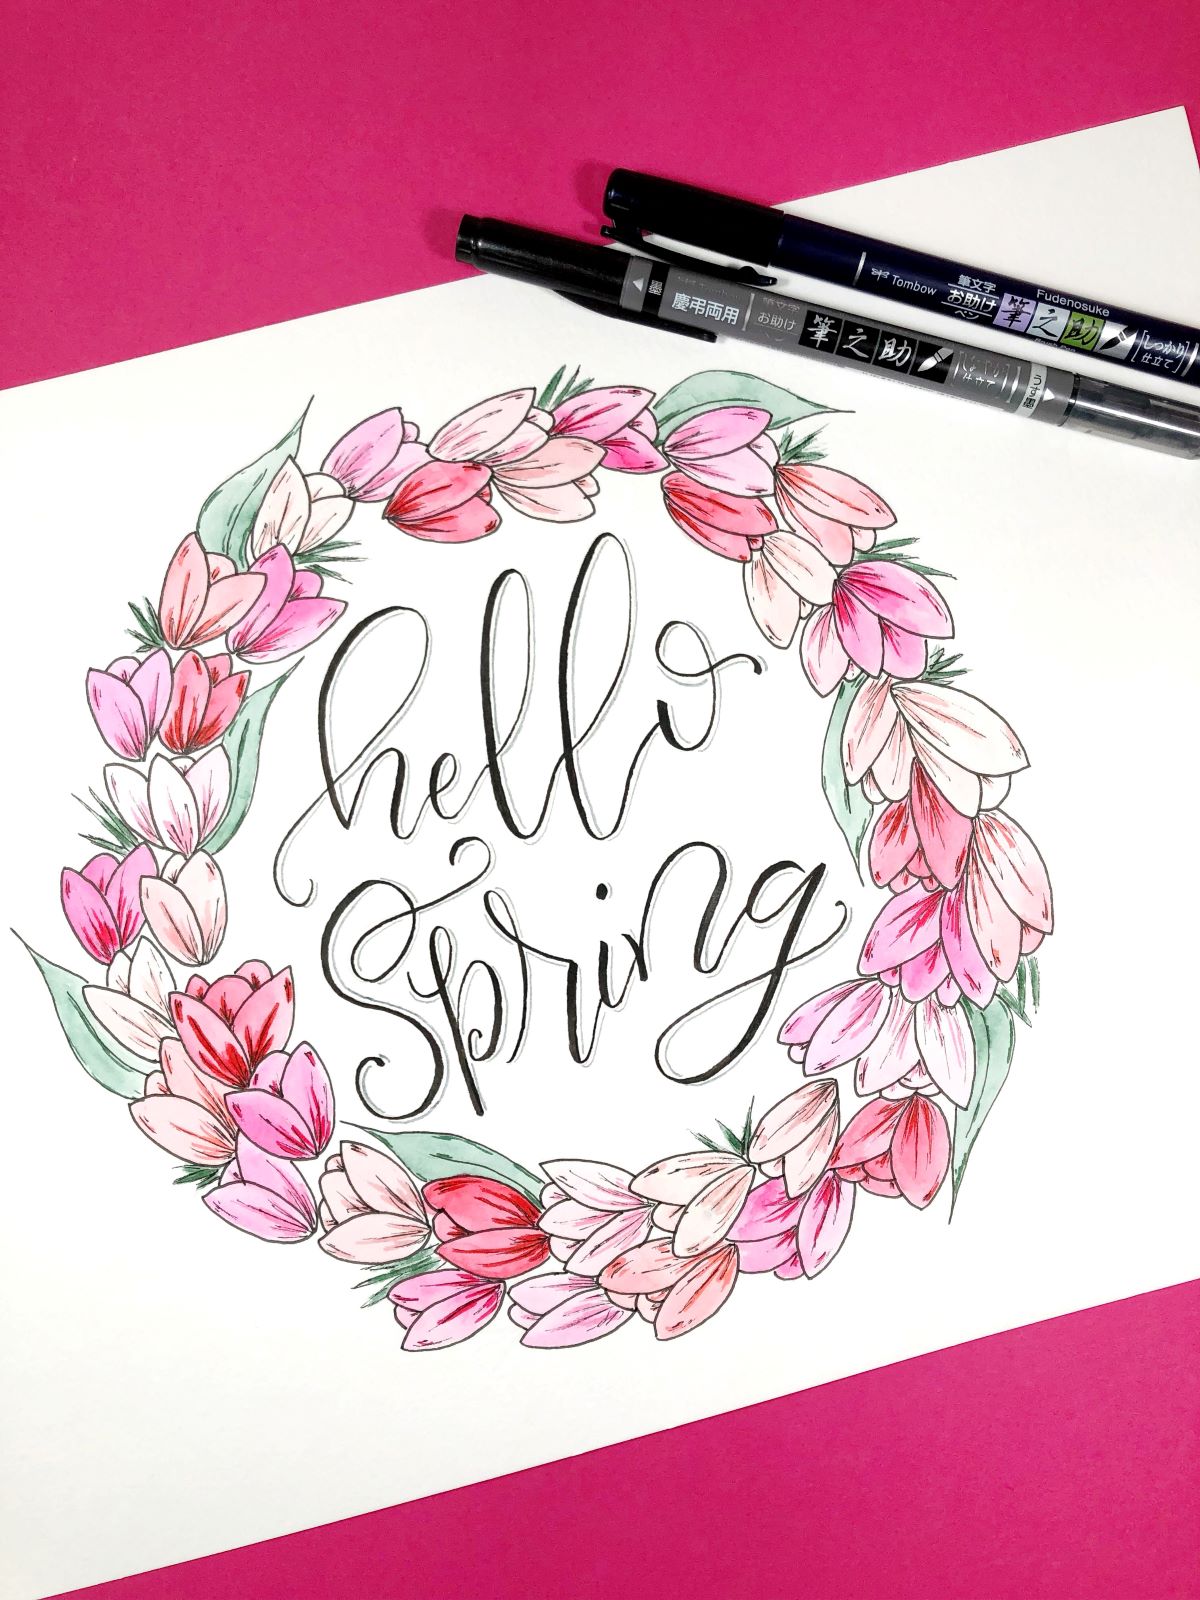
Your spring time wreath is done!
I hope you enjoyed learning how to create a tulip inspired watercolor wreath! If you create your own, be sure to tag @a_heartened_calling and @tombowusa so we can see your beautiful work!
If you’d love to create other watercolor projects using Dual Brush Pens, check out this post from Smitha Watercolor Art Journaling with Tombow Markers and this post from Marie Easy DIY Watercolor Retro Flowers!
Have fun creating and see you next time!
Mandy
It’s super cute and is a great tutorial.
Izmir airport çeşme transfer service! Tell us where you want to go, let us take with our vip transfer vehicles.
We’re glad you liked the tutorial Debbie!