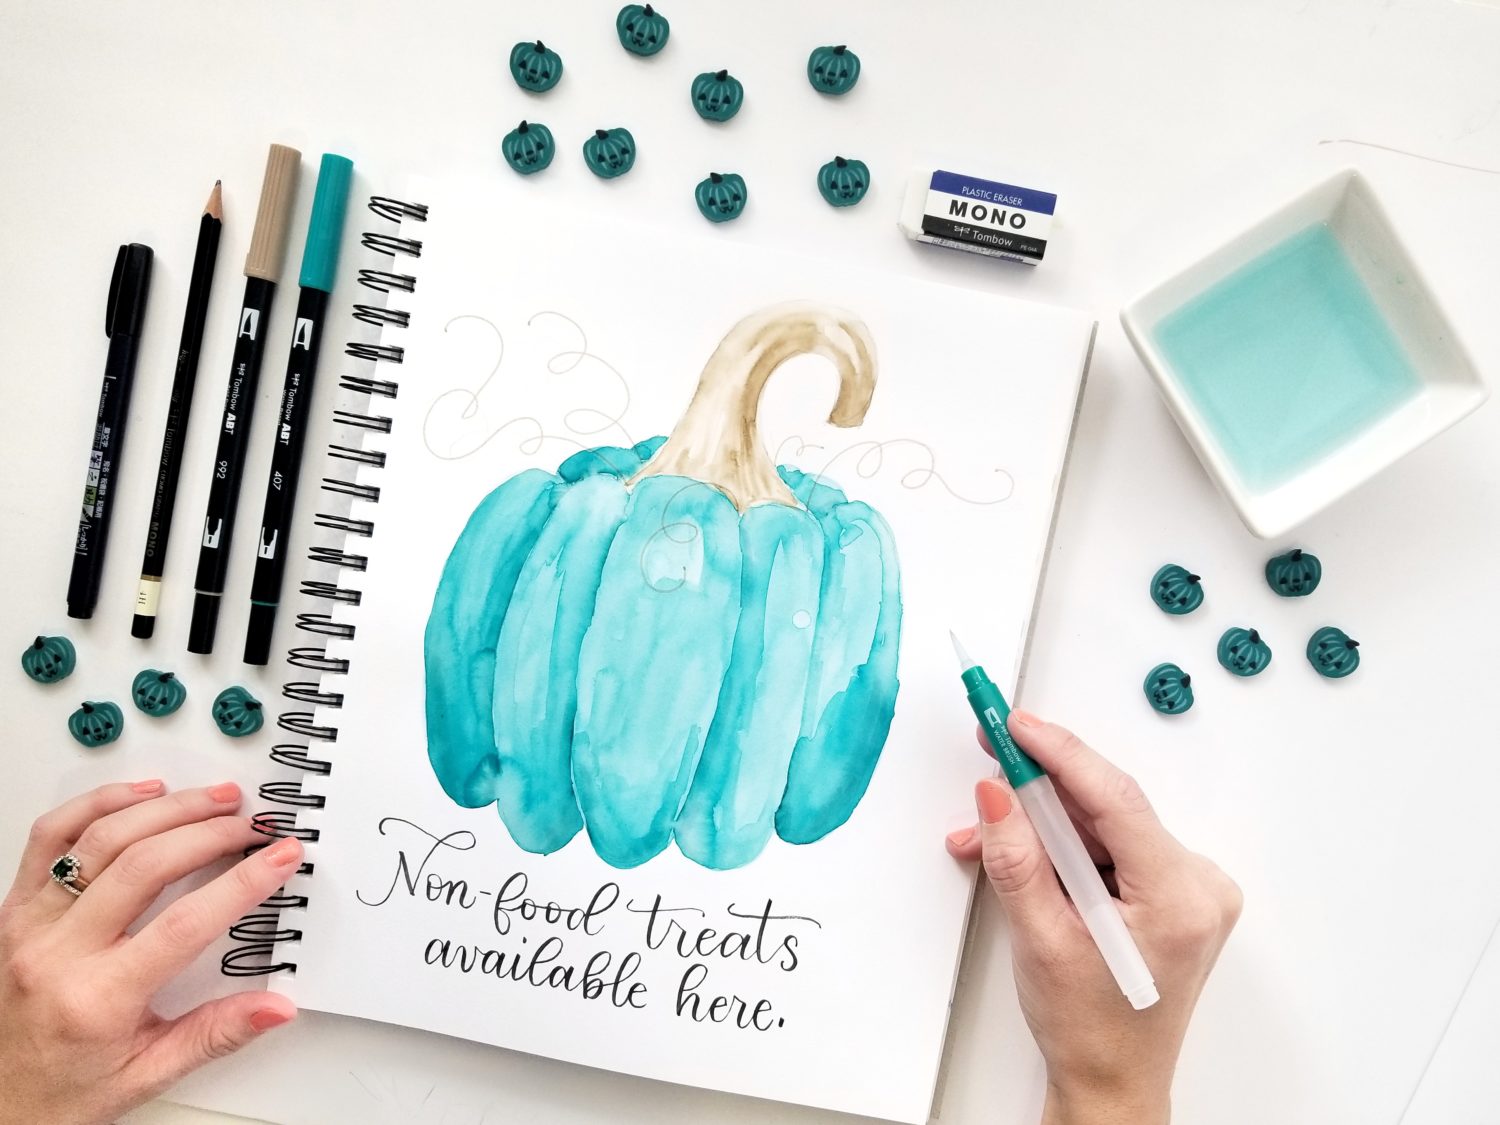
Hi Tombow friends! Grace from Grace Anne Studio here. Have you heard of the Teal Pumpkin Project? If you know a child with food allergies, chances are you have! If you haven’t, it’s an organization that raises awareness of food allergies by adding non-food treats to your treats on Halloween. Participating is easy! You just buy some fun non-food treats or trinkets, put out a teal pumpkin, and have them on hand when the trick or treaters ring your doorbell. Today, we’re creating your own Halloween allergy-friendly trick-or-treat sign.
Now, let’s make that teal pumpkin!
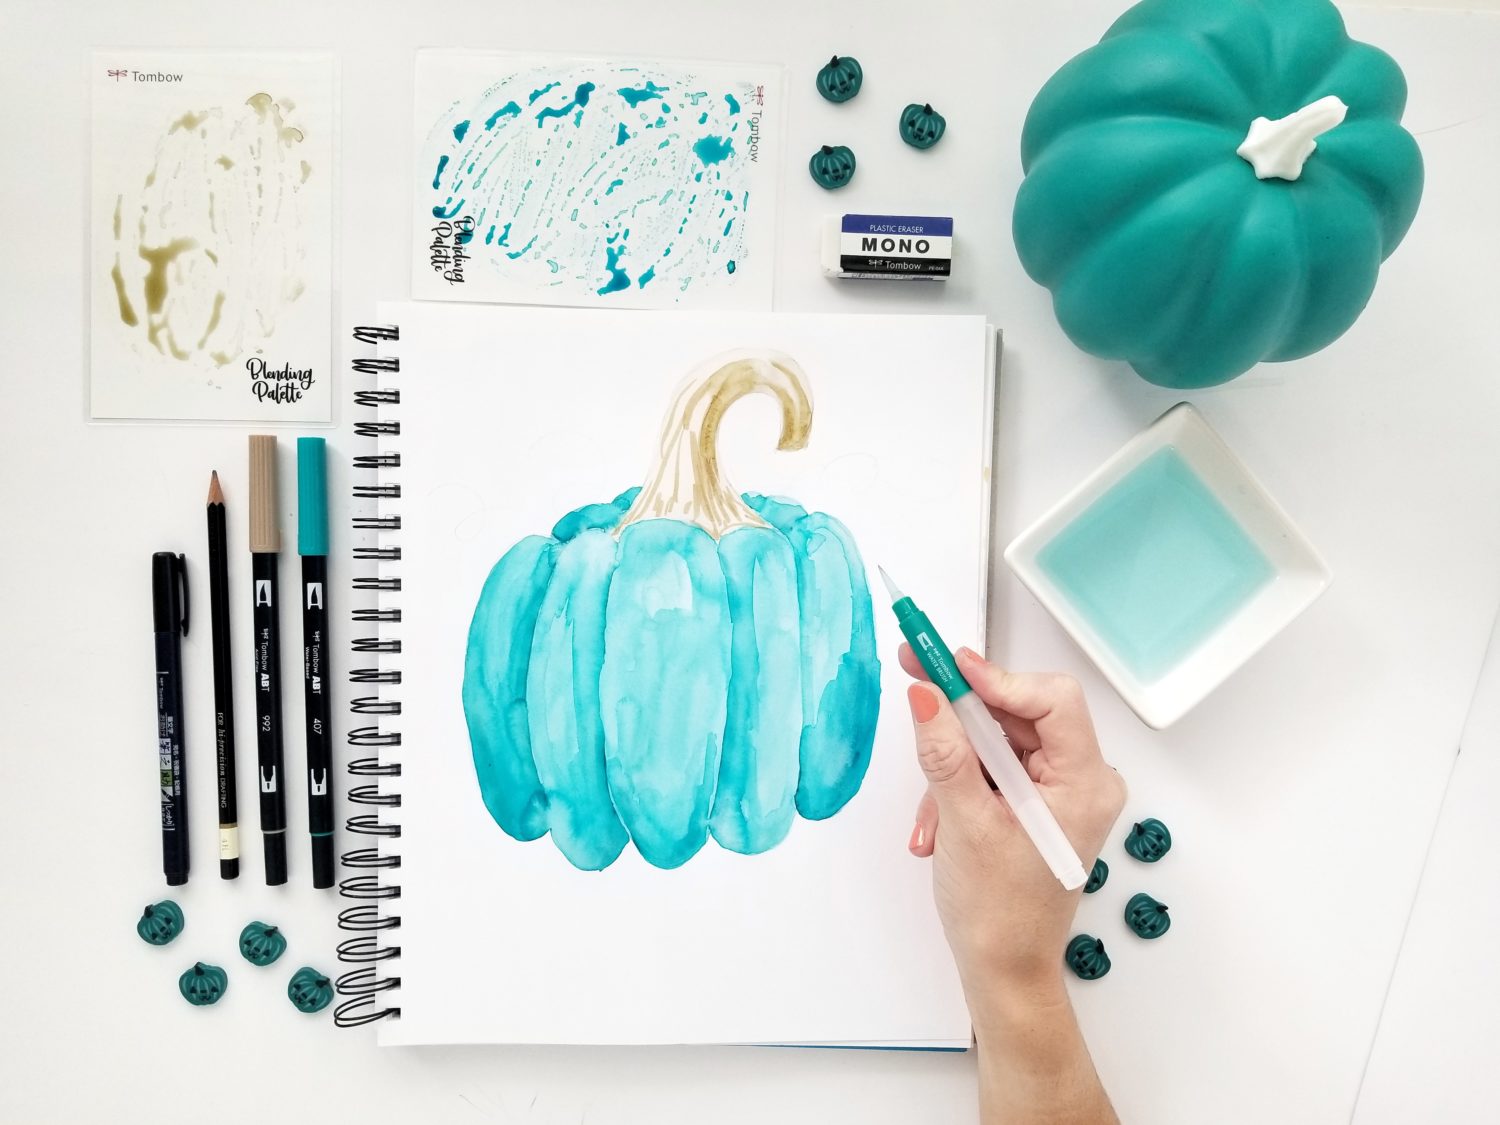
Supplies
- Tombow Dual Brush Pens – 407, 992
- Tombow Water Brush – Medium
- Tombow MONO Drawing Pencil – 4H
- Tombow MONO Eraser – Medium
- Tombow Fudenosuke Brush Pen – Hard Tip
- Tombow Blending Palettes
- Mixed Media or Watercolor Paper
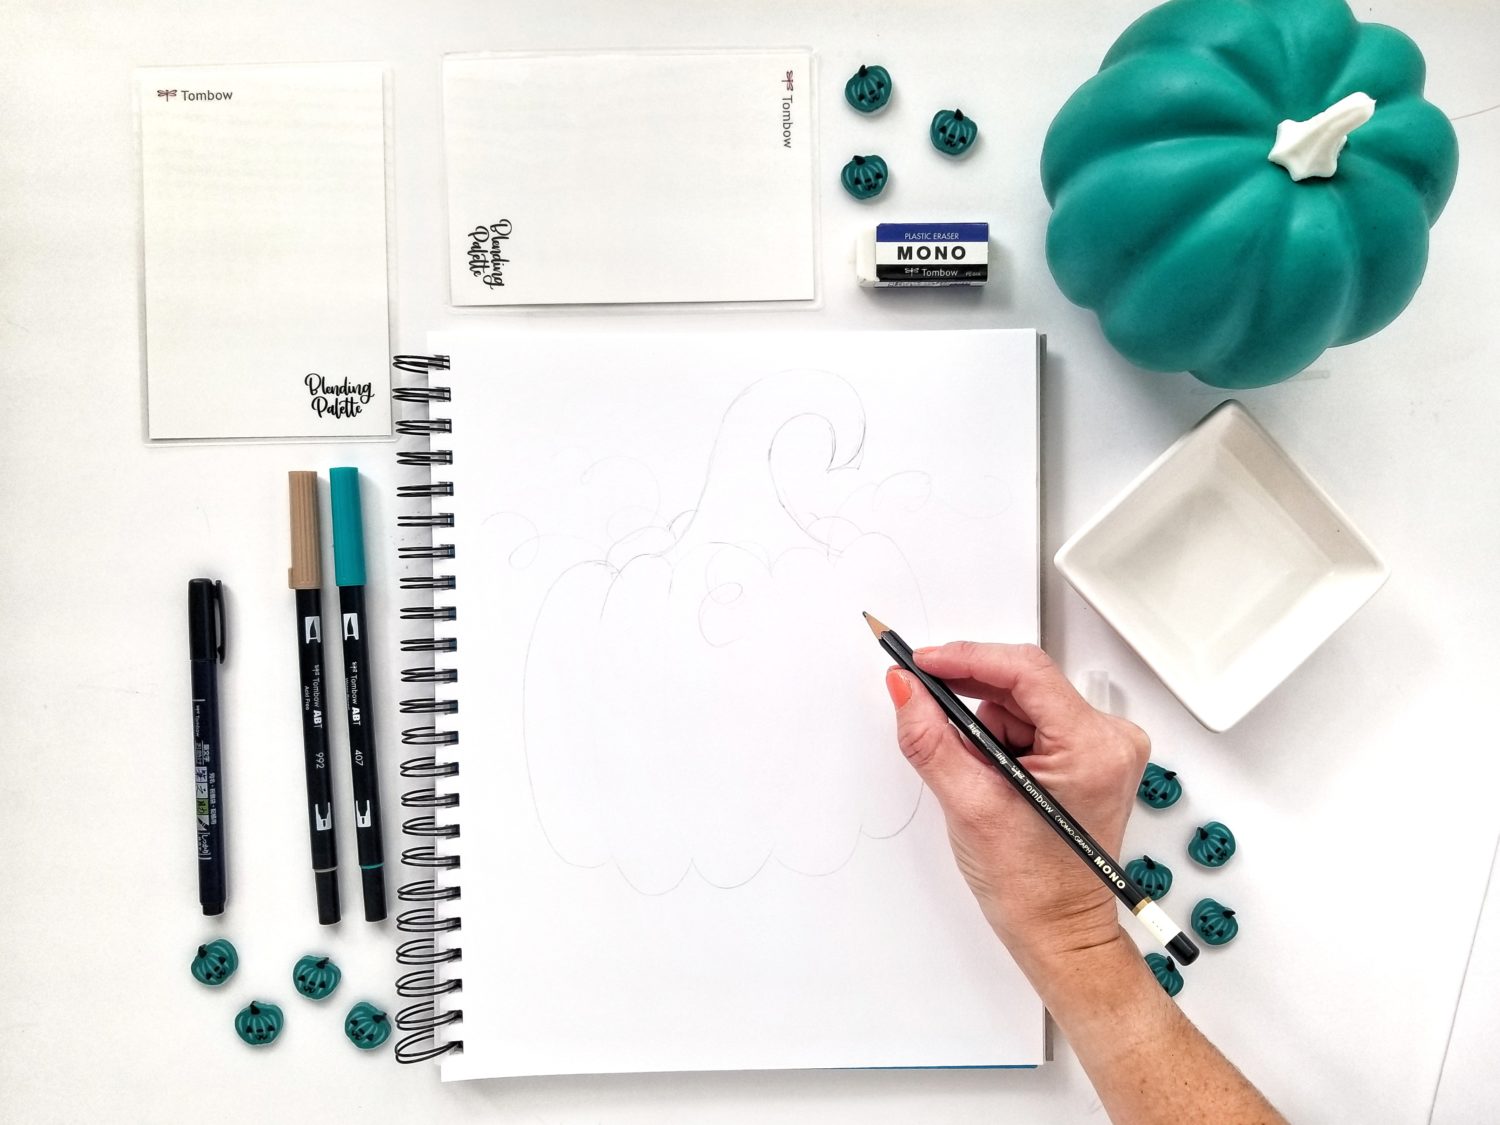
Step 1: Sketch Pumpkin
First, use your 4H MONO Drawing Pencil to lightly sketch a pumpkin. You can either freehand one, trace one, or even print one on your watercolor paper! Adrienne from Studio 80 Design has a GREAT tutorial on the @tombowusa Instagram account!
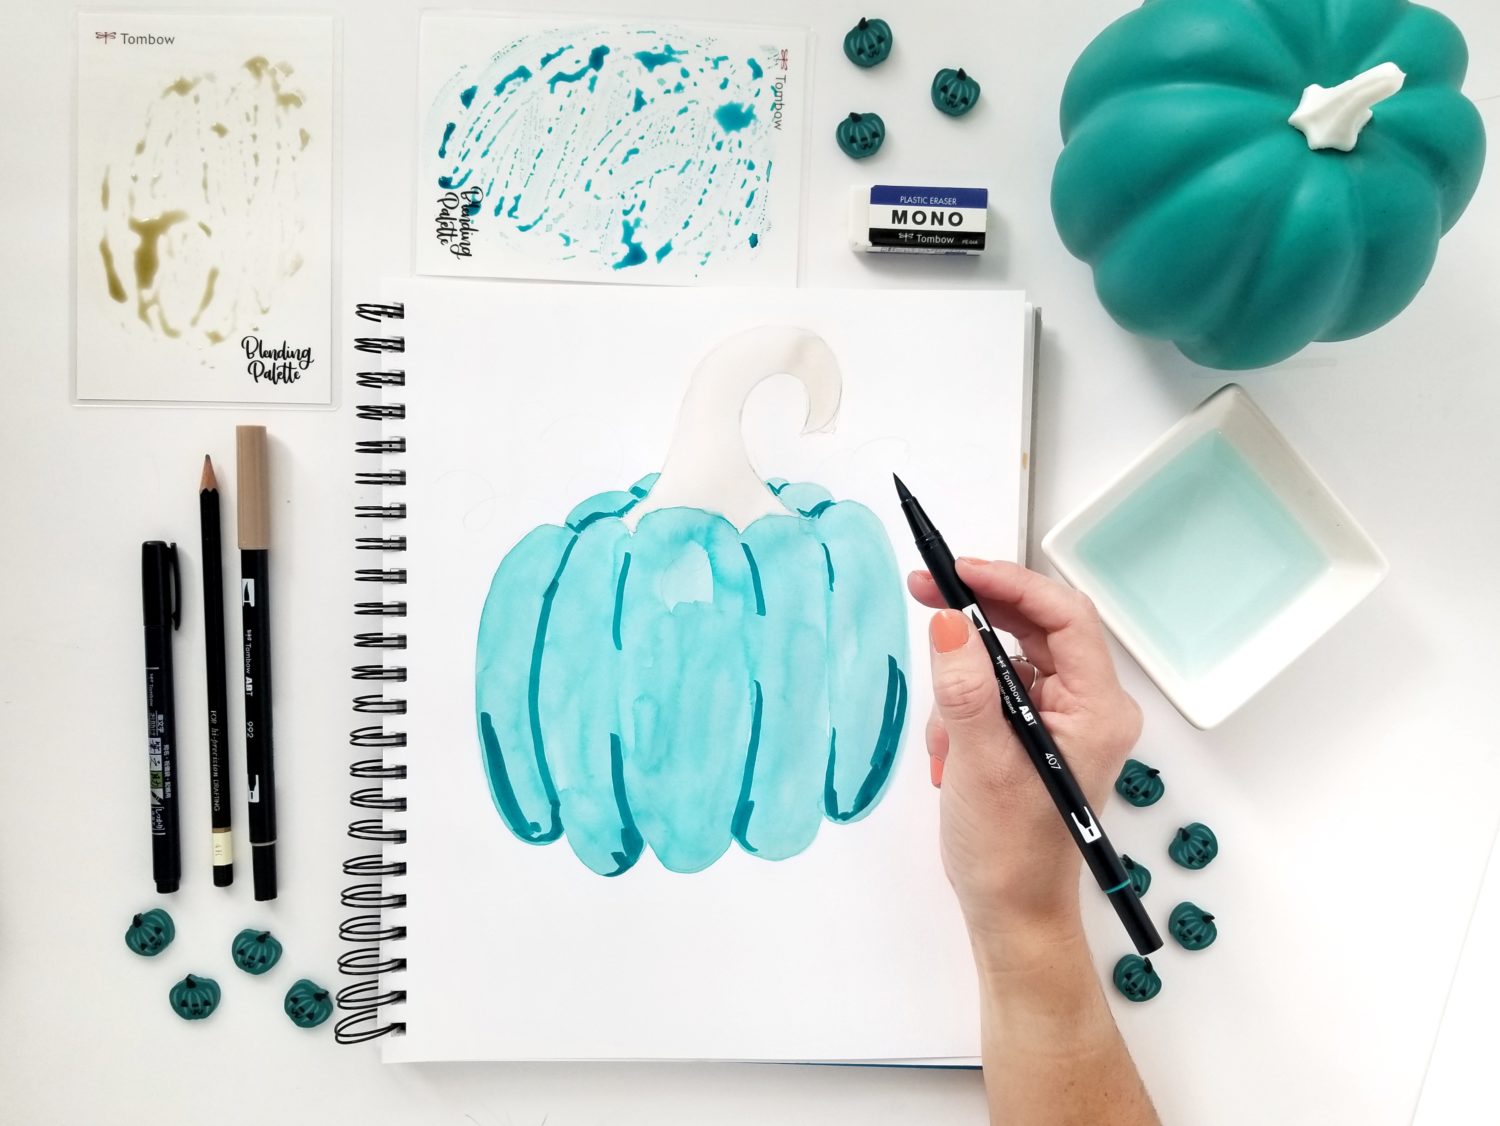
Step 2: Watercolor Wash
Next, scribble some Dual Brush Pen color onto a Blending Palette. I knew I would be using a lot of each color, so I used one palette per color. Then, squeeze a few water drops from your water brush onto each palette and mix it with the color. This dilutes the color and creates a watercolor. Next, use your Water Brush to paint a wash of each color on the pumpkin. Use 407 for the pumpkin and 992 for the stem. I like to also use a water dish to thoroughly rinse my brush between colors.

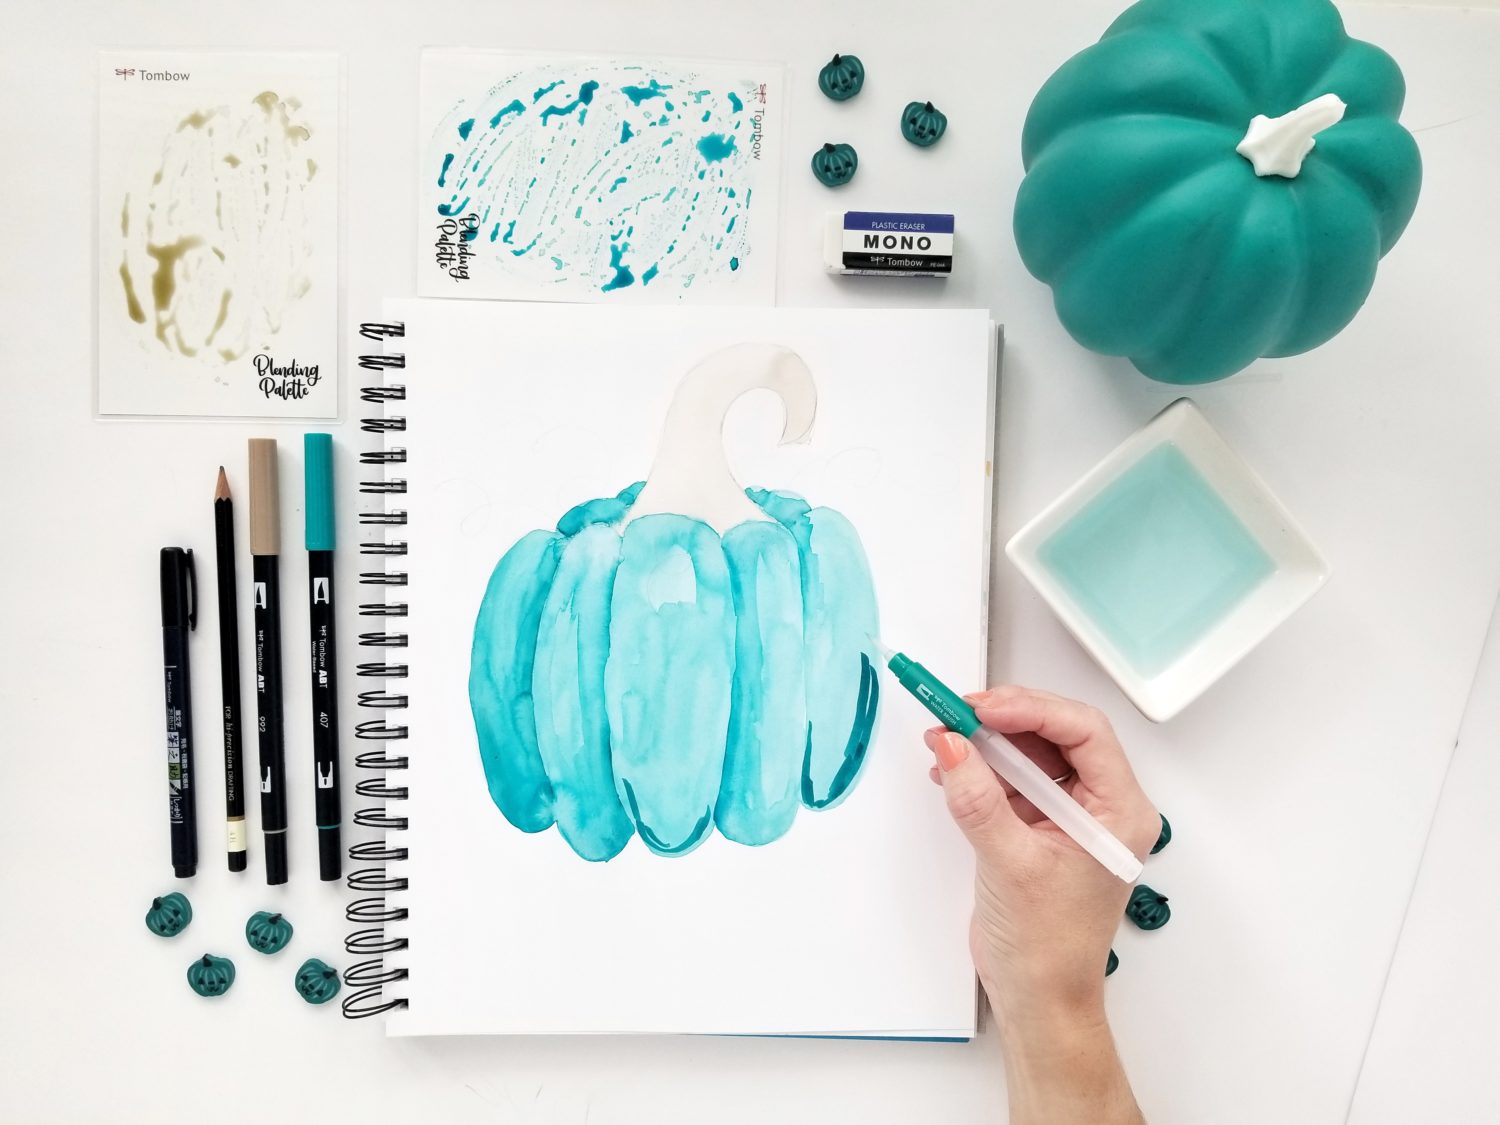
Step 3: Layer Watercolor
Once the base layer is dry, use your Dual Brush Pens to layer color and create depth on the pumpkin. I used Dual Brush Pen 407 to add shadows around each rind,and Dual Brush Pen 992 to add texture to the stem. Next, use your Water Brush to dilute the color and create the shadows and texture.
Step 4: Add Lettering
Finally, use your Hard Tip Fudenosuke Brush Pen to write “Non-food treats available here” below the pumpkin. Use your MONO Eraser to erase any stray pencil marks. I also used Dual Brush Pen 992 to add a few curly vines to the stem.
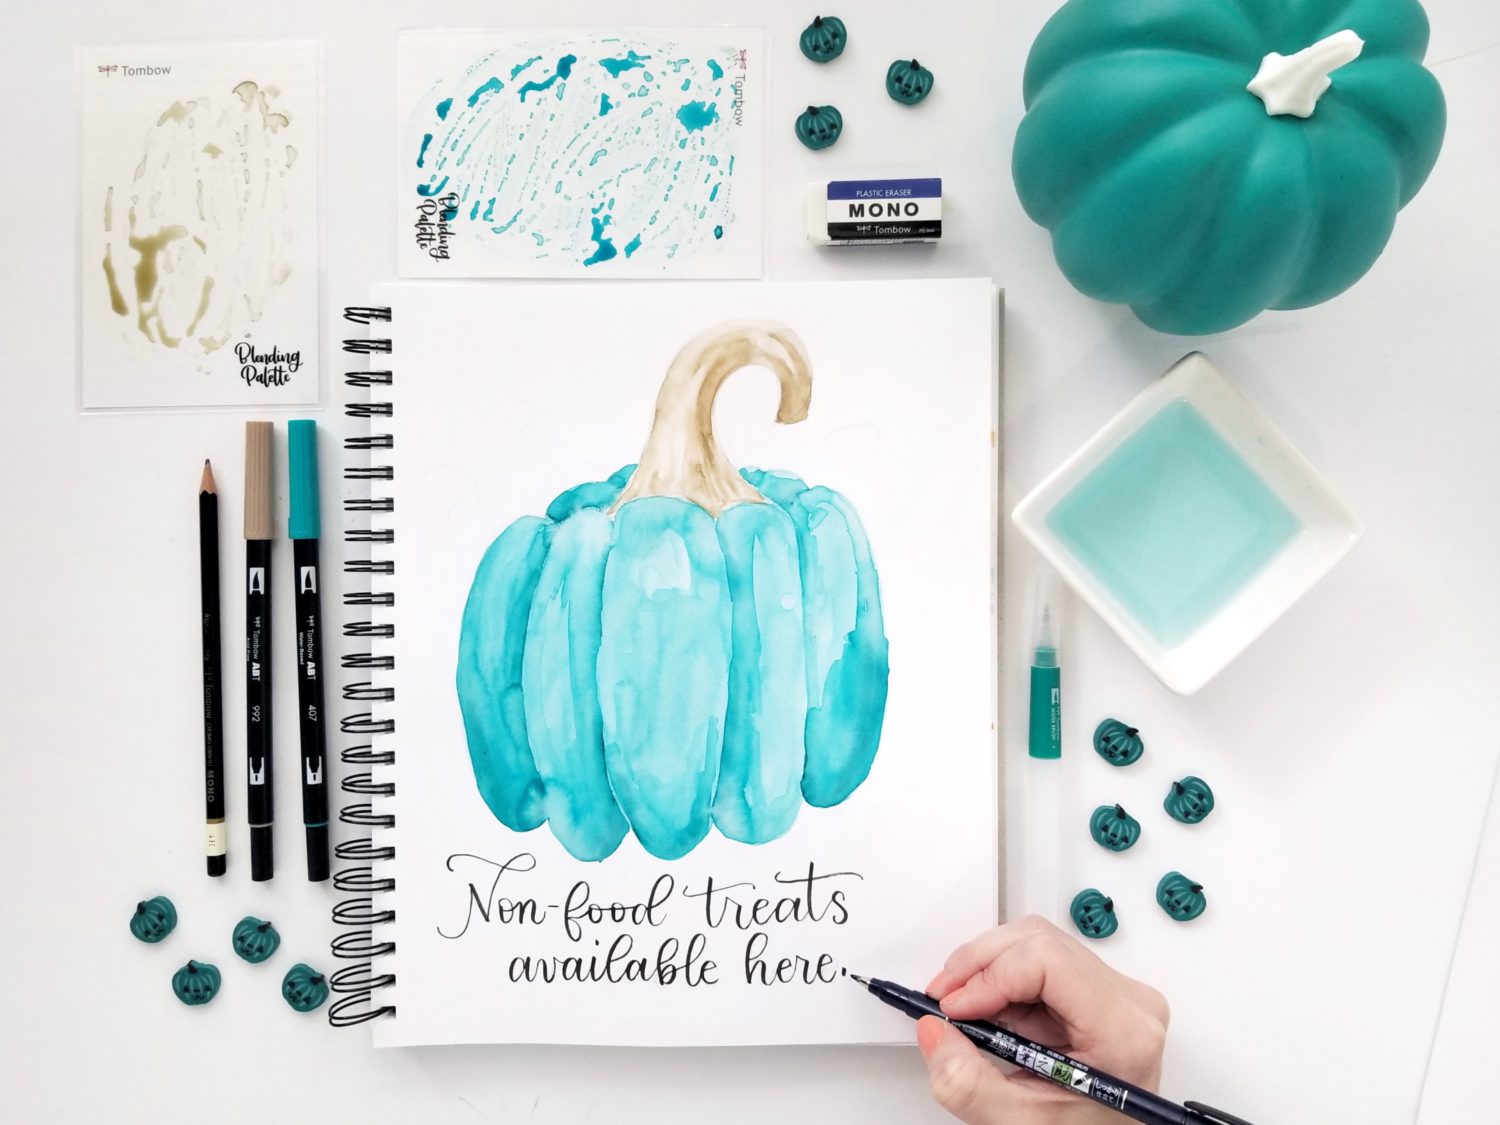
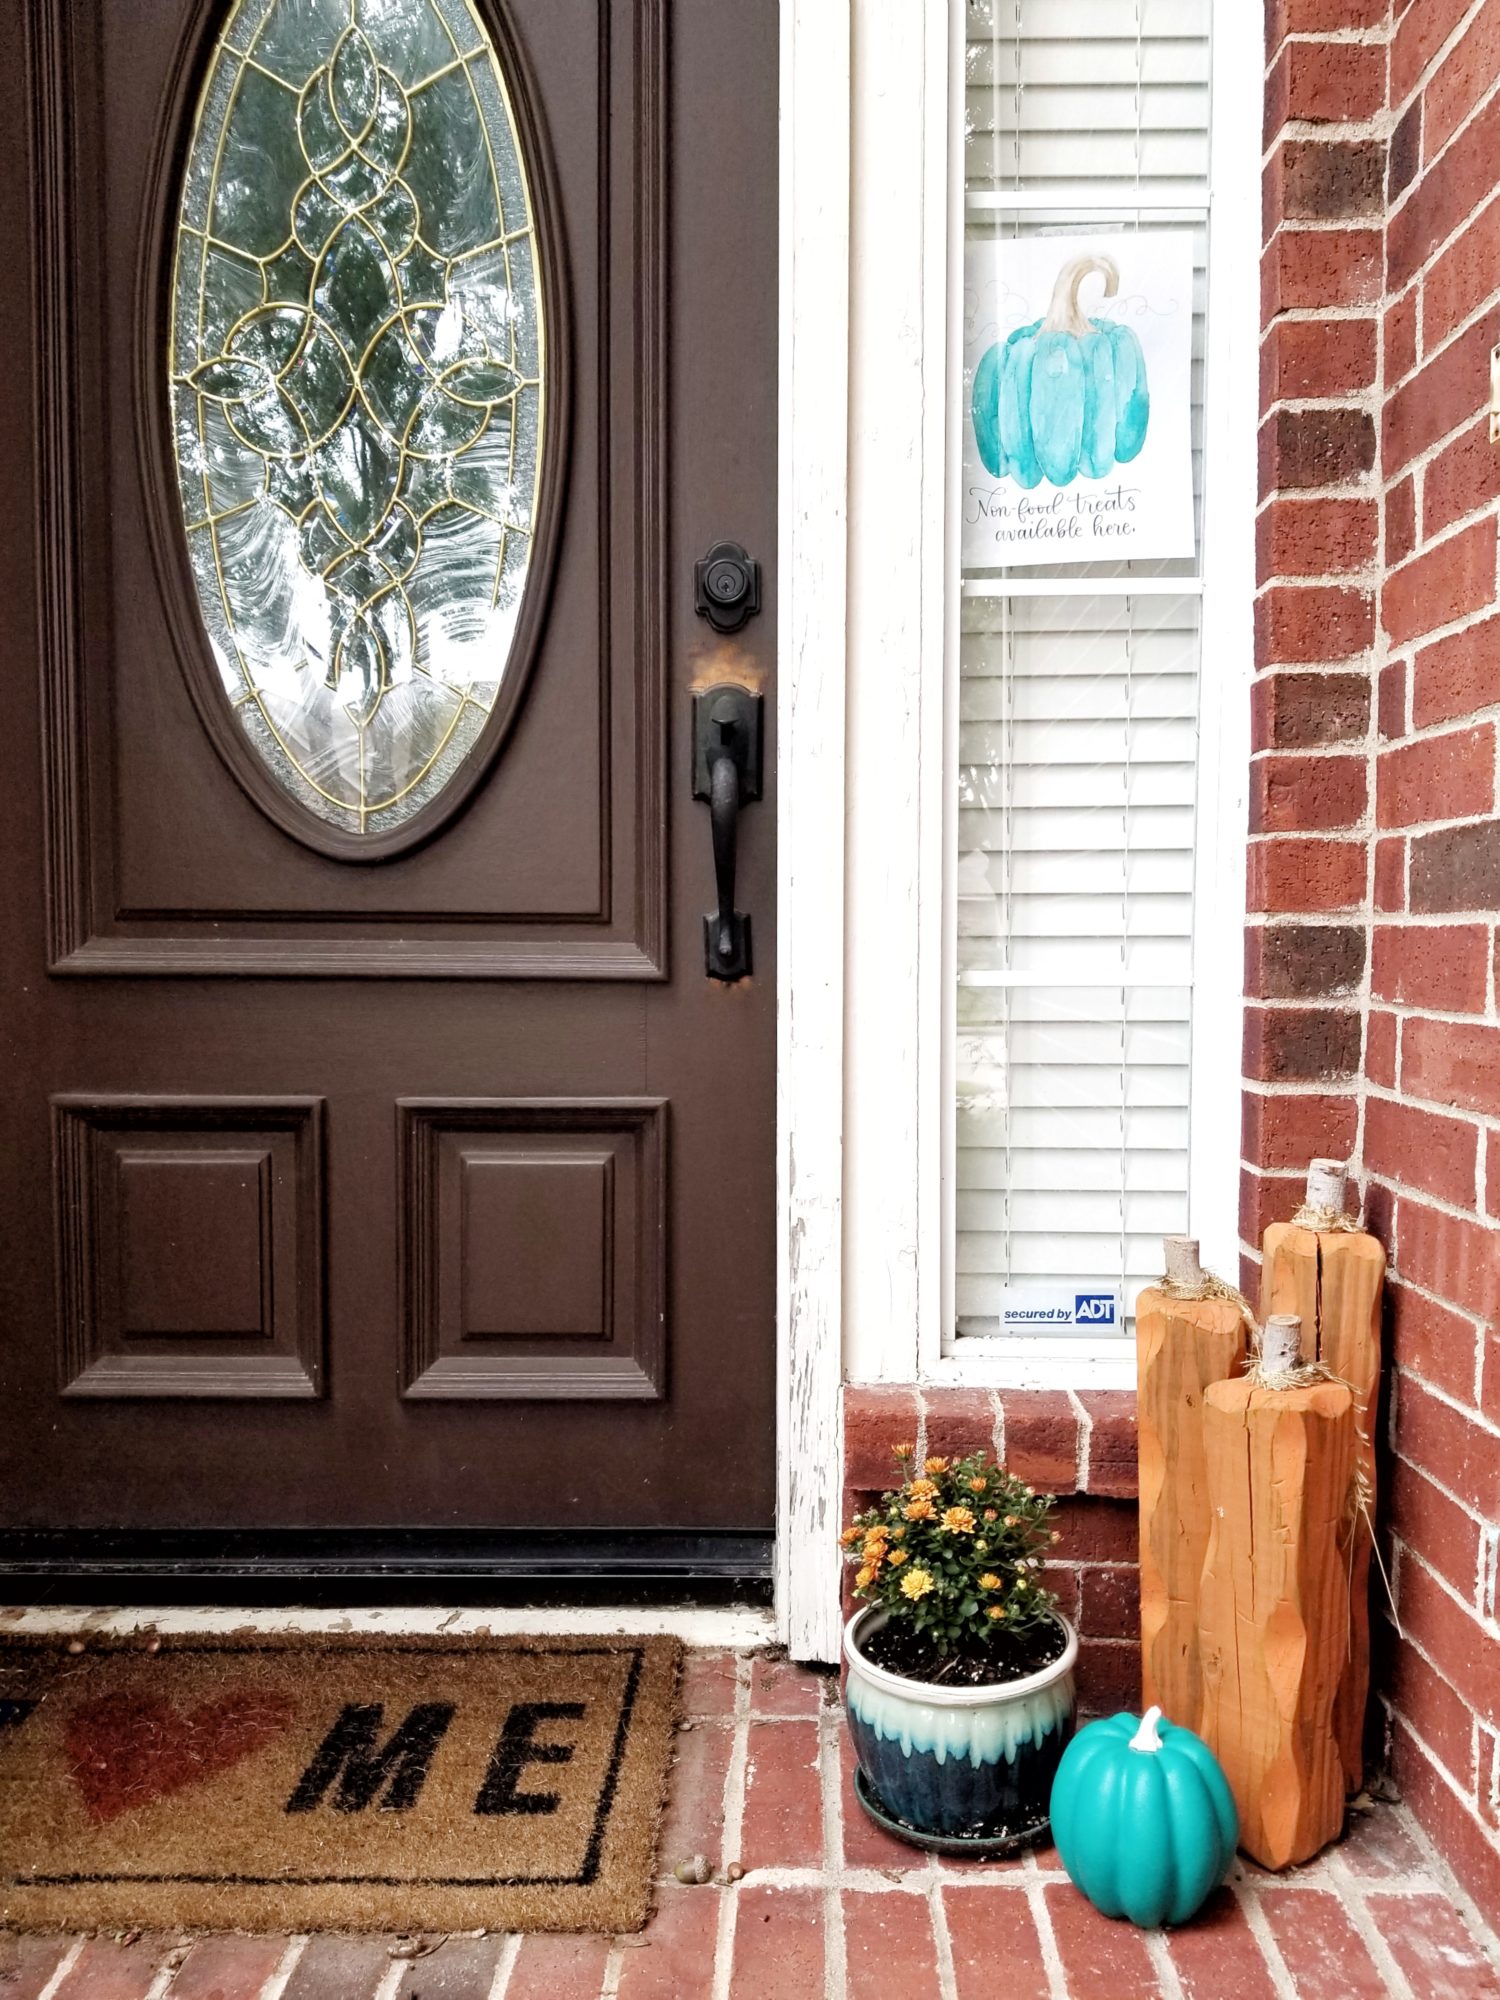
Step 5: Hang it up!
The last step is to hang the sign by your door. This will let trick-or-treaters know you have safe options for everyone!
Step 6: Non-Food Treats and Trinkets
Here are some easy ideas for non-food treats and trinkets. For even more ideas, check out the Teal Pumpkin Project website here.
- Glow Sticks
- Stickers
- Bubbles
- Spider Rings
- Halloween Erasers
Thanks for following along today friends! If you use this tutorial to make a Halloween allergy-friendly trick-or-treat sign, be sure to tag @graceannestudio and @tombowusa so we can cheer you on! For more Halloween decor, check out these posts:
- DIY Halloween Decorations
- DIY Black and White Halloween Banner
- Fun and Floral Halloween “BOO” Banner
Happy creating!