Hello friends, Adrienne here from @studio80design here to share a fun and super easy envelope tutorial! I’ll be using beautiful paper and supplies from Echo Park Paper Co. to create the envelope! This valentine-inspired paper is great because it is double-sided, so you get a lot of options when it comes to creating! I make envelopes like this to pass along notes to friends and family. This tutorial is so easy, anyone can do it!
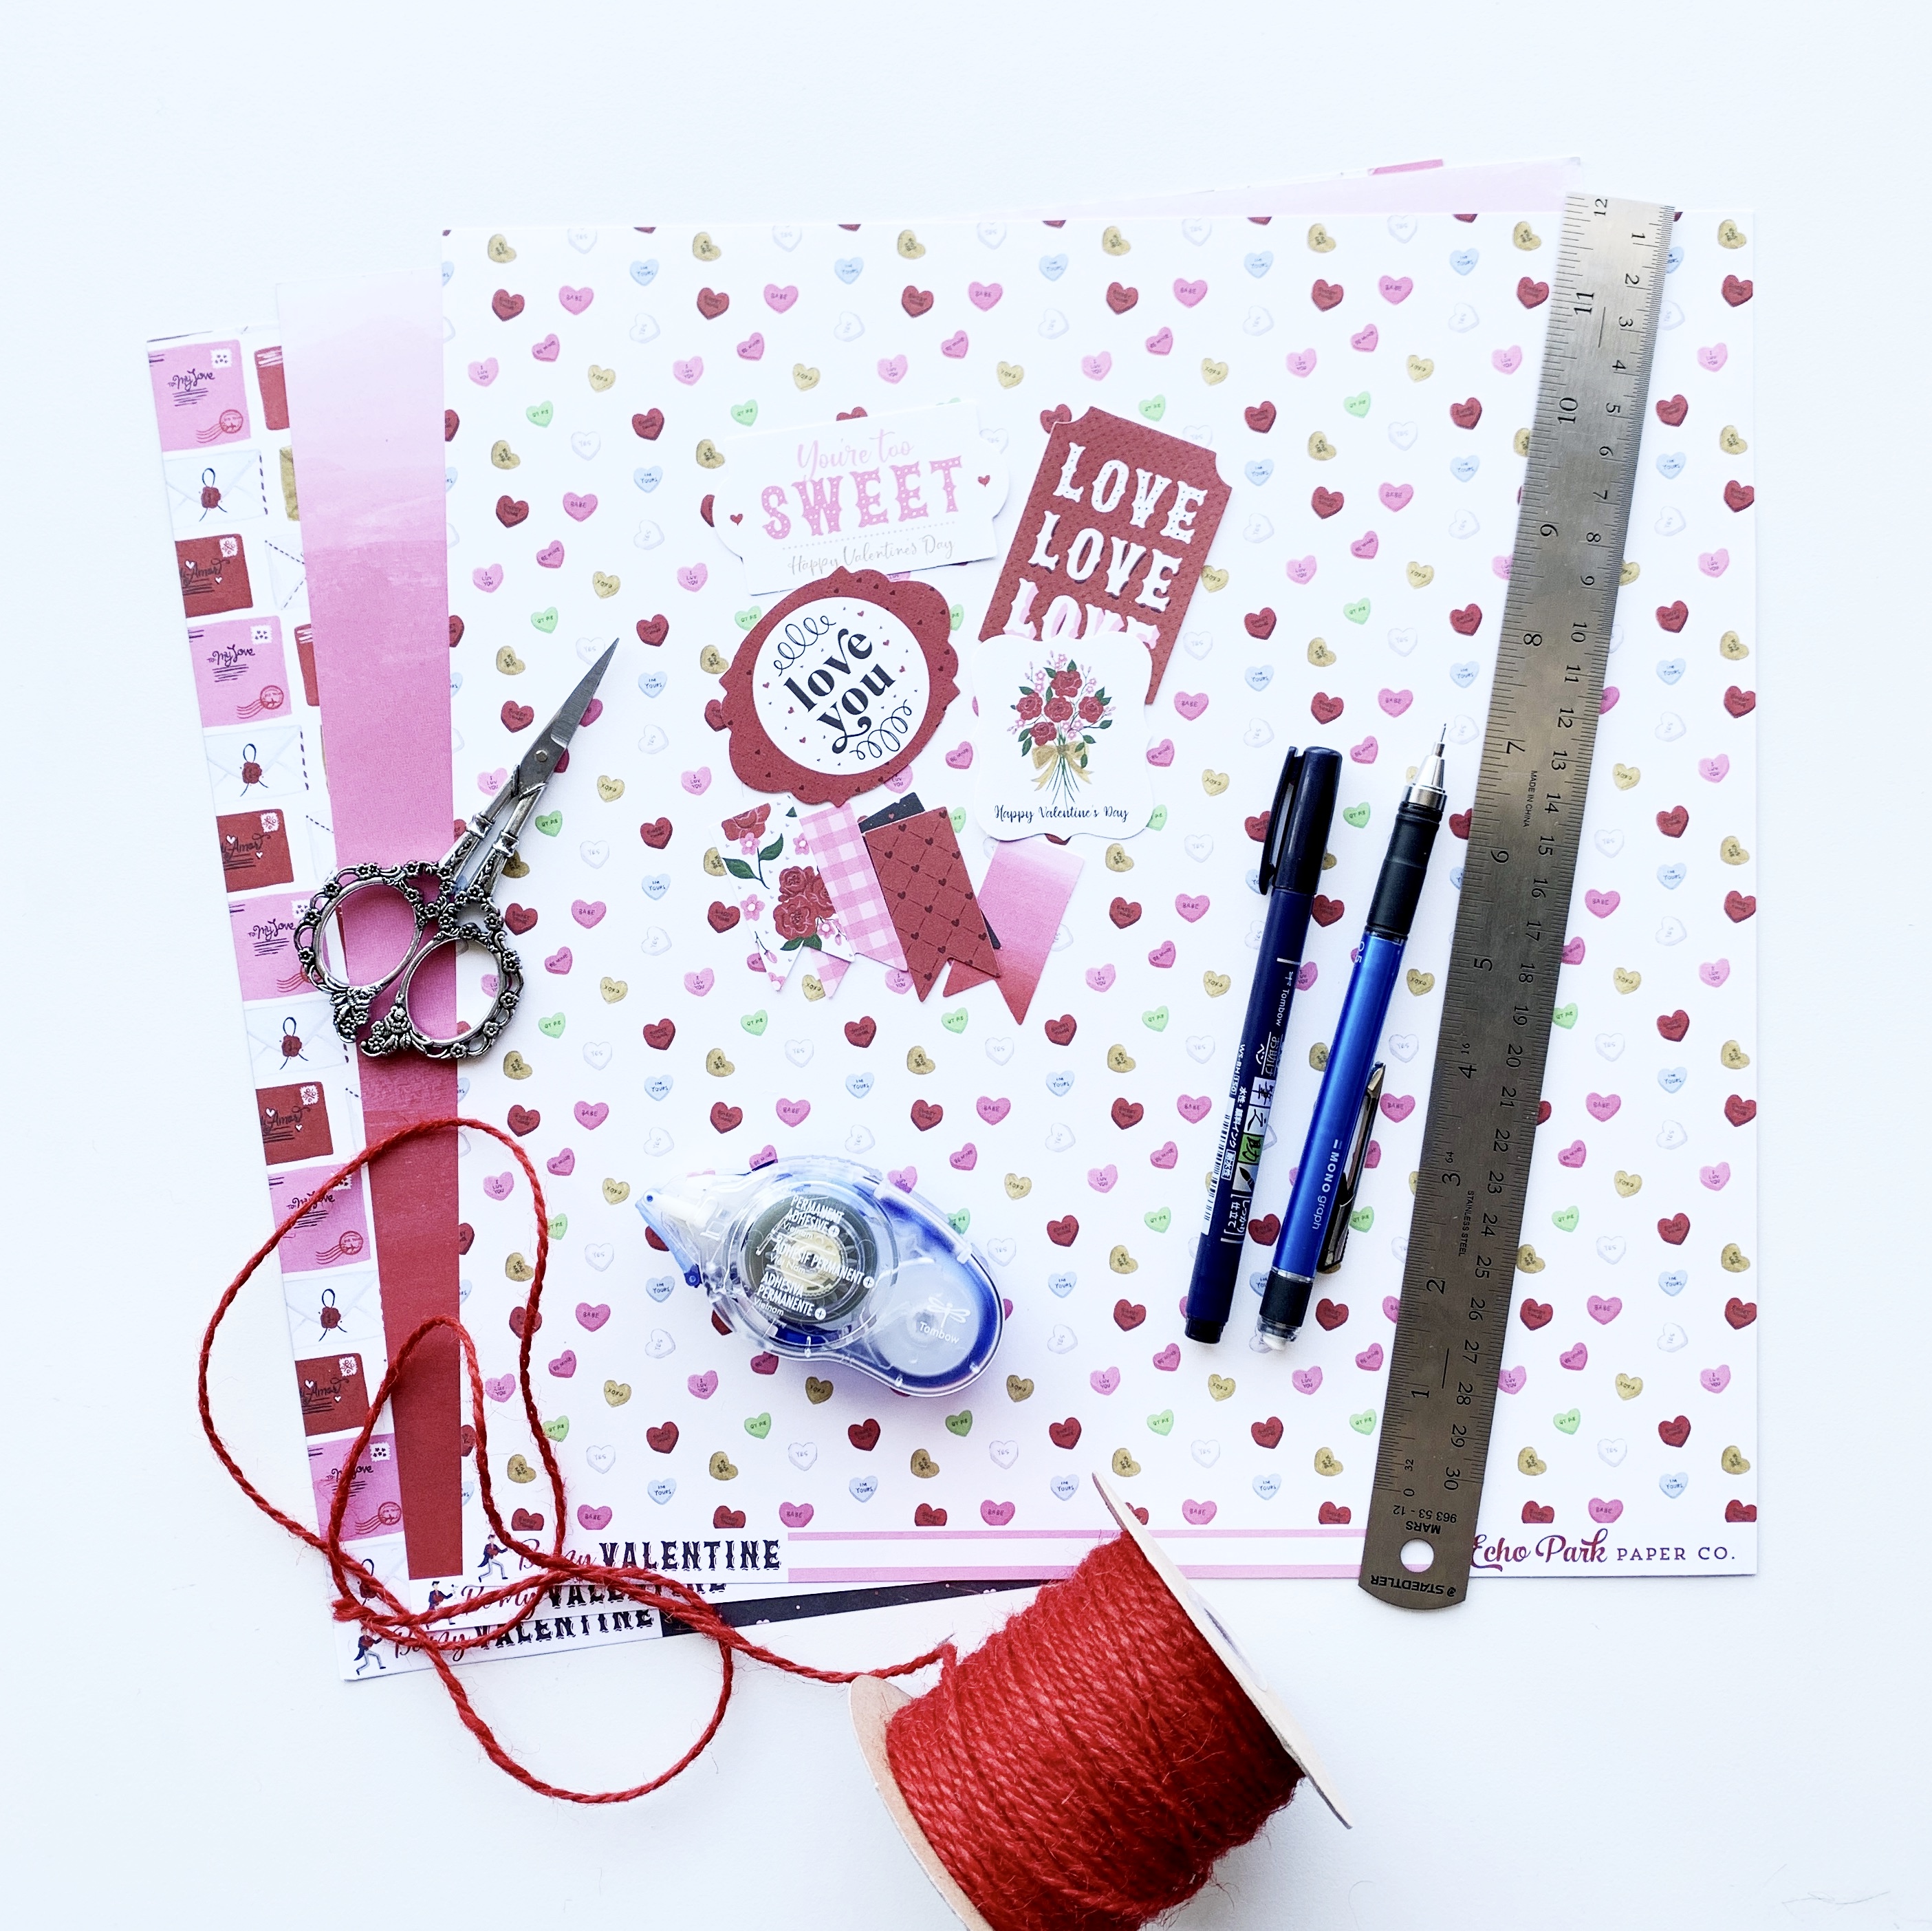
Materials you’ll need:
- Echo Park Paper Co. Be My Valentine Paper – cut to 8in x 8in
- Echo Park Paper Co. Die Cut Cardstock Pieces
- Tombow MONO Graph Grip Mechanical Pencil
- Ruler
- Tombow MONO Adhesive + Permanent
- Scissors
- Tombow Fudenosuke Hard Tip Brush Pen
- Red string (or any matching color)
Step 1: Create left and right folds
The first step to making this easy envelope is to turn the paper so it’s in the shape of a diamond. Bring the two left and right outside corners together to meet in the middle and fold down to create a crease.
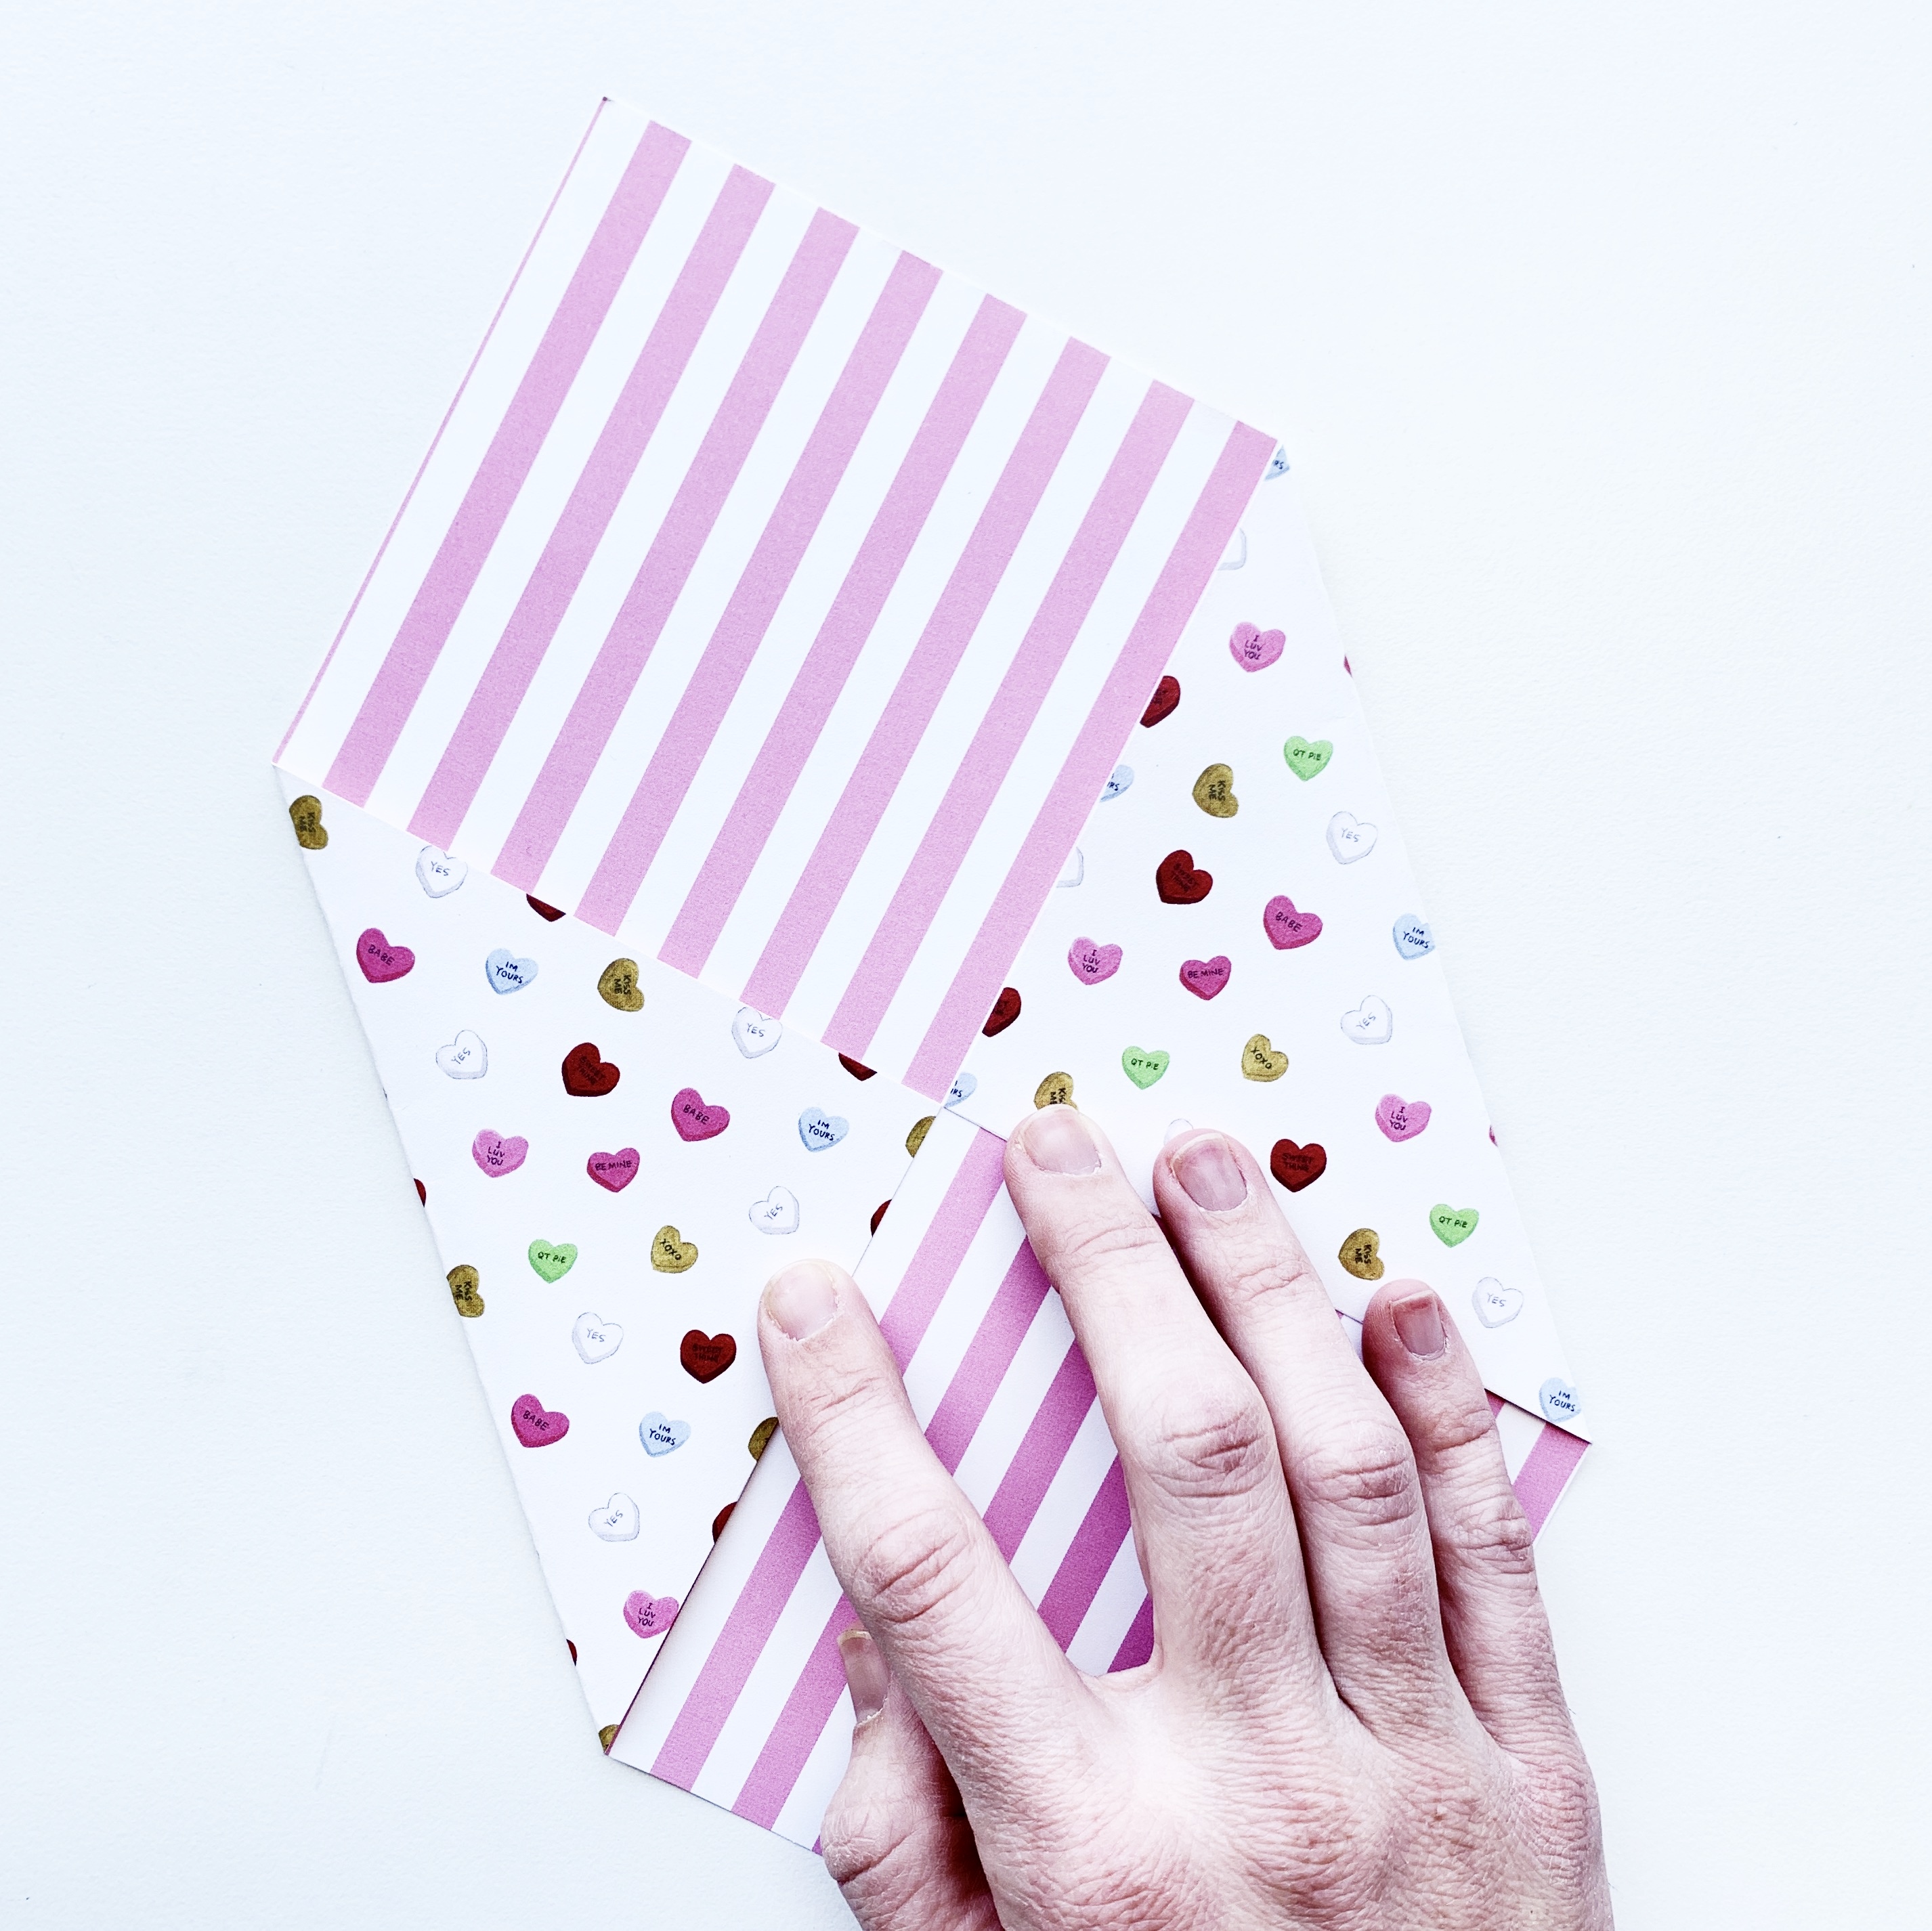
Step 2: Create the top and bottom folds
Fold up the bottom, overlapping the bottom crease on the sides by about 1 cm. Since we are overlapping, it will allow us room to glue down the pieces of the envelope together. Fold down the top of the envelope (just like the bottom), by overlapping the fold by the same 1 cm measurement.
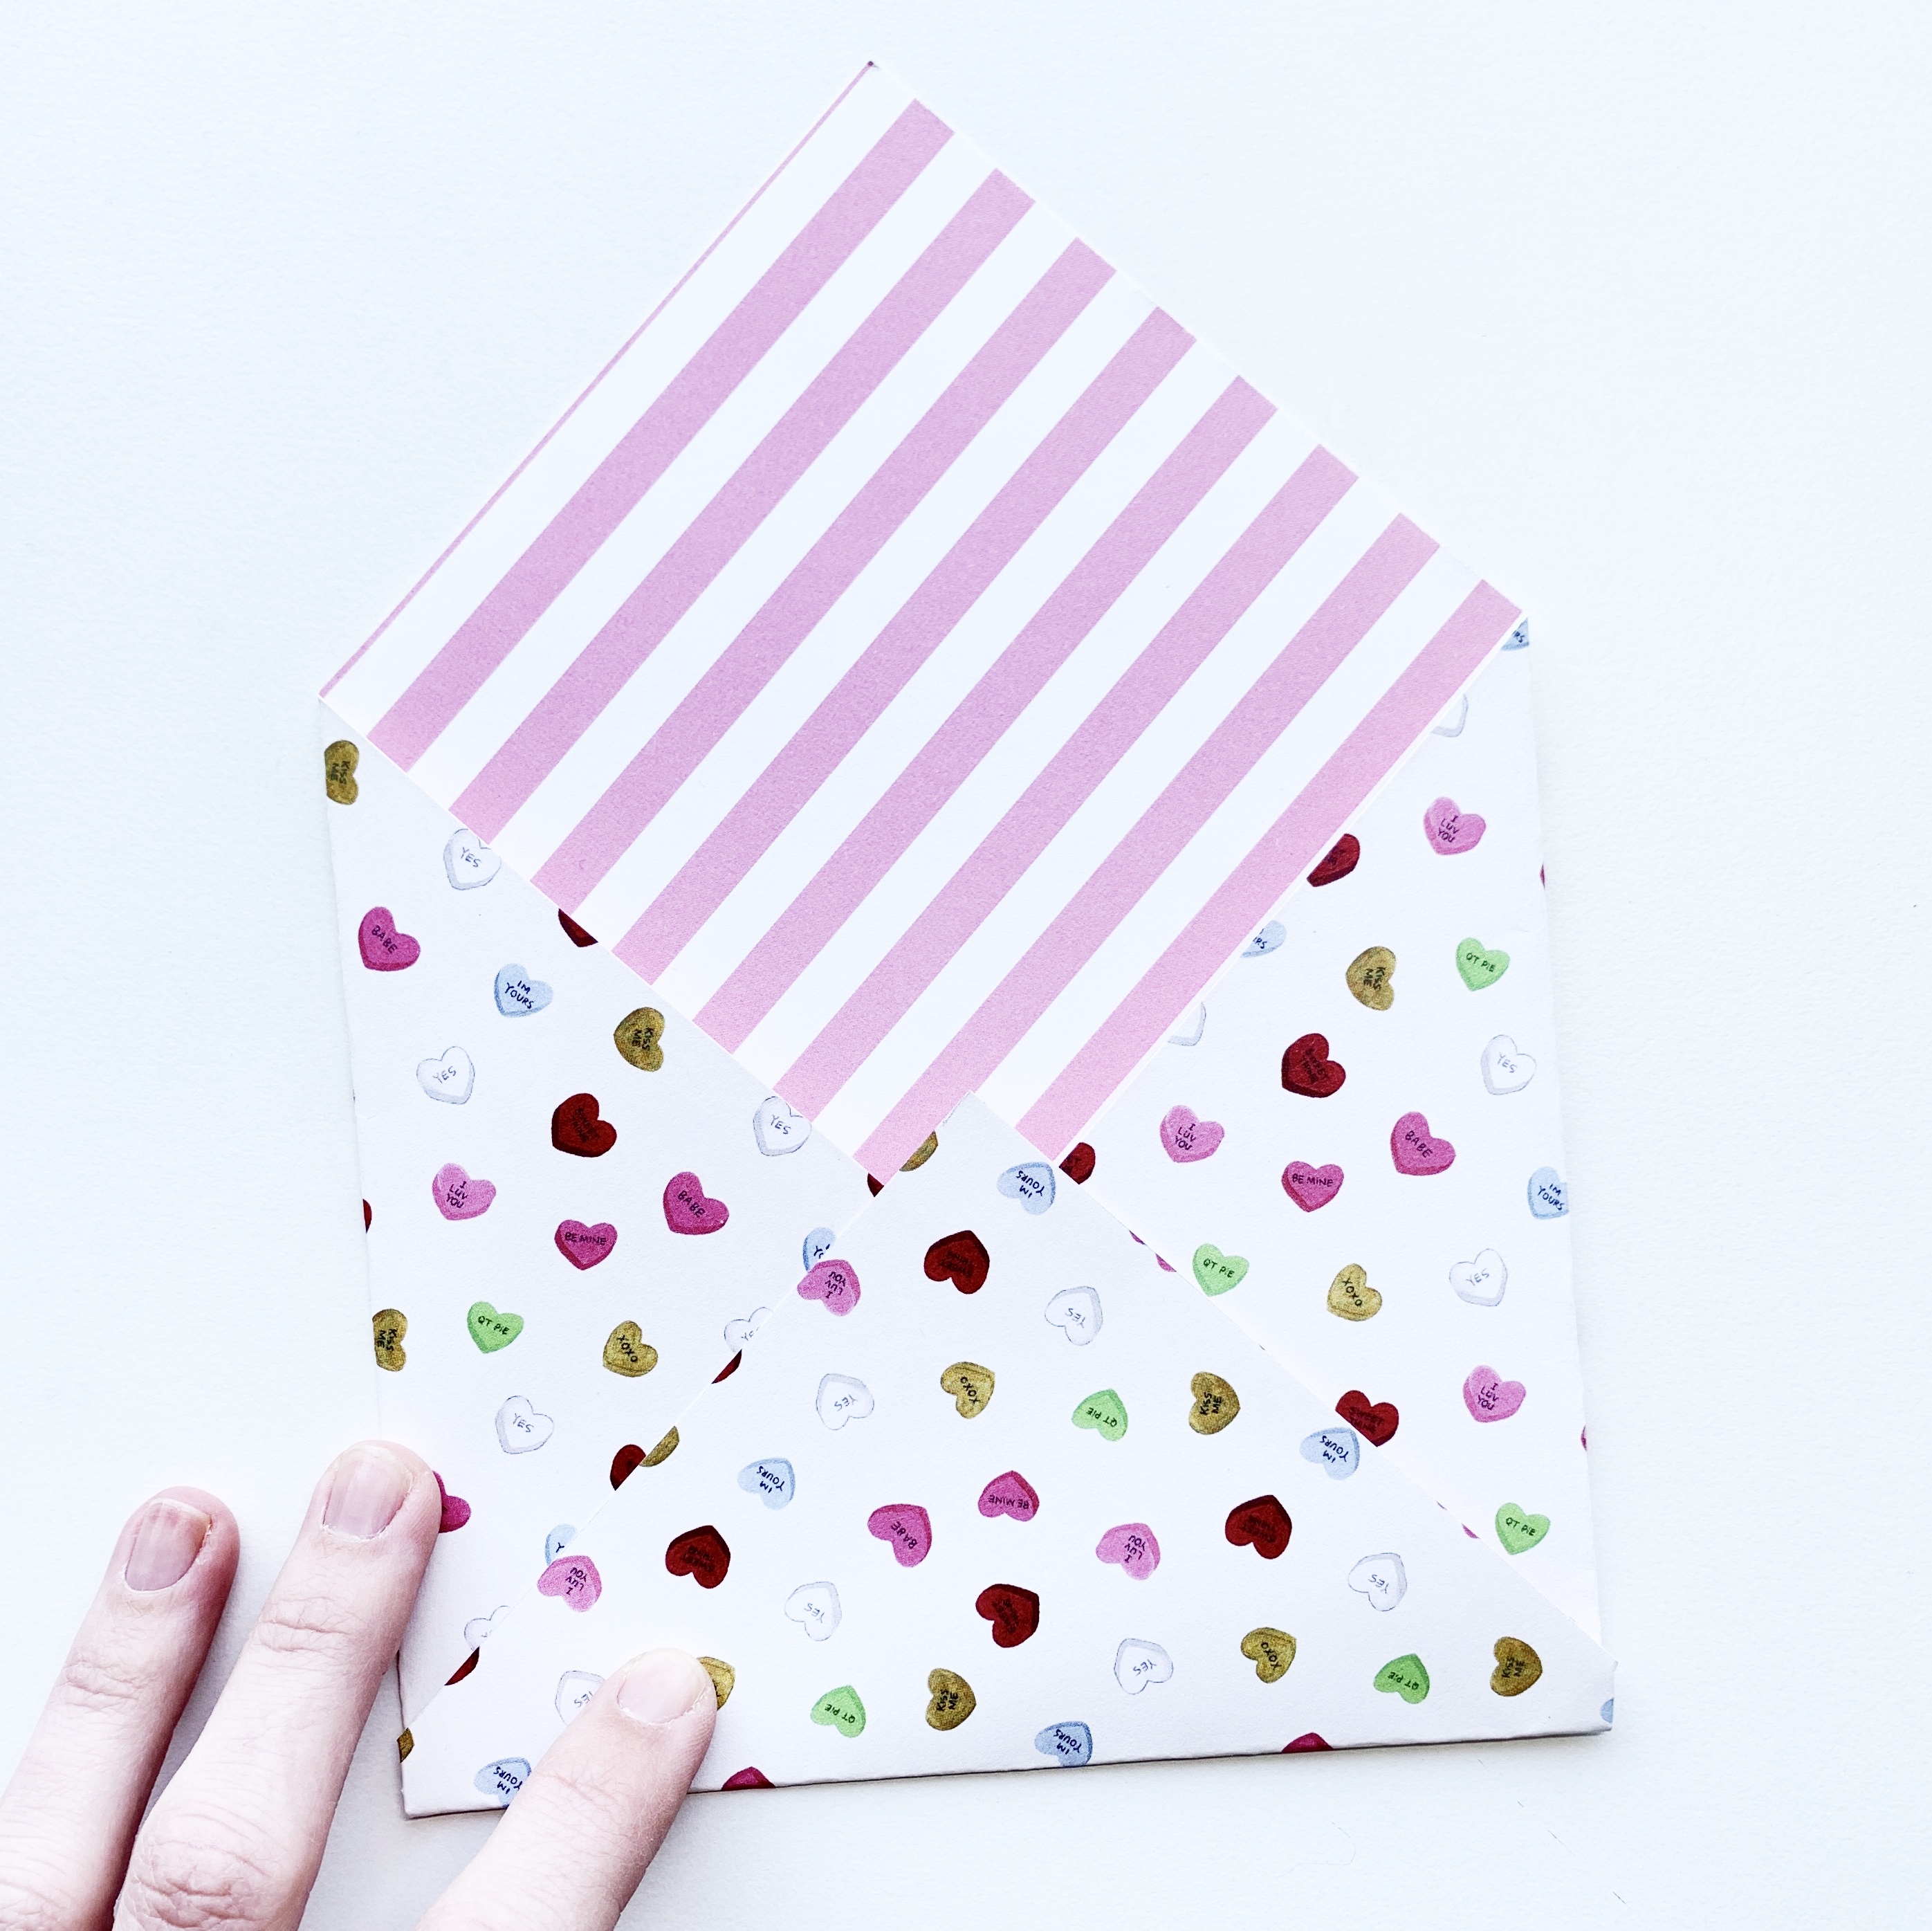
Step 3: Cut out triangles
Now unfold your envelope and you will be able to see where the corners of the envelope overlap, creating small triangles on the outside edges. Use your scissors to cut out all four of those small triangles. This will make it easier to fold and glue the envelope together! You can also cut the top off the bottom triangle. This will make the top of the bottom triangle be even to the sides of the envelope.
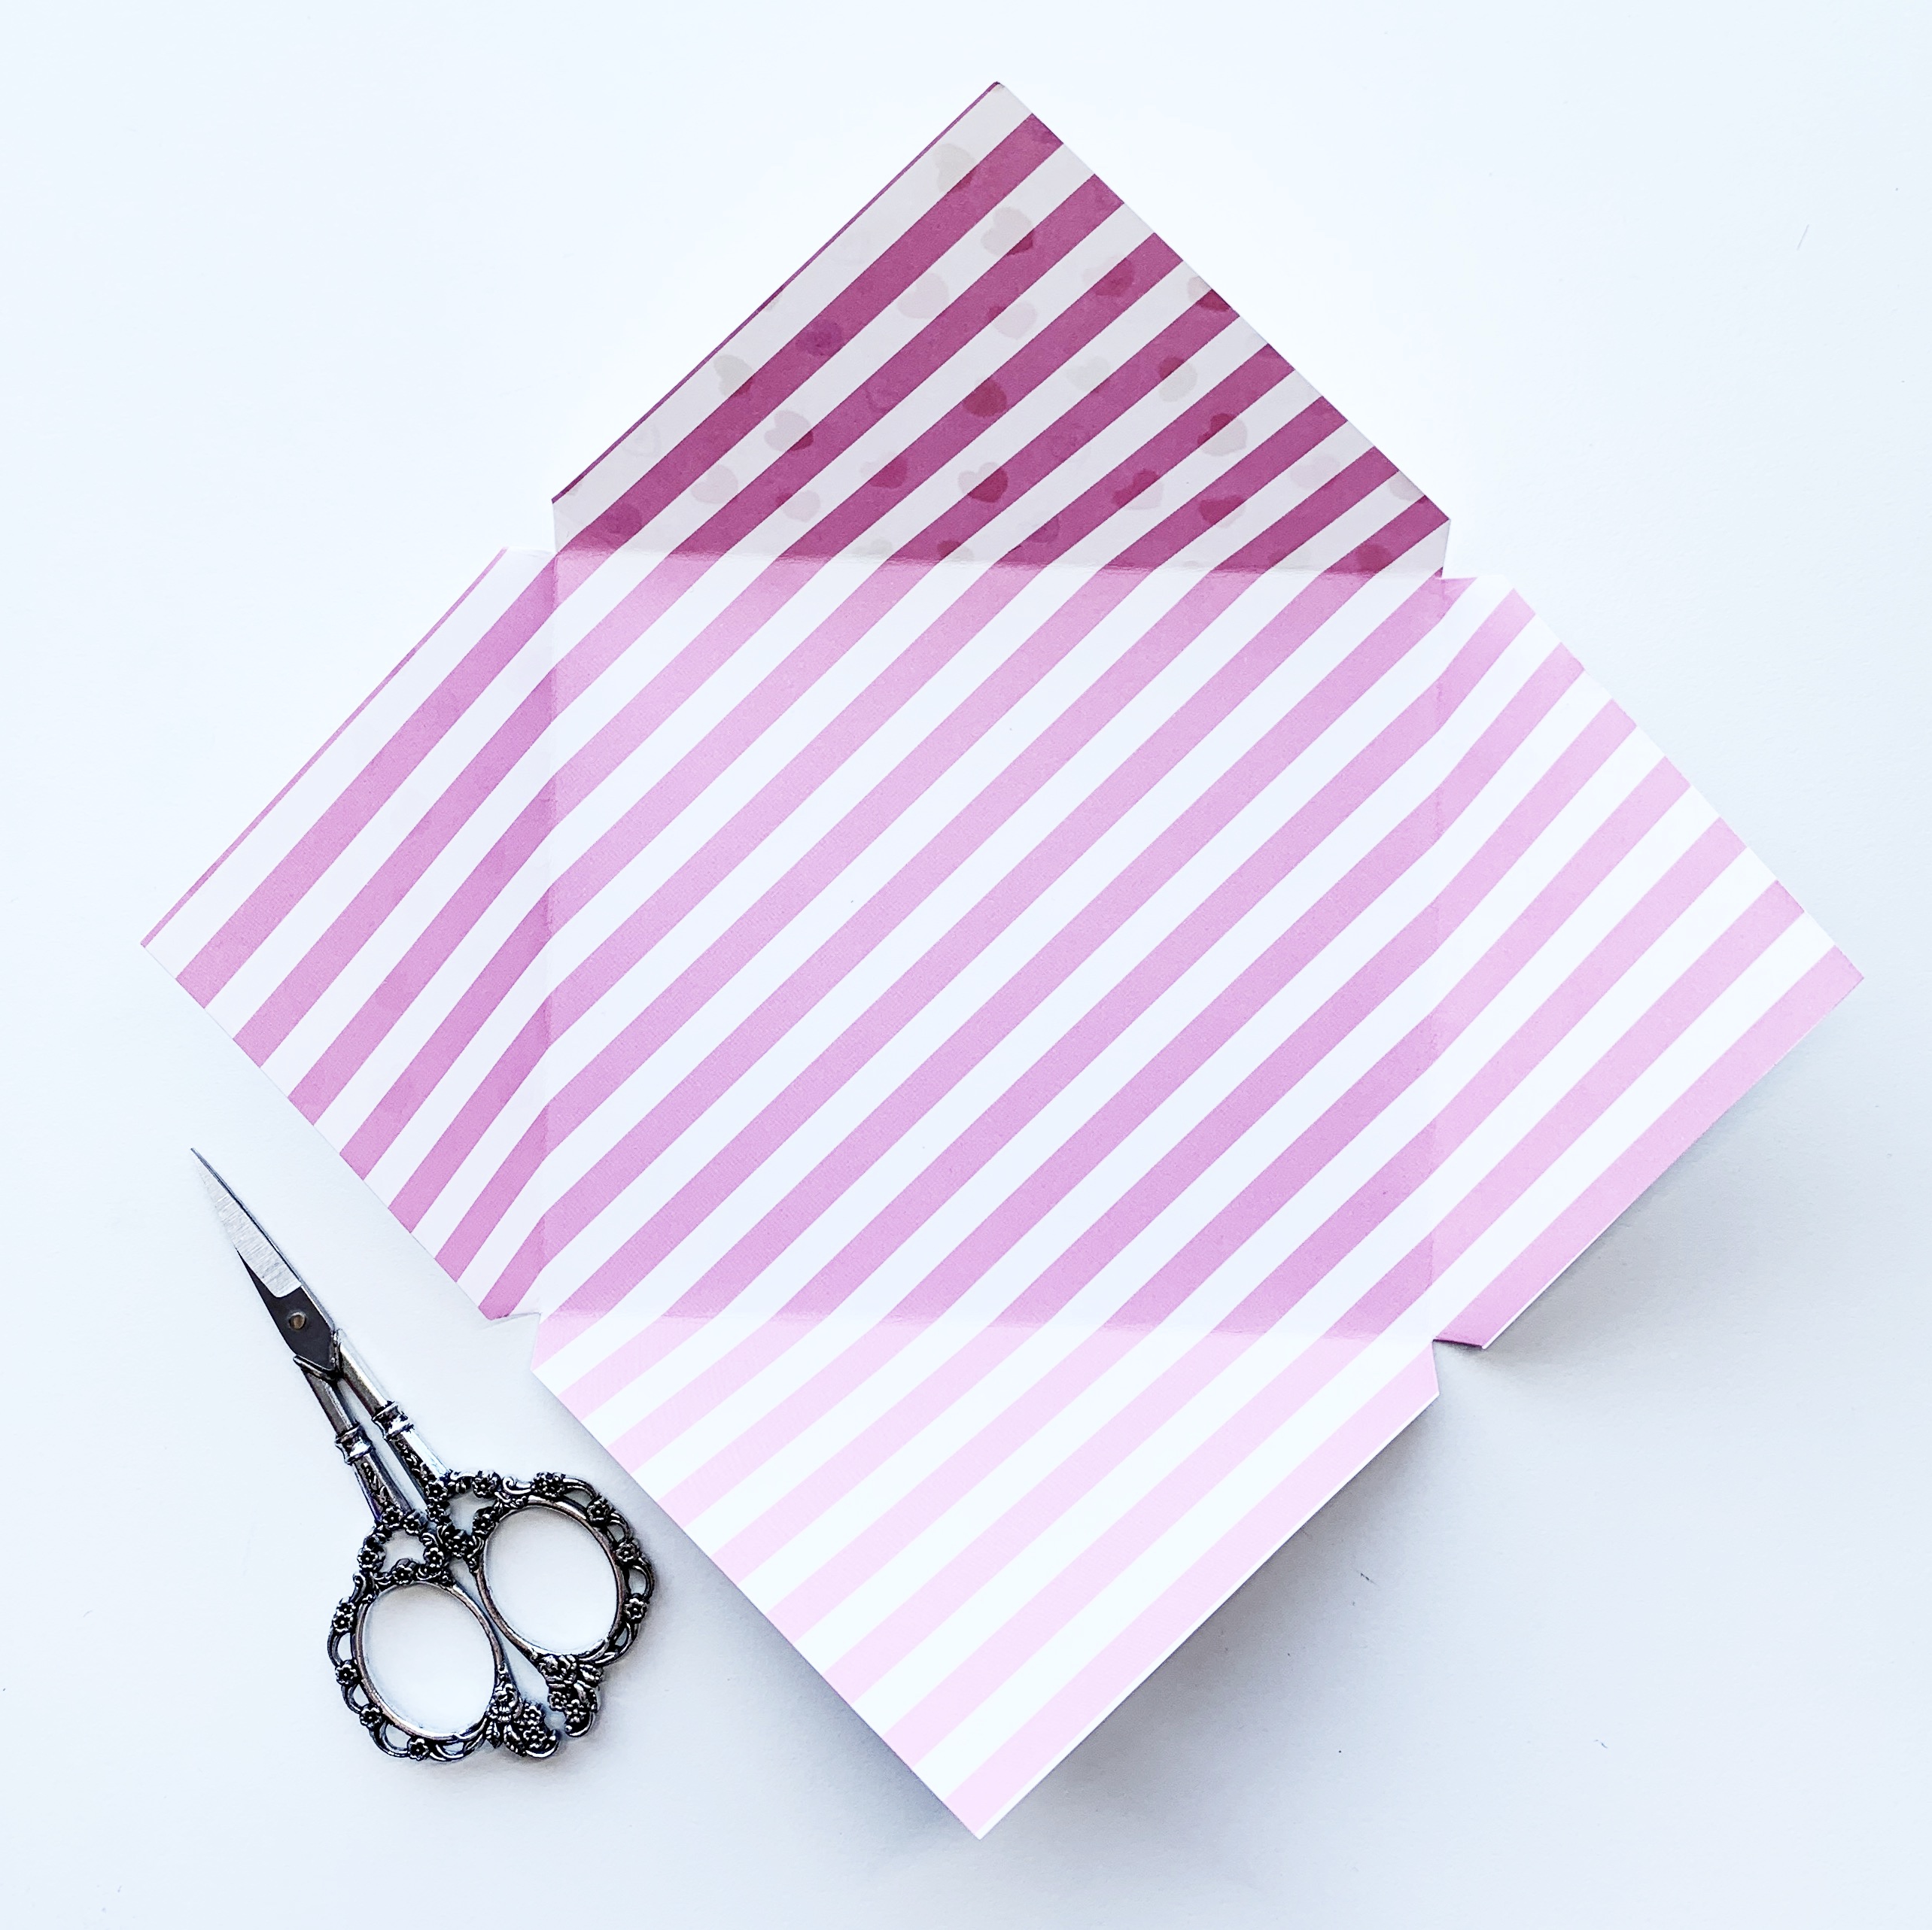
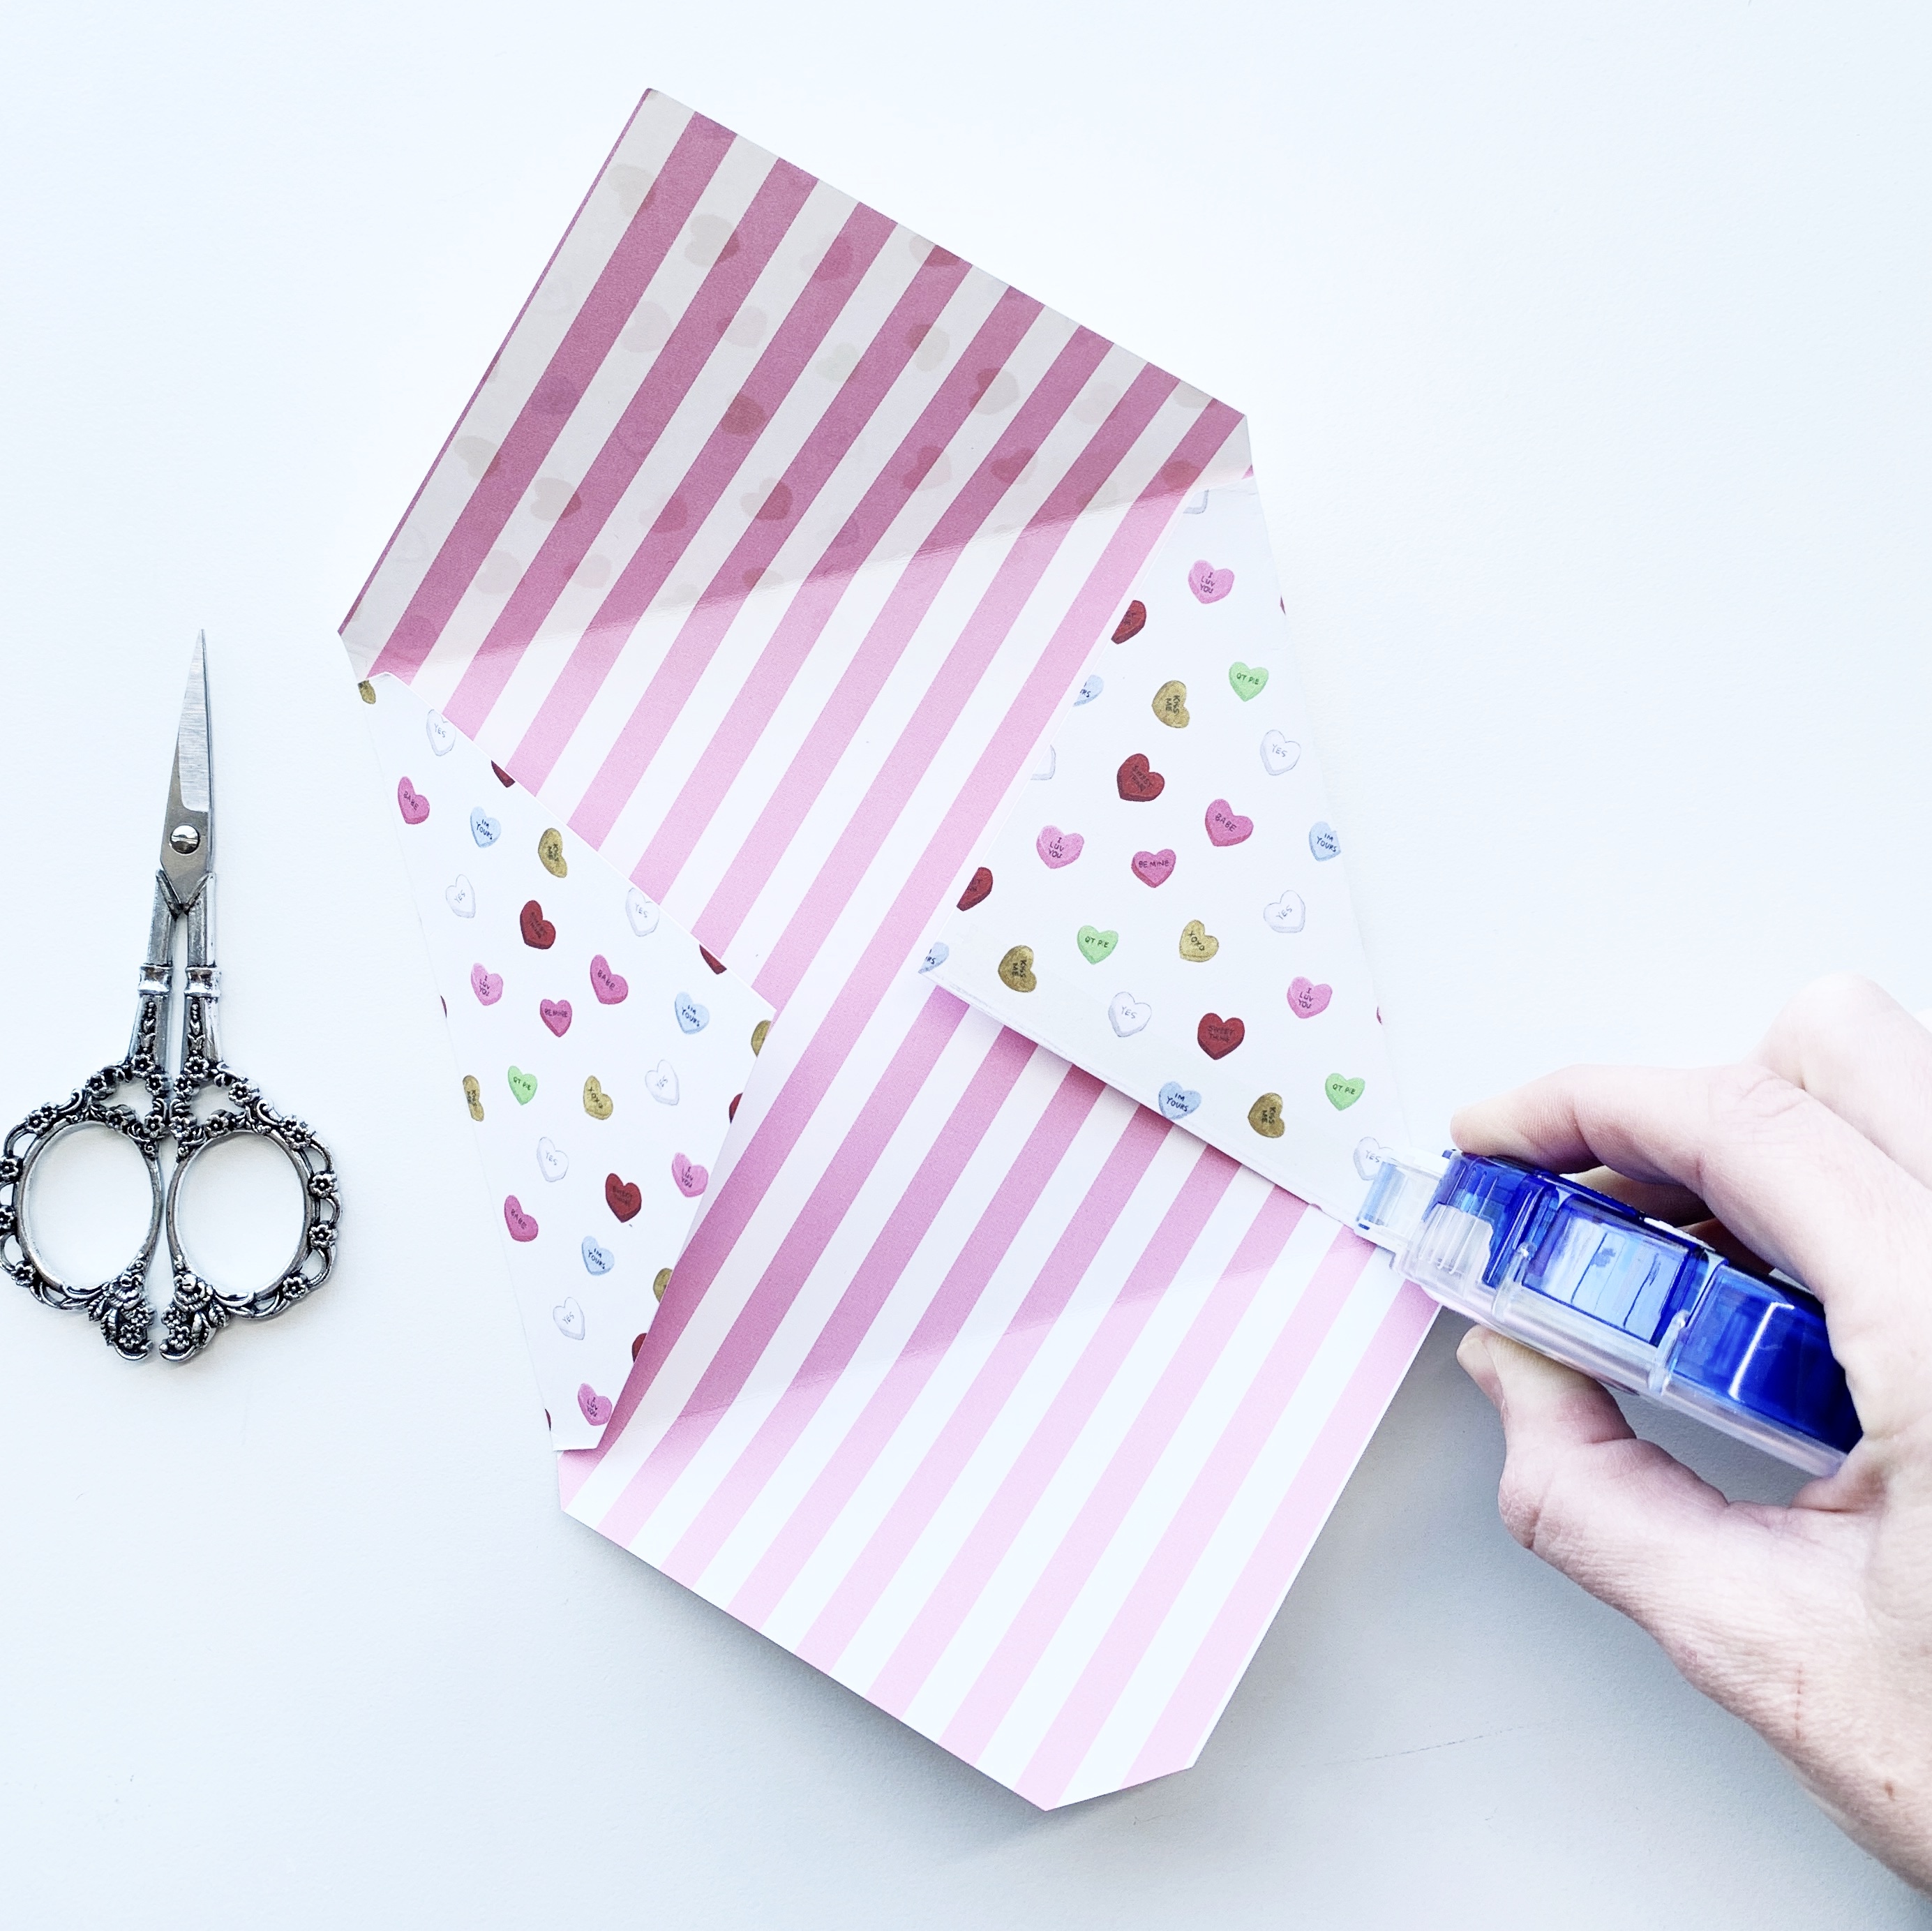
Step 4: Glue envelope together
Use the MONO Adhesive + Permanent to add a strip of tape to the bottom of both of the left and right triangles (where the bottom will come up to overlap them). Fold the bottom half of the envelope together, press and make sure the sides are adhered together. I love using the MONO Adhesive + Permanent because it always gets the job done! I’ve never had projects fall apart when I’ve used it!
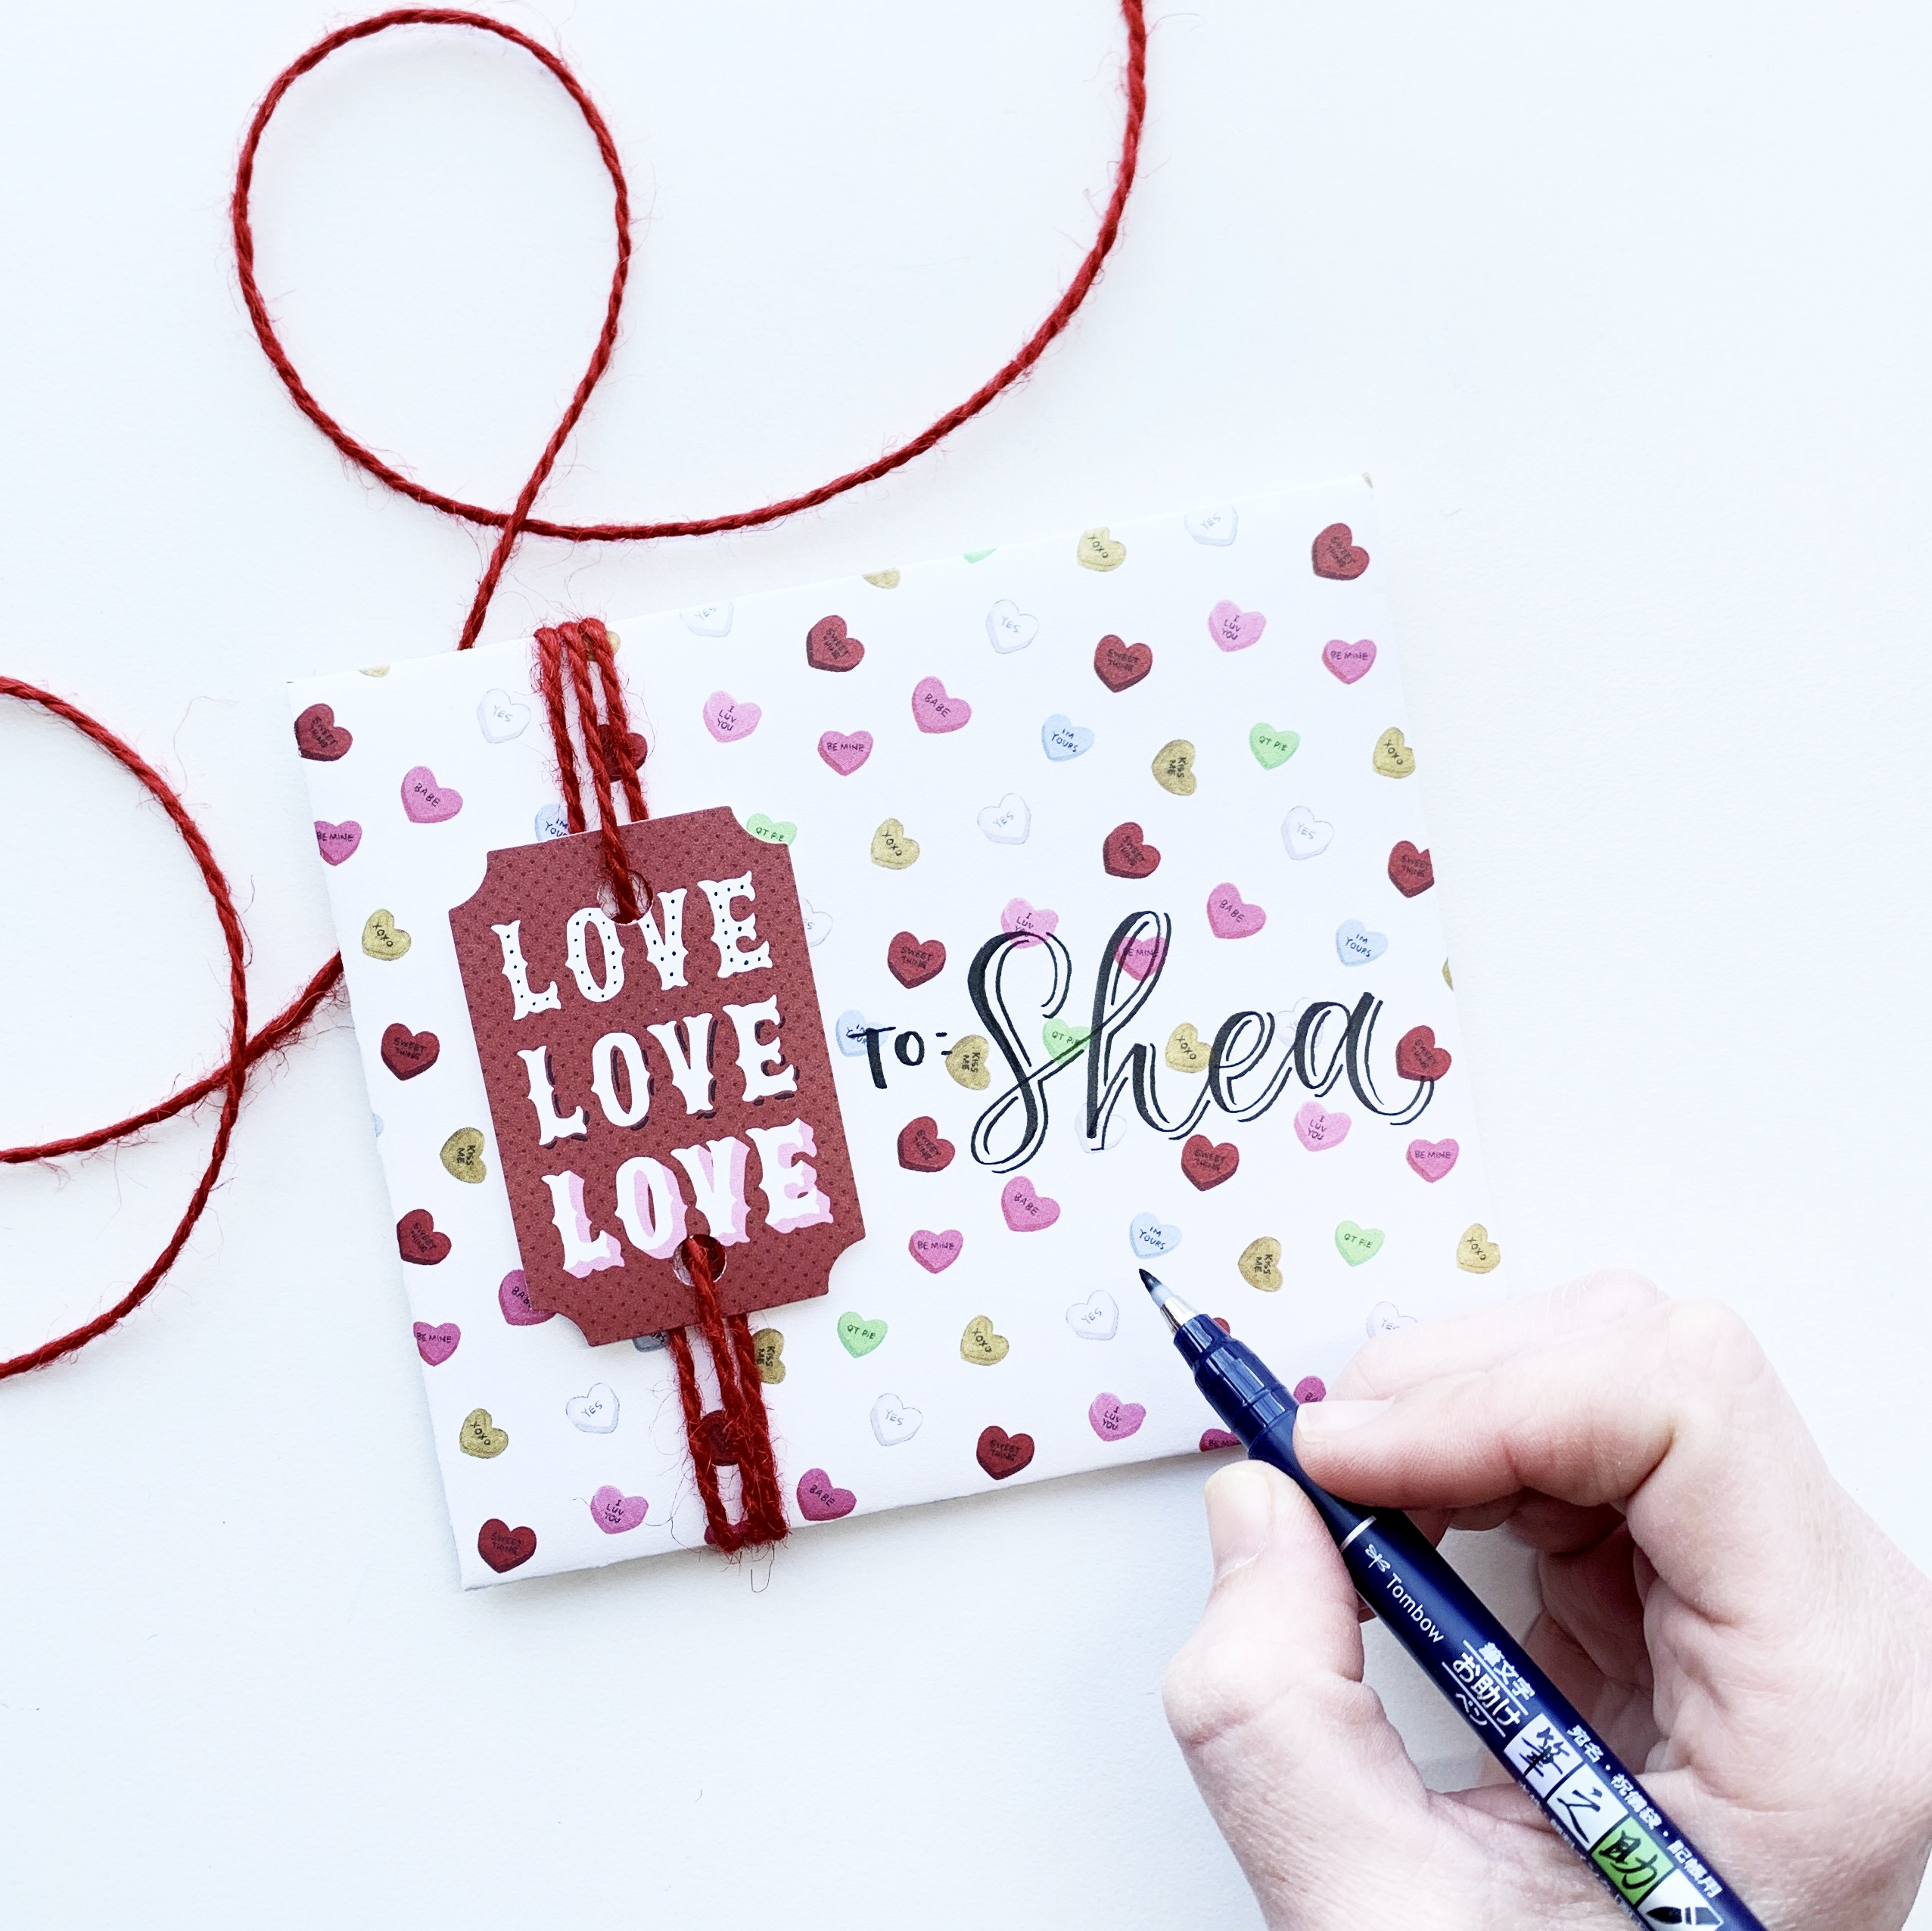
Step 5: Decorate
Decorate the front of the envelope by using the Fudenosuke Hard Tip Brush Pen to write the recipient’s name. I used my red string and an Echo Park Paper Co. die cut and wrapped it around the front of my envelope. With the Echo Park Paper, die cuts and stickers, you can decorate your envelopes a million ways! Plus, Echo Park Papers are double sided so the inside of your envelopes will look cute as well!
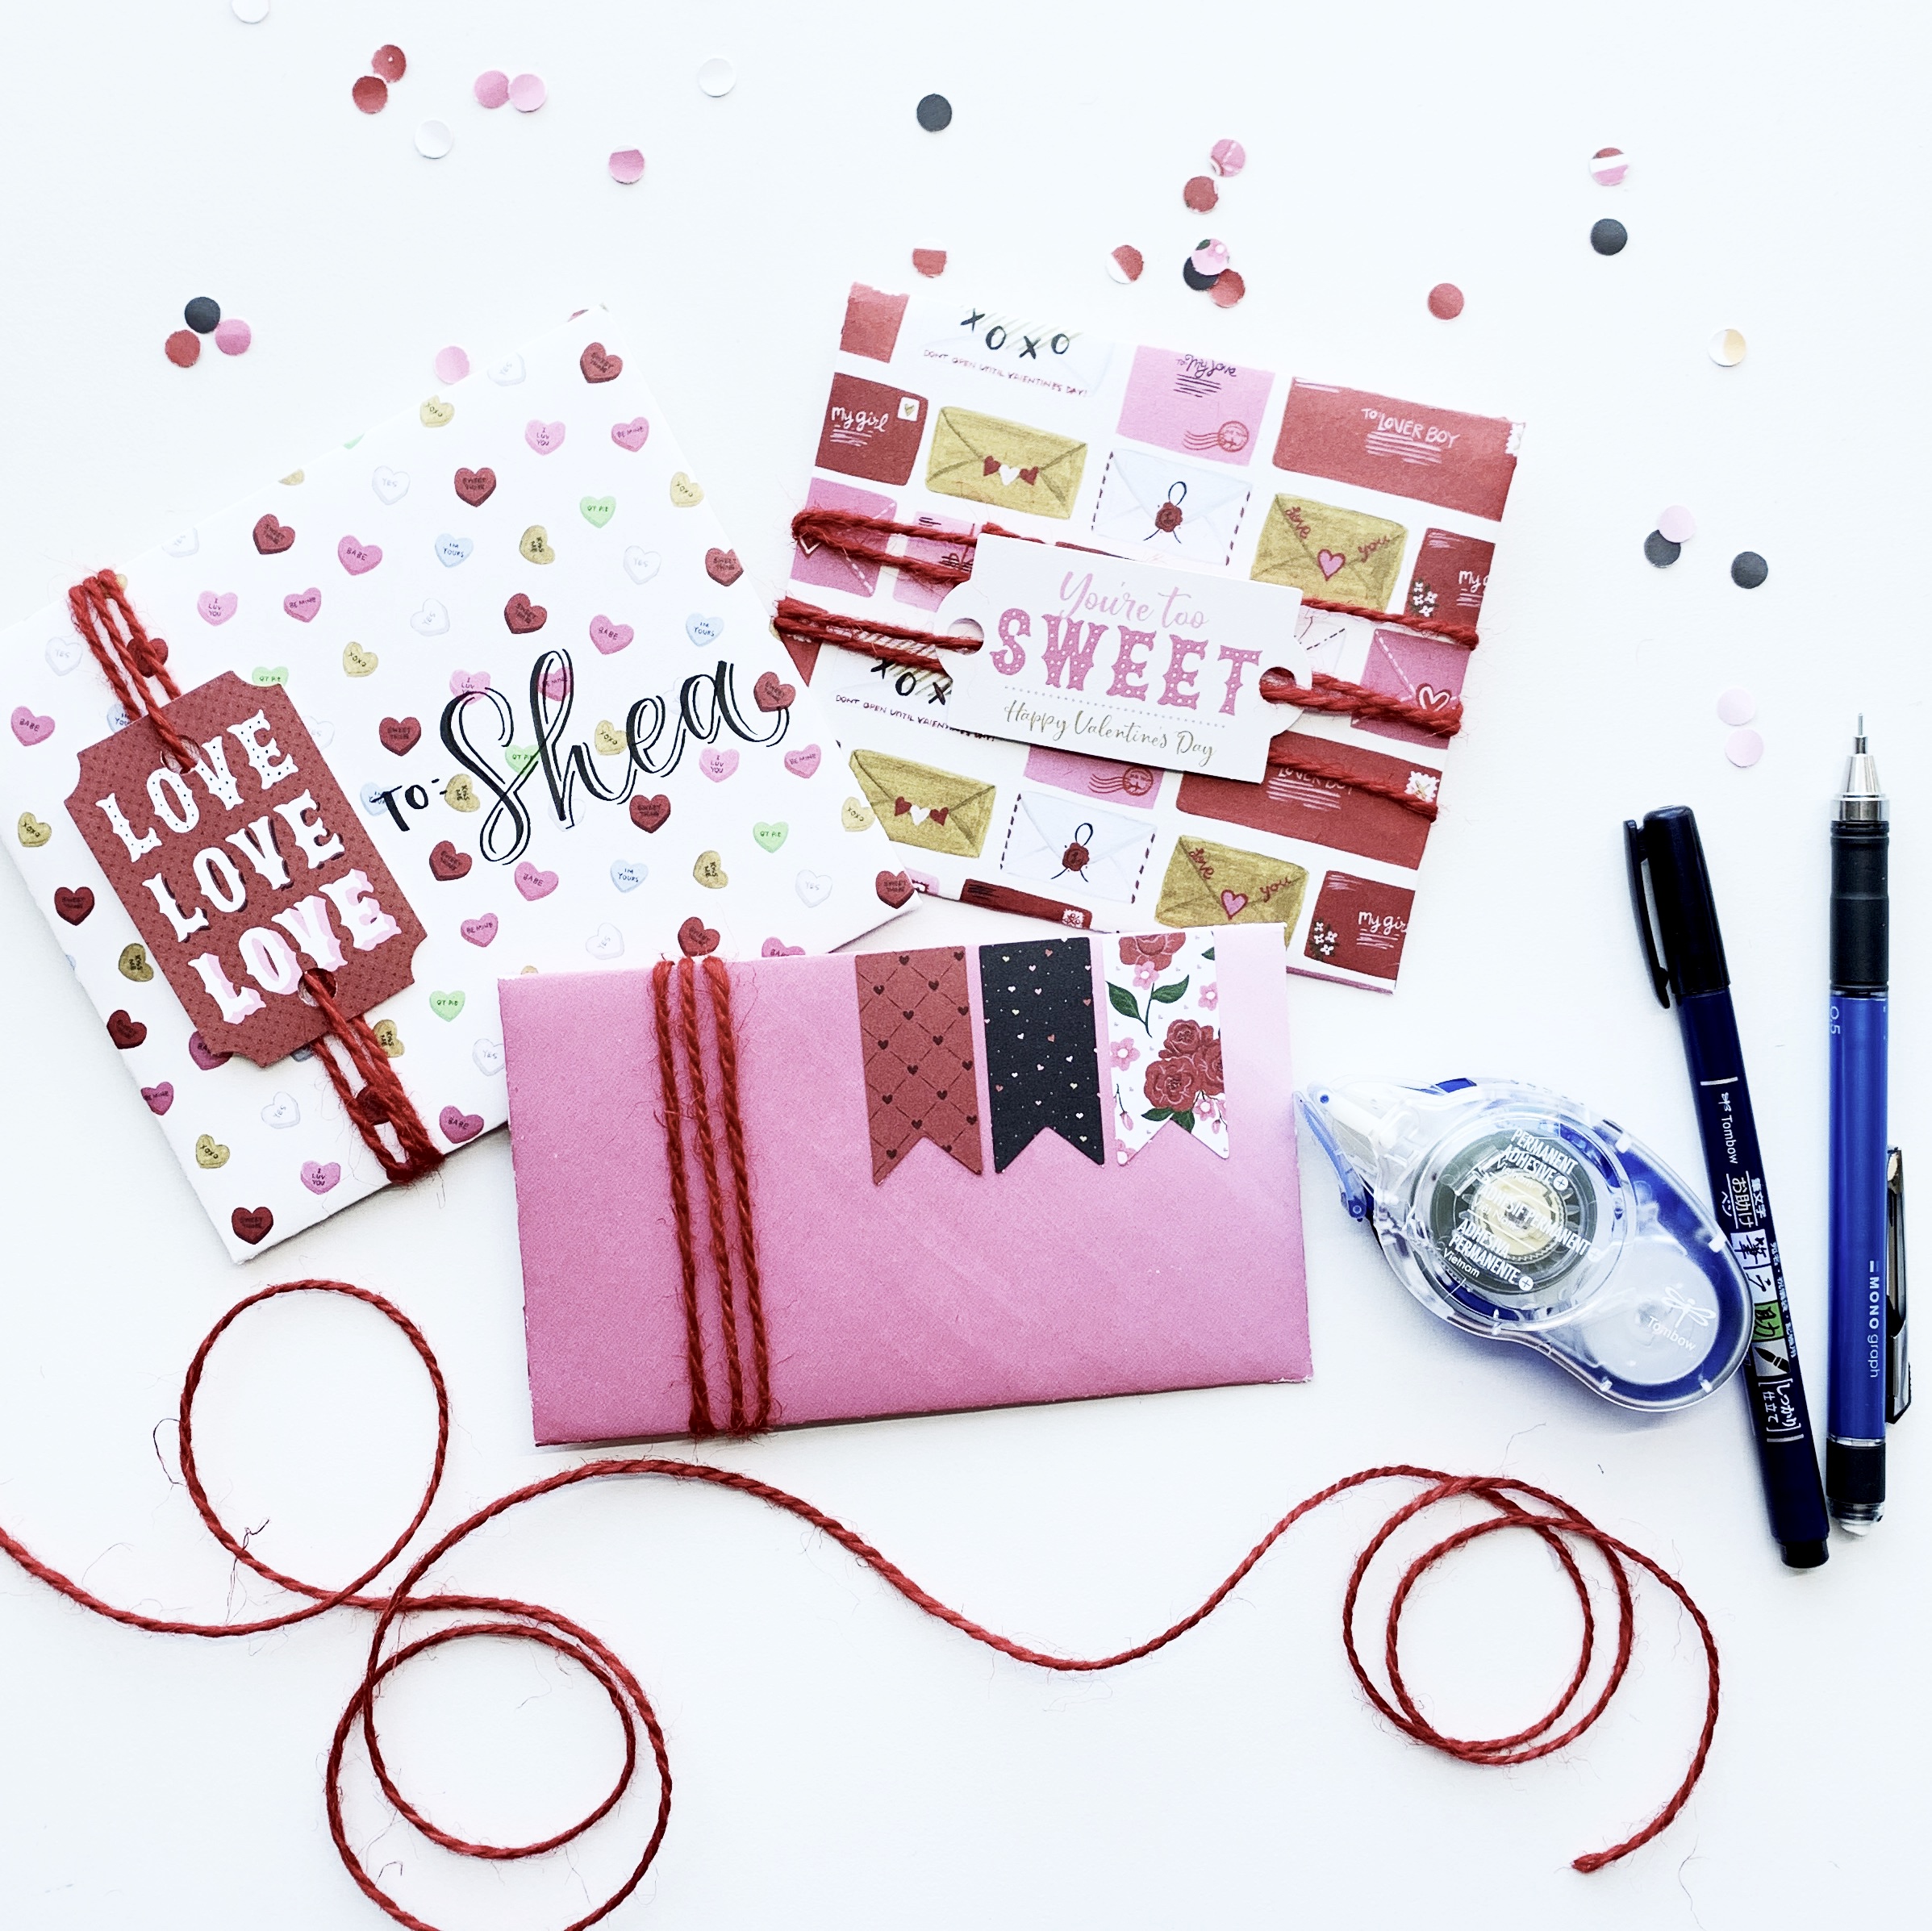
And that’s it! So easy! Play around with the dimensions of the paper, the length of the top and bottom fold and the decor to change things up and create new designs! I hope you found this easy envelope tutorial helpful and you try it out! For more inspiration, make sure to follow @studio80design!
For more paper crafts, check out these awesome tutorials:
- How to Make Galentines Tea for Two Envelopes
- Gift Ideas for Papercrafting Addicts
- Cardmaking with ABT PRO Markers