Hello, Tombow fans! Serena Bee from @SerenaBeeCreative here with a quick and fun DIY Home Decor tutorial on how to create an altered record! Let’s take a look at some of the supplies you will need to create this altered record decor piece!
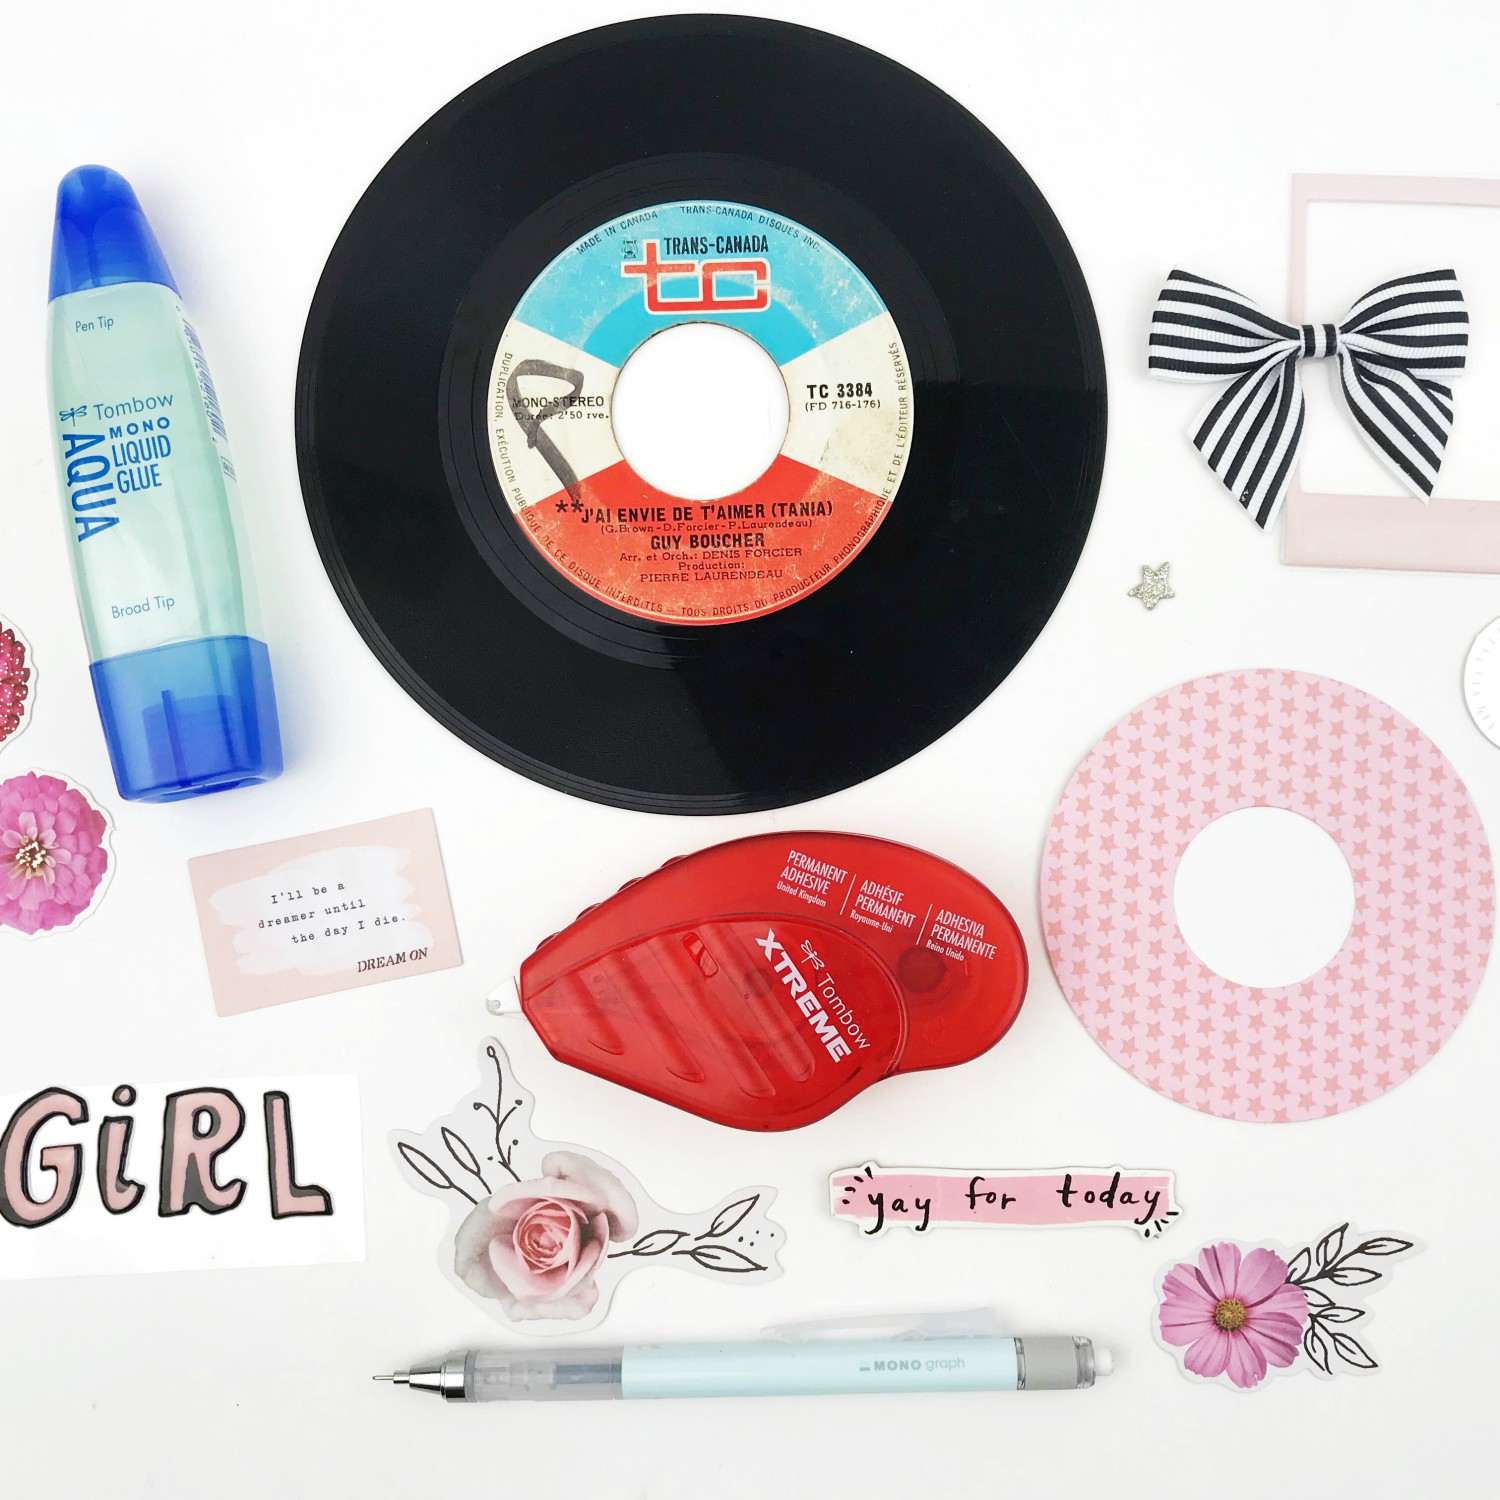
Supplies:
- Tombow Xtreme Adhesive
- MONO Aqua Liquid Glue
- “45 vinyl record
- Pattern paper
- Circle dies + die cutting machine
- Stickers and embellishments
- Rubbing alcohol/hand sanitizer
Part One:
To begin this altered record project, you first need to find a “45 vinyl record. They can easily be found for cheap at any thrift shop or online sites like Ebay or Etsy.
First, it’s important to clean your record to remove dust, dirt, and oils that may have accumulated over the years. I like to use rubbing alcohol or hand sanitizer and a paper towel to gently clean the record.
Next, it’s time to select a pattern paper to create your own label. Using nesting circle dies, select two that match the original label on the record and cut using your die-cutting machine.
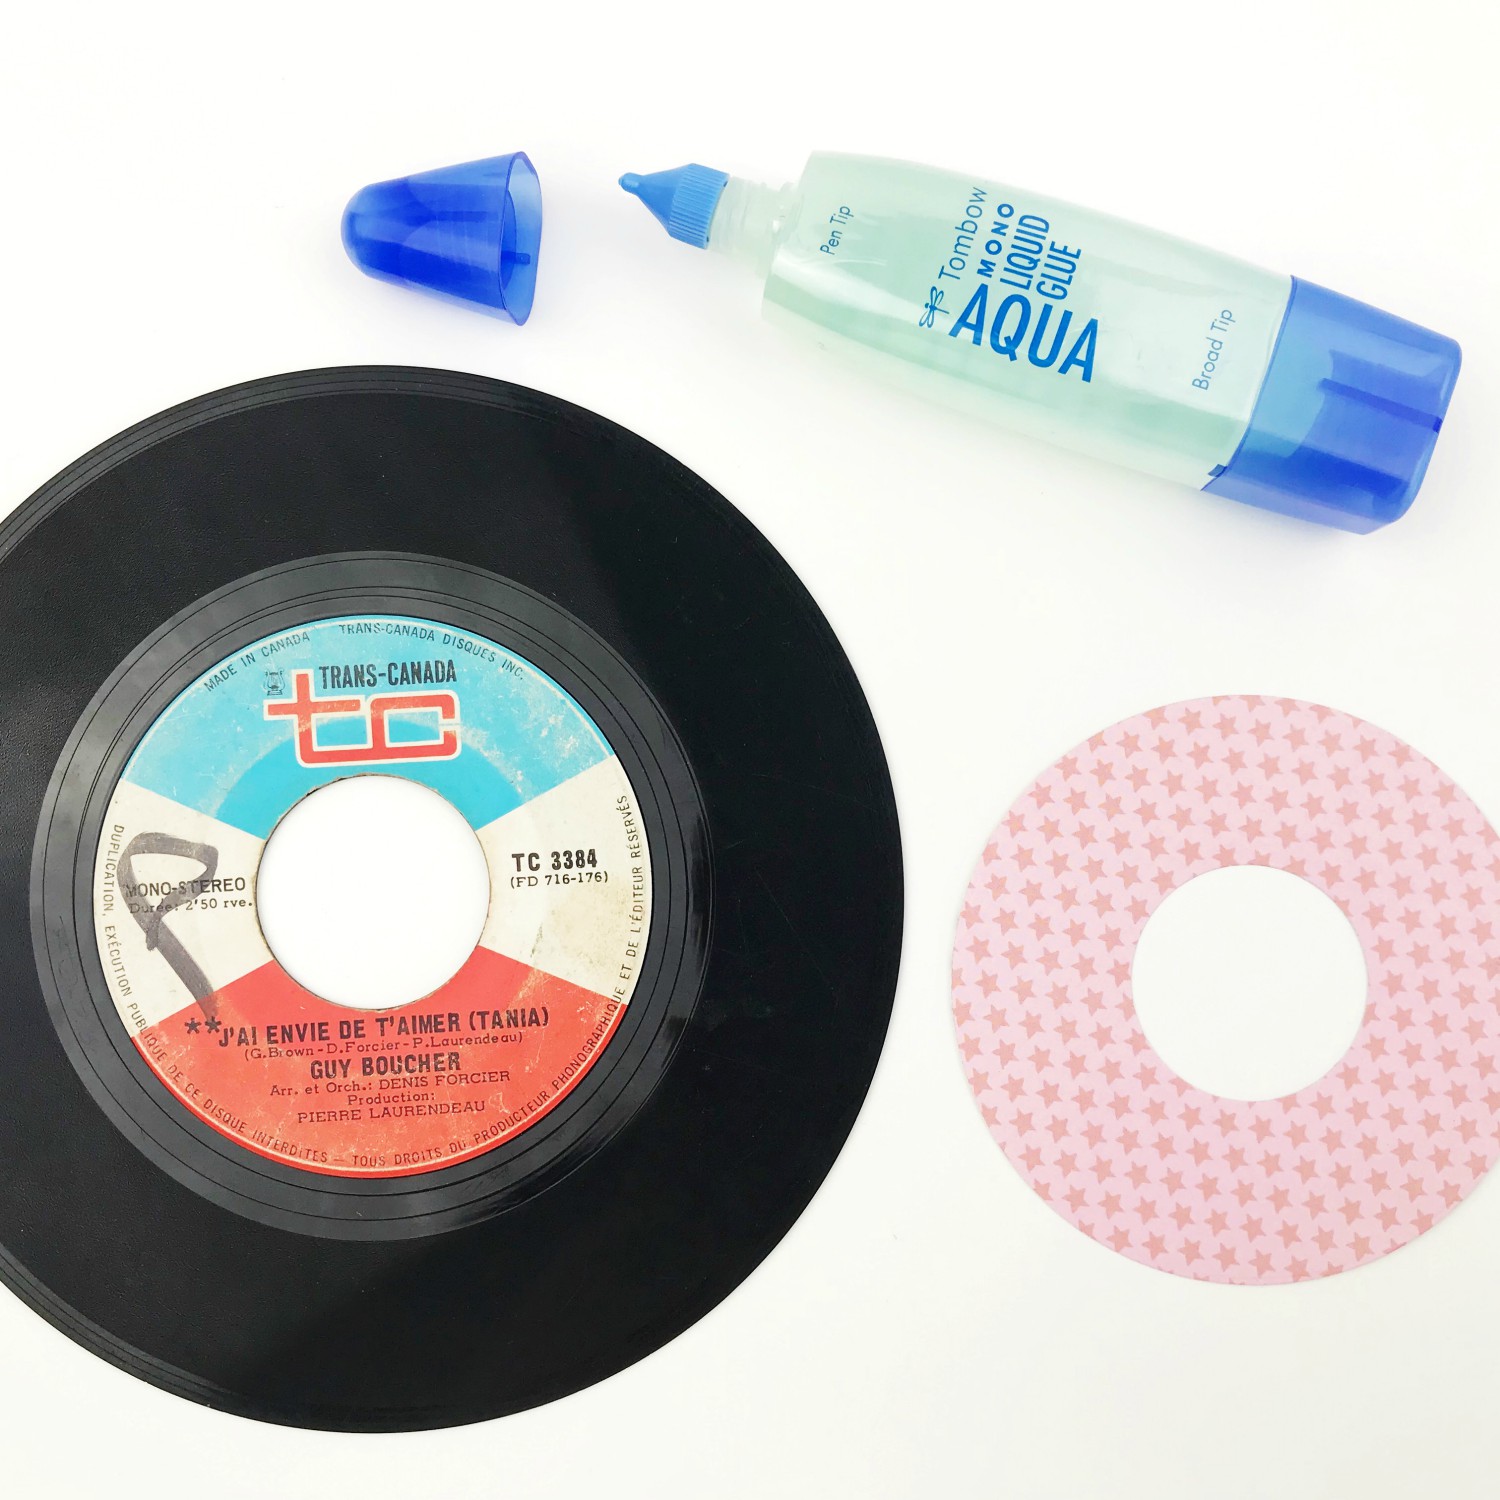
Next, grab your MONO Aqua Liquid Glue and adhere your label to the center of your record. The MONO Aqua Liquid Glue is the perfect adhesive for these types of altered projects because it adheres paper perfectly to hard surfaces like plastic, vinyl records, wood, metal, and more!
Part Two:
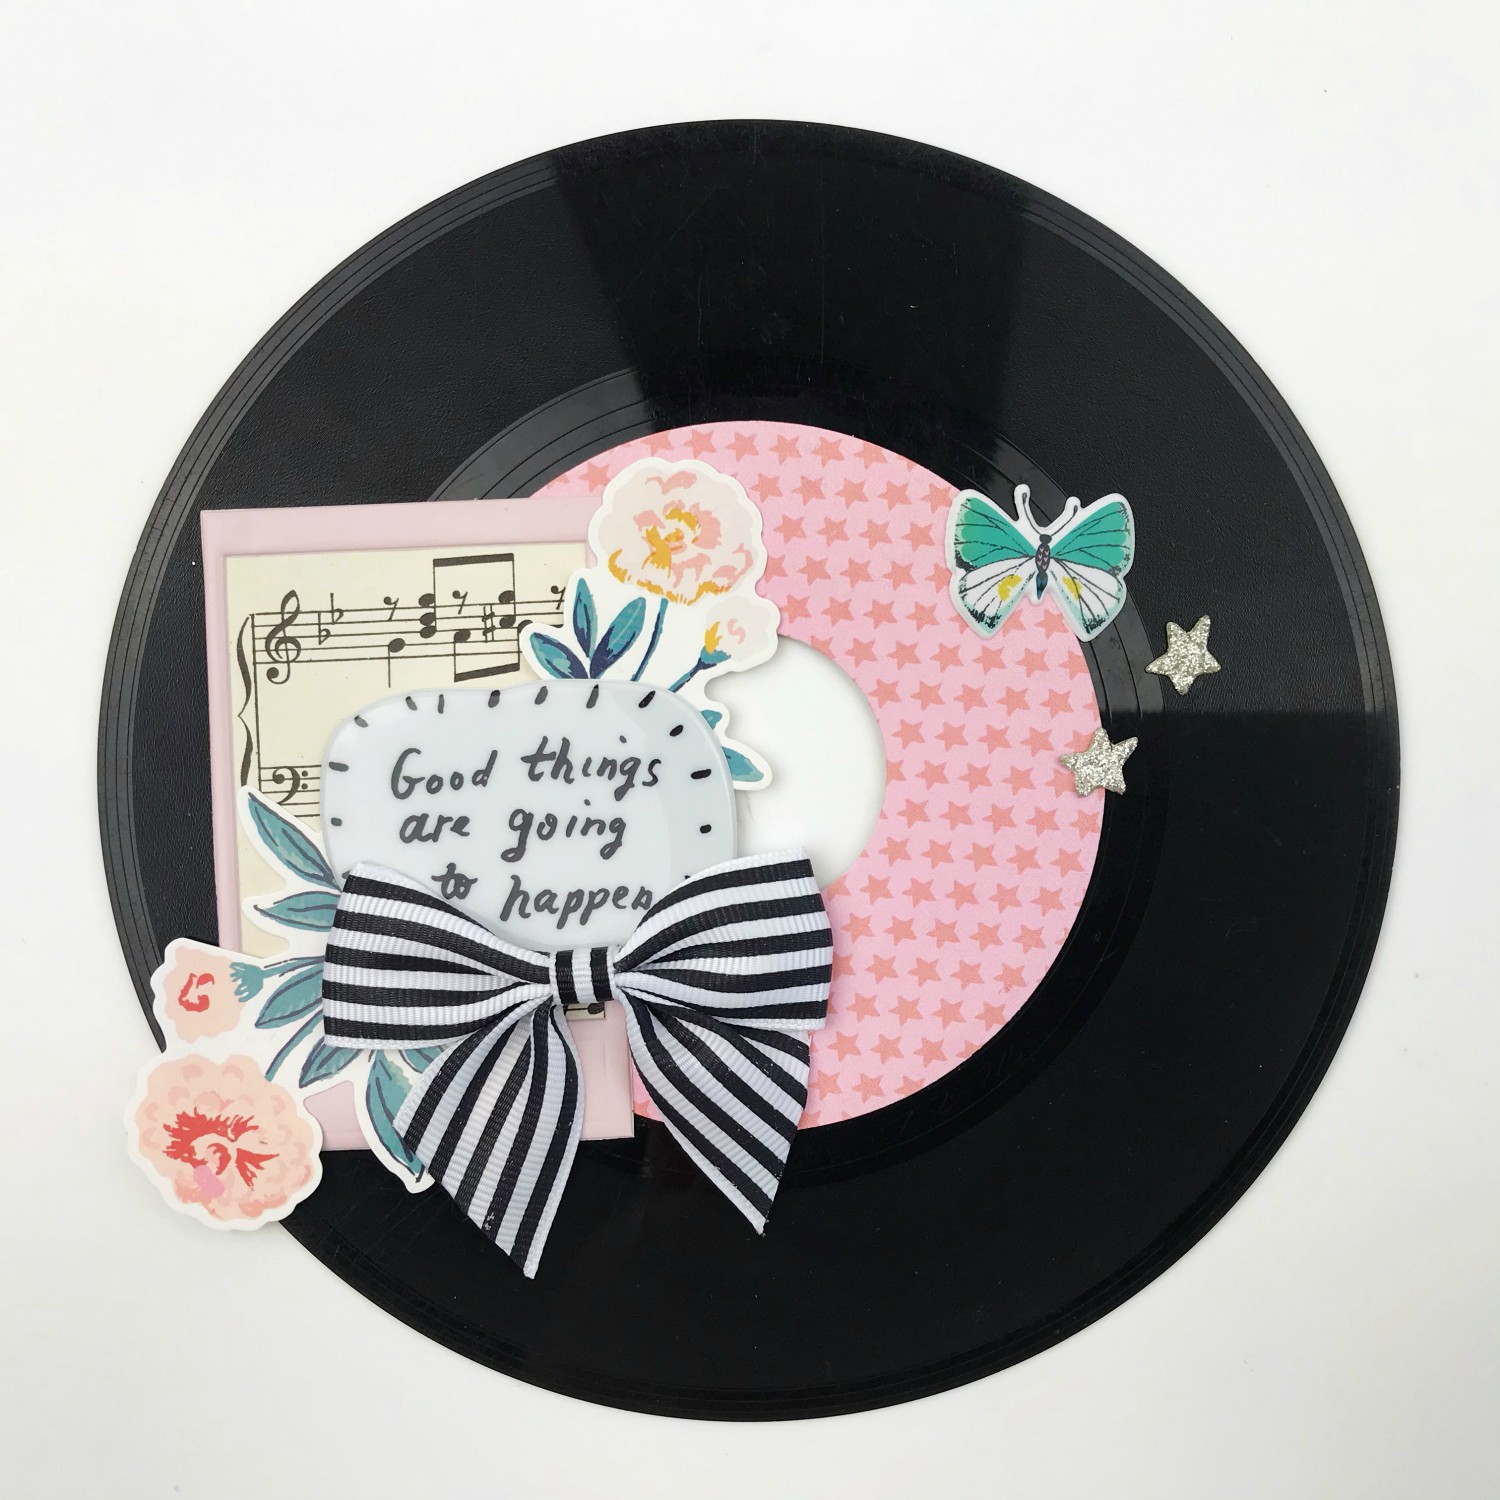
Now the fun part. It’s time to decorate your altered record! I decided to use the All Heart Collection from Crate Paper to create a motivational art piece that I can then place on my gallery wall.

To adhere to my fabric bow, I’m using the Tombow Xtreme Adhesive because of its strong bond.
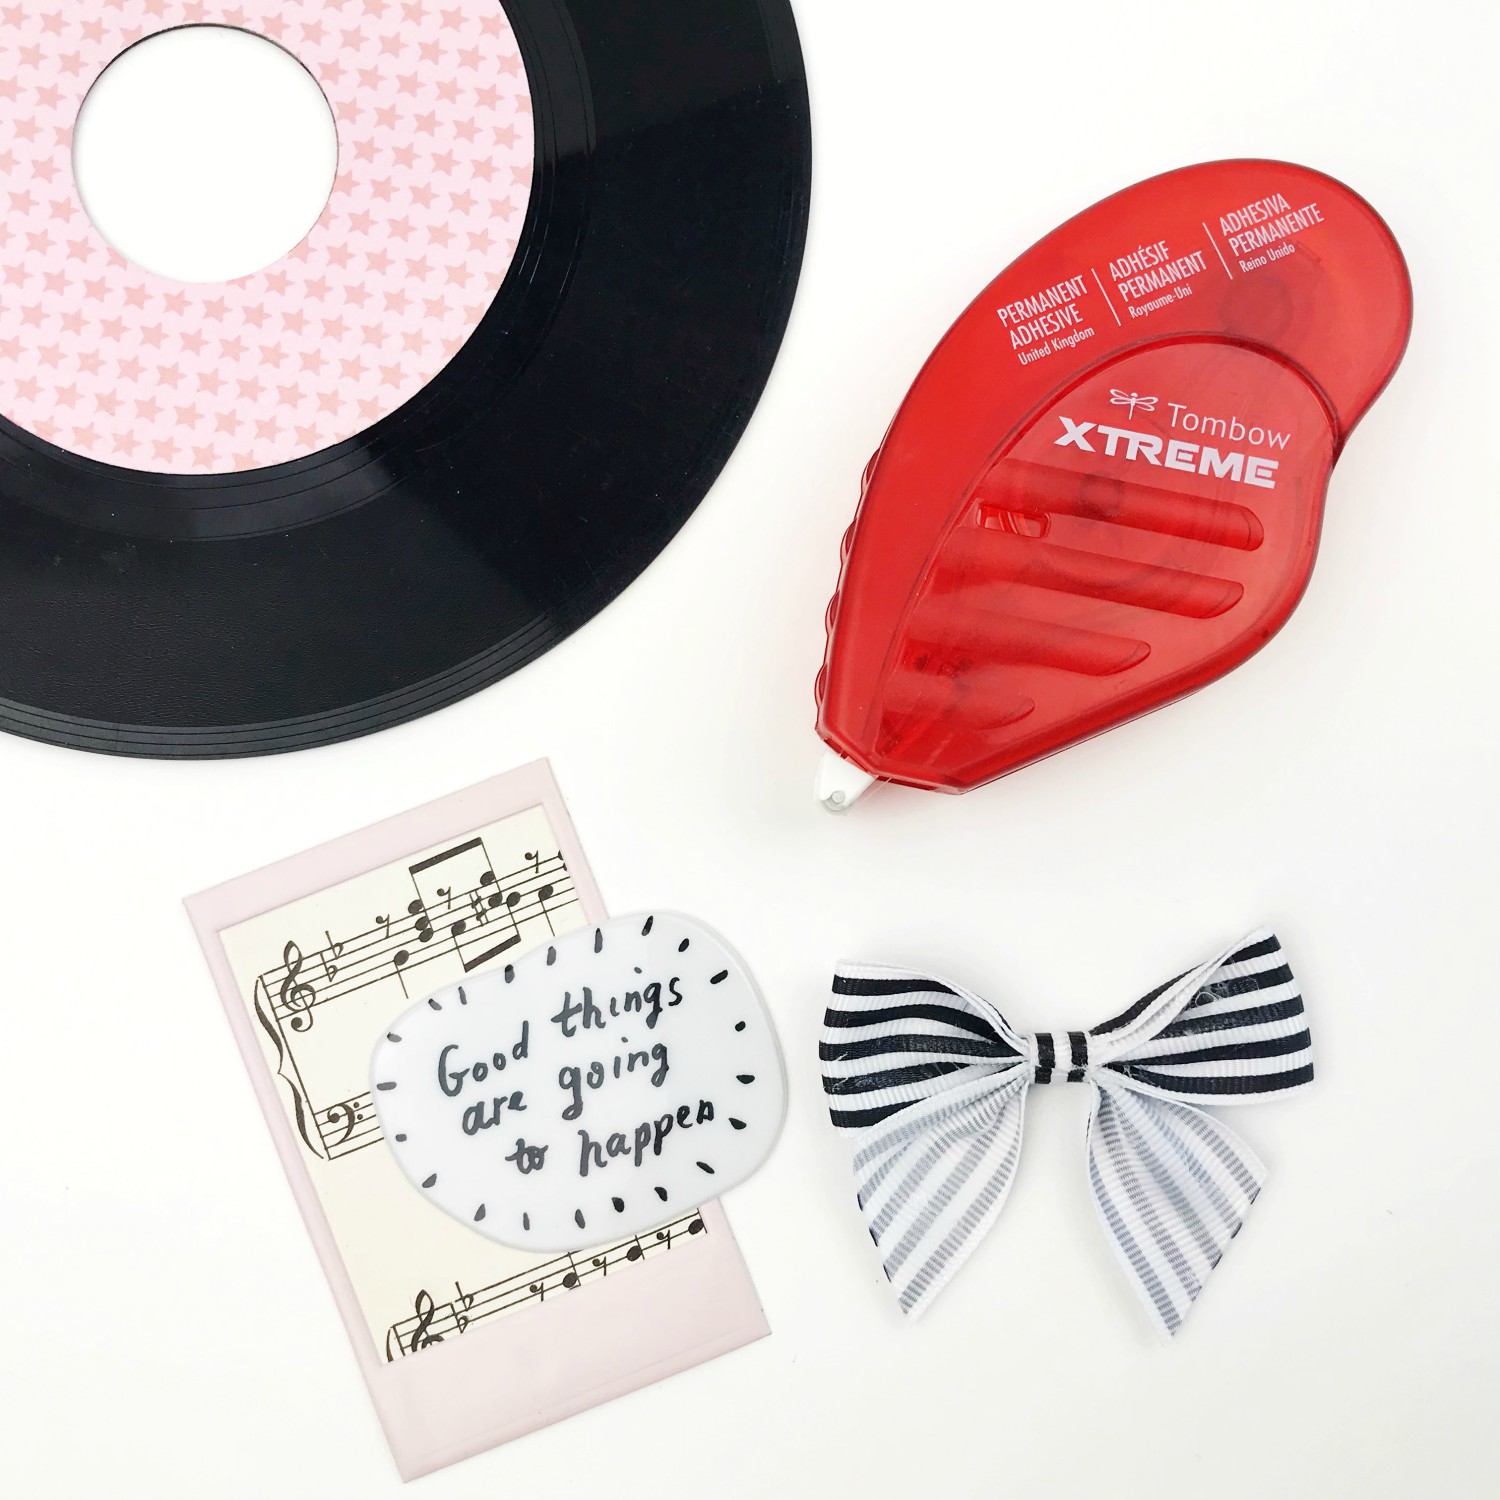
I’m using antique music note paper to line the inside of a pink polaroid frame. When working with antique papers, I recommend using the MONO Aqua Liquid Glue instead of an adhesive runner because the runner will stick to the paper and lift it up. Antique music note paper is very delicate, as you can see below. The back of it tore when I was layering a floral sticker.
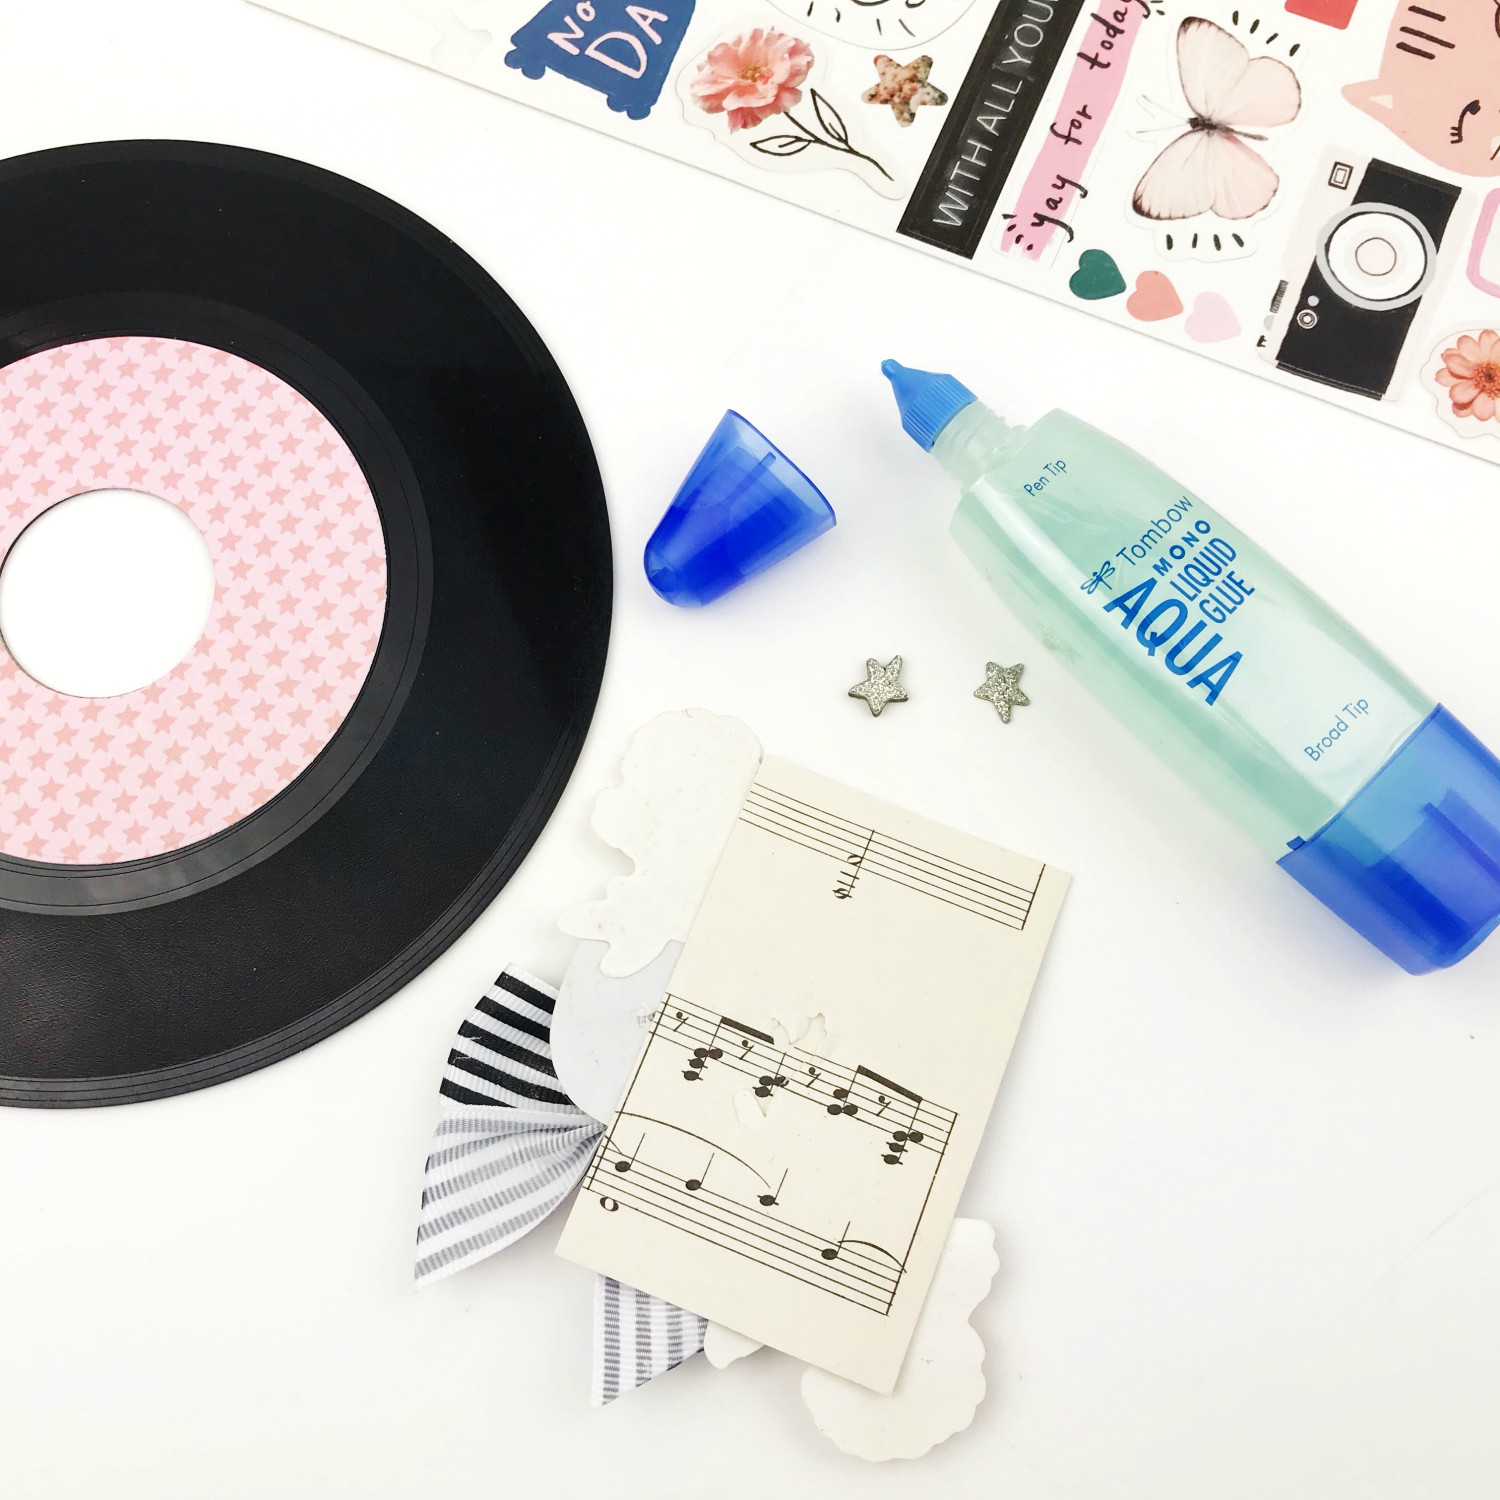
Once you have decided on the layout of your stickers and embellishments, it’s time to adhere the focal point to your record using the MONO Aqua Liquid Glue.
Further embellish the record as you like. I added a puffy butterfly sticker and a couple of glitter stars to balance off the right side of the altered record.
You’re all done!
Grand Finale:
Using the Xtreme Mounting Putty, add a small amount behind your record and then place it on your wall! This creates the perfect home decor piece for all you music fans out there! You can create a bunch of altered records using the Xtreme Mounting Putty. You can add them on the wall around your record player!
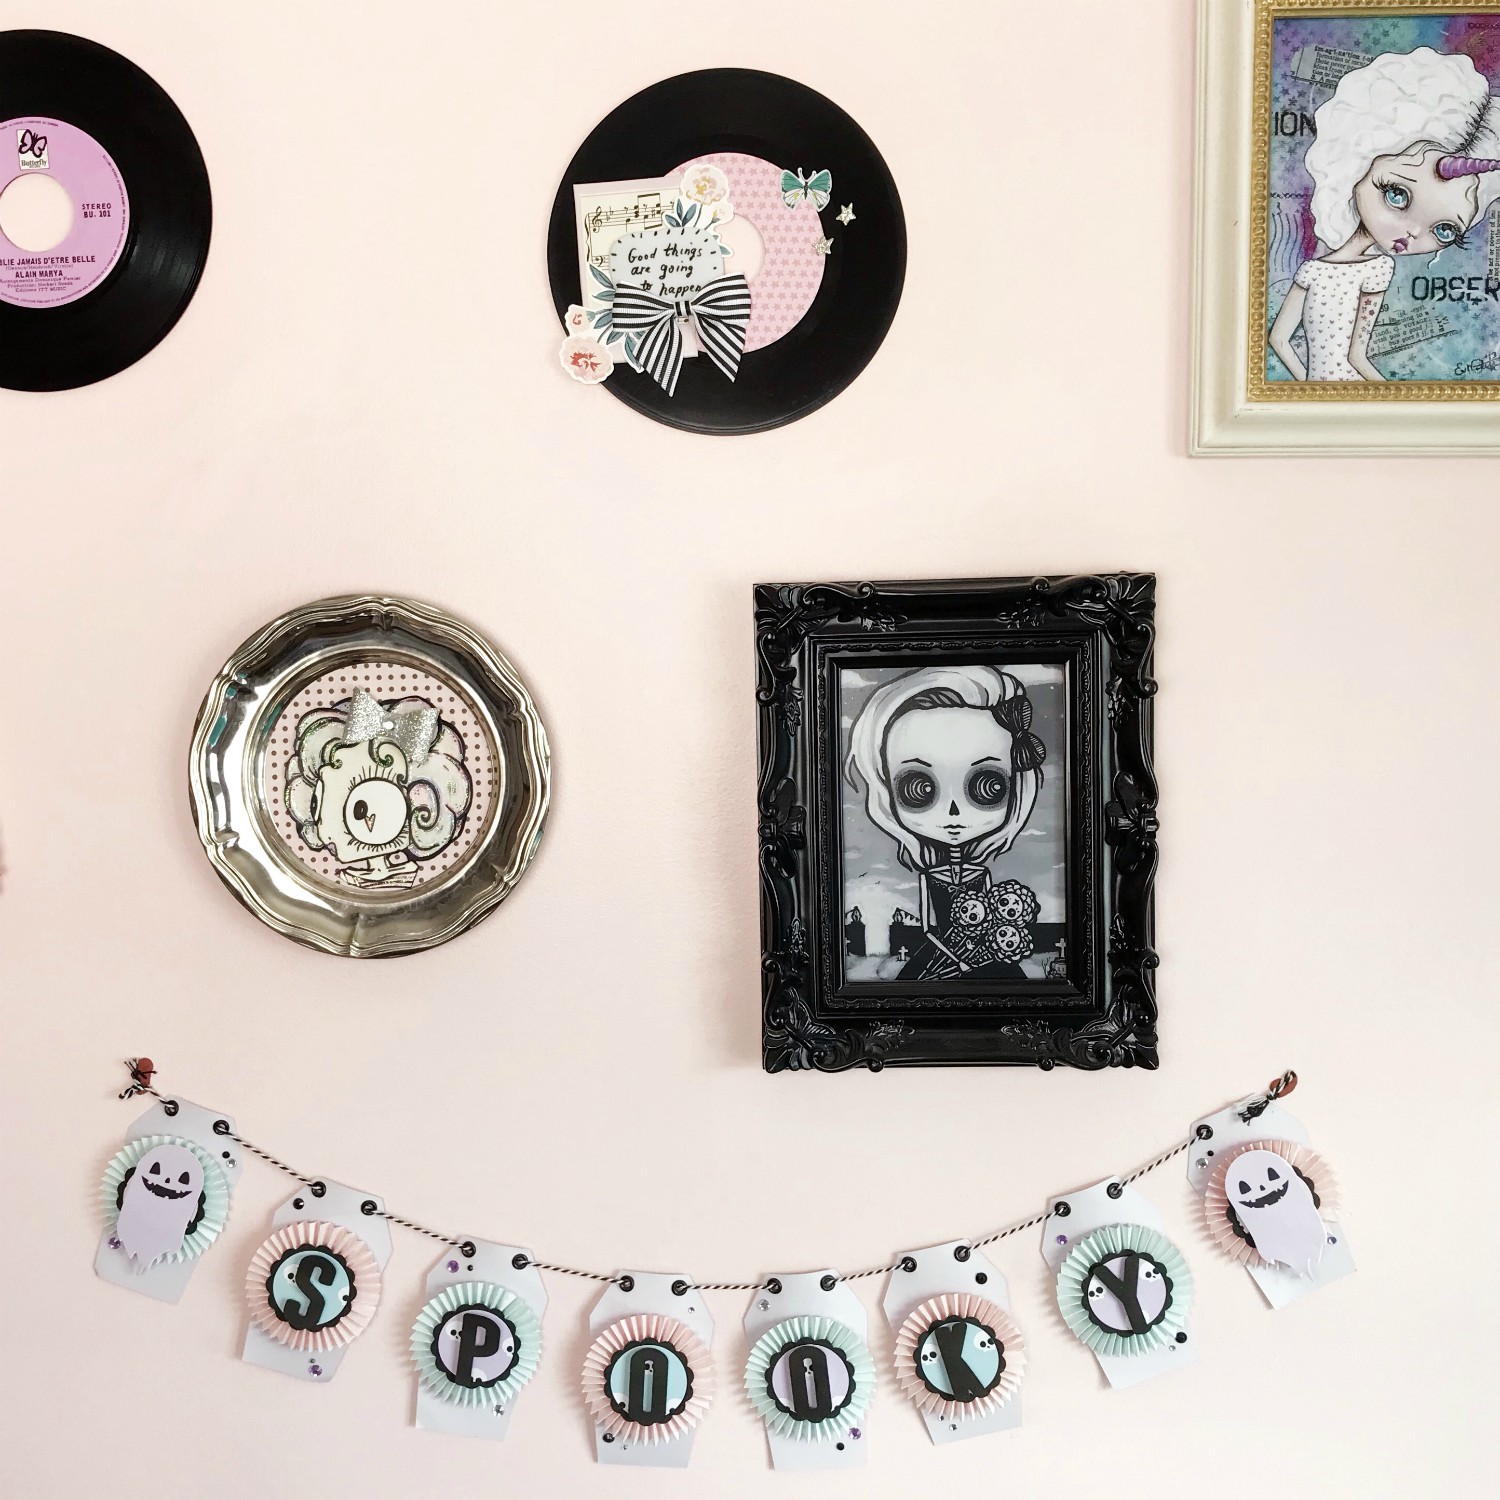
You don’t have to worry about the Mounting Putty ruining your paint or walls. This stuff works like magic! It can hold up to 13 lbs, is washable, and super easy to remove! I’ve been using it for years and it is literally one of my favorite Tombow products of all time!
In fact, all the pieces you see on my gallery wall have been added using the Mounting Putty. This means I can move things around without having to make multiple holes on my wall!
If you’d like to see how I created that altered plate decor piece in the photo above, you can check out the full tutorial here.

If you do create your own altered record, make sure to tag @serenabeecreative and @tombowusa.
If you’d like to see more from me, check out my Youtube channel or join my Crafty Rebelles Community!
Much love,
Serena Bee
Pingback: DIY Gift Box Decor Using Tombow Xtreme Adhesive - Tombow USA Blog