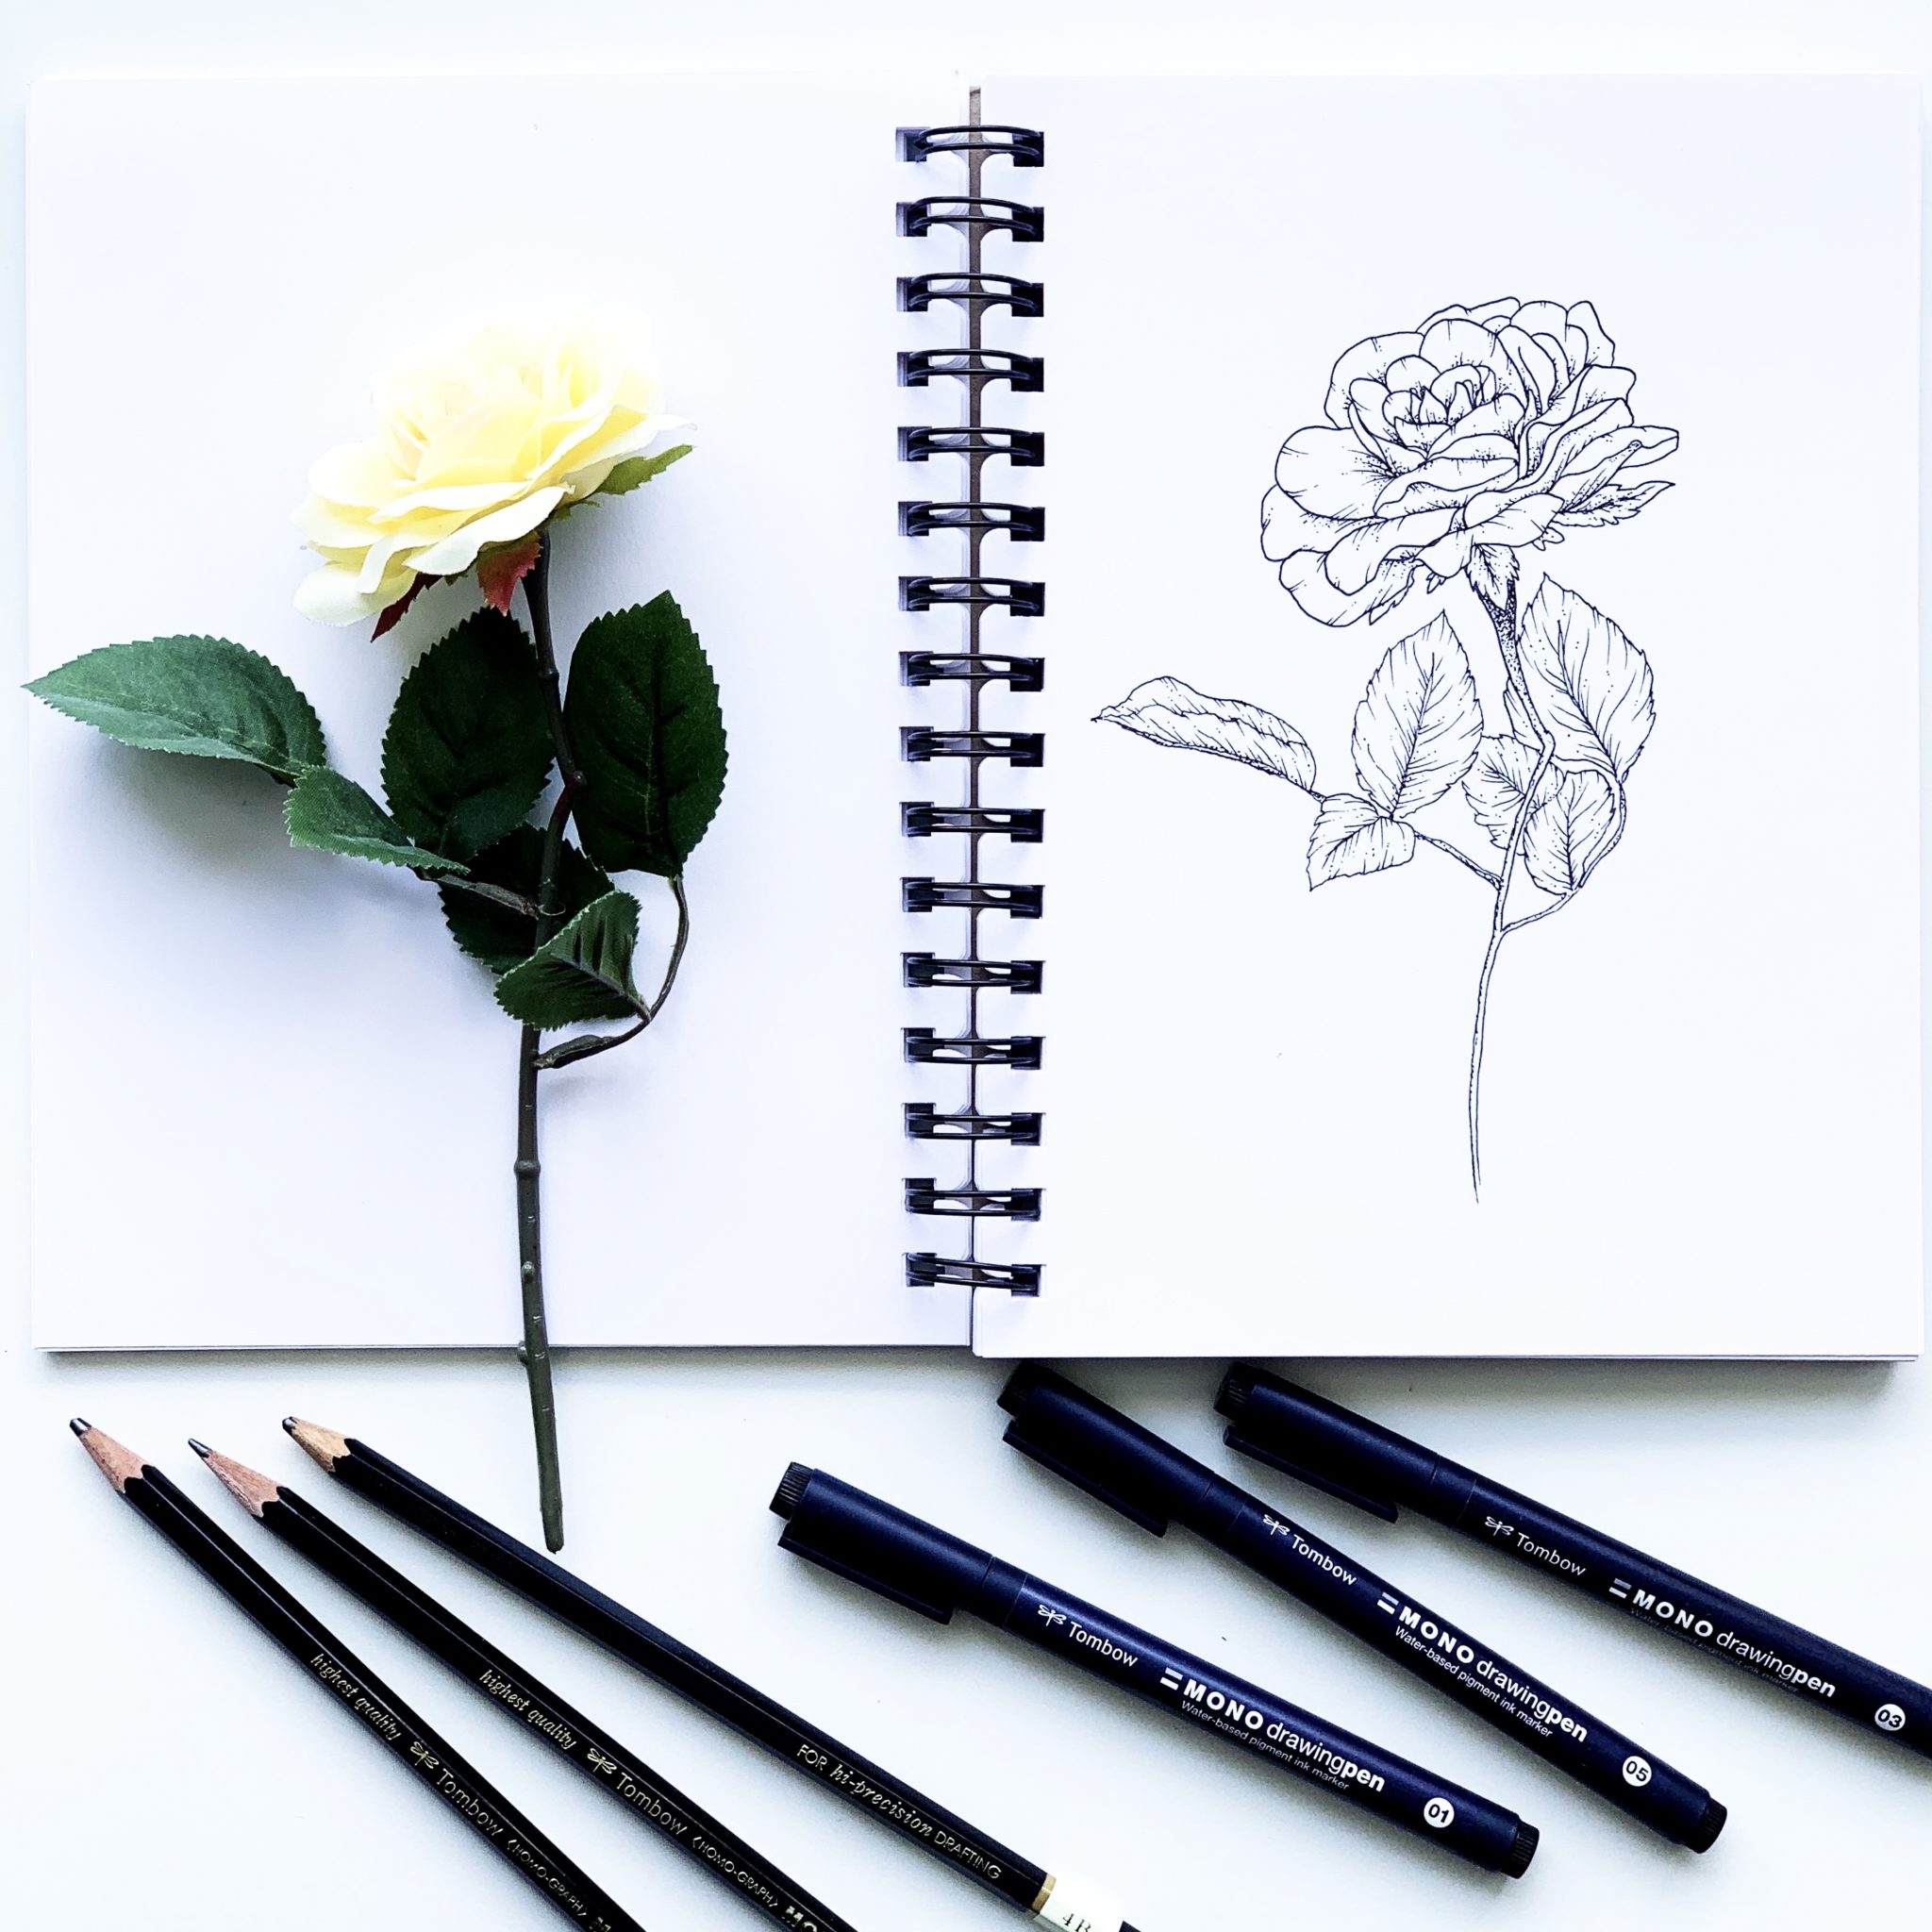
Hi friends, Adrienne from @studio80design here to talk about floral illustration! I love using my Tombow MONO Drawing Pens to create floral illustrations. Today, I’m going to share some tips and tricks as well as a tutorial on how you can learn how to draw florals. Let’s get started!
Tip 1: Draw from real life
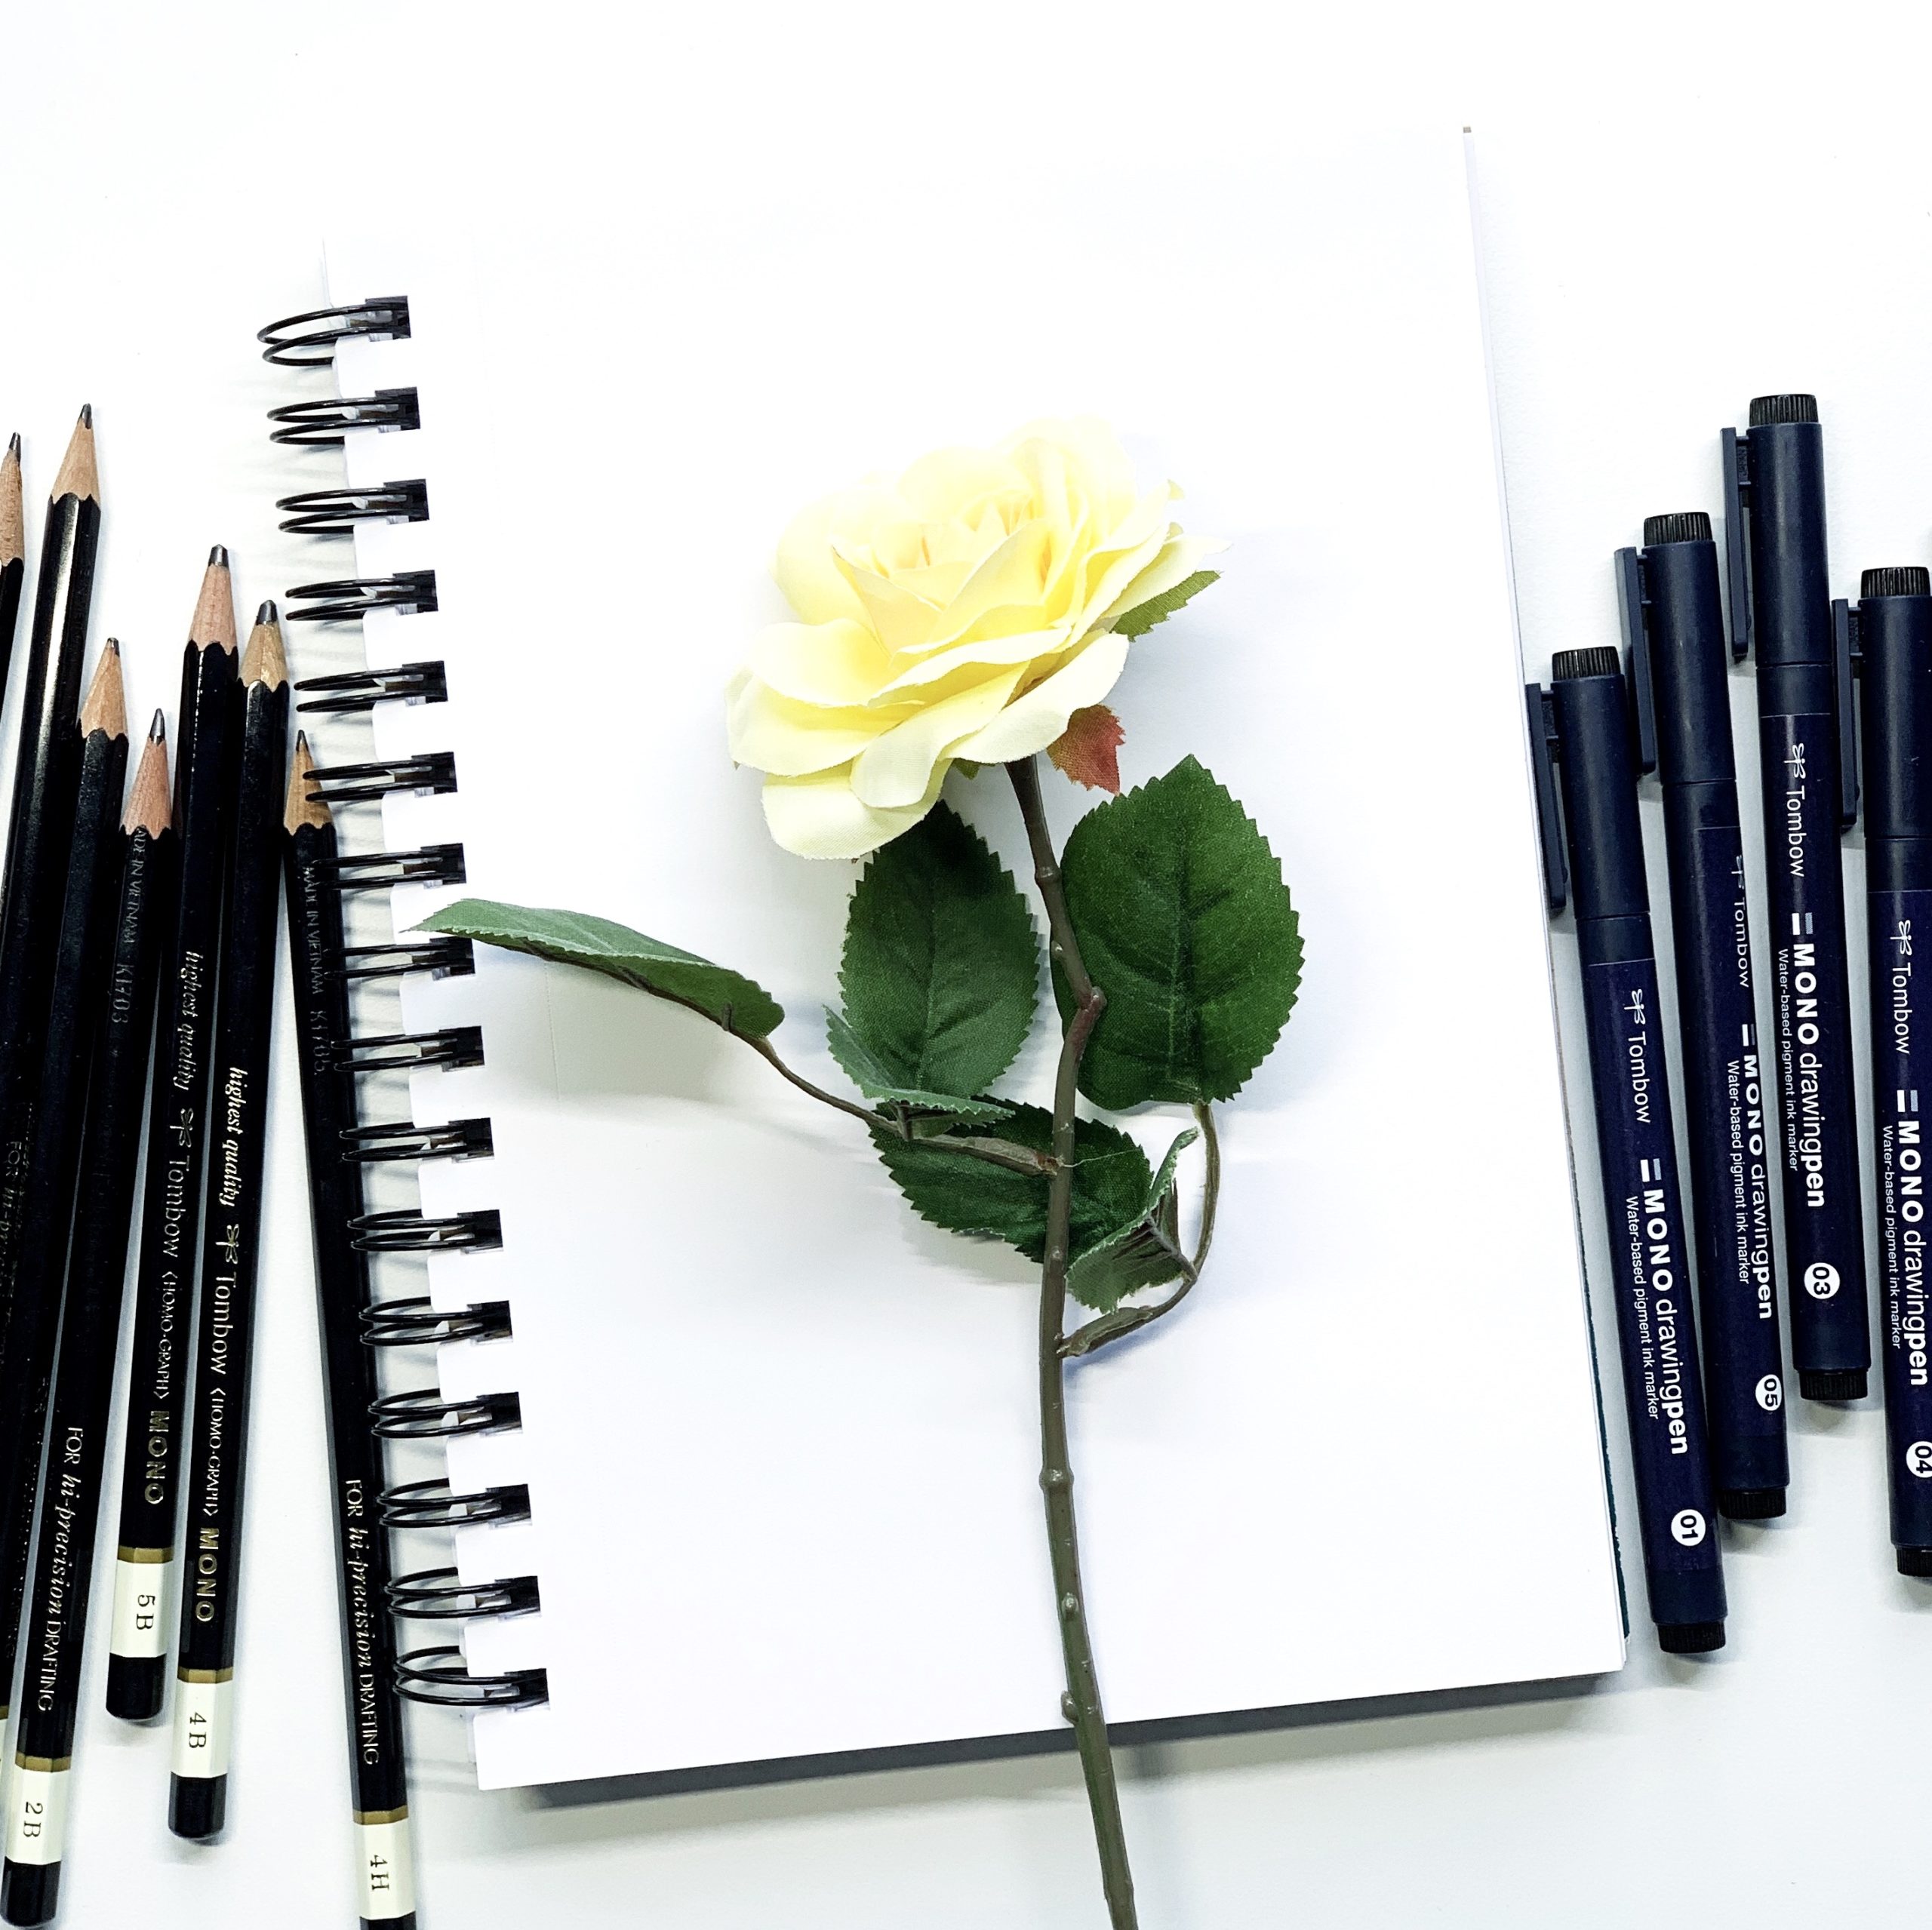
My first tip is to draw from real life. That could either be drawing from a real flower or drawing from a fake flower. It’s easier to draw if you have a physical object in front of you, so you can see individual petals, shadows and perspective.
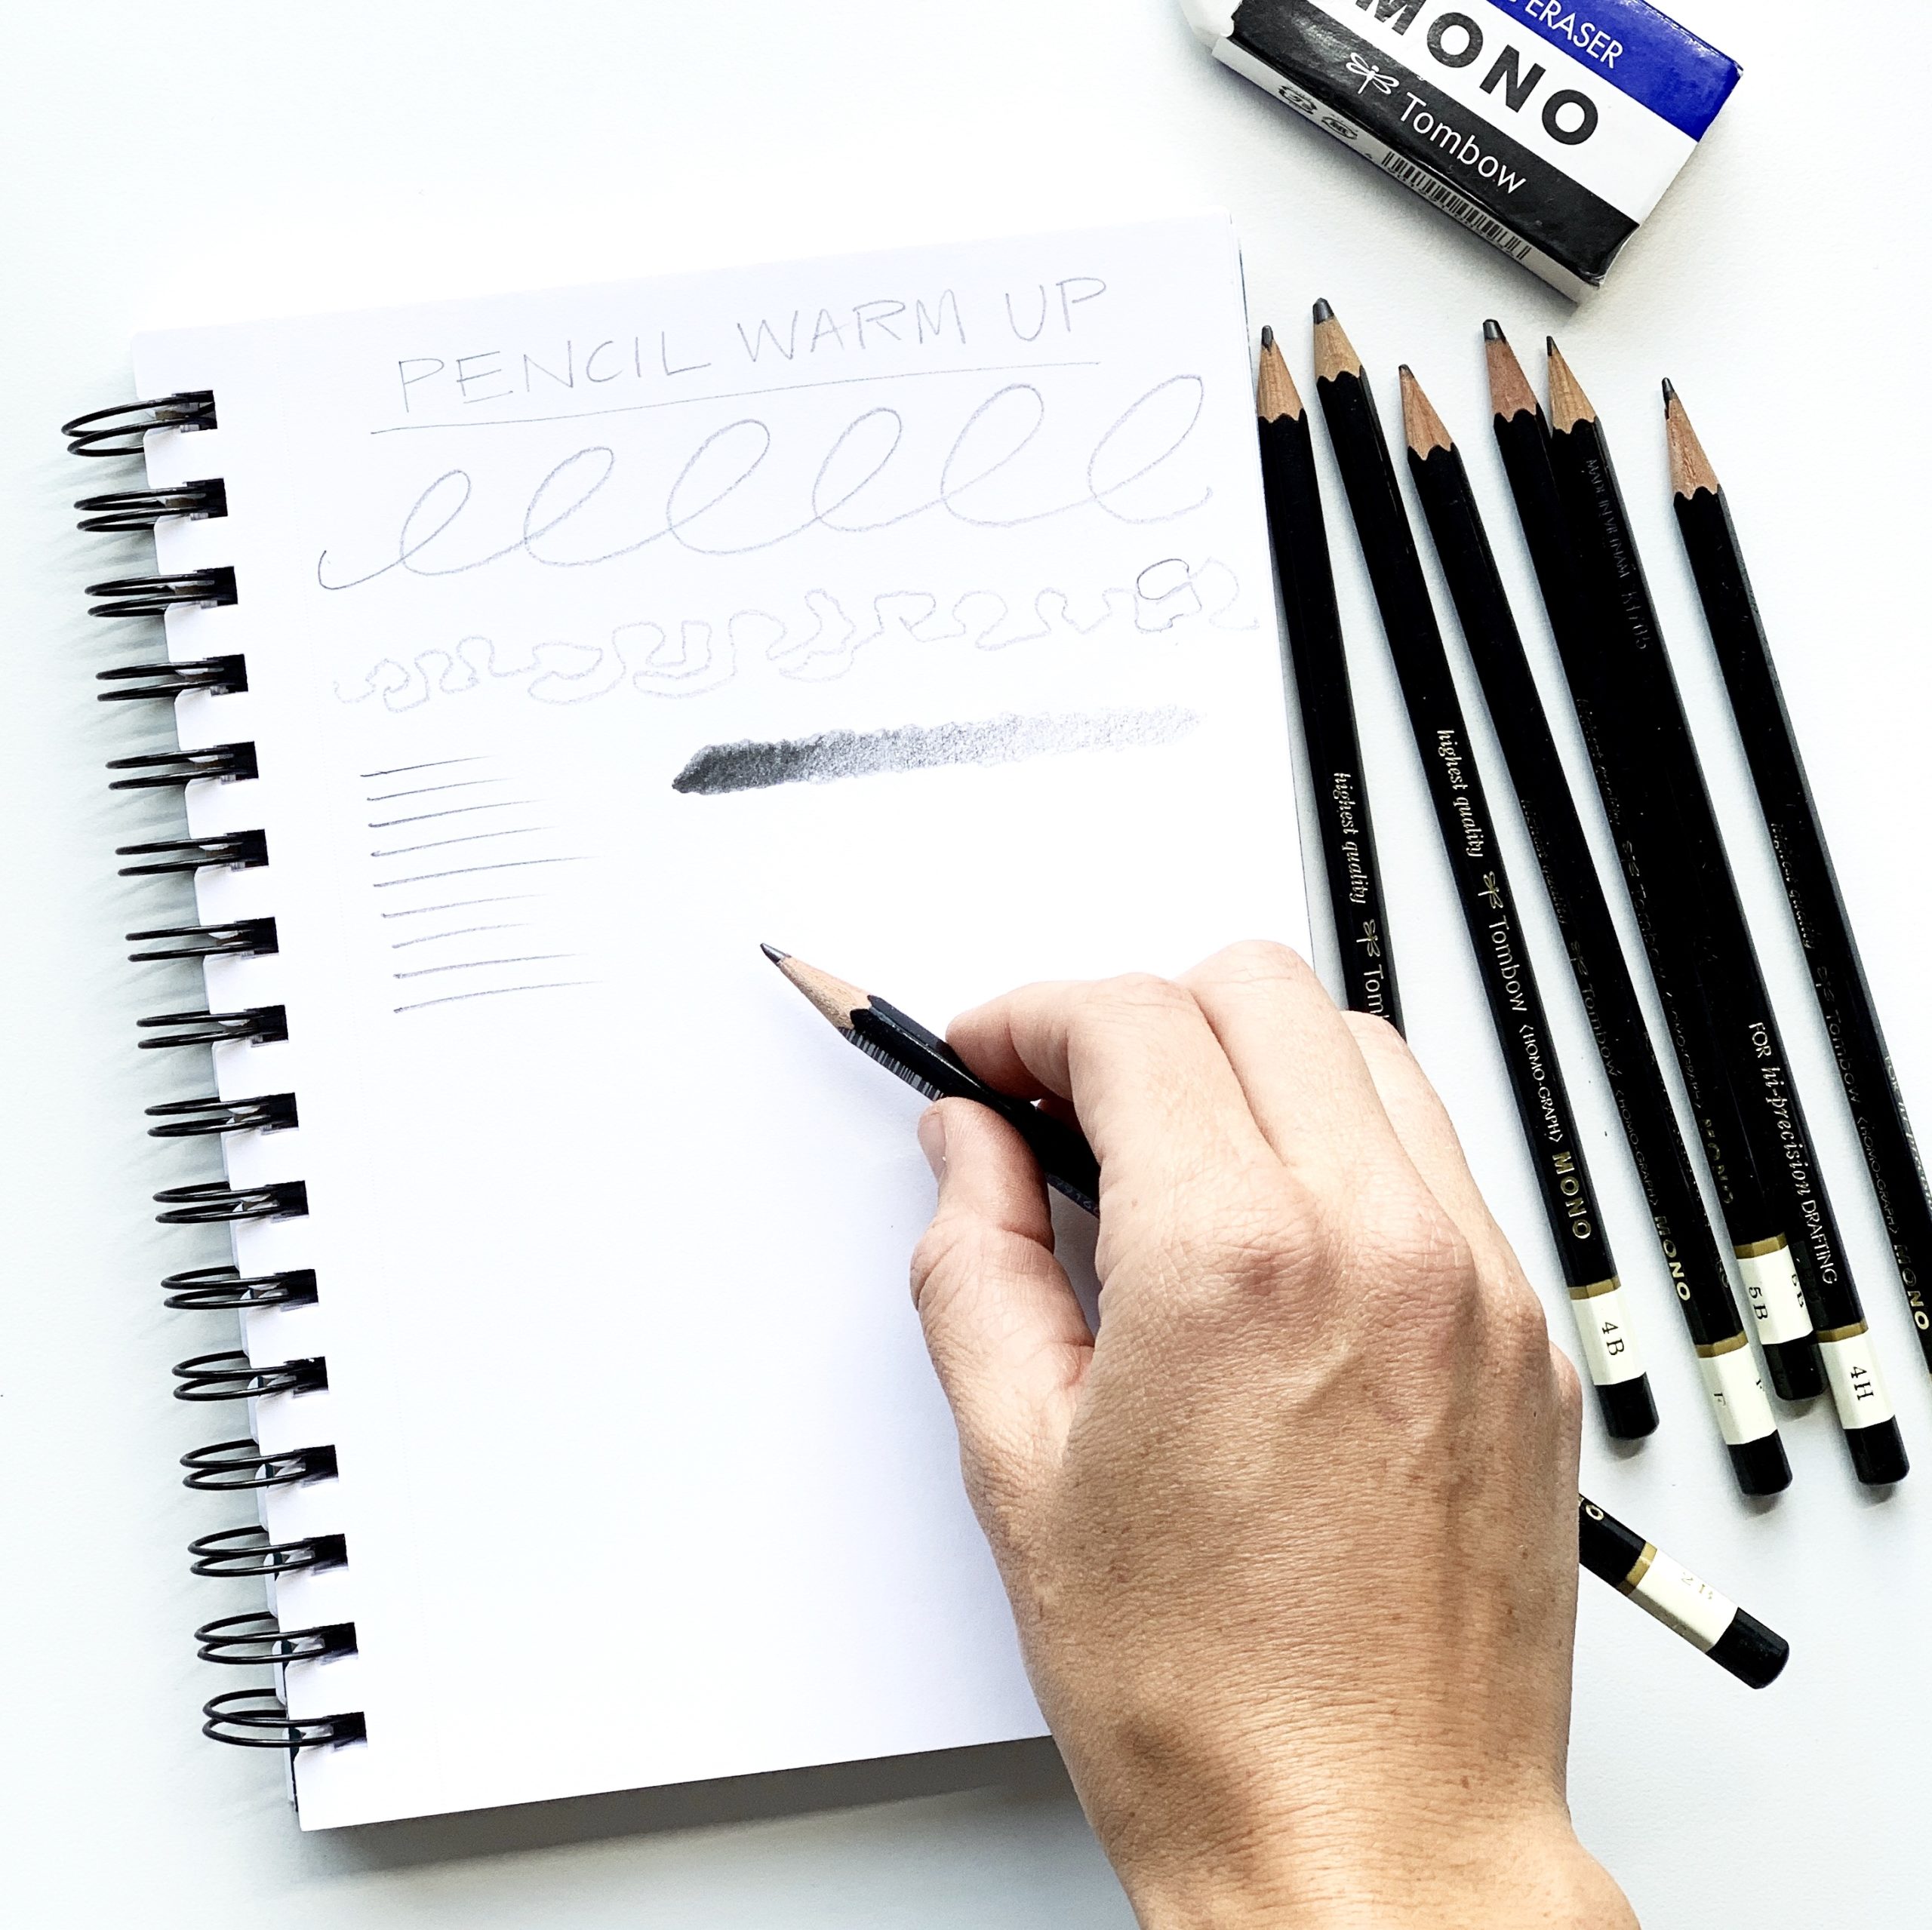
Tip 2: Warm-up
Warming up before you get into illustrations is a must! I like to do both pencil and pen warm ups because I use both to create floral illustrations.
Whether you’re just starting out or you’re a seasoned pro, sketching in pencil first is always a good idea. I love using the Tombow MONO Drawing Pencil Set because you get multiple pencils with different density graphite that will give you a variety of lines. When I am sketching, I like to hold them underneath my hand. I grip them with my thumb and fingers. This gives you more freedom to move your pencil and create large shapes for sketching shapes.
Things to focus on during pencil warm-ups:
- Make big and bold continuous shapes to get your hand moving across the page
- Make small squiggle lines focusing on smaller and intricate line bumps
- Make quick flick marks to give you a tapered ending to your mark
- Create values with your pencil to see how dark and light it can go (also helps to practice with shading!)
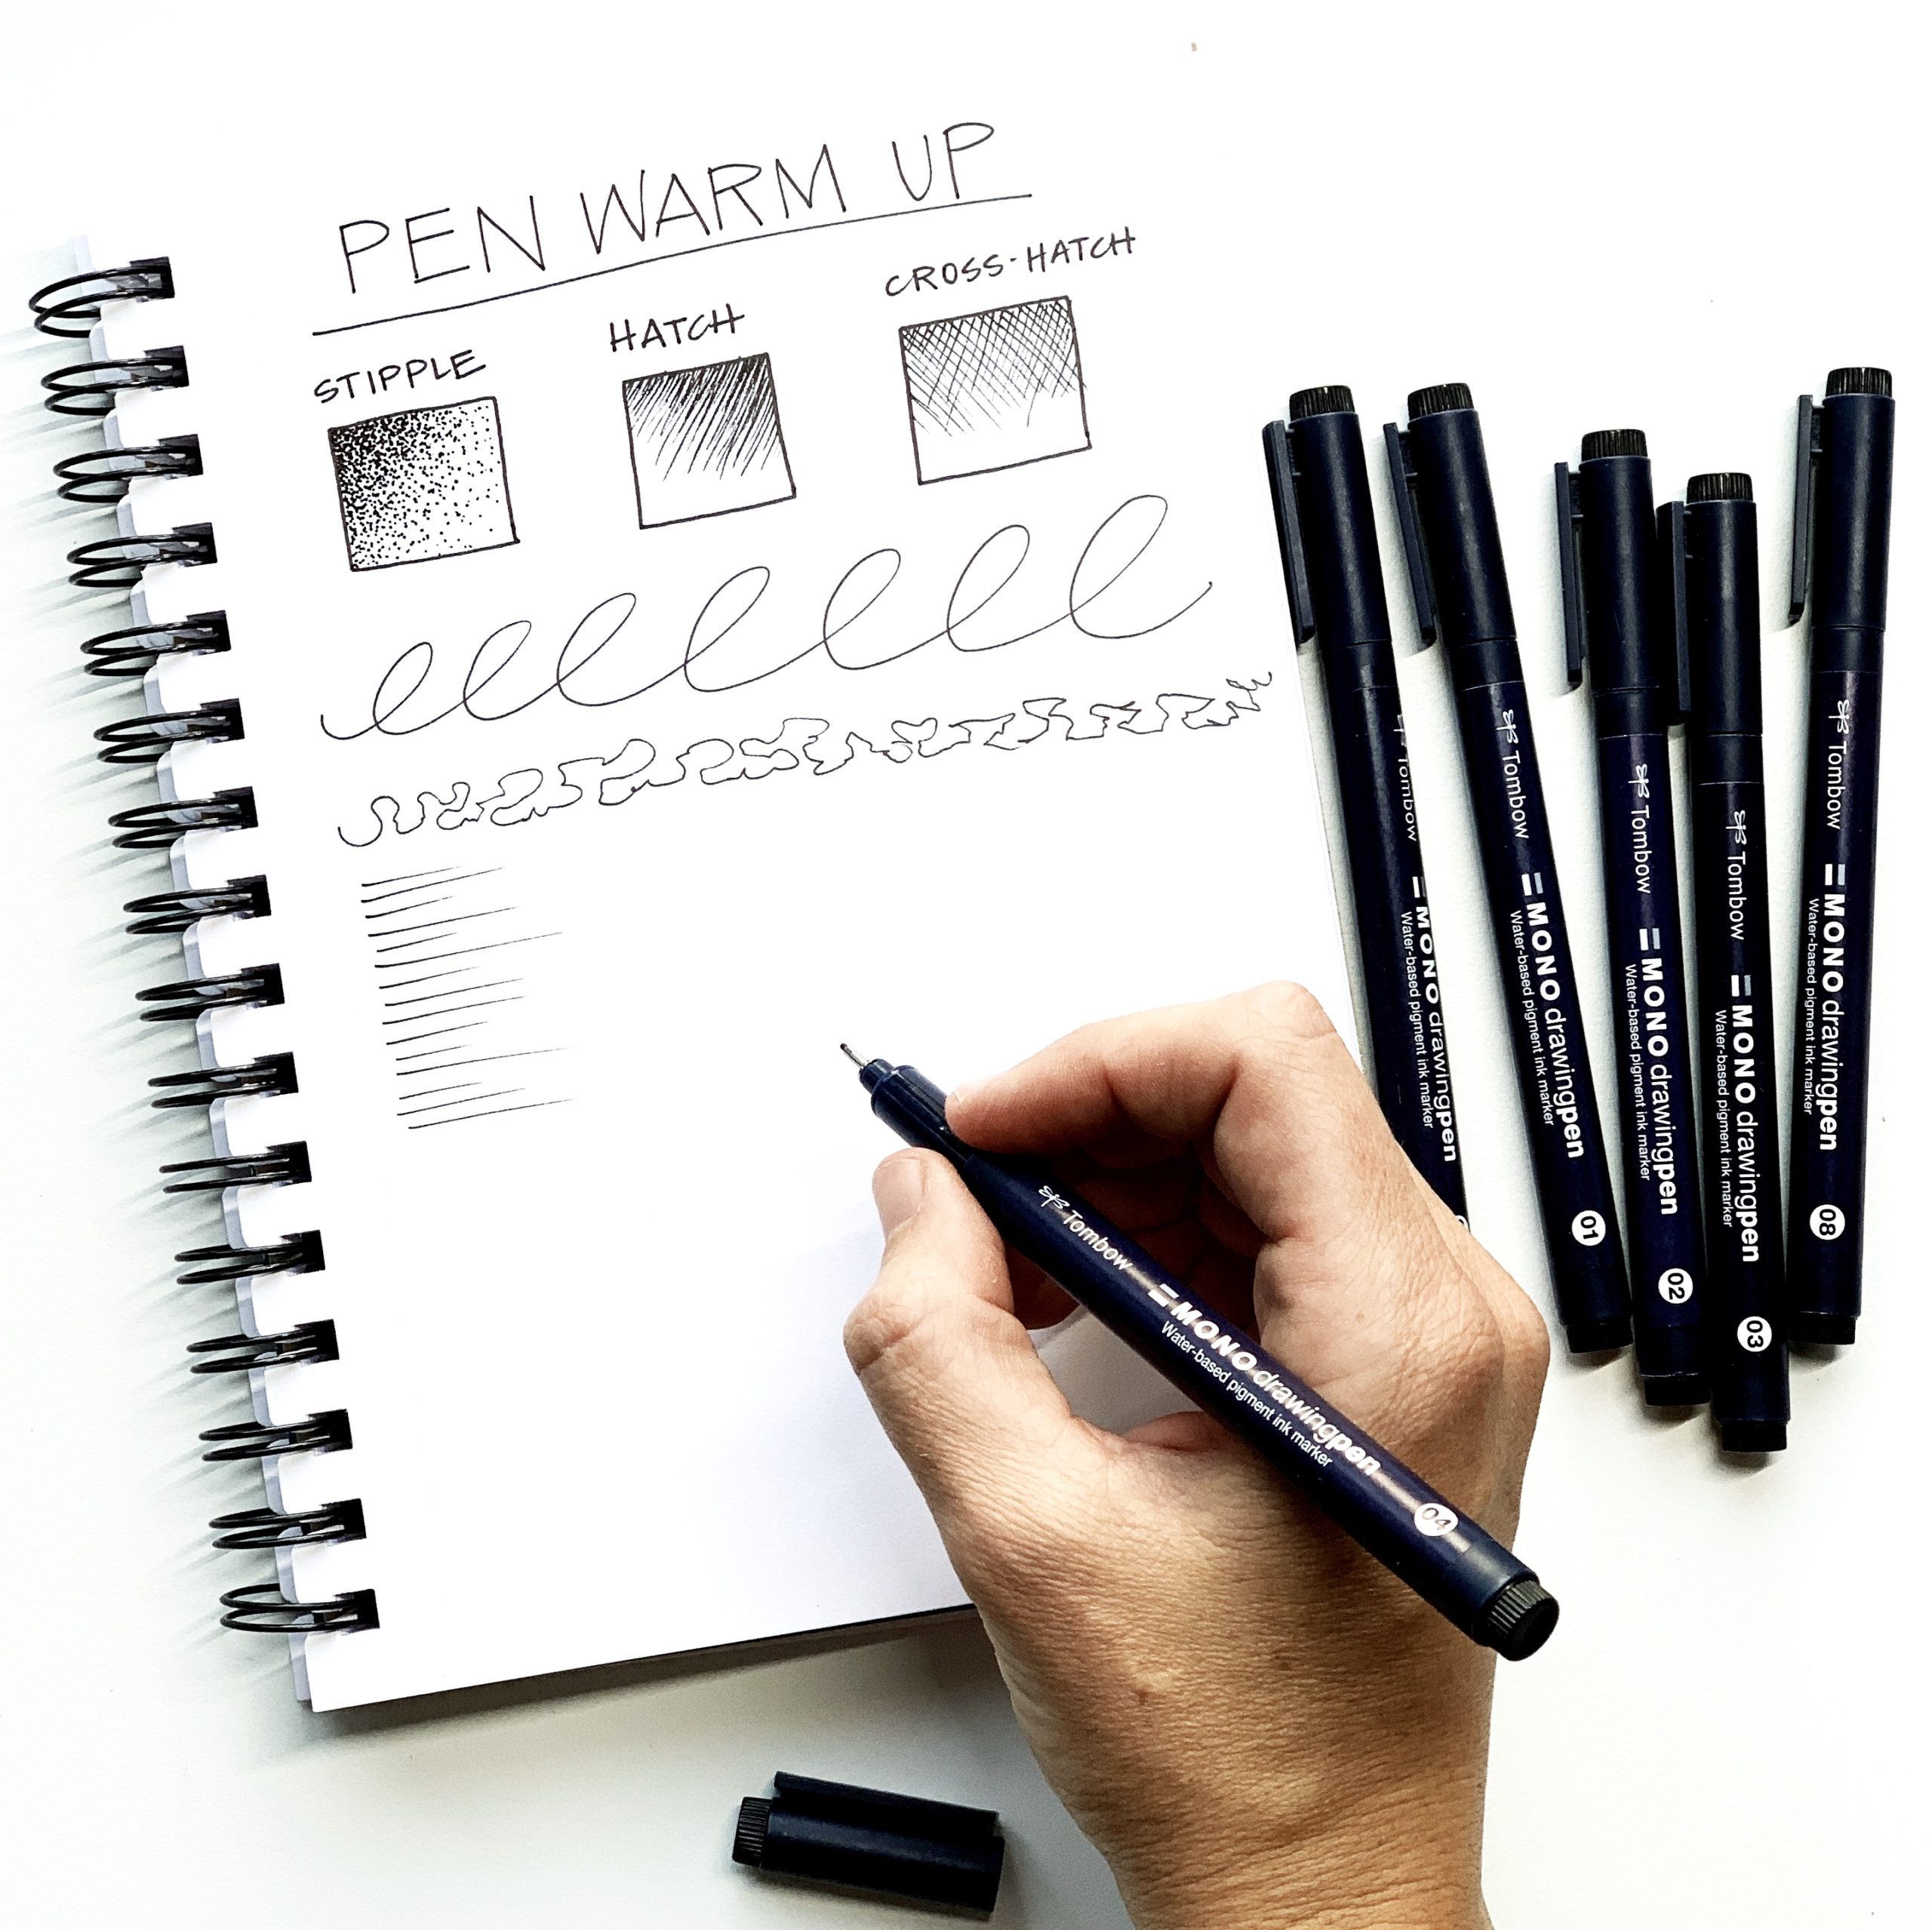
Next is a pen warm-up! After we sketch with pencil, we’ll be going over to make permanent marks with our pen. So, it’s important to learn the same warm ups and more for the pens.
Things to focus on with pen warm ups:
- Practice shading with your pens with stipple, hatch and crosshatch drills
- Practice large and continuous shapes and move your hand across the page.
- Make small and precise bumps and squiggles while coming up with different shapes as you go
- Practice swish marks to give tapered endings to your lines
Tip 3: Think about perspective
If I were to ask you to draw a flower, you’d probably draw a circle with five petals coming from the center with a line stem coming down and maybe a leaf or two. In most cases, flowers are much more intricate and complicated. Rather than drawing a flower looking straight at you, try drawing the flower from different angles. How would the flower look from the side or looking up from below?
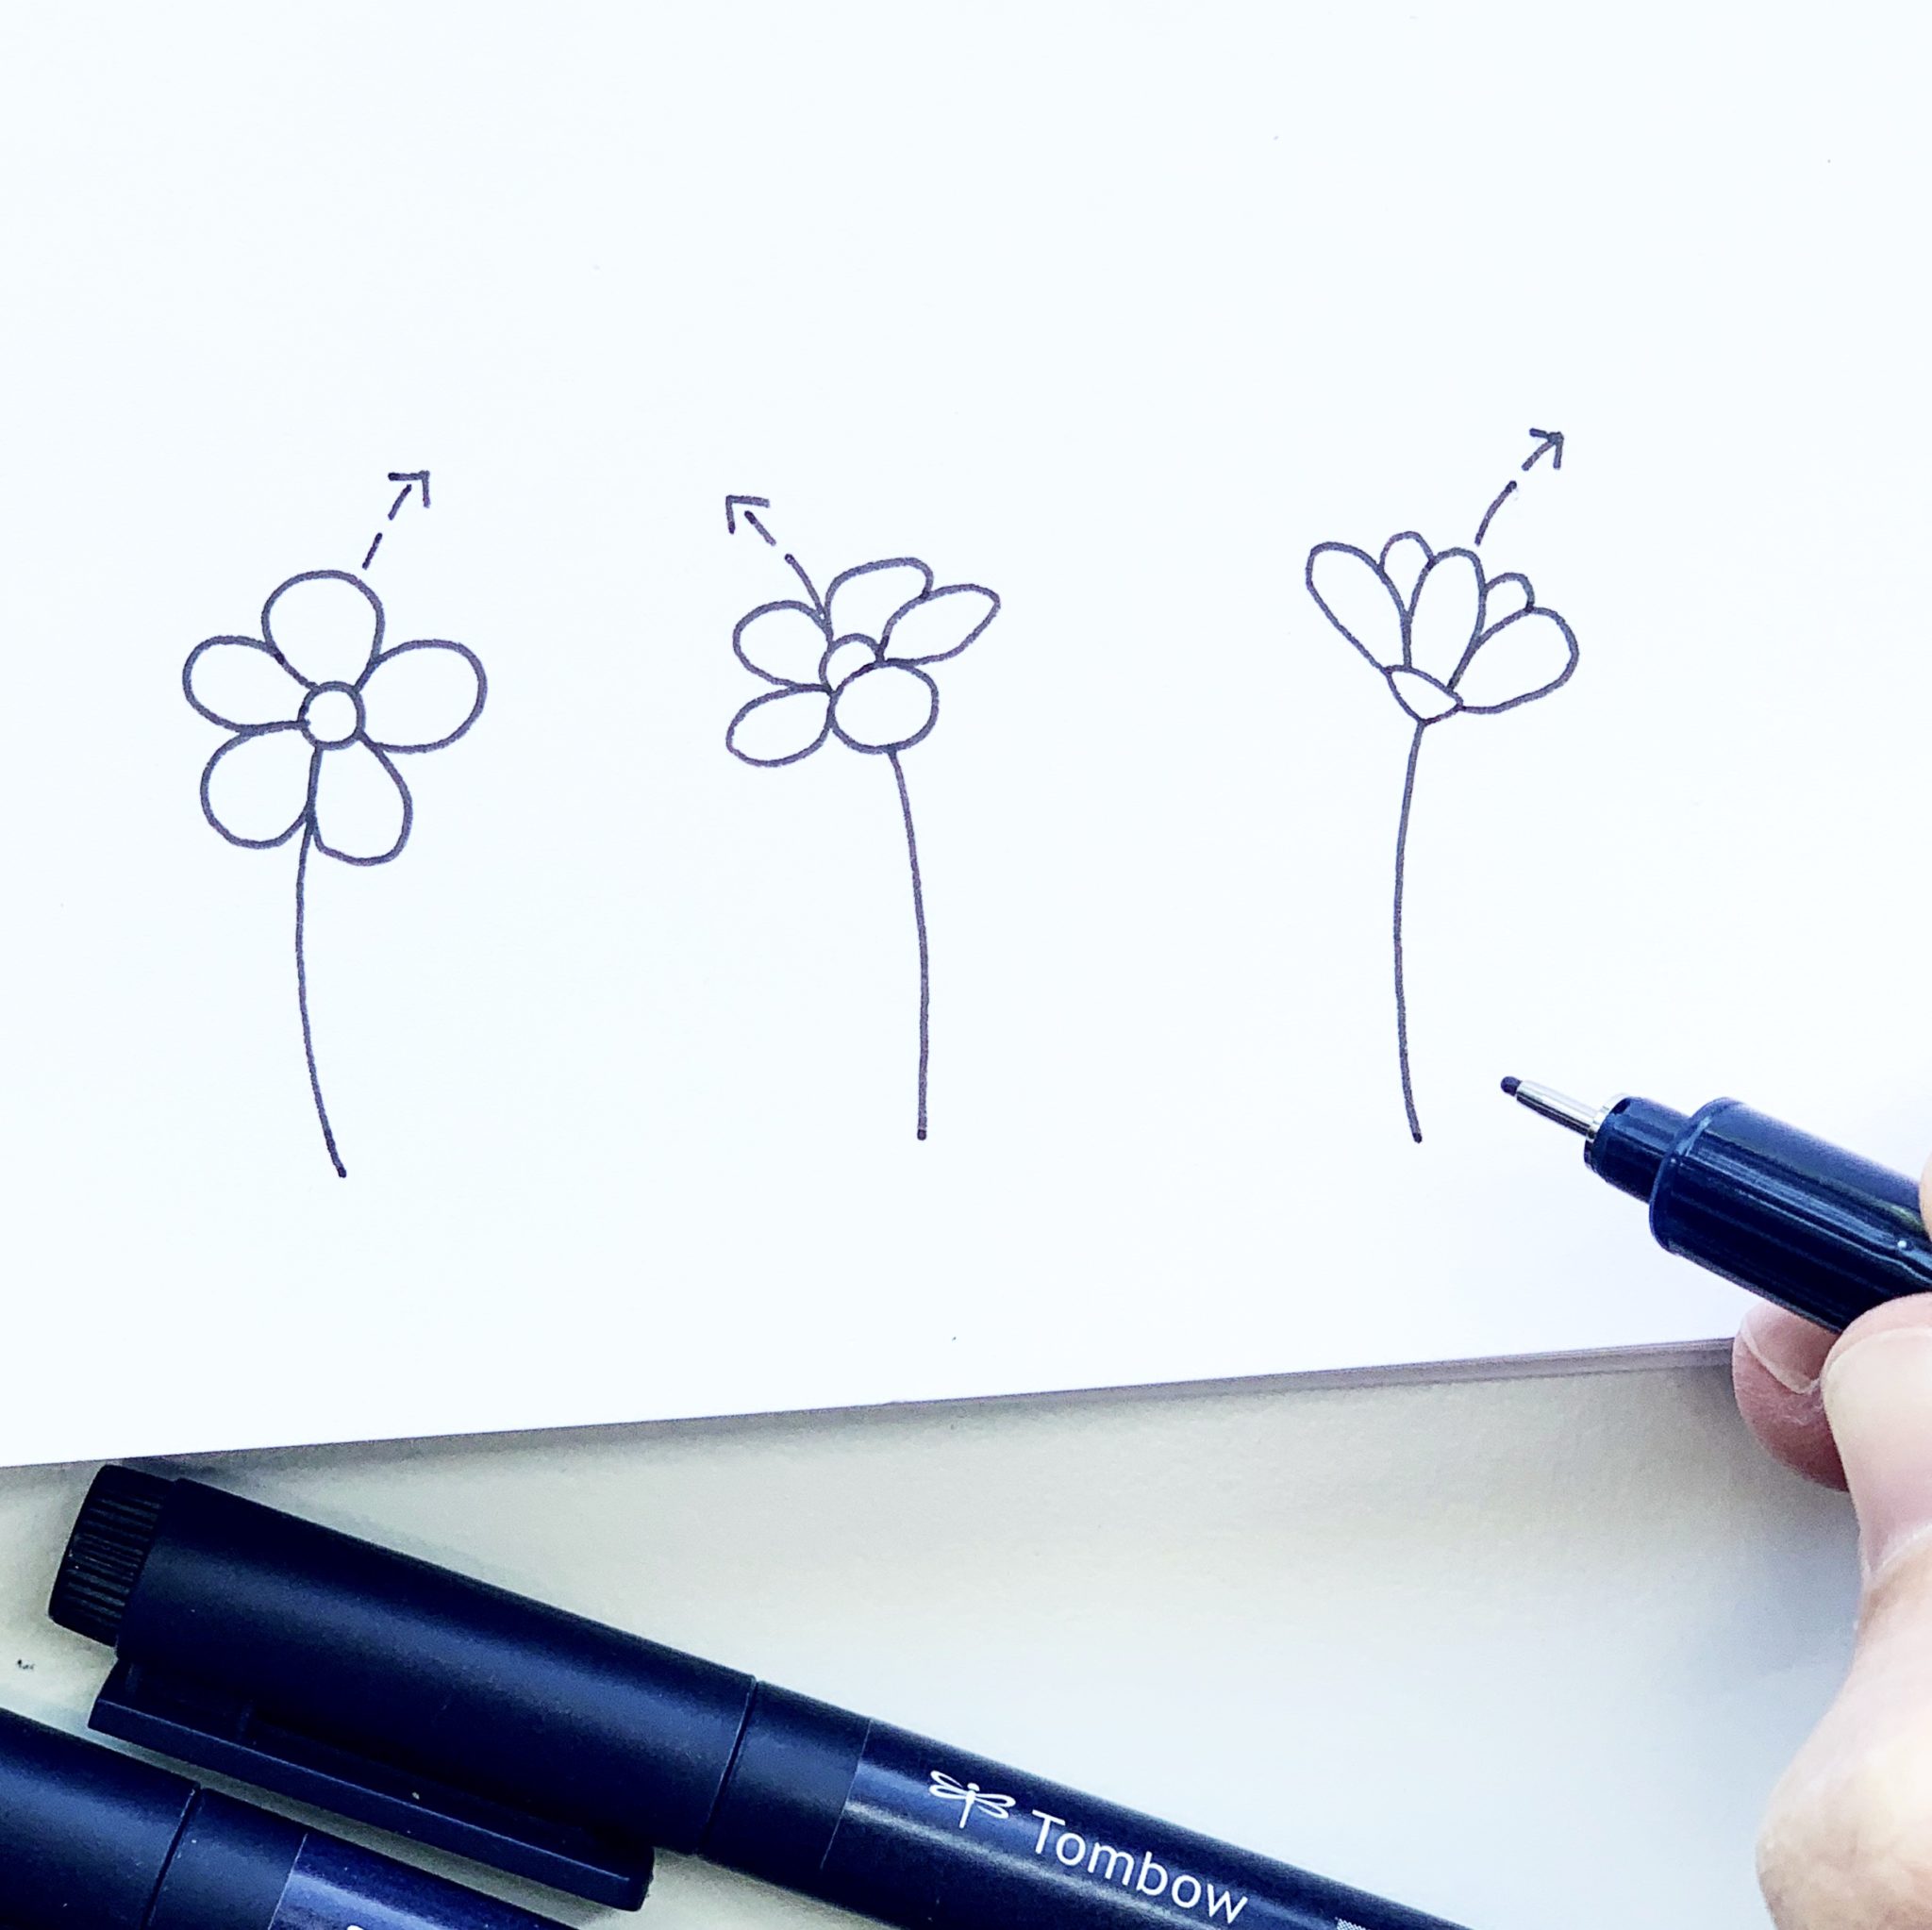
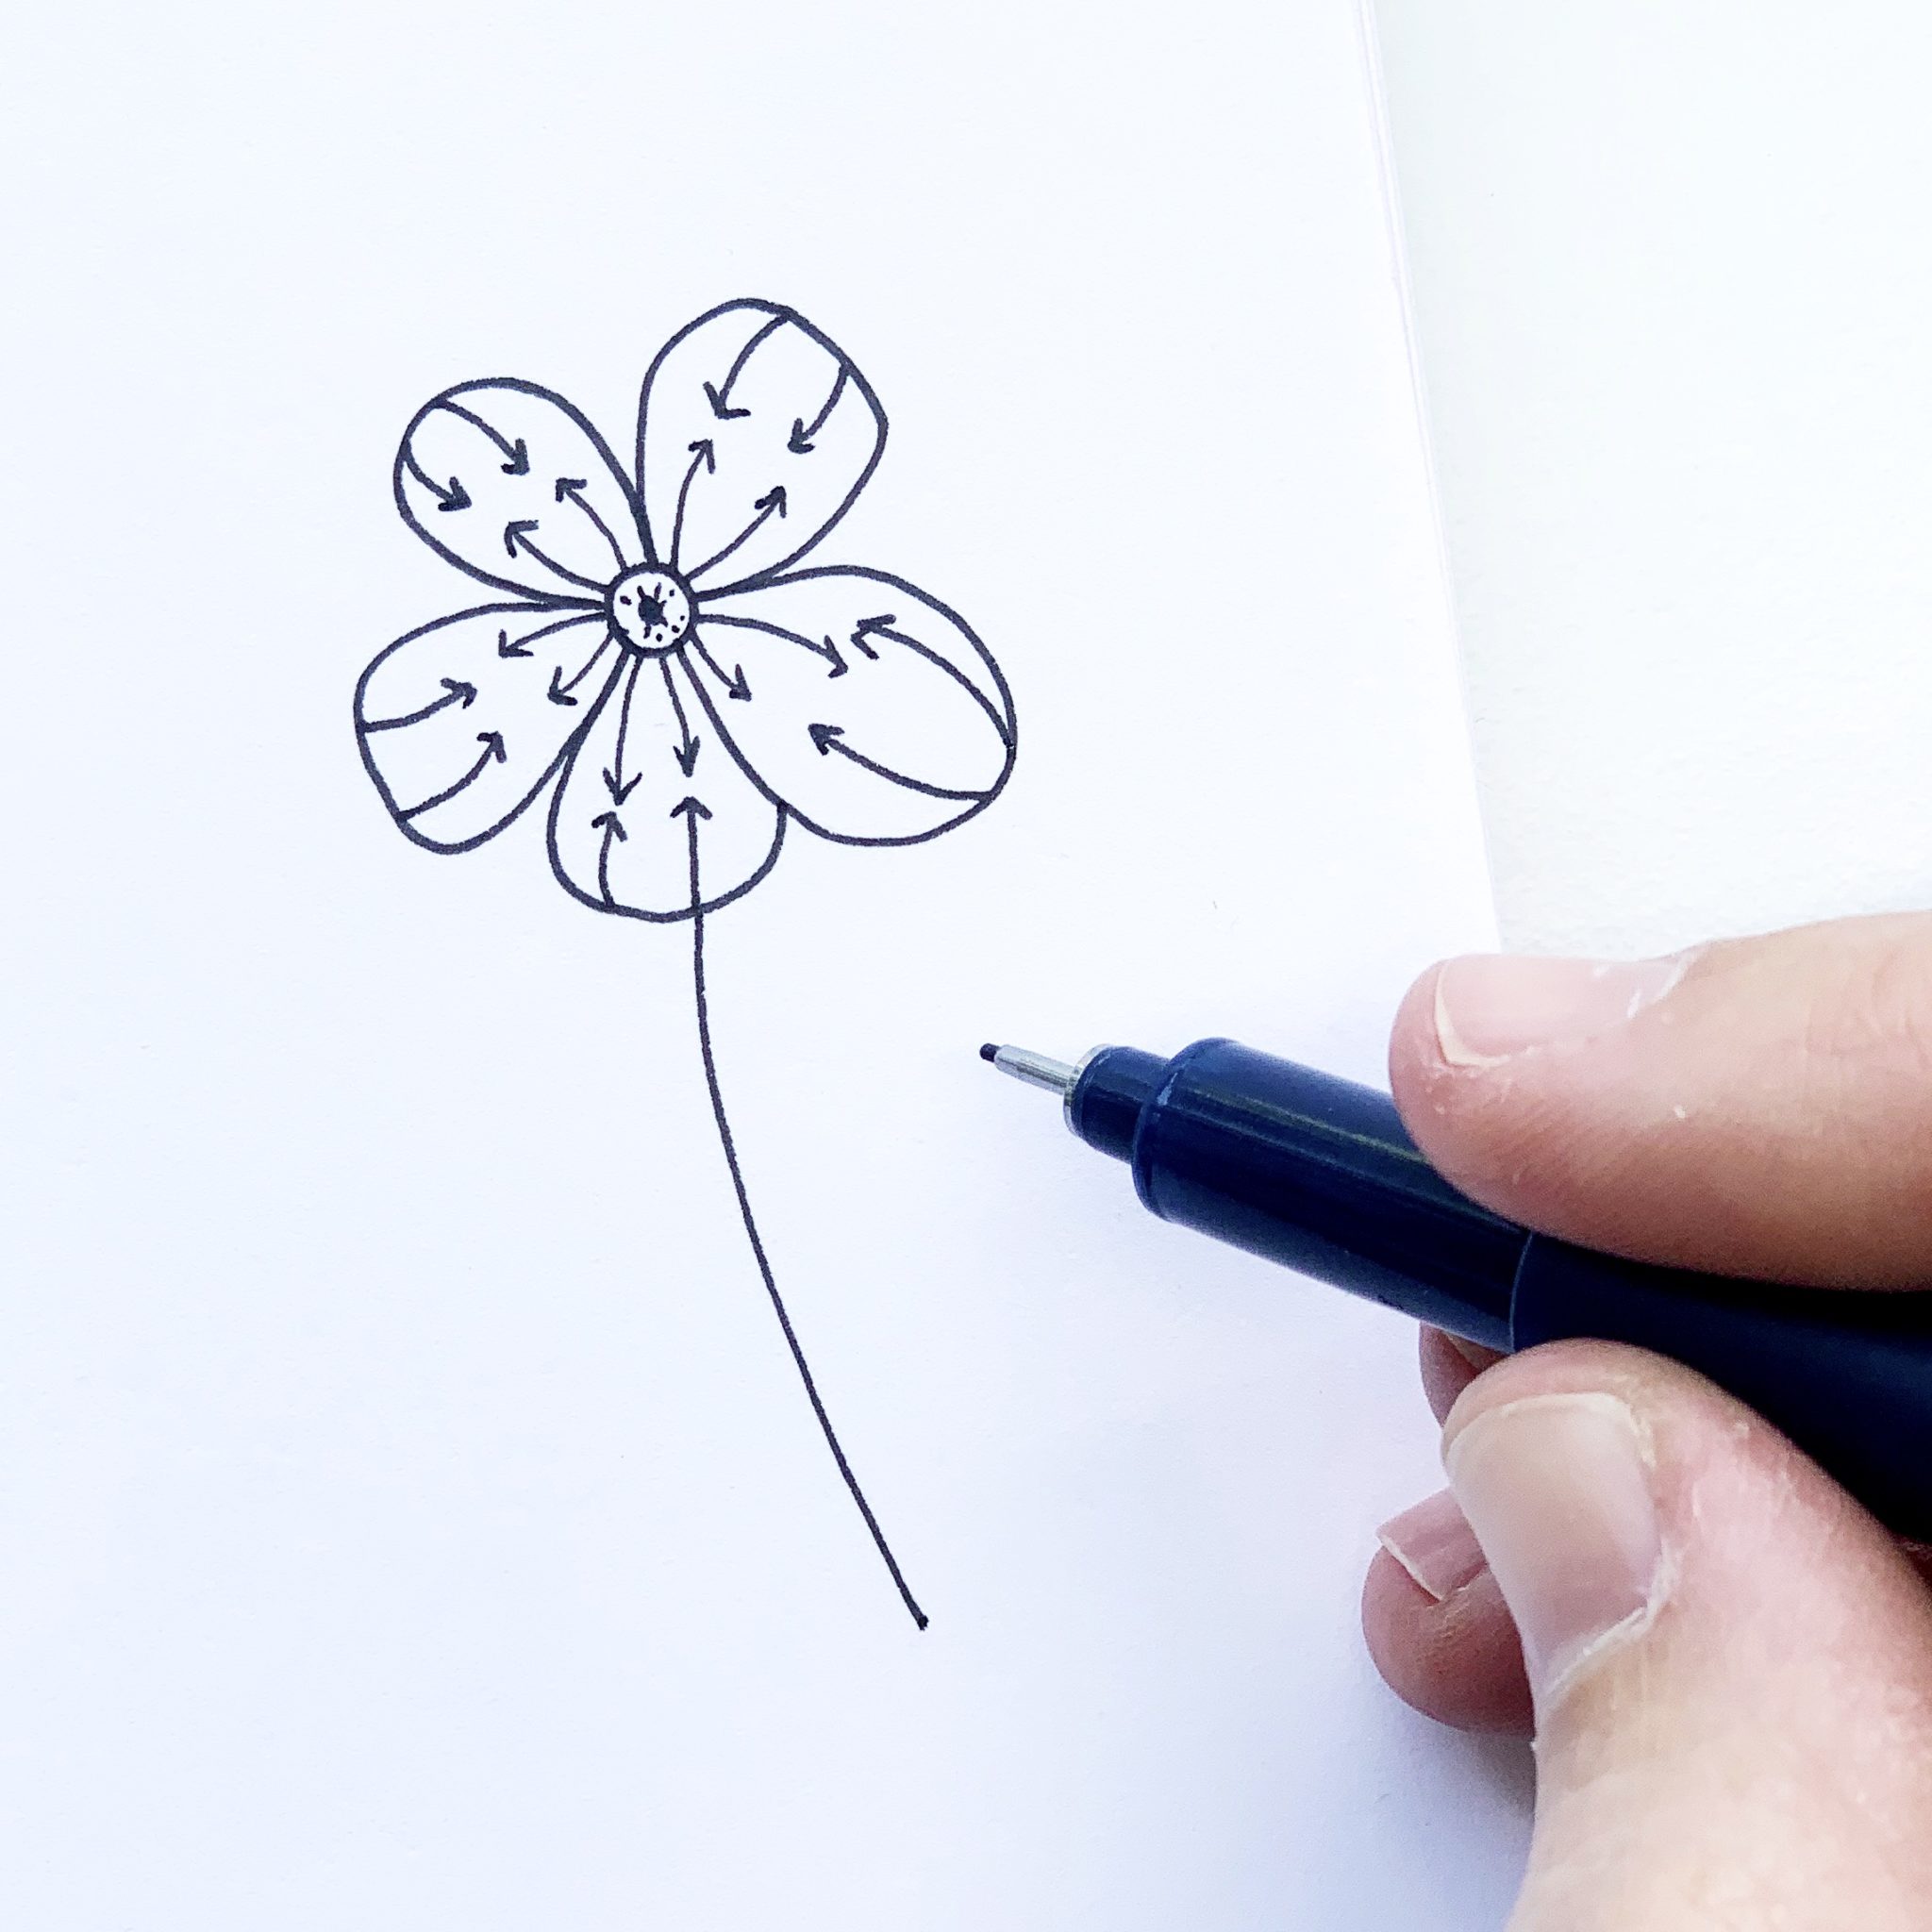
Tip 4: Go to the center
All things point to the center of the flower. What I mean by this is any detail or shading line that we add to the flower should extend from the center of the flower or move towards the center of the flower. When you draw your lines that way, you’ll keep the shape of each petal consistent and more life-like.
Tip 5: Use the right tools
Using the right tools to create floral illustrations will help you in the short and long run! Pencils help you sketch correctly. I like using the MONO Drawing Pens to create my lines. It helps the flower appear more delicate. Your eraser is also needed to erase any indication that you sketched. Having the right tools makes all the difference!
Now that we’ve covered the basics and done the warm ups, let’s get onto the tutorial on how to draw a rose!
Materials you’ll need:
- Notebook (I’m using the Grumbacher mixed media notebook)
- Tombow MONO Drawing Pencil Set
- Tombow MONO Eraser
- Tombow MONO Drawing Pens
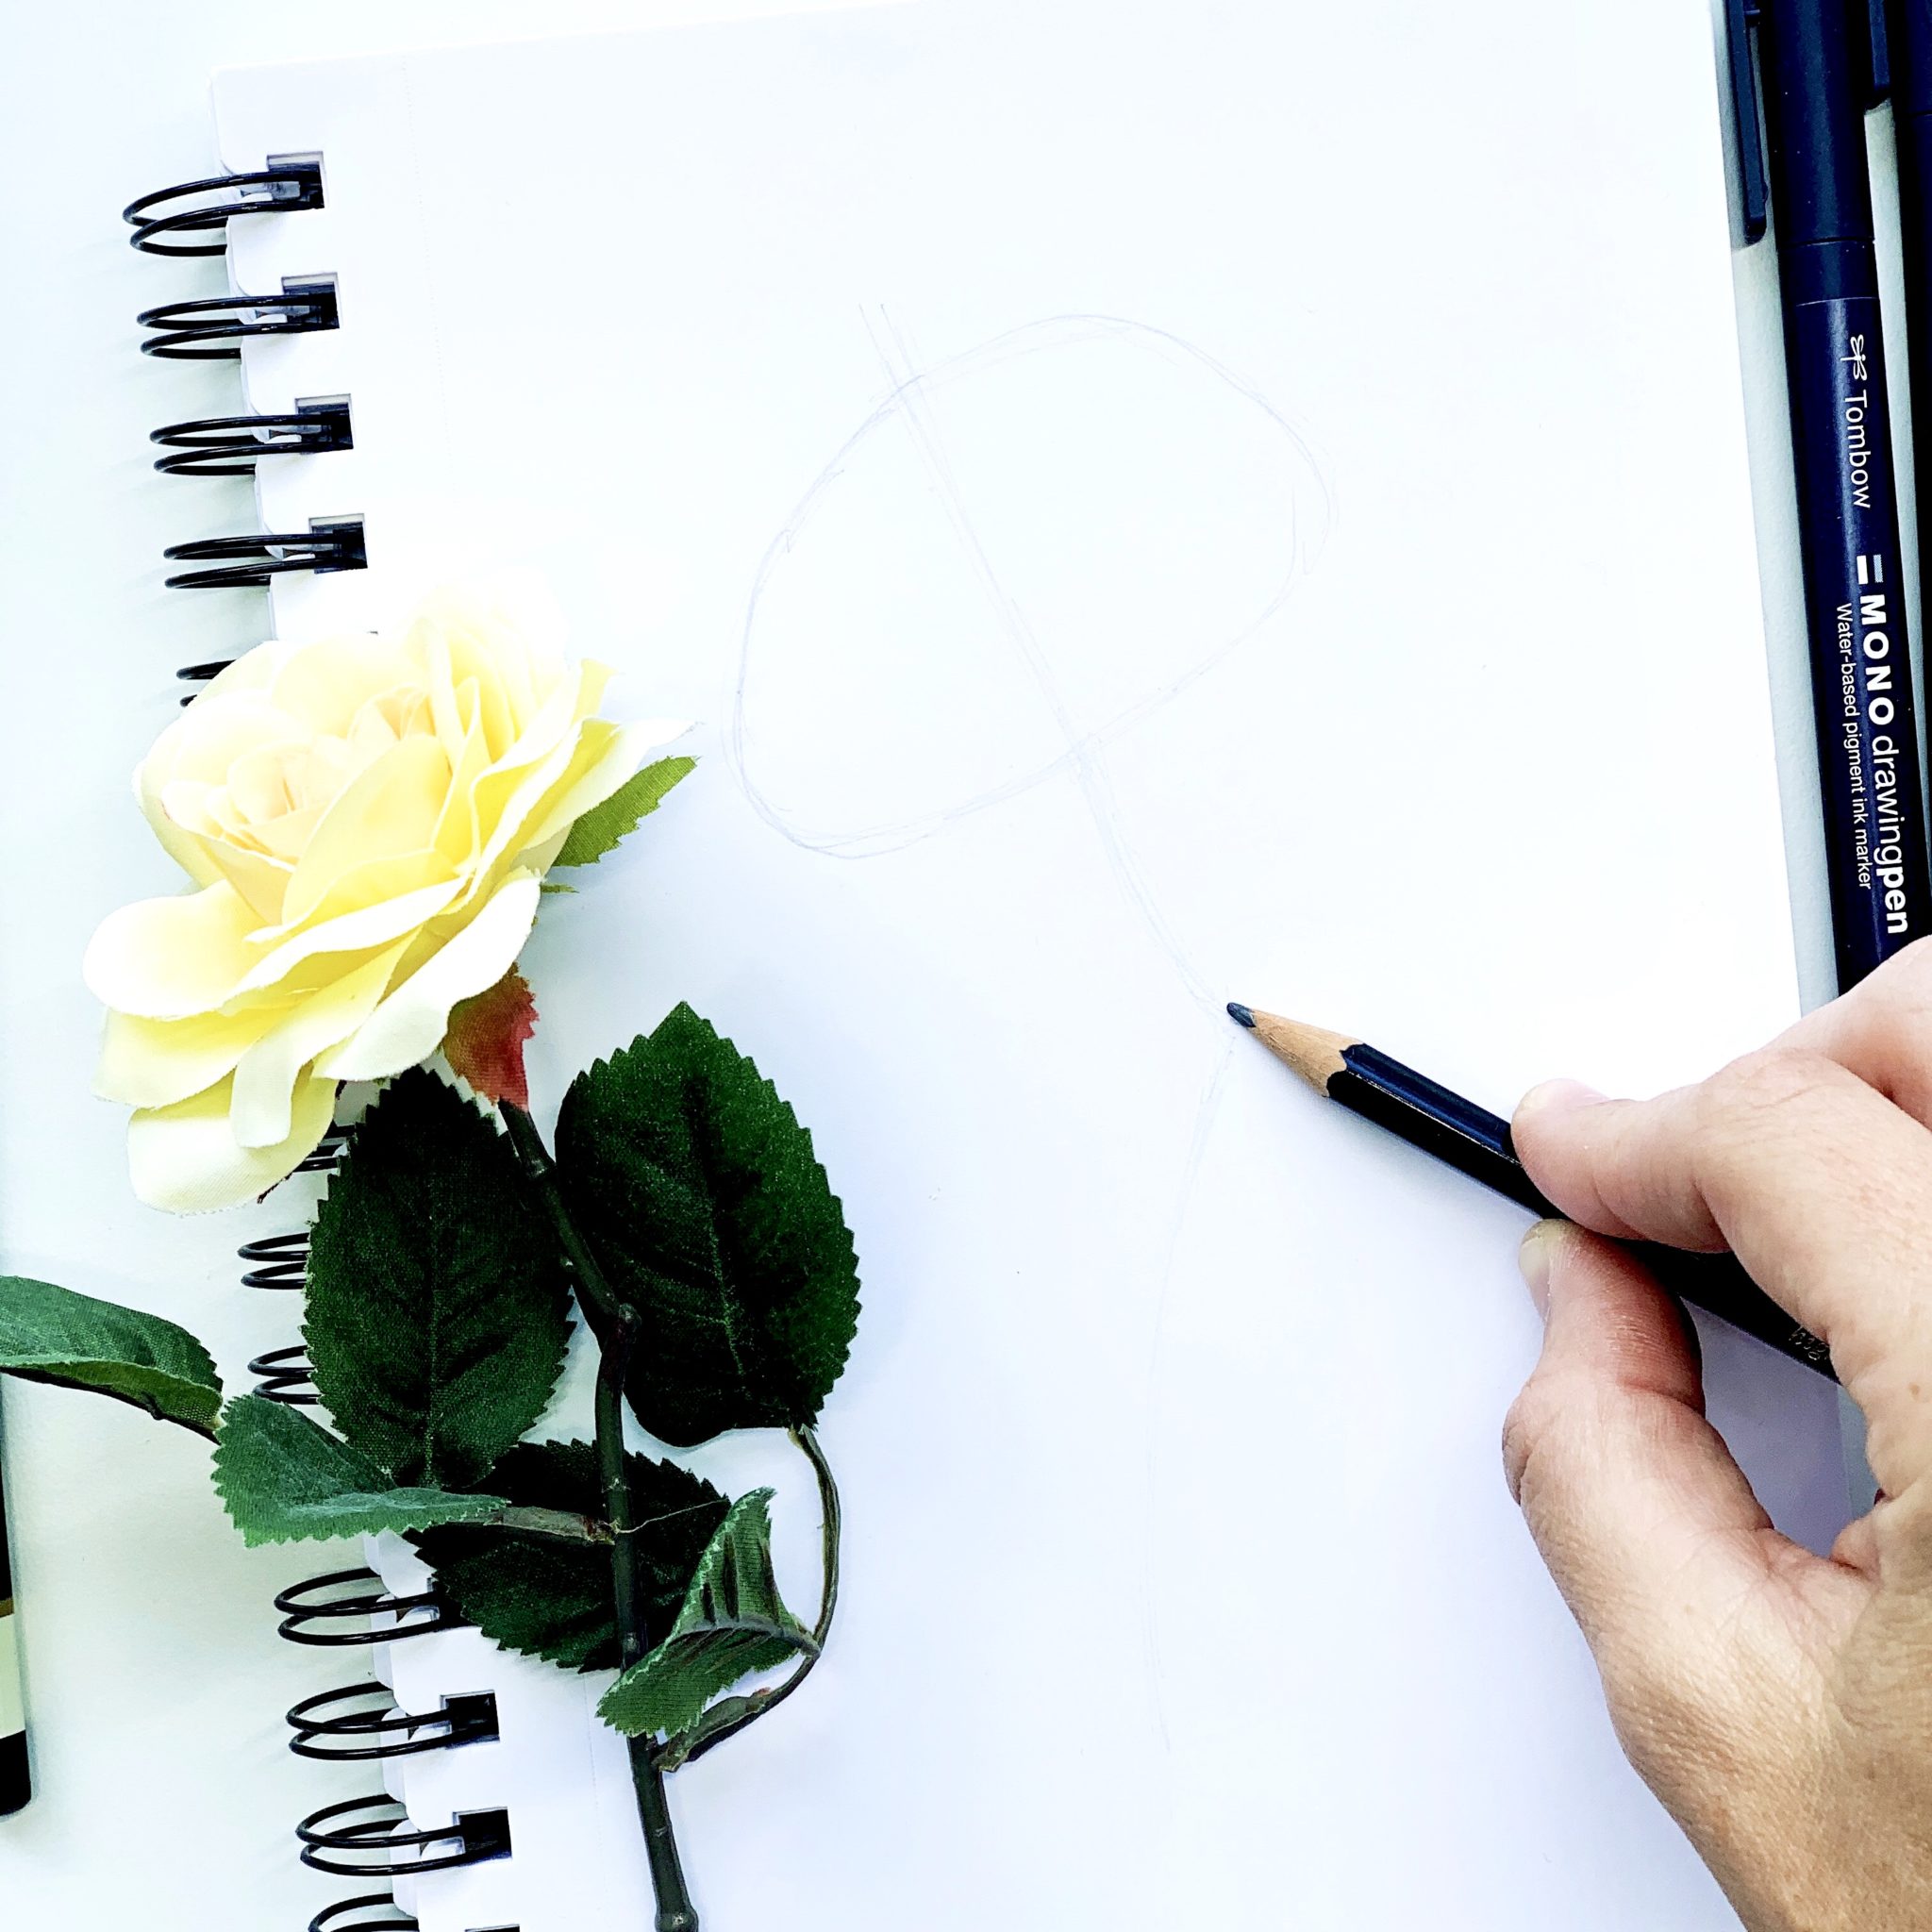
Step 1
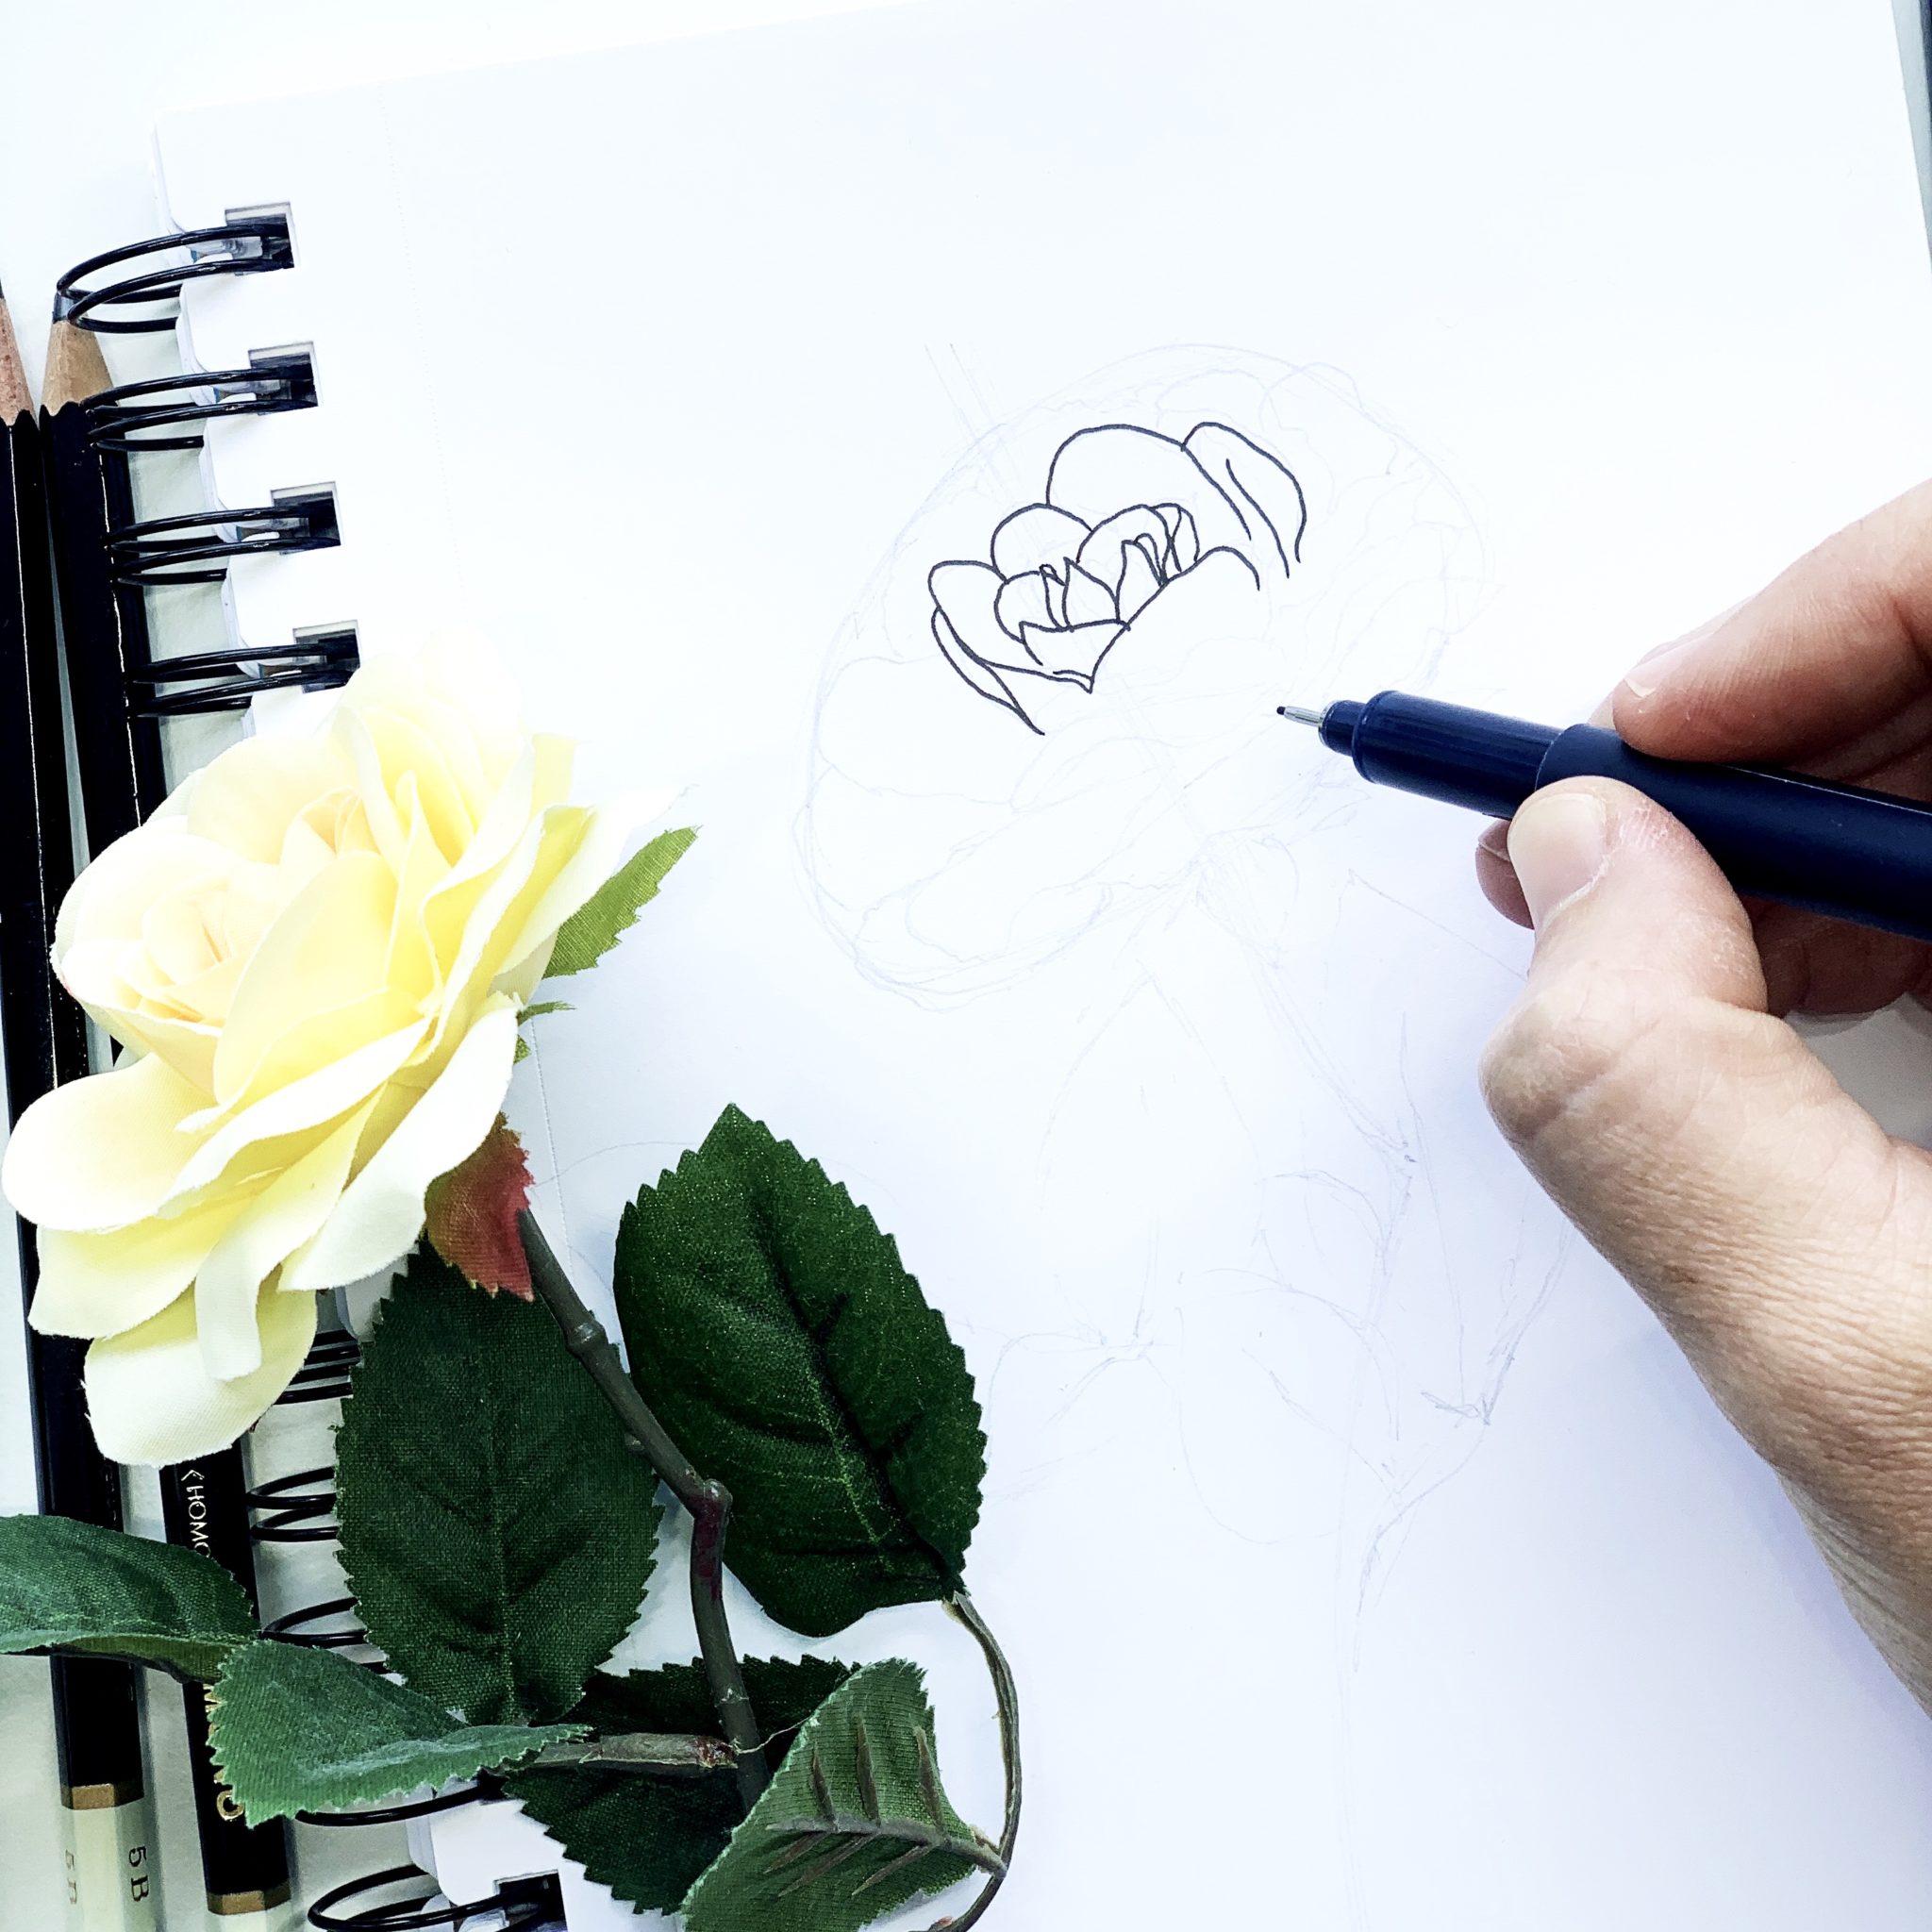
Grab a harder graphite MONO Drawing Pencil (something with an H. This will give you lighter lines so they’ll be easier to erase later!) and hold it under your hand to start sketching on your notebook. Draw the overall shape of the head of the flower based on your perspective by making large and round circular motions. This flower is facing up and to the left, so I’ll have an oval shape with a rounder top and flatter bottom. Then, draw the stem coming down from the flower. One trick is to start the stem above the head of the flower and pass right through the middle. This will make sure your stem angle is correct. When drawing flowers, everything meets back at the middle.
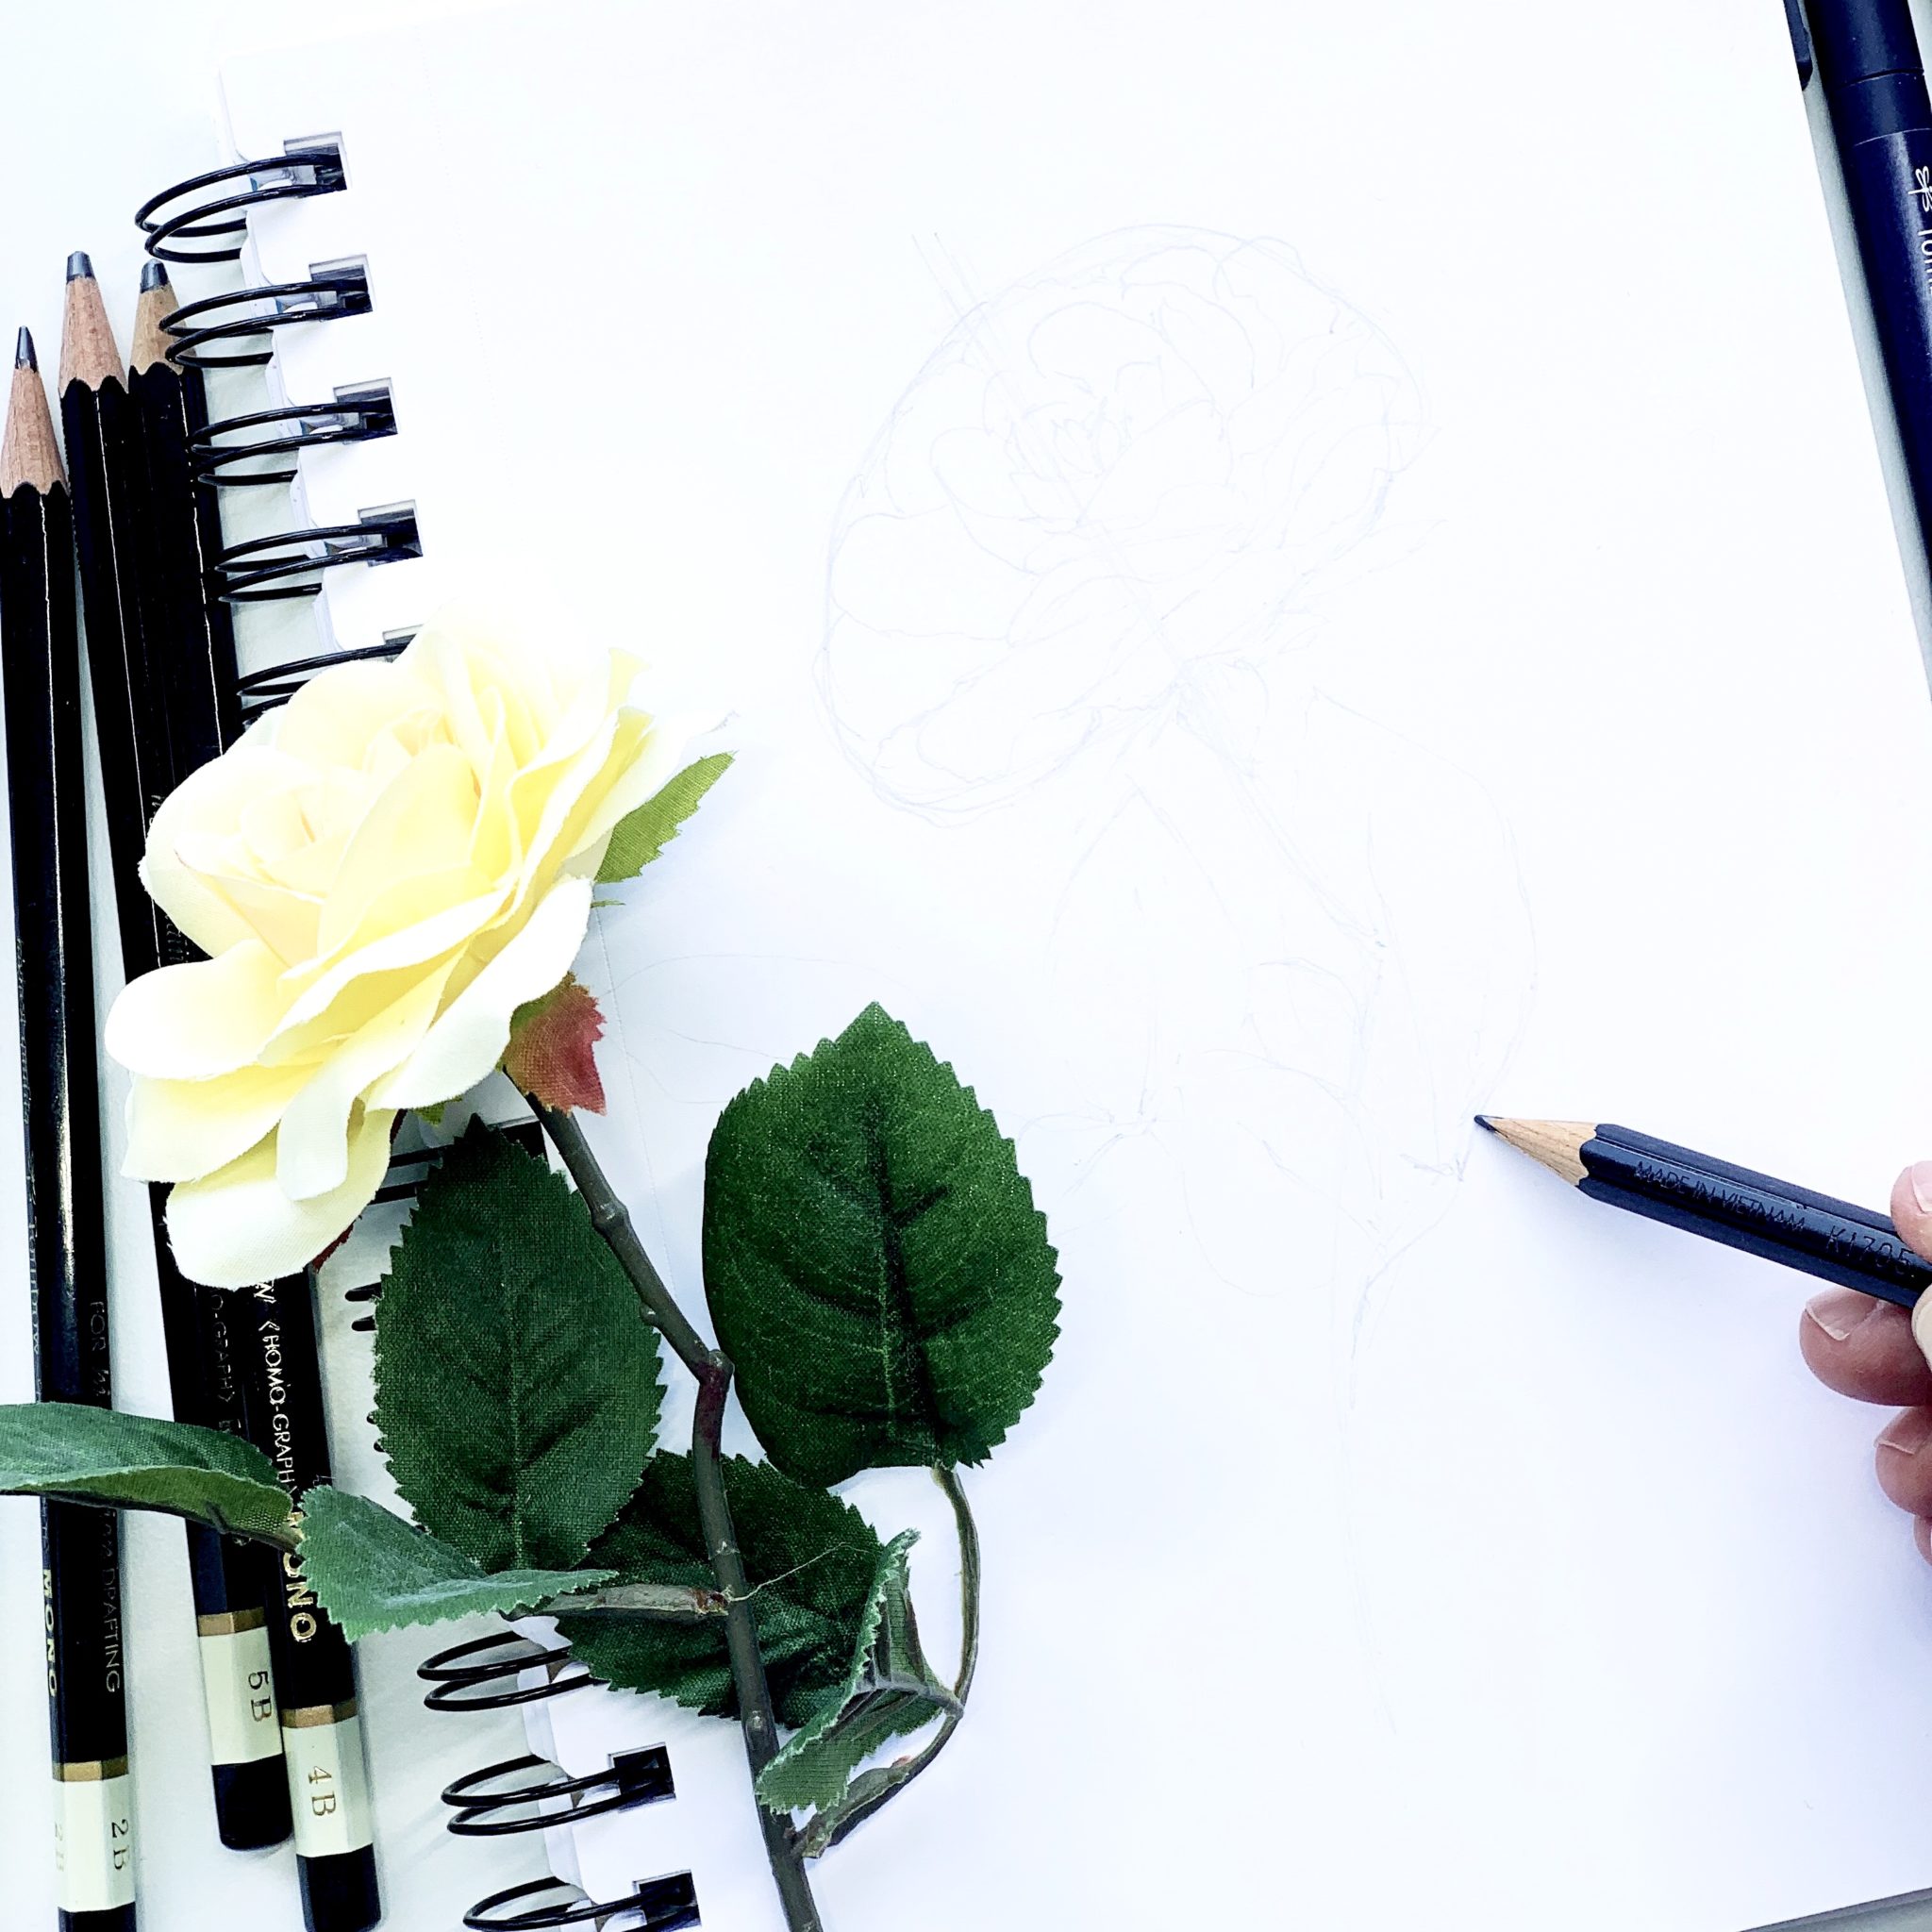
Step 2
Next, use your pencil to roughly sketch out the petals on the head of the flower. You can hold the pencil normal now, if it’s easier for you. Focus on perspective and angles. Not all the petals will have the same shape. This is where drawing from real life has its advantages. You can look up close and see the actual angle of the petals and how they’re folding and sitting on each other. Maybe some petals you’ll only draw a corner of it. Stay true to the actual shape you SEE versus what you think in your head is a “petal.” Sketch the stem and leaf placement as well, so you know where everything will sit on the page.
Step 3
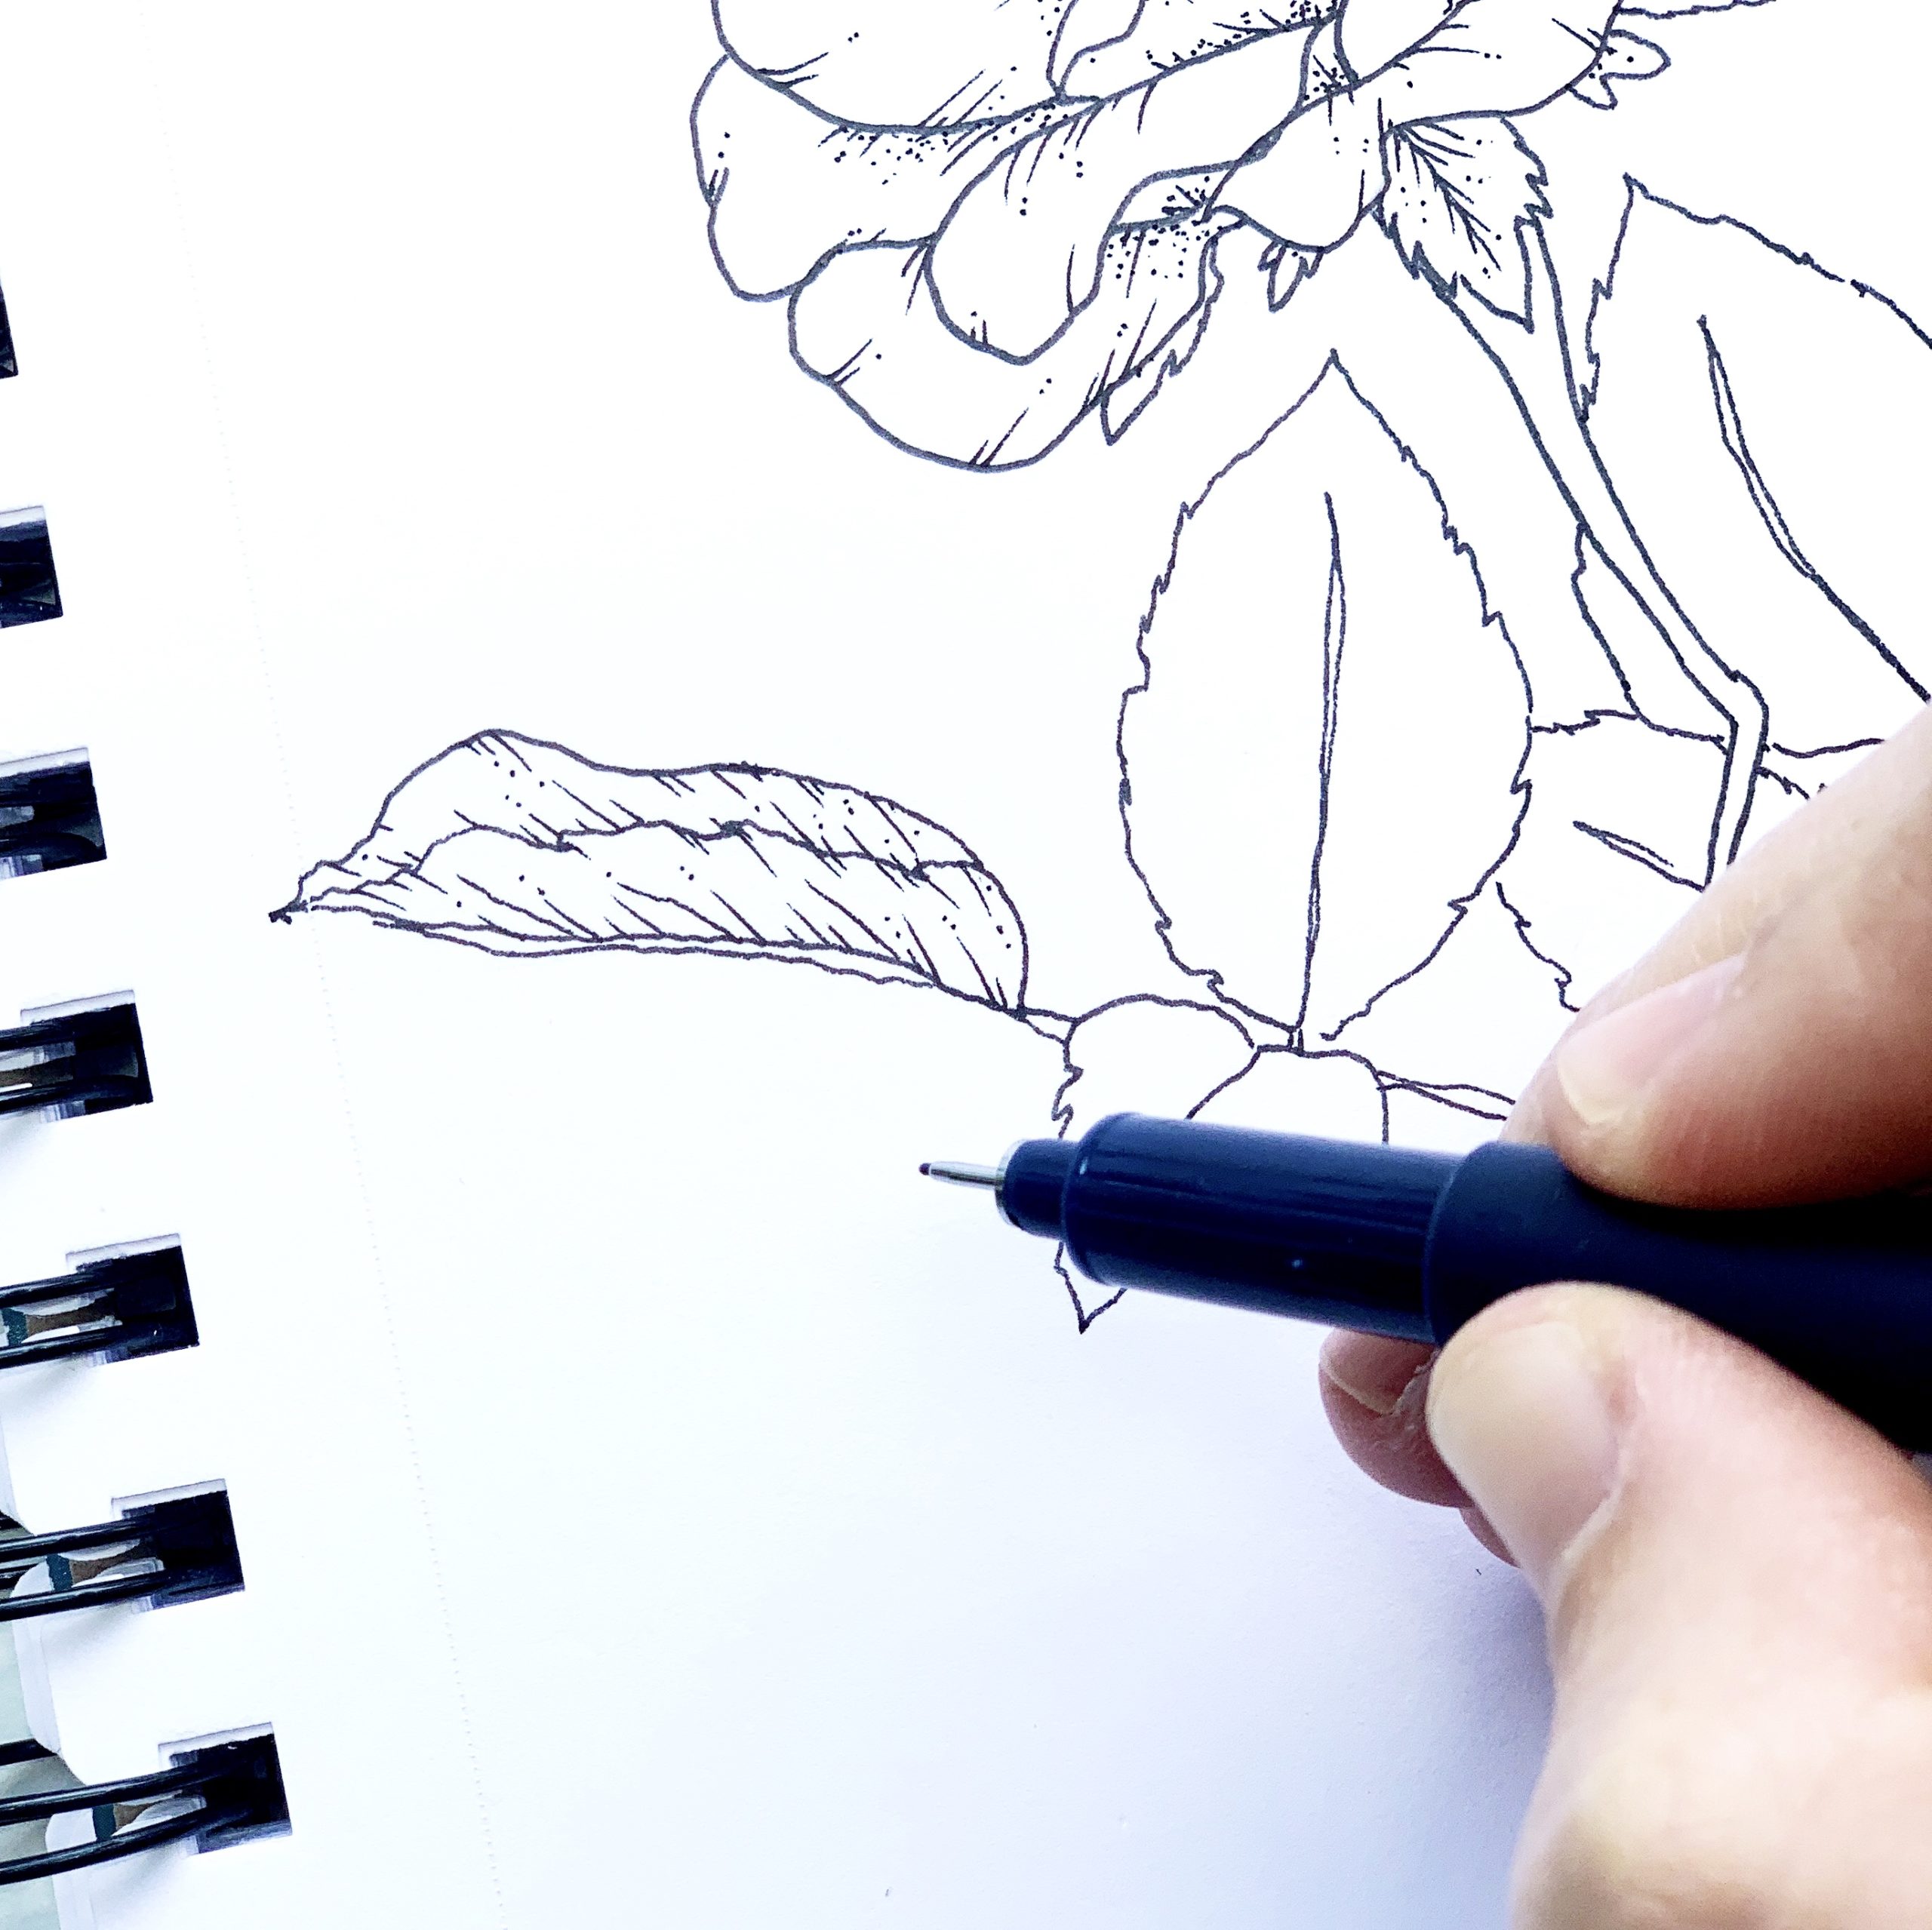
Now that the flower is sketched with pencil, it’s time to start inking it in! I really like using the smaller tips of the MONO Drawing Pens because I think it makes it appear more delicate and you can do more with the lines. I am using MONO Drawing Pen 03 to begin drawing the center petals of the flower. Again, make sure you’re looking at the shape of the petal that you see. When you draw the individual shapes of the petals, the flower will start to come together.
Step 4
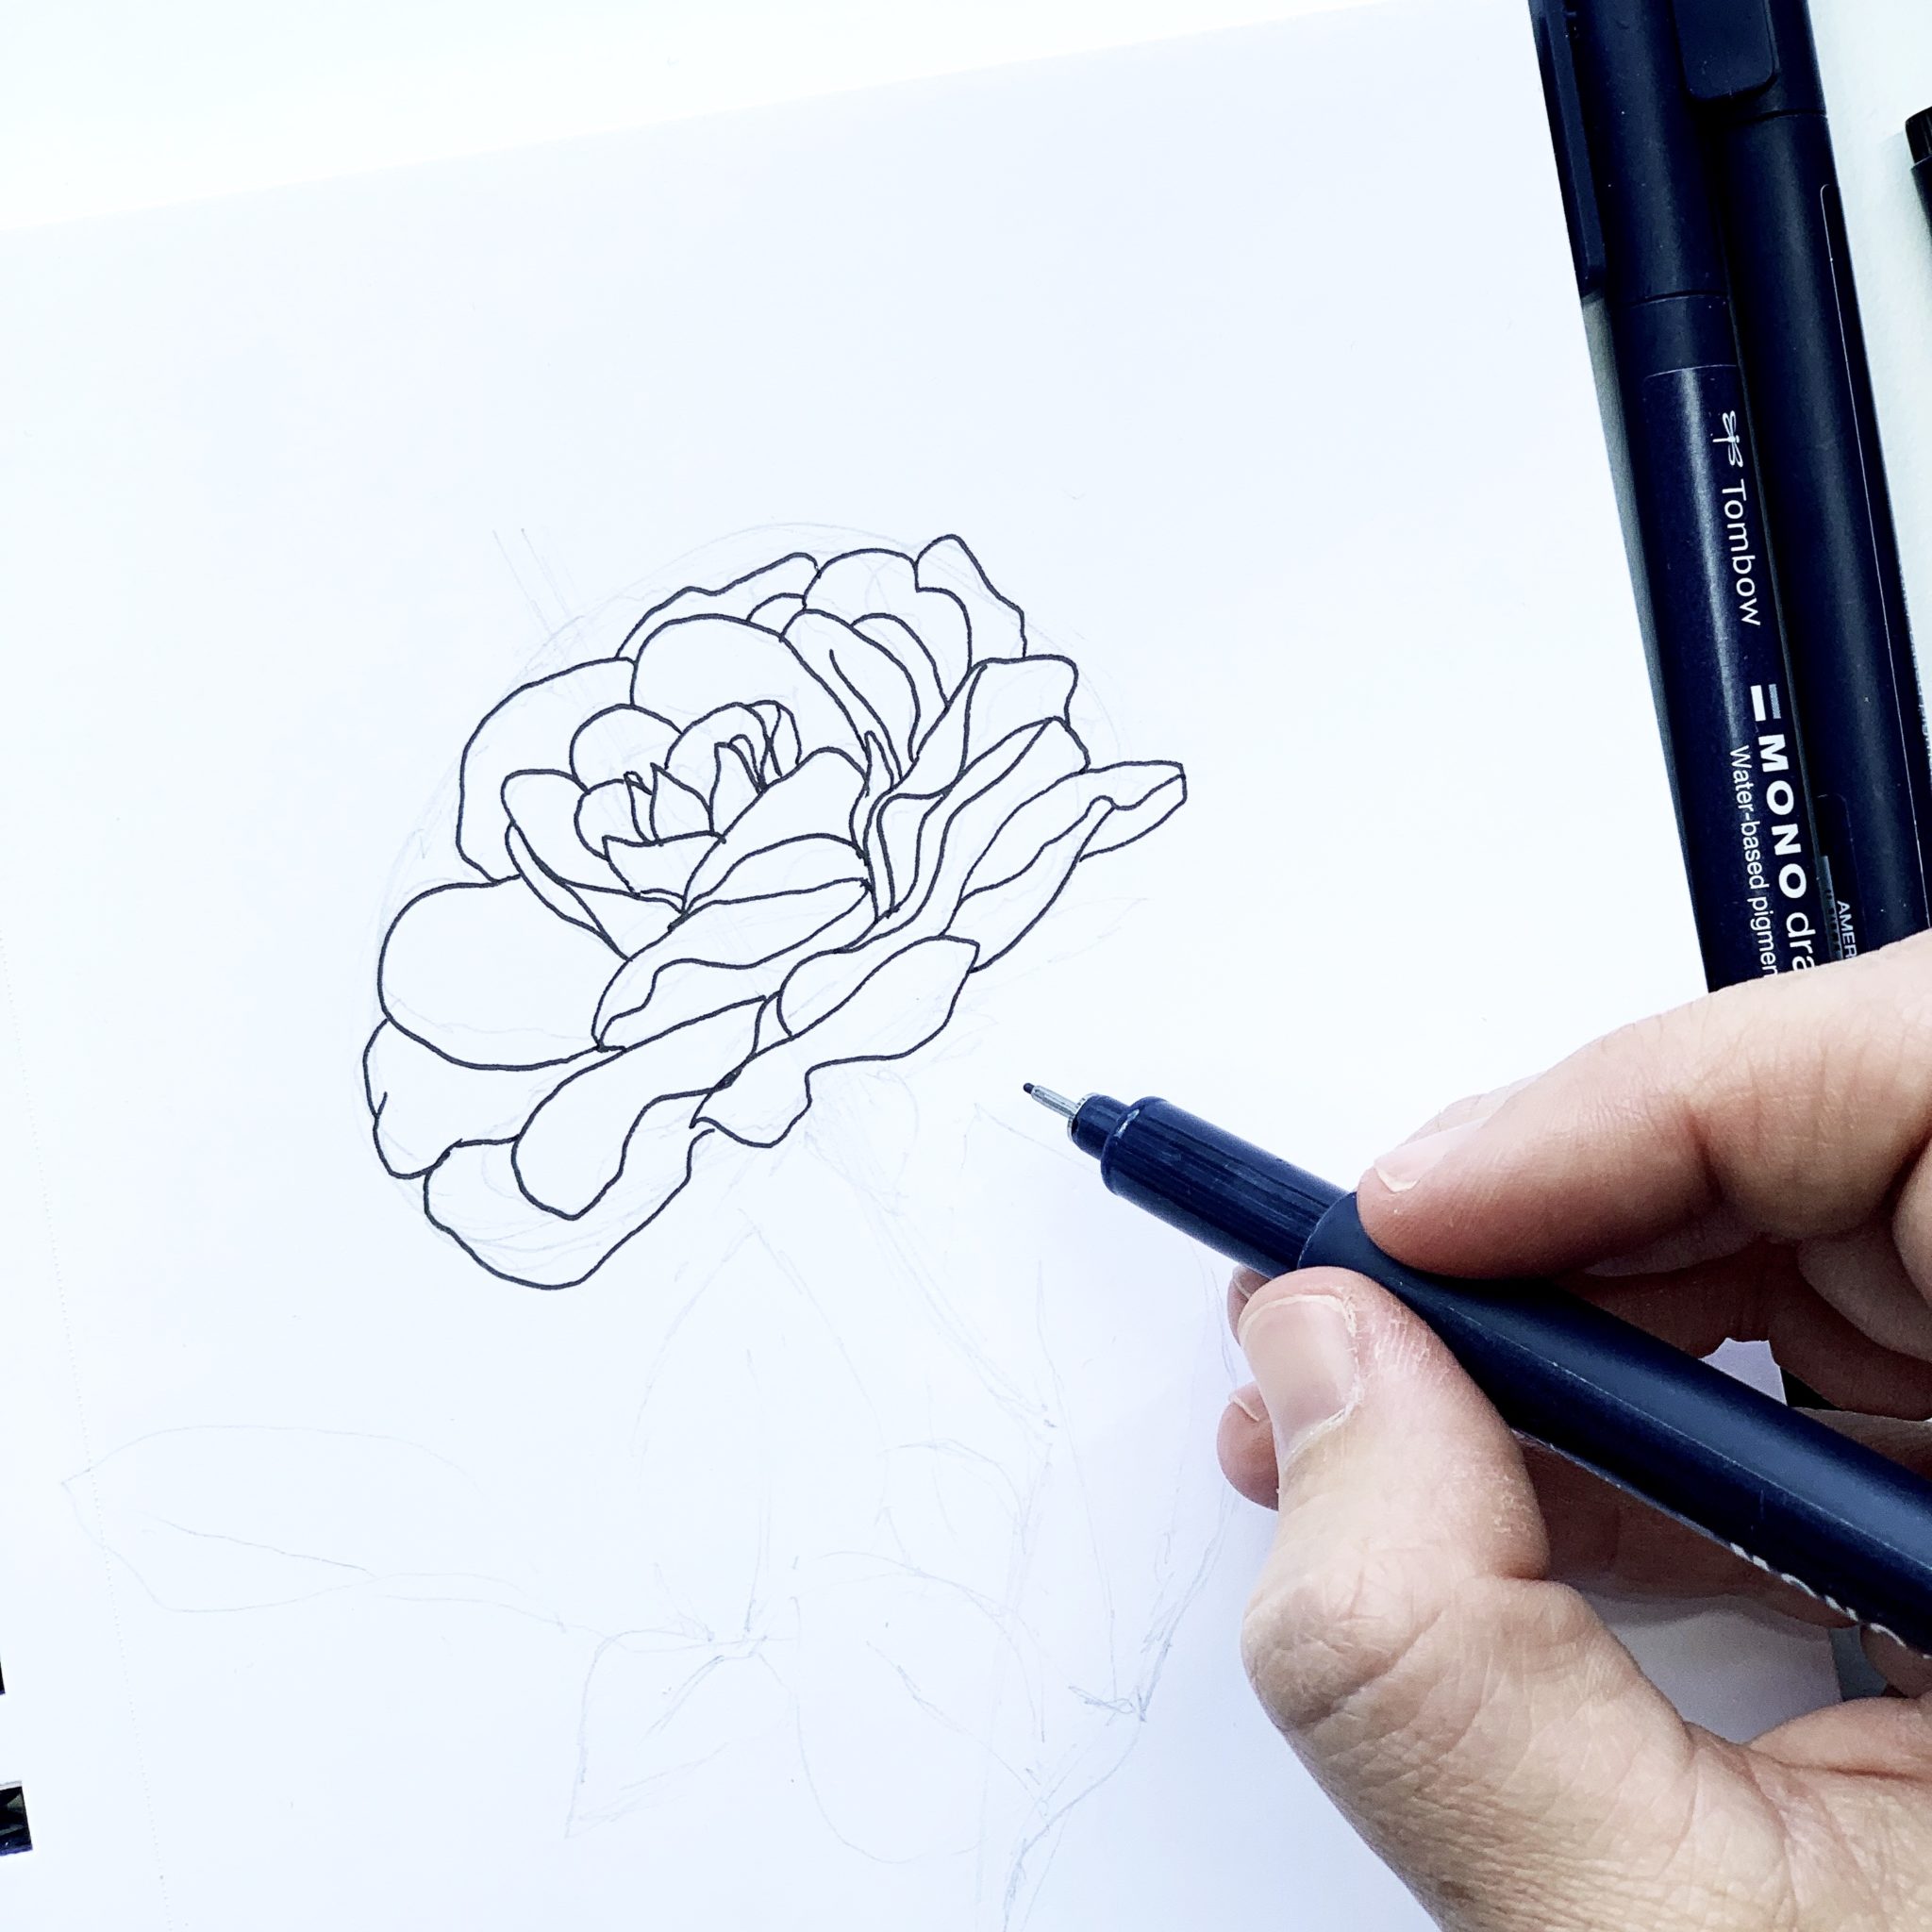
Continue to add layering petals around the center of the flower, filling out that oval shape we initially drew with the pencil. Think of that initial oval pencil shape as a guideline or barrier to your flower head. Look at the folds in the petals and draw what you see. Some petals will overlap others, so make sure you leave some room for those.
Step 5
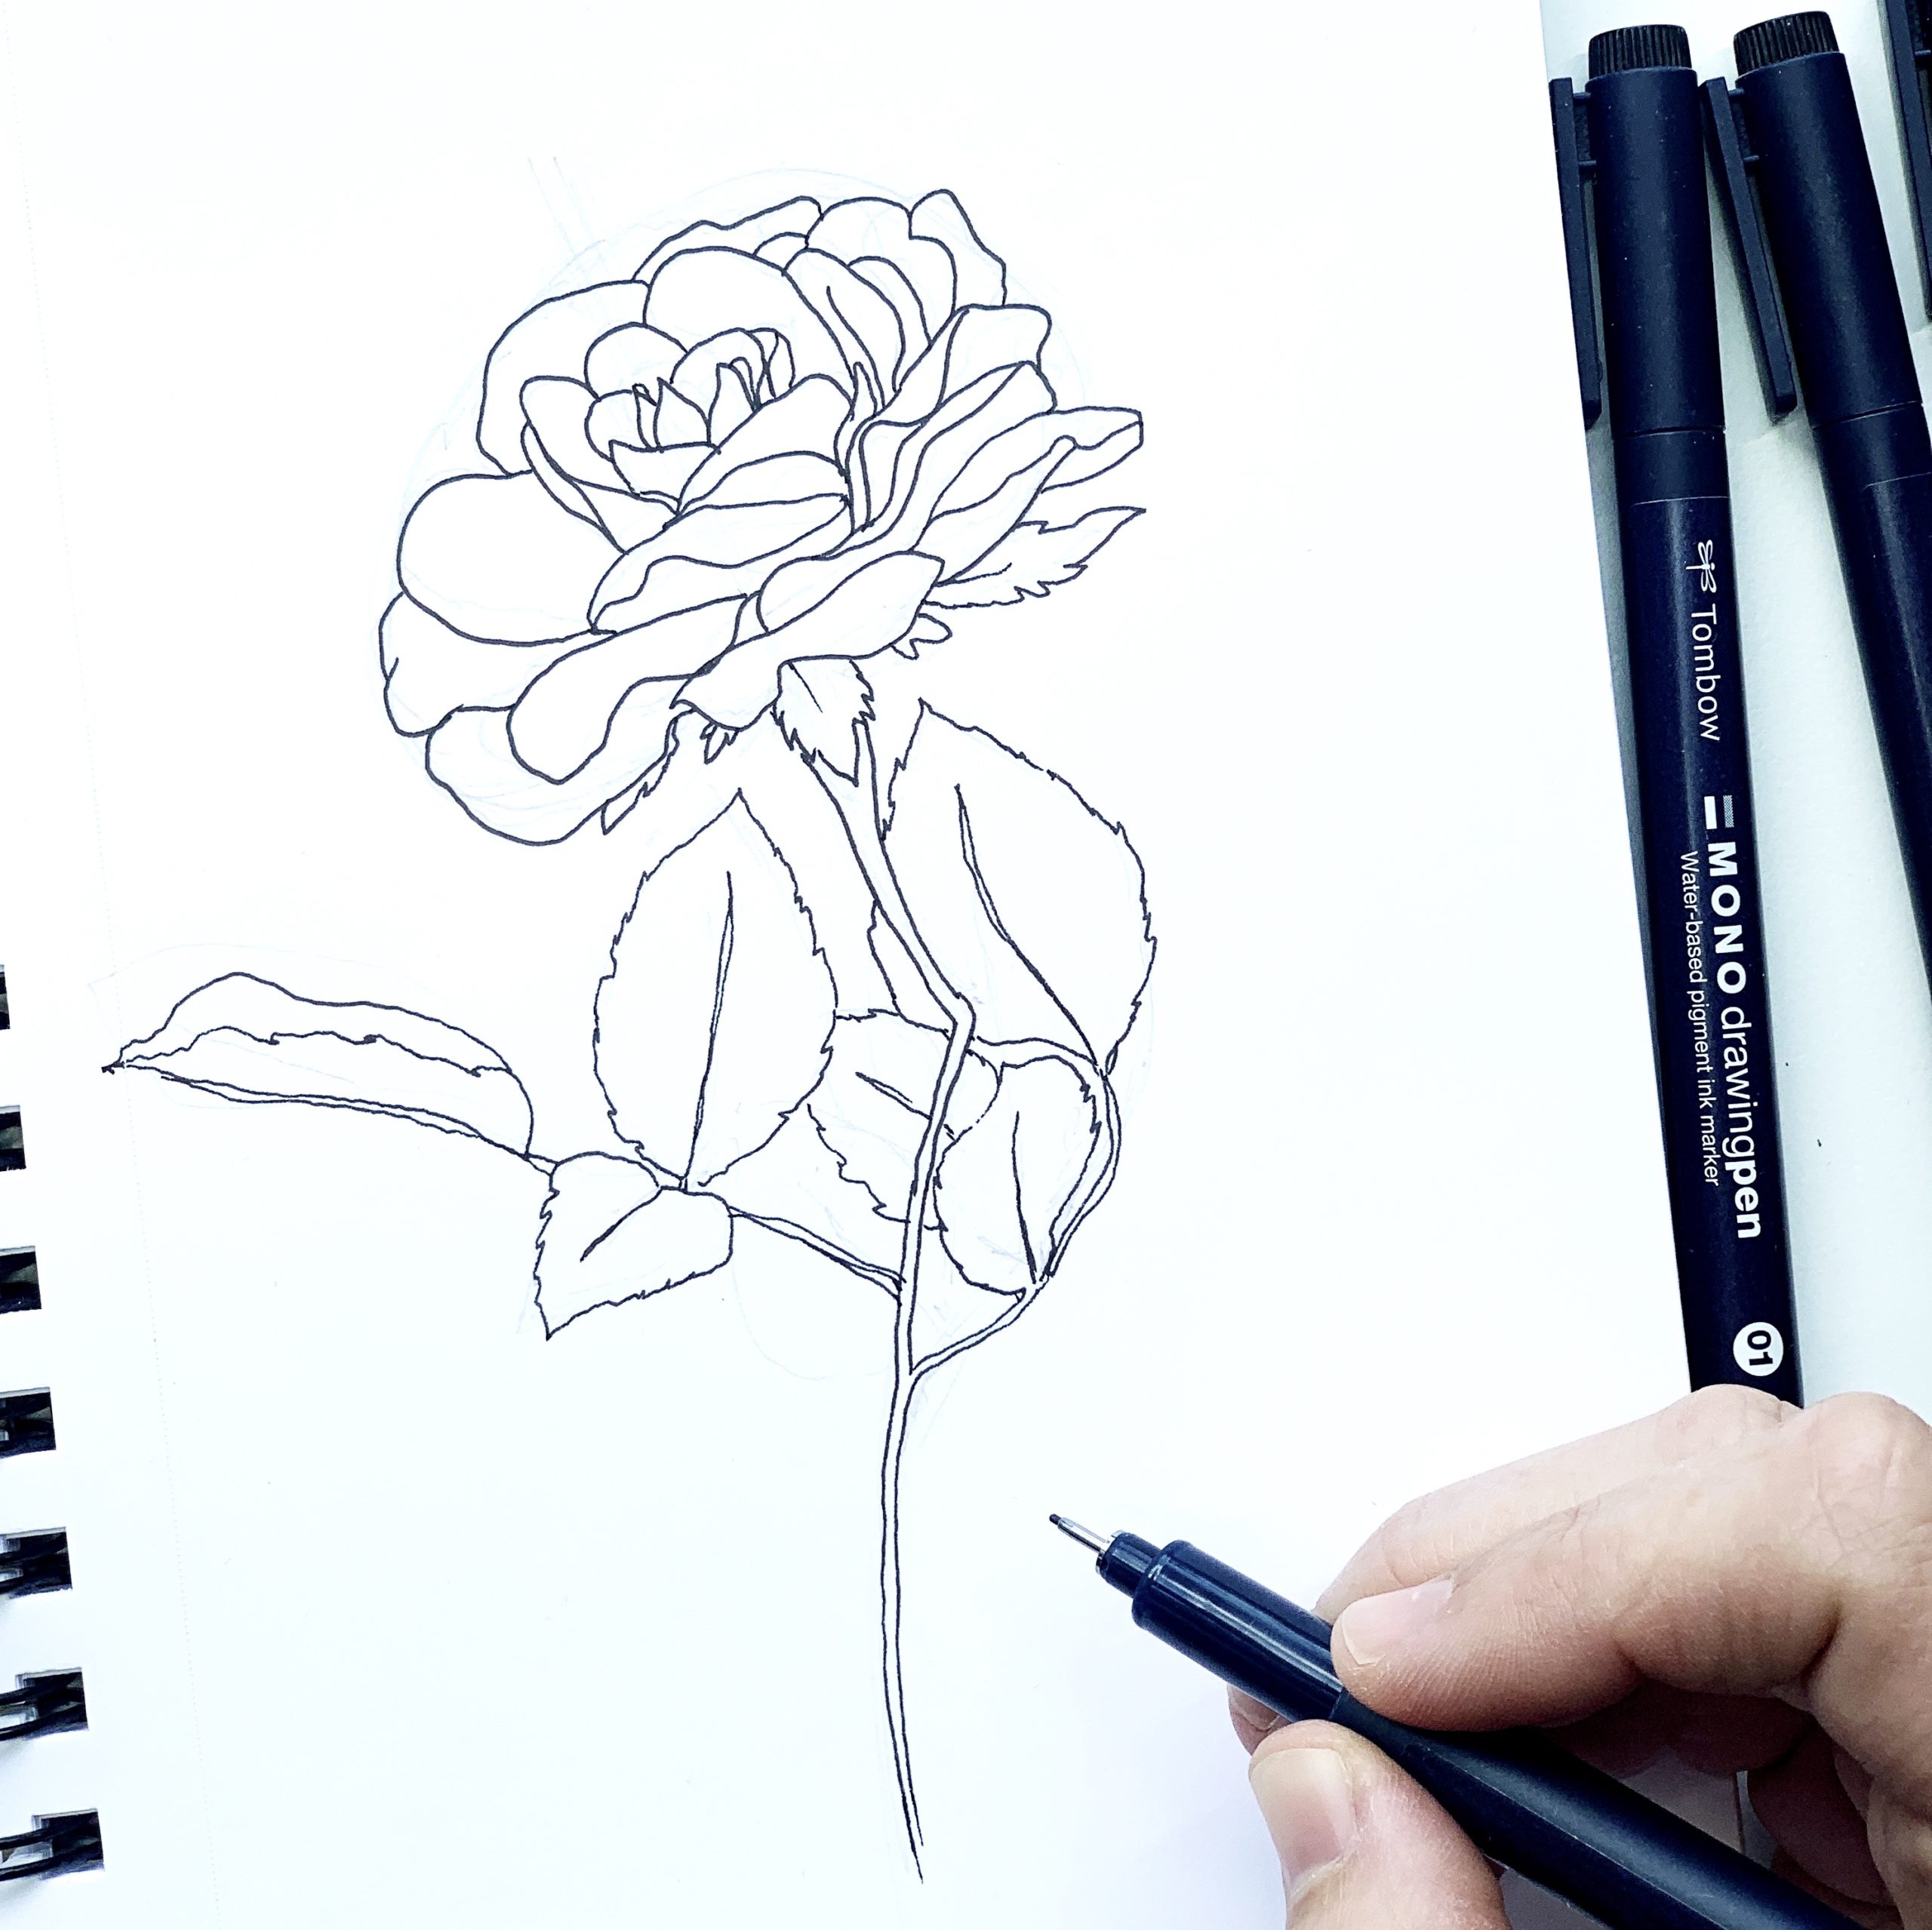
Finish drawing the stem and leaves. Based on how your flower is placed, the leaves will have different perspectives as well. Leaves could be coming out toward you, going away from you or growing out left or right. Make sure all the petal lines of the flower are connected.
Step 6
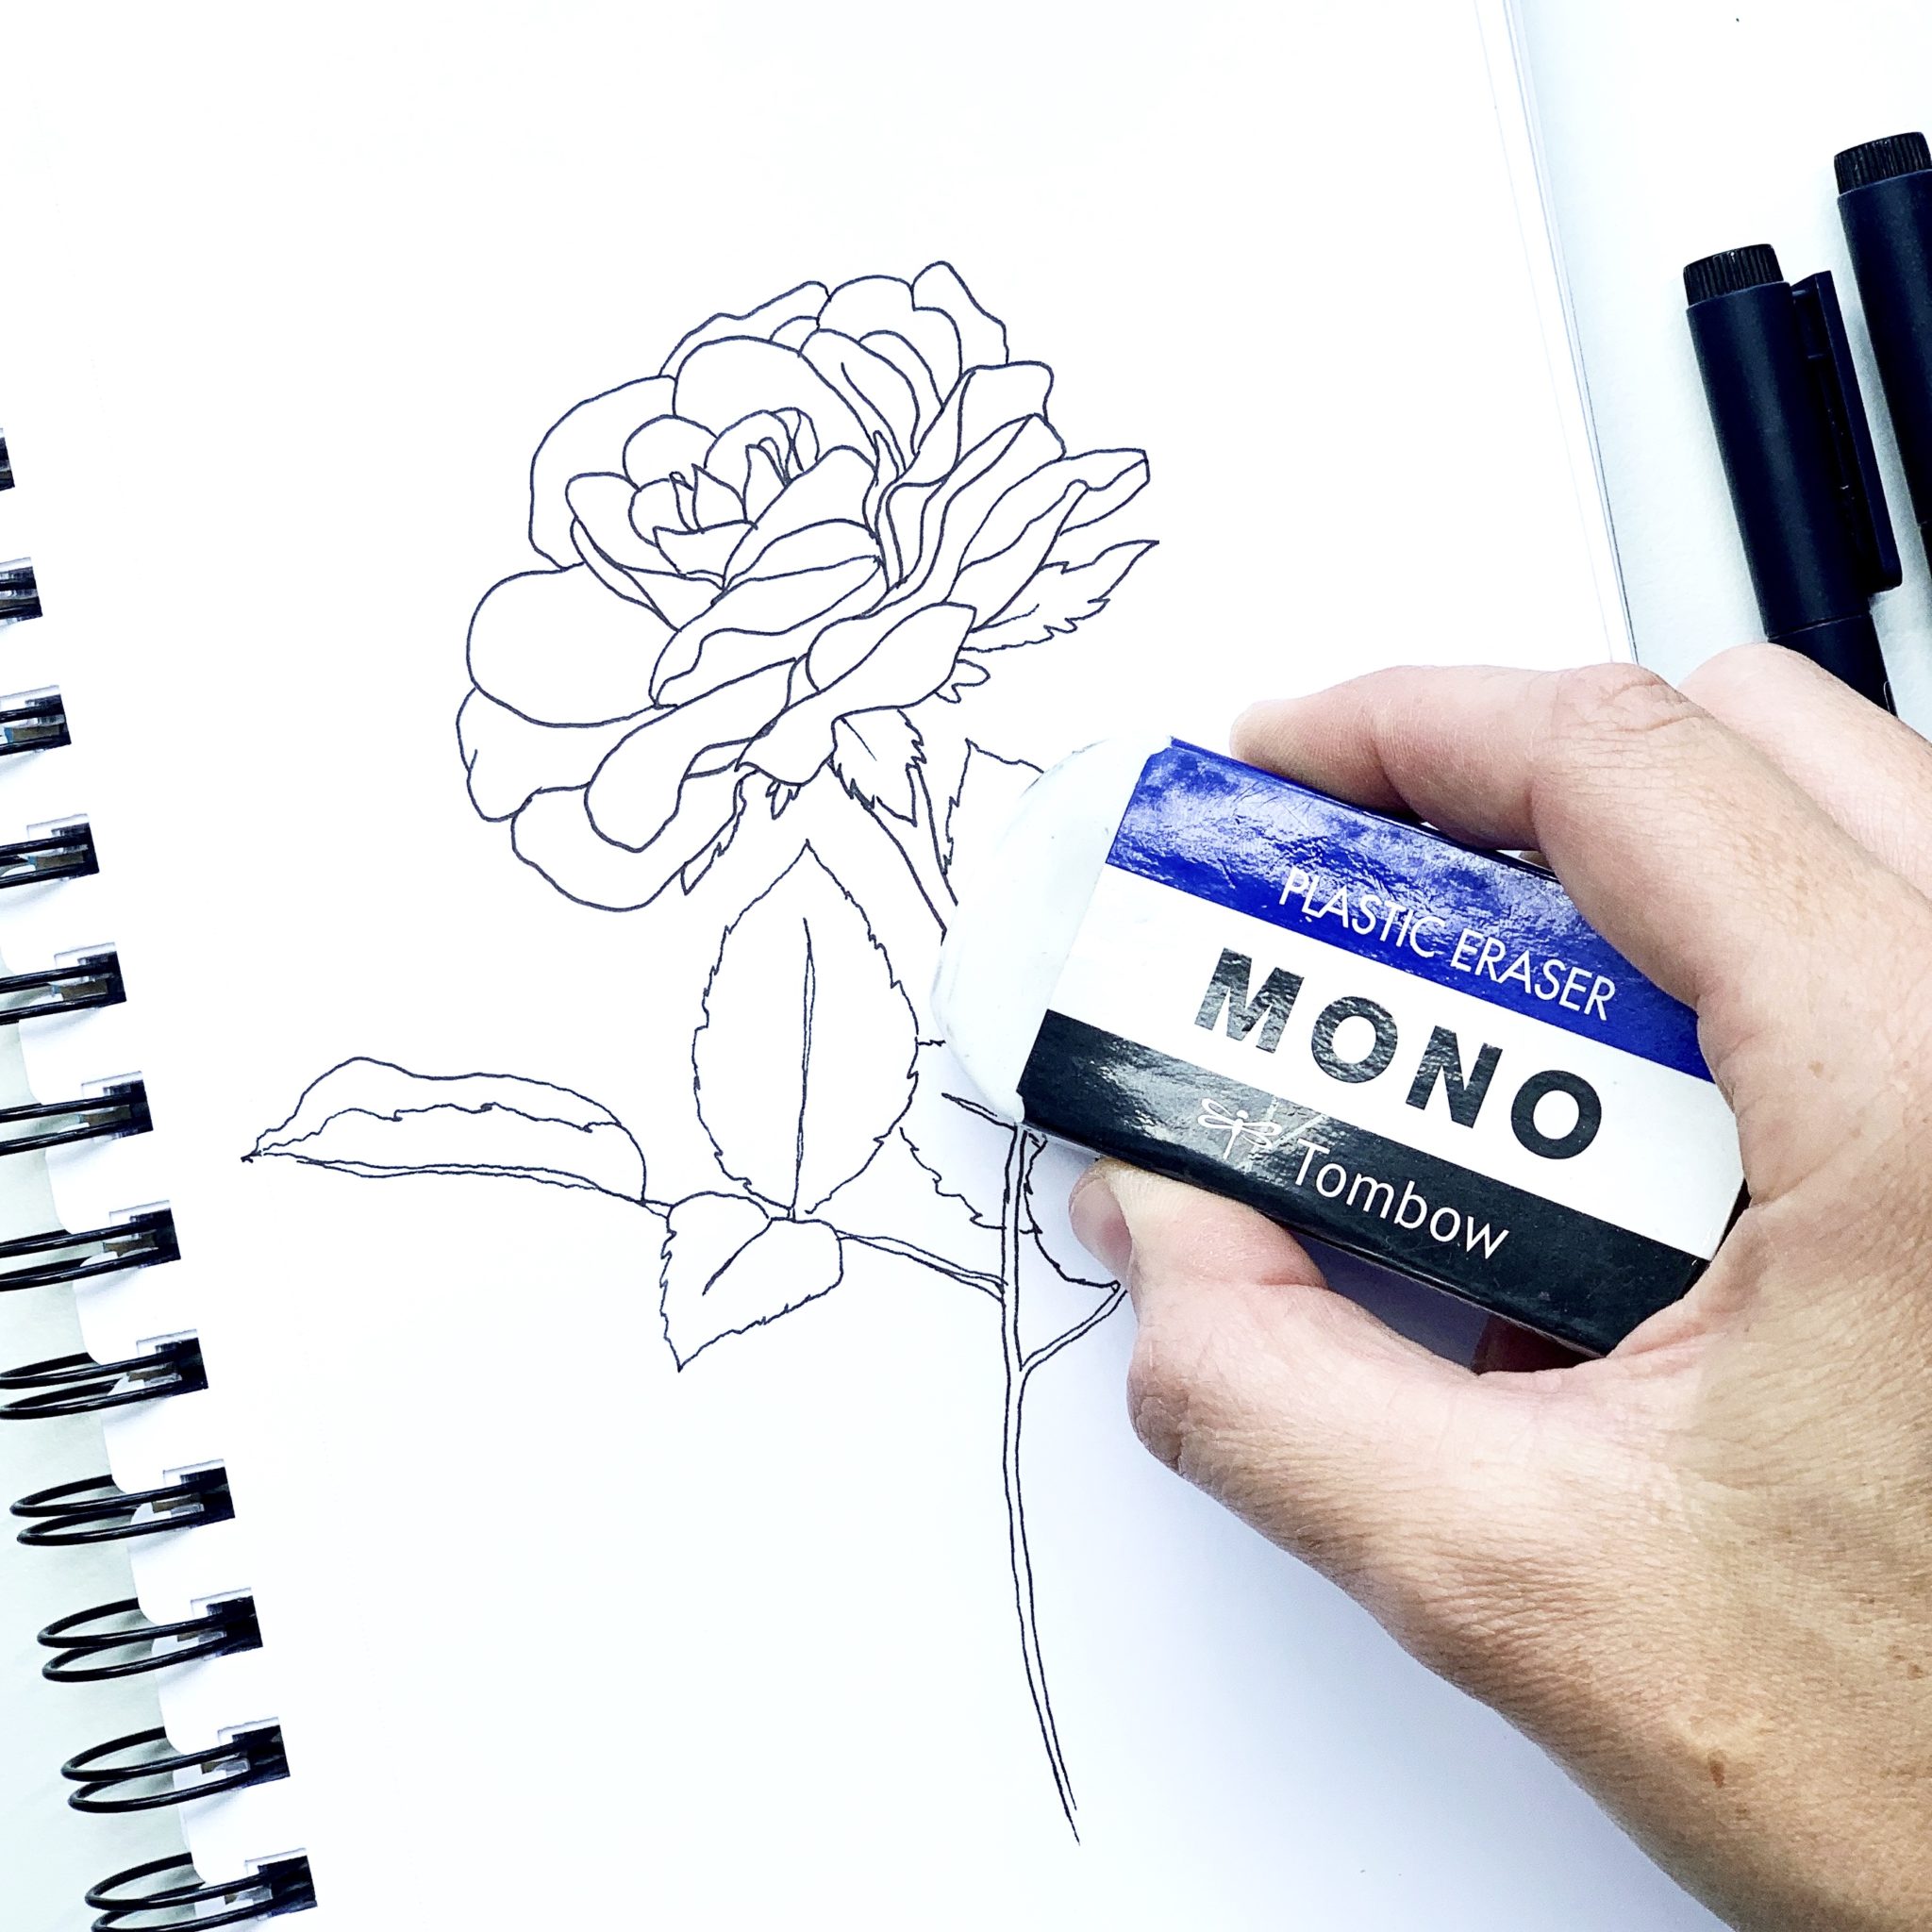
Use the MONO Drawing Eraser to erase any pencil marks you made while sketching. This gives the flower a clean slate, so you won’t be confused with the various lines. I love this eraser because it is large and covers a lot of area in a short amount of time!
Step 7
Now it’s time to start the shading and detailing! Remember when I said everything comes from the center of the flower? Here’s where that really applies! When you’re adding shading or petal details, find the center of the flower and move outward, making those swishing marks that will taper off at the end. You don’t want an even line all the way across the petals because it will make them look too heavy.
I like to use a pen that is one or two sizes smaller than the first pen to draw in the details. I want the lines to be smaller and more delicate, as its purpose is to suggest the shape and shadow of the overall flower. I am using MONO Drawing Pen 02 to draw in my details.

When you are shading, use a variety of lines and wiggly lines to show the overall shape of the petal or leaf. You can totally add more than one shading method to your work—so use the stippling, hatching and crosshatching together at different times throughout the illustration. For this leaf, I used a mixture of hatching and stippling to help it appear shaded and give a shape to the leaf. The combination of stippling and hatching gives the illusion that the lines continue to go out and fade. The same rule applies to leaves as the petals—all the shading lines should come out from the center of the leaf, or extend inward toward the center.
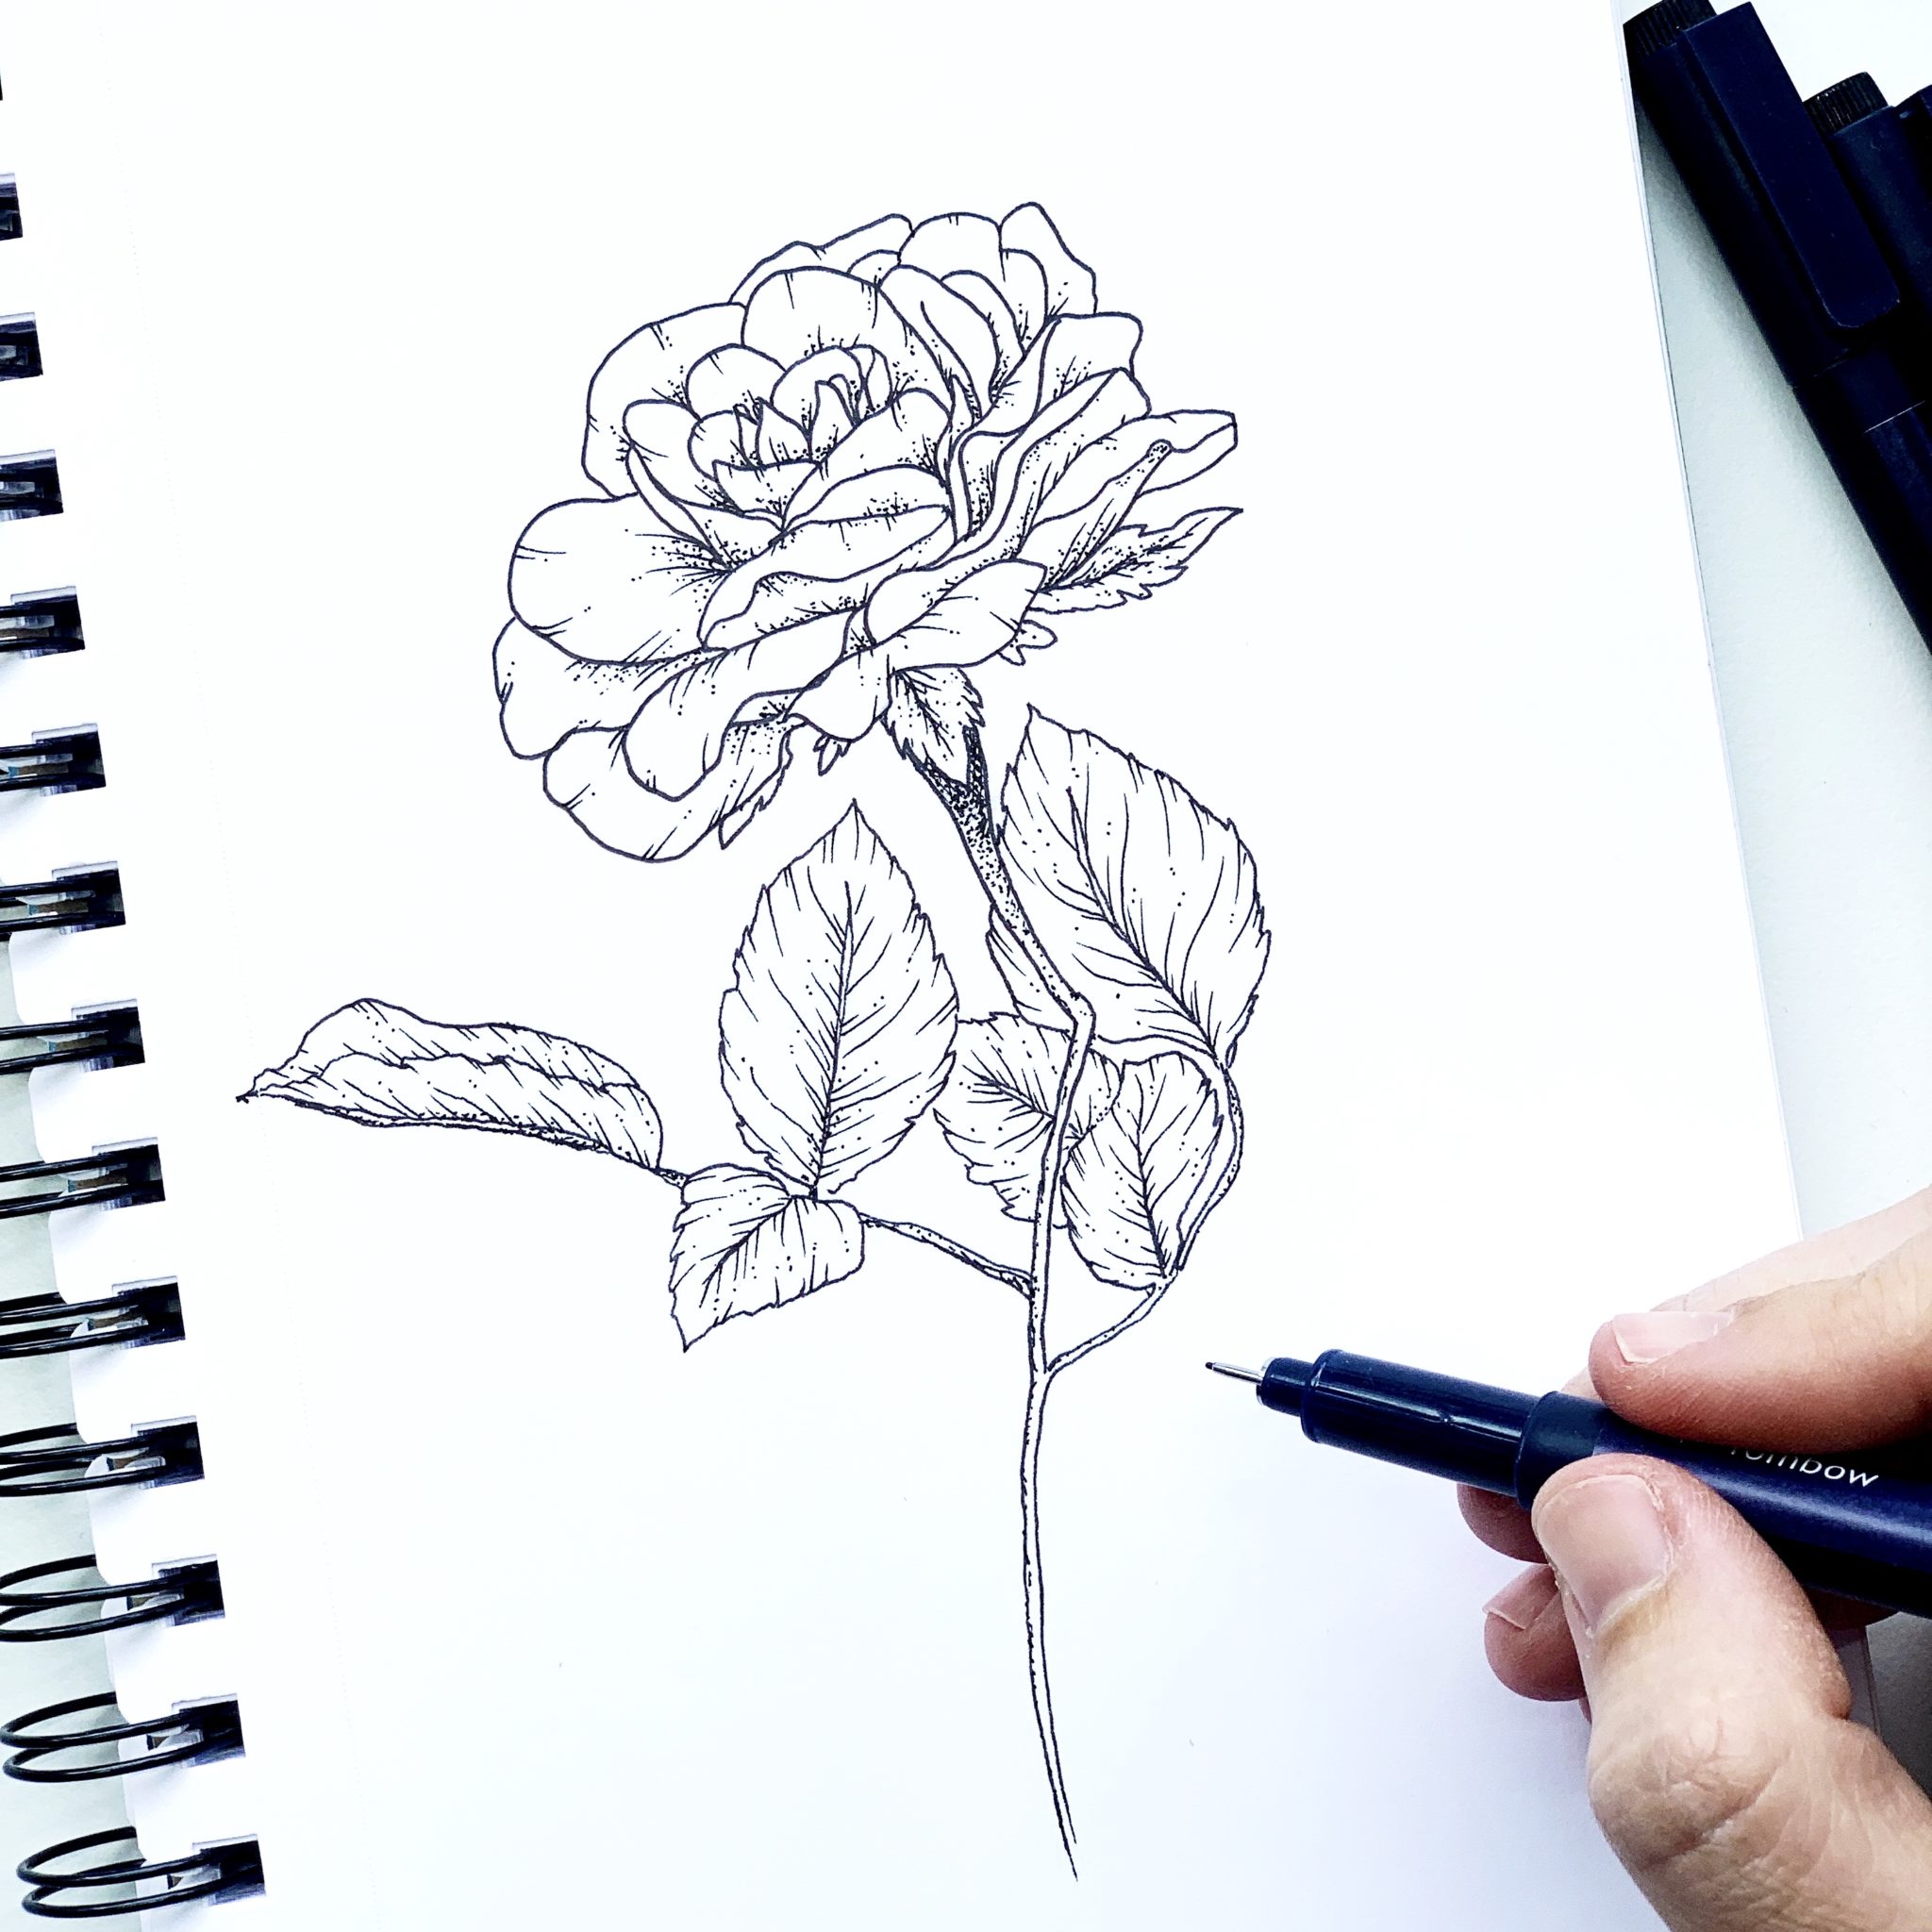
Step 8
Finish adding stippling, hatching and crosshatching to the flower until it looks well shaded and three dimensional. Here’s another trick: let your hand get loose. Embrace all the wiggles and bumps to create these lines because it adds character and movement. Don’t try to make all your shading and petal lines the exact same on every petal. Change it up so each petal looks slightly different from the next! Remember, the detail and shading lines will either be coming out from the center or going from the edge of the petal back toward the center!
You’re done! I hope you found my tips for drawing floral illustration helpful! I hope you try it out! For more inspiration like this, make sure to follow @studio80design!