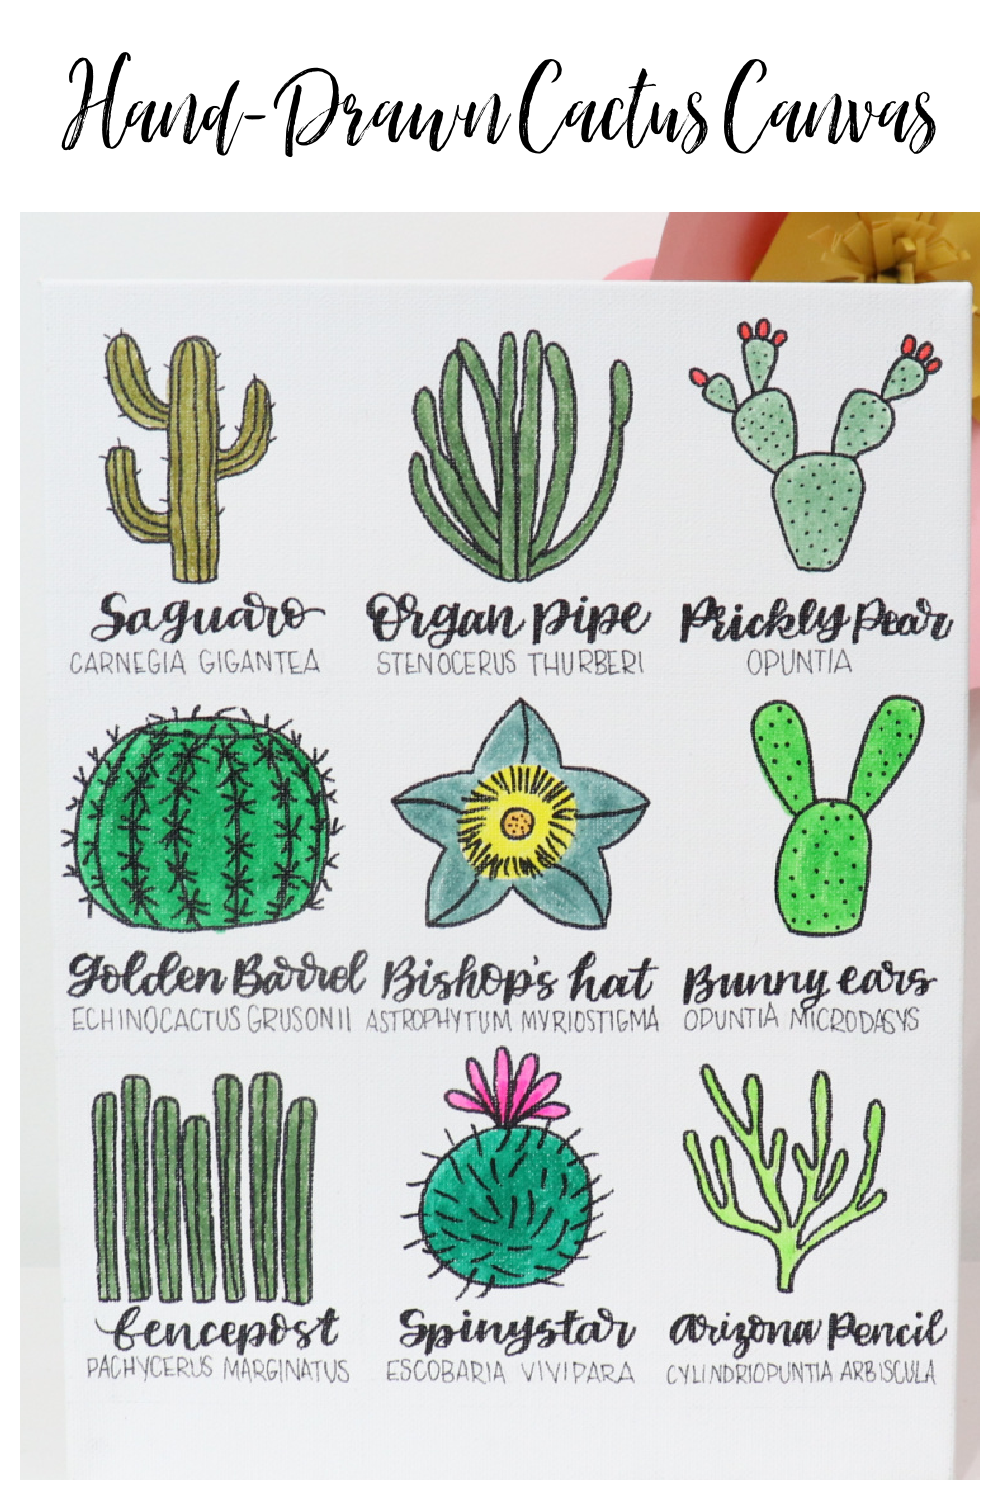
The earth is full of amazingly diverse biomes, each filled with their own complex ecosystems. One biome that doesn’t always get the attention it deserves is the desert. We often think of it as an empty wasteland, when in reality, it’s full of all kinds of fascinating plants and animals. For example, did you know that there are over 1750 species of cacti? This Hand-Drawn Cactus Canvas project gives us a chance to celebrate the beauty and variety of the desert. Grab your favorite Tombow supplies, and let’s get started!
How to Make a Hand-Drawn Cactus Canvas
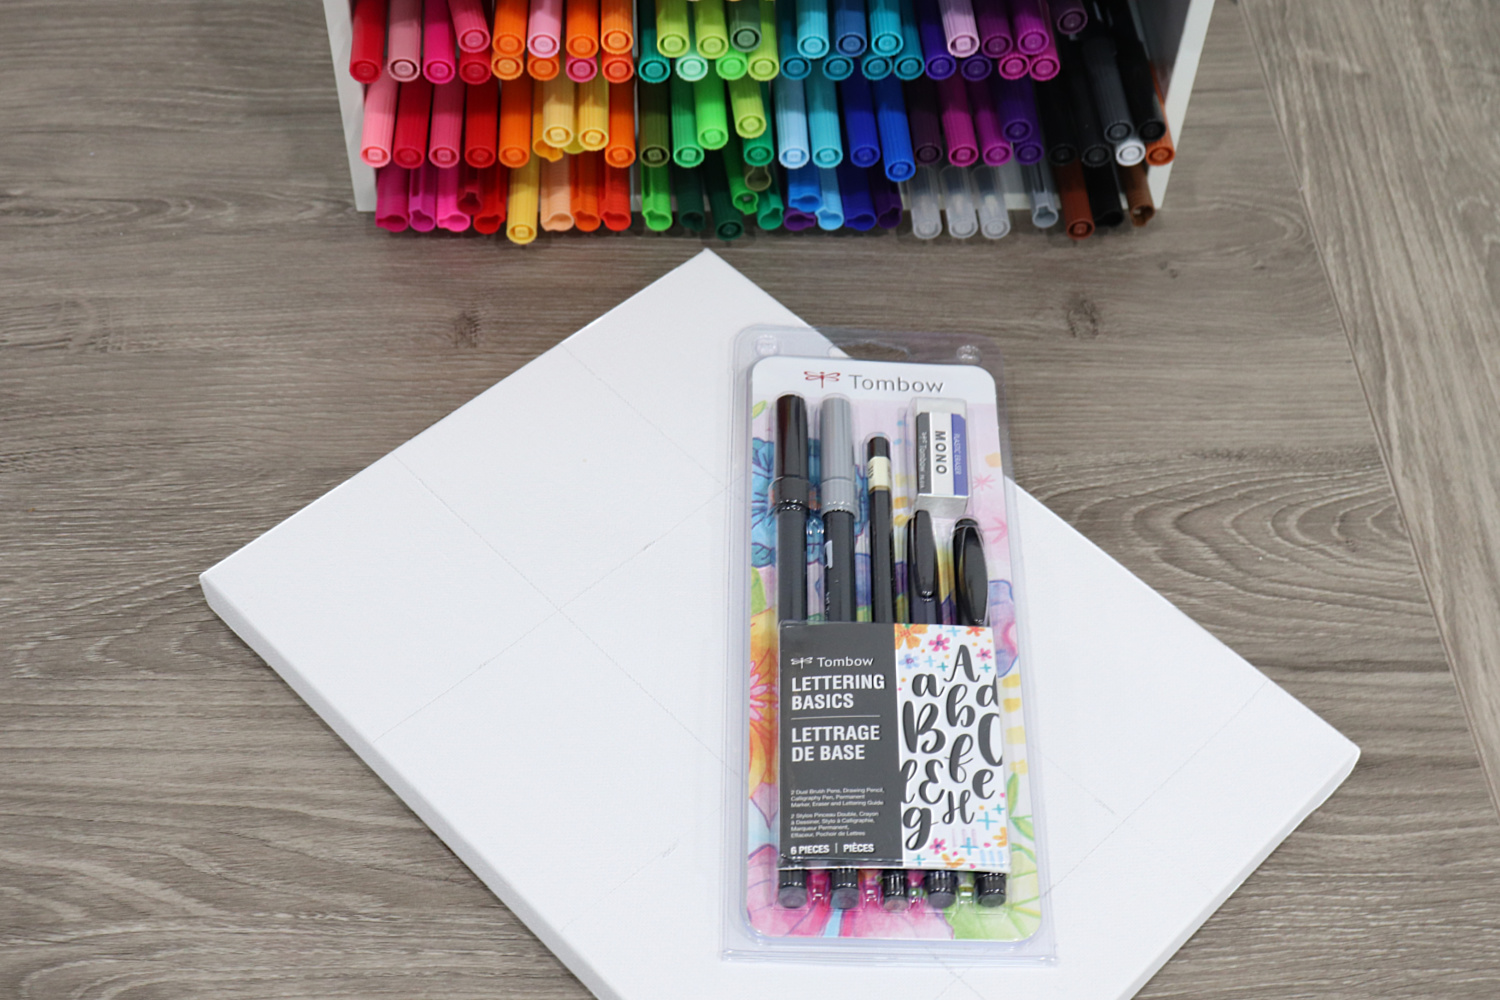
This project only requires a few materials, plus a set of doodles. Each drawing is built from basic shapes; like upside down “u”-shapes, circles, and ovals. I’m Amy from Amy Latta Creations, and teaching others to draw is one of my specialties. Even if you think you’re not an artist, I promise, you really can create these doodles! Just make sure to grab the free two-page download that breaks them down into simple steps. If you need to, you can even trace my finished drawings from those pages until you get the hang of creating them yourself. Here’s a list of the other supplies you’ll want to have on hand.
Materials:
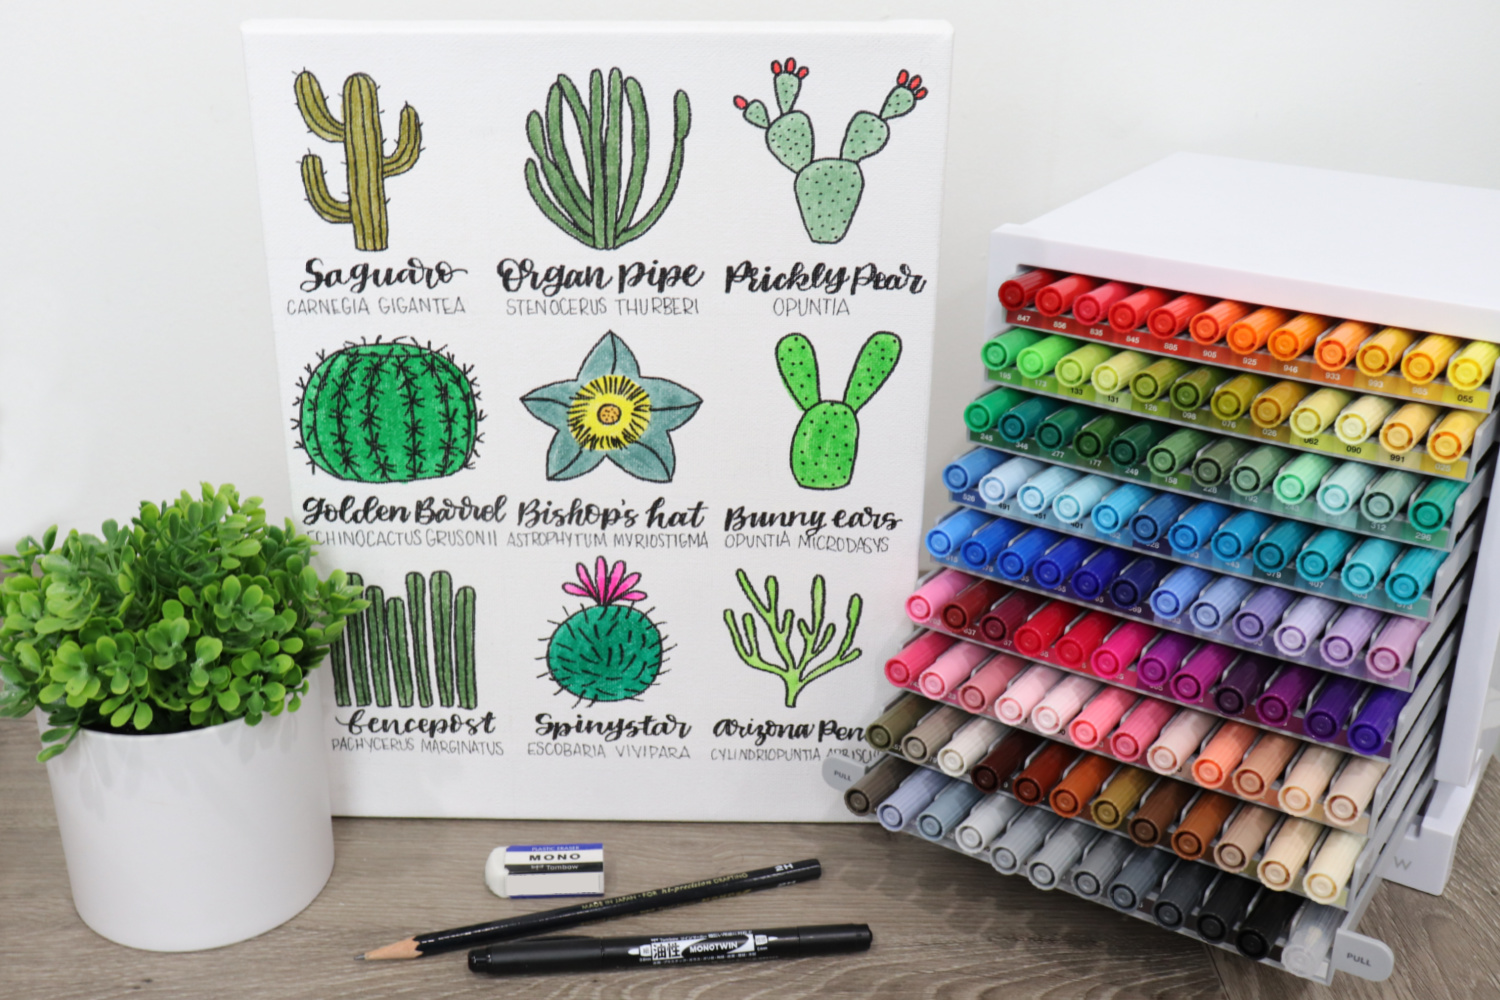
- blank canvas (mine is 9”x12”)
- Tombow Lettering Basics Set
- Tombow Dual Brush Pens, assorted shades of green plus yellow and pink
- ruler
- printable cactus doodle practice pages
Instructions:
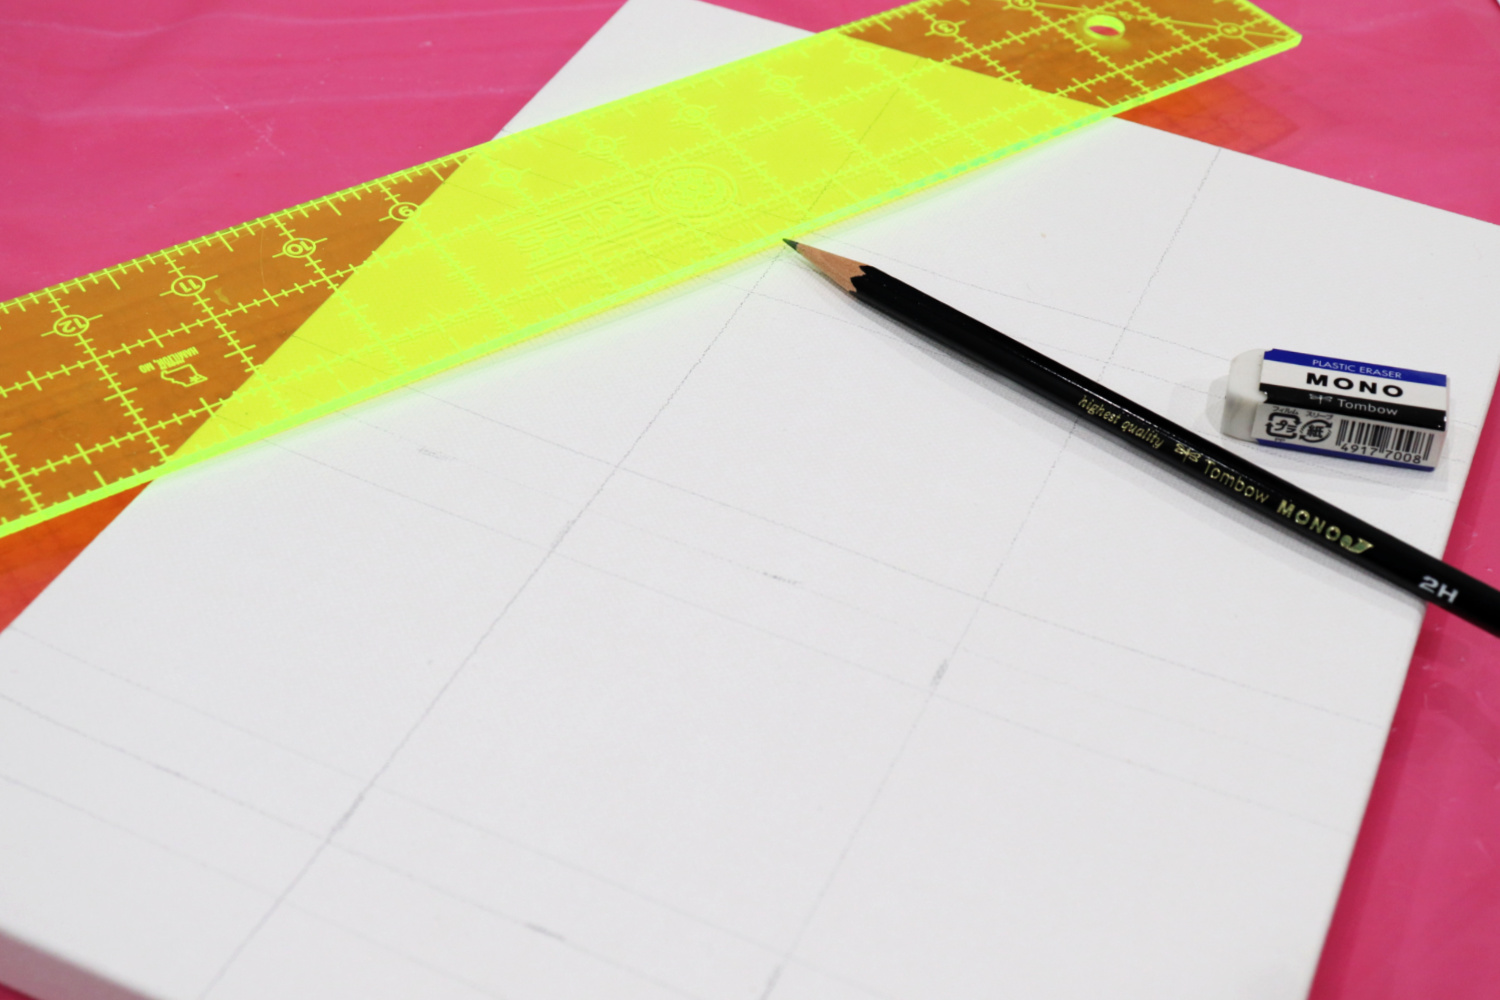
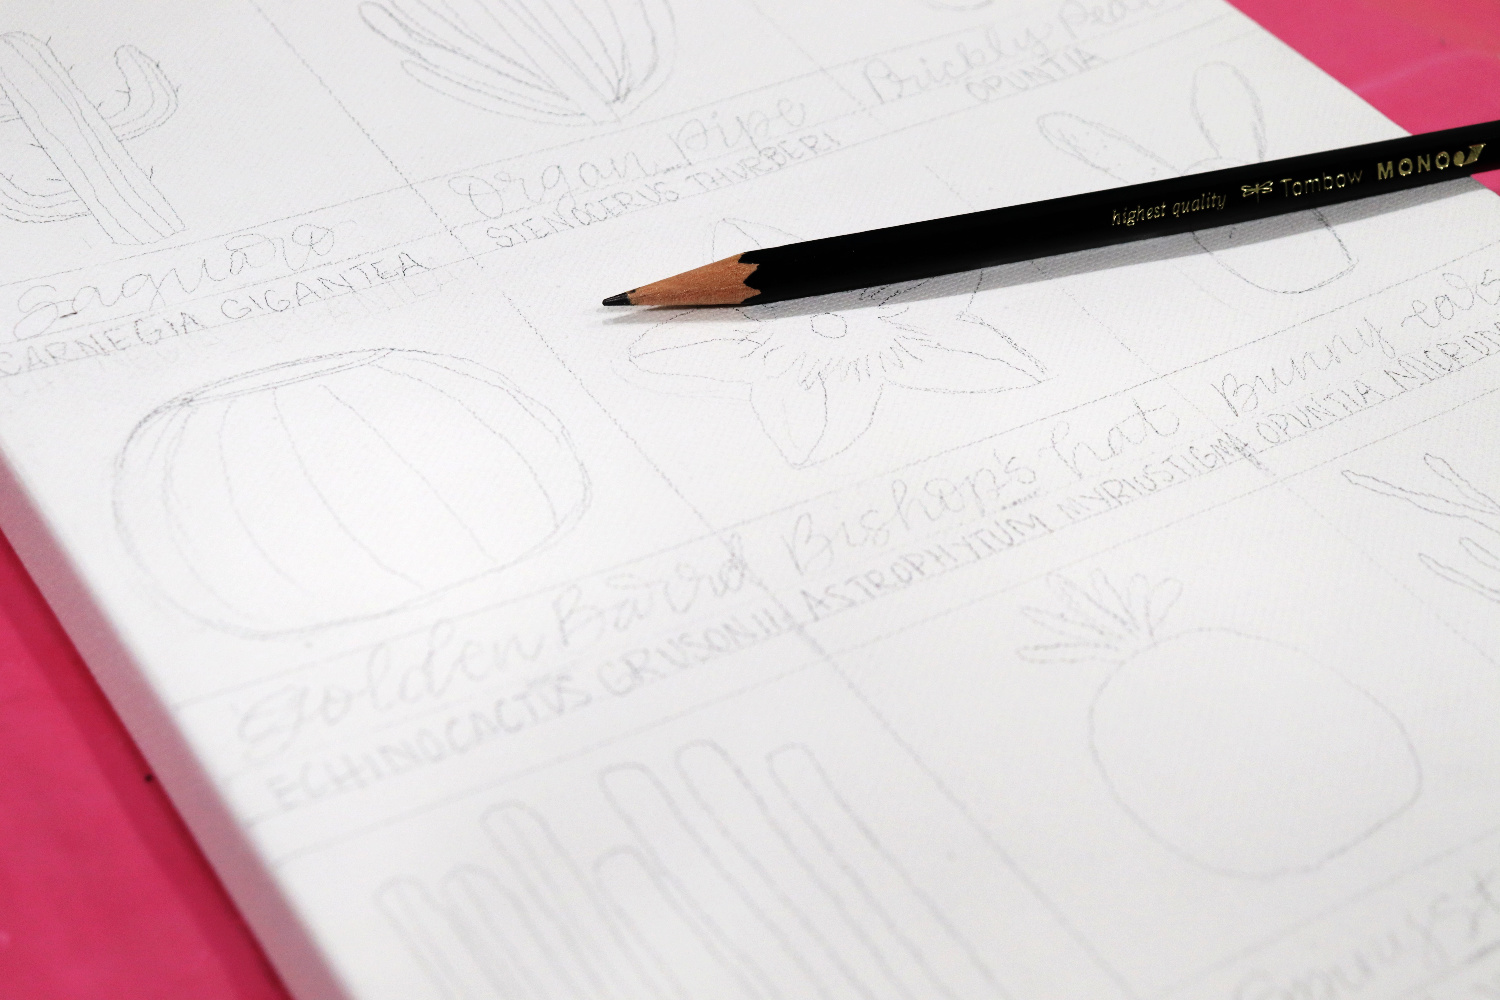
Step 1: Use a ruler and your Tombow MONO Drawing Pencil to divide your canvas into sections.
First, I marked horizontal lines at 3.5”, 7”, and 10.5.” Then, I drew vertical lines at 3” and 6.” That gave me 9 sections for my drawings, along with a bit of space at the bottom of the canvas. Next, I drew a line half an inch above each of my three horizontal lines to give me a box where I could letter the names of each cactus. Finally, I sketched a line a quarter of an inch below each of the original horizontal lines. Those became the baselines for writing the scientific names of the plants.
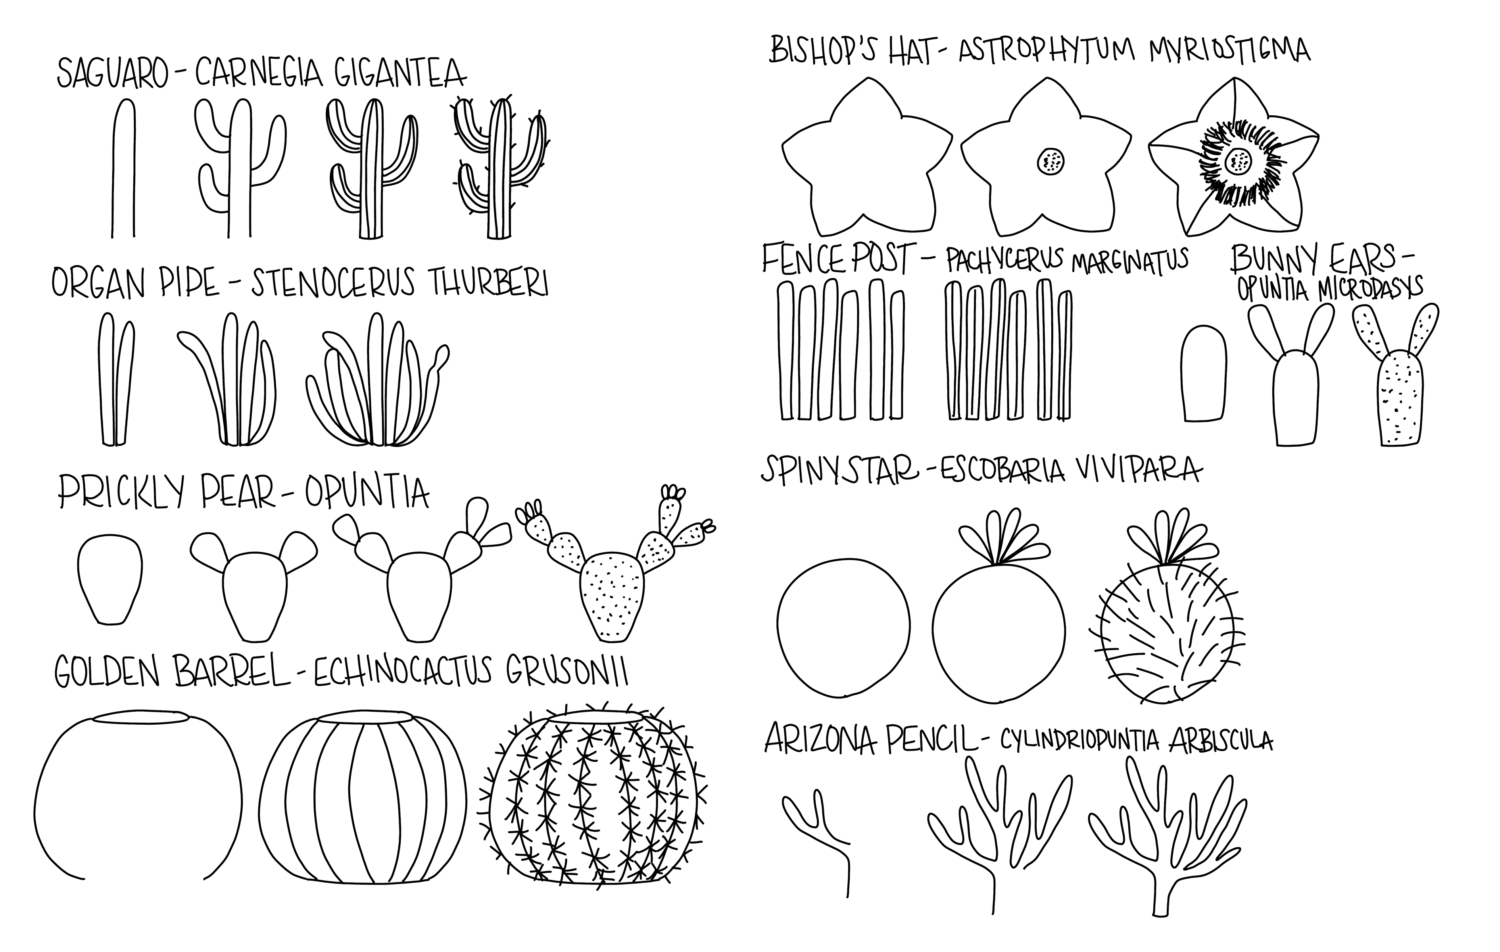
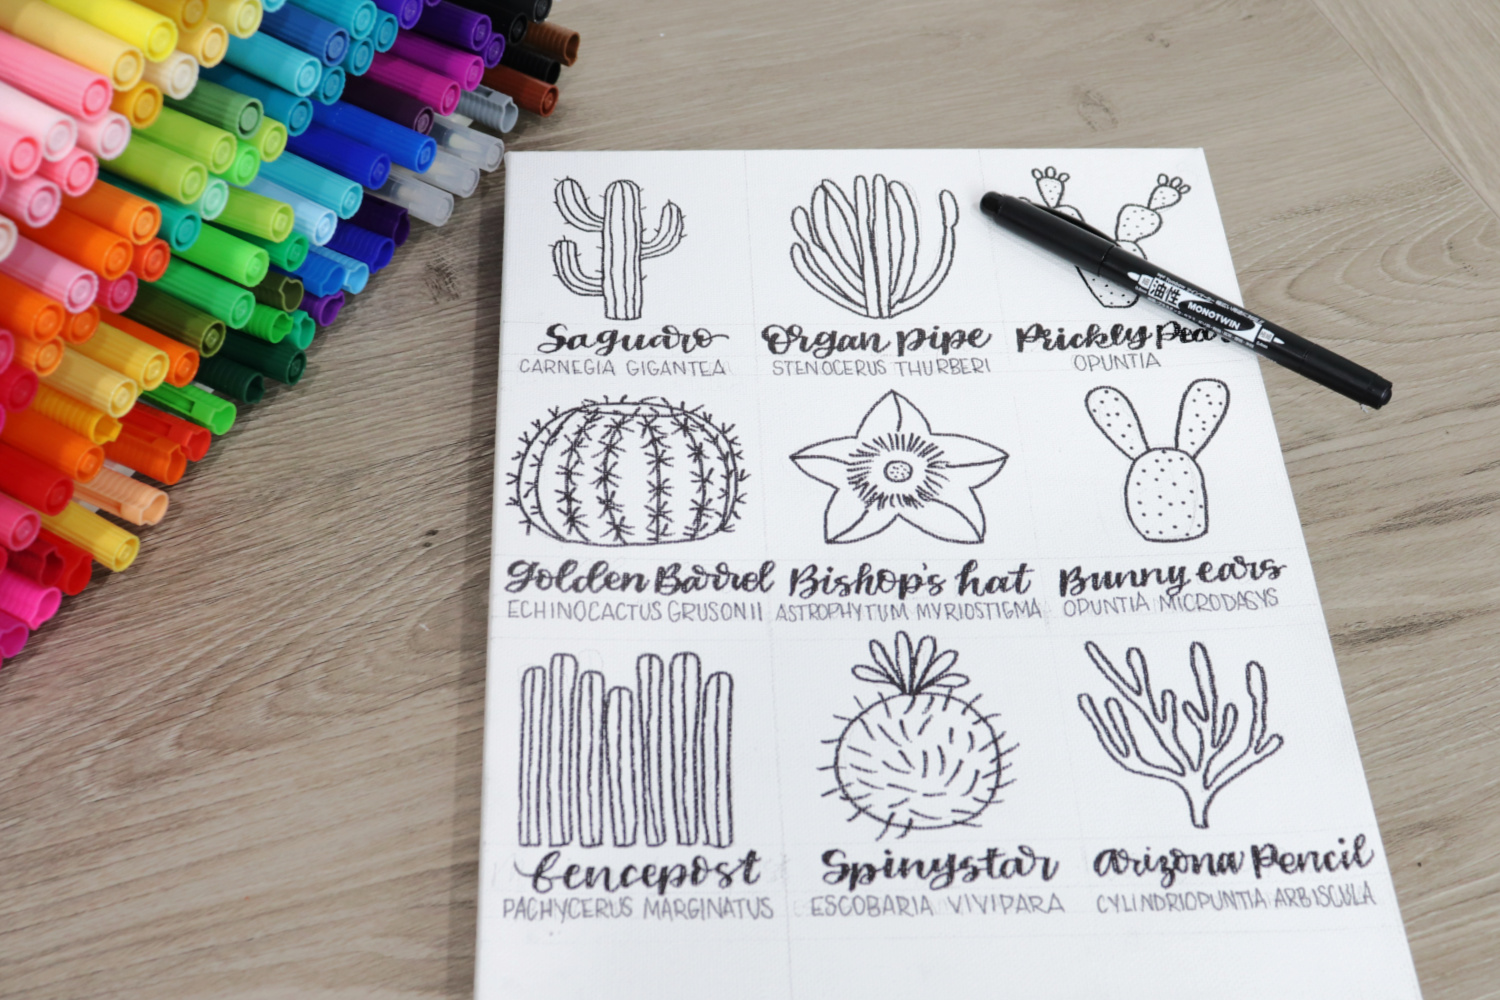
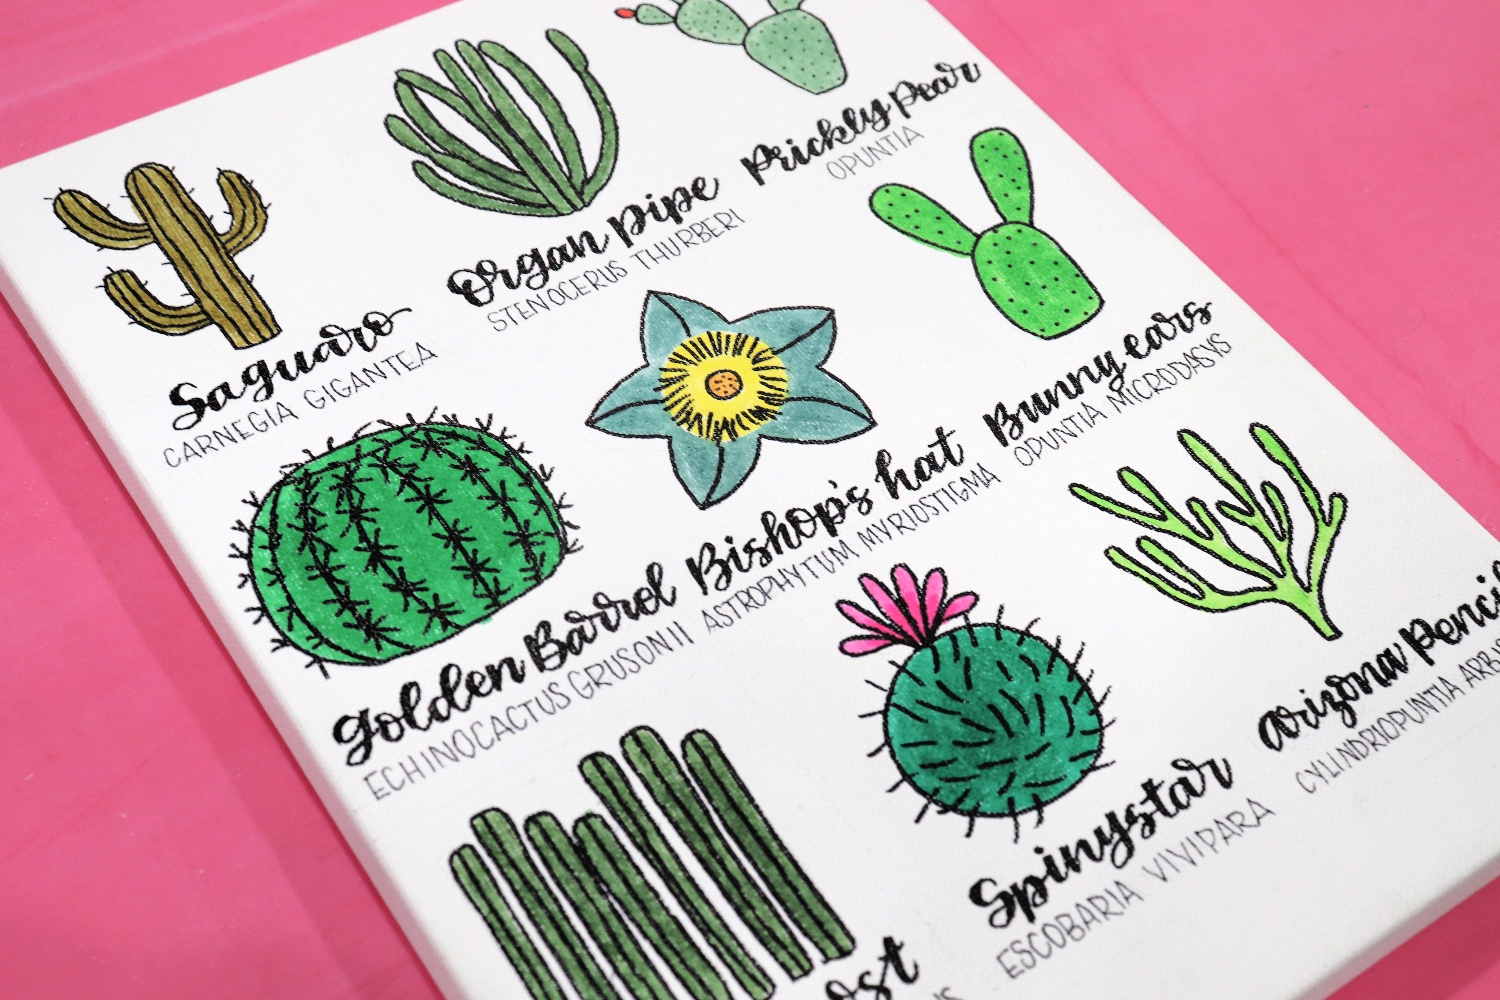
Step 2: Lightly sketch a different type of cactus in each of the nine large boxes.
You’ll want to do this with the MONO Drawing Pencil again, keeping in mind that the lighter your lines are, the easier they will be to erase. Here are the nine varieties I chose to illustrate. I’ve created a free download for you of these two pages that break down each of the doodles into totally do-able steps. You can download them here, then print them and use them for practice. Remember, you can also trace my images if you like.
Step 3: Write the nicknames and scientific names in pencil.
Use your guidelines to help you with spacing. I chose to use script for the common names and a smaller, all-caps print for the scientific names. Feel free to use any style of writing you like best.
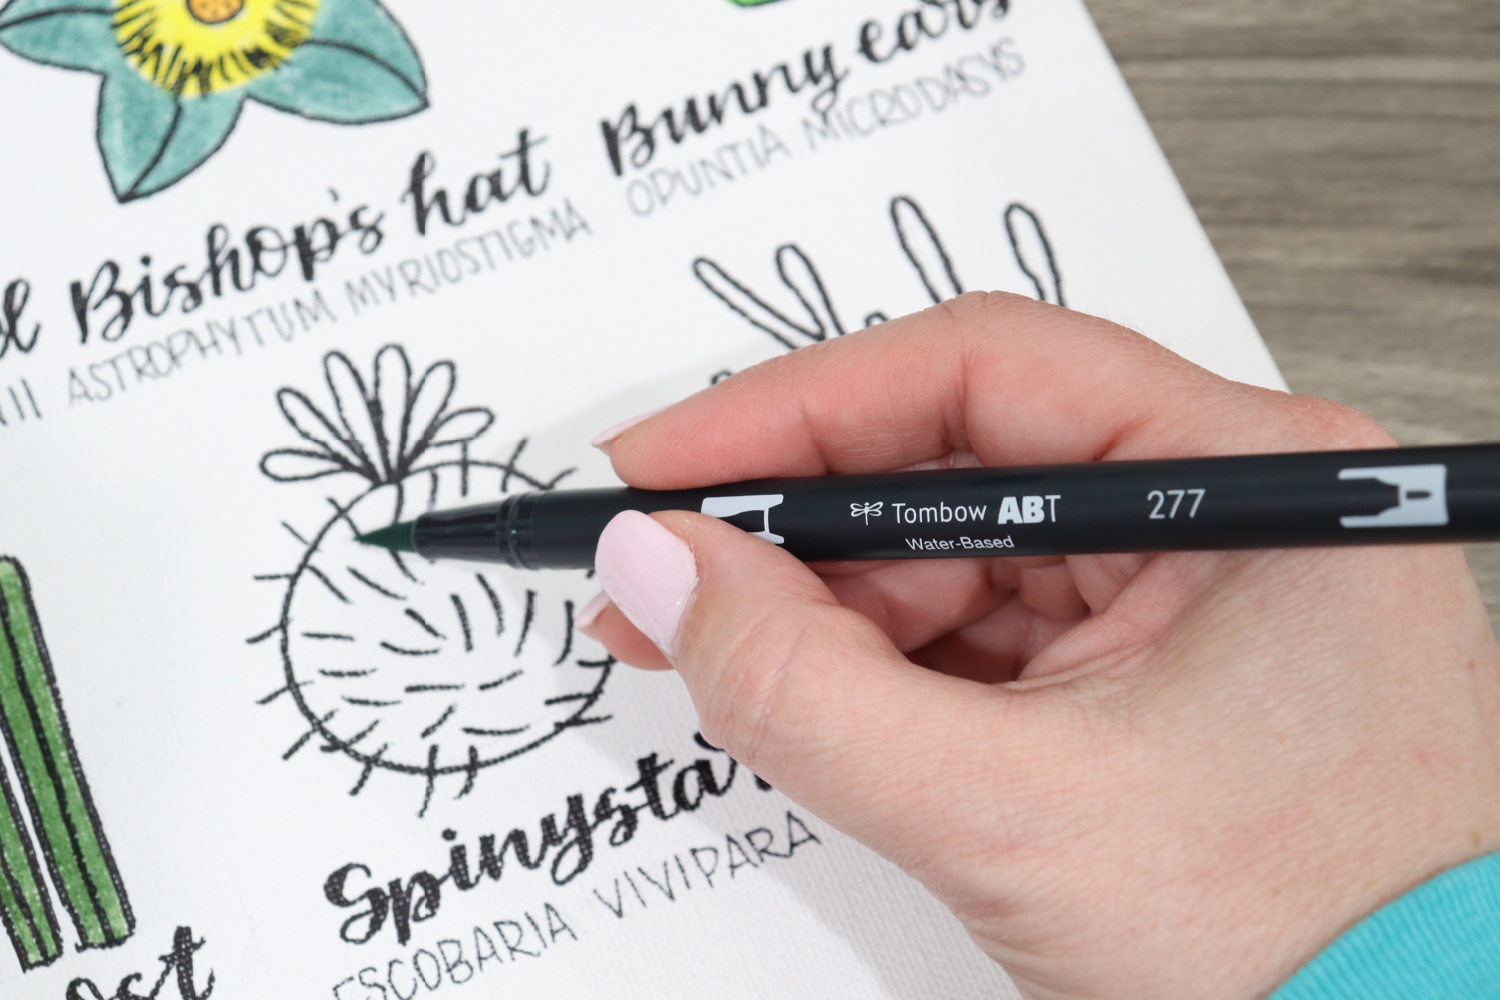
Step 4: Trace over your sketches and names using the Tombow MONO Twin Permanent Marker.
I used the larger 0.8mm tip to outline my doodle as well as to create a faux calligraphy effect for my cactus name. To get that brush script look, just trace your script word, then go back and make every downstroke (places where your pen was moving down when you were writing) thicker than the rest of the lines in the letters. For a full tutorial on how to do this, check out my super-easy Beginner Faux Calligraphy post!
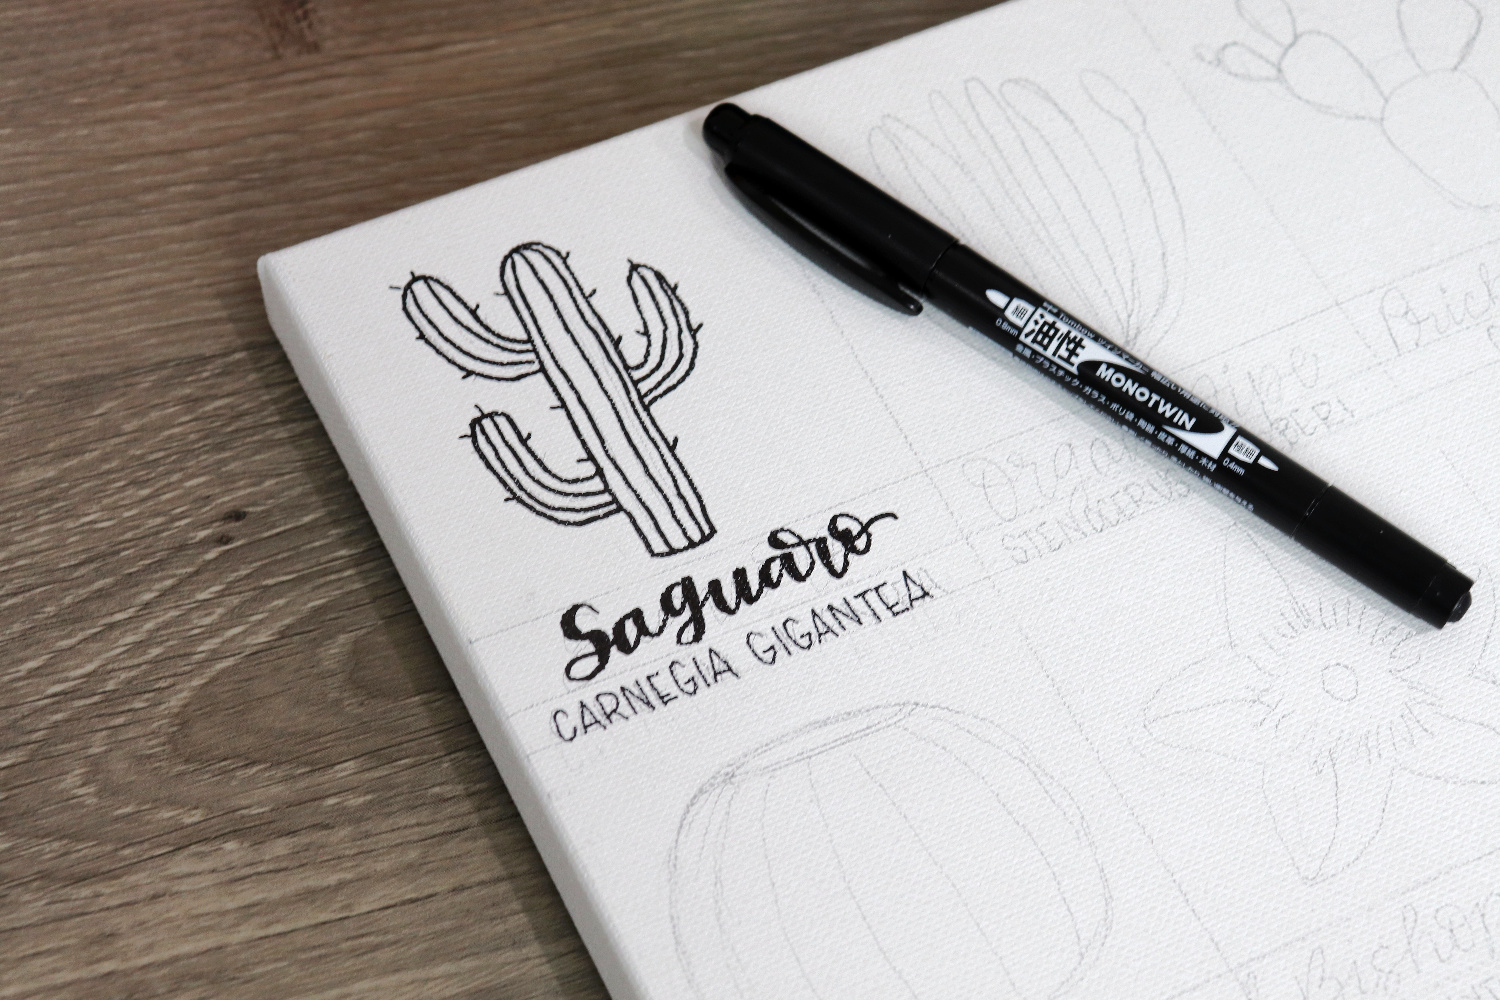
Then, I used the extra-fine tip (0.4 mm) to write the scientific name. The MONO Twin is the perfect tool for this project, because not only do you get two different sized tips to work with, the permanent oil-based ink won’t smear at all when it’s time to erase the pencil lines and add color.
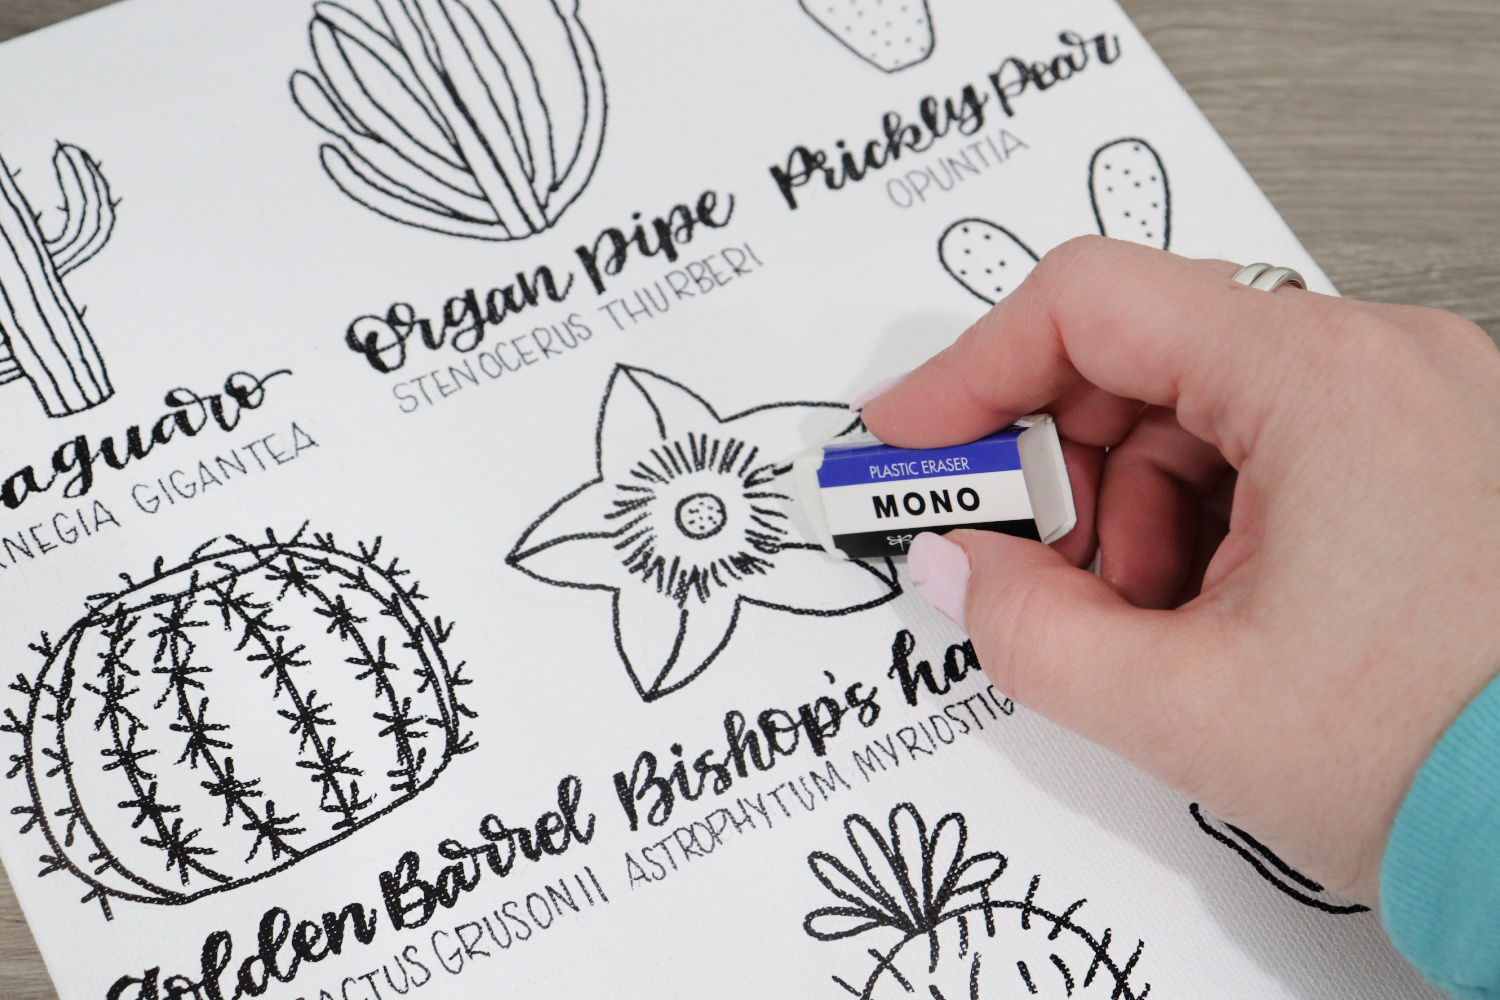
Step 5: Erase your pencil lines.
Once the ink is dry, use your MONO Eraser to get rid of any visible pencil lines, including the guidelines dividing your canvas into sections.
Step 6: Use Dual Brush Pens to color your illustrations.
There are 108 vibrant colors to choose from, including almost 20 shades of green that range from yellow-ish to blue-ish and everything in between. Plus, these markers are blendable, so you can even create your own custom colors.
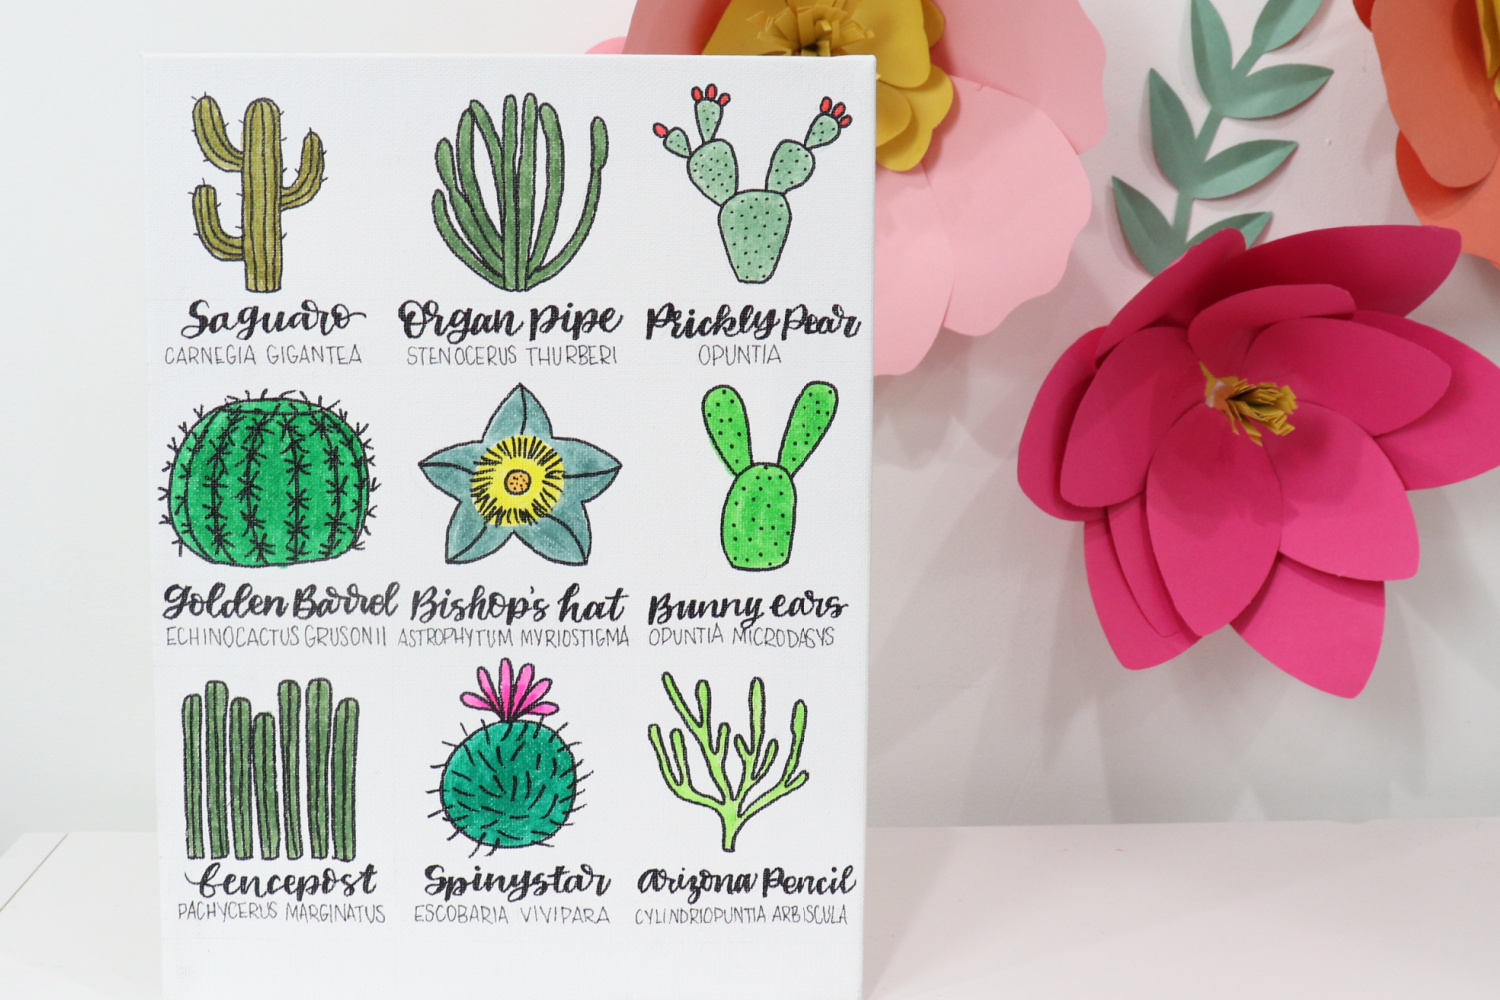
Once you’ve added color, let the ink dry, then your canvas is ready to display! Whether you hang it on the wall or sit it on a shelf, it’s a fun piece of handmade art that will add color and personality to any room.
Which cactus is your favorite? I love this reminder that the world is full of such amazing variety, even where we least expect it.
Next Steps:
If you enjoyed this project, there are lots more nature-themed tutorials here on the blog that you’re going to love!
Check these out:
Colorful Owl Illustration
Flower Bouquet Mood Tracker
Watercolor a Landscape
Monoline Travel Coasters
If you try creating your own Cactus Canvas, or any of these other projects, make sure to tag us at @tombowusa and @amylattacreations so we can all be inspired by each other! Can’t wait to see what you create!
Pingback: Hand-Drawn Cactus Canvas - Amy Latta Creations