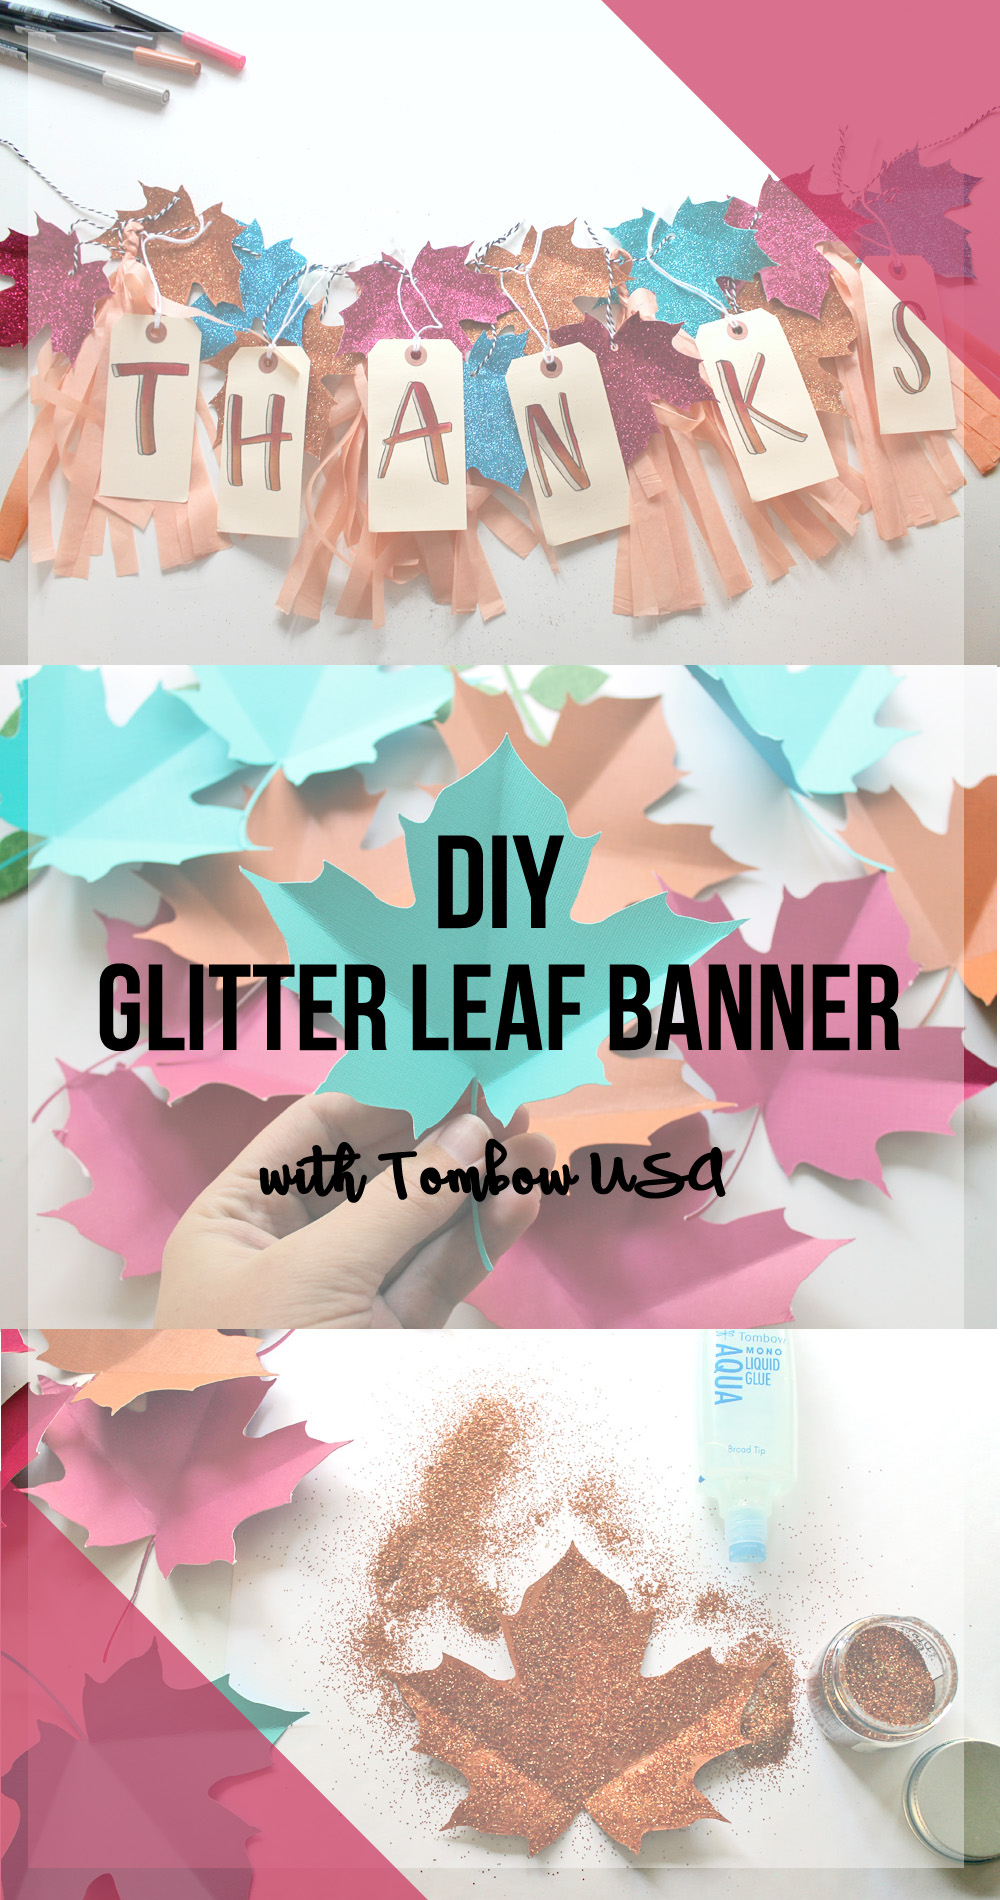
Hello everyone, it’s Katie here! Today I am sharing a decor piece that is perfect for fall parties: a banner! I’ve always loved making cute banners and garlands, so I created this festive, glittery banner using some of my favorite Tombow supplies and the Cricut Explore Air 2.
Supplies:
- Cricut Explore Air 2 (Huge thanks to Cricut for supplying me with this machine!)
- MONO Aqua Liquid Glue
- Dual Brush Pens
- Fudenosuke Hard Tip
- Blending Pen
- Colored cardstock
- Extra fine glitter in colors to match your cardstock
- Paper tags
- Tissue paper tassels
- Baker’s twine
How to make a glitter leaf banner:
Step one:
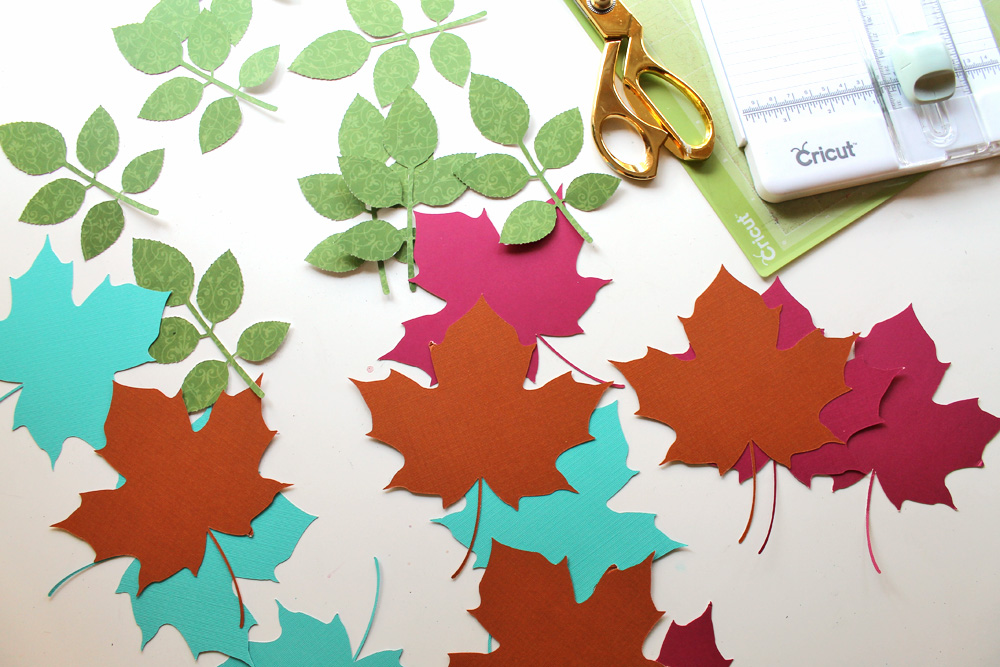
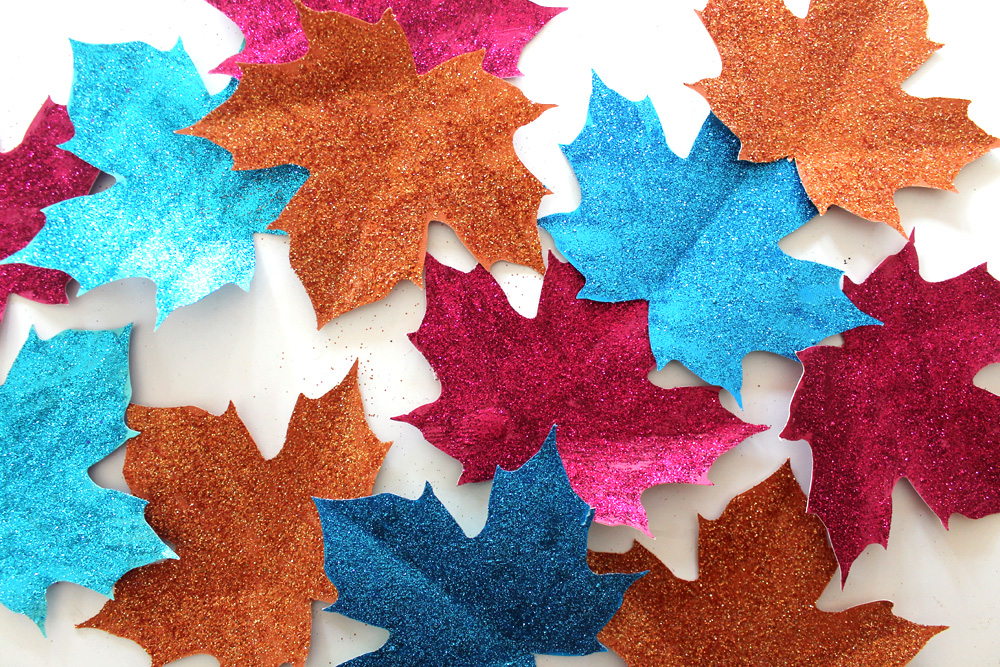
Start by cutting out leaves from the colored cardstock! I used my Cricut Explore Air 2 to cut these out, I found the maple leaf in the Cricut design store so it made cutting these out extremely quick.
I also cut out some green vines too, however I didn’t end up using them in the finished banner.
Step two:
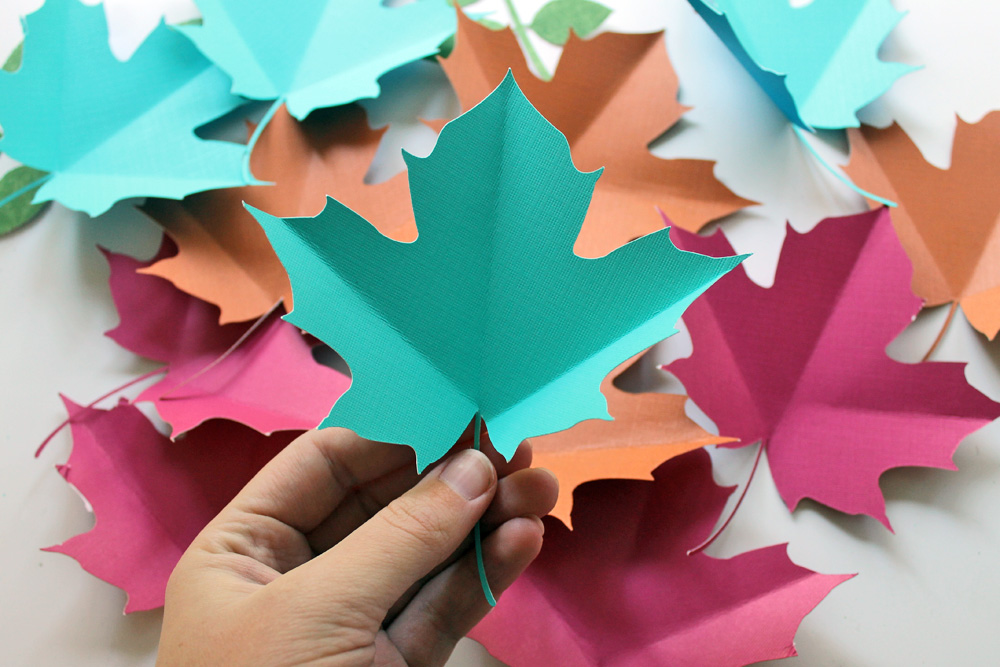
Next fold and crease your leaves to give them a three-dimensional look.
Step three:
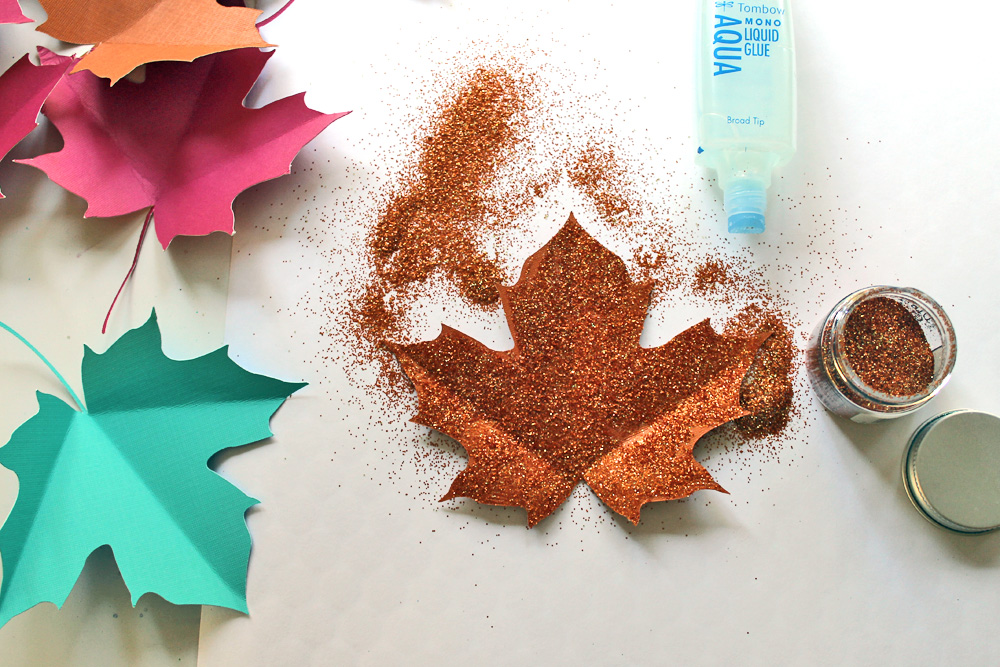
Use the broad tip of the MONO Aqua Liquid Glue to cover the leaf in adhesive.
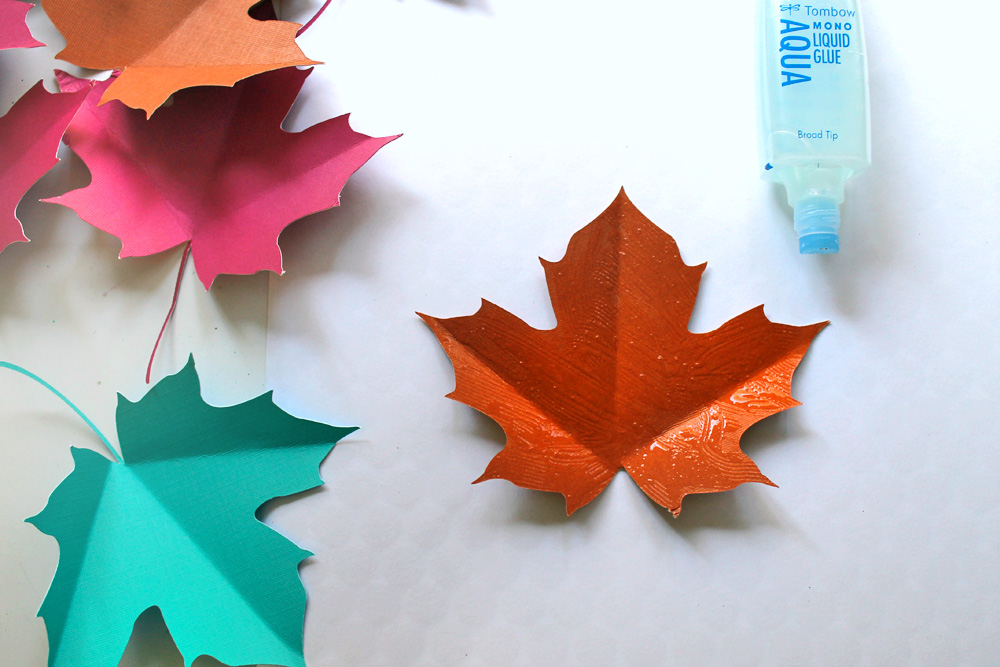
Step four:
Place your leaf over the top of an extra piece of cardstock (so that you can pour extra glitter back in the bottle)and sprinkle glitter over top of the adhesive! Flip the leaf upside down and shake off any loose glitter.
If there are any spots that didn’t get good glitter coverage, use the pen tip of the MONO Aqua Liquid Glue to fill them in and repeat the glitter process!
Repeat with all of your cardstock leaves!
Step five:
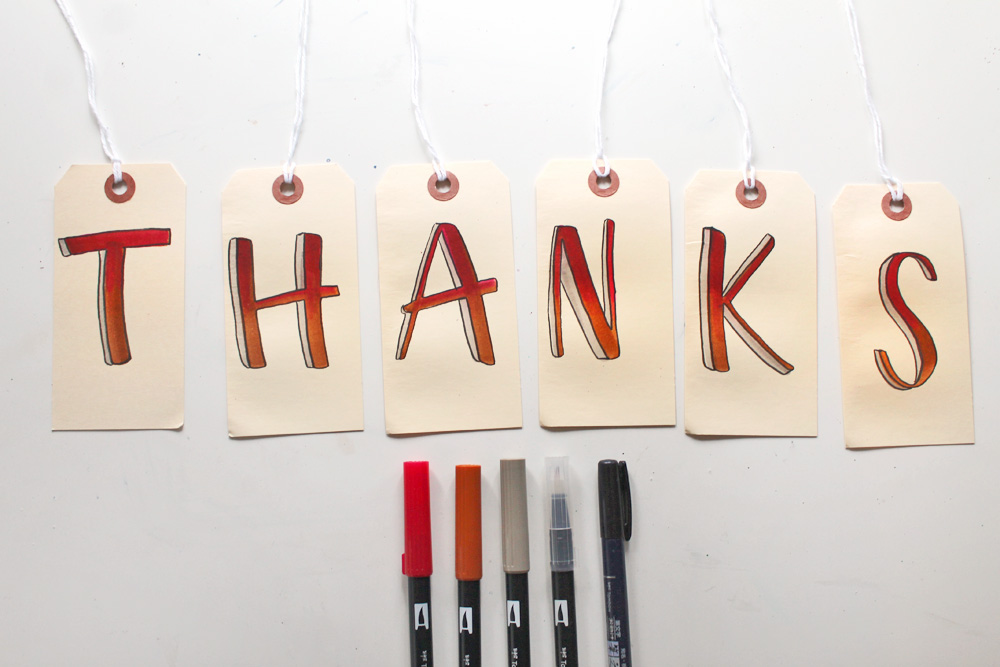
Add a bit of lettering onto your paper tags! I used Dual Brush Pens 947 and 755 to create ombre letters, using the Blending Pen to blend the colors together. I added a shadow with N79 and outline the letters with the hard tip Fudenosuke.
Here are some super helpful Lettering Tips by Smitha.
Step six:
Combine all of your elements into a banner! I punch holes into my glitter leaves and strung them up on a length of baker’s twine with a few tissue paper tassels. Once those were all strung together, I tied my letters to the banner, spacing them out evenly!
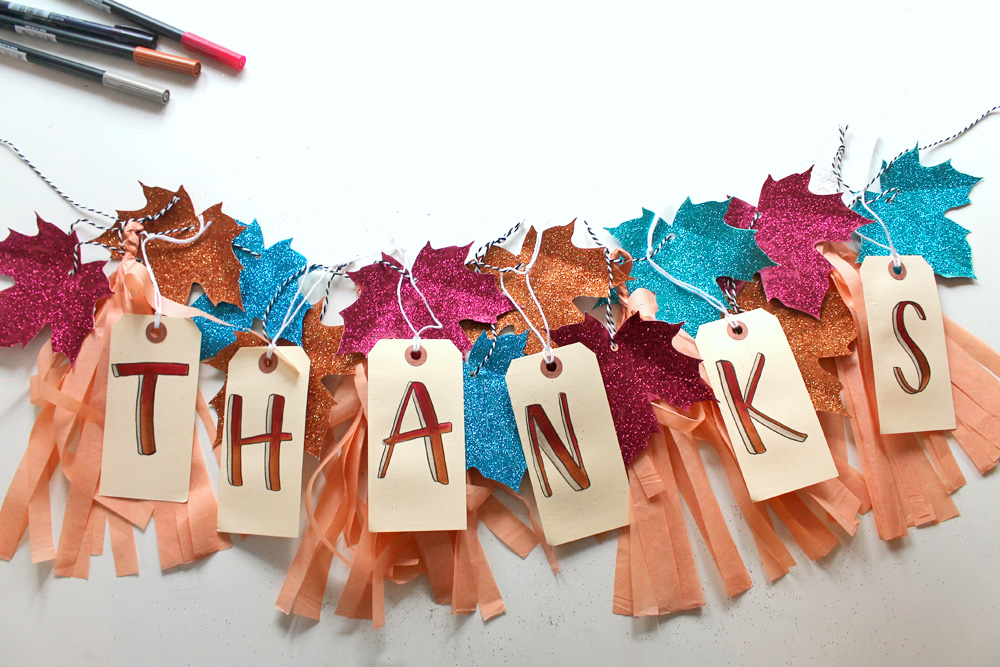
That’s it! You can easily customize this with the colors of glitter and Dual Brush Pens you use, as well as the word you choose to add! I used “THANKS” as a Thanksgiving decoration, but “FALL” or “AUTUMN” would be cute as well!
If you have a minute, Beth also shared a really cute Autumn inspired Banner here on the blog.
Happy Fall, Y’all!

Pingback: How to Make Glitter Leaves – Studiokatie