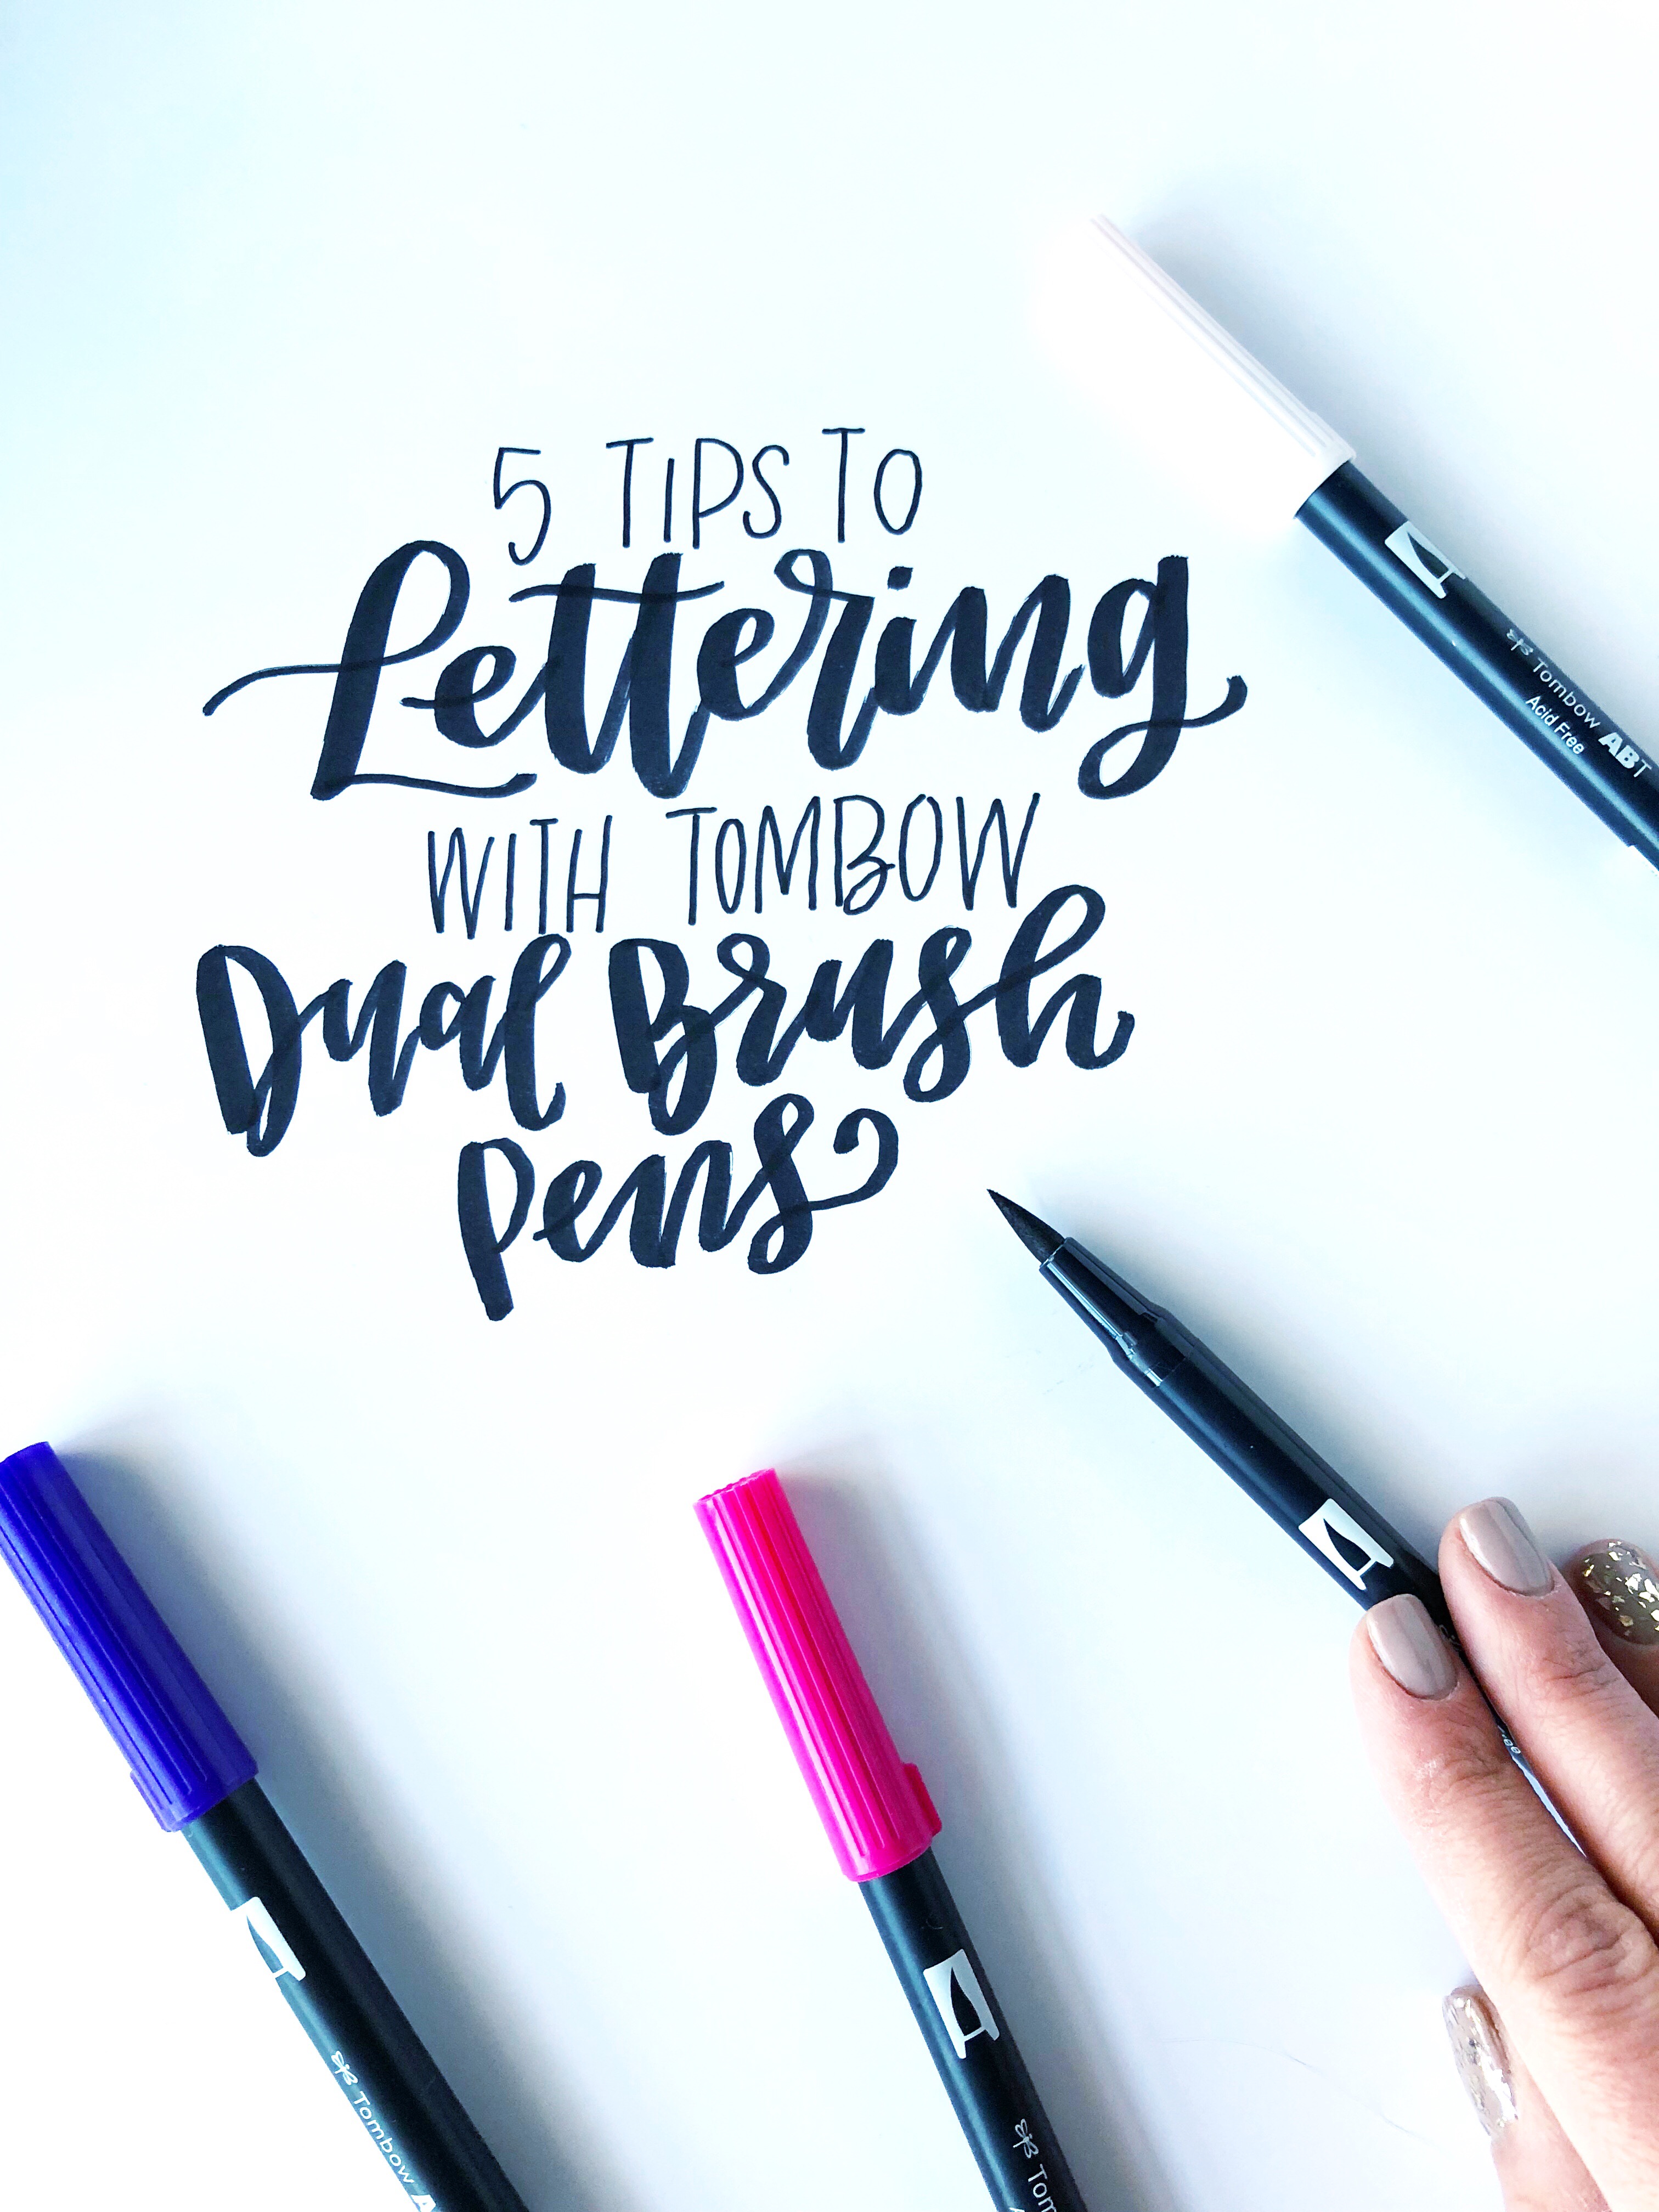
It’s Lauren here, and I hope you’ll get creative this year while lettering with Tombow Dual Brush Pens. Today I have 5 fun tips that will make this lettering tool your new favorite!
The Tombow Dual Brush Pen is definitely loved by many letterers and creatives, but when I started lettering and tried this pen for myself, I was frustrated because I didn’t know how to use it correctly. I also had no idea what I could do with it. Often, I get questions on how to letter specifically with Dual Brush Pens, as others experience the same frustrations because of the lack of understanding of how to use a brush pen.
My hope is that these 5 tips will help you understand how to become more comfortable using this large brush pen while also understanding what it can do or be used for.
LETTERING TOOLS YOU’LL NEED
Throughout this blog post I’ll be giving you the scoop on how to letter specifically with Dual Brush Pens but will also be using a variety of Tombow Supplies for each tip, including:
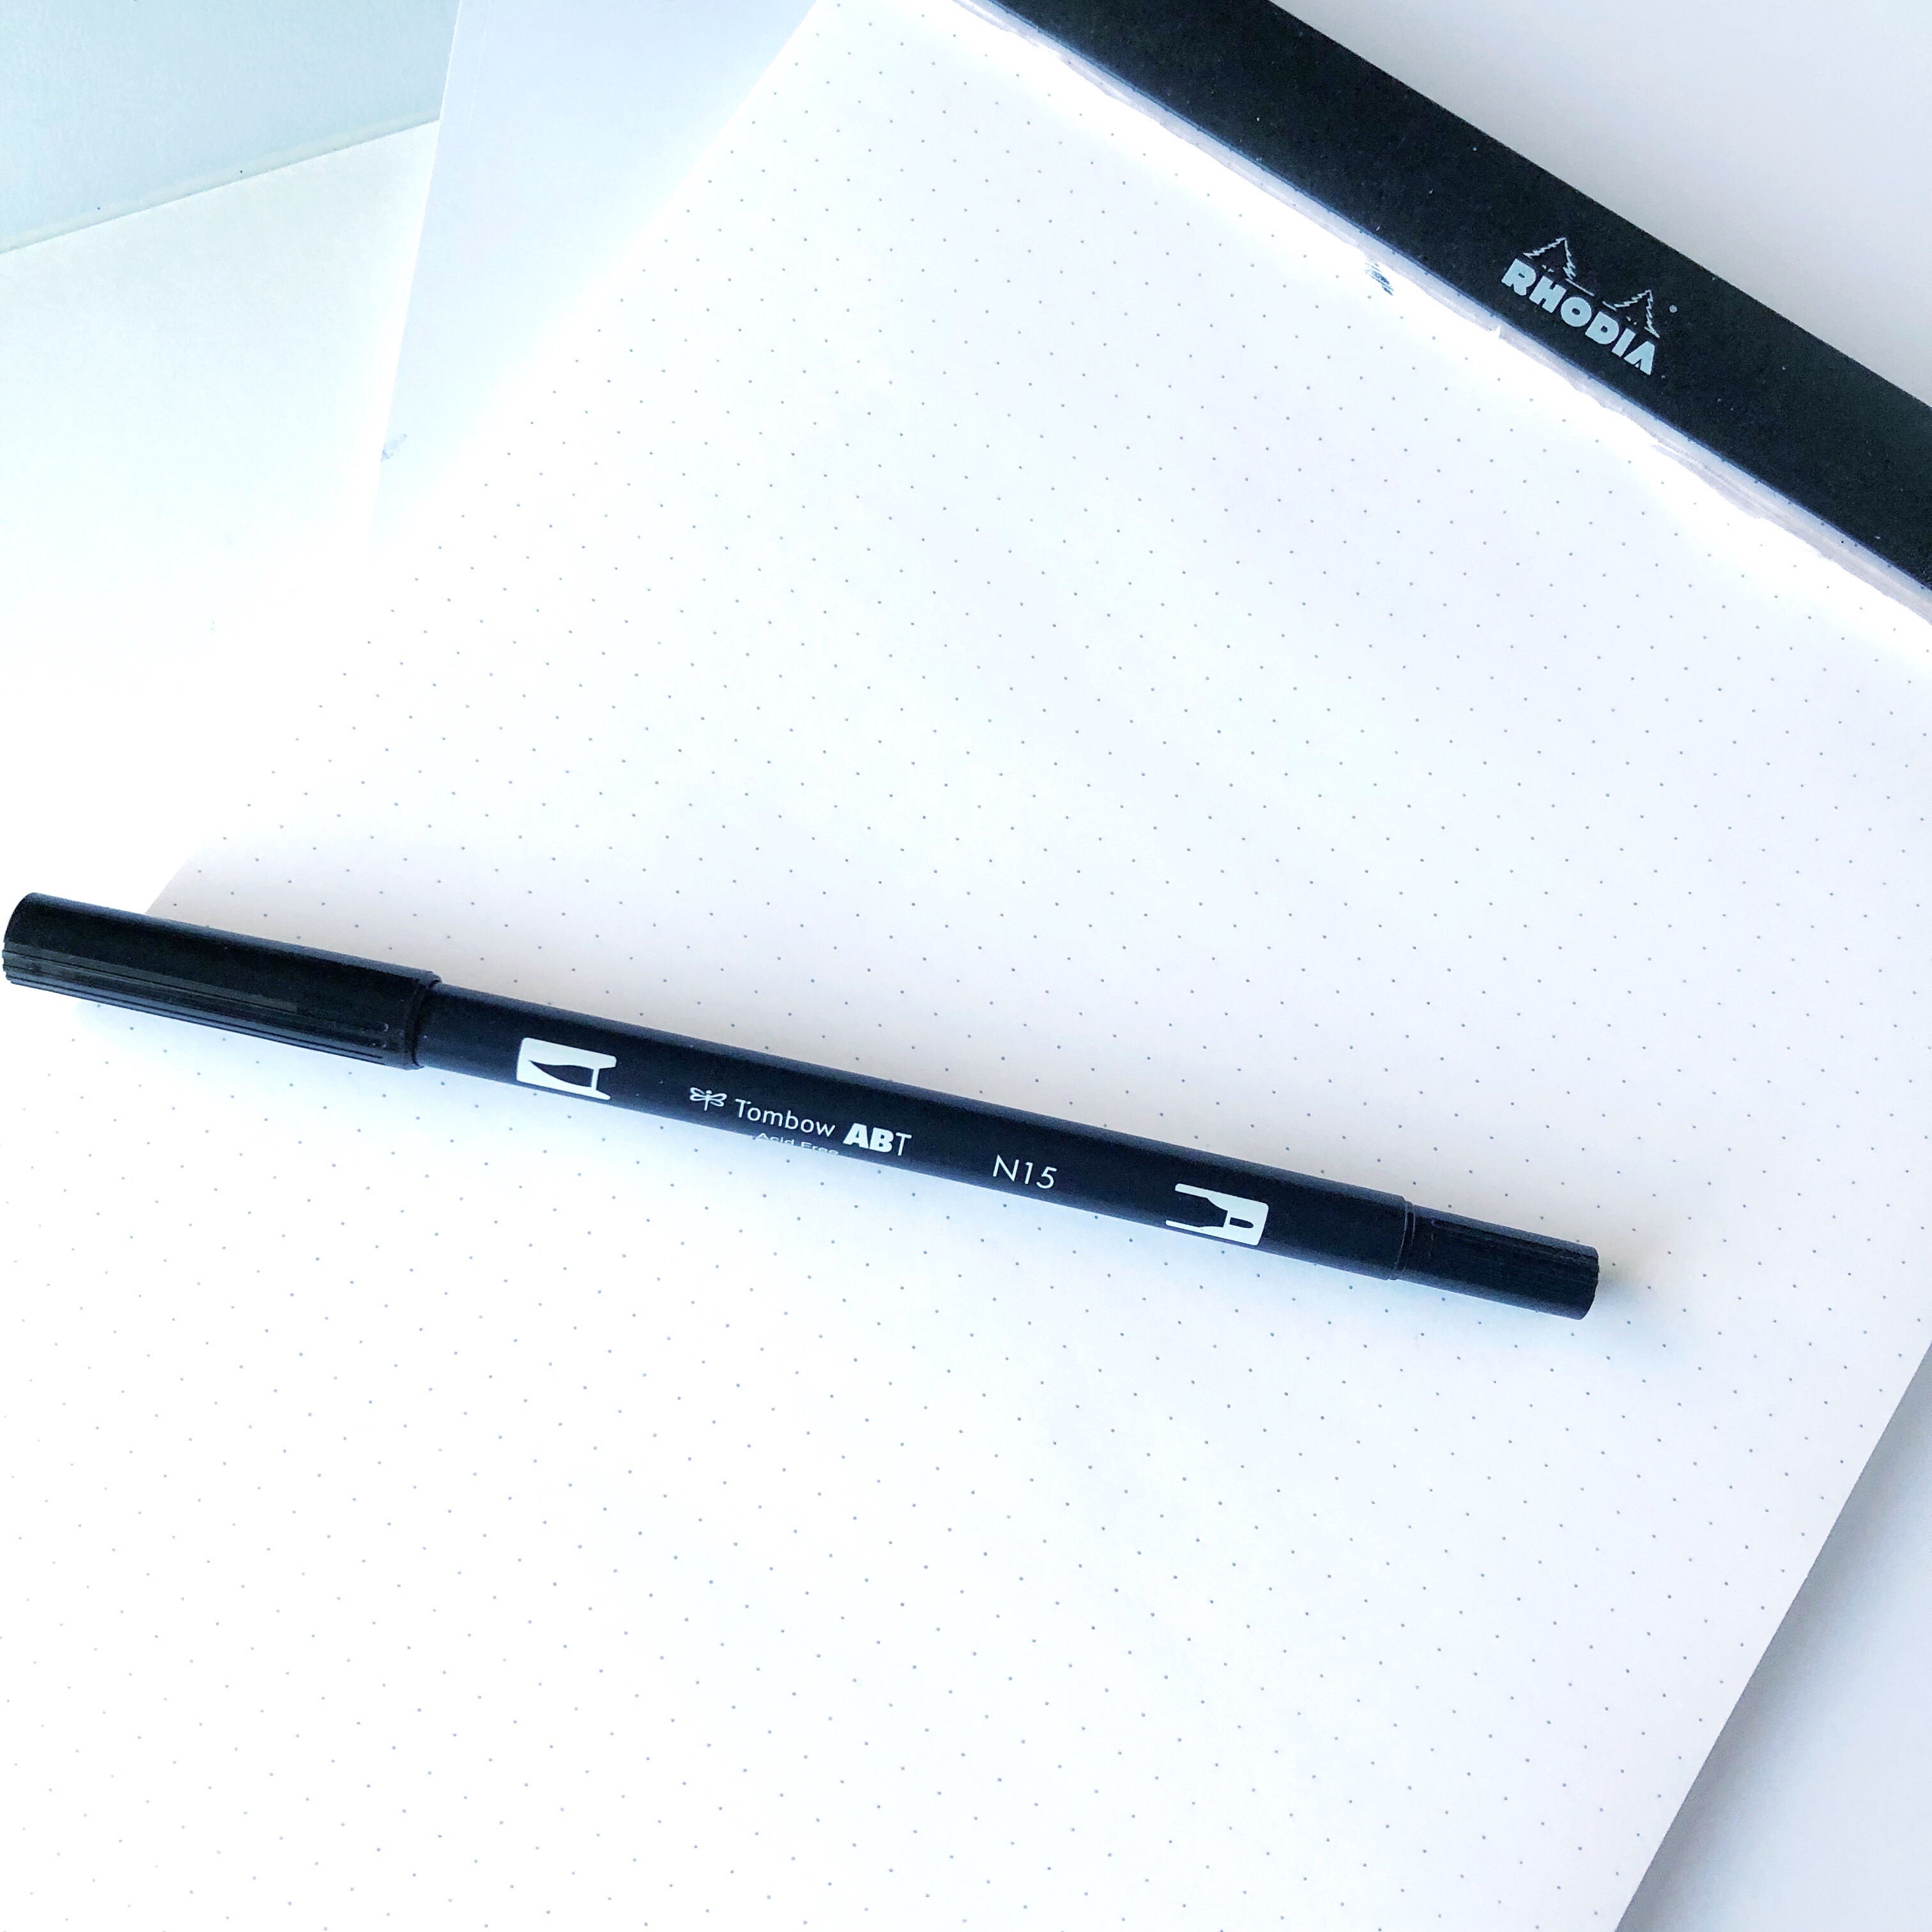
- Tombow Dual Brush Pens
- Tombow MONO Drawing Pencil
- Tombow MONO Drawing Pen
- Tombow Fudenosuke Brush Pens (hard tip, soft tip, and twin tip)
- Tombow Blending Kit
- Watercolor Brush
- Hahnemuehle Handlettering Block
- Rhodia Dot Pad
- Strathmore Mix Media Paper
1. UNDERSTAND THE BRUSH PEN
There are many different Tombow lettering tools to use for lettering and while the Tombow Dual Brush Pen is (in my opinion) one of the coolest, it’s not necessarily the easiest to use if you don’t fully understand how to use a brush pen.
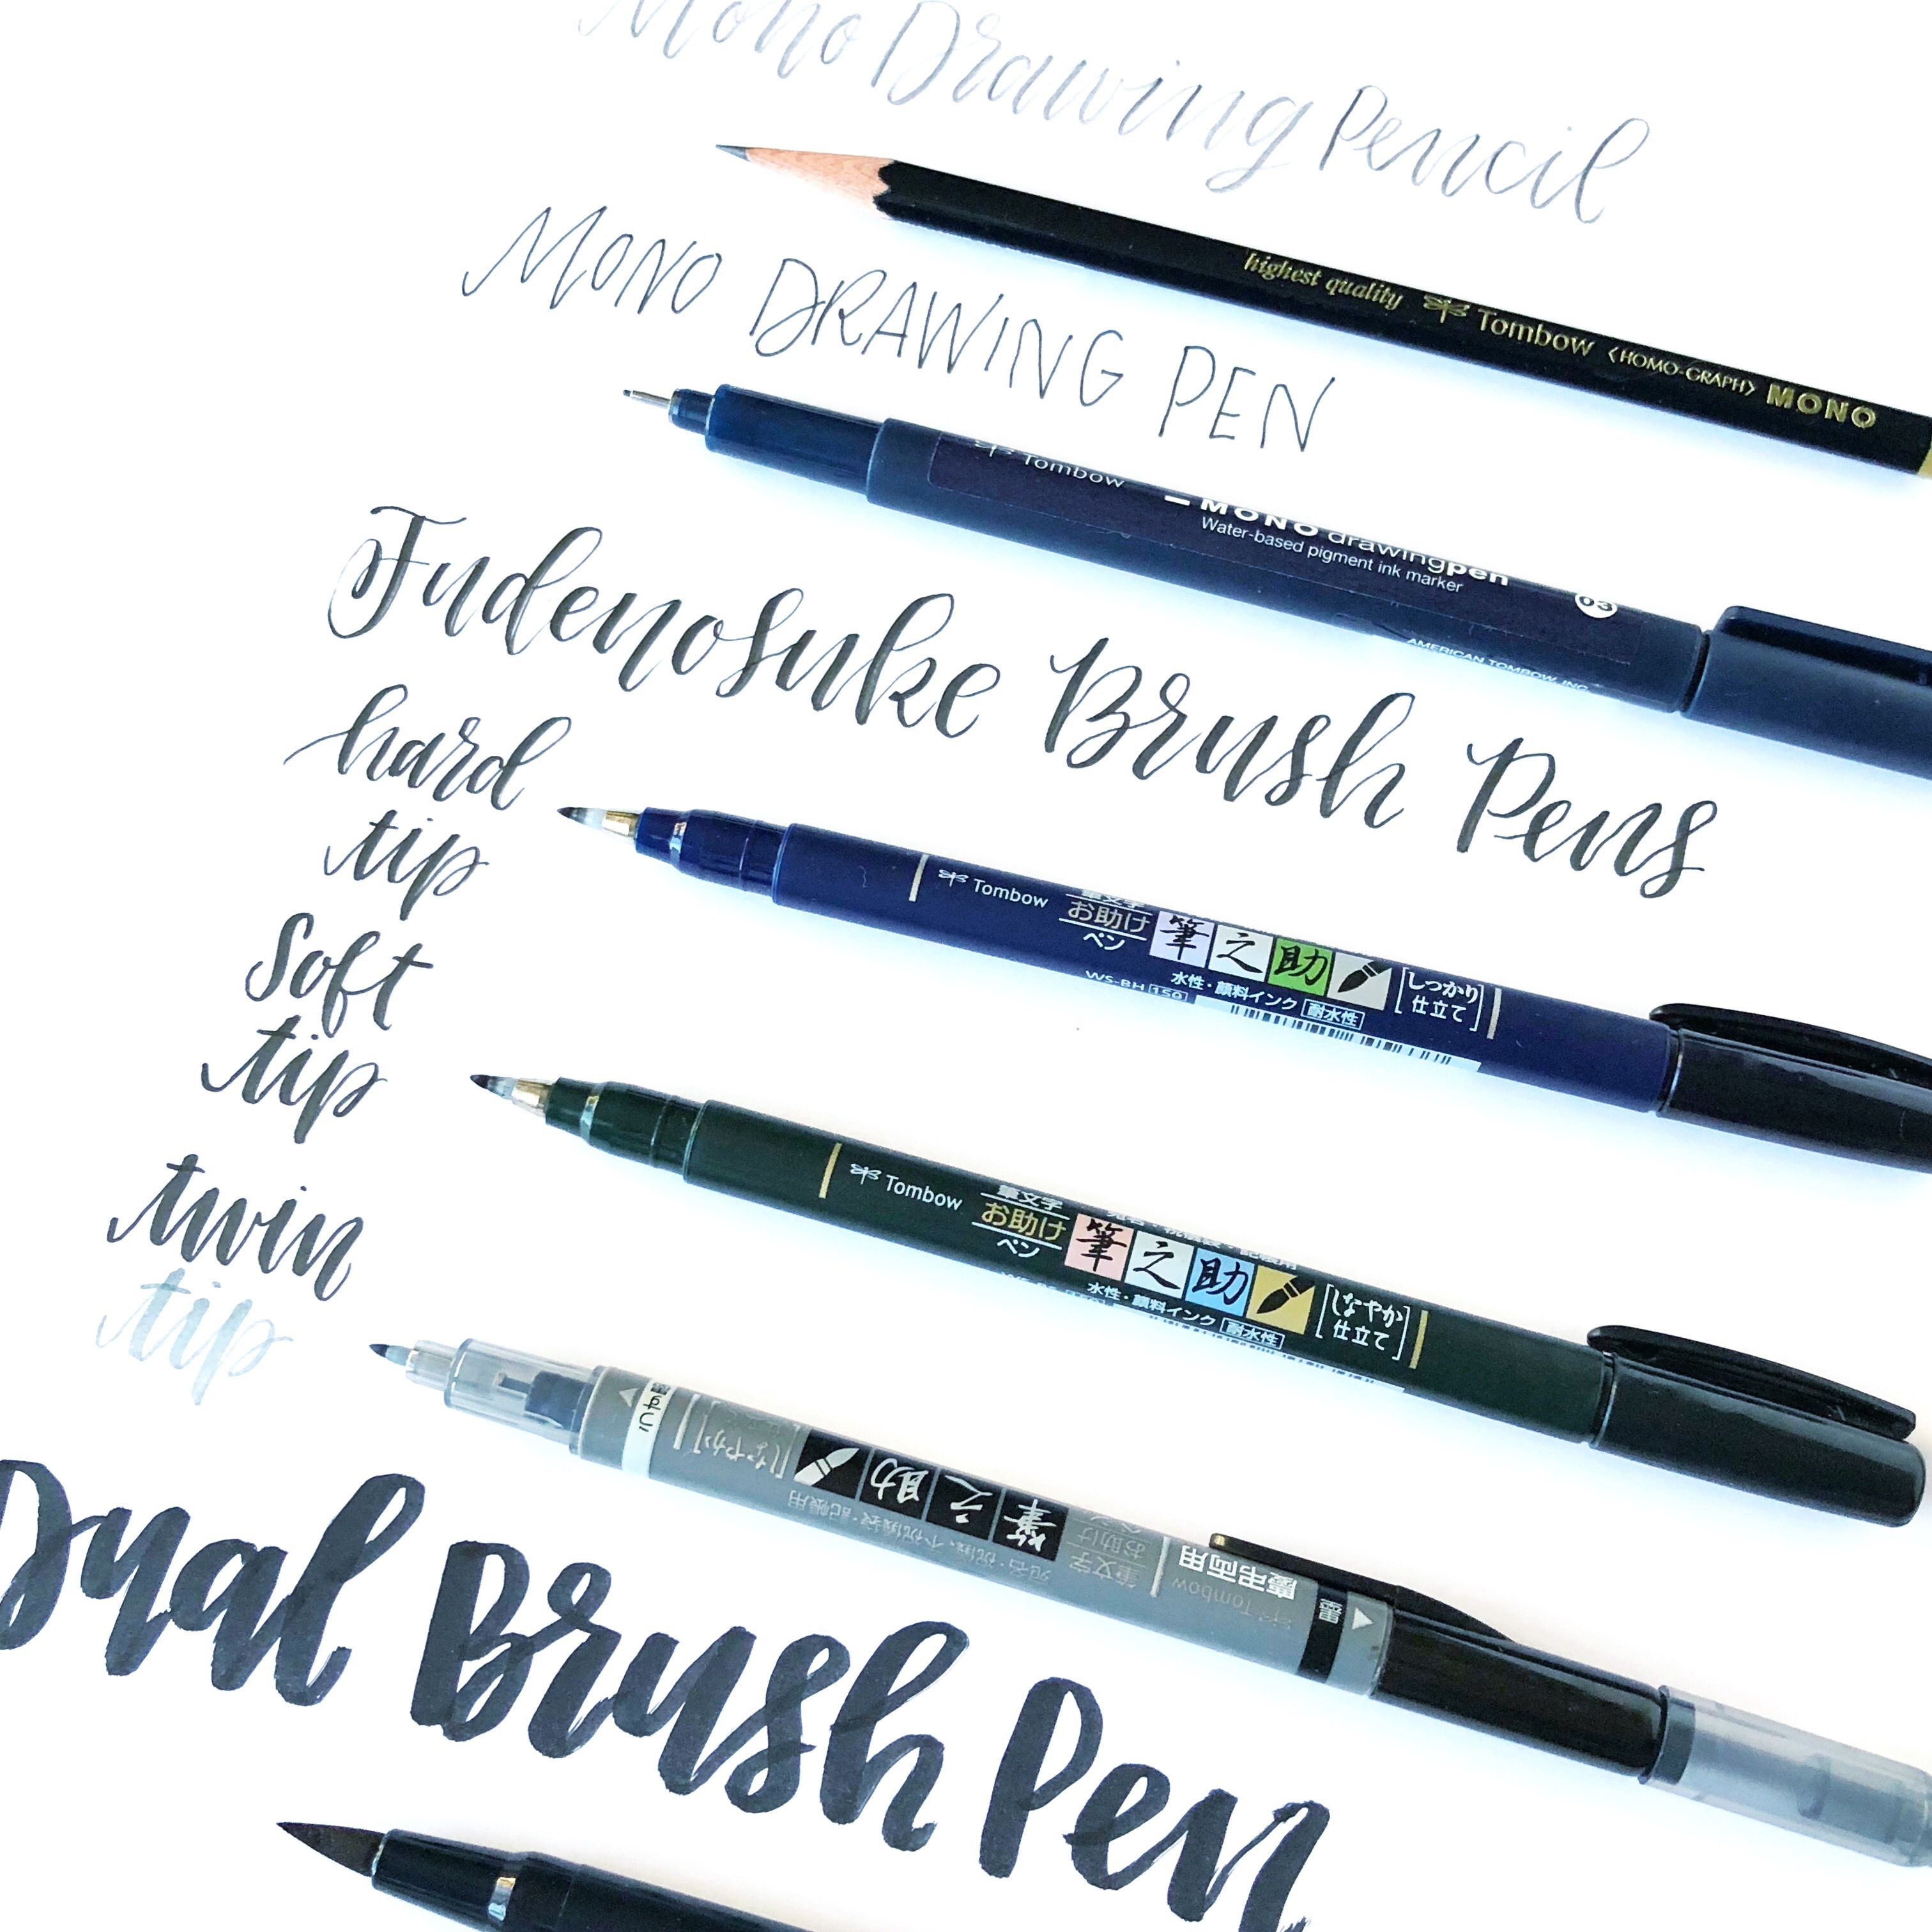
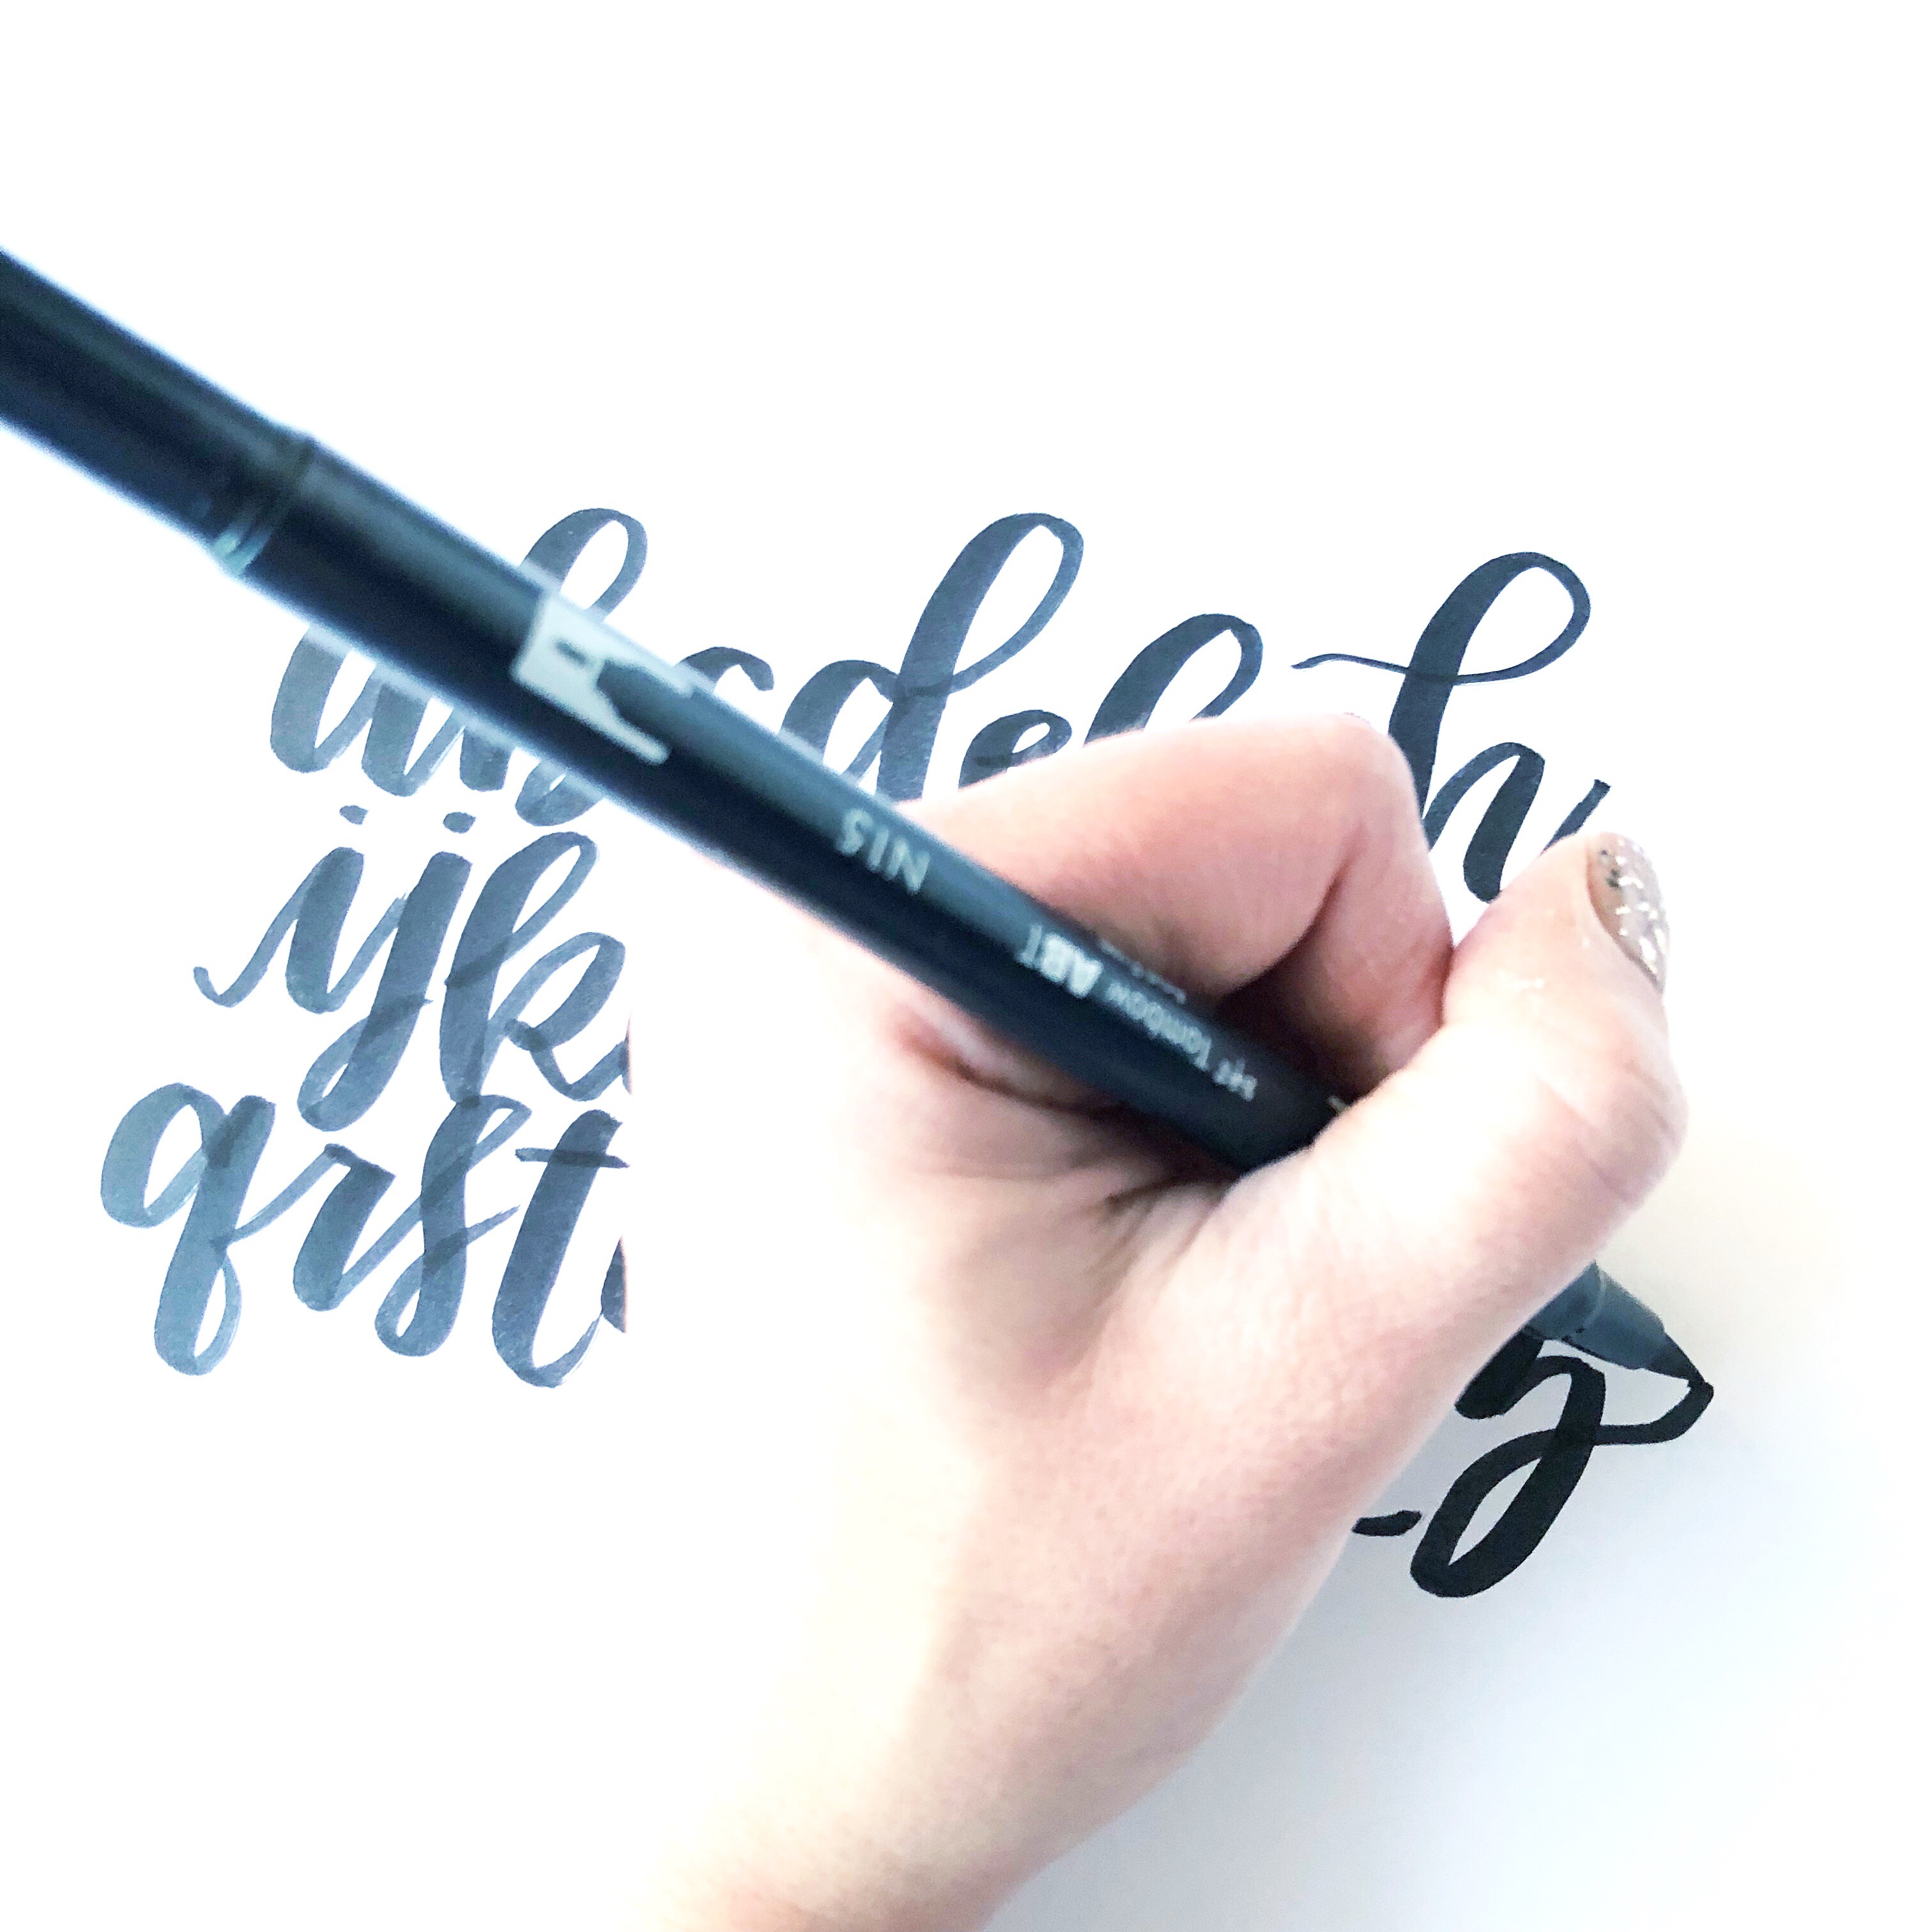
The key to using a brush pen is understanding how to use pressure to create a calligraphic effect with thick downstrokes and thin upstrokes. Before picking up the Dual Brush Pen, I think it’s a great idea to try some of the above lettering tools including Tombow MONO Drawing Pencils and Tombow Fudenosuke Brush Pens. The pencils (preferably the B grades) are great to practice pressure with and the smaller brush pens have firmer, smaller tips that are easy to control. Once you have the hang of it, challenge yourself to pick up the Tombow Dual Brush Pen.
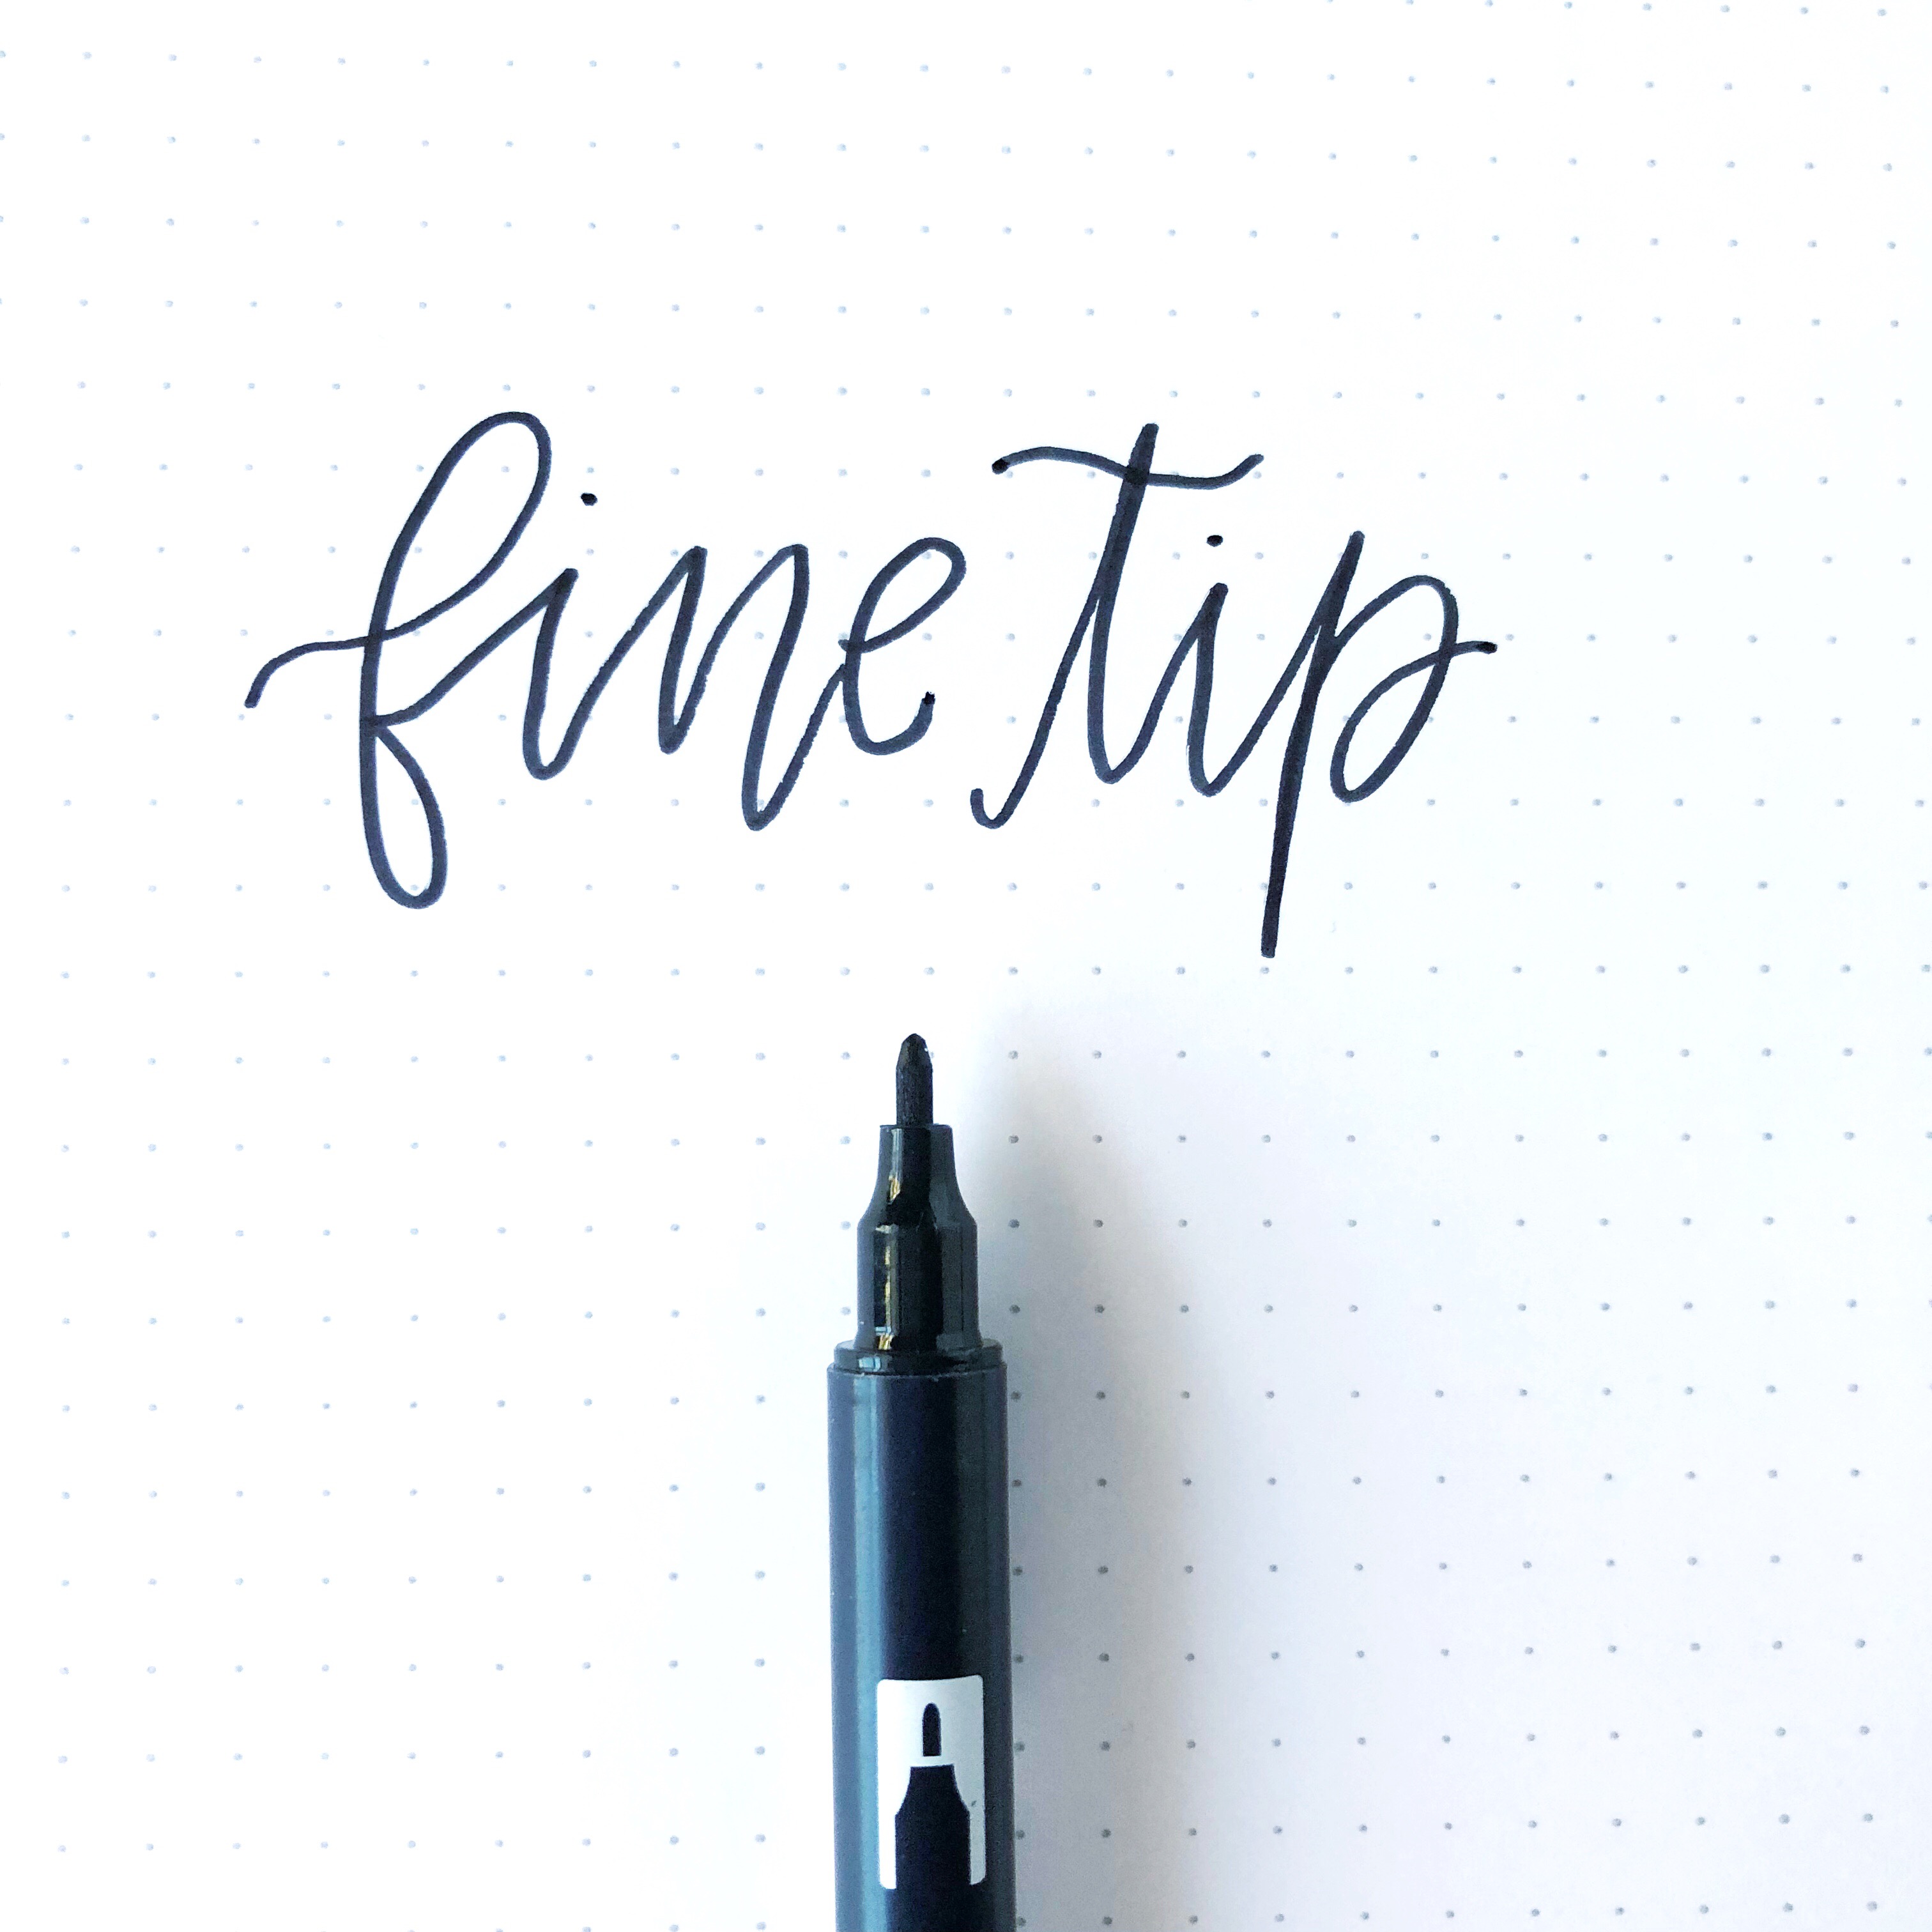
The Tombow Dual Brush Pen has two different tips: the fine tip and the brush tip. The fine tip is great for monoline writing as well as creating faux calligraphy (drawing in thick downstrokes and thin upstrokes) and filling in small parts of lettering that may have an imperfection.
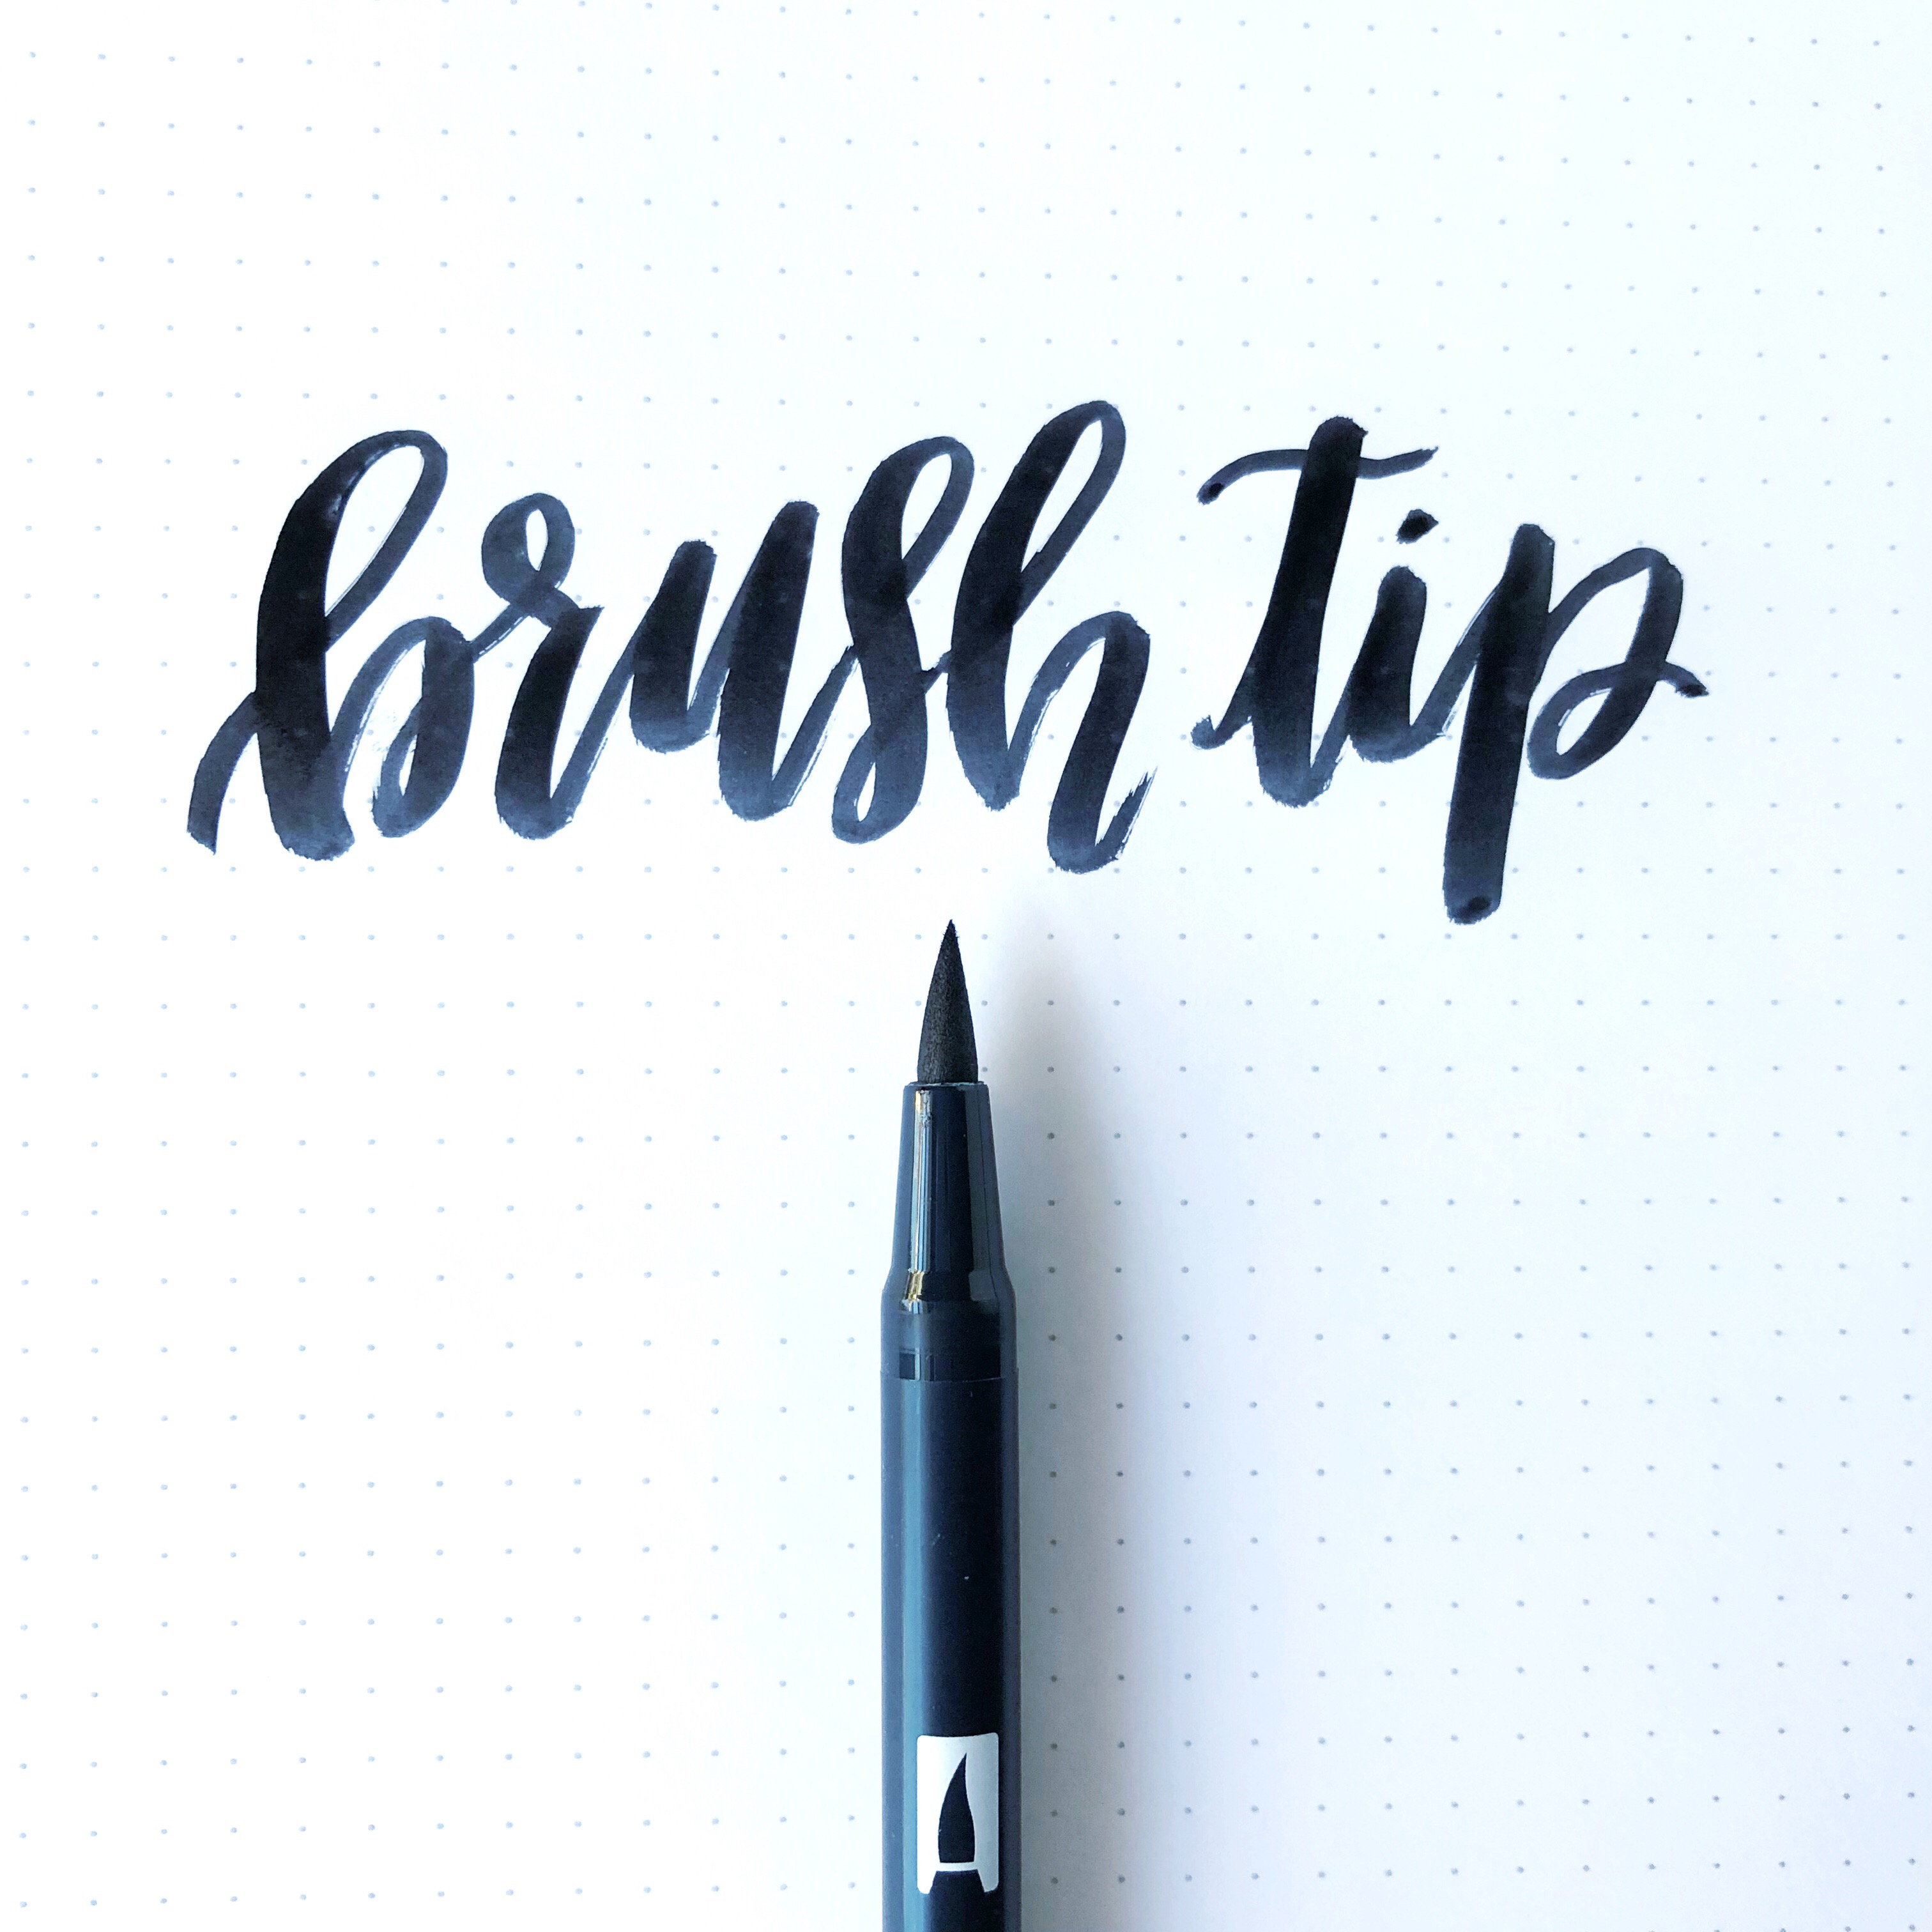
The brush tip on the Tombow Dual Brush Pen is large and very flexible, which definitely takes practice to control. These tips are made for pressure, so pushing down hard (at the appropriate angle) will not damage the tip. Also, blending the colors will not stain the tips, which are self cleaning. It’s important to use the pen correctly with the right paper to ensure that the tips stay in tact and create an amazing final product.
2. PICK THE RIGHT PAPER
A huge part of lettering is picking the right paper. When lettering with Tombow Dual Brush Pens, it is crucial to use smooth, high quality paper. Hahnemuehle Handlettering Block and Rhodia Dot Paper are both very smooth and easy on the tips of the Tombow. Strathmore Mix Media Paper great when using the brush pens as water colors. Need to letter on worksheets for practice? No worries… Just use HP Premium Choice Laserjet paper. So whether you are practicing or completing a specific kind of project, make sure to select the perfect paper.
3. LEARN & PRACTICE THE BASICS
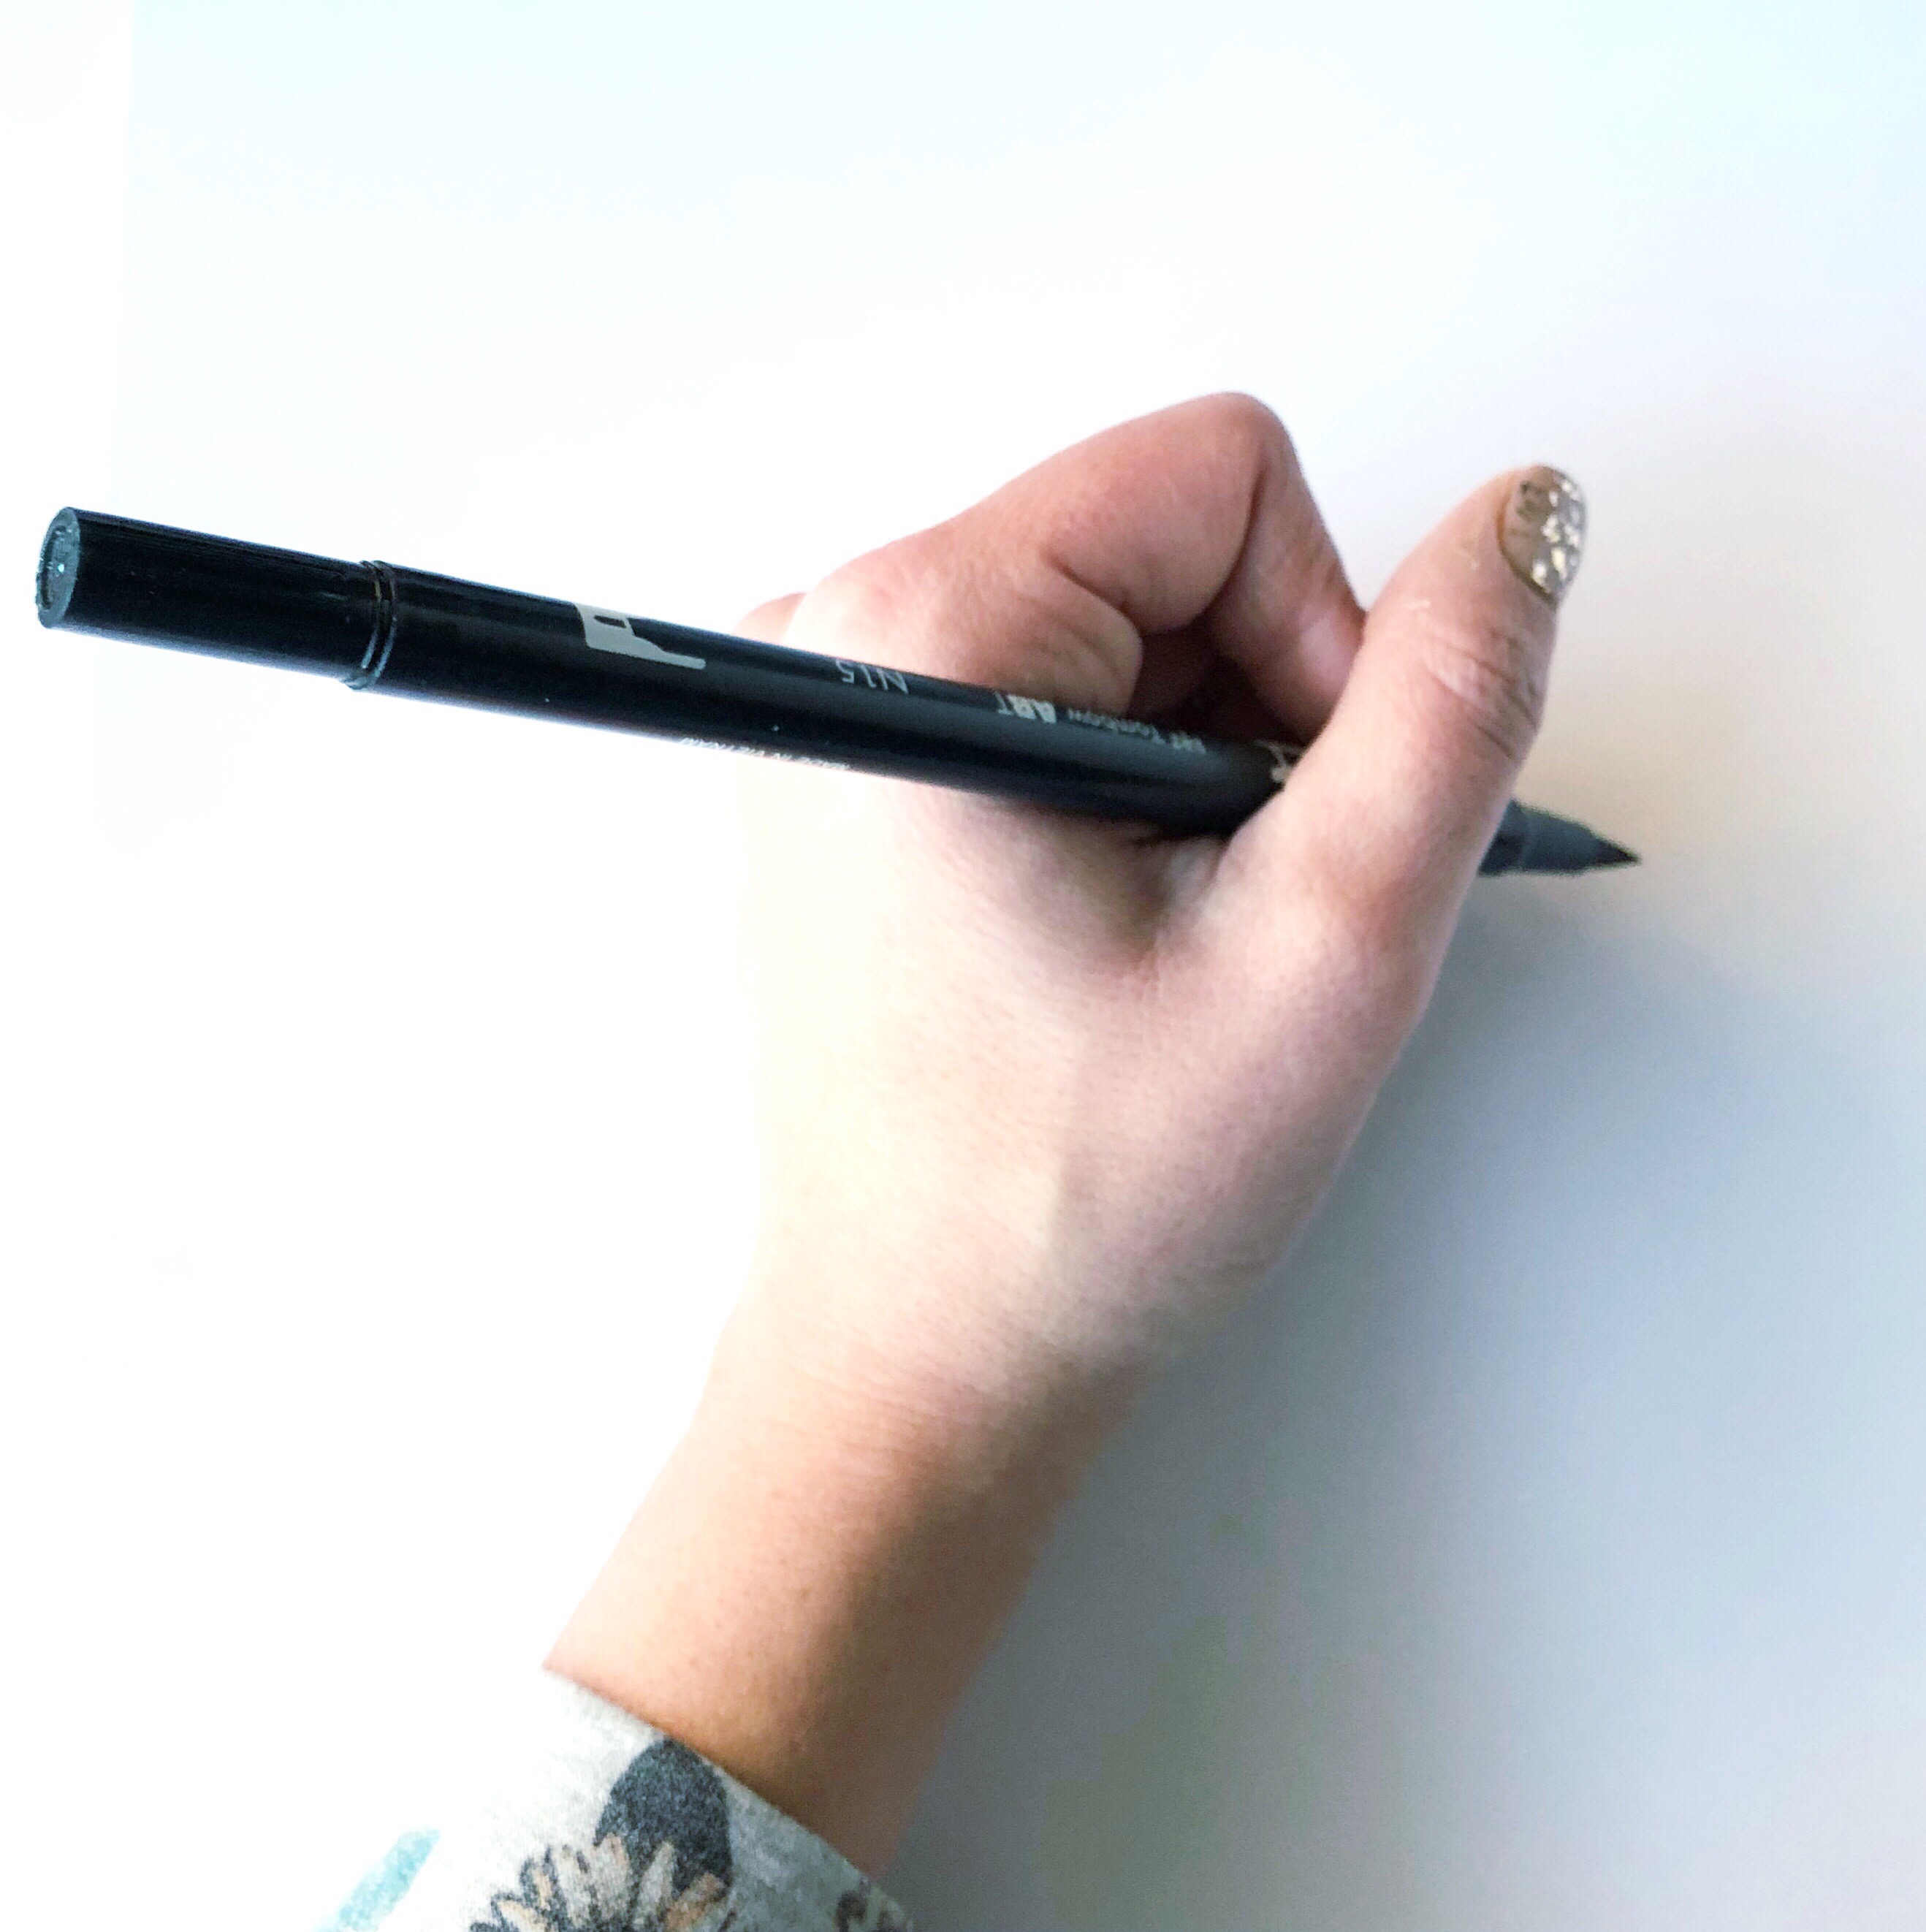
Many people get frustrated with how to hold their brush pen. As a lefty, I hold mine with the pen kind of resting on the middle outside of my hand – almost as if it were pointing to 9 on a clock. Righties would do the same thing, but opposite in the opposite hand. Holding the pen at this angle is extremely important because it will allow you to create thick downstrokes and thin upstrokes with ease.
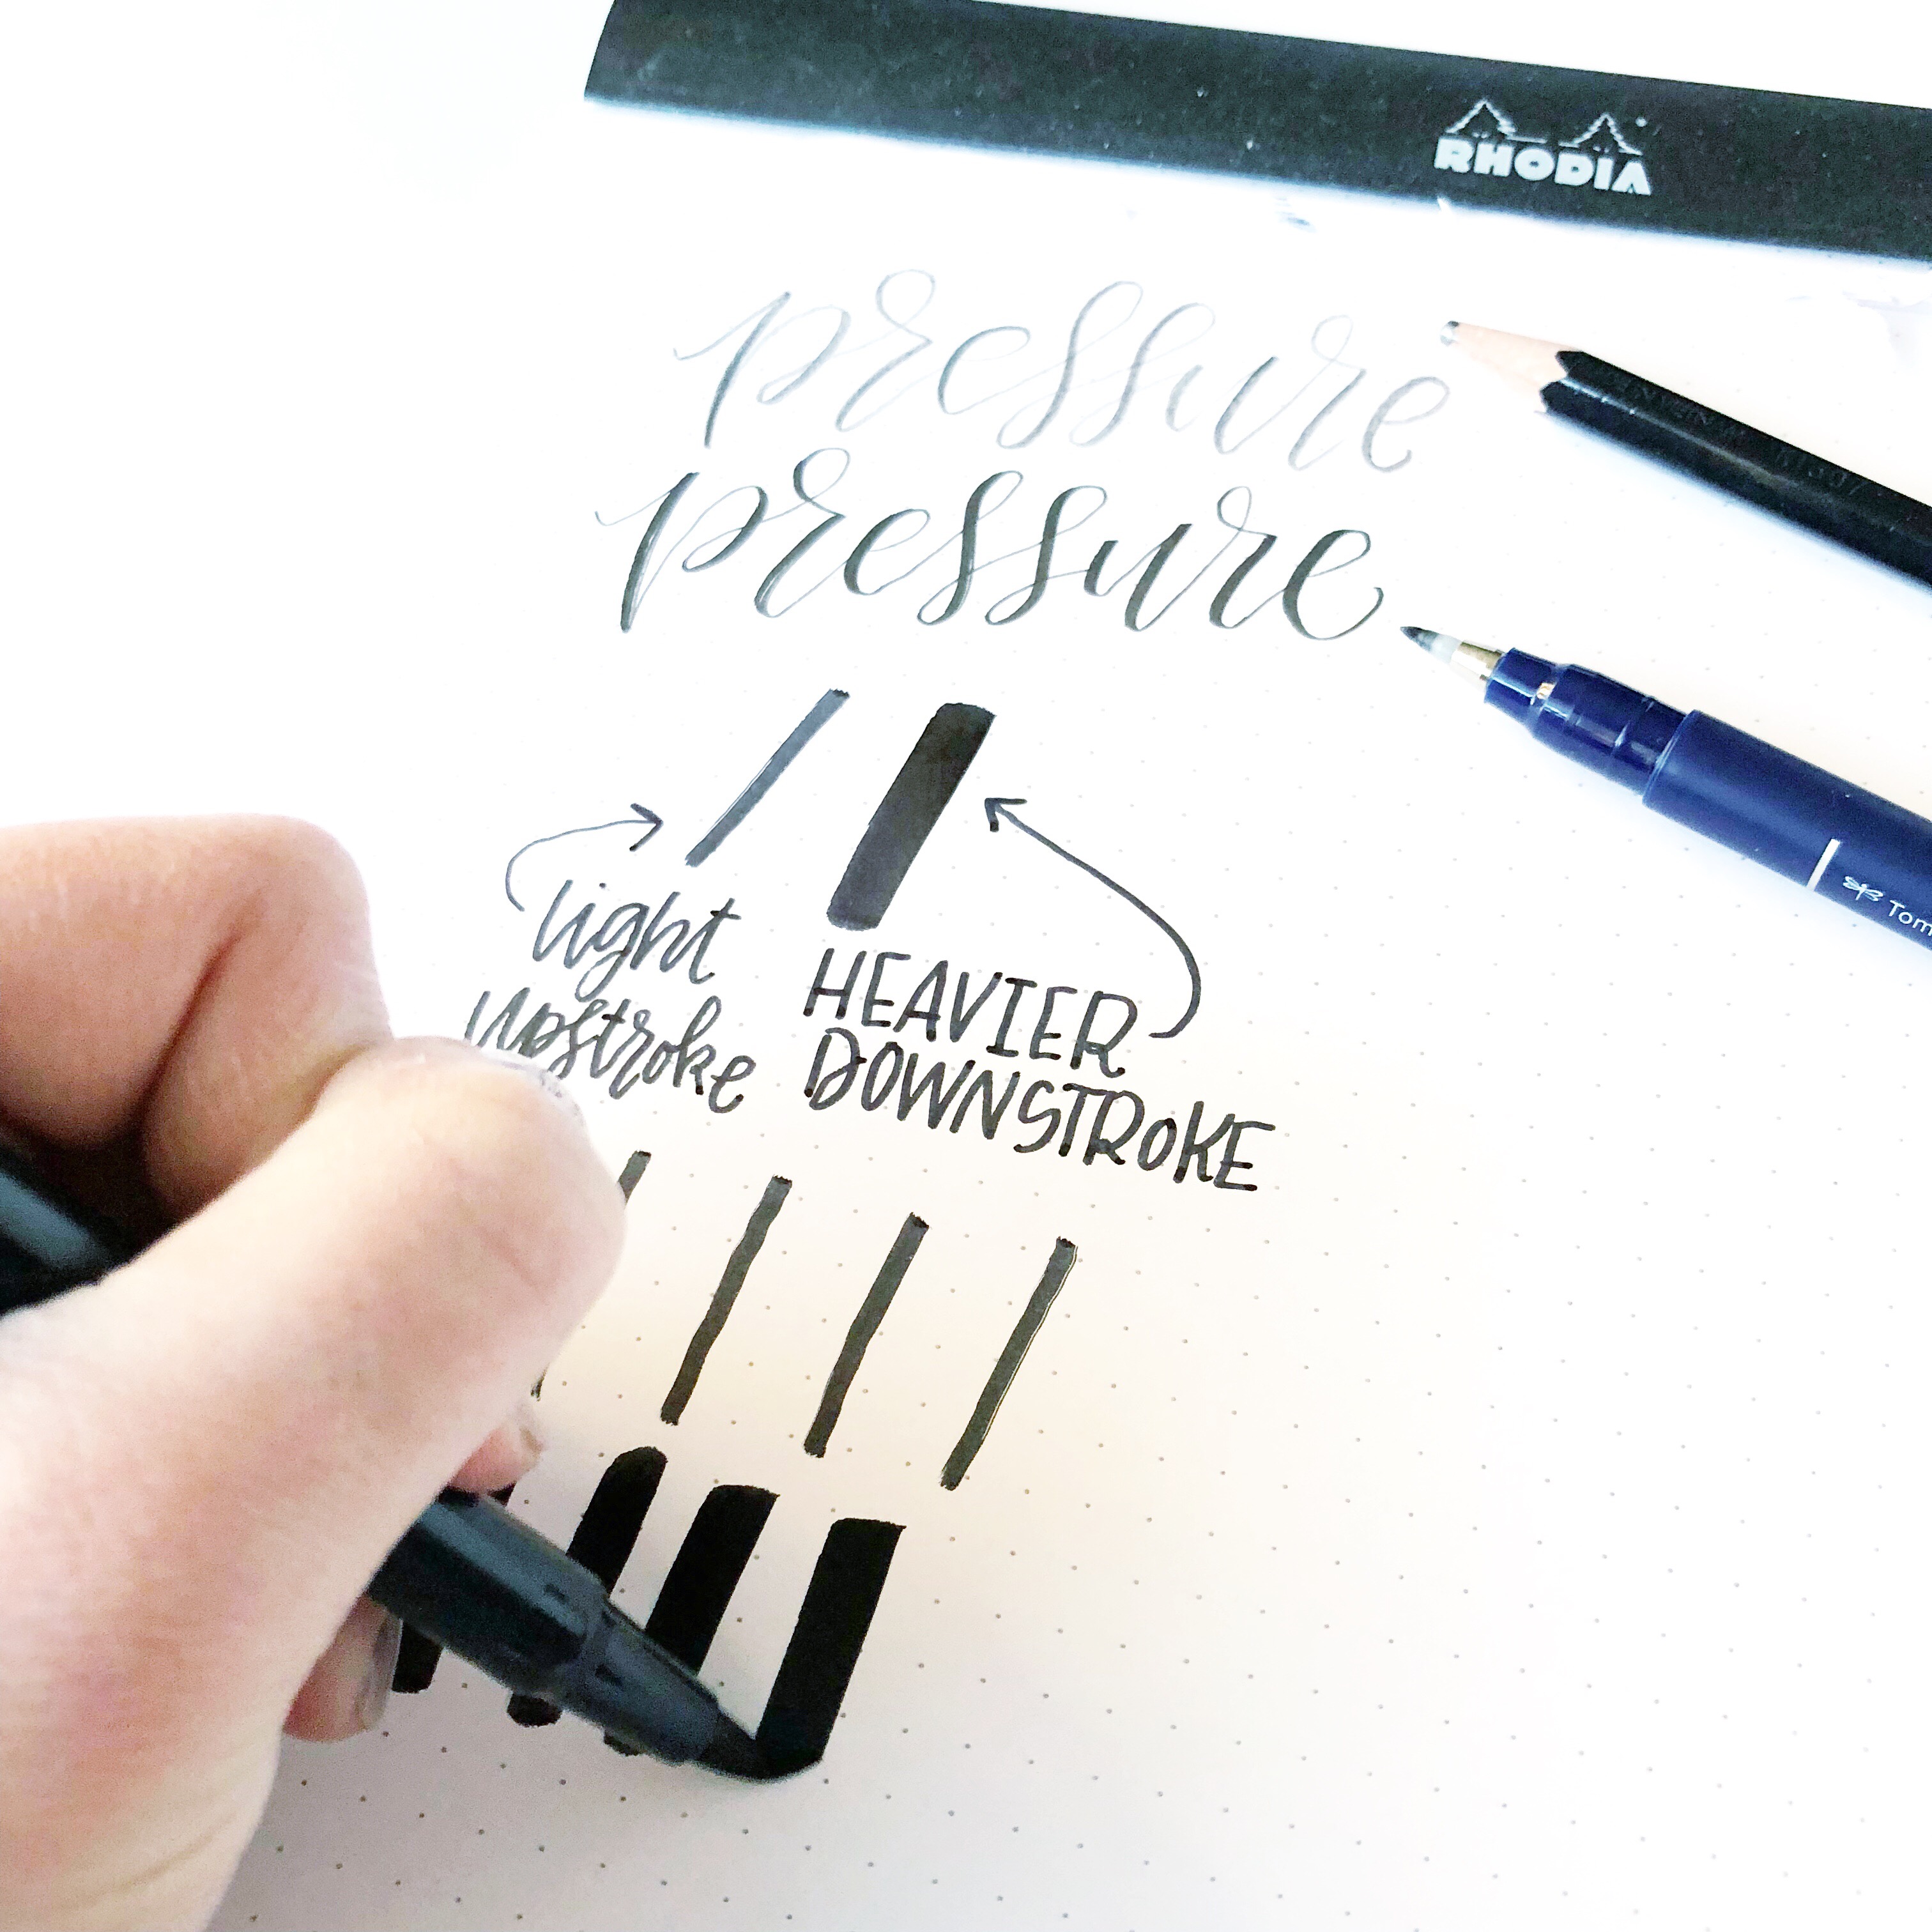
The first time I saw a Dual Brush Pen being used on Instagram, it was like magic that I wanted to try immediately, without any practice or knowledge of the pen. I quickly found out that just like you cannot sit down at a piano and play a beautiful song, writing with a brush pen takes lots of practice. Start by learning and practicing the basics. Draw some light upstrokes by gliding the tip of the pen across the paper. Create thick downstrokes by using the Dual Brush Pens to create thick downstrokes. If you struggle with this at first, take a step back to some easier lettering tools and practice pressure again.
Once you have learned the basics of creating strokes, move on to letters. You may be wondering where you can learn these. Did you know that Tombow USA has free worksheets on their website that are perfect for practicing basic drills and letters? Download them here. Once you have mastered letters, try forming words and then work your way up to sentences, quotes, addresses, and more. The possibilities are endless.
4. BLEND, BLEND, BLEND
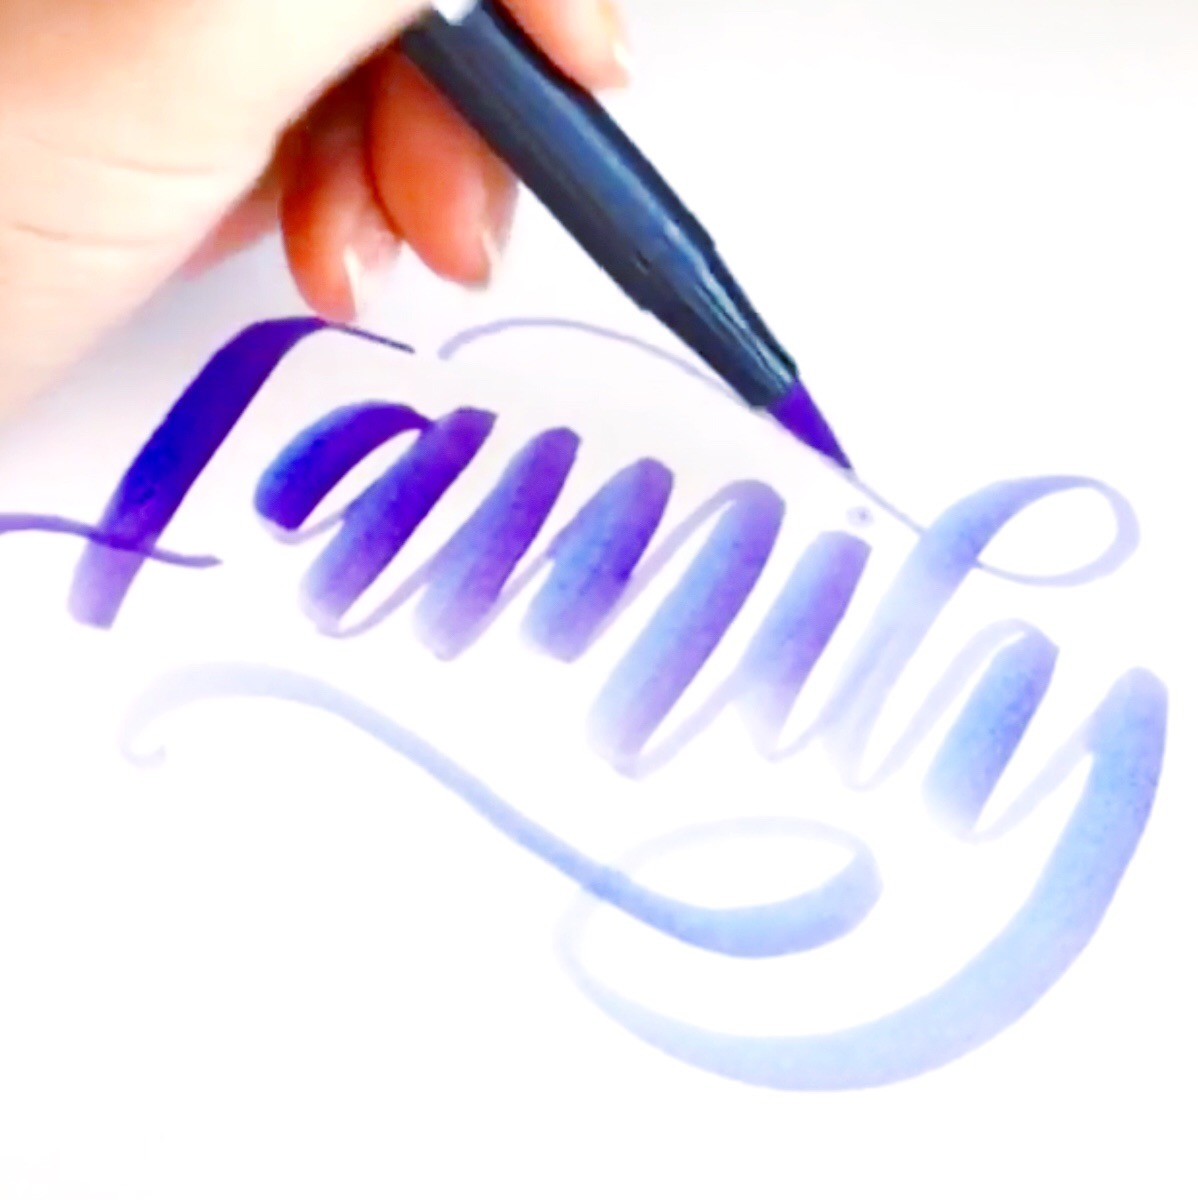
The Tombow Dual Brush Pen is a magical thing. The 96 different colors are beautiful and can be blended together. Try blending with the pens in several ways. First, you can rub the tips of a dark color and a lighter color together. Then write with the lighter color for an ombré effect (like above). You can also blend by using a Blending Palette and picking up a darker color with a lighter one. There are several other ways to blend, but trying these simple ways can really up your creative game and add a big pop to the color story a lettered piece.
5. CREATE WATERCOLOR
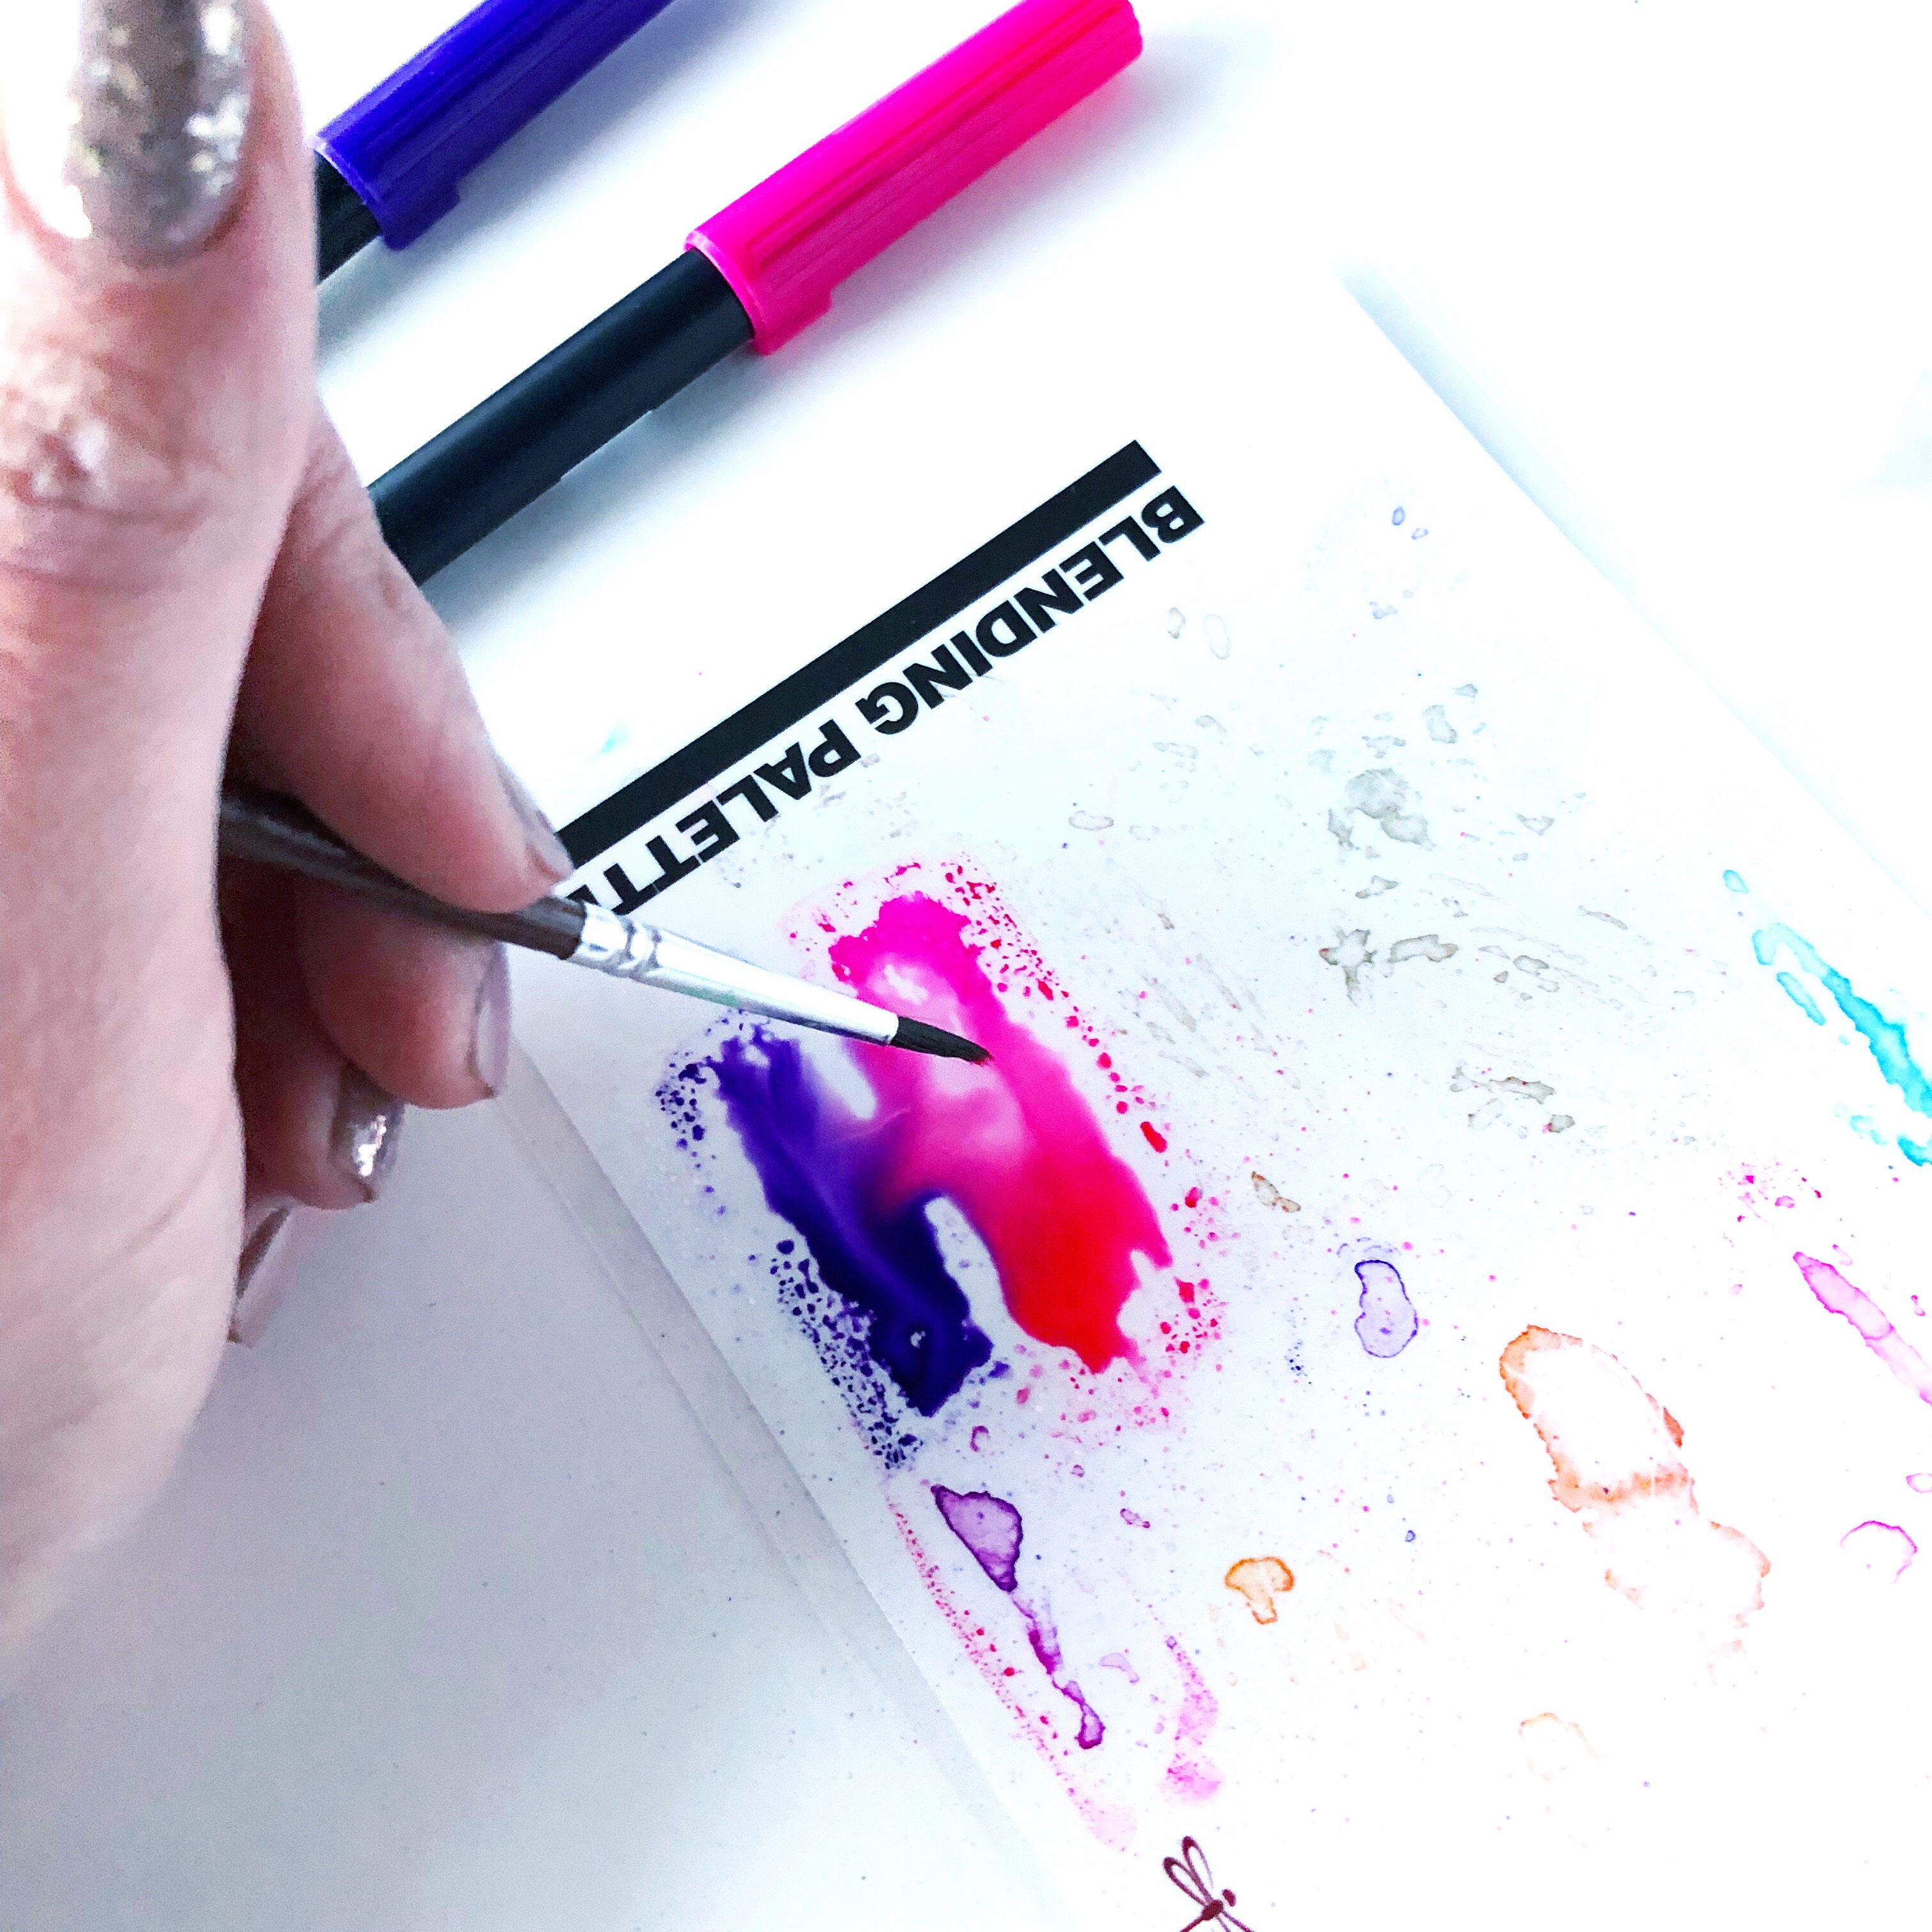
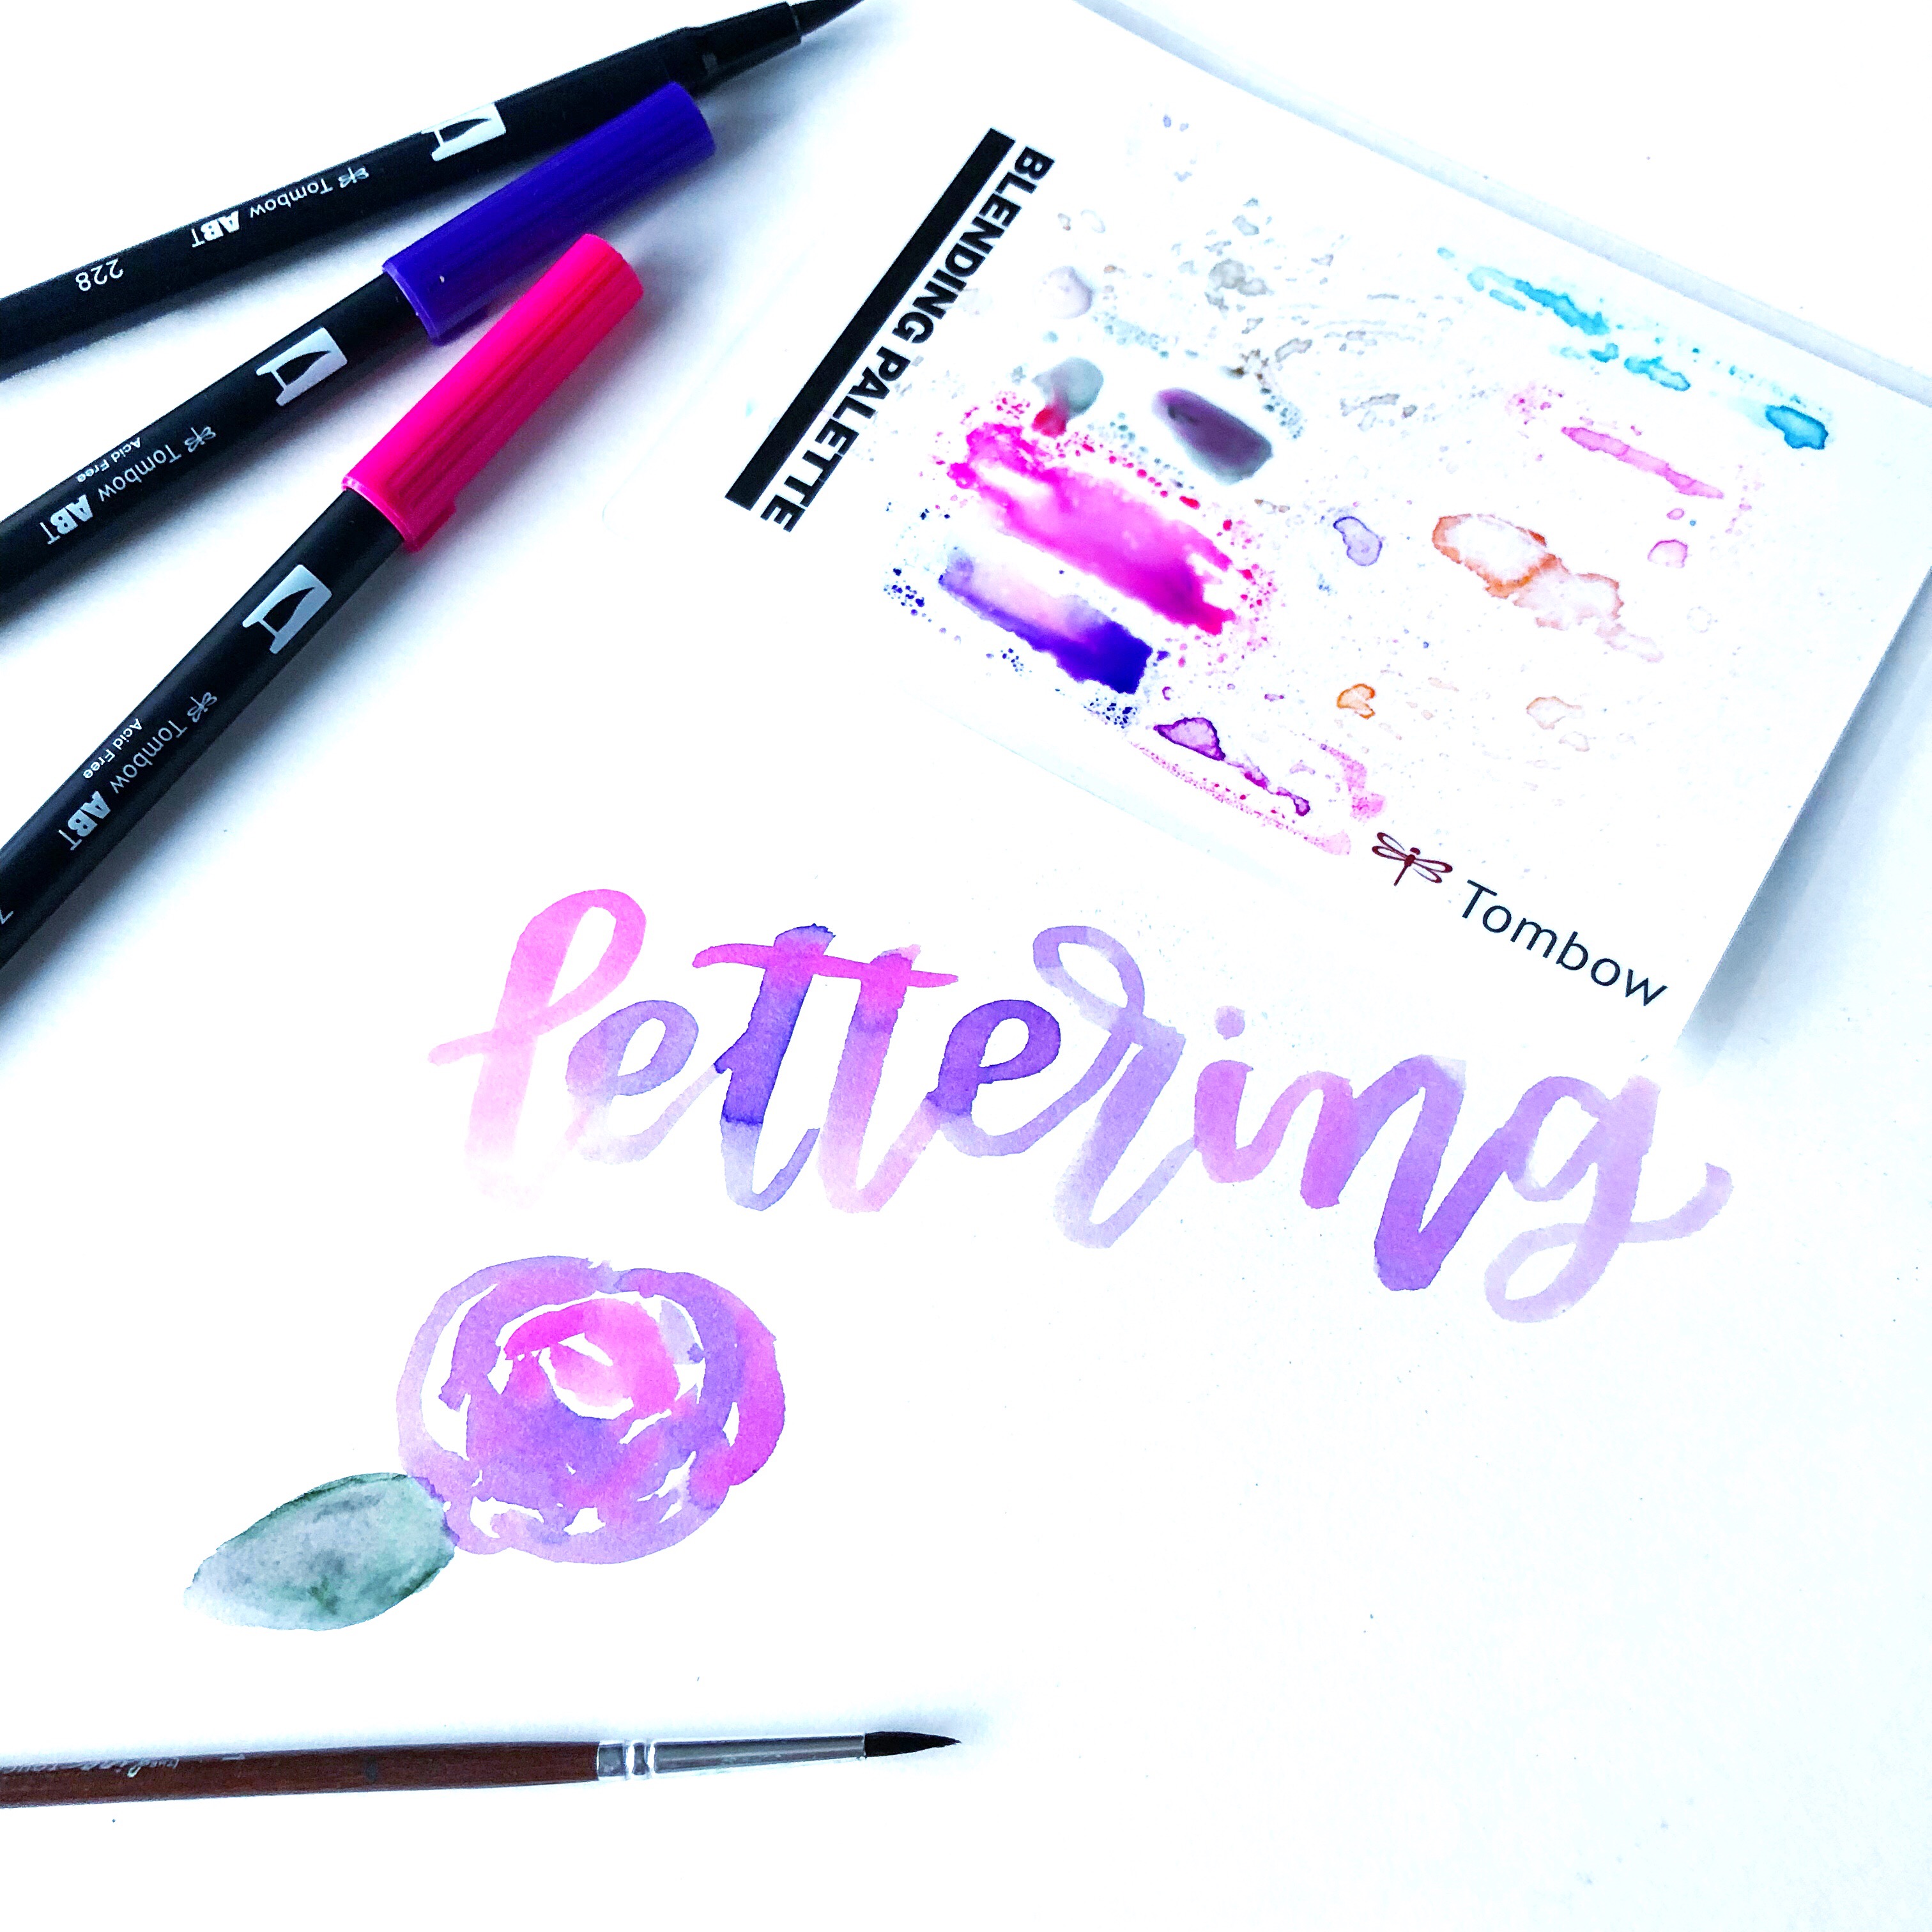
Last, but certainly not least, the amazing Tombow Dual Brush Pens can be used as watercolors. The pens are water based which makes them extremely reactive to water and moveable. When creating watercolor, I prefer to use Mix Media Paper. I love to color two colors on the Blending Palette, spray with the mister in the blending kit, and letter using a watercolor brush. Alternating colors really gives it a fun effect. You can also create shapes and florals with the amazing colors.
Another method is to color directly onto the paper with a color of your choice and then color over it to move the color with a watercolor brush (like on the leaf below).
And there you have it! Lettering is an amazing hobby! Try it and get to know those Tombow Dual Brush Pens. They have so many amazing uses that are sure to bring life and creativity into whatever you create. For more lettering inspiration, tips, and tricks, check out my website at renmadecalligraphy.com and go say hi over on Instagram @renmadecalligraphy. Tag your work and make sure to tag me so I can see!
Happy Lettering!
Lauren
Pingback: Free Download! Valentine's Day Heart Banner - Tombow USA Blog
Pingback: Free Download! Valentine's Day Heart Banner - Tombow USA Blog
Grazie… prodotti stupendi!❤
Pingback: Yummy Love Donut Lettering Inspired by Lauren - Tombow USA Blog
thanks so much for this, all of my friends say I’m a human printer lol
Pingback: How to Draw Zentangle-Inspired Hand Lettered Cards - Tombow USA Blog
Can you make a tutorial on how to write, I am new and I am trying but I cannot seem to get it to be good. i would really appreciate if you would get back to me!
Pingback: How to use Tombow brush pens for hand lettering - The Pen Company Blog
so how do i like blend with like the aesthetic brown tombow brush pen set. As i have that and i really wanted to try using them for pretty notes but i stuggled this morning with blending and making them look pretty from the brown set ar there any recomended colours that go well together. Can anyone please answer this for me as im really struggling and would like to sort out my issue.
Kind regards.