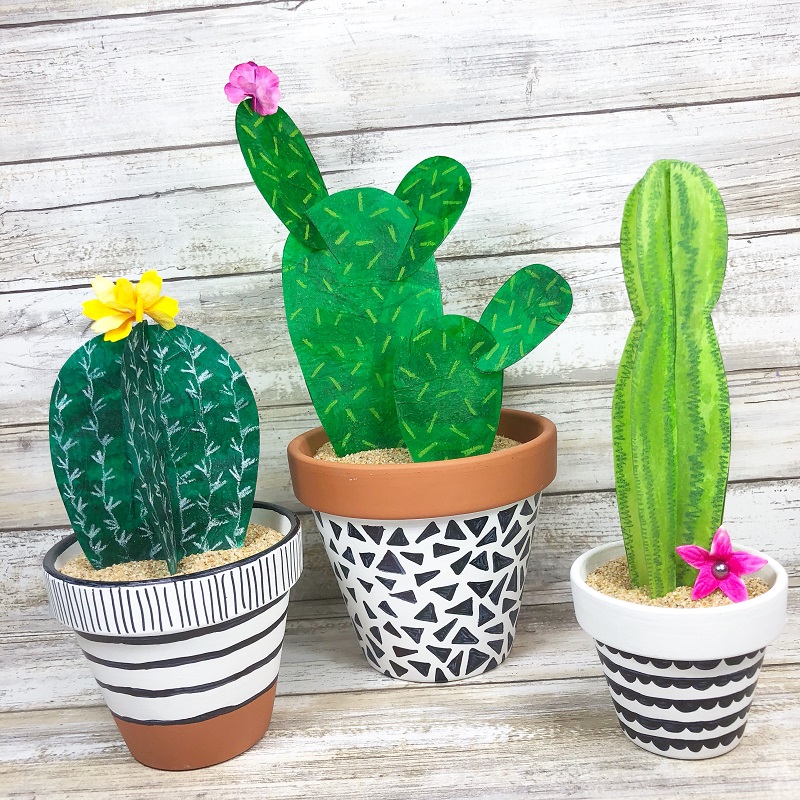
Good morning y’all, Beth with @creativelybeth here to share a project that is so ME! This week the Design Team is creating projects that represent us, whether literal self-portraits or implied through our design styles. My Upcycled Faux Cactus featuring all of my favorite Tombow USA products is a true reflection of my creative design style. I hope you enjoy!
Here is what you will need to create Upcycled Faux Cactus
- Tombow MONO Aqua Liquid Glue
- Tombow MONO Twin Permanent Marker
- Tombow 1500 Series Colored Pencils – White, Yellow Green and Olive Green
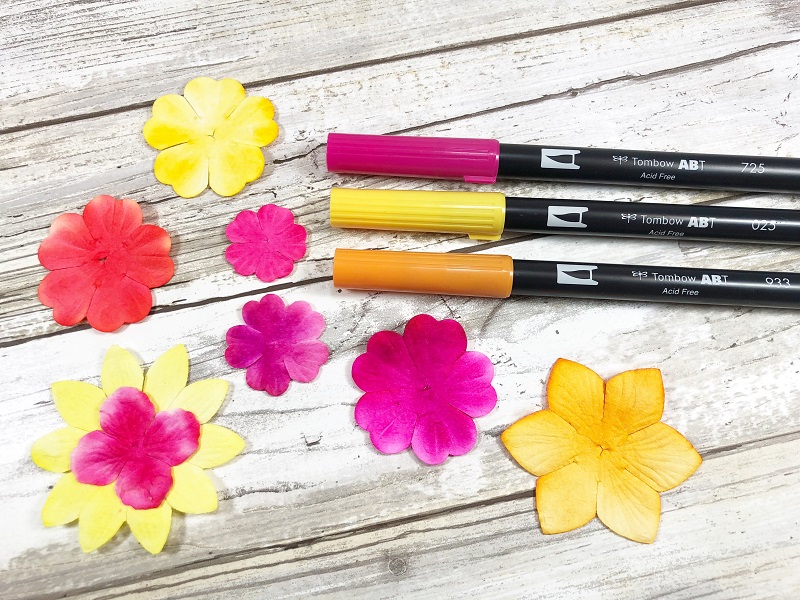
- Tombow Dual Brush Pens – 025, 725 and 933
- Tombow Spray Mister and Blending Palette from the Blending Kit
- Tombow MONO J Drawing Pencil – 2H grade
- Tombow MONO Dust Catch Eraser
- Tombow Xtreme Tabs
- Upcycled Clear Plastic Packaging; Terra Cotta Pots; White Craft Paint; Tissue Paper; Paintbrush; Scissors; Paper Flowers; Sand;
STEP ONE
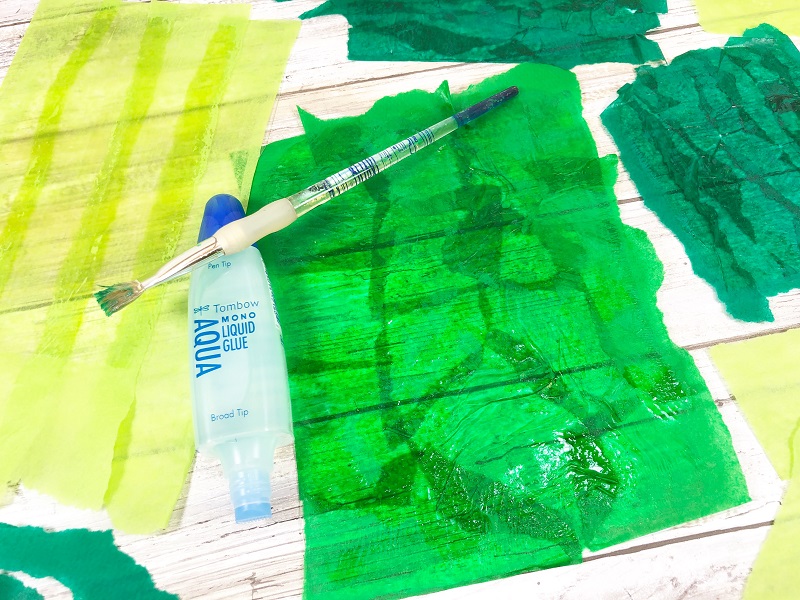
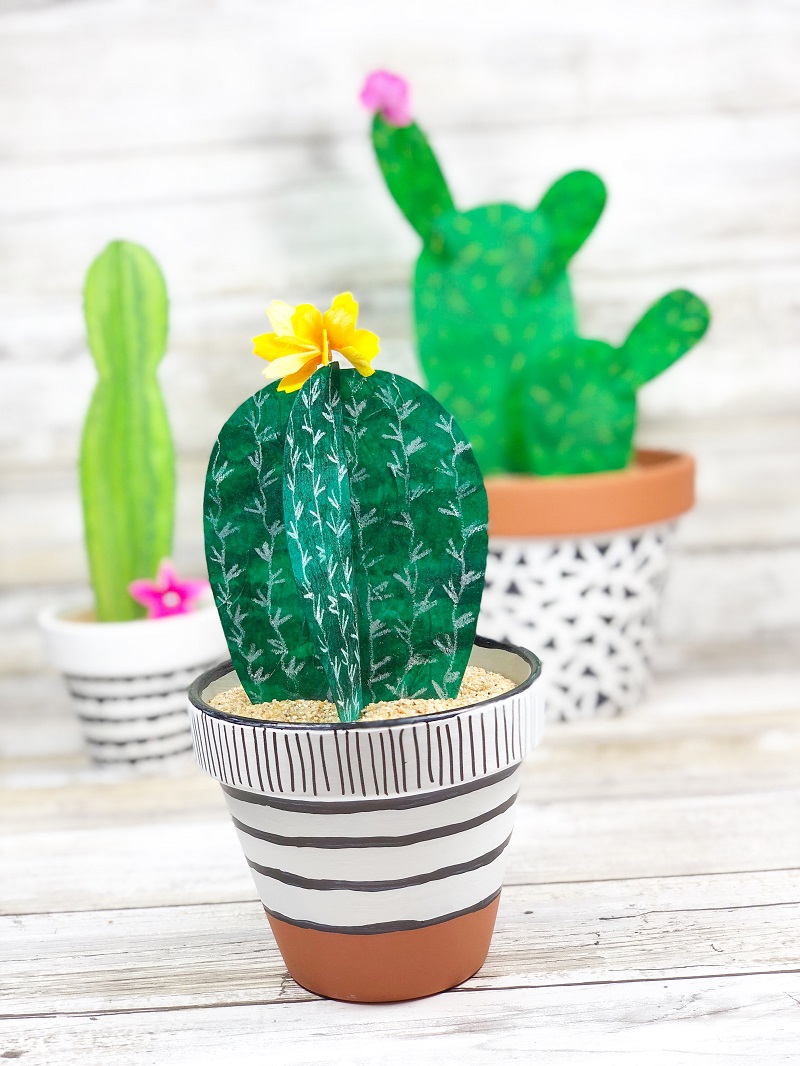
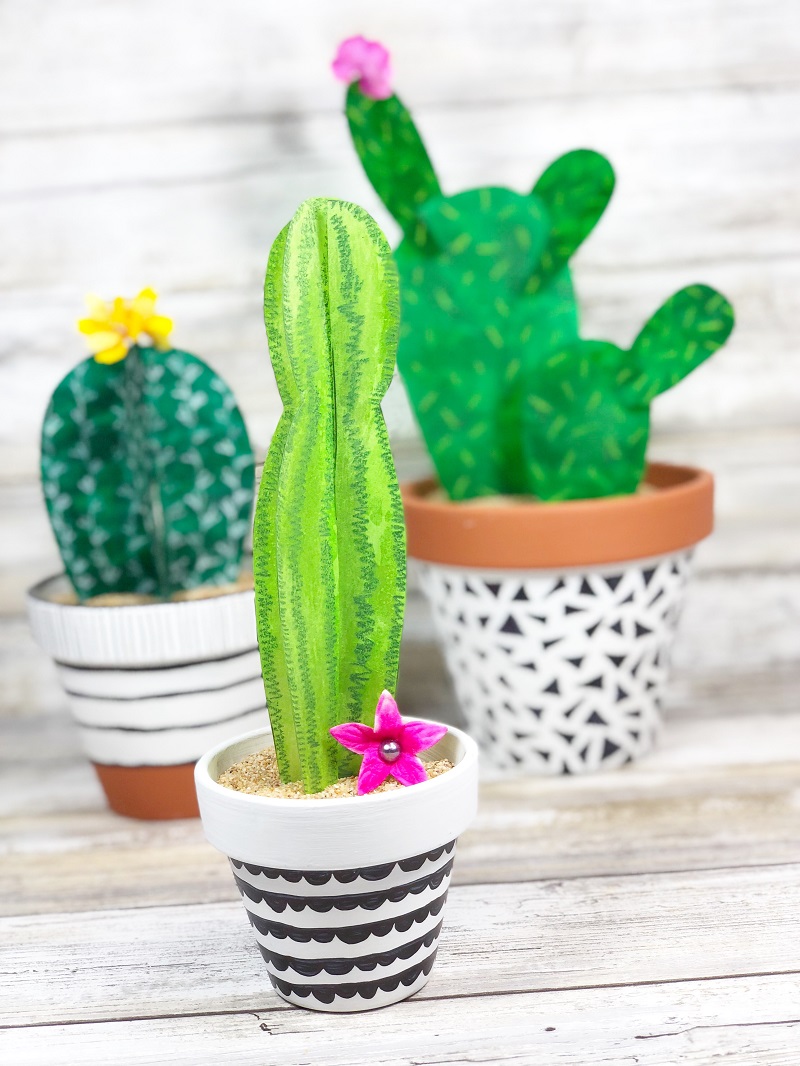
Decoupage green tissue paper to upcycled clear plastic packaging with an old paintbrush and MONO Aqua Liquid Glue. Let dry, flip over and decoupage the second side. I used a light, medium and dark green green tissue, tearing it into pieces before applying.
STEP TWO
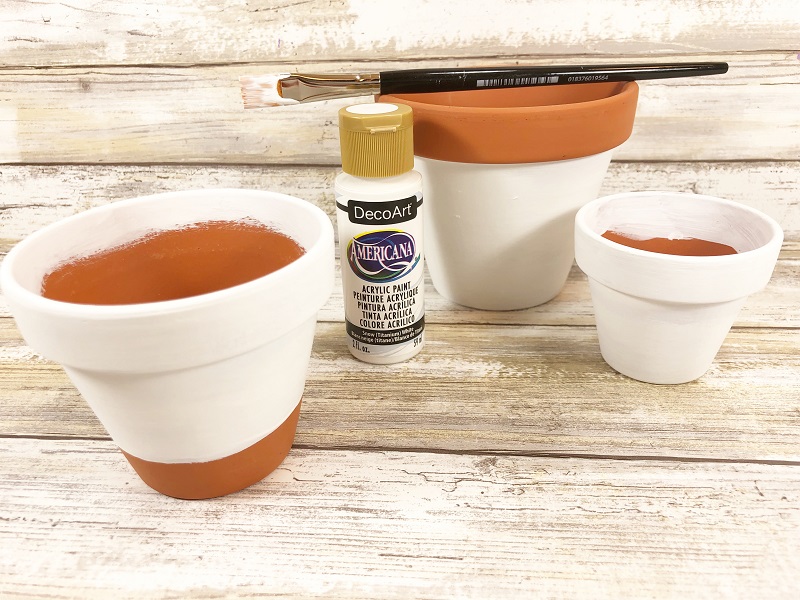
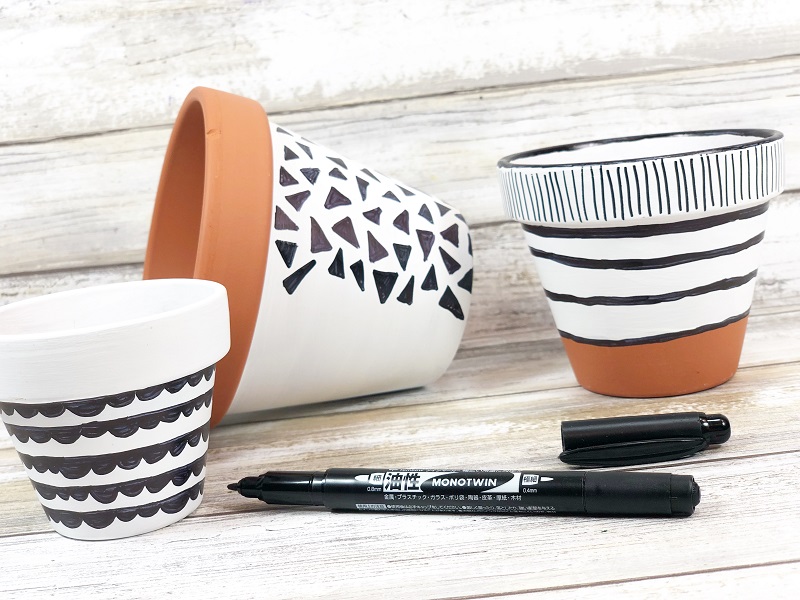
Base coat terra cotta pots with white acrylic craft paint, let dry. Apply a second coat, if necessary.
STEP THREE
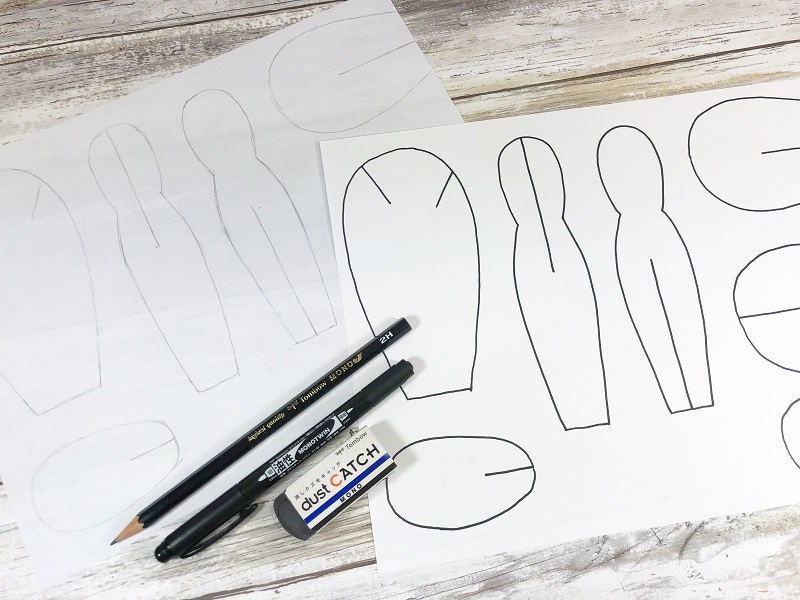
On a plain piece of paper draw cactus shapes with MONO J Drawing Pencil 2H grade, then ink in with the broad tip of MONO Twin Permanent Marker. Include a slit halfway down from the top of one shape and halfway up from the bottom of the second shape.
STEP FOUR
Doodle designs onto the terra cotta pots with the broad tip of the MONO Twin Permanent Marker.
STEP FIVE
Once dry, trace each of the three cactus shapes on to each of the three decoupaged plastic sheets with the fine tip of the MONO Twin Permanent Marker.
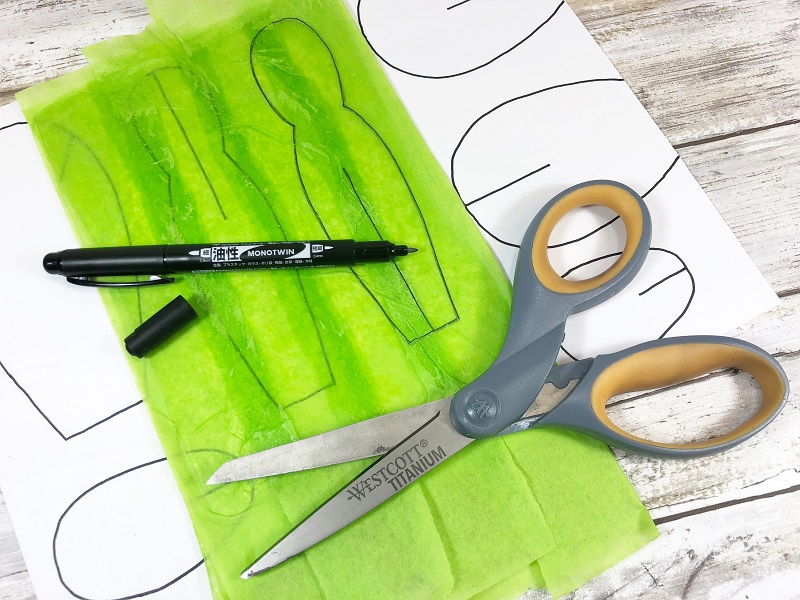
STEP SIX
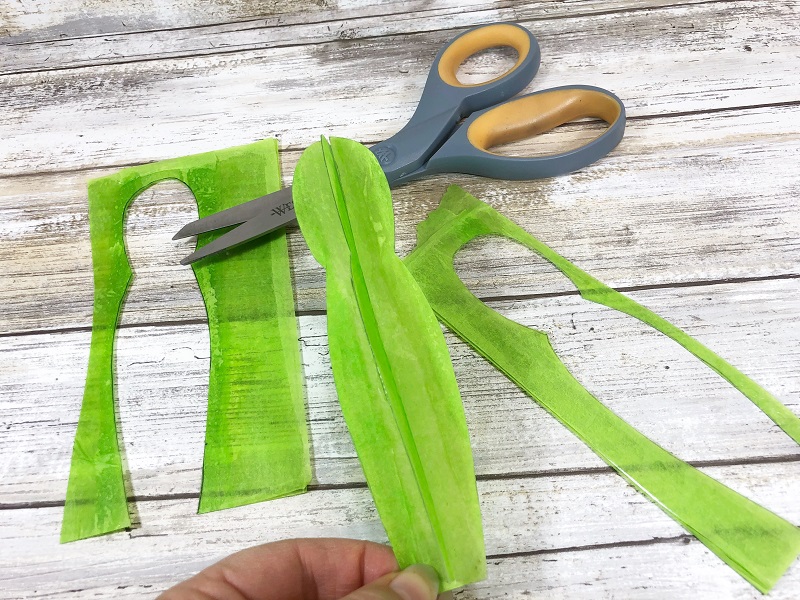
Cut out all of the cactus shapes with scissors. Double cut the slits to 1/16″ wide and slide both pieces together to create a three-dimensional cactus shape.
STEP SEVEN
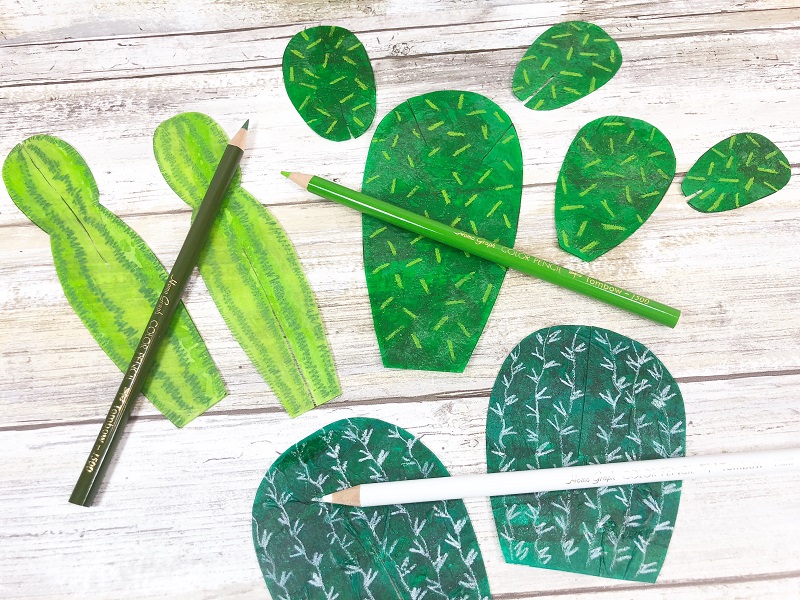
Lay all pieces flat and add needles to each cactus with Tombow 1500 Series Colored Pencils.
STEP EIGHT
Color paper flowers by scribbling Dual Brush Pens on the Blending Palette, spraying with the Spray Mister and dipping the flowers into the colored ink. Set aside on paper towel to dry. Then scrunch dry flower and attach to the top of he cactus with Tombow Xtreme Tabs, which are clear so they won’t show!
STEP NINE
Apply a piece of duct tape to the hole at the bottom of each terra cotta pot, fill with rocks and sand, then “plant” the cactus.
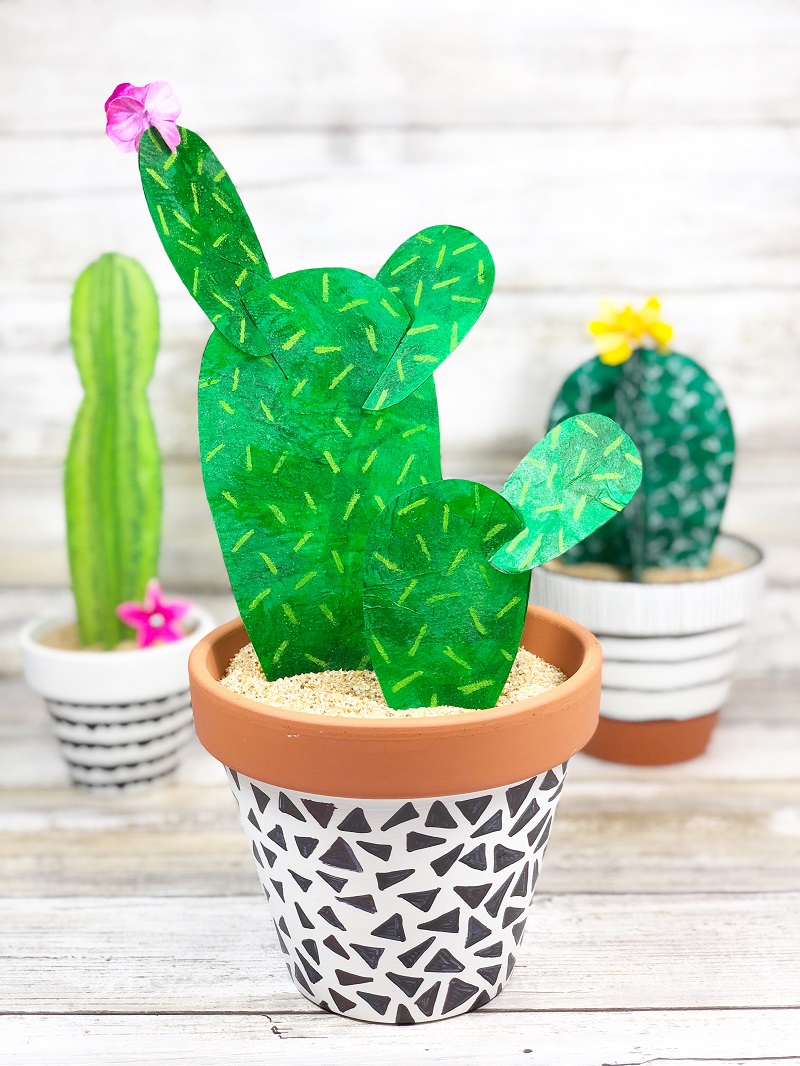
Here is a close up of each cactus!
I am so pleased with the way this project turned out and don’t you think it “looks” just like me?
Be sure to check out all of the self-portrait inspiration this week, here on the blog and over on the @tombowusa Instagram!
Thanks for stopping by!
Creatively, Beth