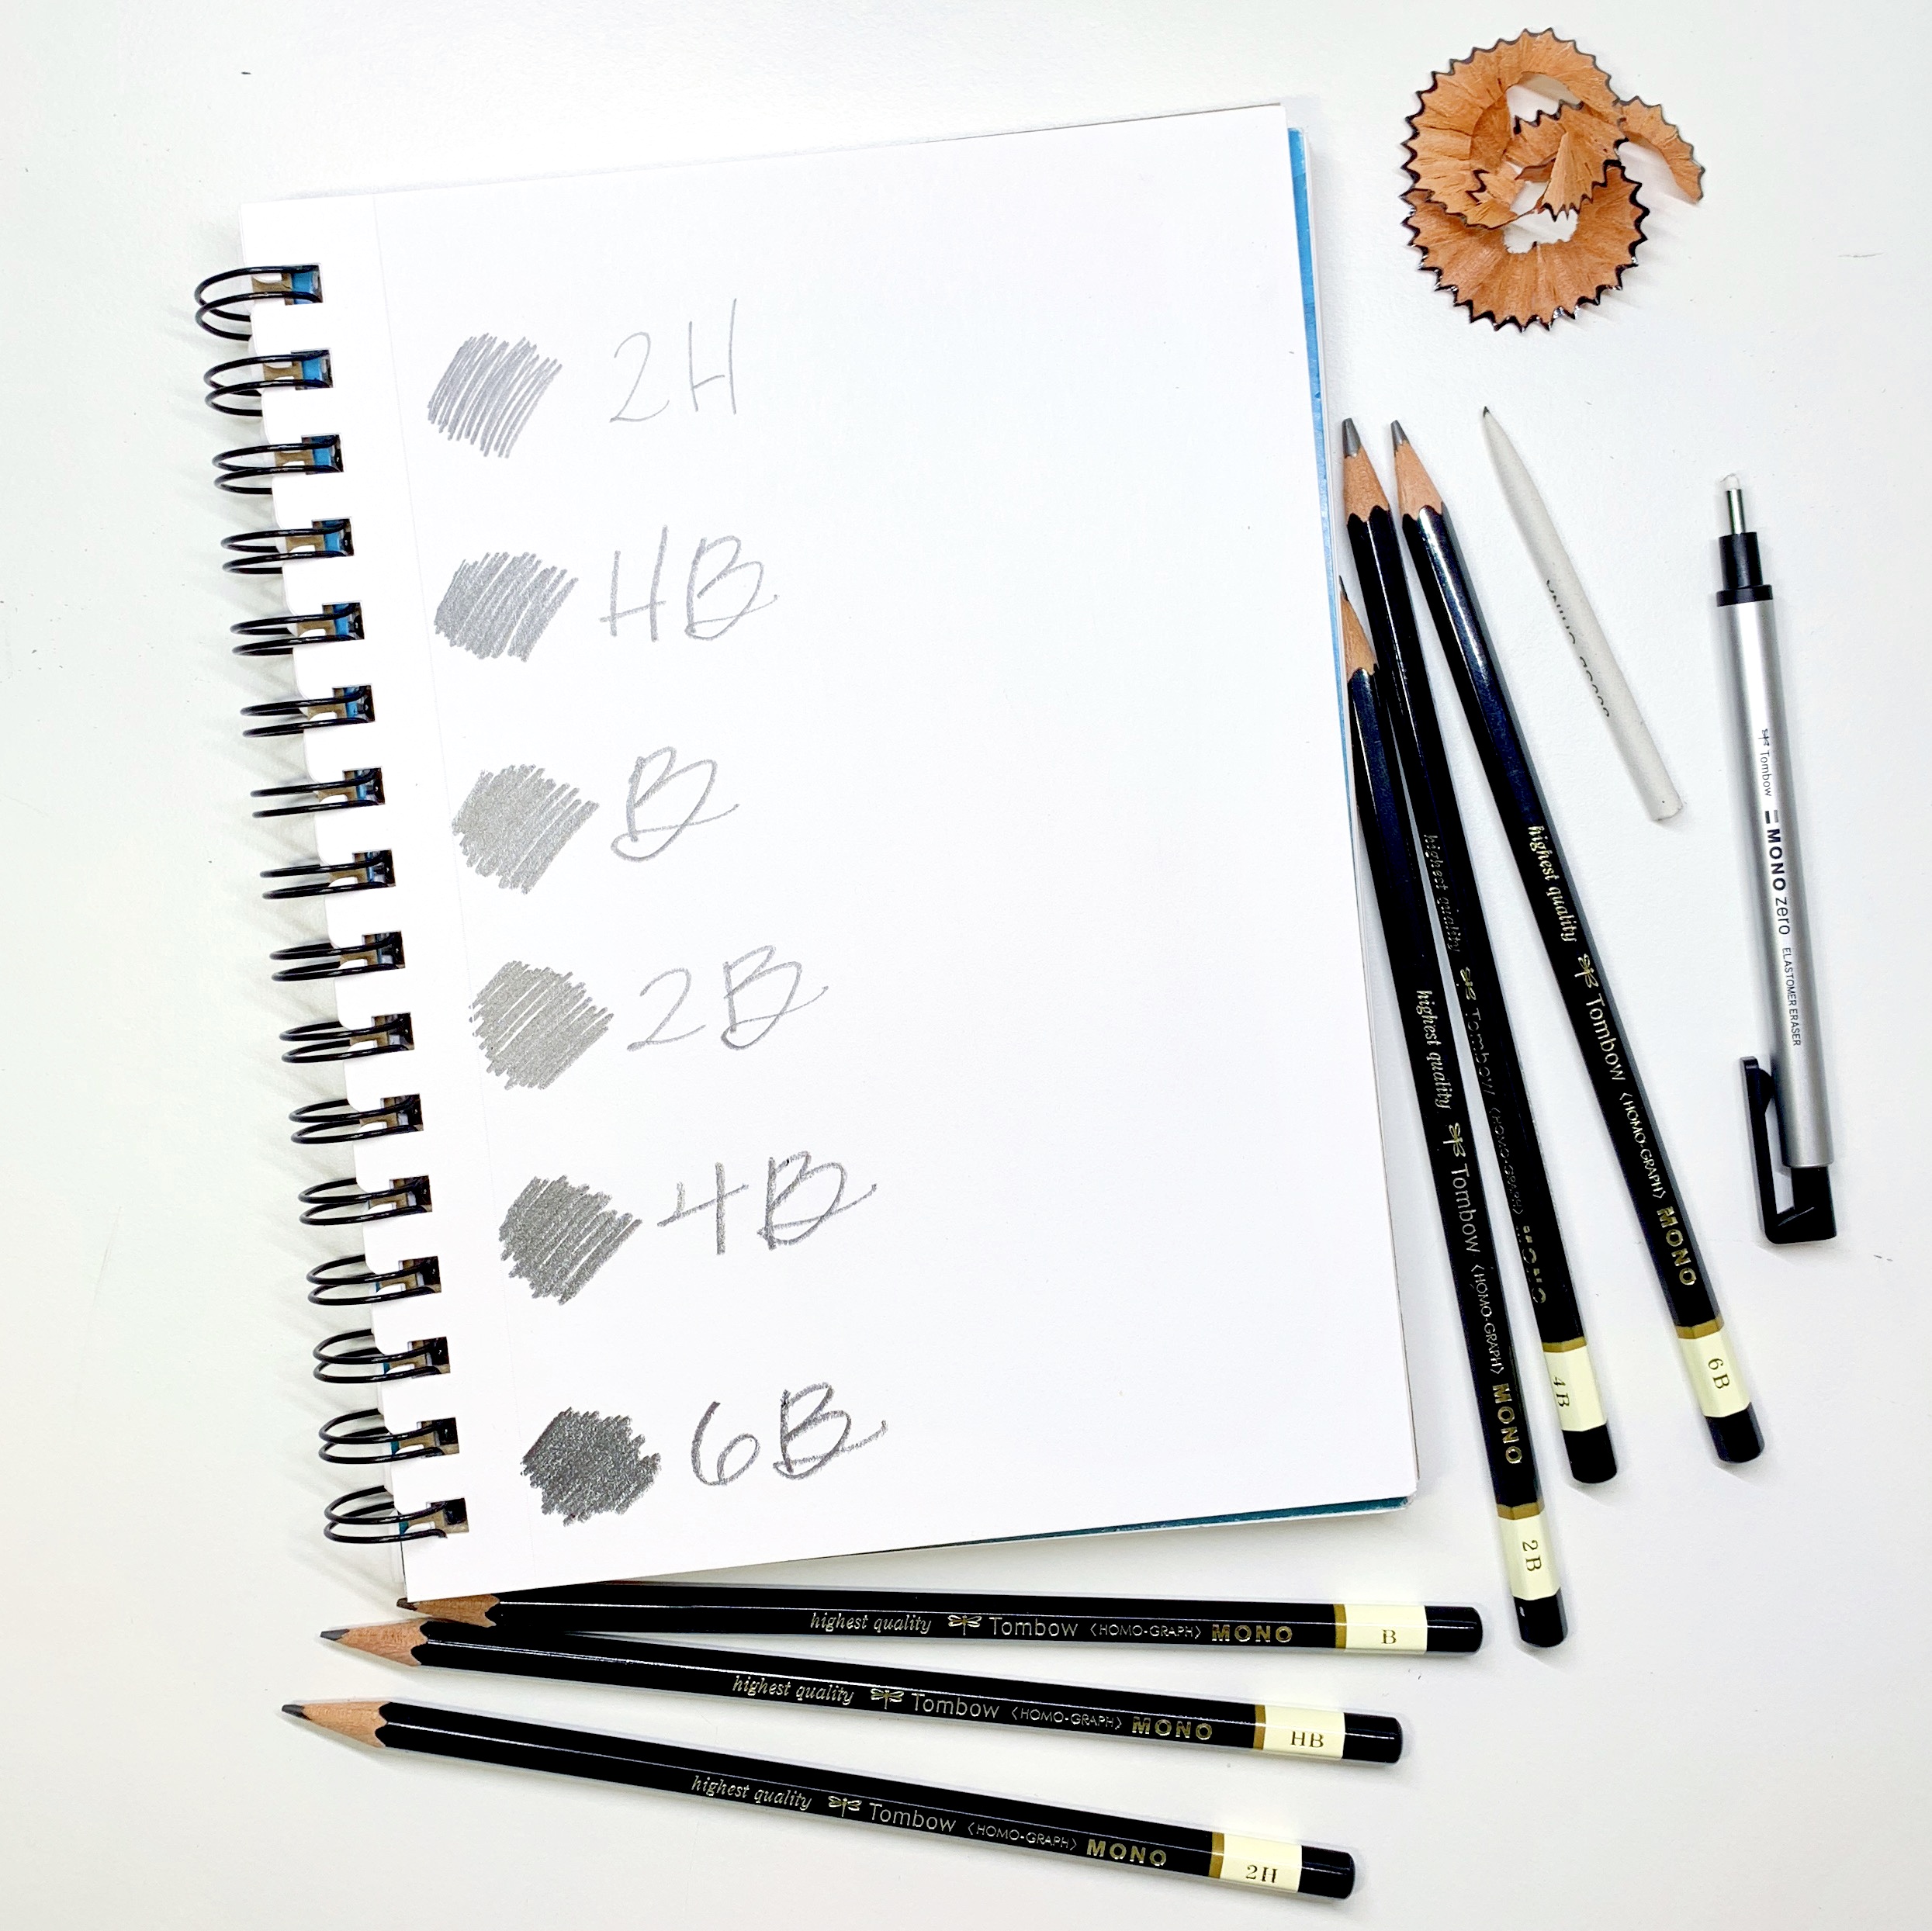
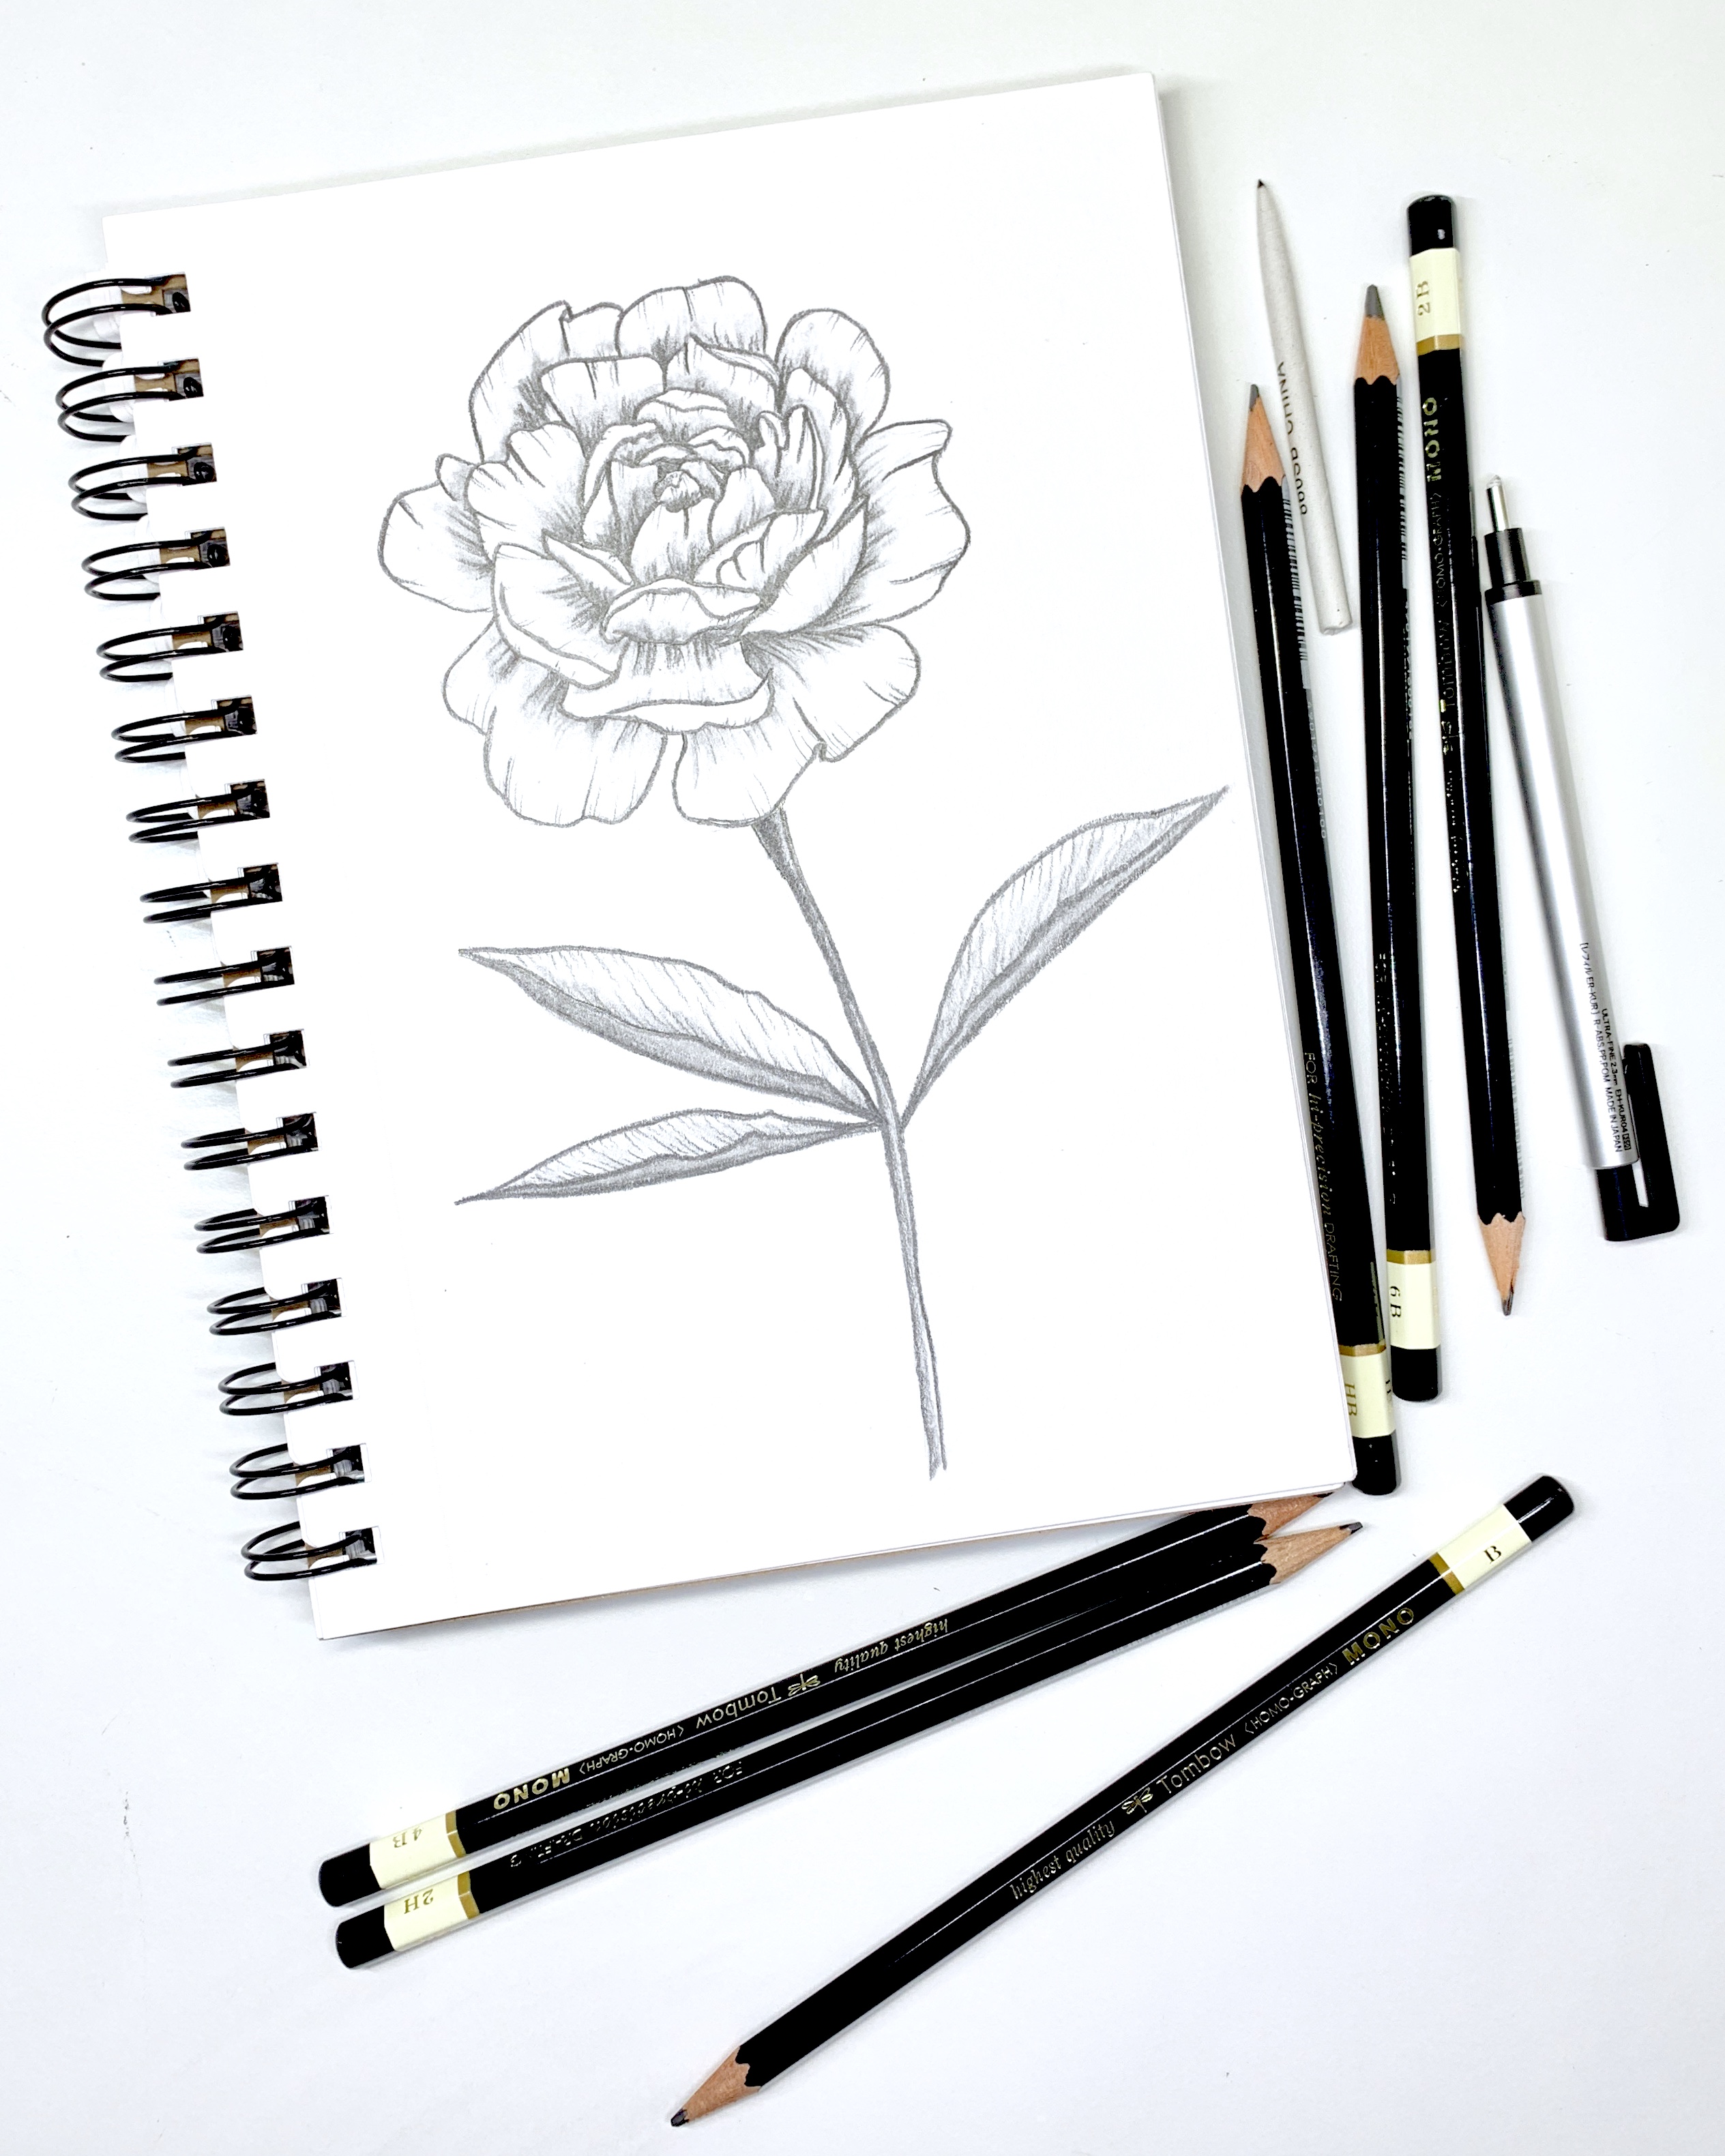
Hello Tombow friends! Adrienne from Studio 80 Design here today to show you how to draw a peony flower using the MONO Drawing Pencil Set! I absolutely love these pencils because they are high quality and come in a variety of grades! We’re going to use all the pencils that come in the MONO Drawing Pencil Set. Let’s get started!
Materials you’ll need:
- Mixed Media Notebook
- Tombow MONO Drawing Pencil Set, Combo Pack
- Tombow MONO Zero Eraser, Silver Round
- Blending Tortillion
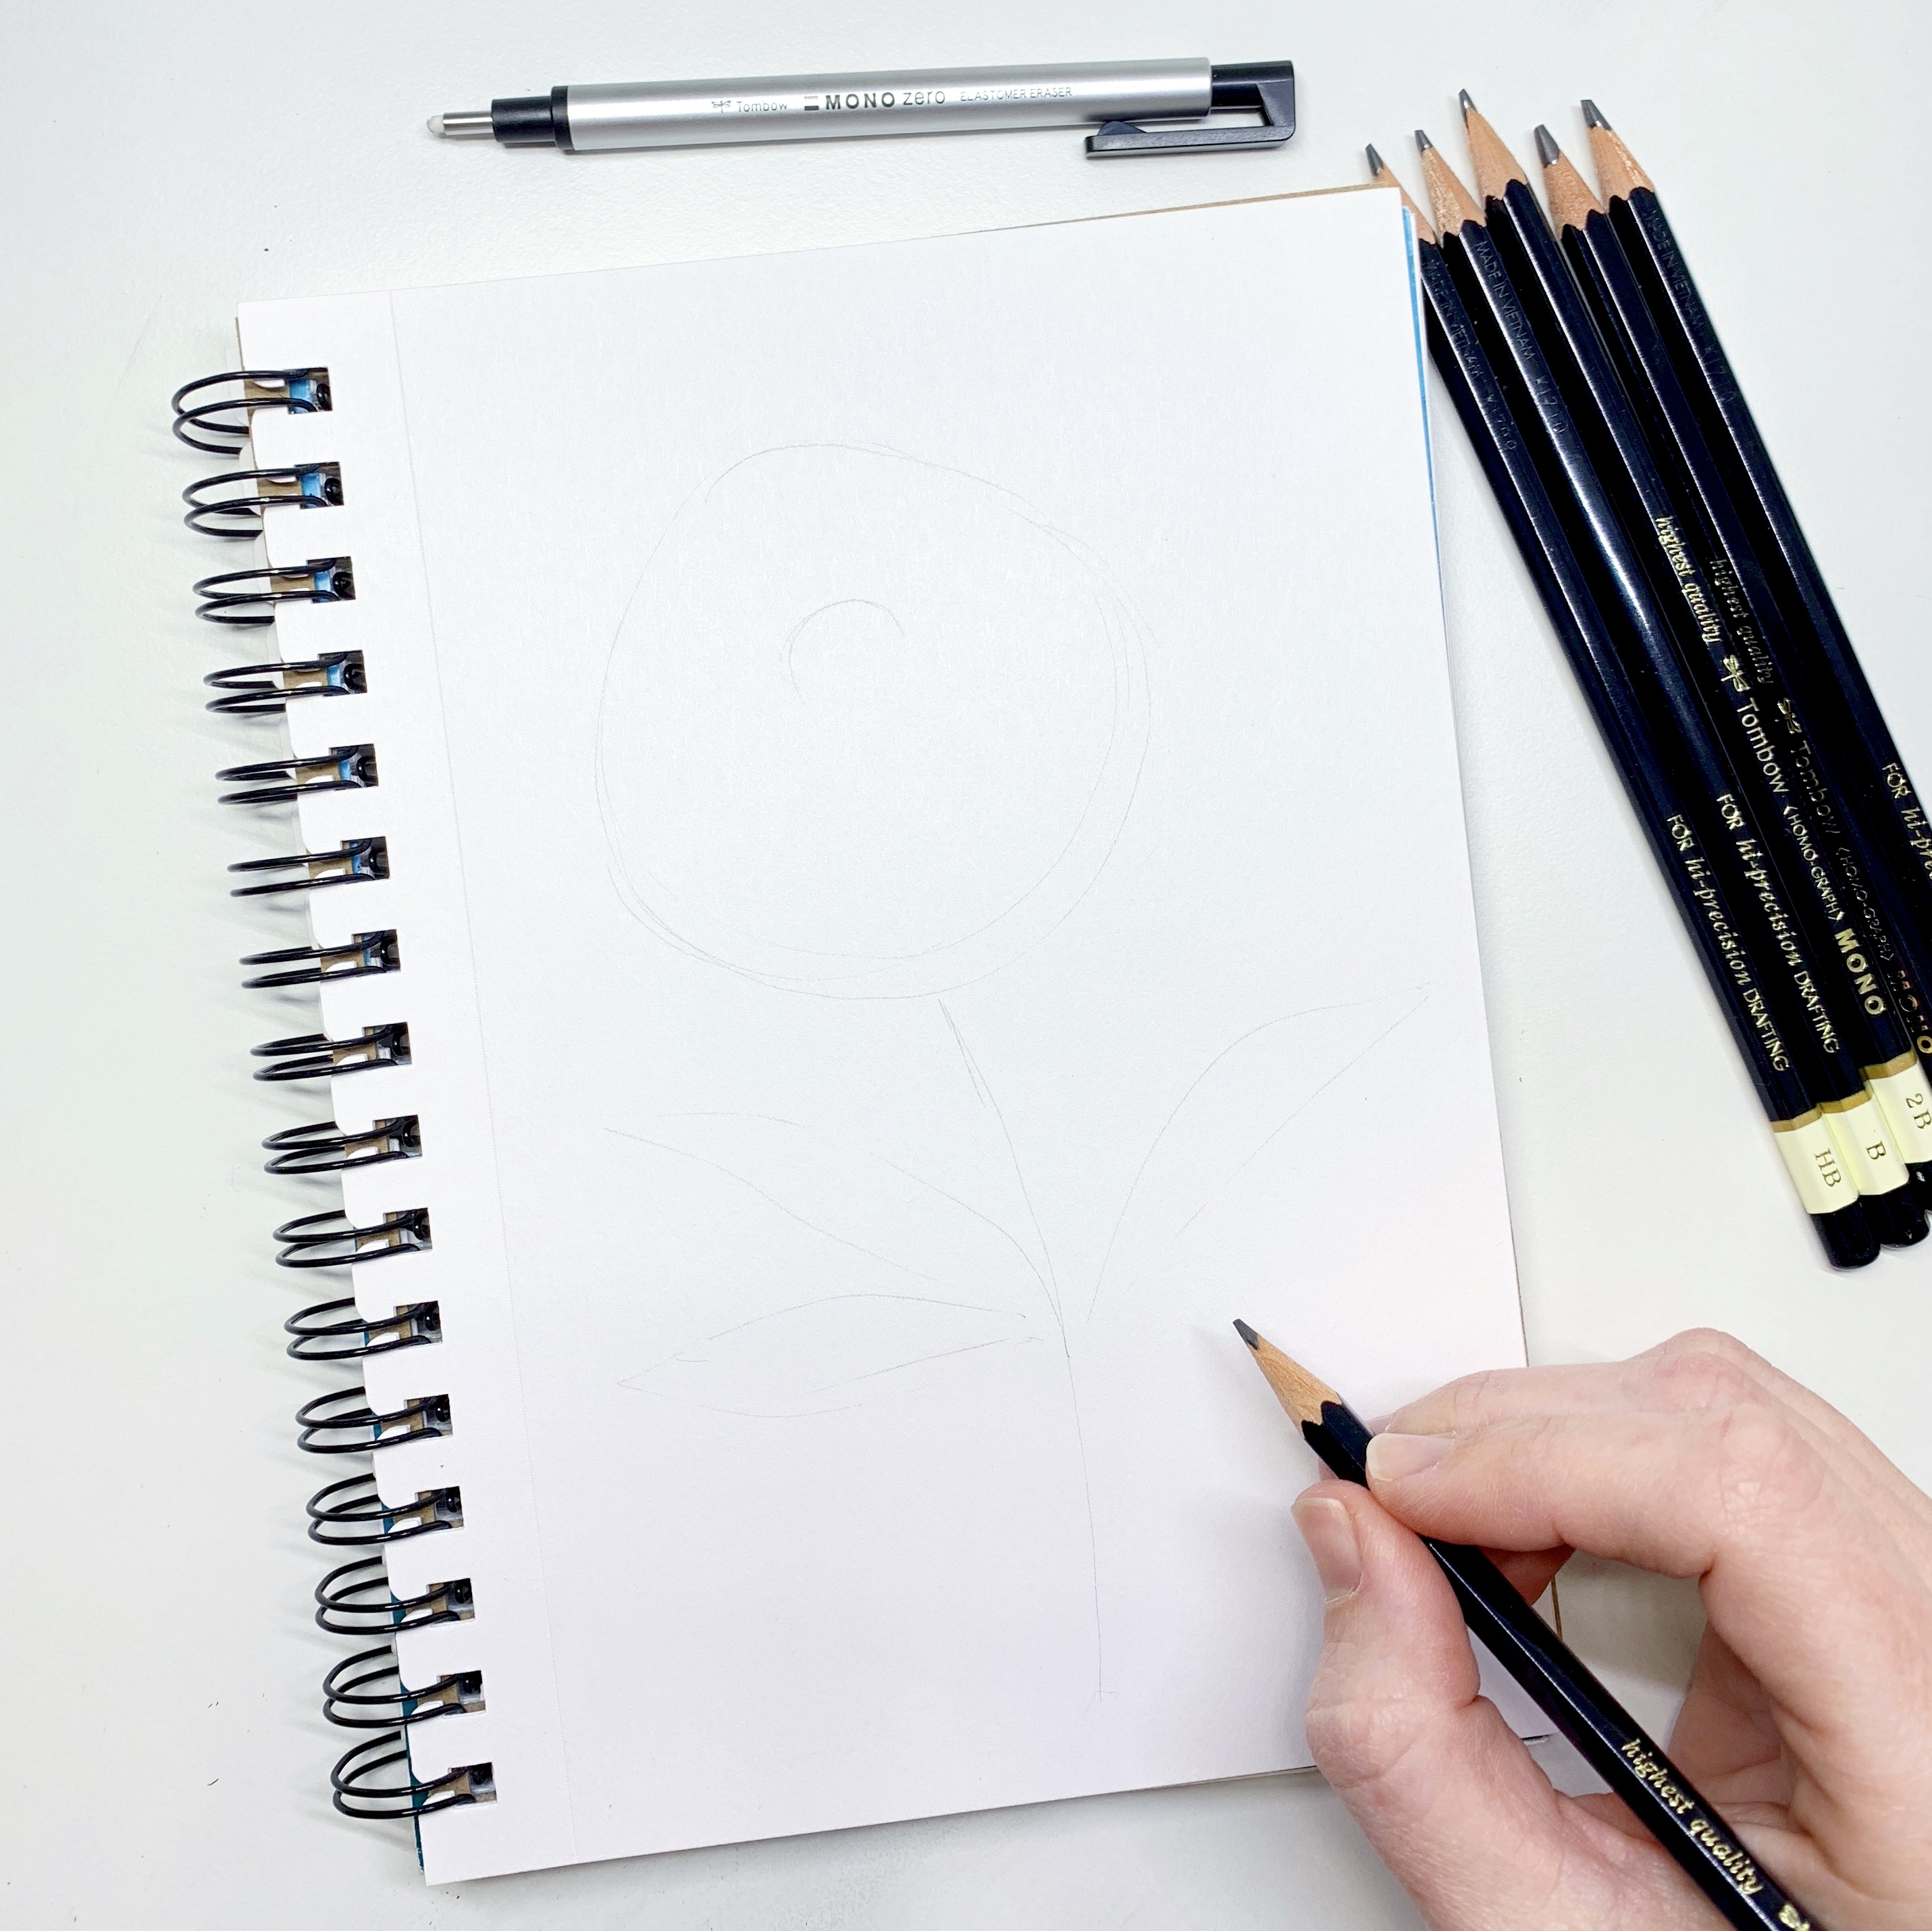
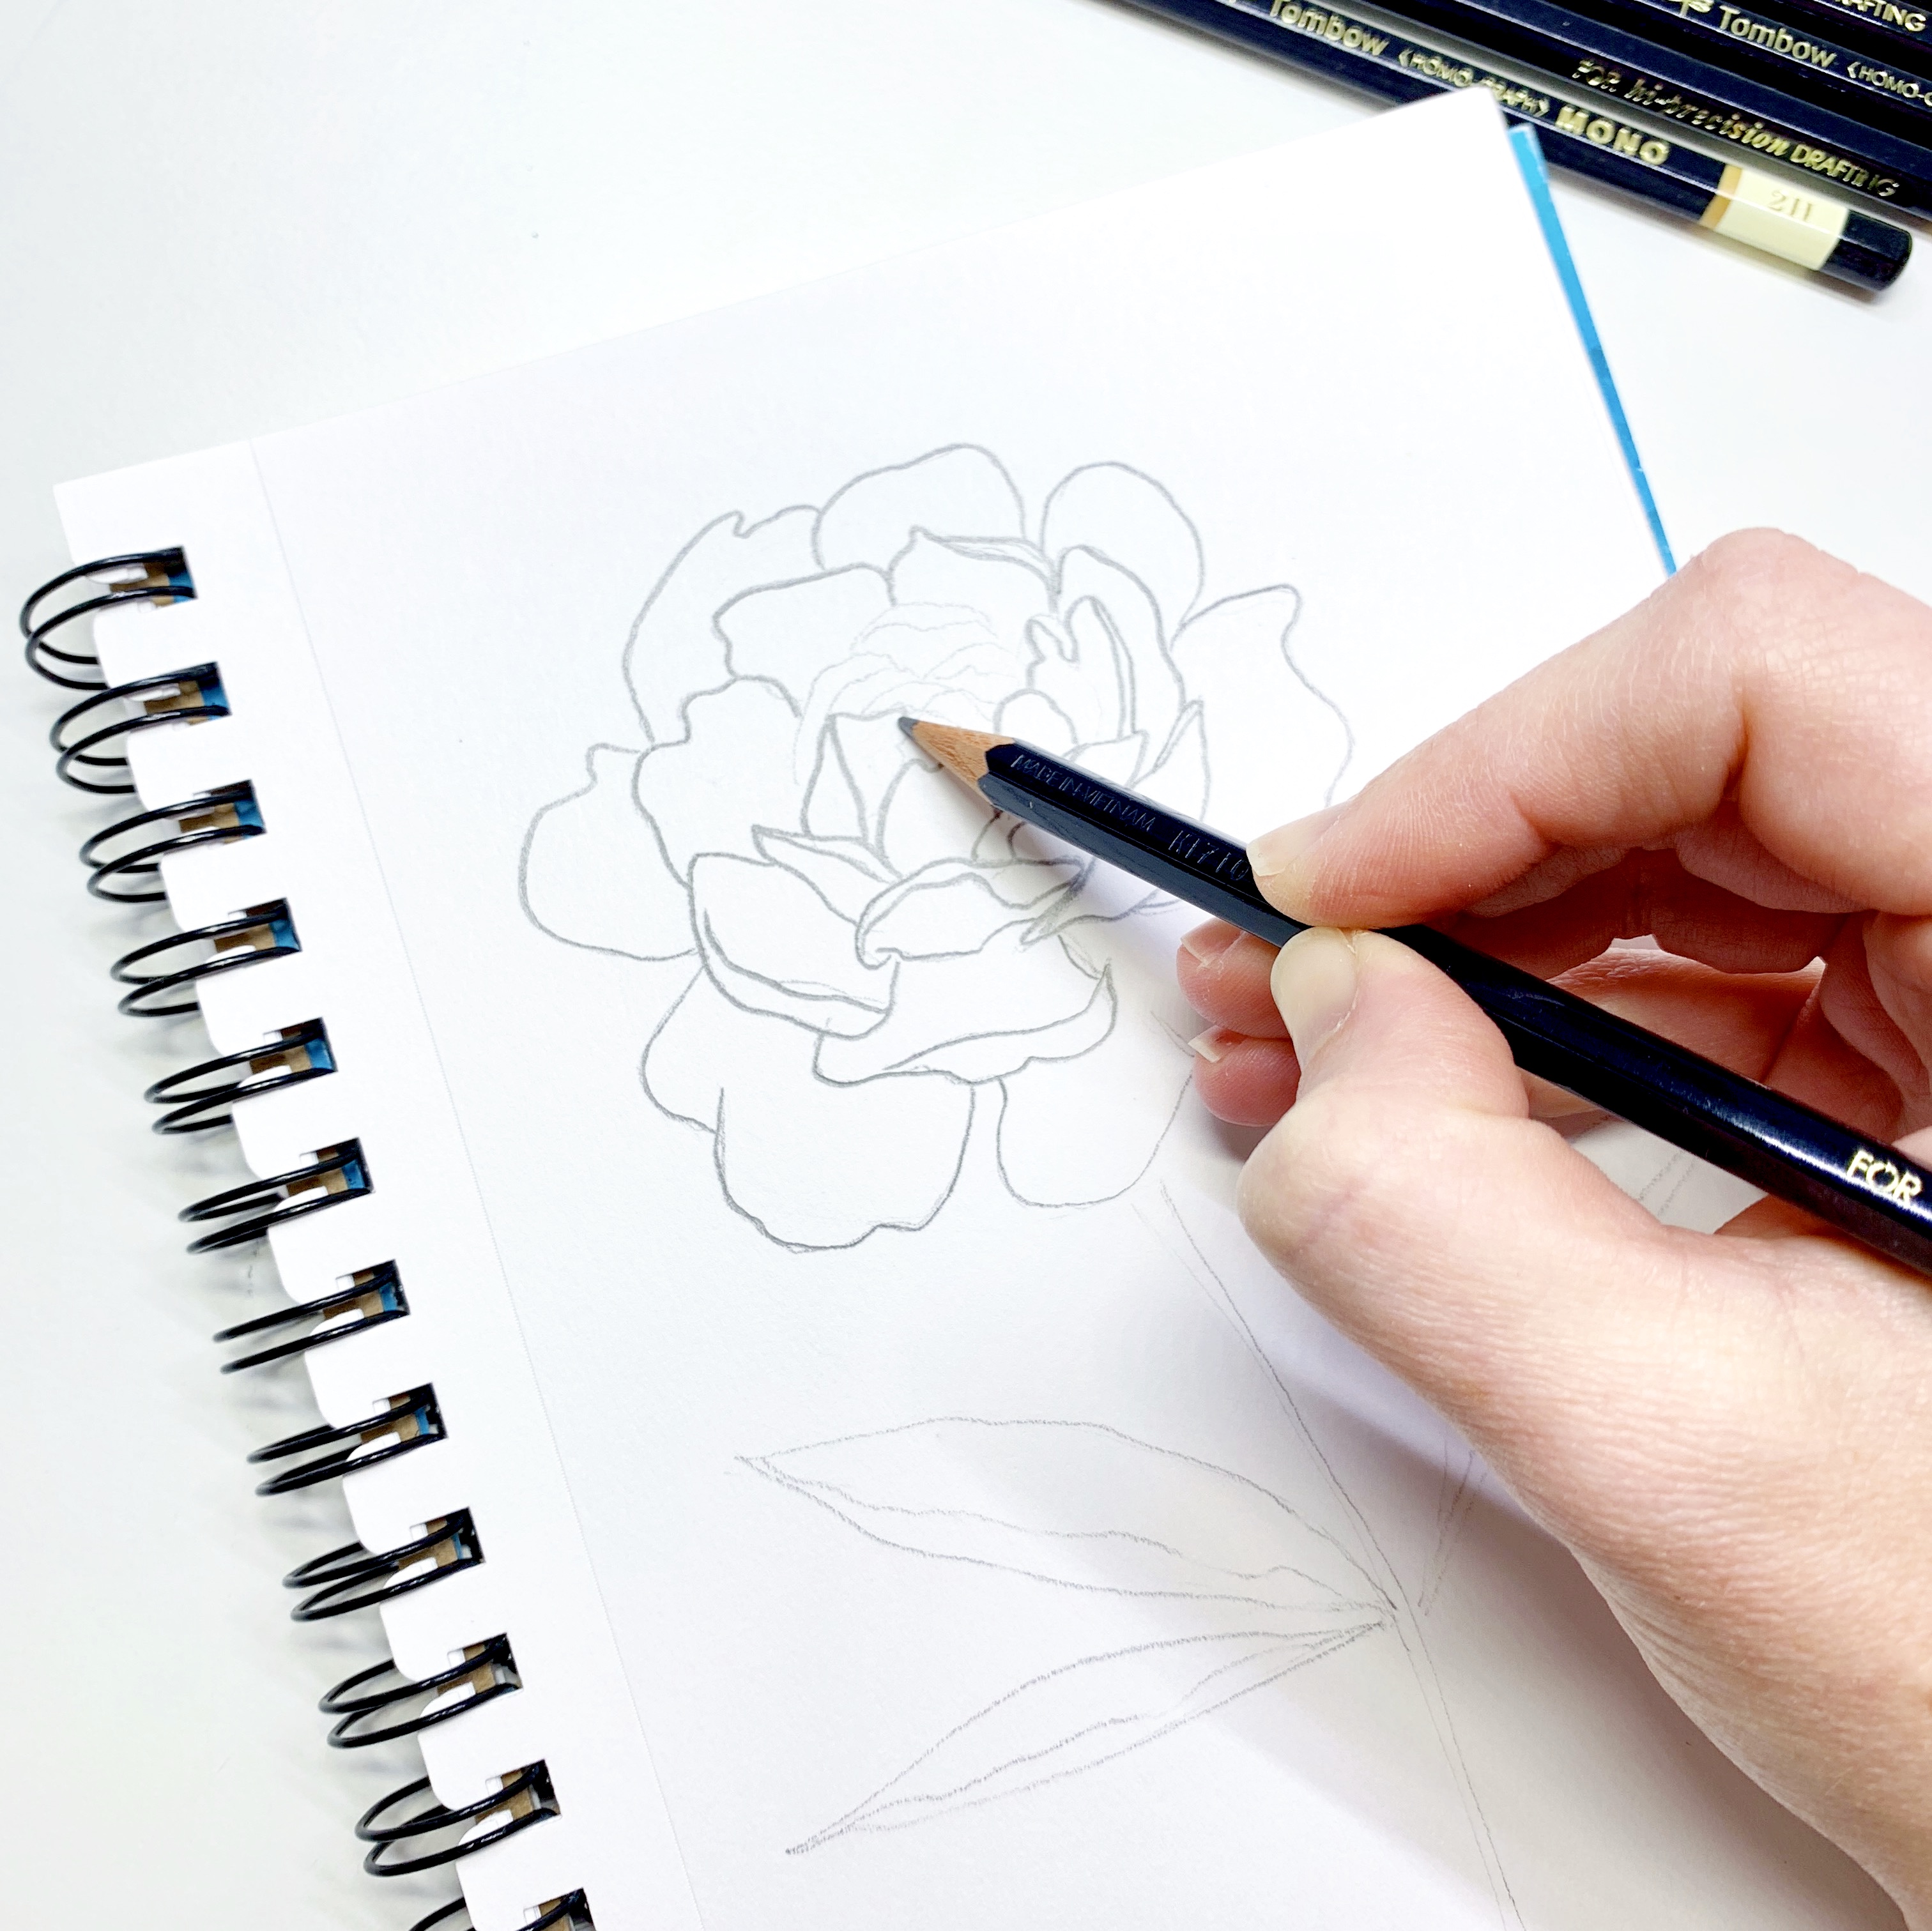
Step 1
To draw this peony, we’re going to use all six pencils in the MONO Drawing Pencil Set. Grab the 2H pencil and lightly draw the rough shapes of the flower (including the shape of the flower, center, stem, and leaves). The 2H is the lightest grade pencil in the set, so it will give you the lightest lines.
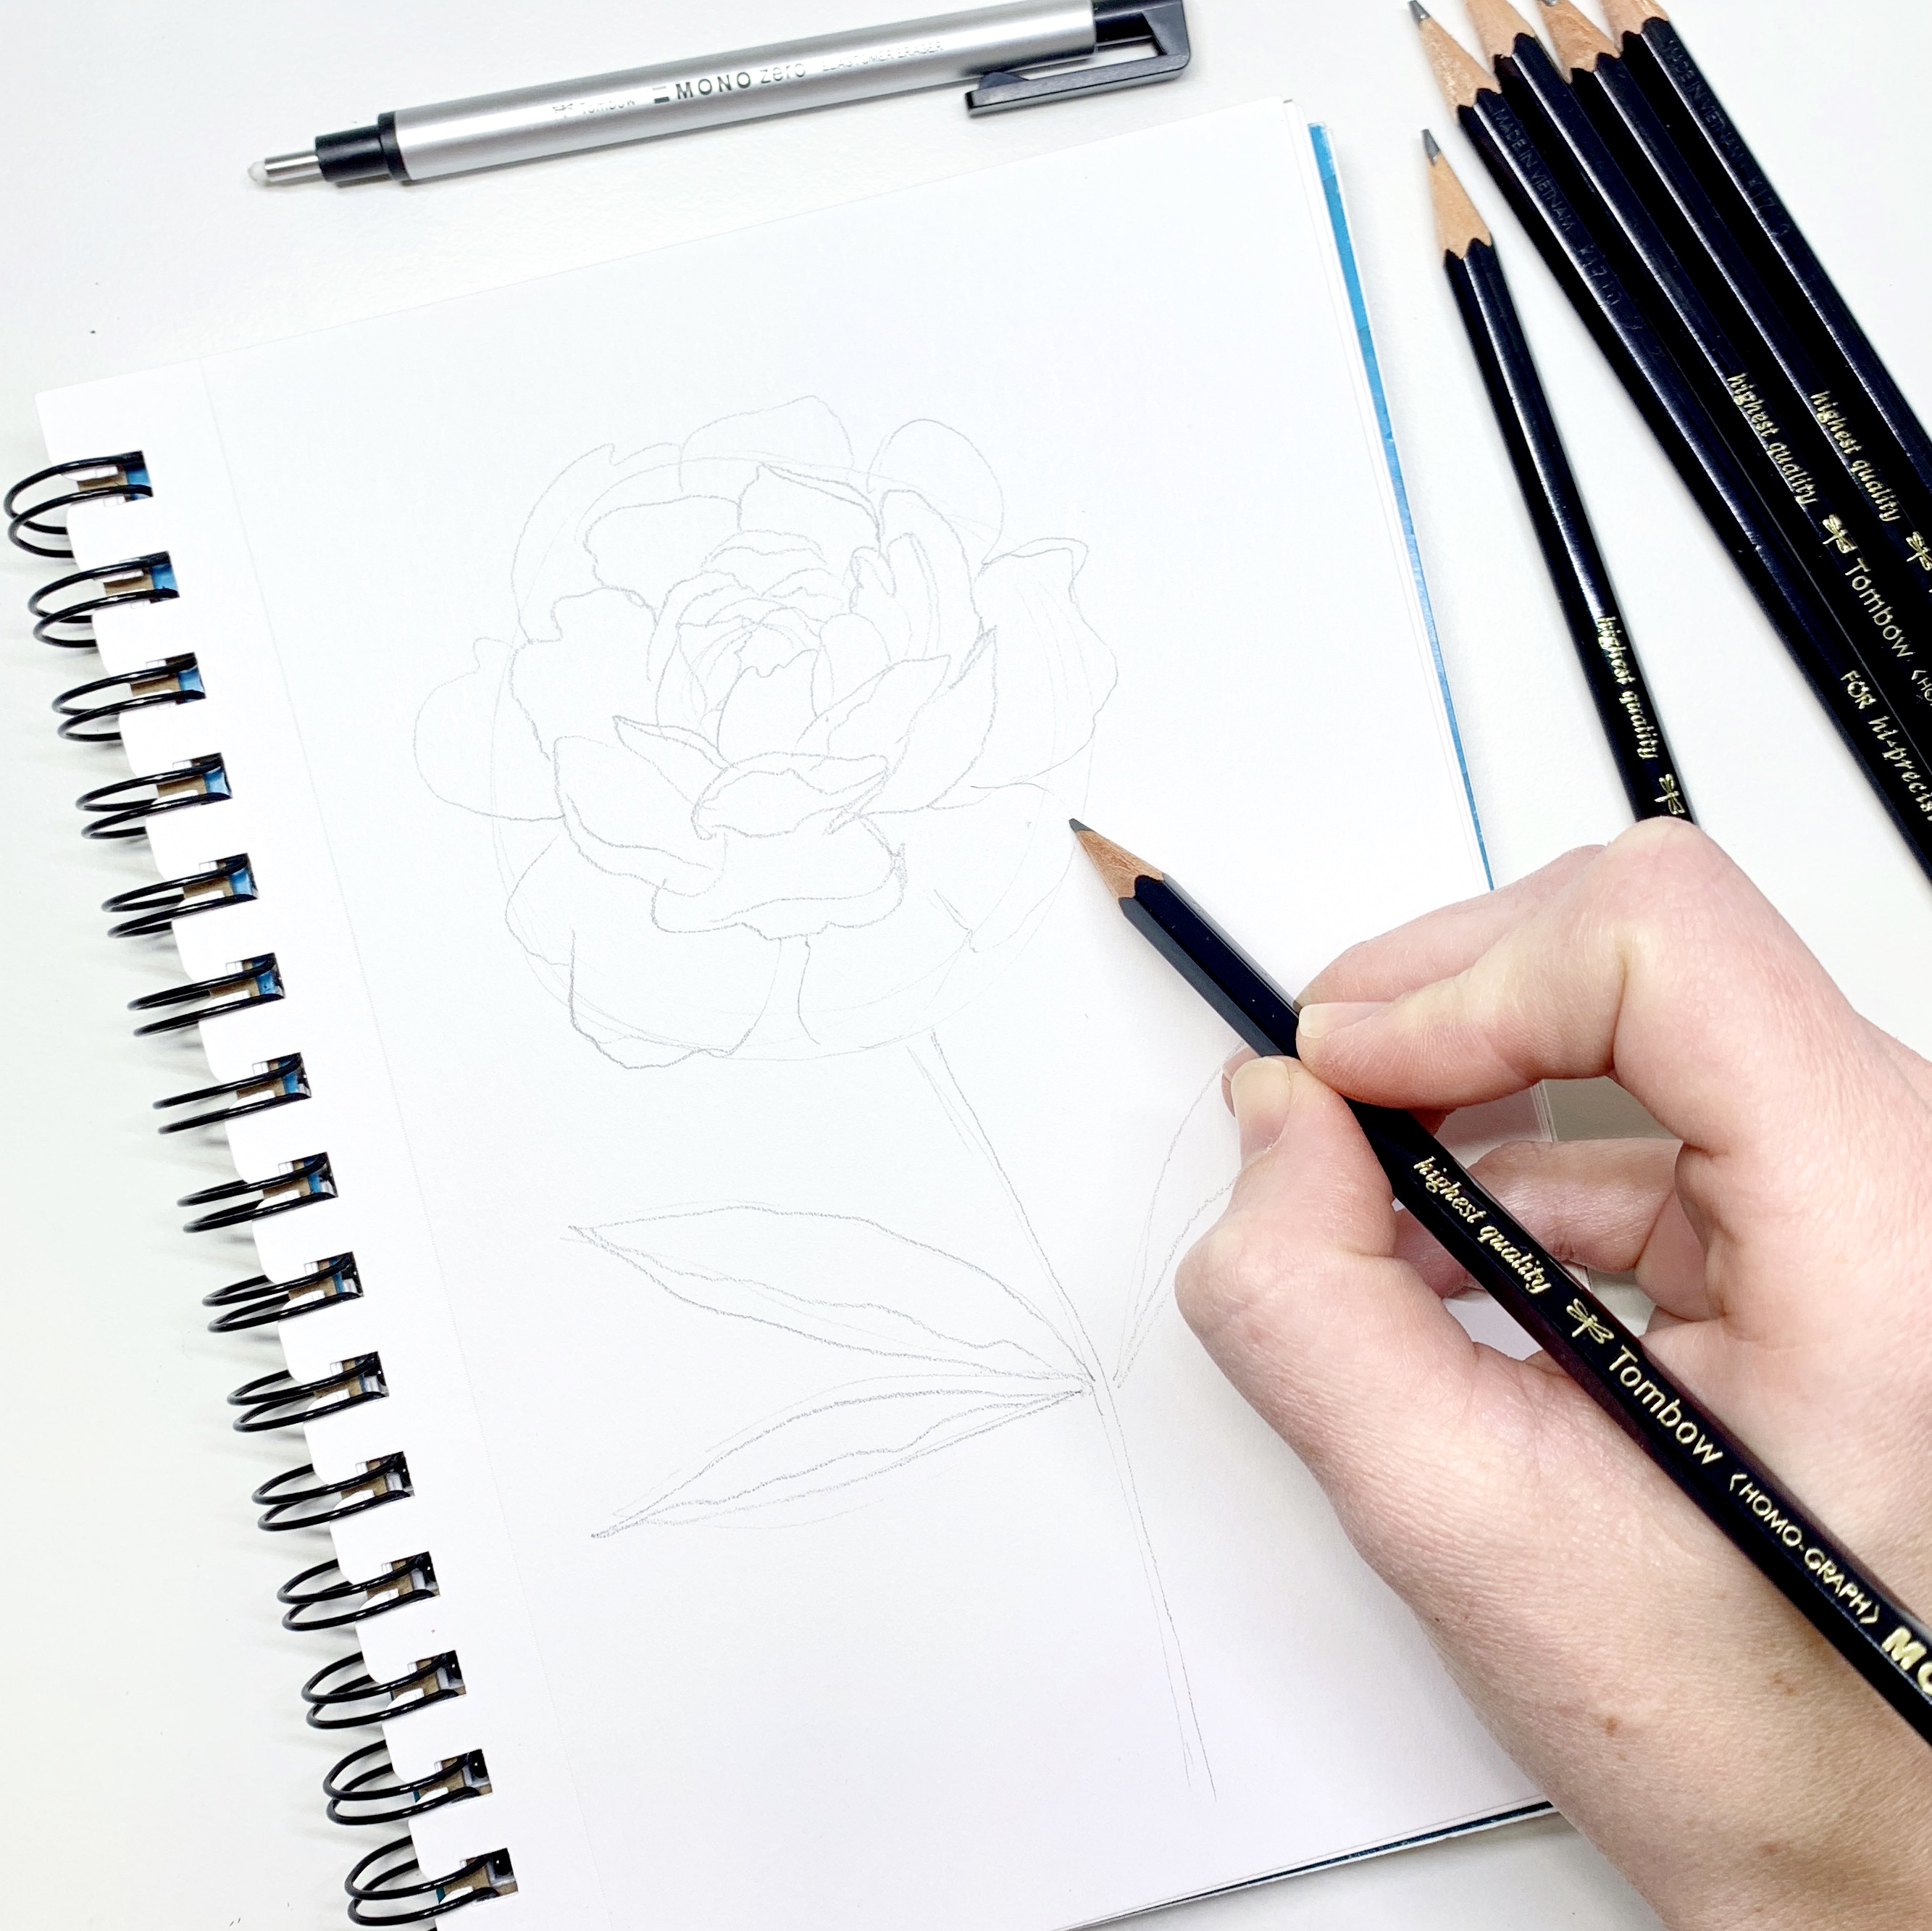
Step 2
The HB grade pencil is the next shade in the pencil set, so you’ll get slightly darker lines with this pencil. Use the HB pencil to draw the individual petals in the peony flower. Just like no two petals on a flower are the same, try to draw each petal differently on the flower! This will make it look more real!
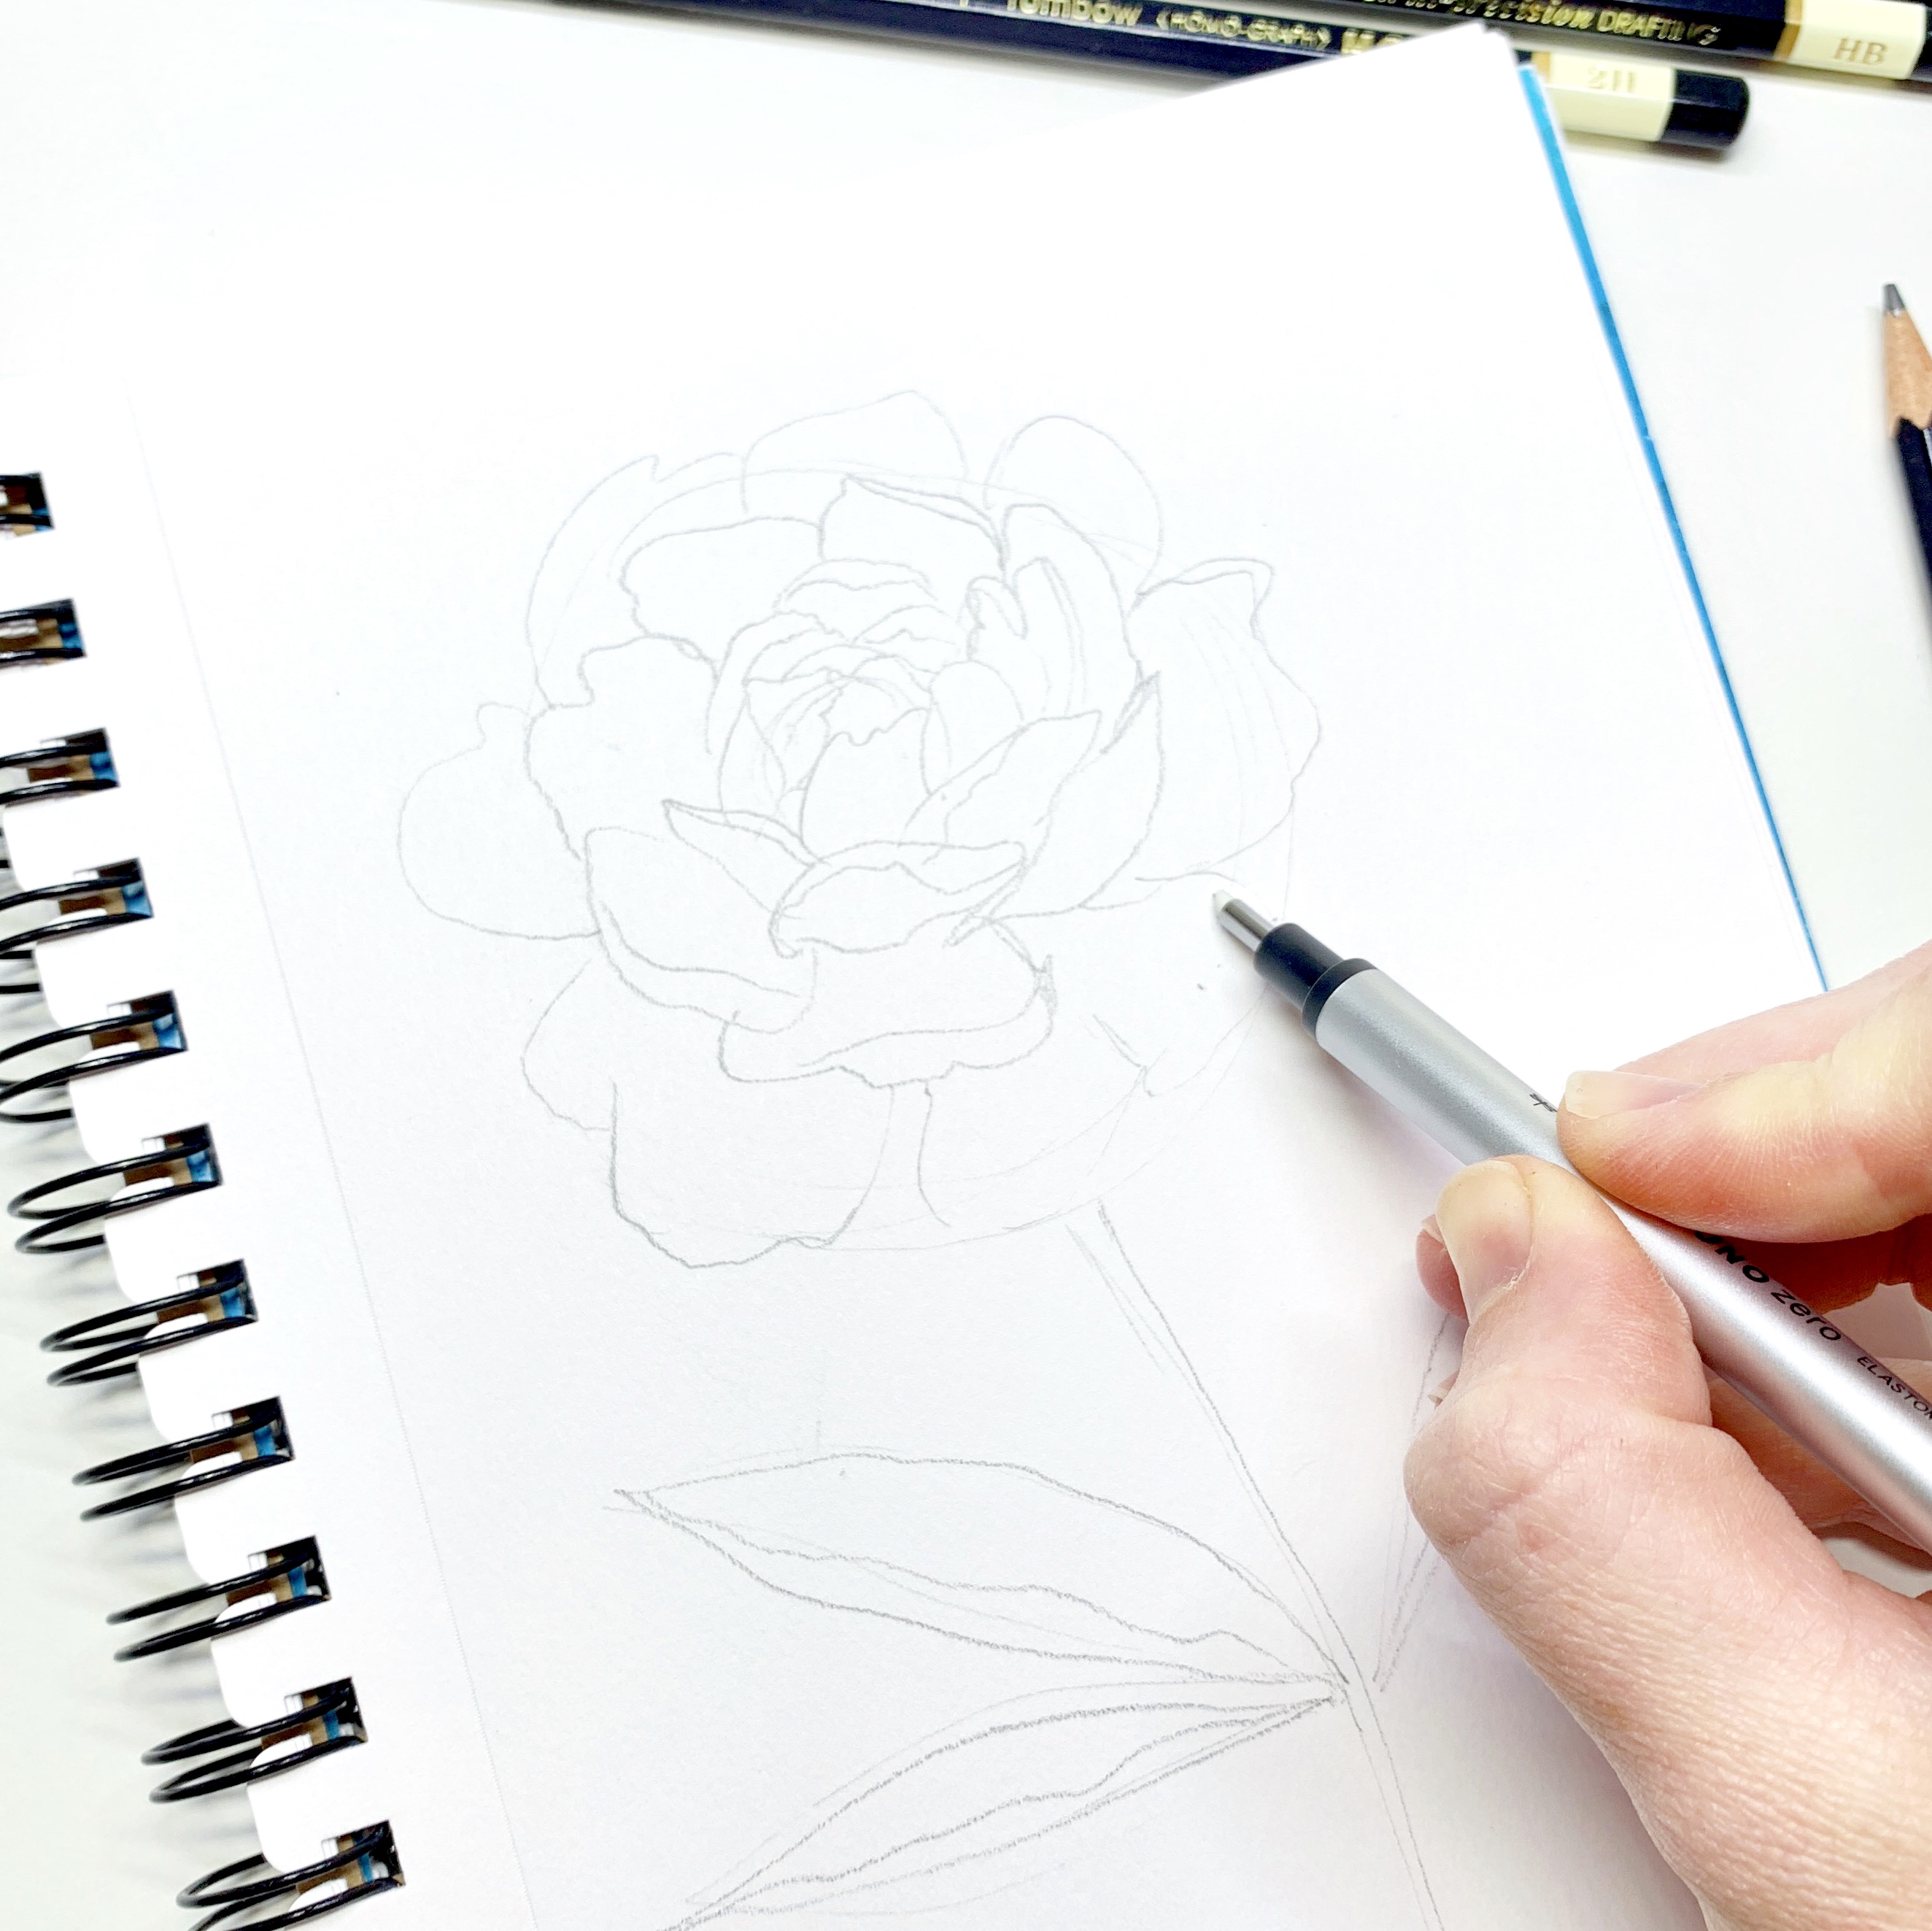
Step 3
The next step is to use the Tombow MONO Zero Eraser to erase the lines we made with the previous pencil. I love that the MONO Zero Eraser is included in the MONO Drawing Pencil Set, Combo Pack! It has a small tip, so you’re able to use it for finer details in your projects!
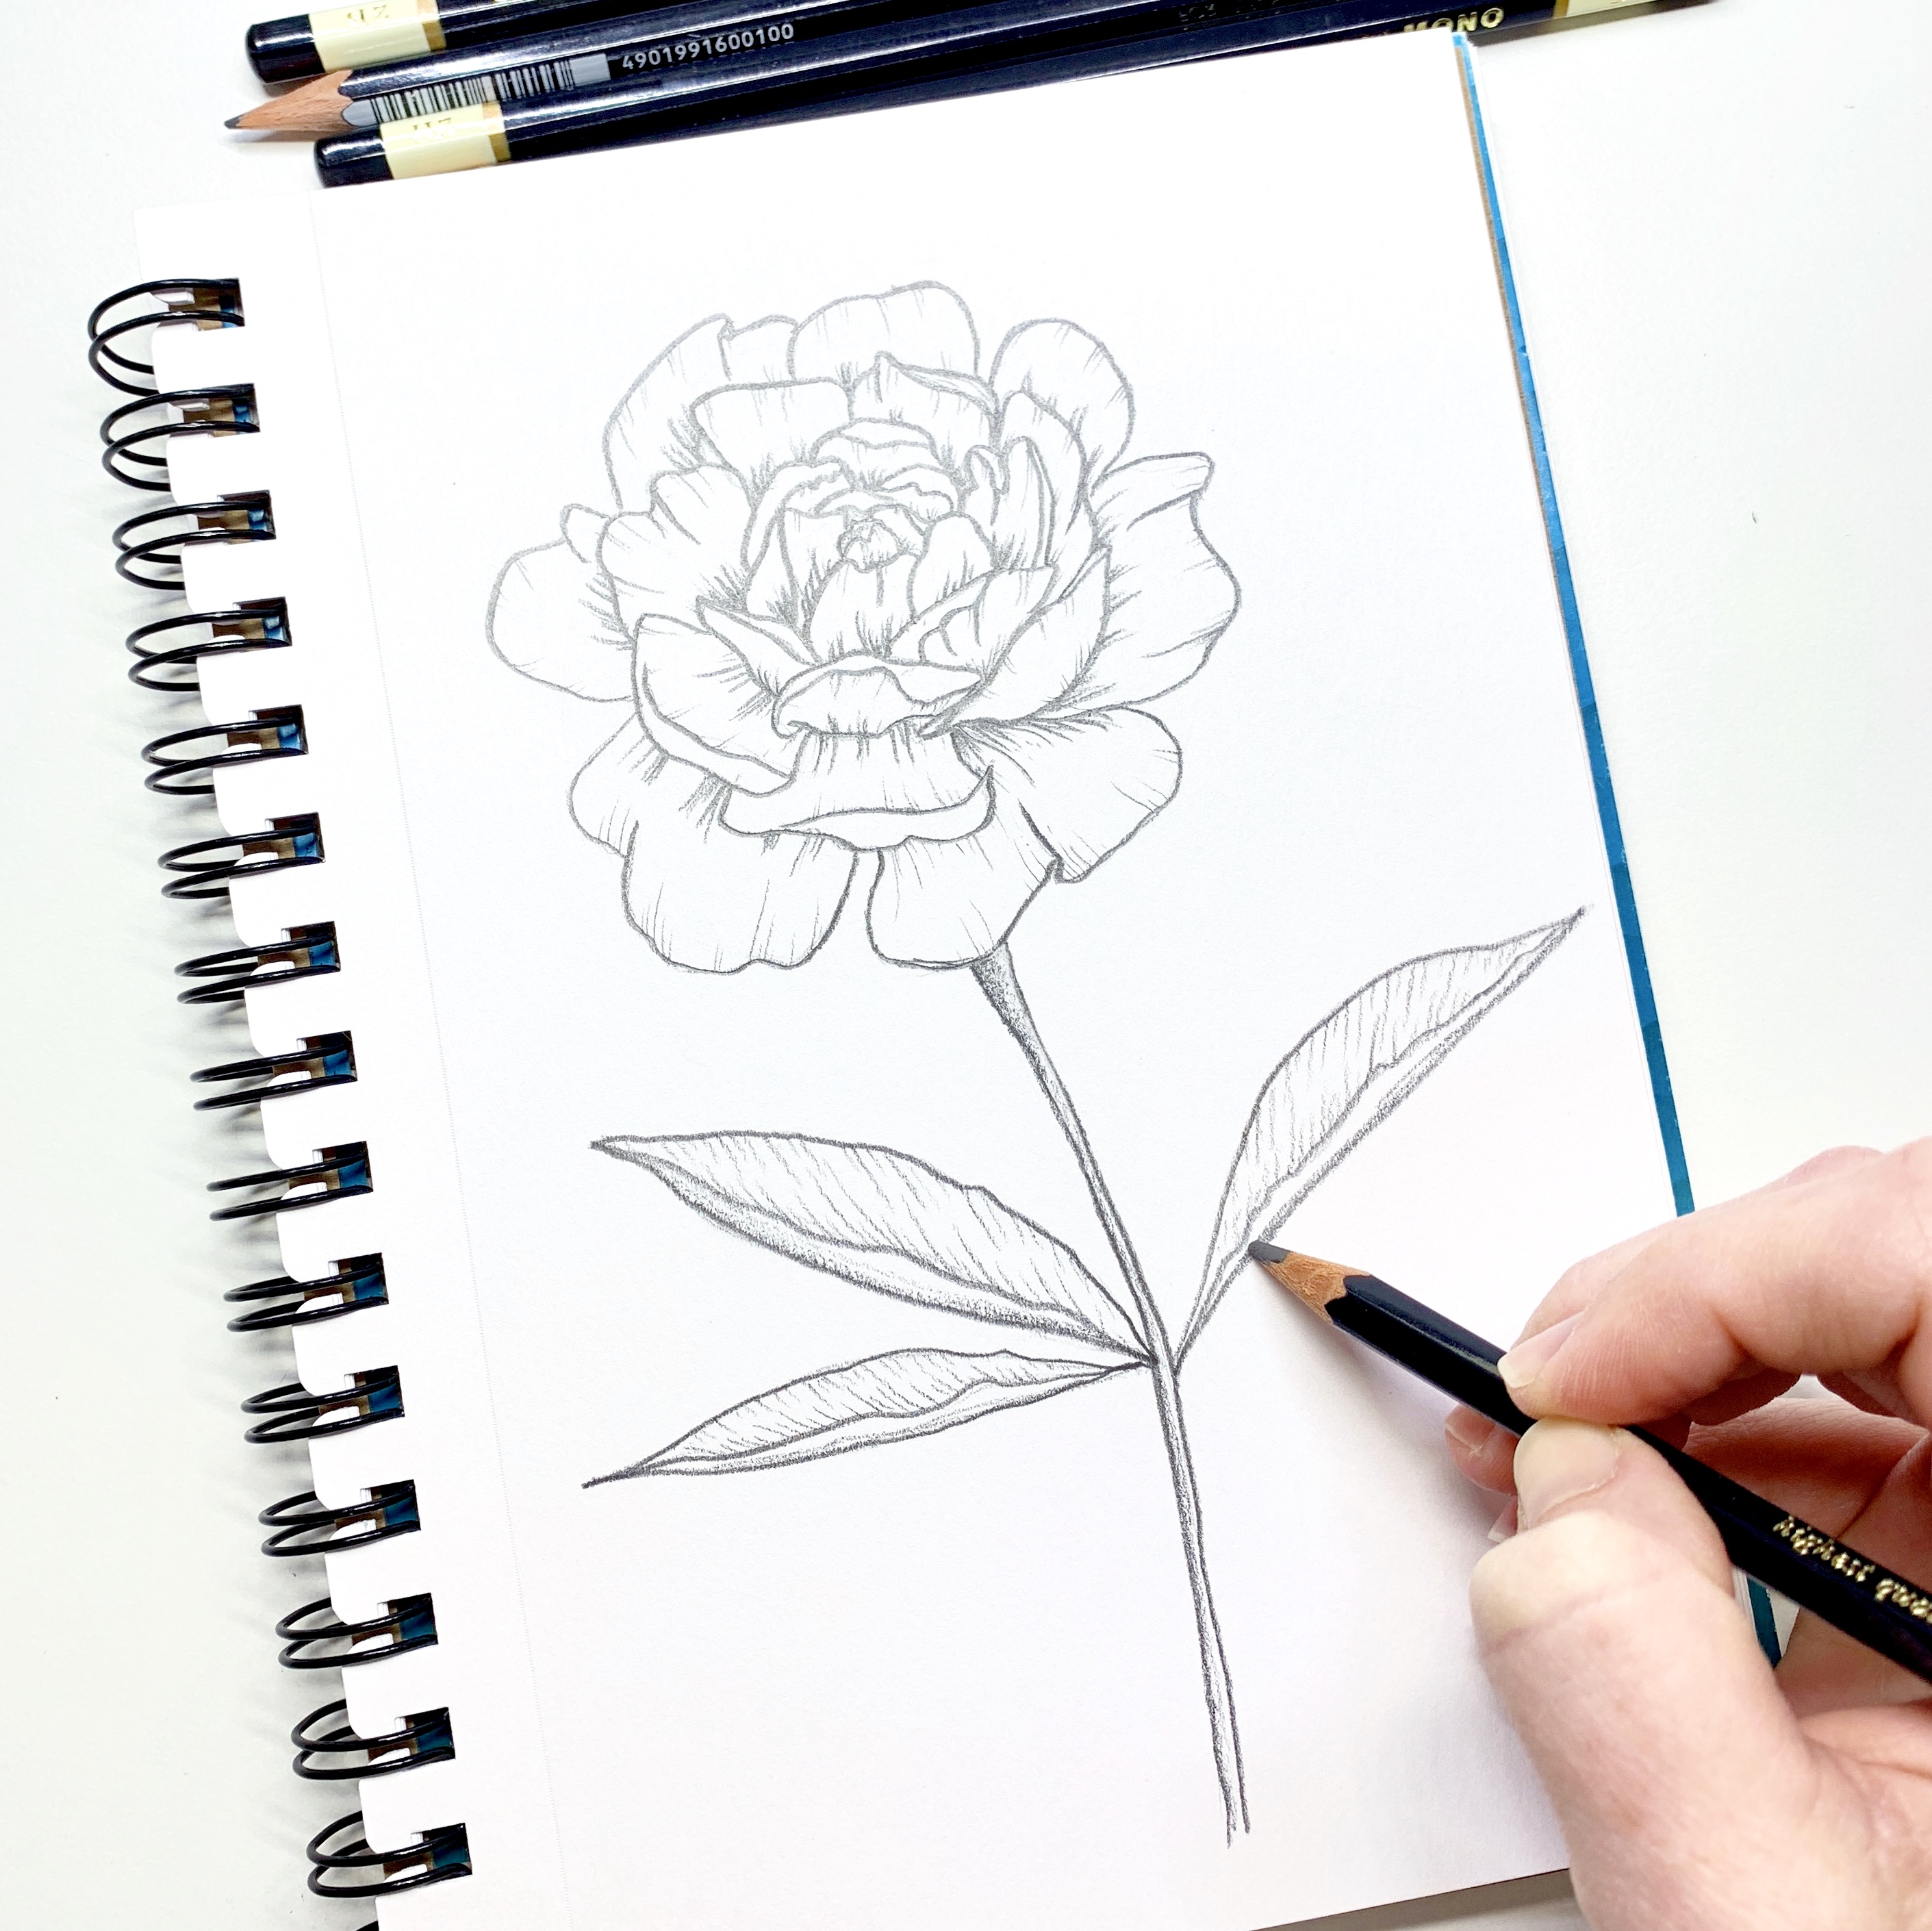
Step 4
Now we’re going to use the B pencil to darken the petals and leaves on the peony. This will define the shapes a little better!
Step 5
It’s time to start shading! The 2B and 4B pencils are soft and great for shading! The key to shading a flower is to darken the center of the flower. The farther away the petals are from the center, the lighter they will be. All the shading lines should point to the same vanishing point, in this case the center of the peony flower. Vary the length of the shading lines to look more natural, and don’t be afraid to add lines to the tops of the petals to show the movement and folds.
Step 6
The next step is to blend! A blending tortillion is great for this type of small detail work. You can find it online or at a local craft store for pretty cheap! I like to slightly blend out the shading lines in order to add dimension and make the lines a little softer.
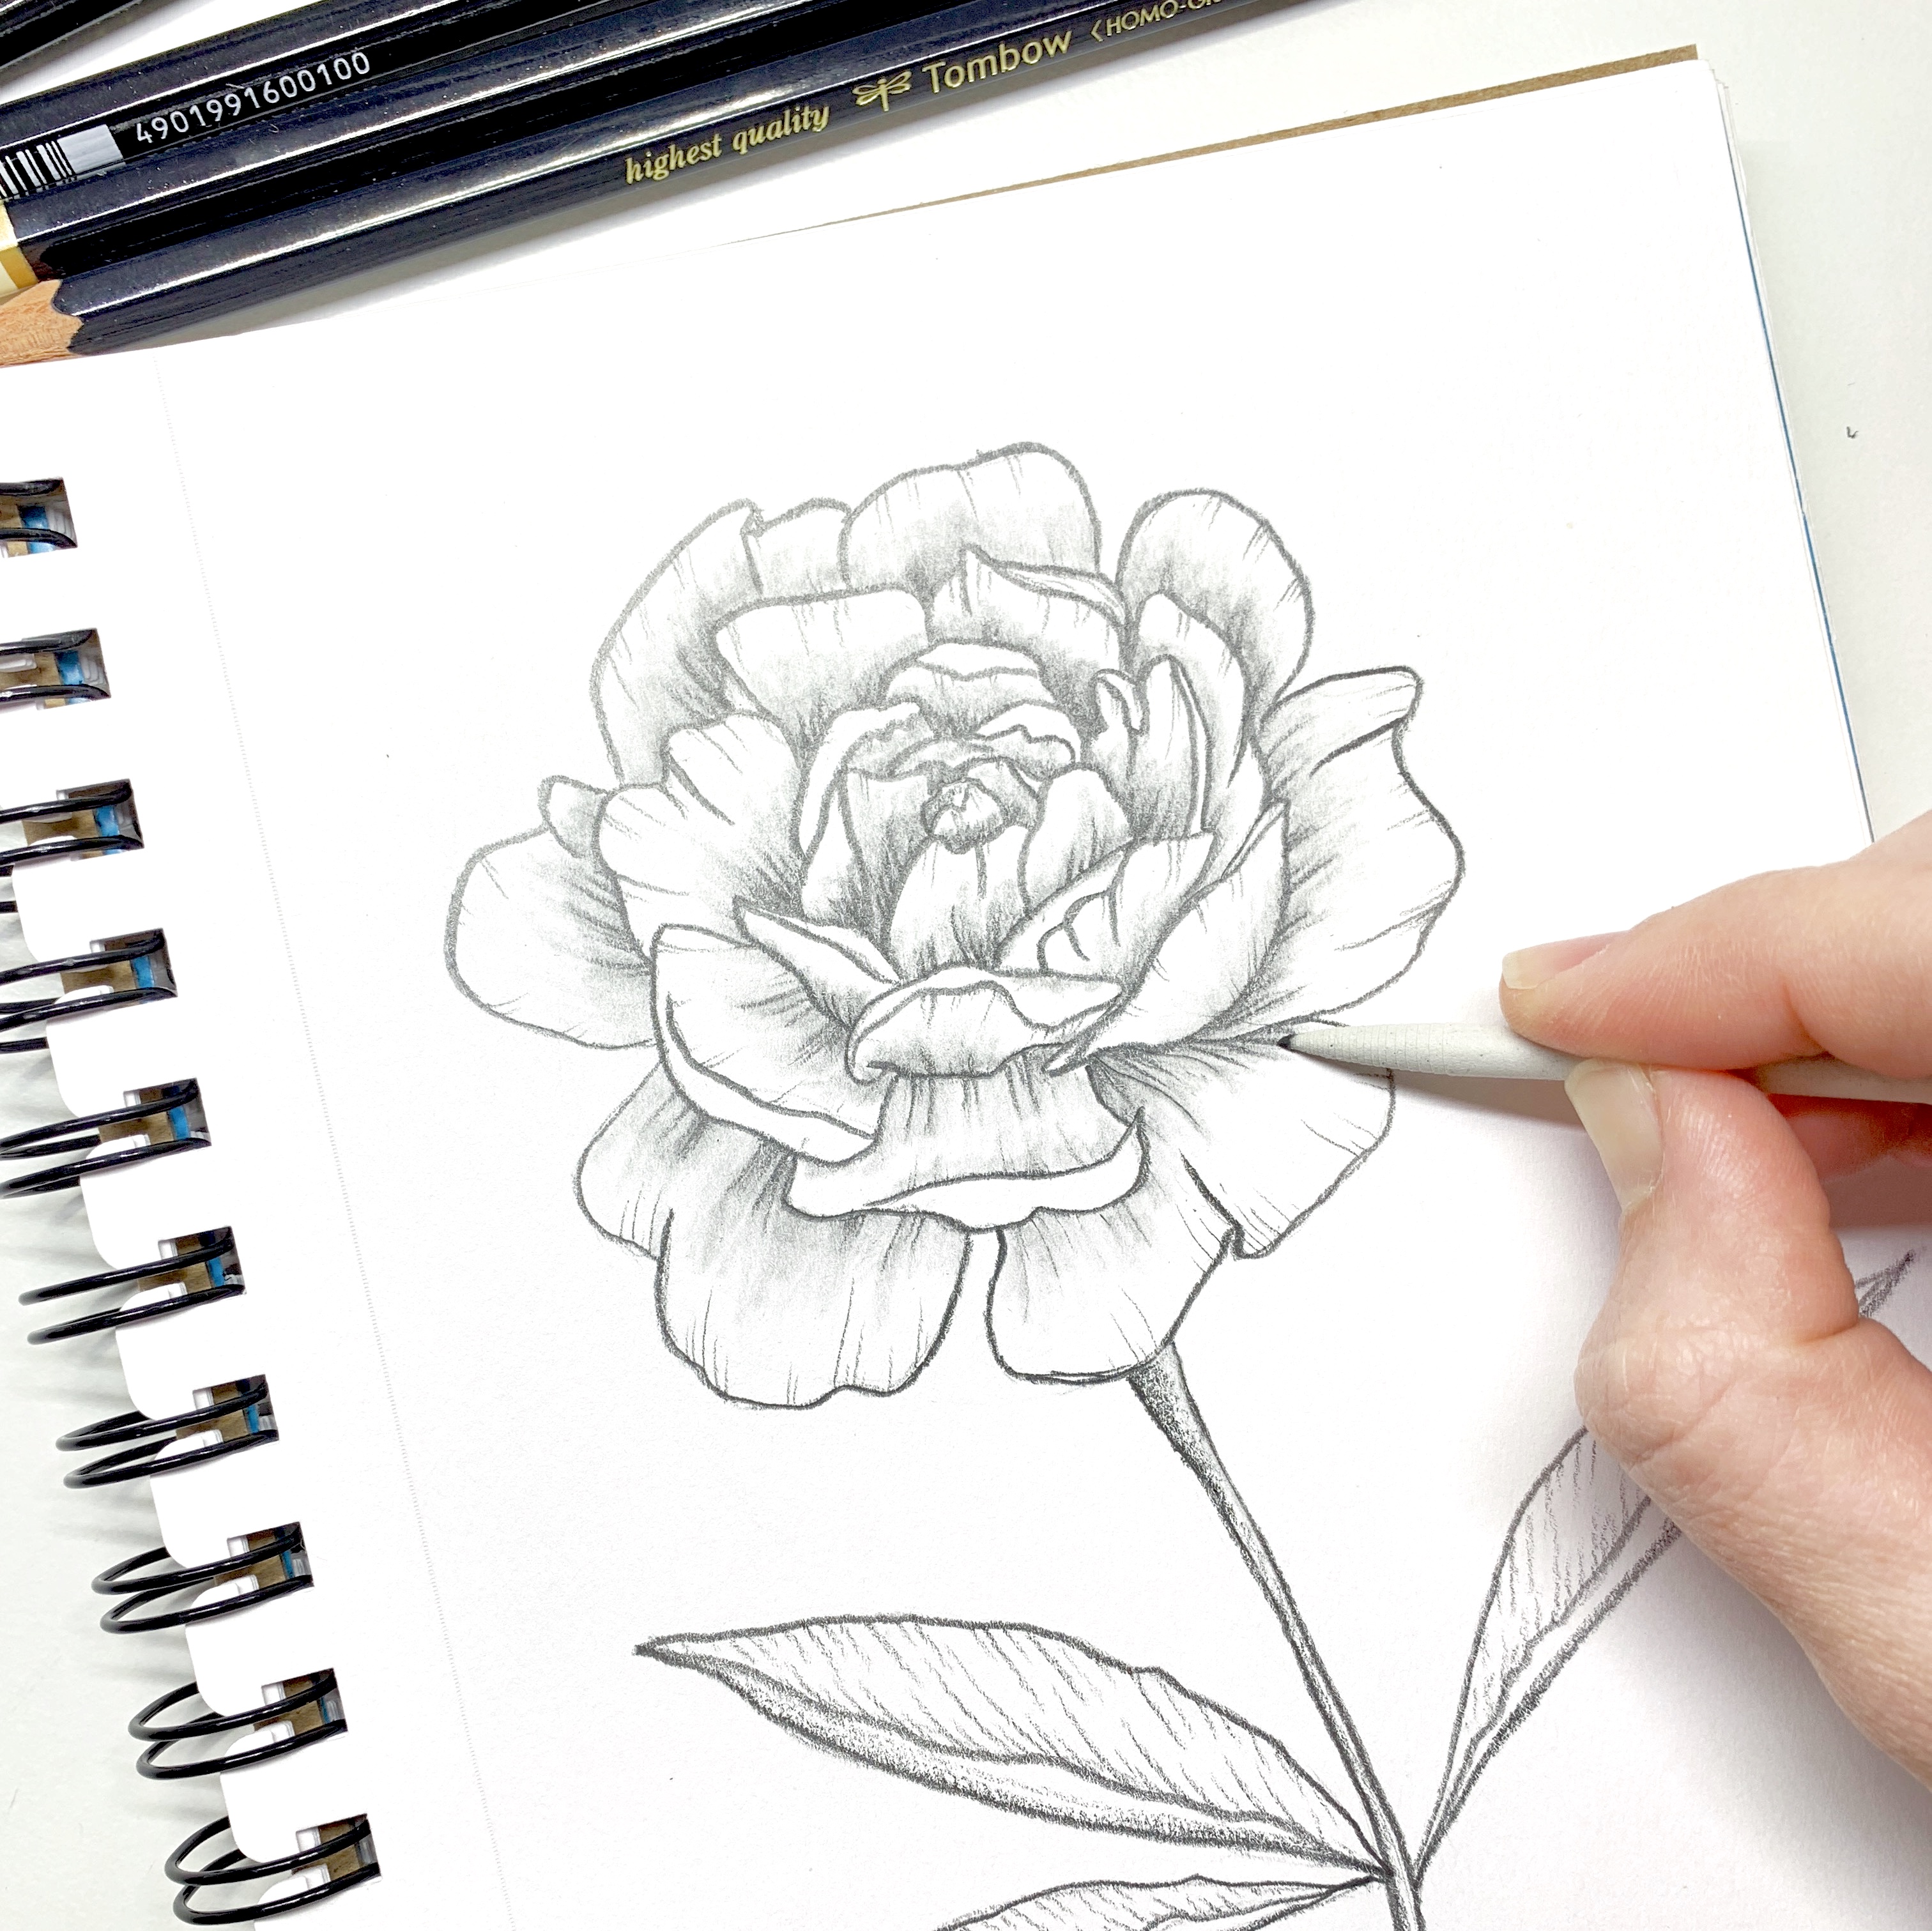
Step 7
After blending out the lines and shading, I like to go back in one more time with the 6B grade pencil. I darken a few lines again. The 6B grade pencil has the softest lead in the set, so you can get some really great dark lines from this pencil! Don’t tell the other pencils, but the 6B is my favorite pencil in the set!

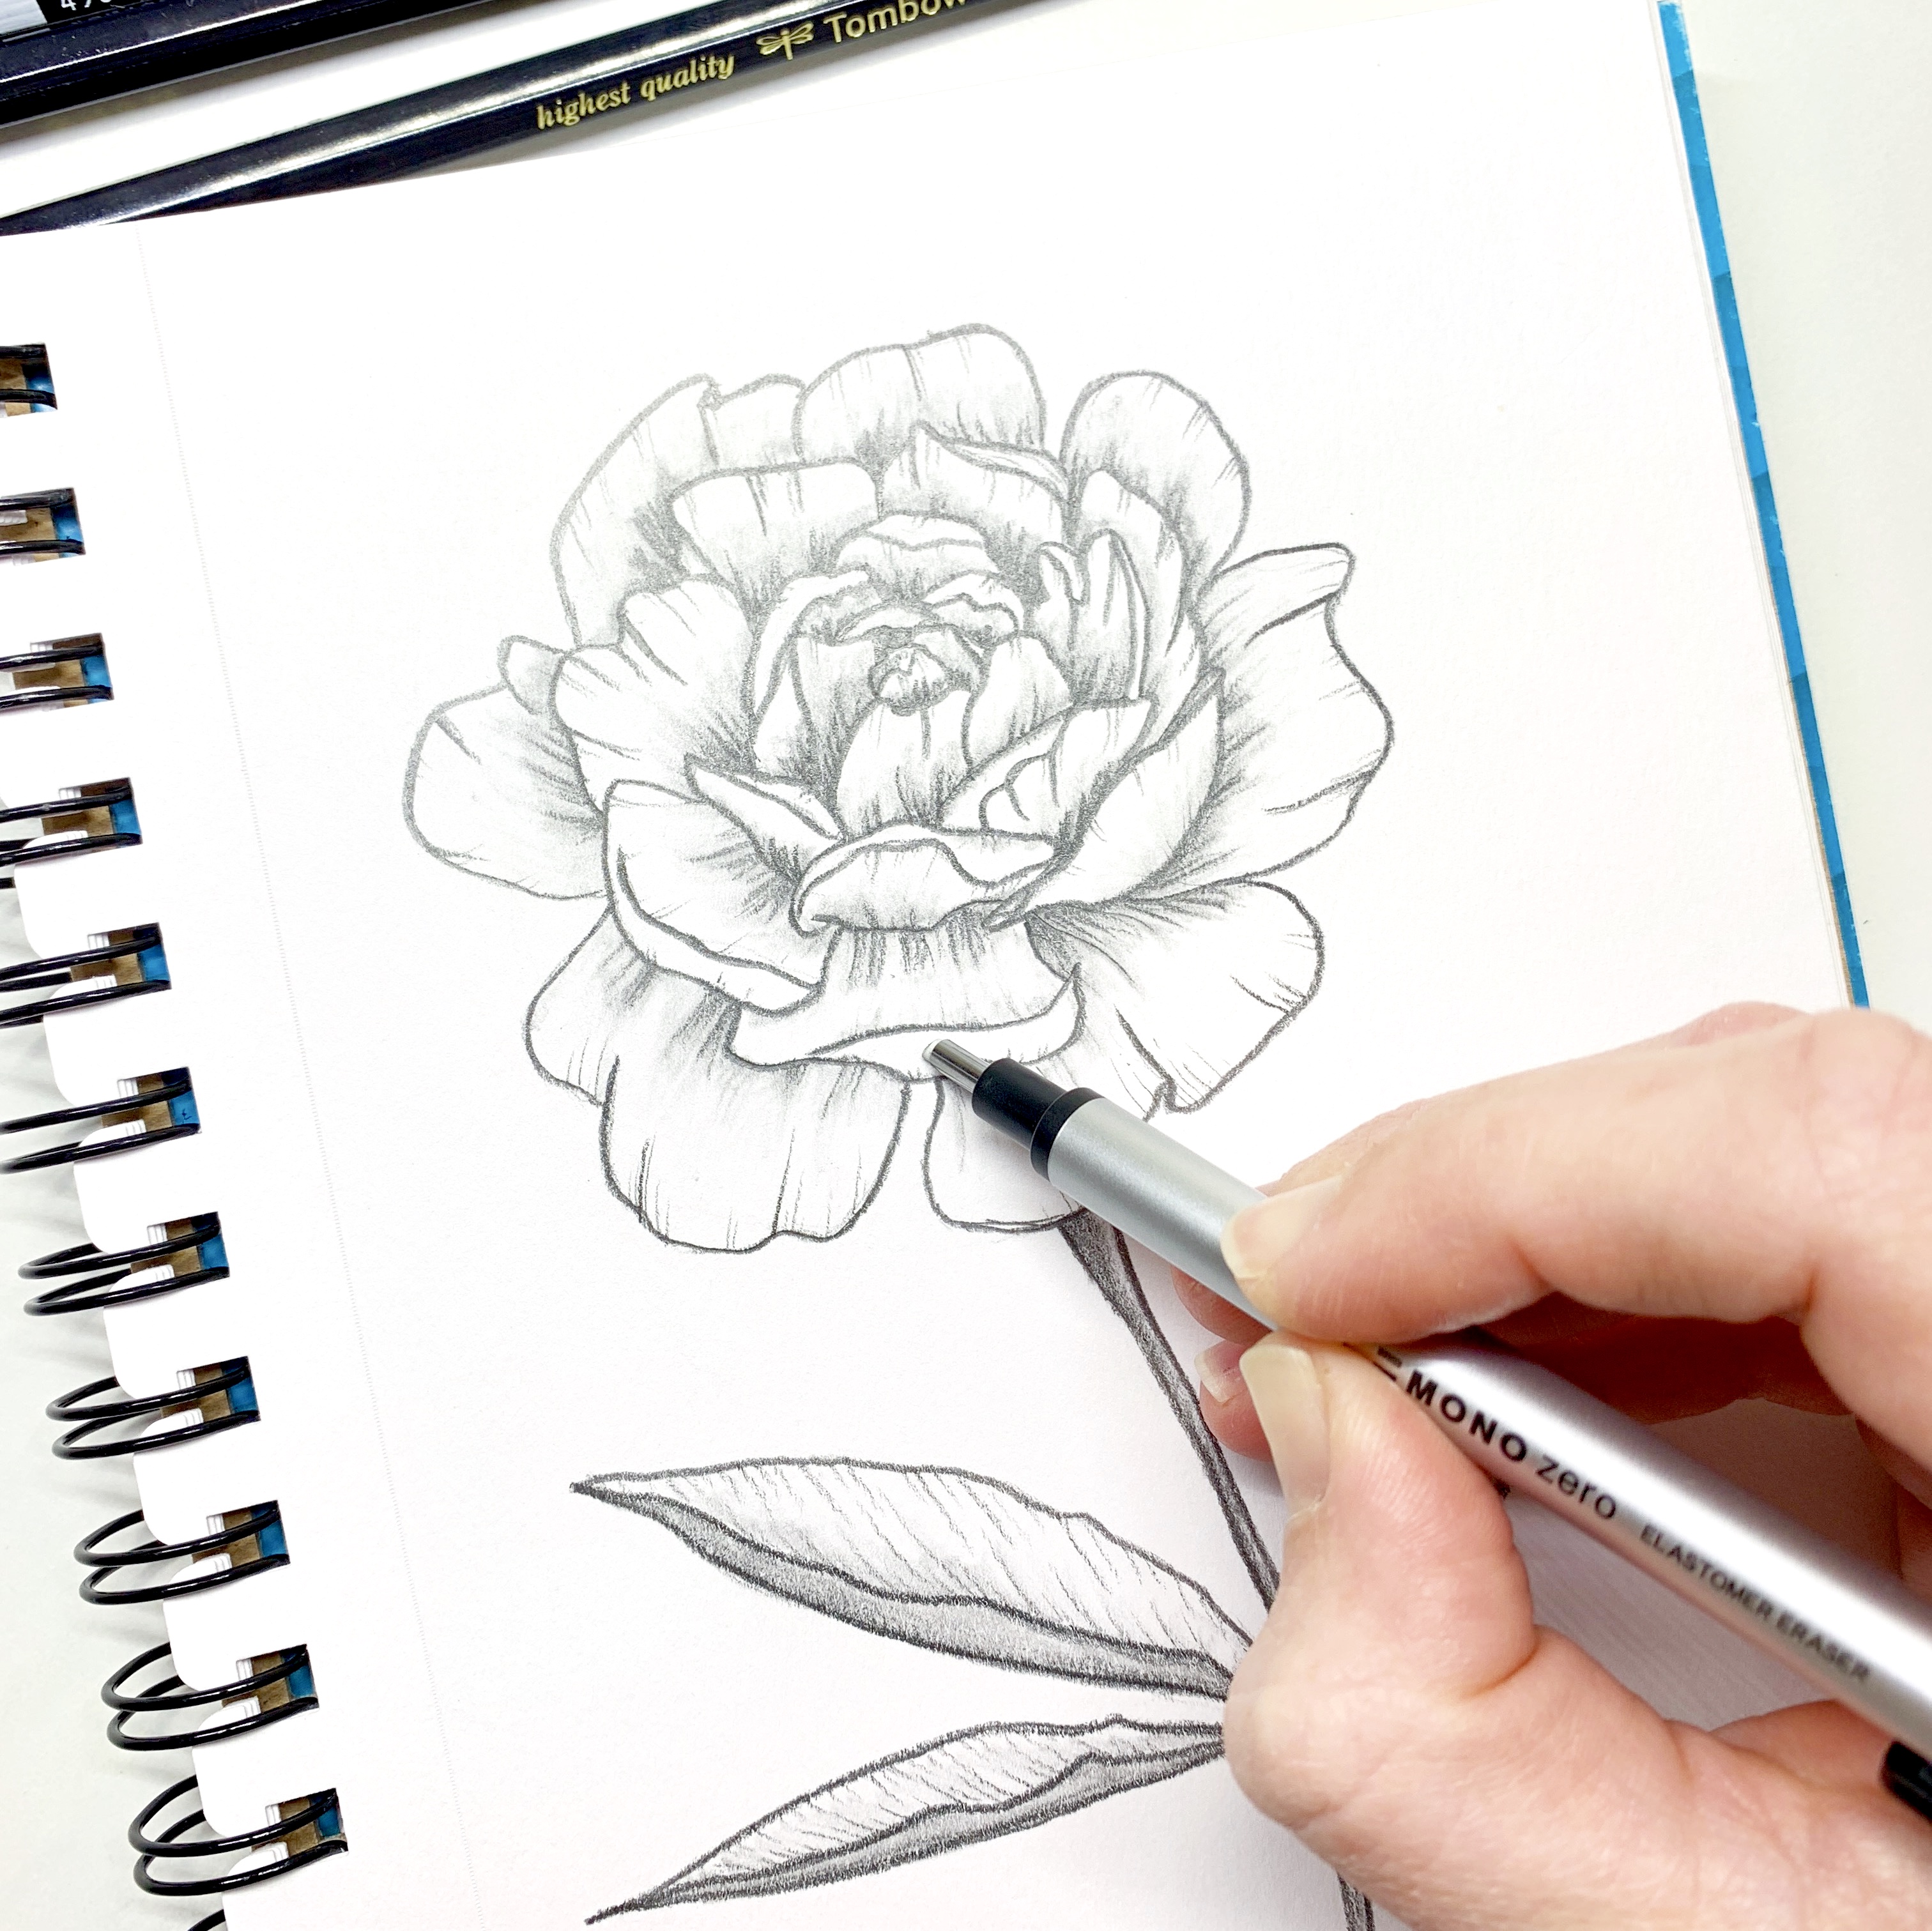
Step 8
After all the shading and blending, smudging can occur. The last step is to go back in with the Tombow MONO Zero Eraser and erase any areas that have accidentally been darkened. You can also lighten up shading that may have gotten a little dark!
That’s it! The trick to drawing florals with pencils is to layer, blend, and add shading a little at a time! I hope you found this peony flower drawing tutorial helpful! If you want to see more inspiration like this, make sure to follow me @studio80design!
For more tutorials with pencils make sure to check out these posts:
- Make A Housewarming Card Using MONO Drawing Pencils
- Moon Drawing Using Tombow MONO Drawing Pencils
- MONO Drawing Pencil Set Basics
Pingback: Create a Floral Swatch Pattern for Tombow's TwinTone Markers - Tombow USA Blog
Pingback: Create Flamingo Emoji Art With Dual Brush Pens - Tombow USA Blog
Pingback: How to Make a Monochromatic Robot With the Tombow MONO Drawing Pencil Set - Tombow USA Blog
Pingback: Five Ways to Use MONO Drawing Pencils Beyond Drawing - Tombow USA Blog
Pingback: Mountain Tutorial Using the MONO Drawing Pencil Set - Tombow USA Blog