Hi Tombow friends! It’s Grace from Grace Anne Studio! You may not know it by looking at my portfolio, but I start every single composition with simple pencil and paper (even my iPad pieces)! Pencils are such an incredibly versatile tool, and pencil calligraphy is a wonderful way to build muscle memory and master the basics before moving on to brush calligraphy. Read on for three easy ways to master pencil calligraphy and build a great foundation for brush lettering!
Supplies
Step 1: Pencil Choice
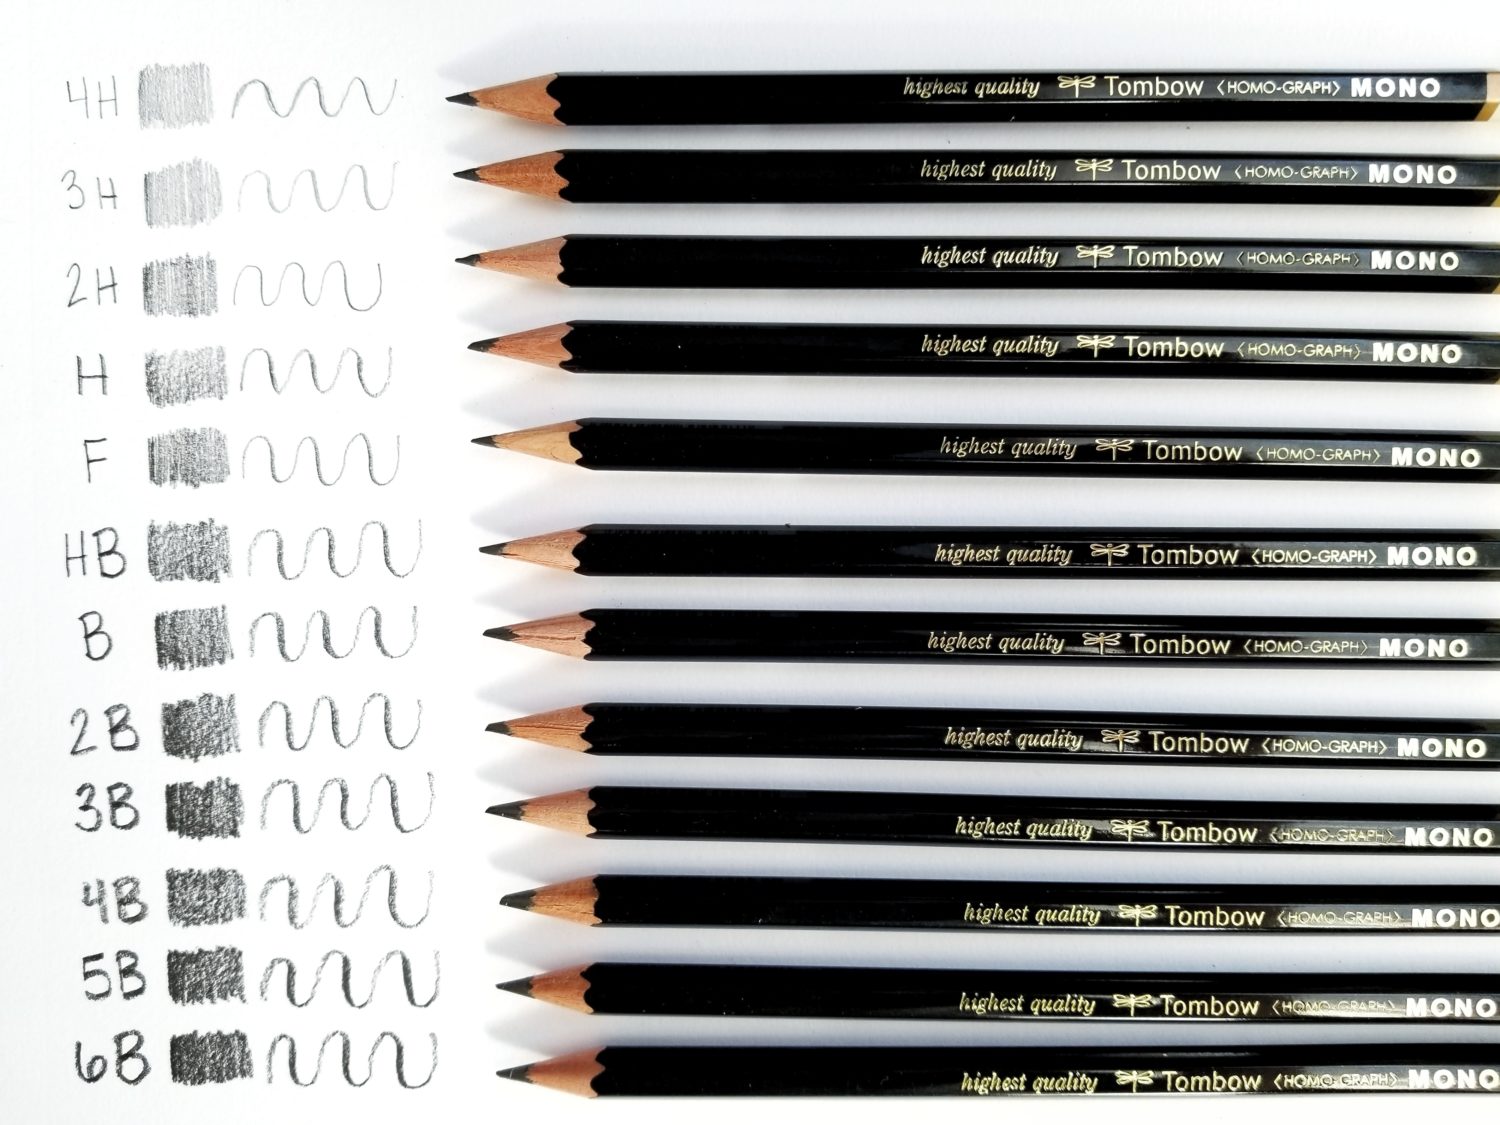
The first step to mastering pencil calligraphy is understanding your tool. The Tombow MONO Drawing Pencil Set comes in 12 degrees of hardness. The “degree” is noted as either H for harder, light lead or B for softer, dark lead. There are also numbers associated with most degrees. The higher the number, the more extreme the associated degree. For example, 4H is harder and lighter than 2H and 4B is softer and darker than 2B.
Each pencil degree has a purpose. For sketching compositions, I like to use the H degree pencils. The F degree pencil allows you to create fine and dark details. I love any pencils from the 2B – 4B range (my favorite is a 3B)! You still get nice variation between thicks and thins, but the lead isn’t so soft that you need to constantly sharpen your pencil. As always, I suggest you test out each pencil and choose the degree that you feel most comfortable with.
Step 2: Pressure
Once you have found the perfect degree of hardness, the next step is to practice writing letters with various pressure. The pencil is the perfect tool for this because you only have to worry about how and when you apply pressure while writing. Pen position is not a major focus here.
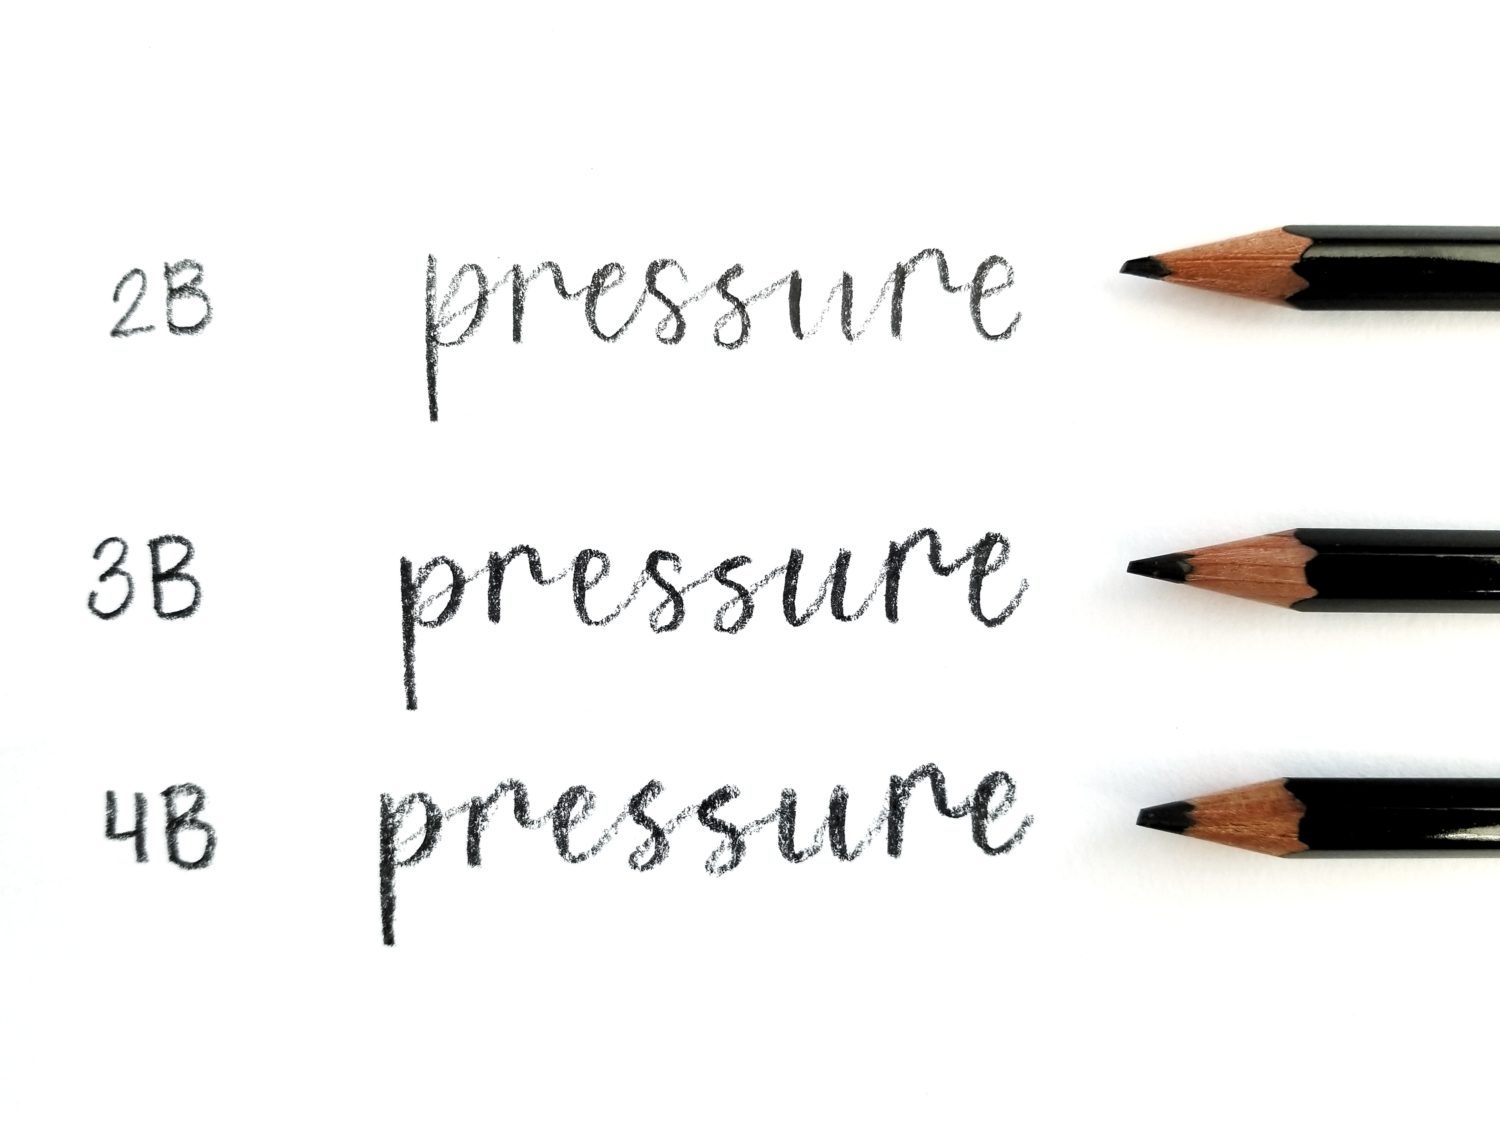
One trick to achieving thick downstrokes and thin upstrokes is to wear down the sharp tip a bit. If you look at the image below, you can see each pencil is worn down at an angle. This allows for more exaggerated downstrokes and really makes pencil calligraphy beautiful. This can easily be done by going through some warm up drills or writing a few words.
To master pressure in pencil calligraphy, apply more pressure while drawing your downstrokes and use light pressure when bringing your pencil up for your upstrokes. The more you practice this motion, the more natural it will become. Building muscle memory with pencil calligraphy is a wonderful way to lay a good foundation for brush calligraphy.
Step 3: Flourishing
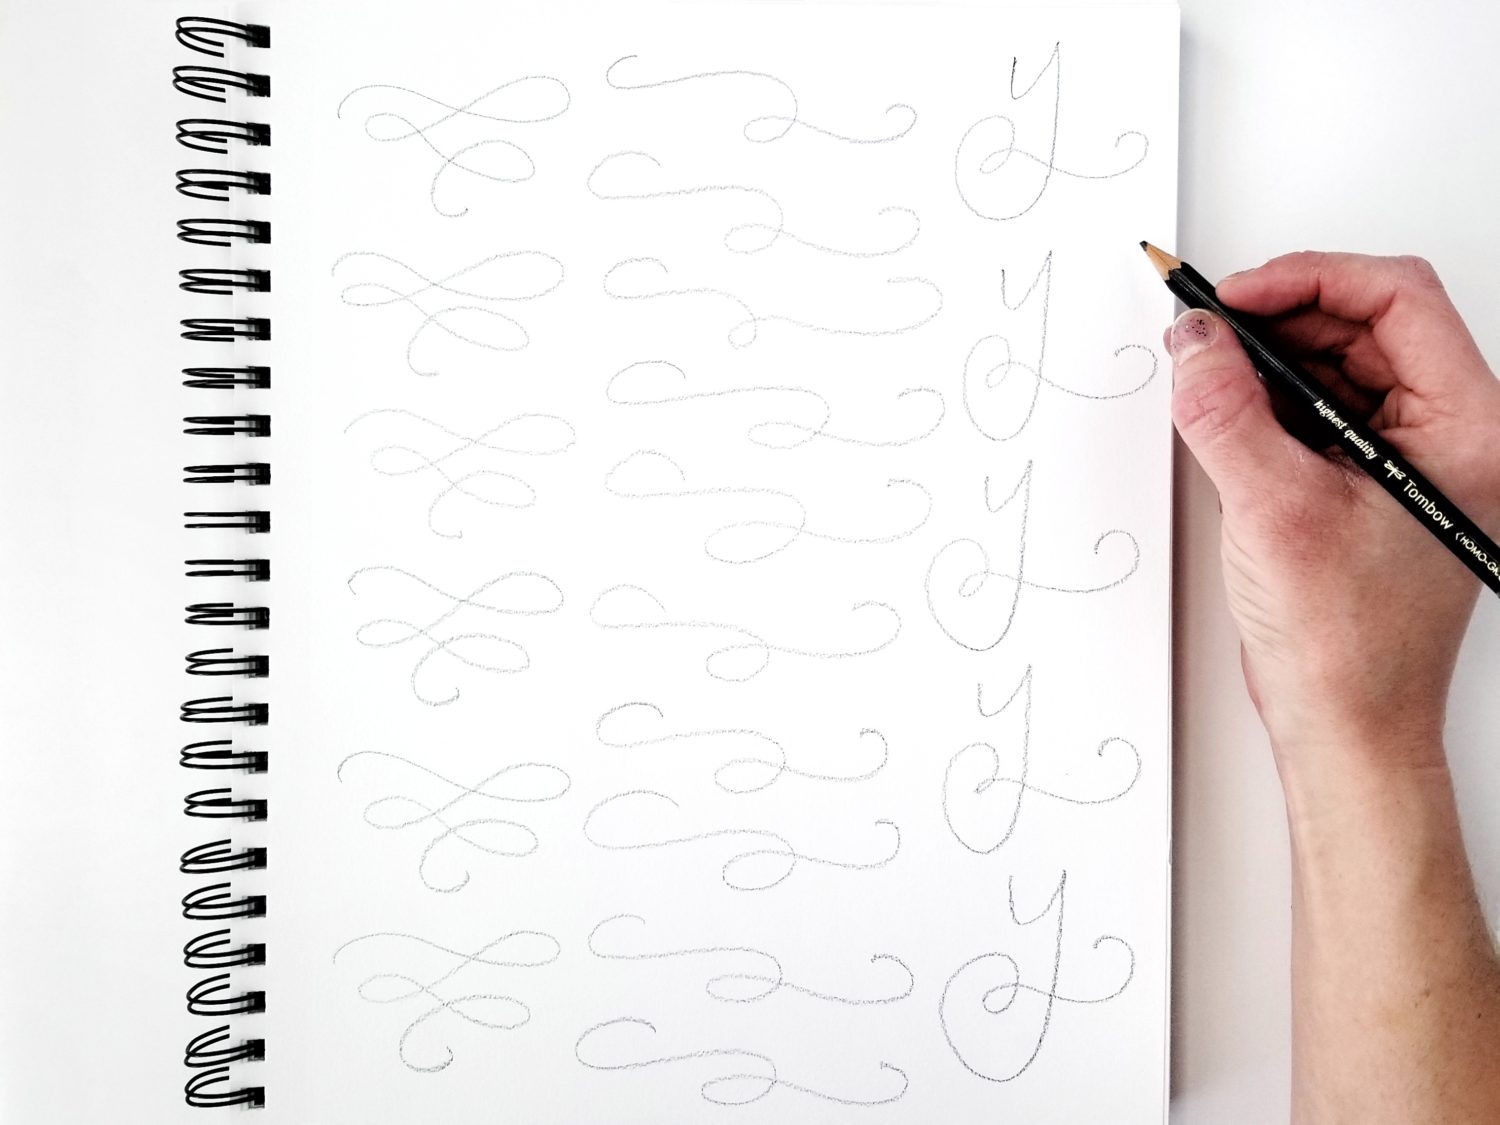
The third way to master pencil calligraphy is adding flourishes. Like applying pressure, repetition and practice are key to building muscle memory for flourishing. However, unlike writing the letters in pencil calligraphy, flourishing requires a light hand for the entire stroke.
To master flourishing in pencil calligraphy, simply choose a flourish to practice. Lightly draw it over and over again to build muscle memory. The more you practice the motions, the more naturally they will flow. Once you’ve mastered flourishing with a pencil, the motion is the same with a brush pen. Use light pressure and the muscle memory will take over and help you produce beautiful flourishes.
For more pencil calligraphy tips, check out Lauren’s post How to Pick Your Pencil for Lettering. When you’re ready to move onto brush calligraphy, check out my post on the 5 P’s of Brush Calligraphy and Hand Lettering! You’ll find all the information you need to succeed with brush calligraphy!
Happy lettering!
Grace
Pingback: Art Journaling Essentials: 6 Products to Get Started - Tombow USA Blog
Thanks! This was helpful!