Hey Tombow fans! It’s Mandy from @a_heartened_calling and today we are creating watercolor art with lots of purple in honor of color week! Want to know a little known fact about me? I designed houses for 13 years. My husband was a General Contractor and my job was to design the homes he built. My absolute favorite part of house design quickly became designing kitchens. I drooled over stunning counter tops (especially anything from Cambria!) and gorgeous back splashes. Even though I’m not in house design anymore, I am always drawn to beautiful counter tops and patterns from mosaic tiles. So, for today’s project I went back to my designing days and drew inspiration from mosaic tiles. Mosaics come in a lot of shapes, colors and sizes. So much inspiration can be found! I went to my local Lowe’s and browsed the tile section for a pattern that would be fun to recreate. I found a pretty scalloped 12″x12″ mosaic tile sheet that I knew would work well for this project. It was also on clearance for $2.49!
Now it’s time to get creative! You’ll need the following supplies for this project:
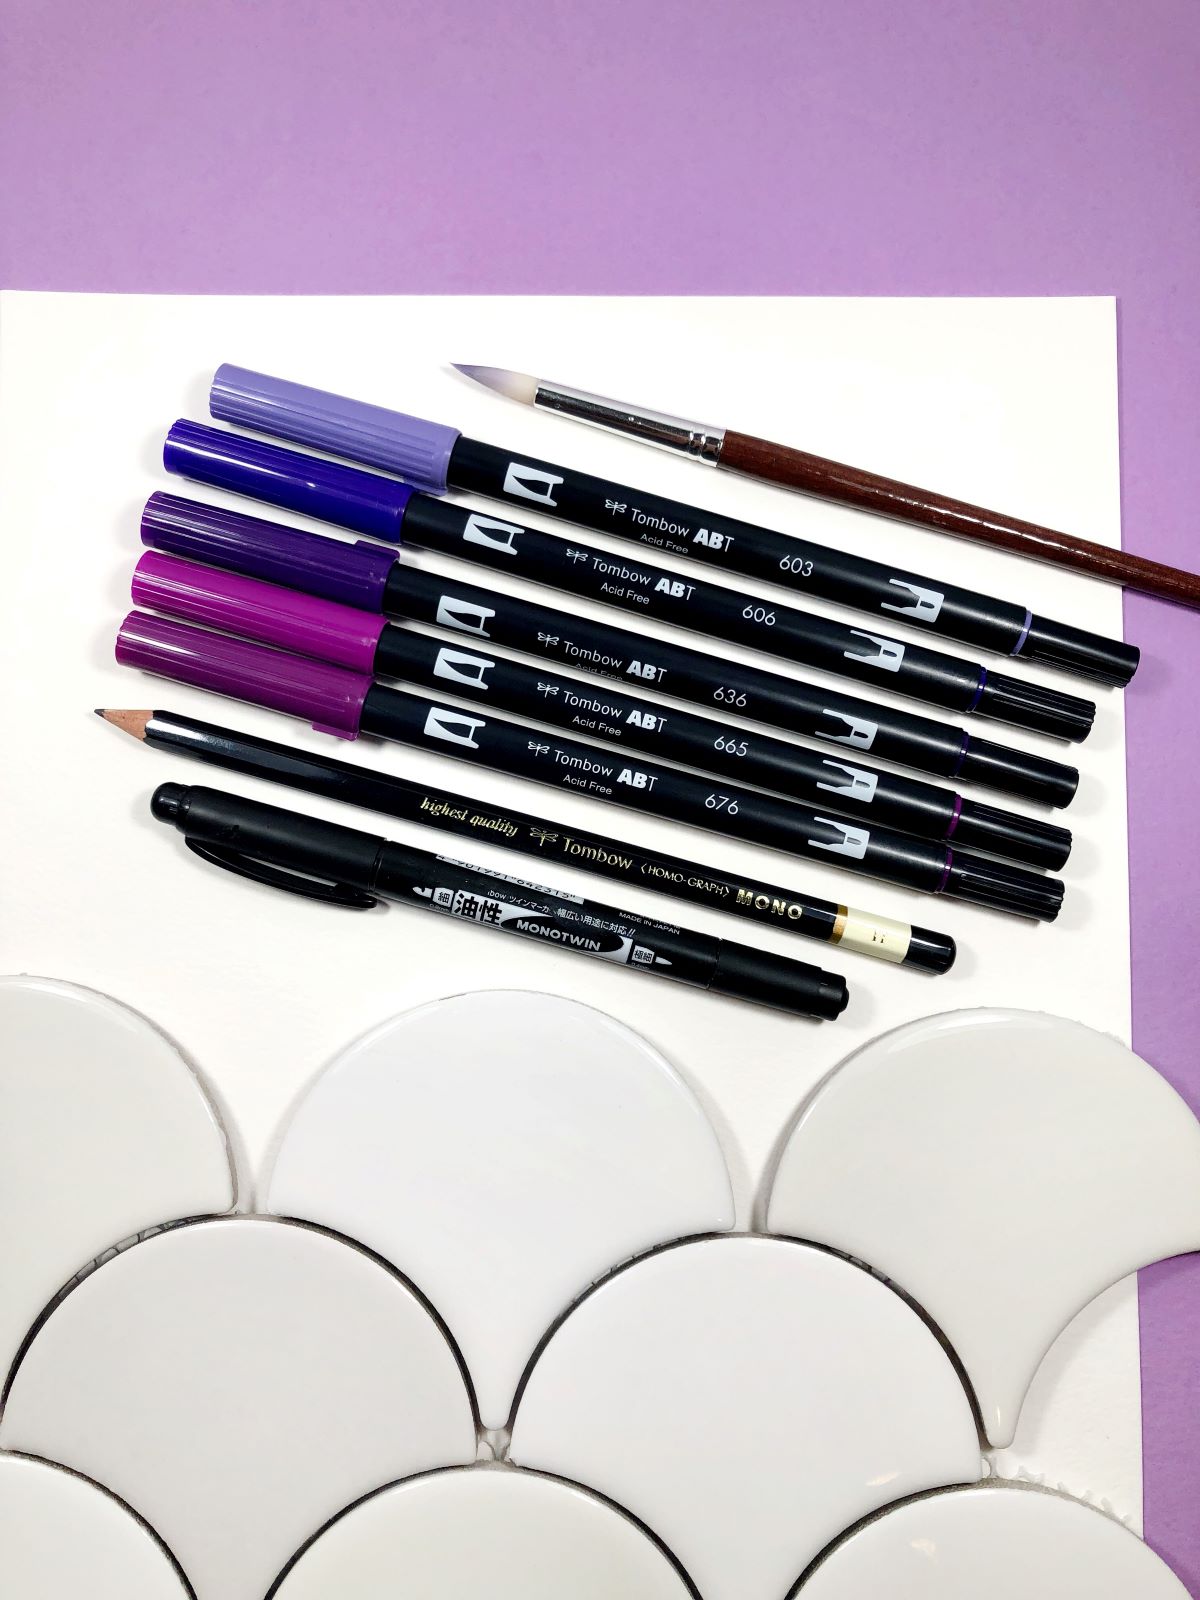
MATERIALS
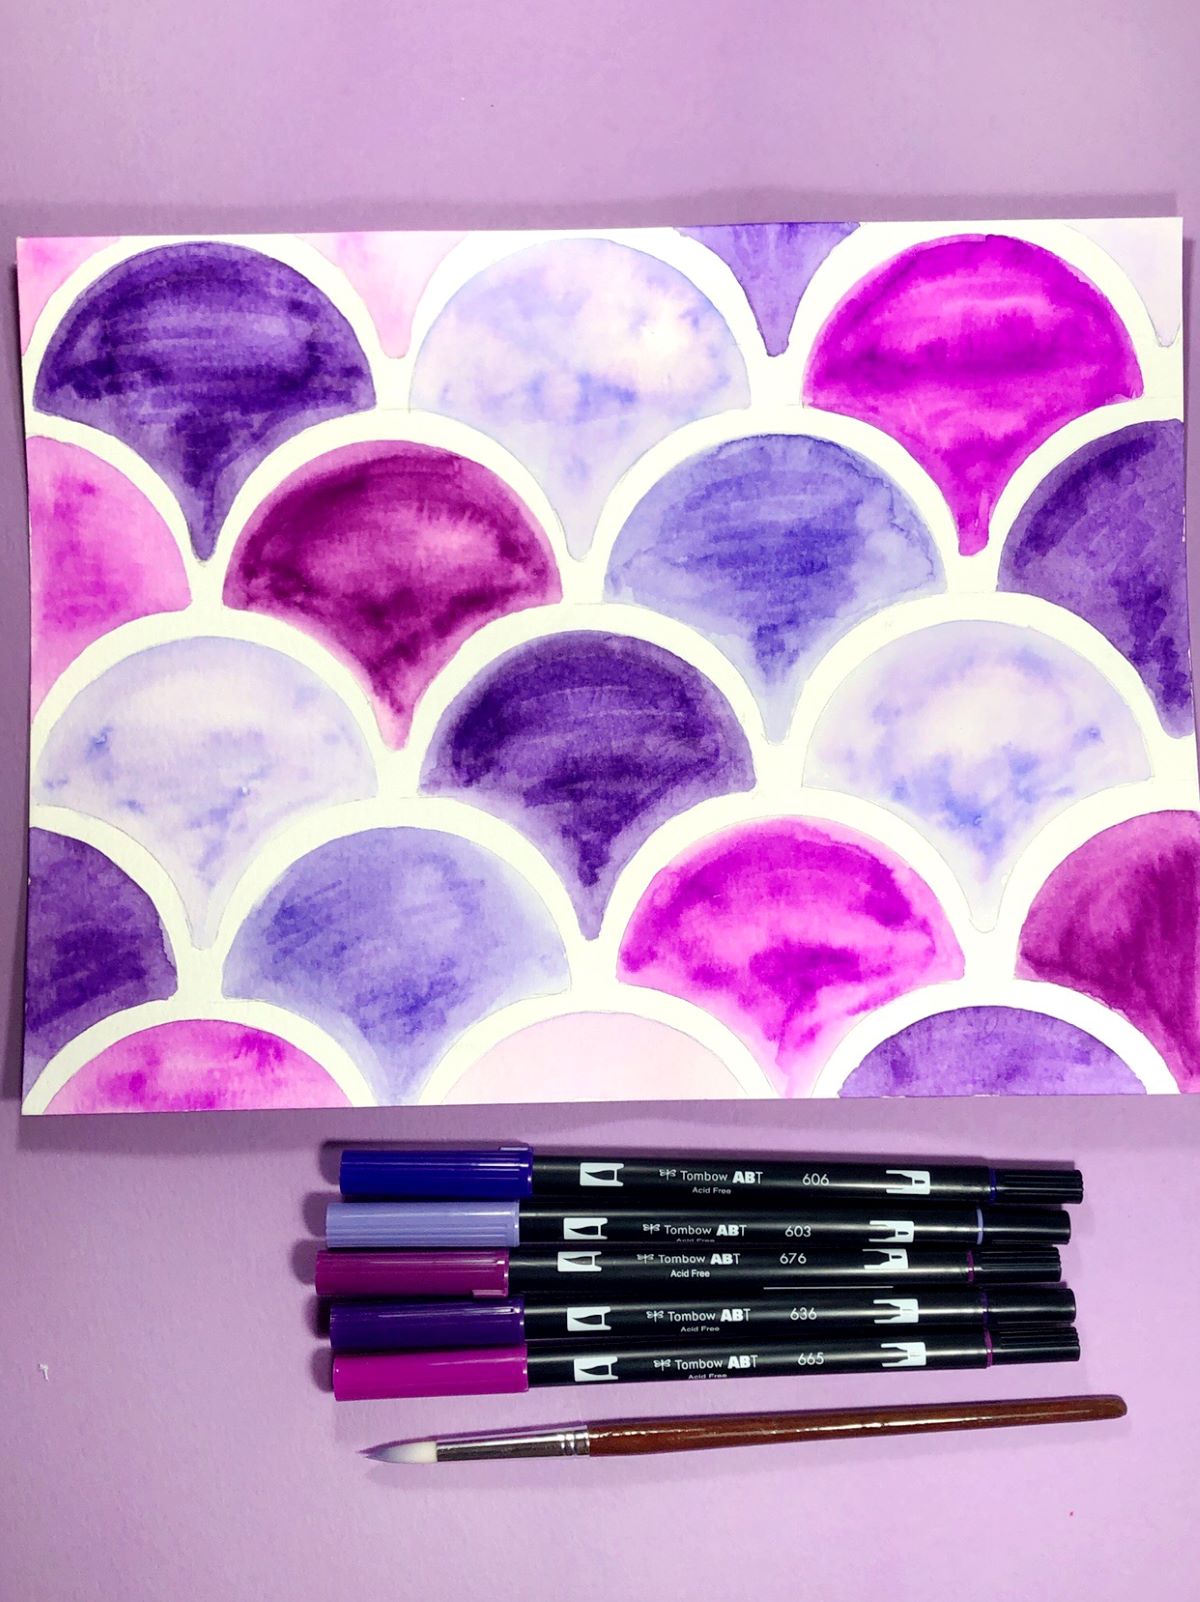
- Tombow Dual Brush Pens 603, 606, 636, 665, and 676
- Tombow MONO Drawing Pencil H
- A piece of watercolor paper (Mine was 9″x12″)
- A round paint brush with a cup of water
- Tombow MONO Twin Permanent Marker
- Sheet of mosaic tile from your local home improvement store (in whatever pattern you are drawn to!)
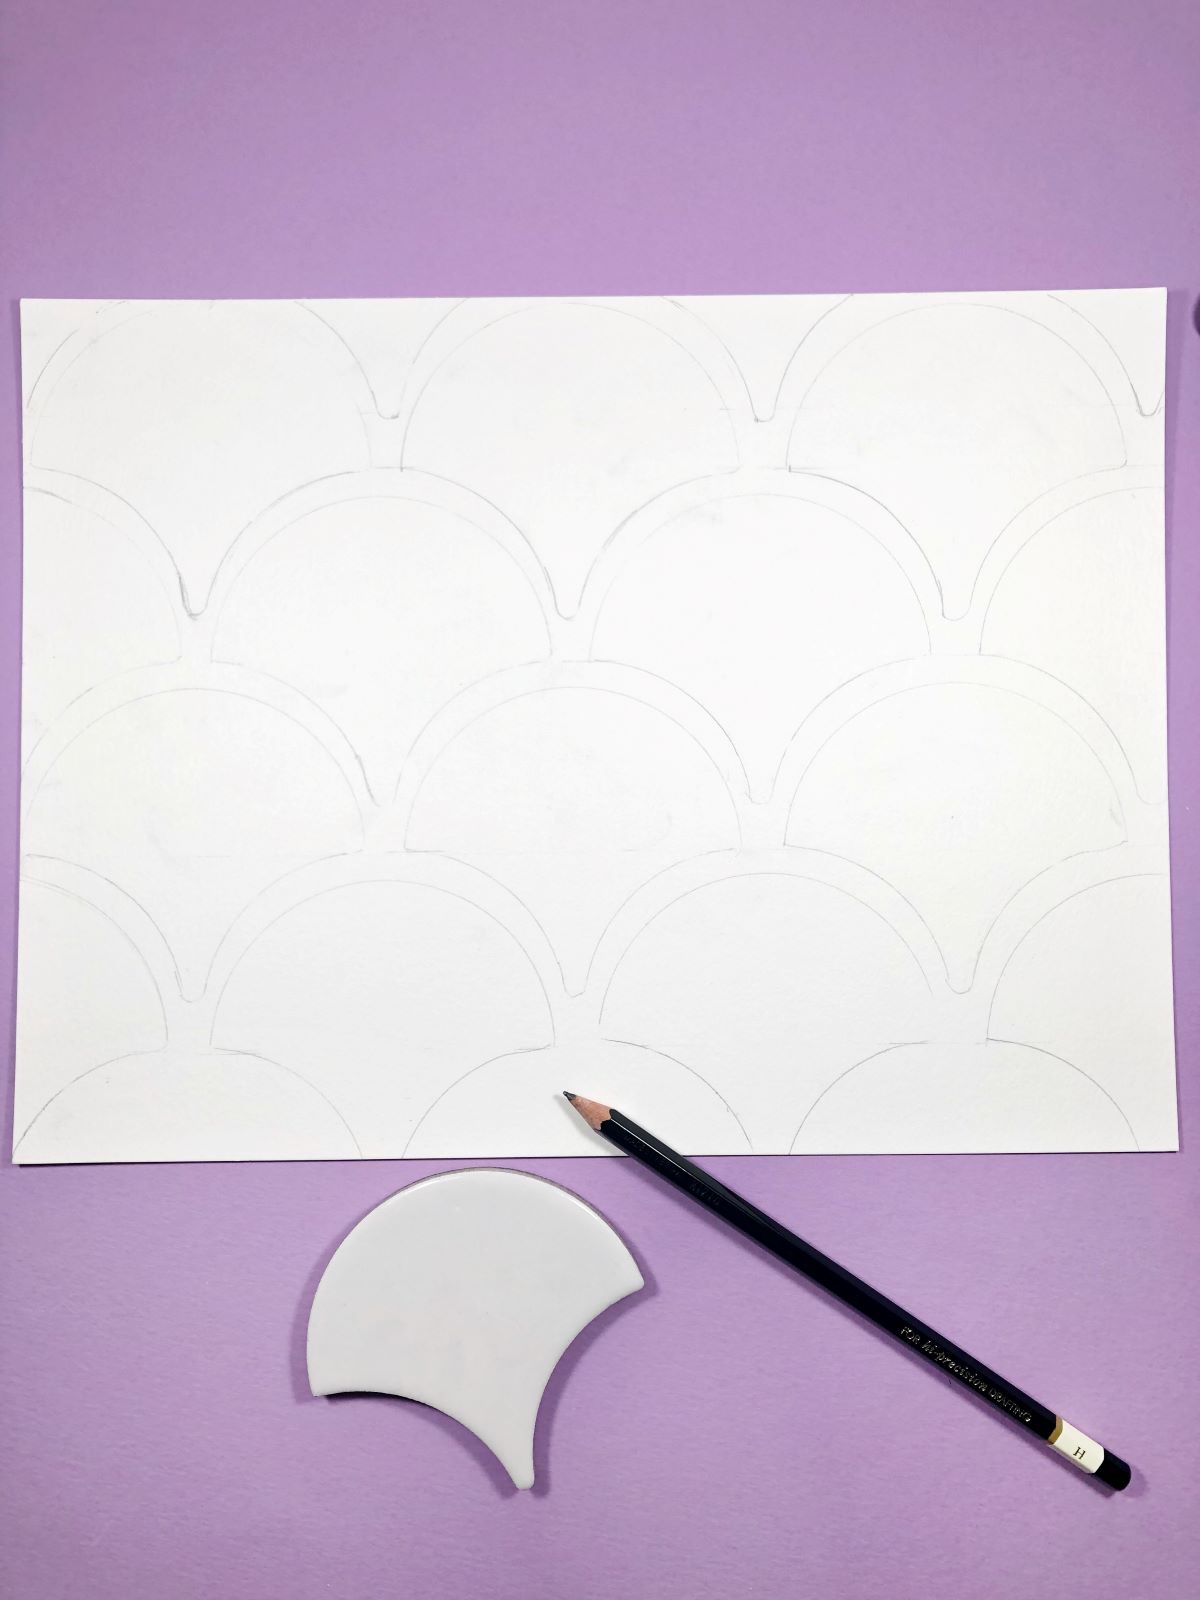
STEP 1 – Trace Tile
Cut one section off of the 12″x12″ sheet of tile to use as a tracing tool. You can easily use scissors to cut the backing from the tile. Then using the MONO Drawing Pencil H, trace around your piece of tile onto a piece of watercolor paper. You’ll want to recreate the same pattern as the tile sheet. Repeat and fill the entire page.
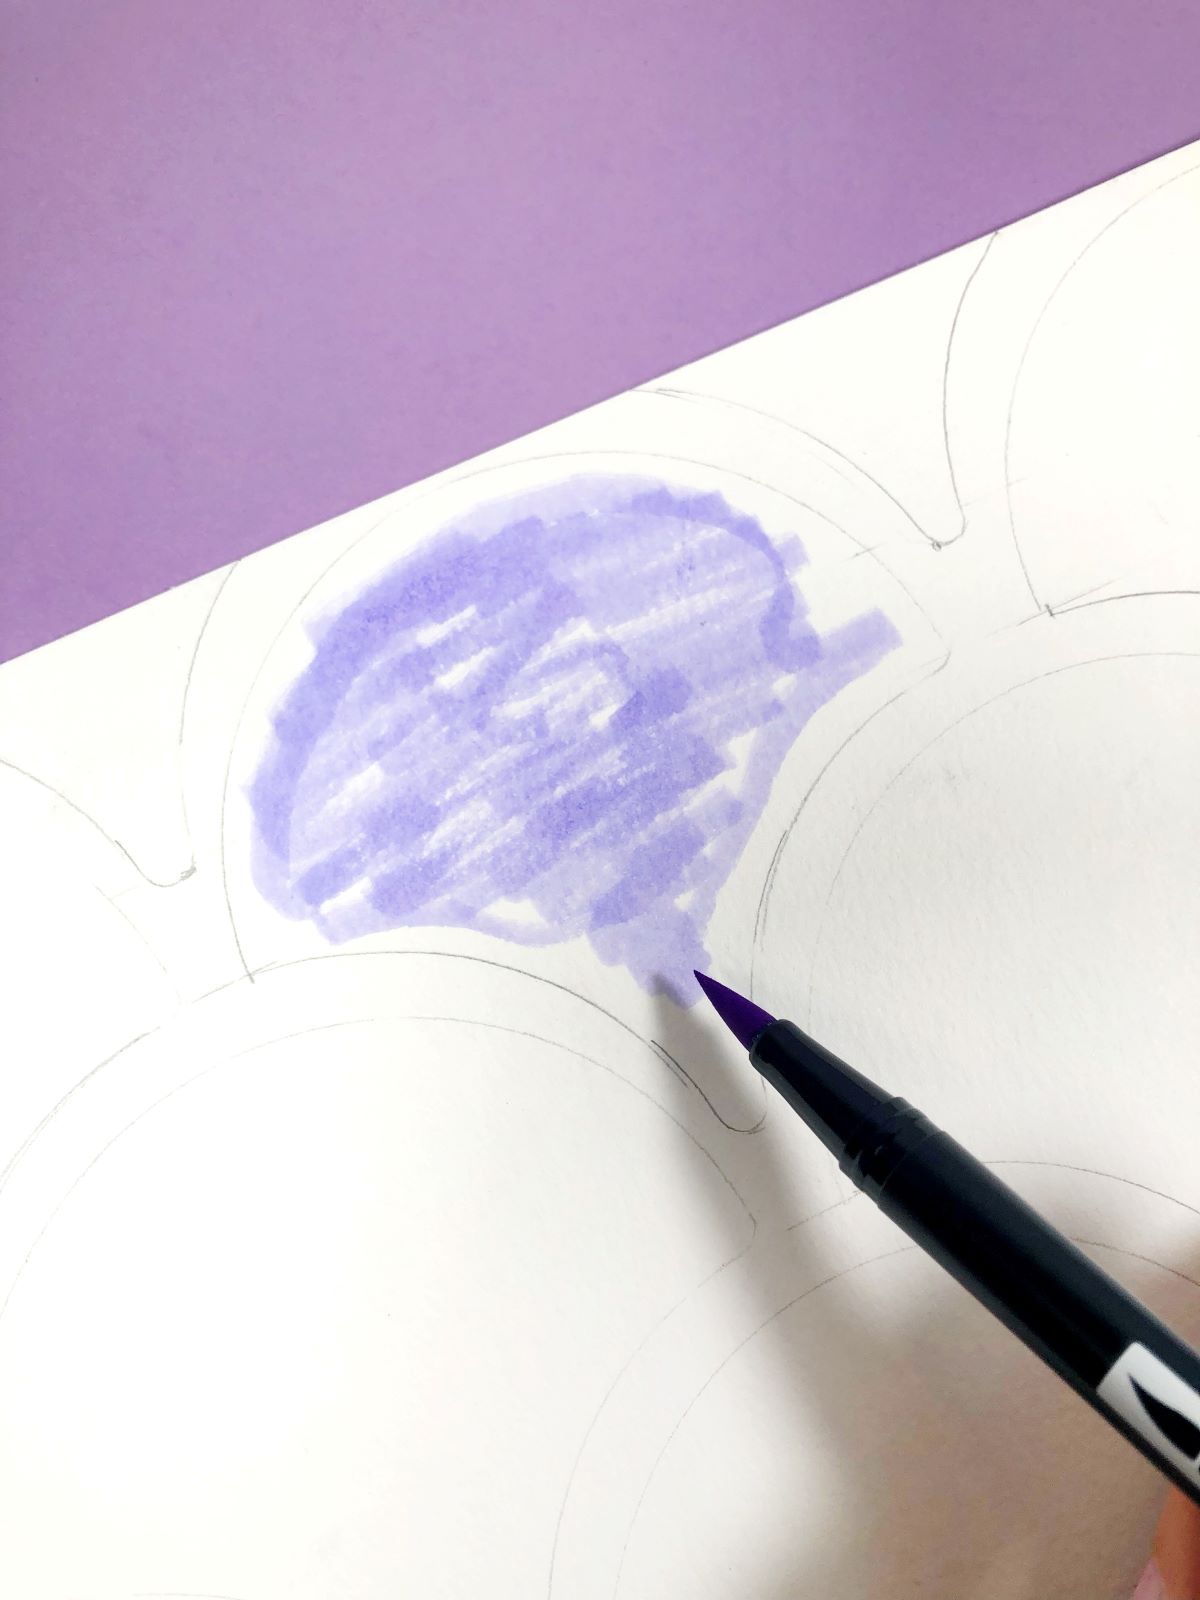
STEP 2 – Watercolor
Pick one Dual Brush Pen color to start with and color in one of the shapes. I started with the lightest color first.
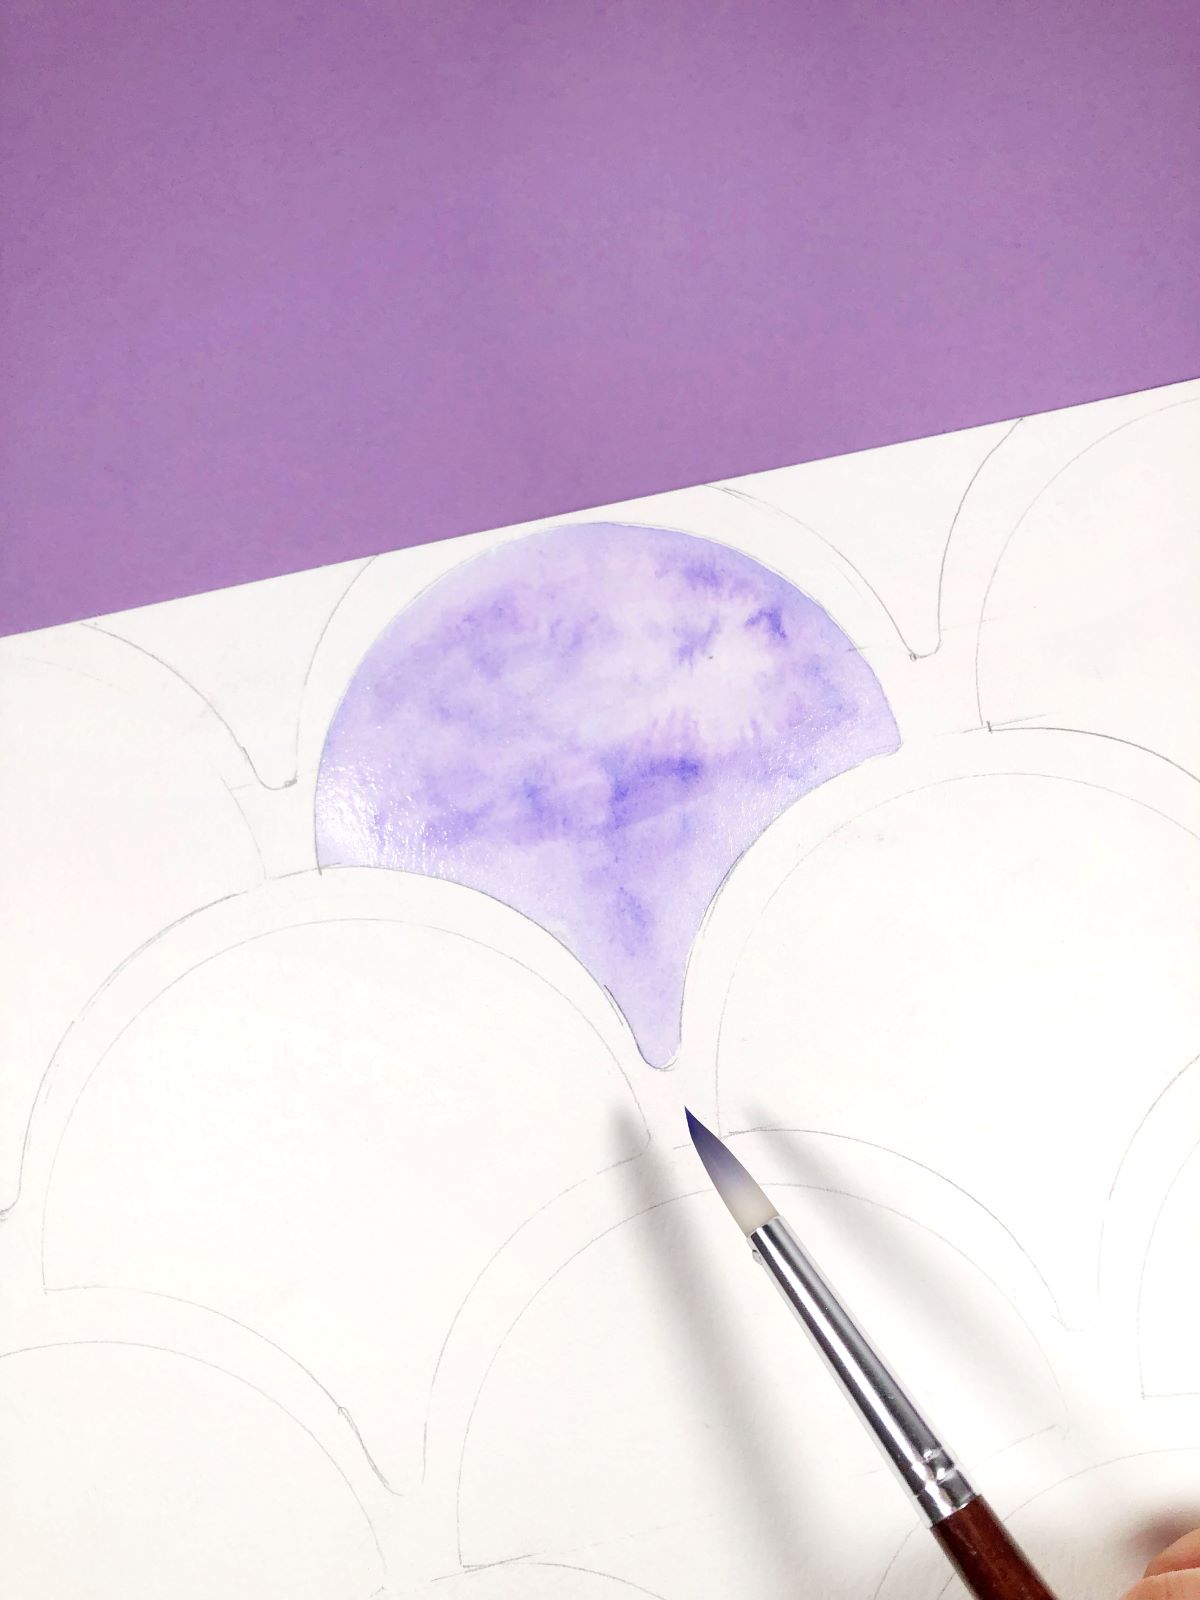
Using a wet paint brush, add water to your color and paint in the whole shape. Here’s a tip: adding water will dilute your color and will create different shades. For the lighter colors, I used more ink when coloring in my shapes and less water when painting. For the darker colors, I used less ink when coloring the shapes in and more water. Experiment with using different amounts of ink. Then use more or less water to create different shades of purple!
Repeat this process, alternating colors for each shape, and spacing out the light colors from the dark. Here’s what it looks like all painted!
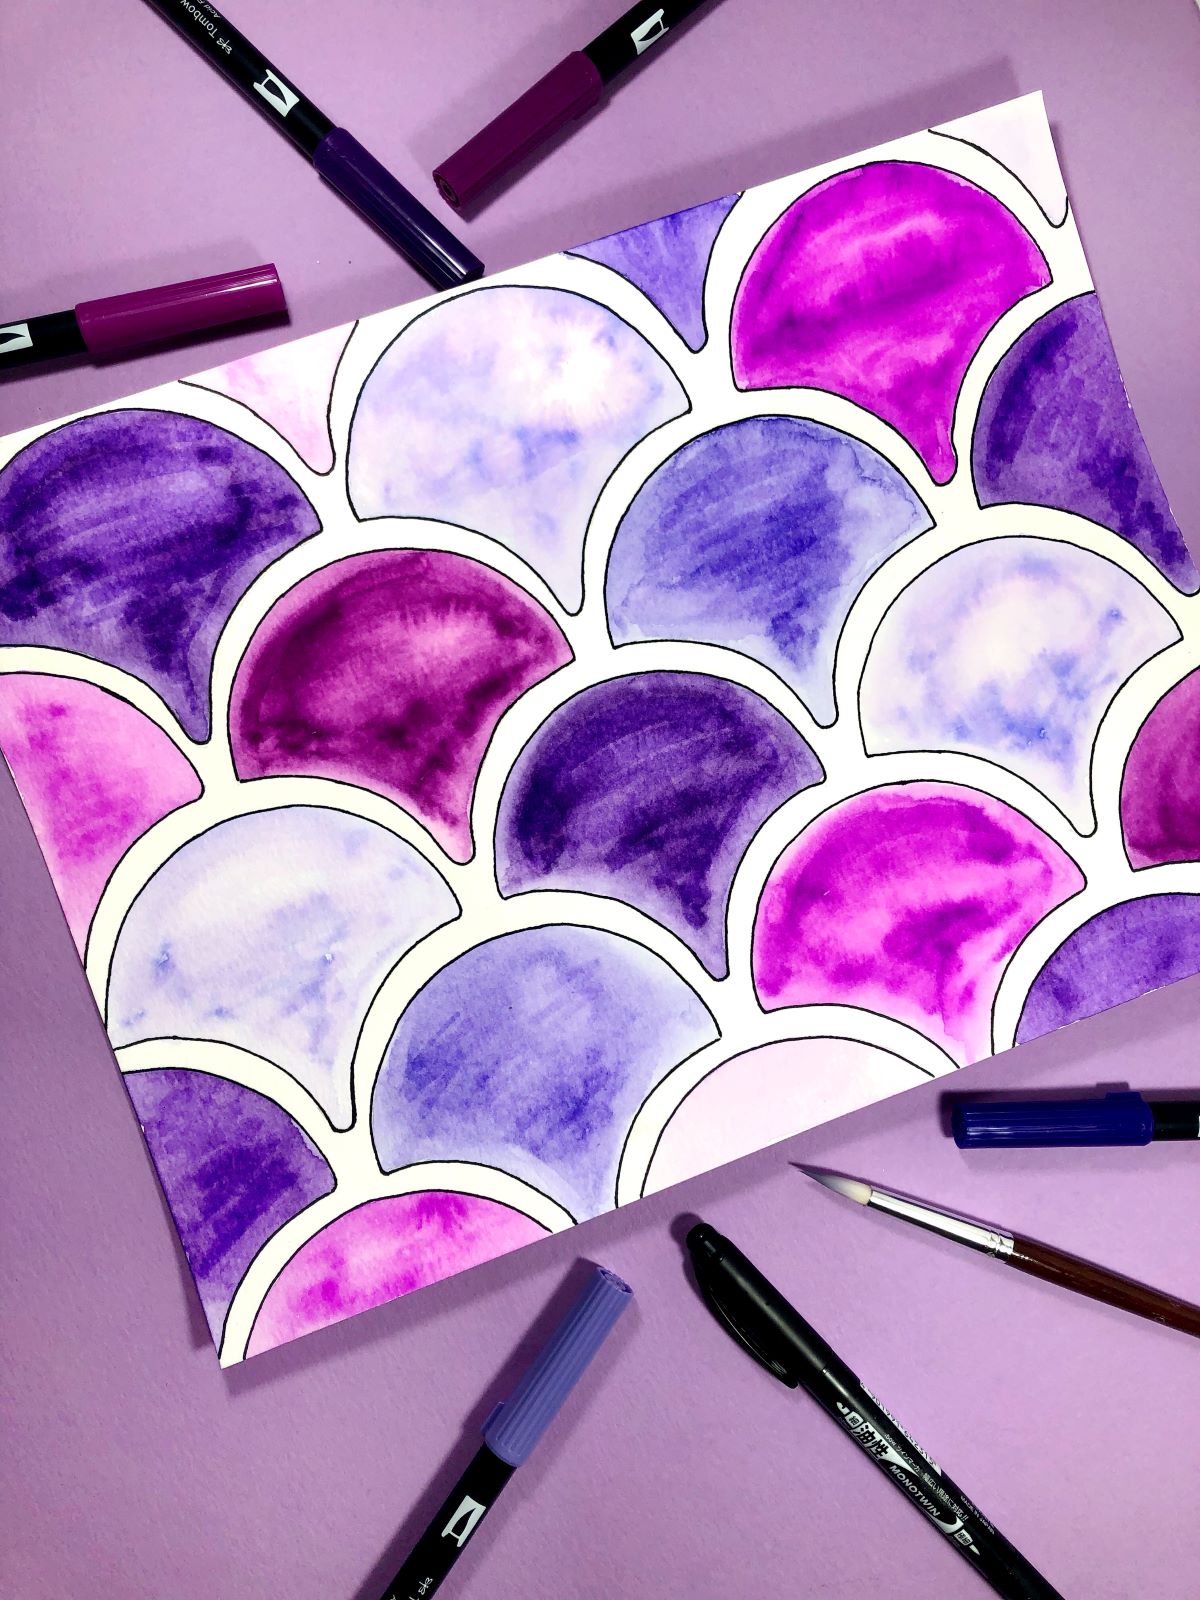
STEP 3 – Add Detail (Optional)
If you like the way it looks, then you are done! However, you can also add a little more detail by tracing over each shape with the 0.4mm tip of the MONO Twin Permanent Marker. This will give your shapes nice crisp edges. You could also outline them with the bullet tip of any of your Dual Brush Pens too!
That’s it, your watercolor art is done! I hope you enjoyed learning how to create this mosaic tile inspired watercolor art. Be sure to tag us at @tombowusa and @a_heartened_calling if you create this project!
If you’d like to see more projects using Dual Brush Pens, visit these posts:
- Four Ways to Tie Dye with Dual Brush Pens by Beth
- 3 Ways To Color Flowers with Dual Brush Pens by Jennie
- Blending Dual Brush Pens with Water with Jessica
Happy creating!
Till next time,
Mandy