Hi friends, Adrienne from Studio 80 Design here to share a fun and easy Fourth of July border tutorial! Anyone can create this page, it’s that simple! Let’s get started!
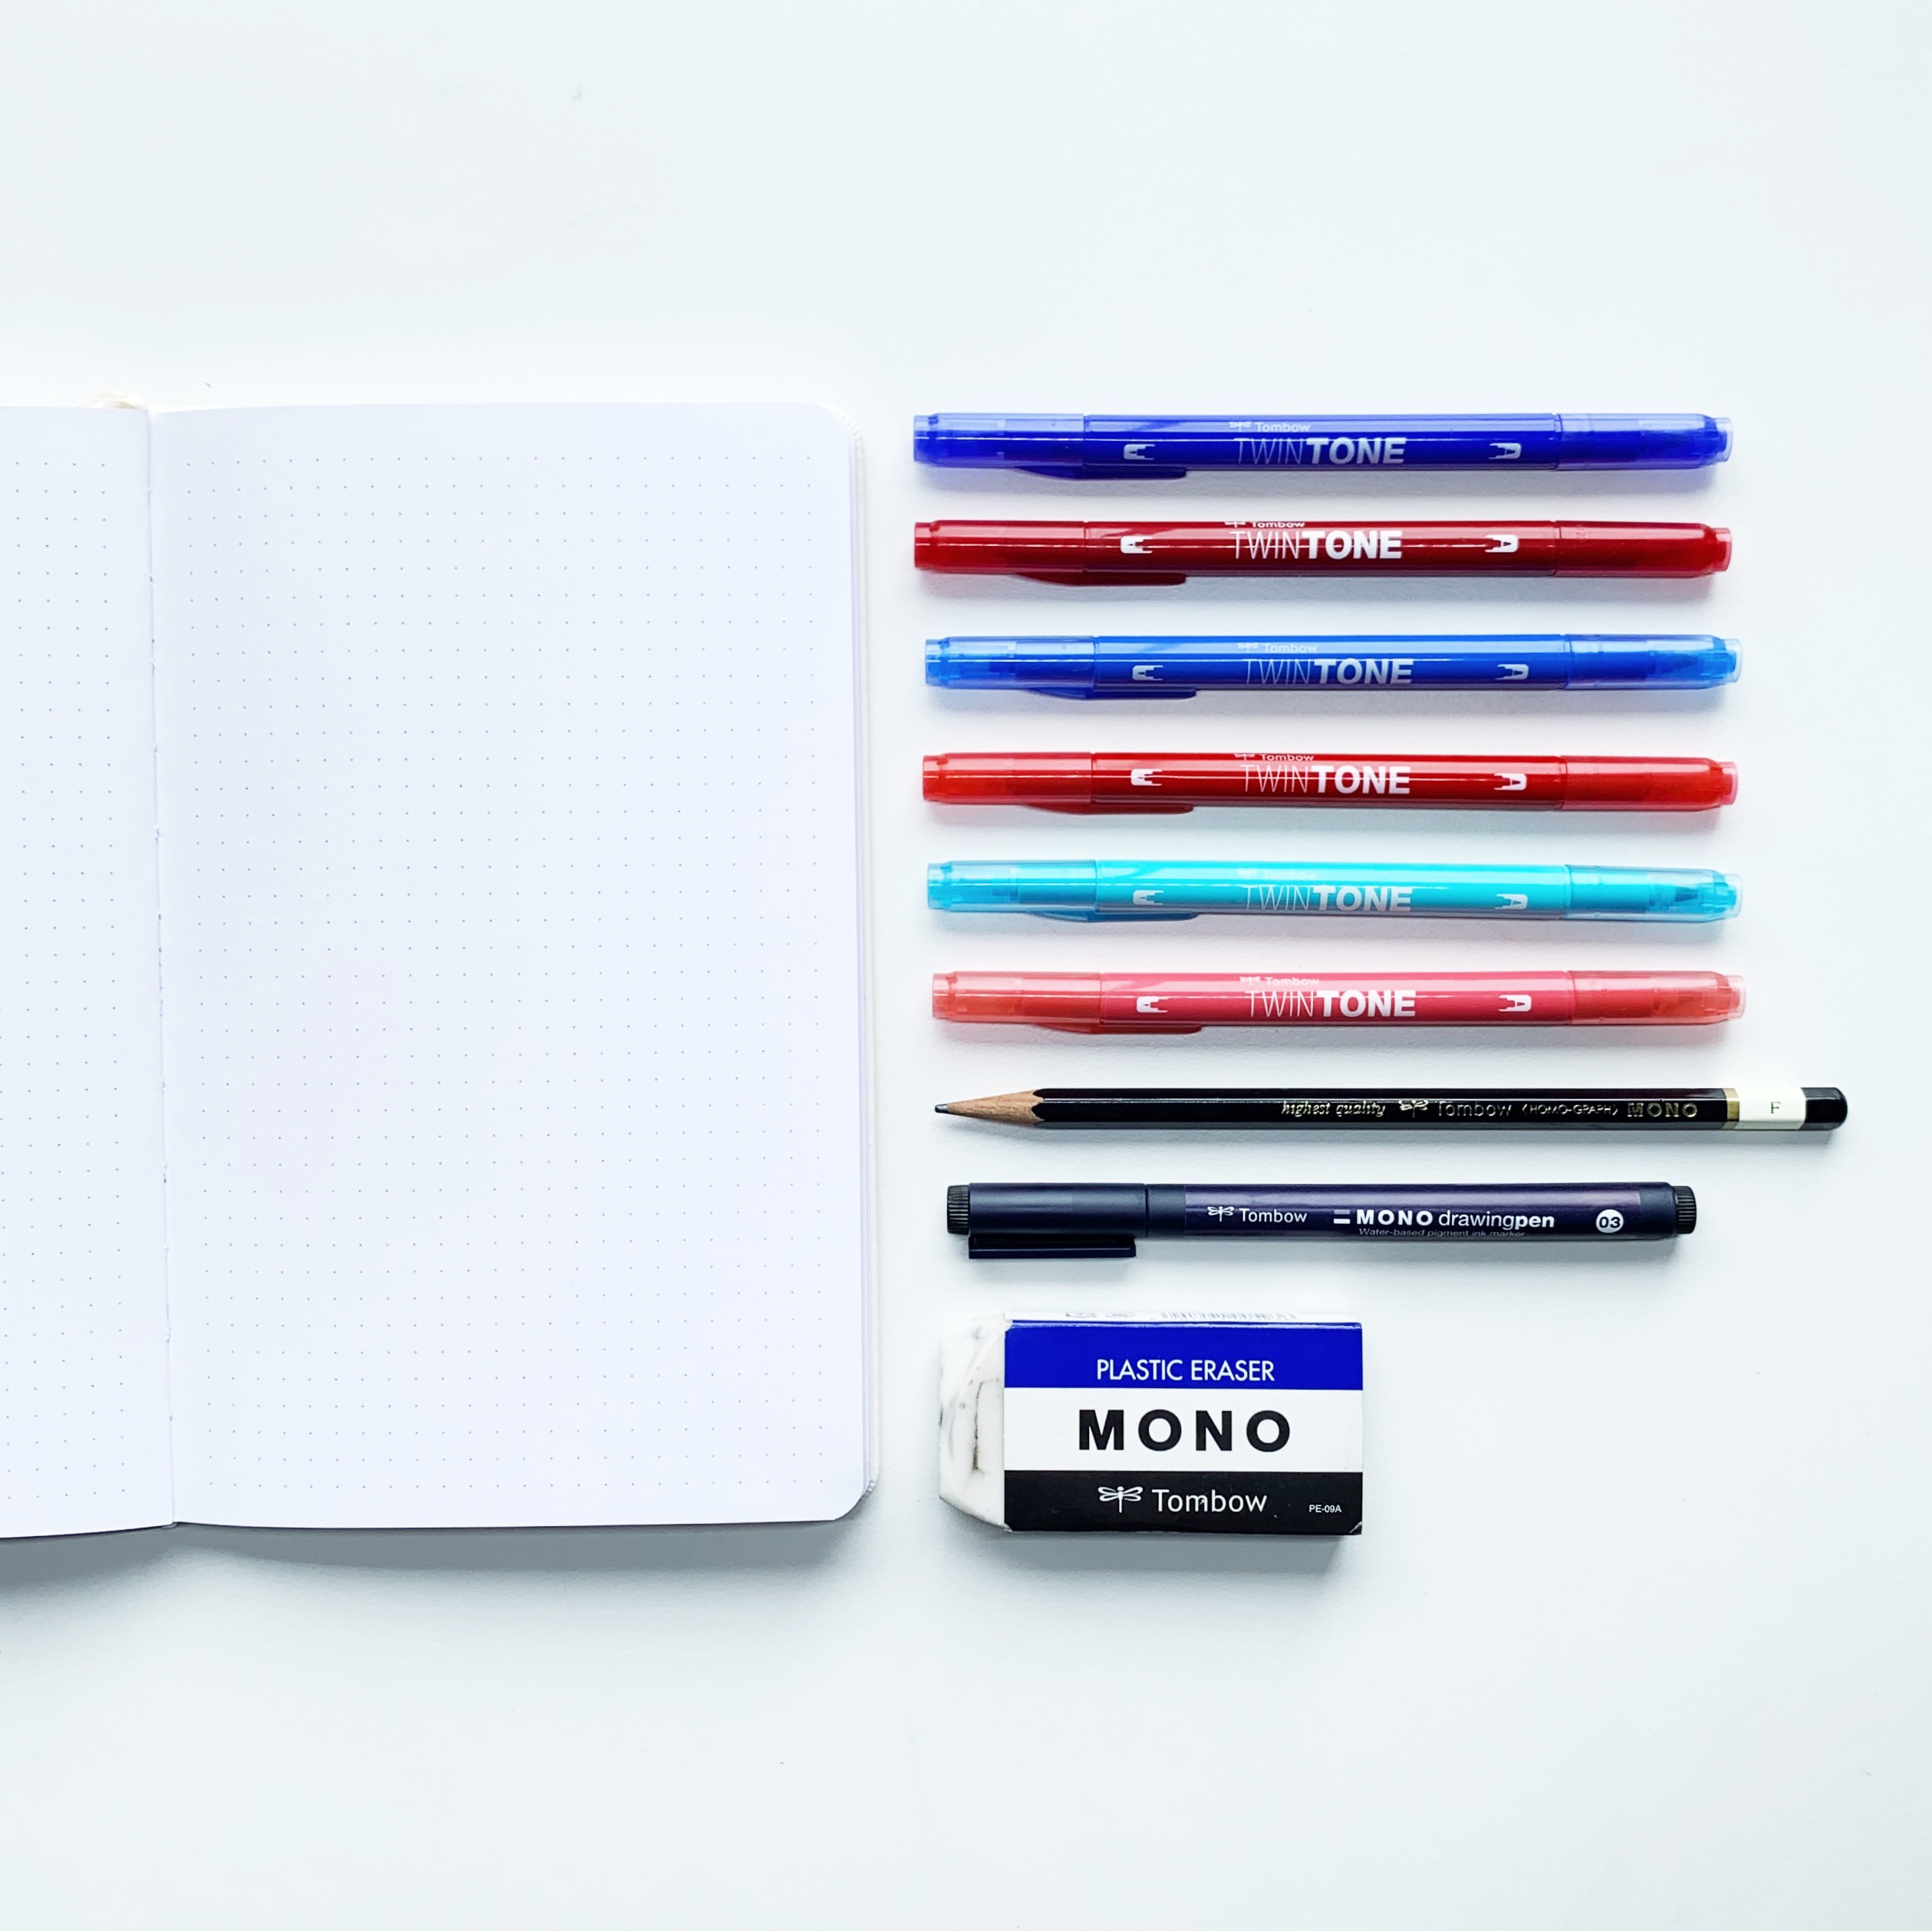
Materials you’ll need:
- Dot Grid Notebook
- Tombow TwinTone Markers in various shades of red and blue
- Tombow MONO Drawing Pencil
- Tombow MONO Drawing Pen 03
- Tombow MONO Eraser
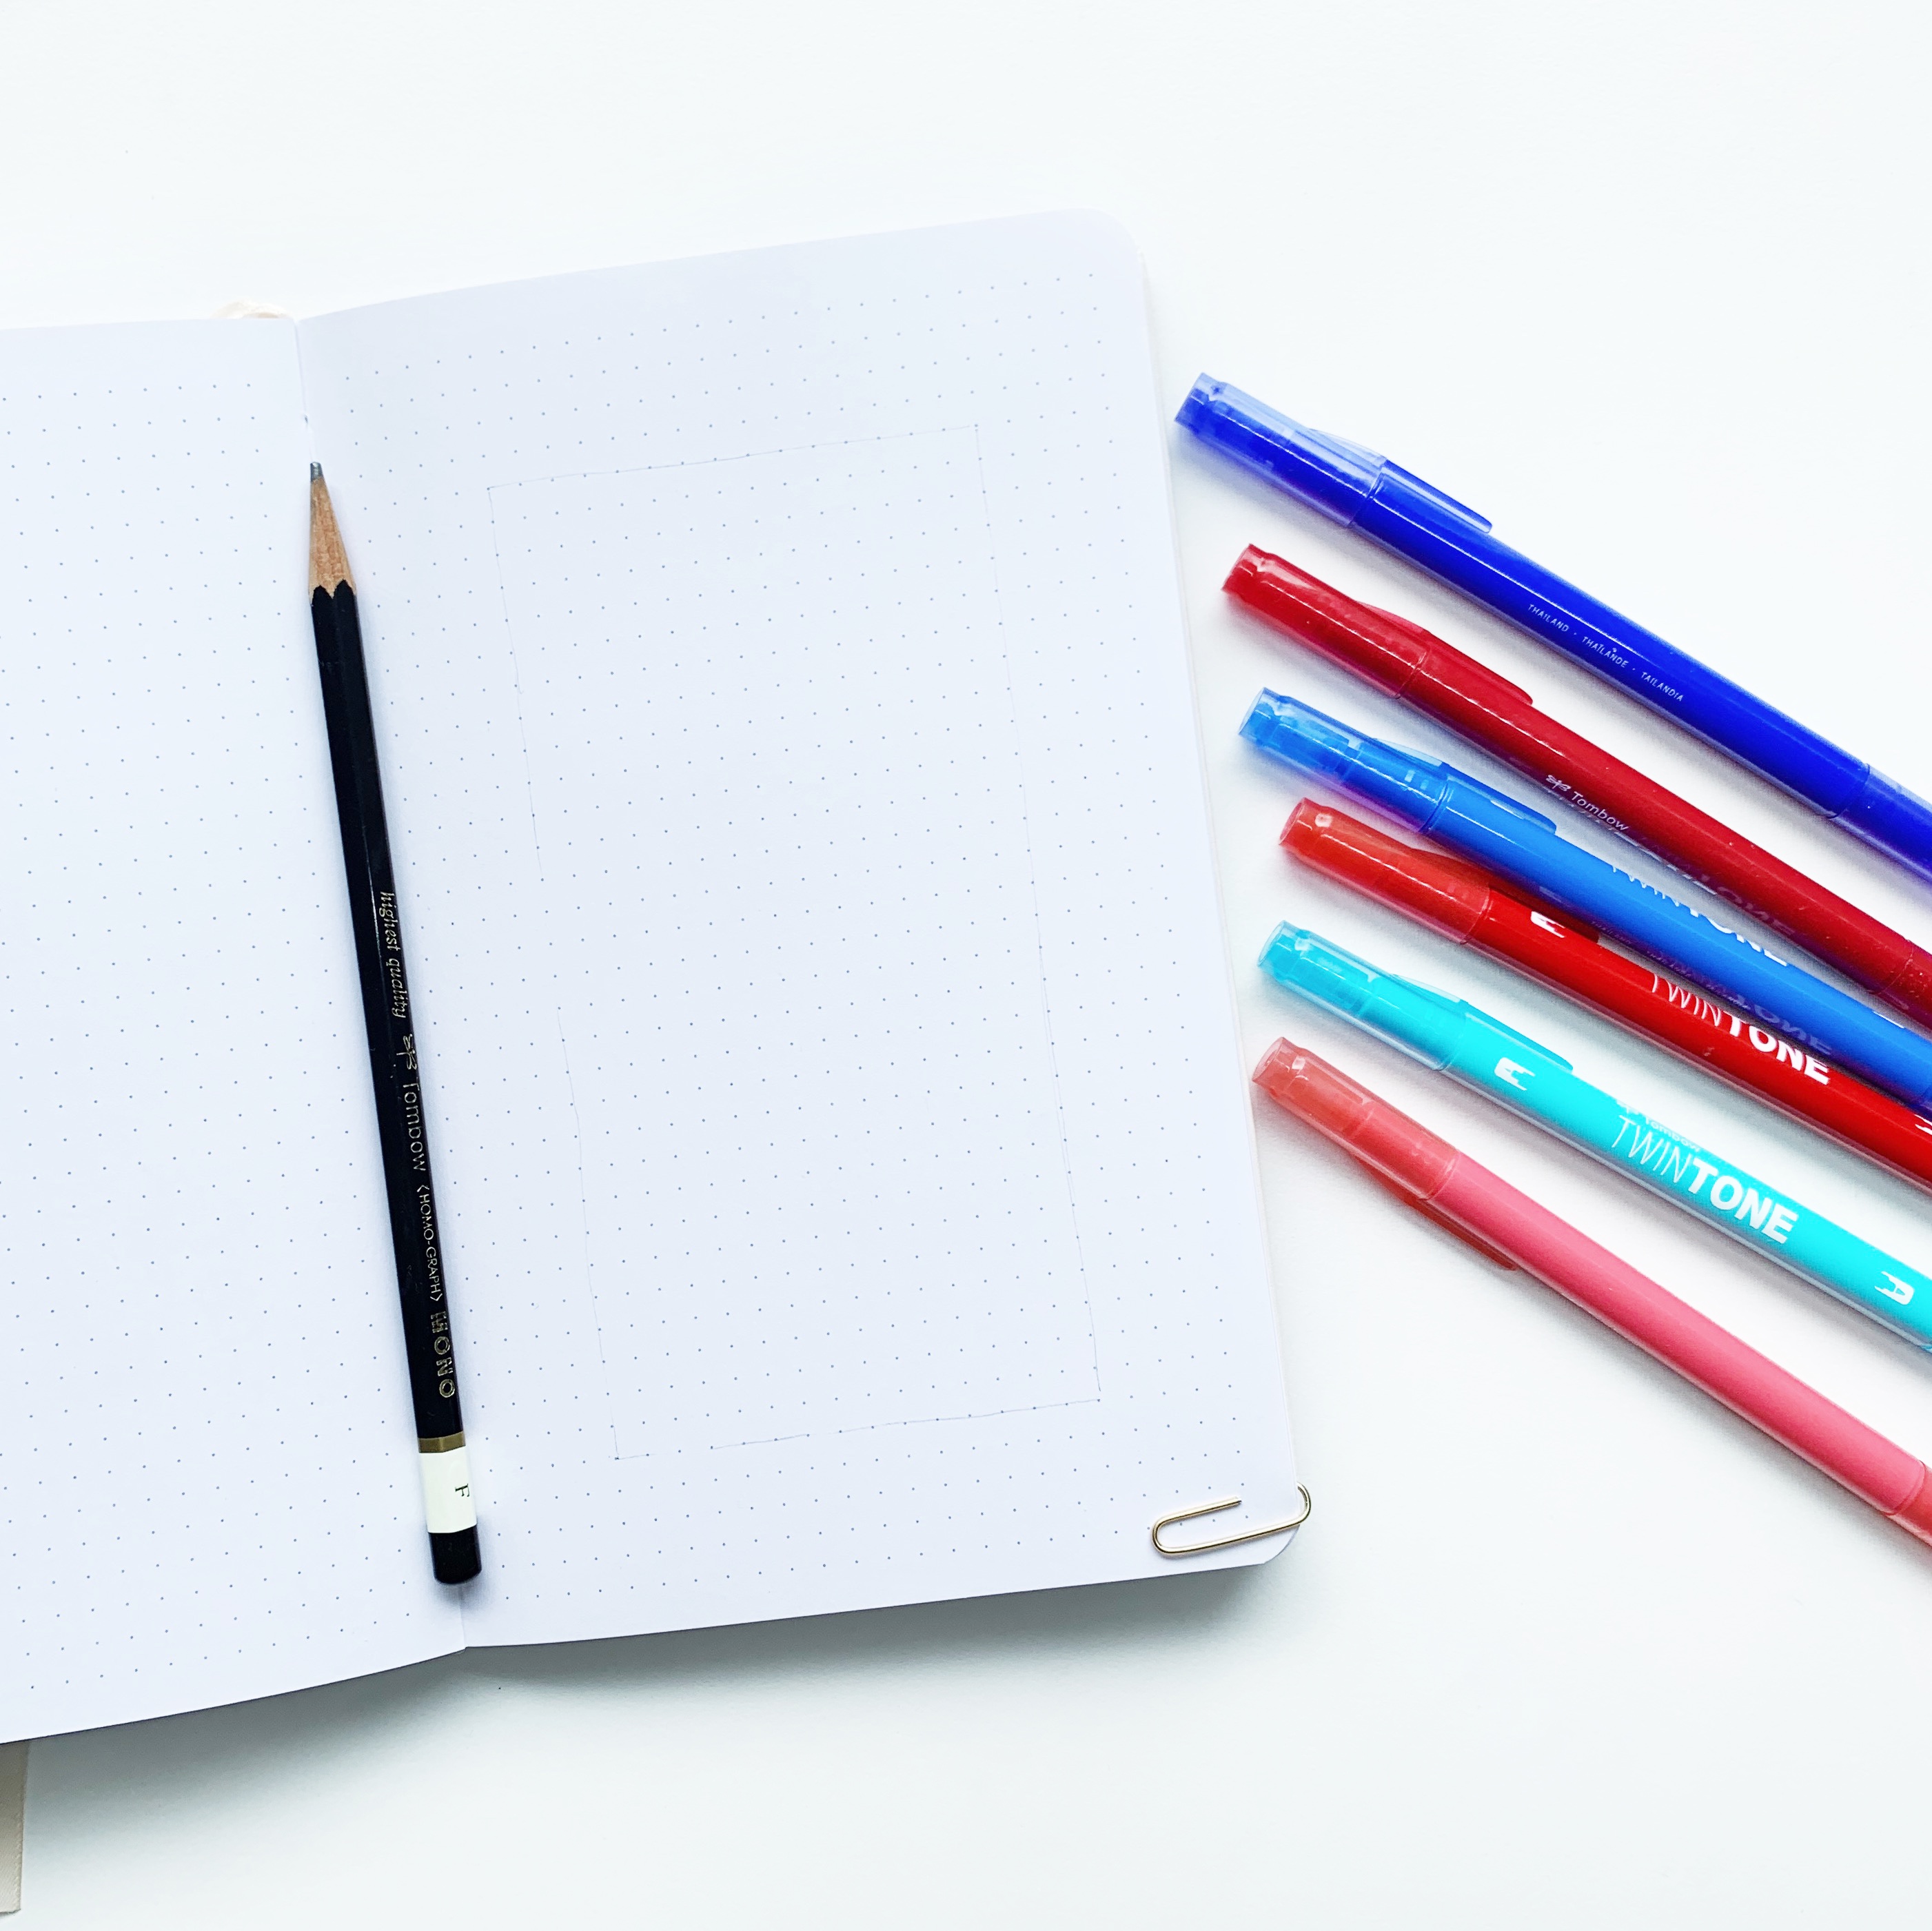
Step 1
Mark off the area you want to use for your border with your MONO Drawing Pencil. I made an outside border of four squares thick on each side.
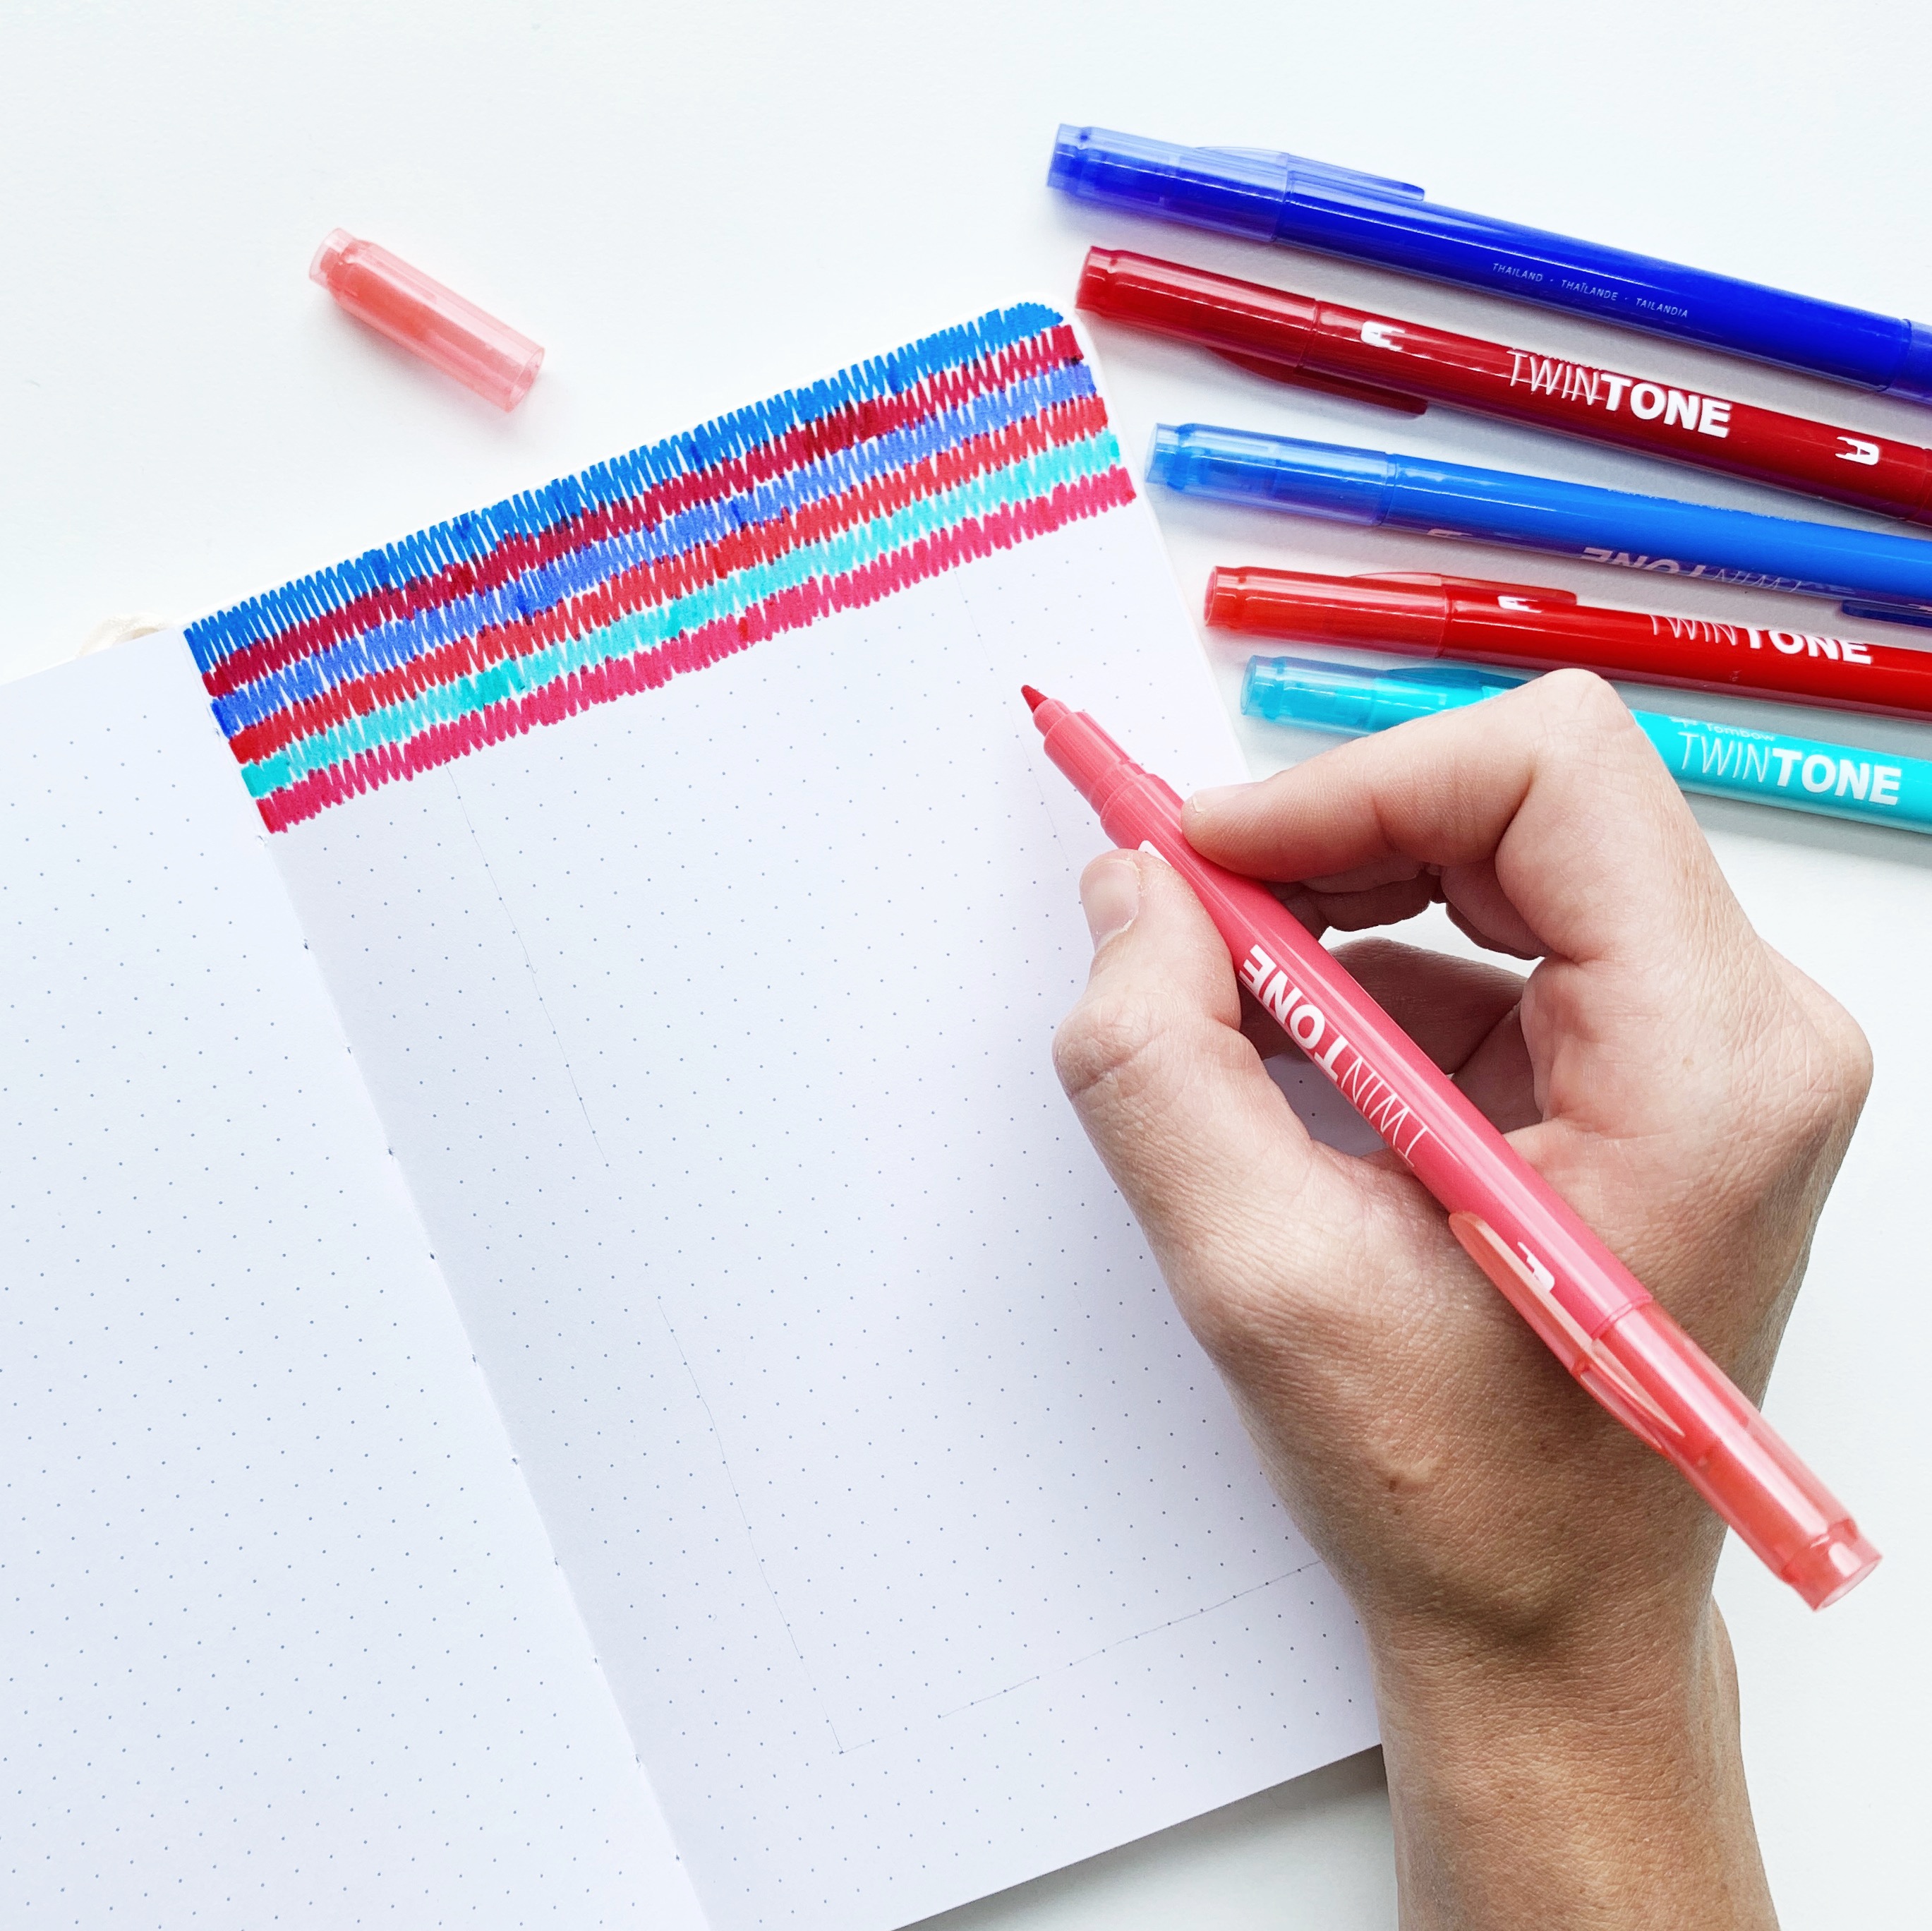
Step 2
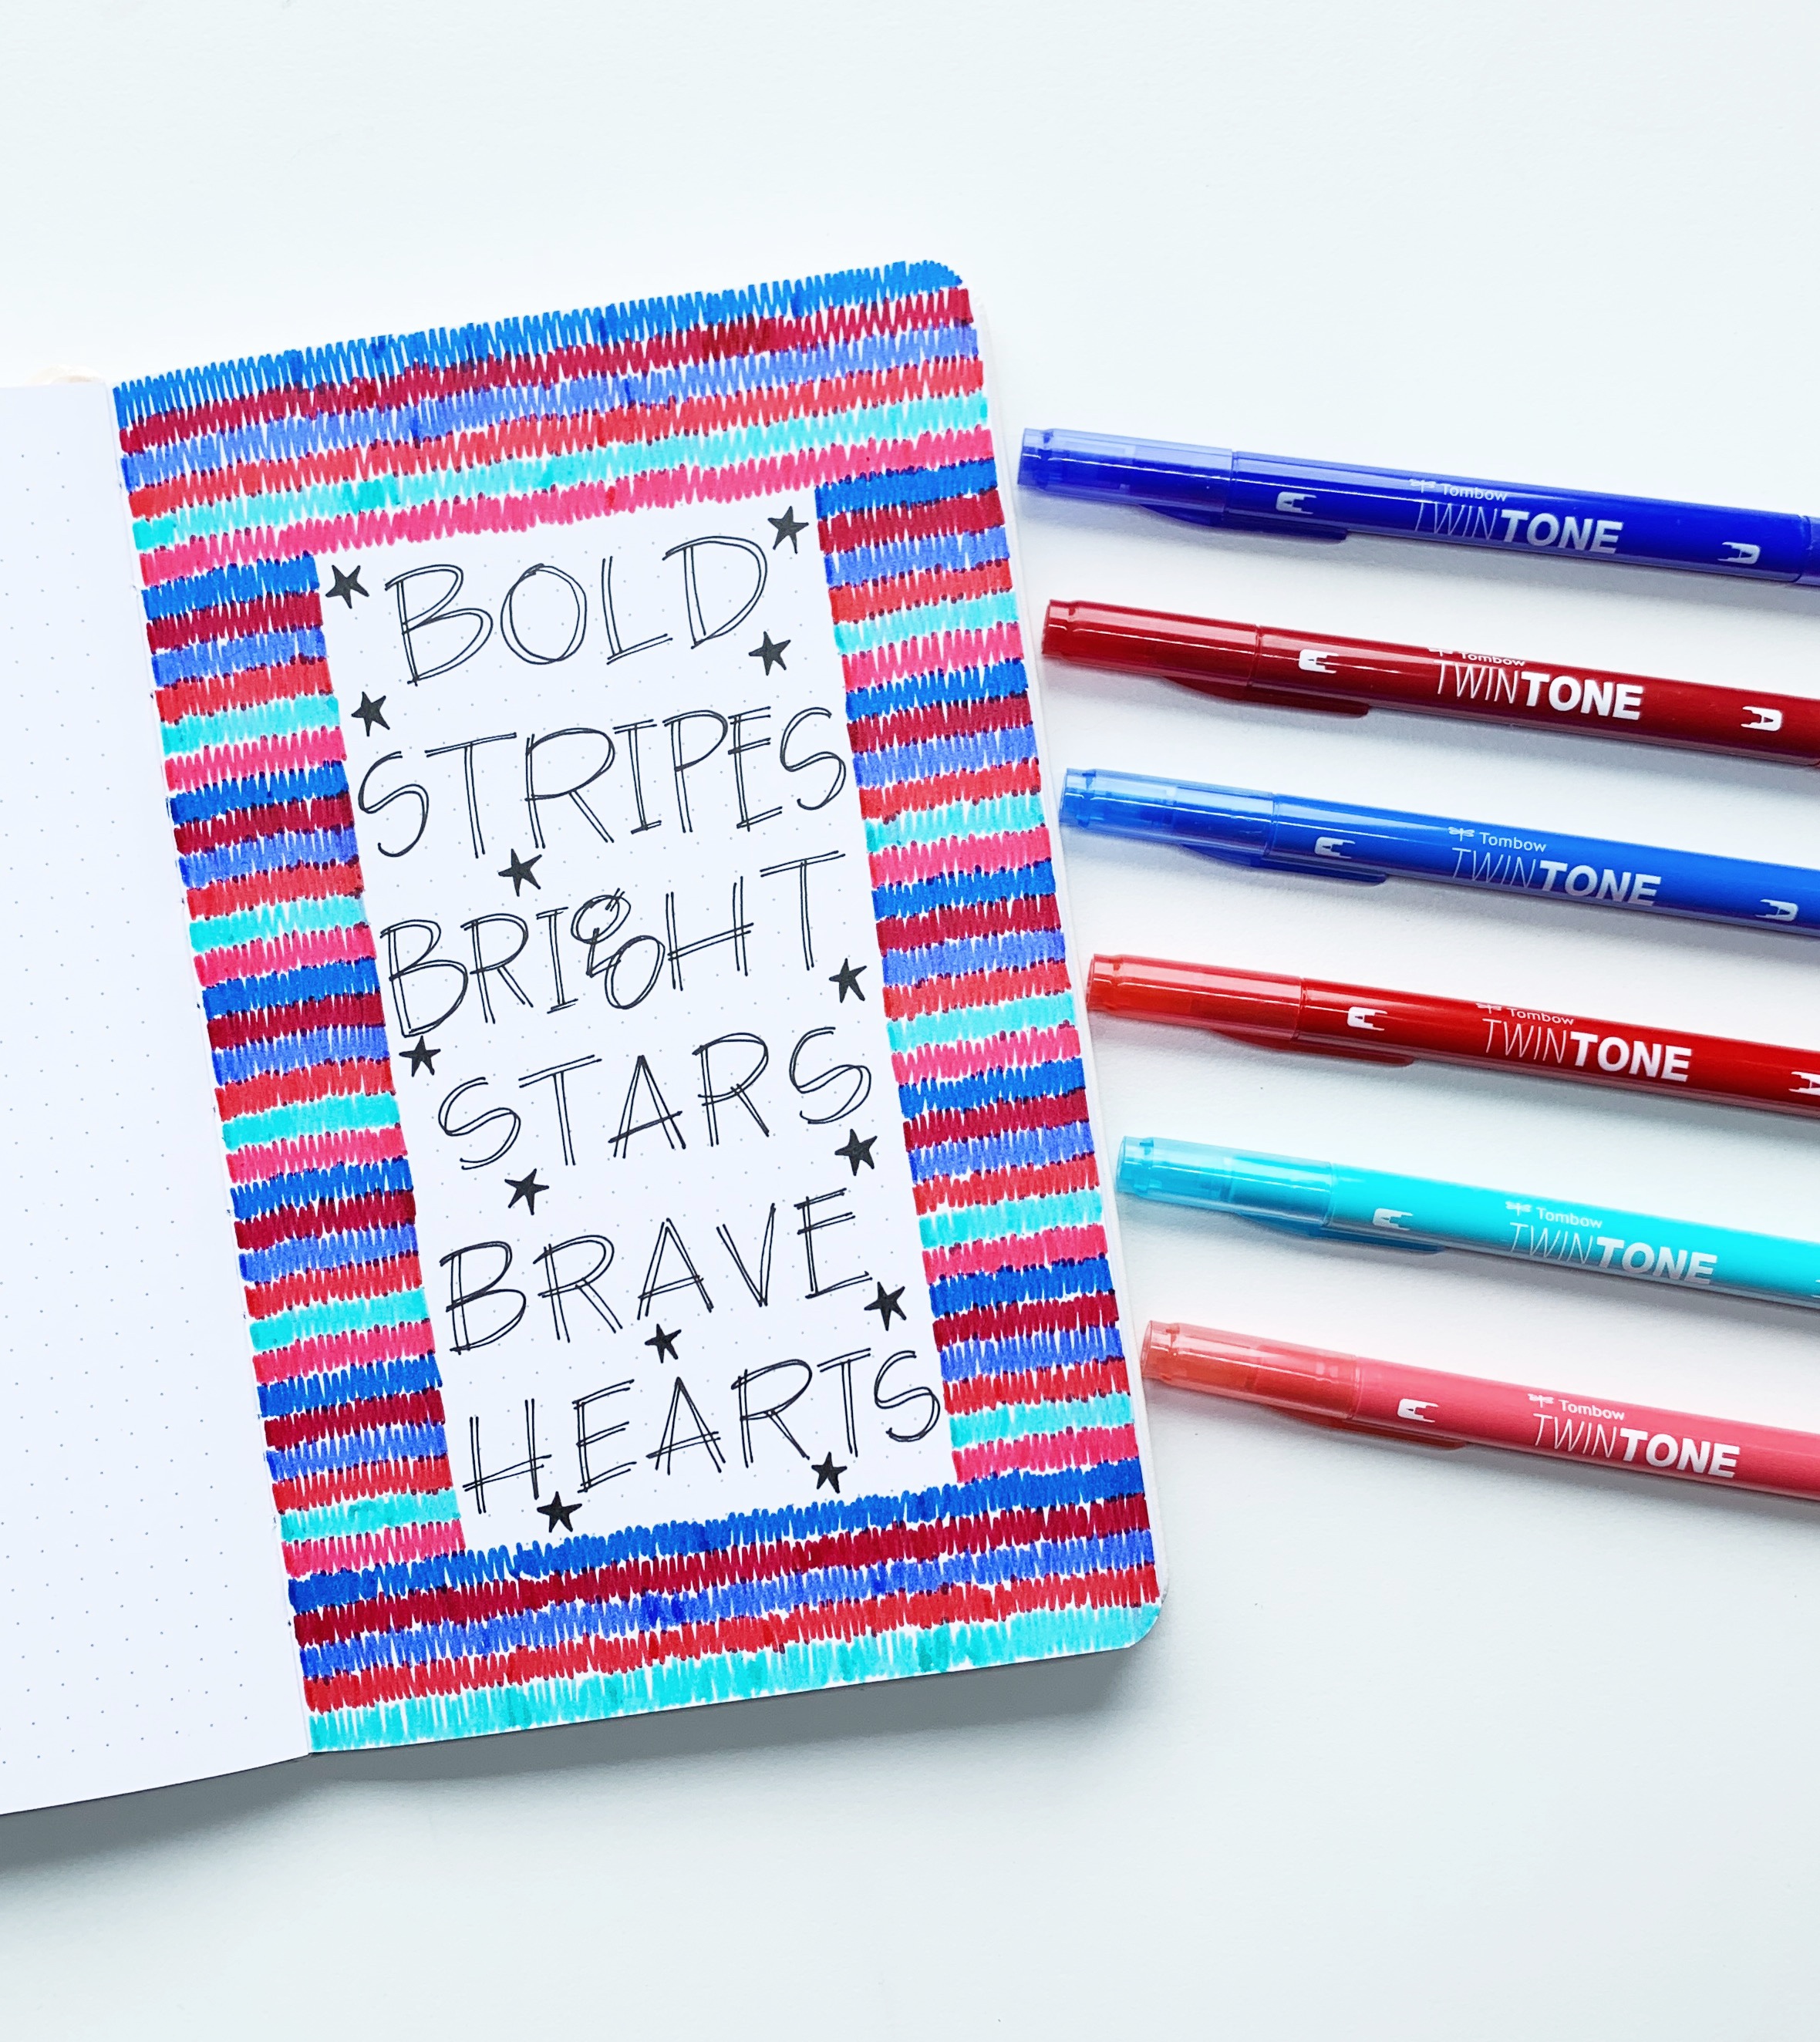
Organize the shades of TwinTone Markers in the order you want to use them. Then, start at the top of the page with the first marker and draw a scribble line going up and down along the top of the page. Each color will take up one row on your dot grid notebook page! Scribble each color below the next until you make your way through all the colors.
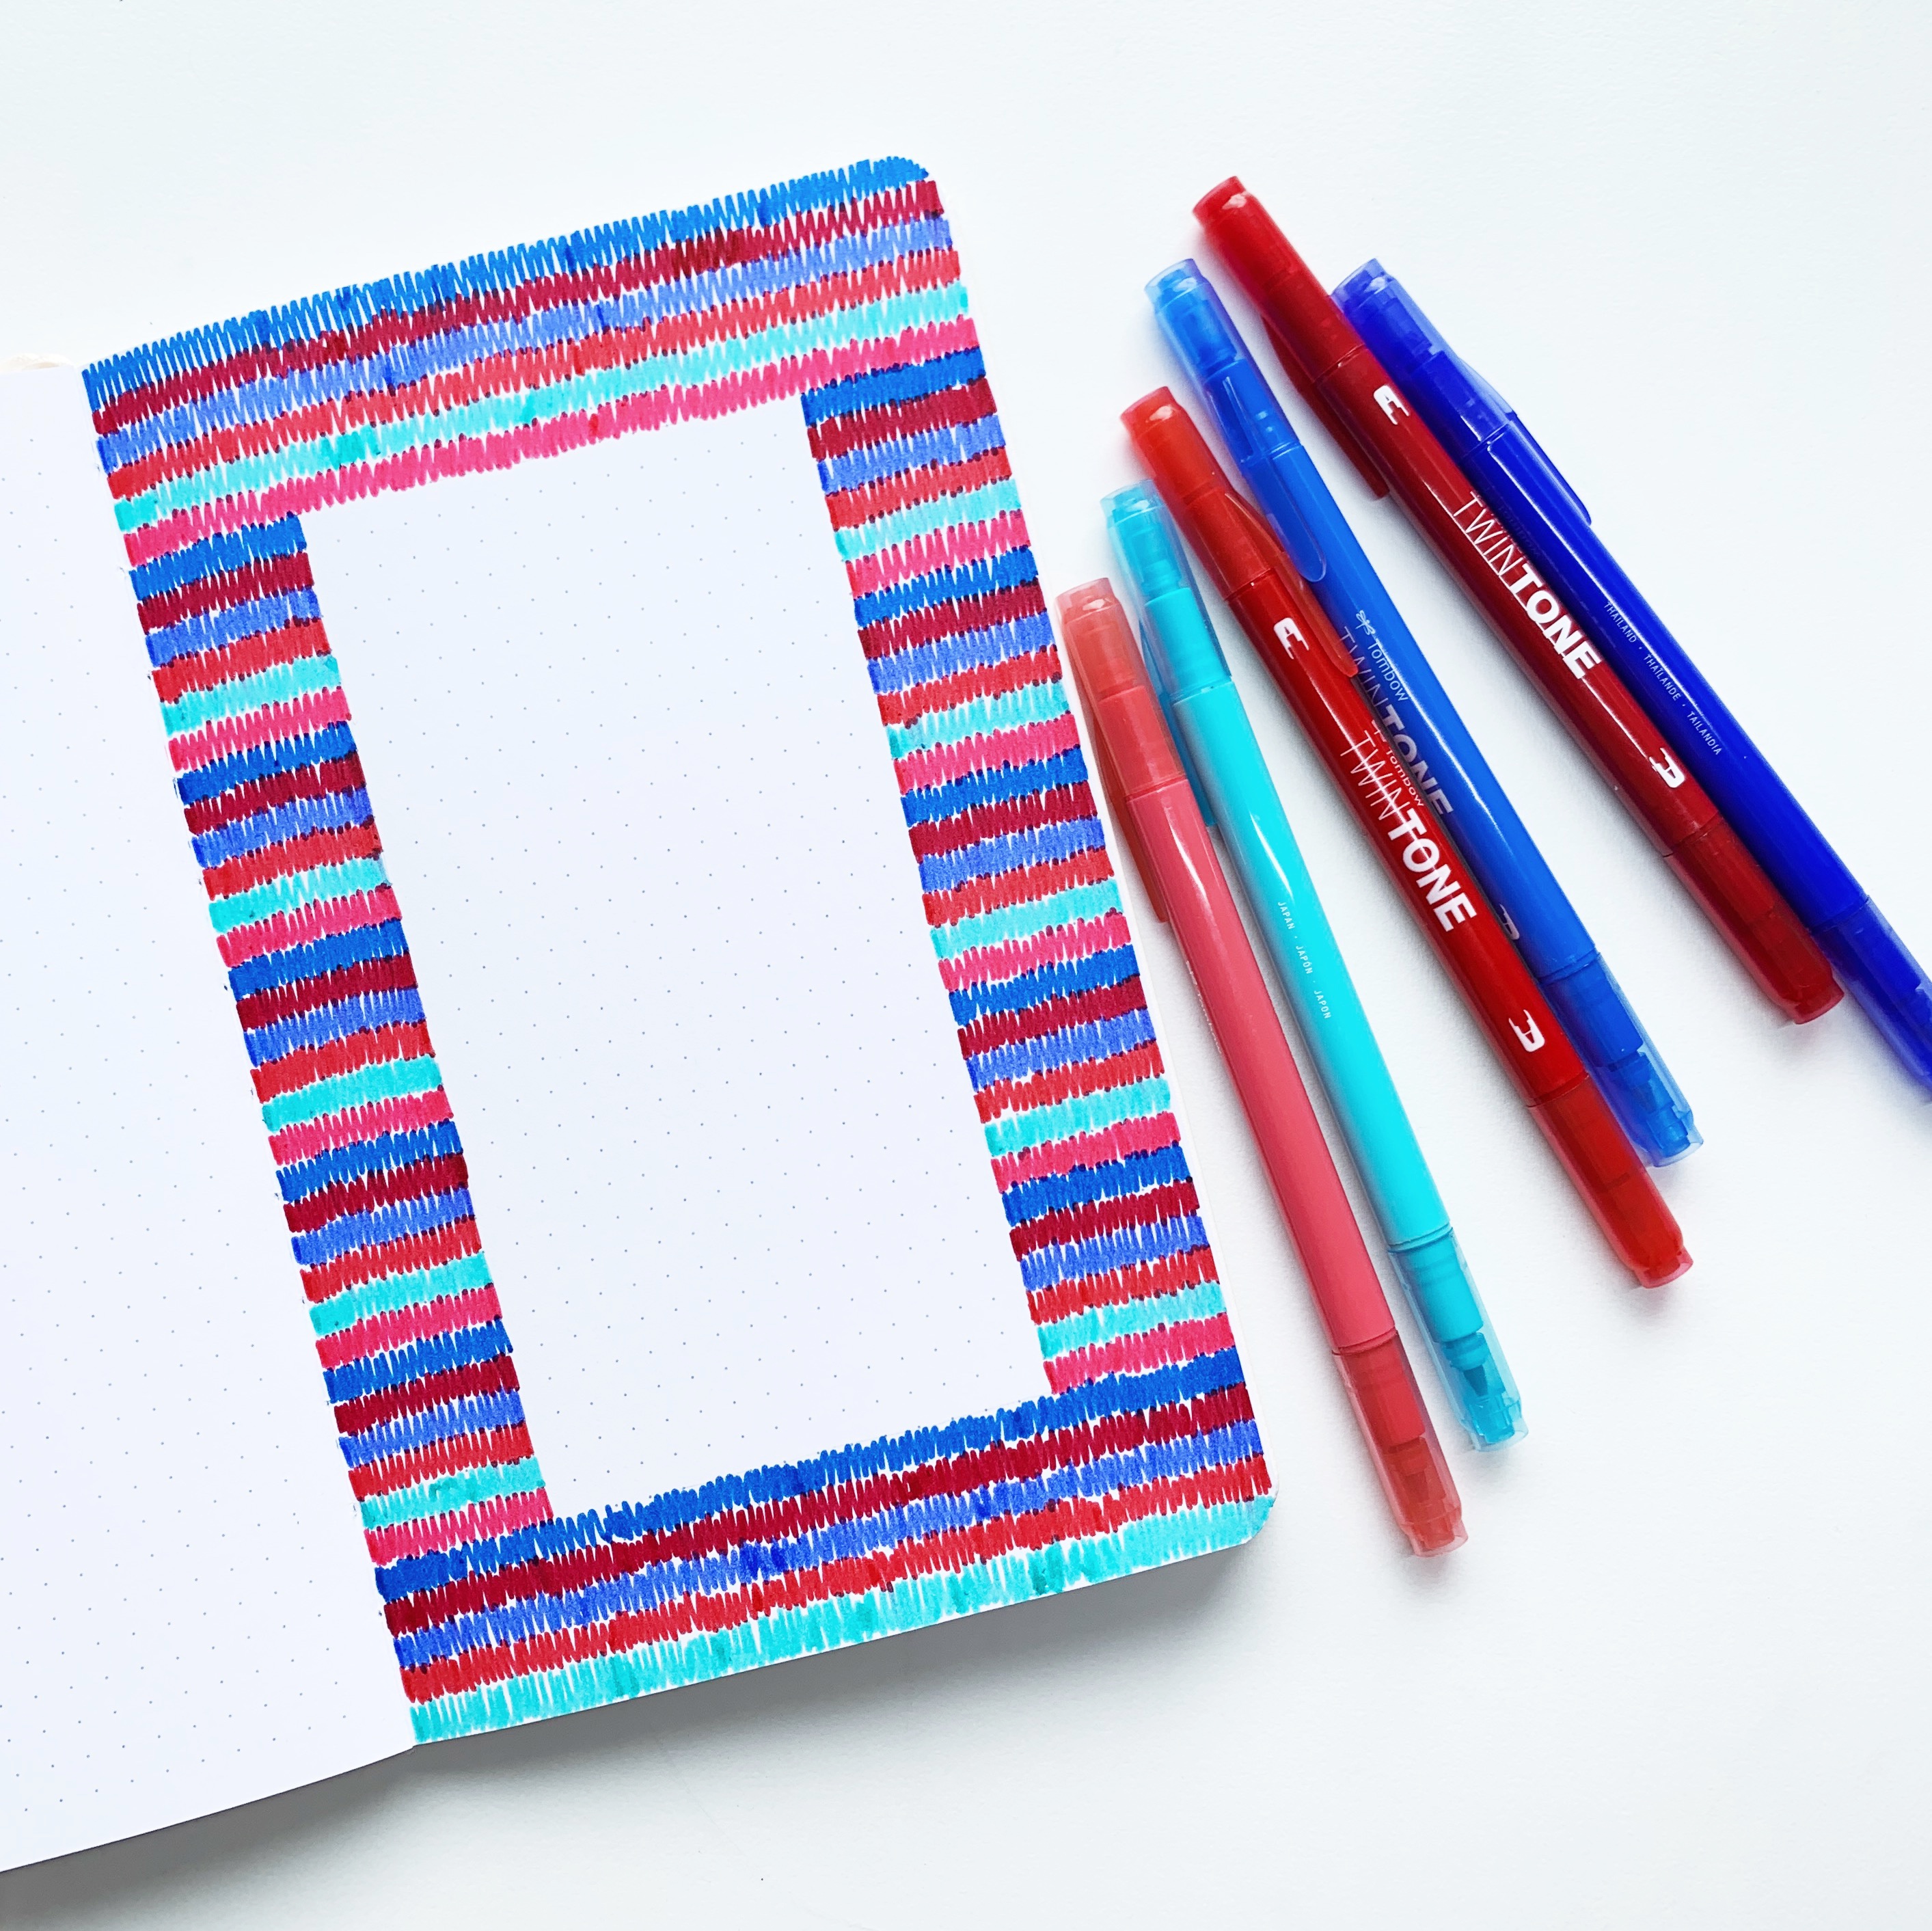
Step 3
Repeat the pattern using the TwinTone Markers all the way down the page!
Step 4
Use the MONO Drawing Pencil to lightly sketch a patriotic quote in the middle of your page!
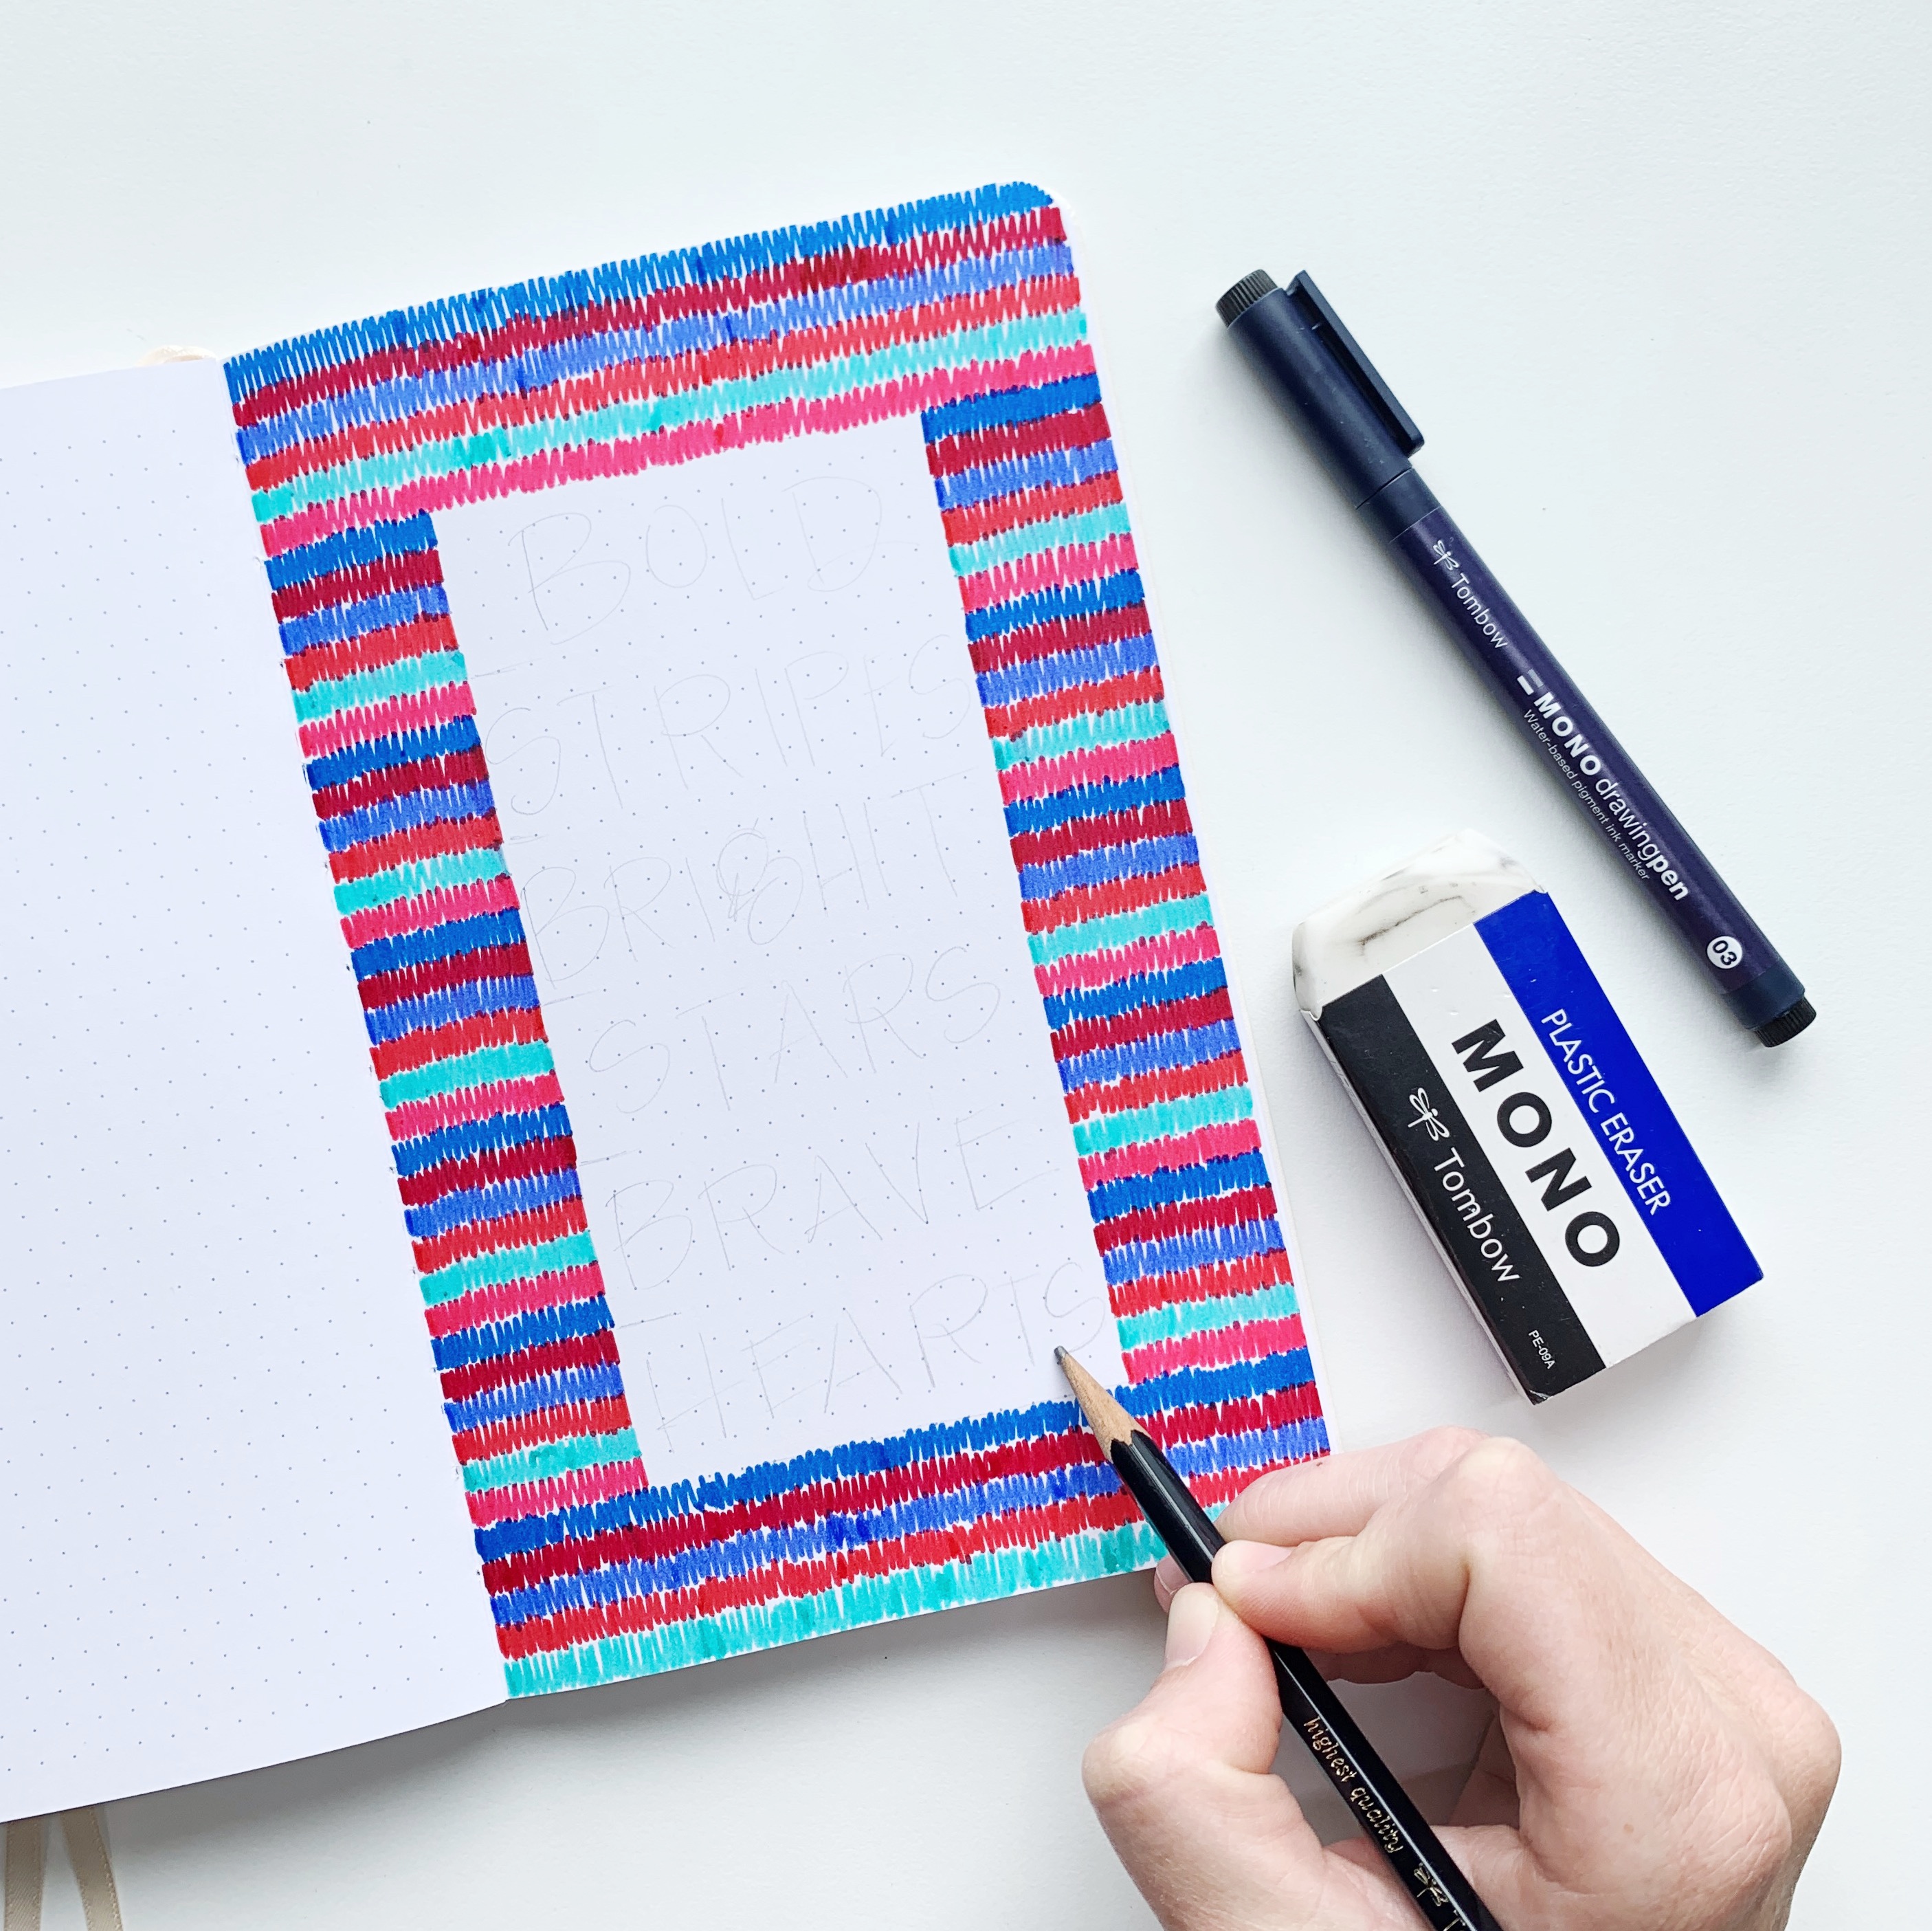
Step 5
Next, ink in your letters with the MONO Drawing Pen 03. These letters are super easy to make. Just write out the word and then write it out again over the top, making sure the letters don’t line up exactly with the first set.

Step 6
Erase any pencil marks with the MONO Eraser and then draw tiny stars with the MONO Drawing Pen 03! You did it!!
Thank you for following along today. I hope you try out this fun and simple Fourth of July border tutorial! Make sure to follow @studio80design for more tips and tricks!
For more TwinTone inspiration, make sure to check out these great posts:
- Create a Floral Swatch Pattern For Tombow’s TwinTone Markers
- Create This Cursive Quote With Tombow TwinTone Markers
- 5 Ways to Use Tombow TwinTones in Your Planner