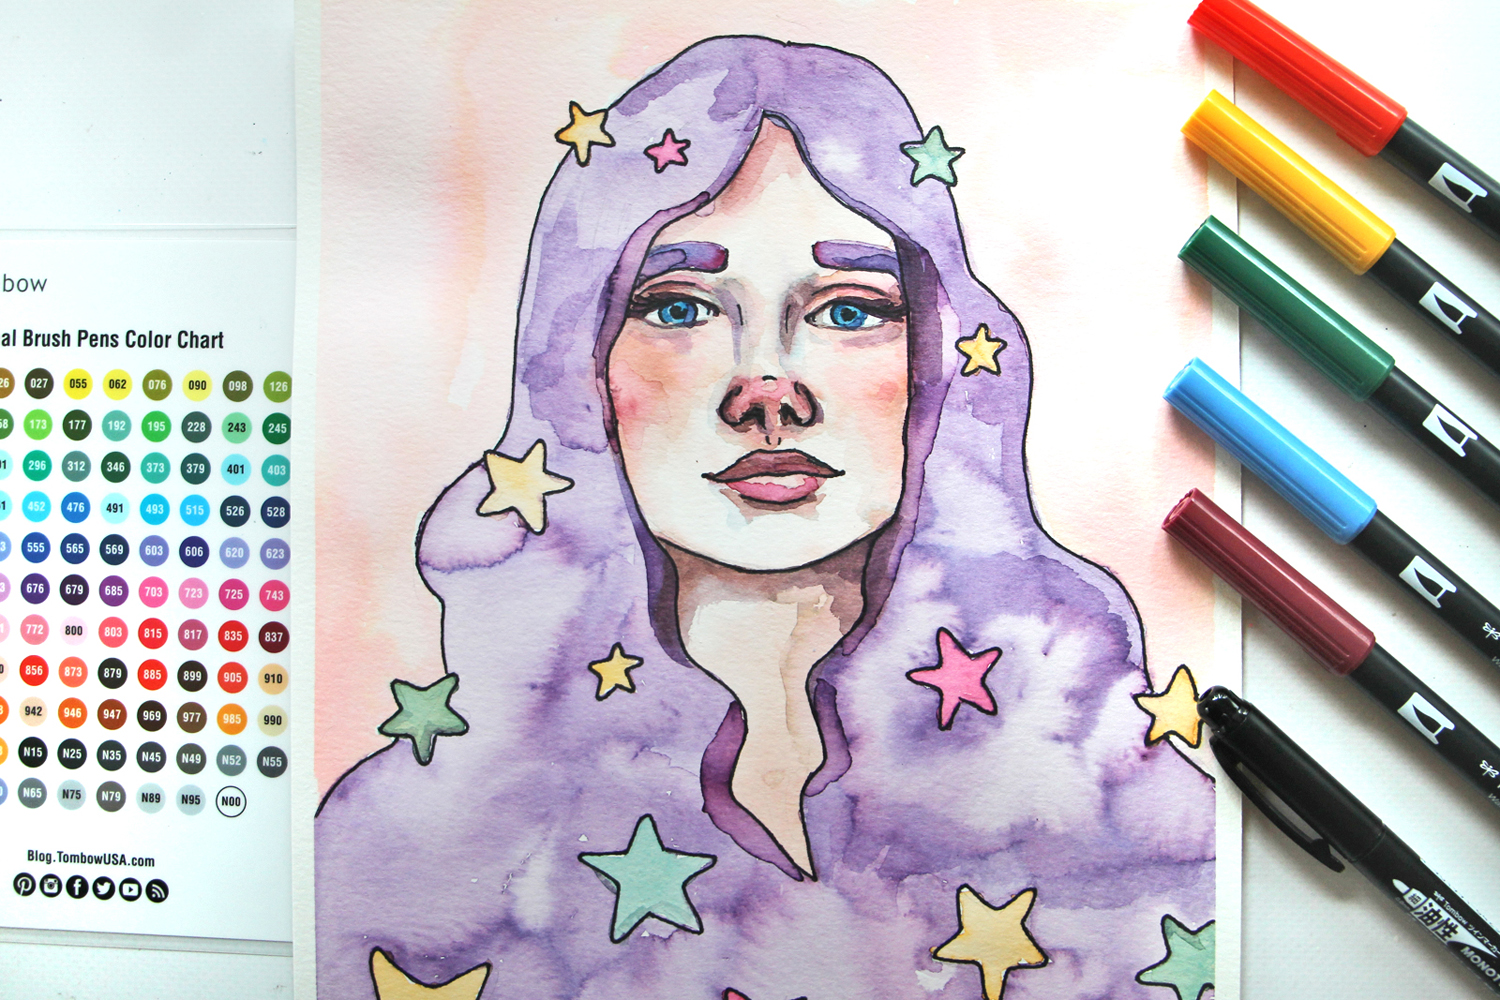
Do you have a limited number of Dual Brush Pen colors, but still want to make a beautiful piece of art? I’m Katie from Studio Katie here! Today, I’m going to show you some tips for mixing Dual Brush Pens to create custom colors.
Since this is my first post of 2020 on the Tombow blog, I wanted to take a second to reintroduce myself to you! I’m Katie! I’m an artist living near Seattle, Washington. I love everything creative, but my favorite types of projects are drawing and painting. My personal style is very inspired by nature and space, so you’ll see a lot of animals and galaxies in my work!
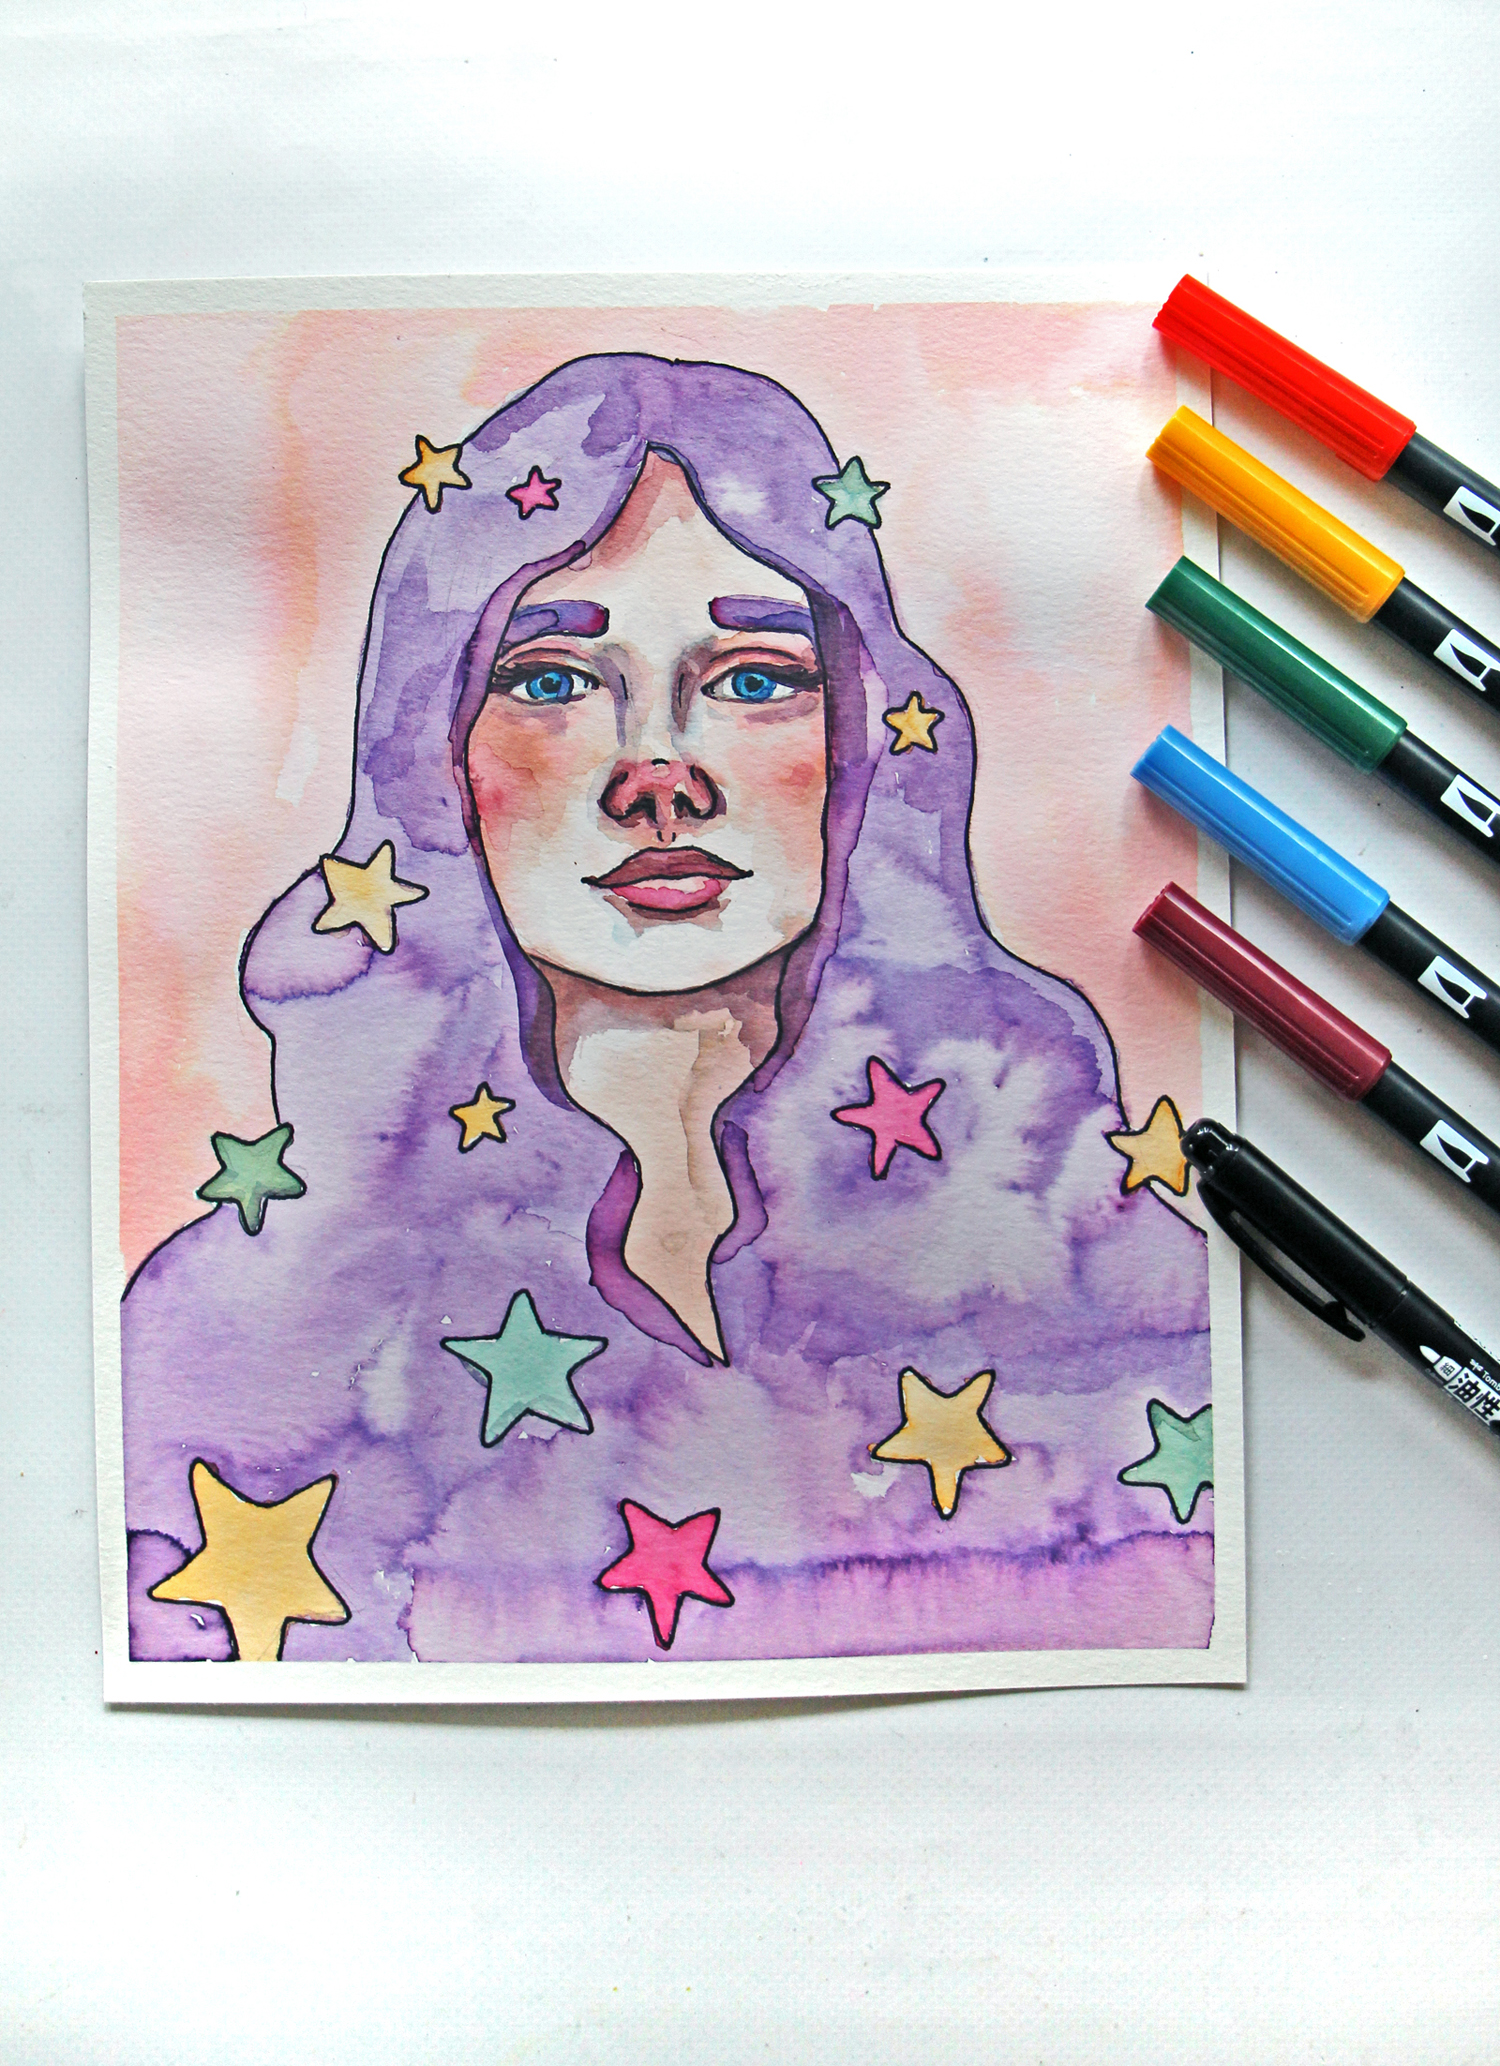
Now, let me show you how I painted this girl using only the five Dual Brush Pen colors from the Watercolor Set!
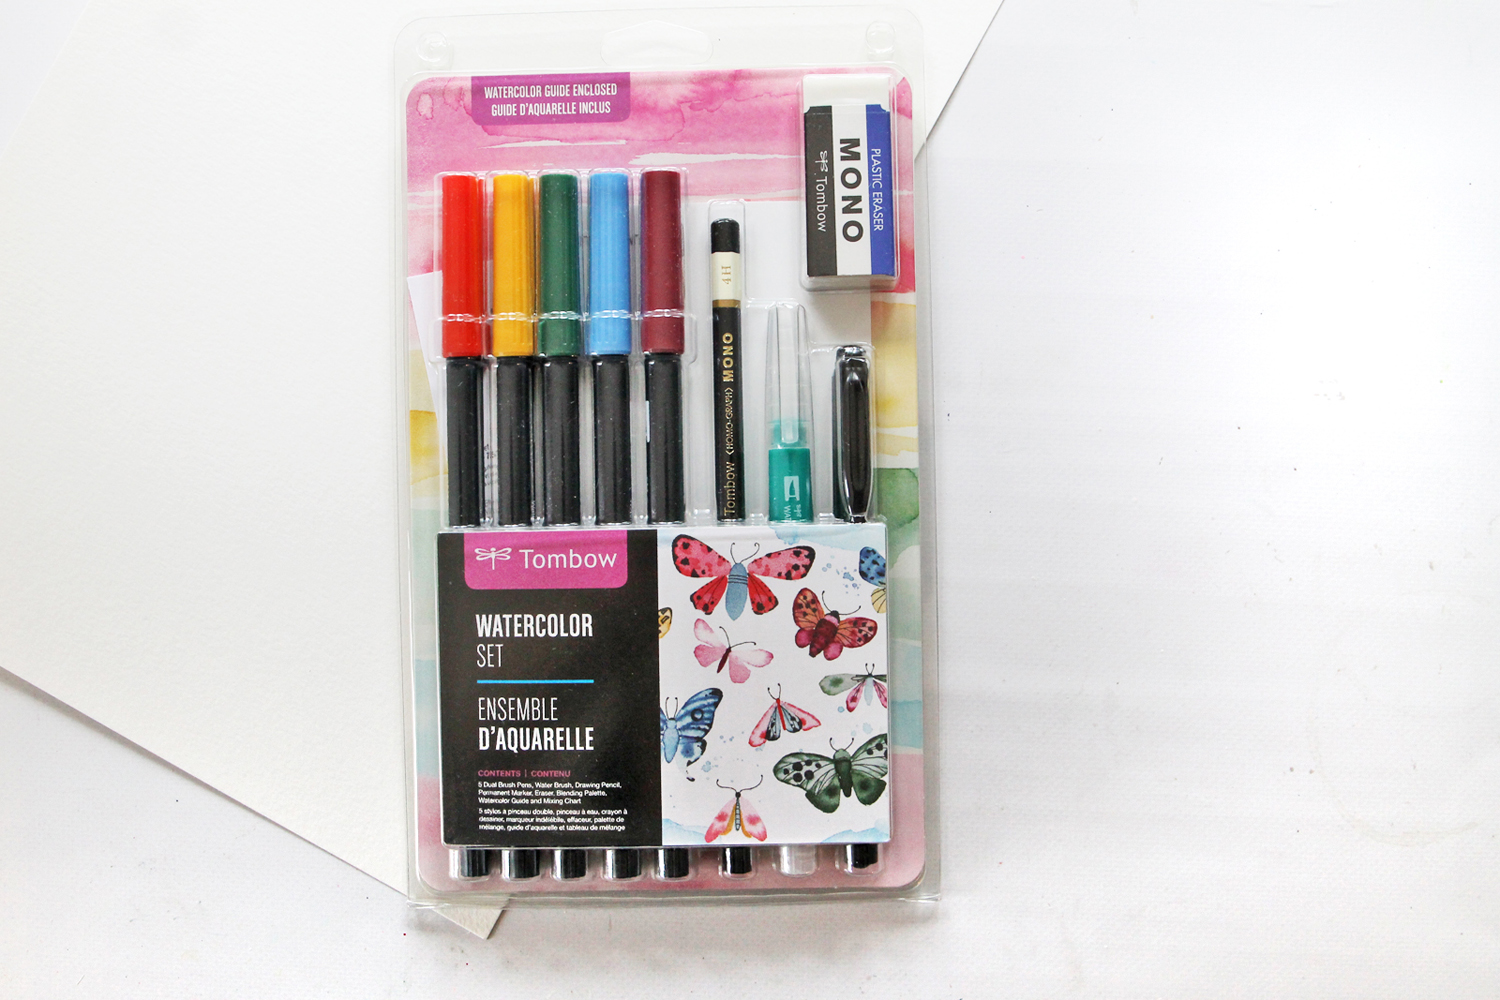
Supplies:
- Tombow Watercolor Set (This comes with: 5 Dual Brush Pens, Medium Water Brush, MONO Drawing Pencil, MONO Twin Permanent Marker, MONO Plastic Eraser, Blending Palette, Watercolor Guide and Mixing Chart.)
- 140 lb watercolor paper
- Washi tape
Mixing Dual Brush Pen Colors:
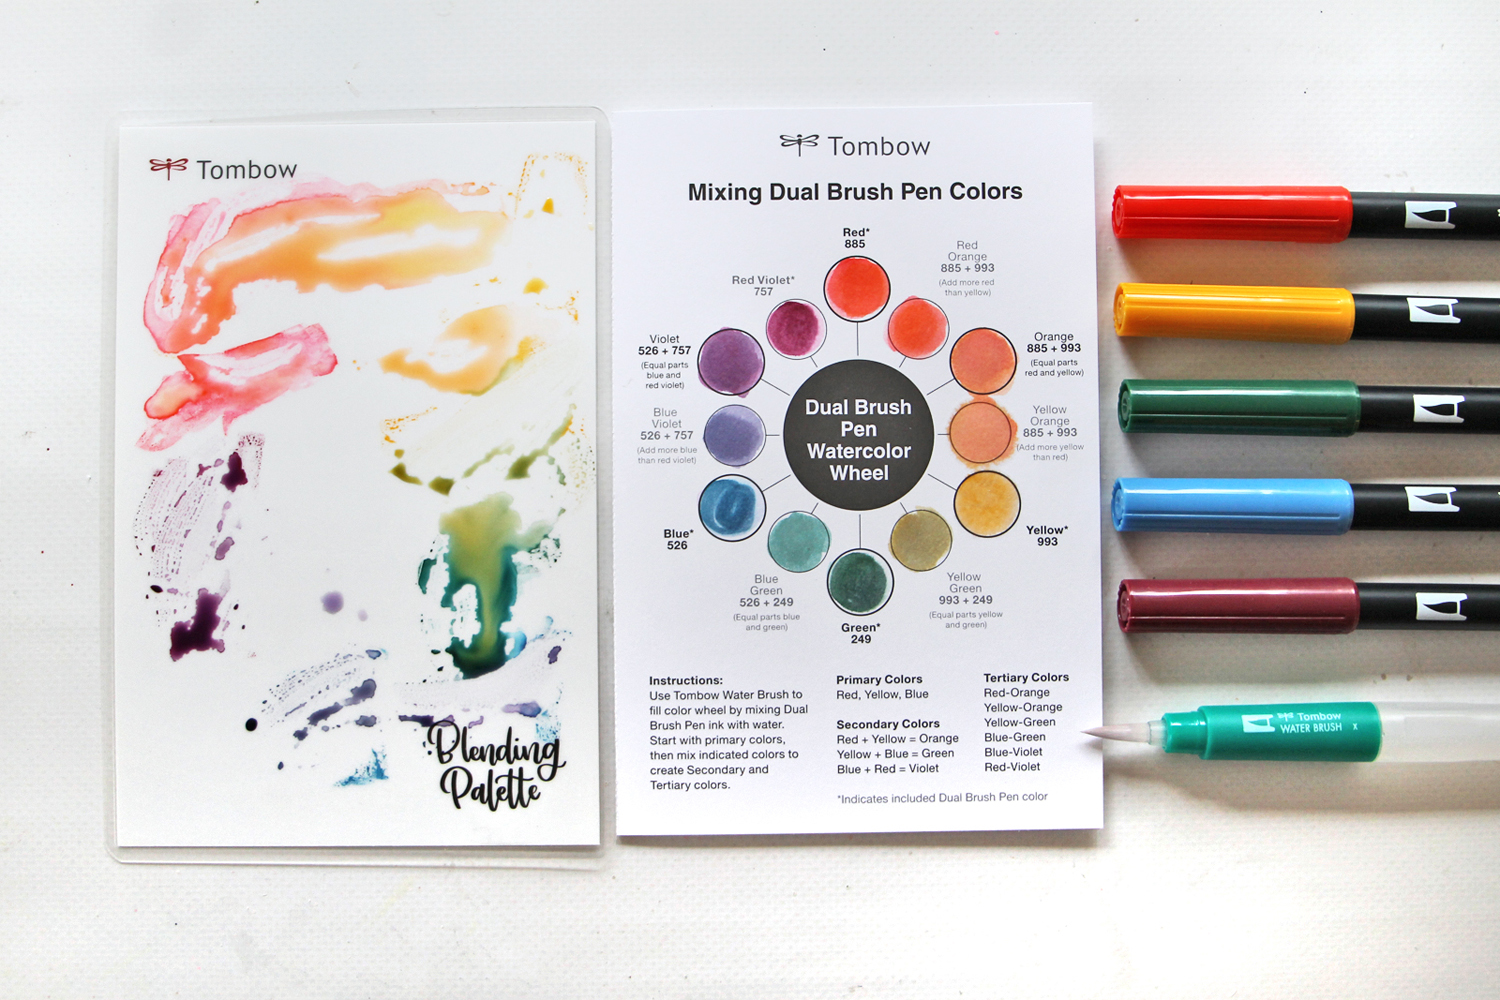
The Watercolor Set comes with five Dual Brush Pens: 885 Warm Red, 993 Chrome Orange, 249 Hunter Green, 526 True Blue and 757 Port Red. It also comes with a pamphlet and mixing chart to show you how you can combine the colors to create more colors!
Step one:
Apply two of the Dual Brush Pen colors side by side on the Blending Palette.
Step two:
Use the Water Brush to mix the two colors and pick up the ink to paint with.
Being familiar with the color wheel and color theory will always come in handy when mixing colors. However, the color mixing guide included in this kit really helps as it shows how you can make secondary and tertiary colors using the five markers.
How to Mix Dual Brush Pens to Paint a Portrait:
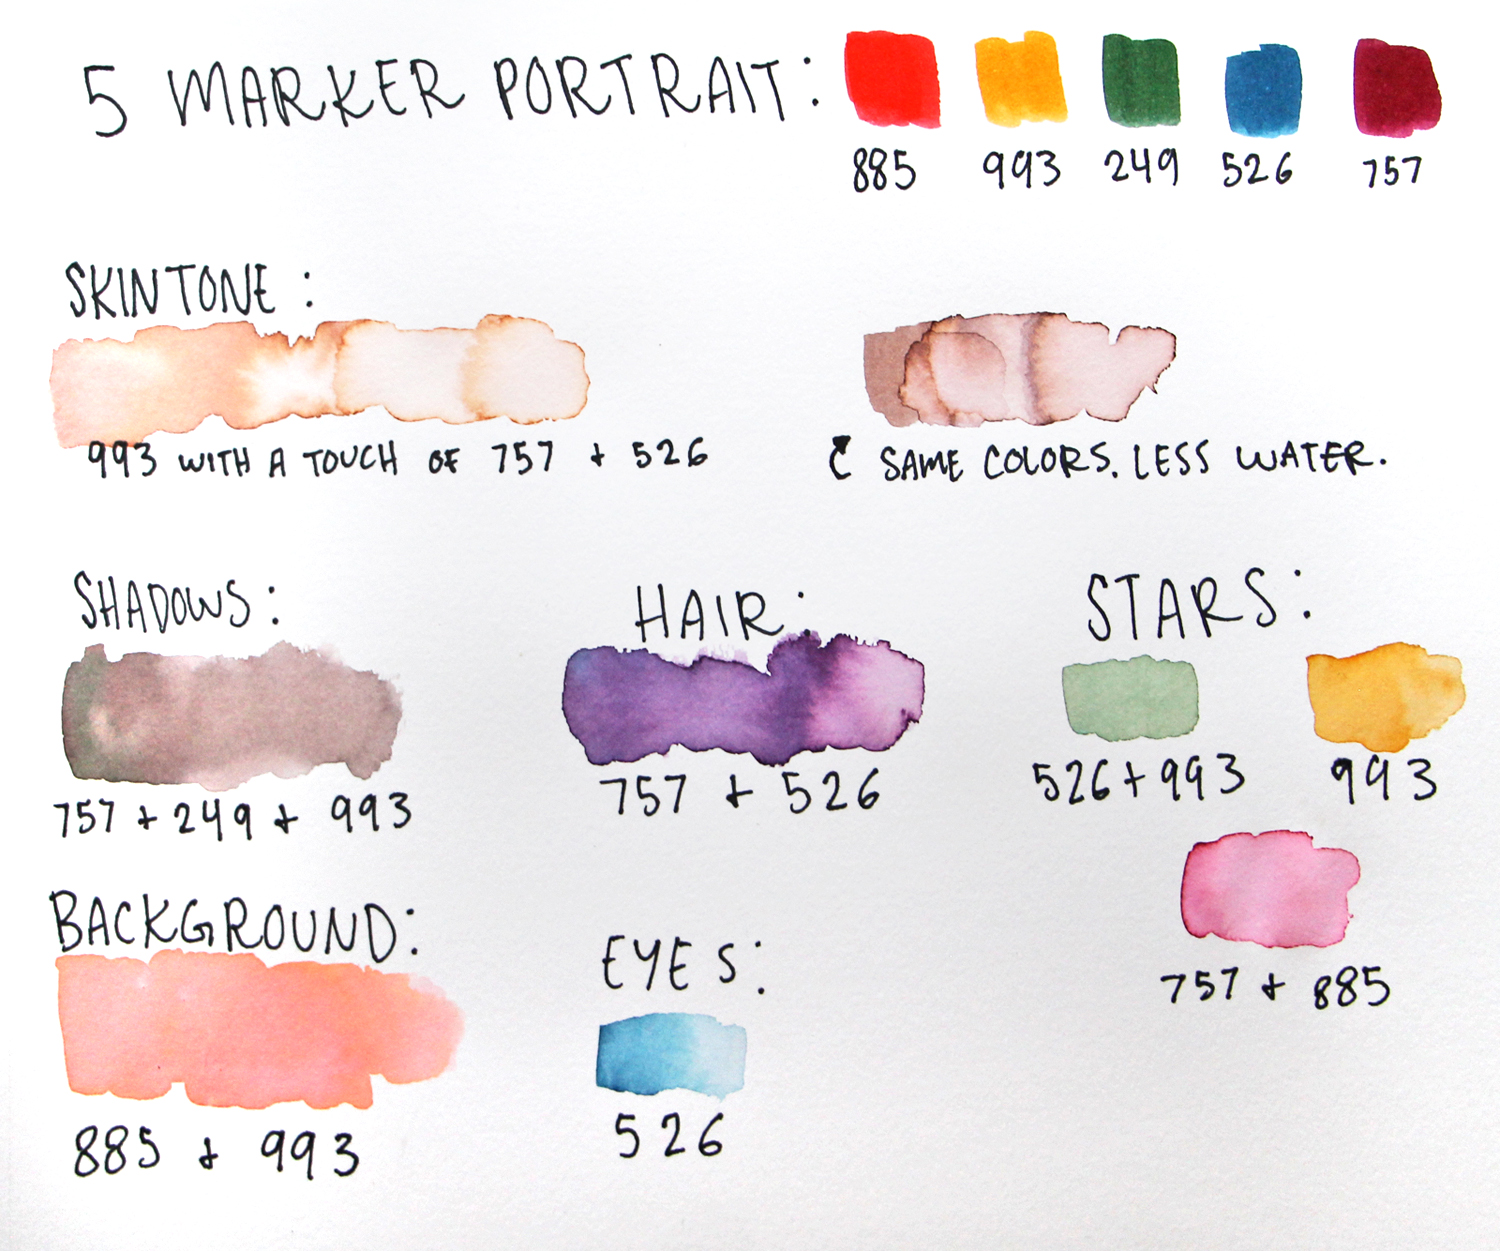
Above, you’ll see the colors I mixed for this portrait using only the five Dual Brush Pens from the Watercolor Set. Below, I’ll show you how I layered these colors for my final piece!
Step one:
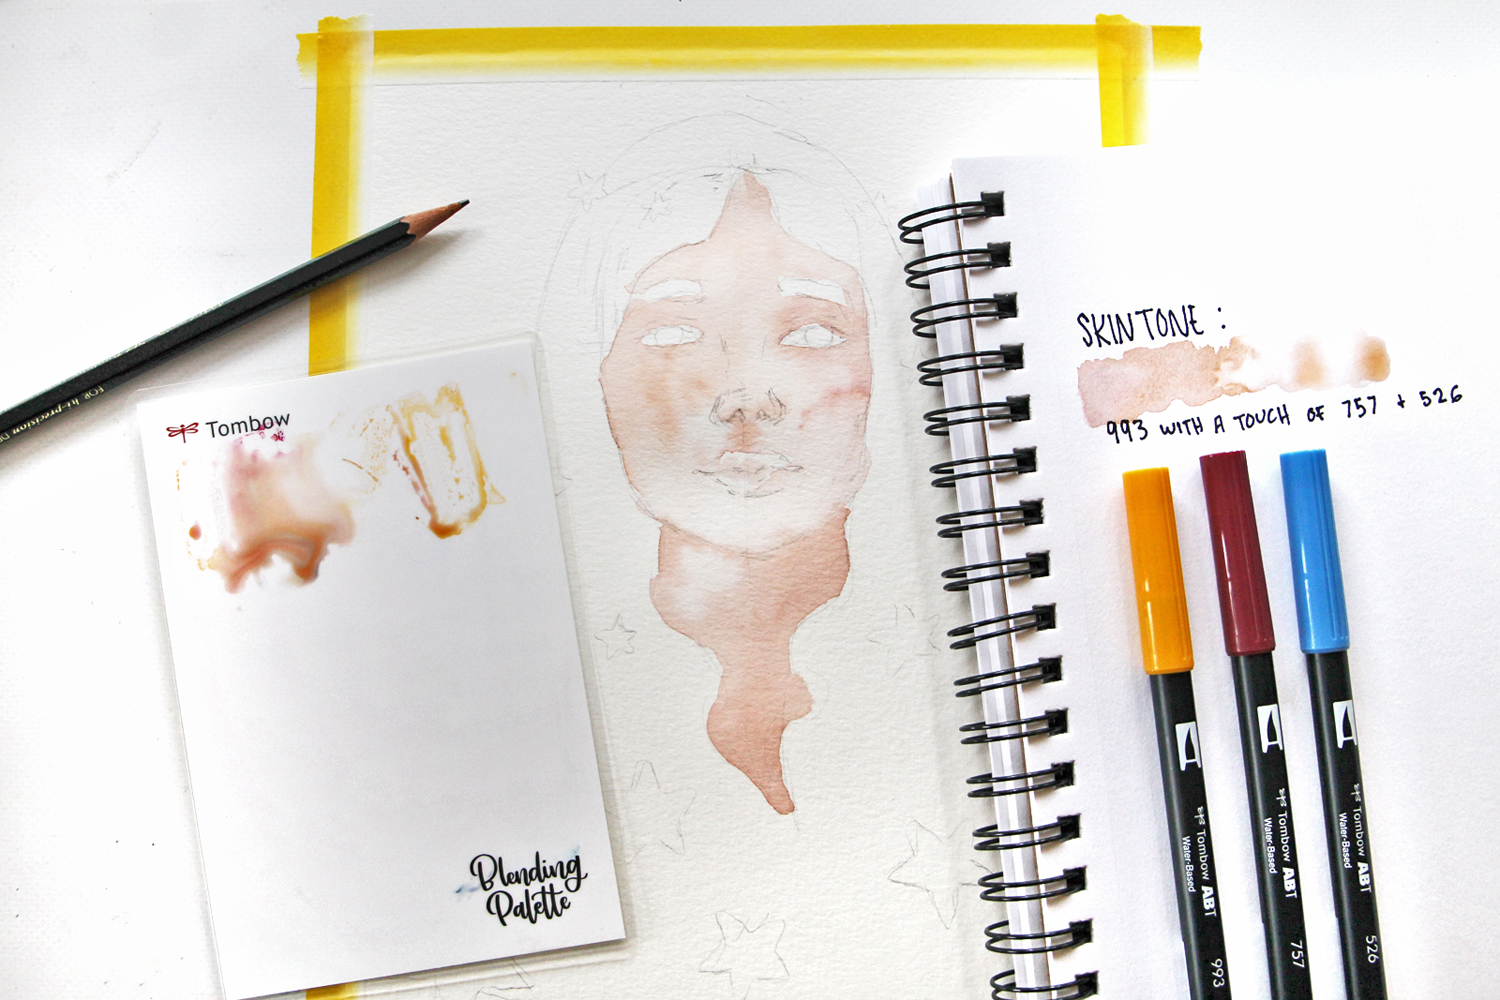
To mix a light skin tone, mix 993 + 757 + 526 together on the Blending Palette. Adjusting the ratio of each color with give you variations on the hue and value. More 993 will make it a lighter yellow tone, but adding more 757 and 526 will make it darker.
I taped down my watercolor paper with the washi tape (this helps keep it flat when you start painting). I used the MONO Drawing Pencil to sketch out my portrait. Next, I applied the skin tone to her face. Let it dry and then you can layer more if you want to make some areas darker in value.
Step two:
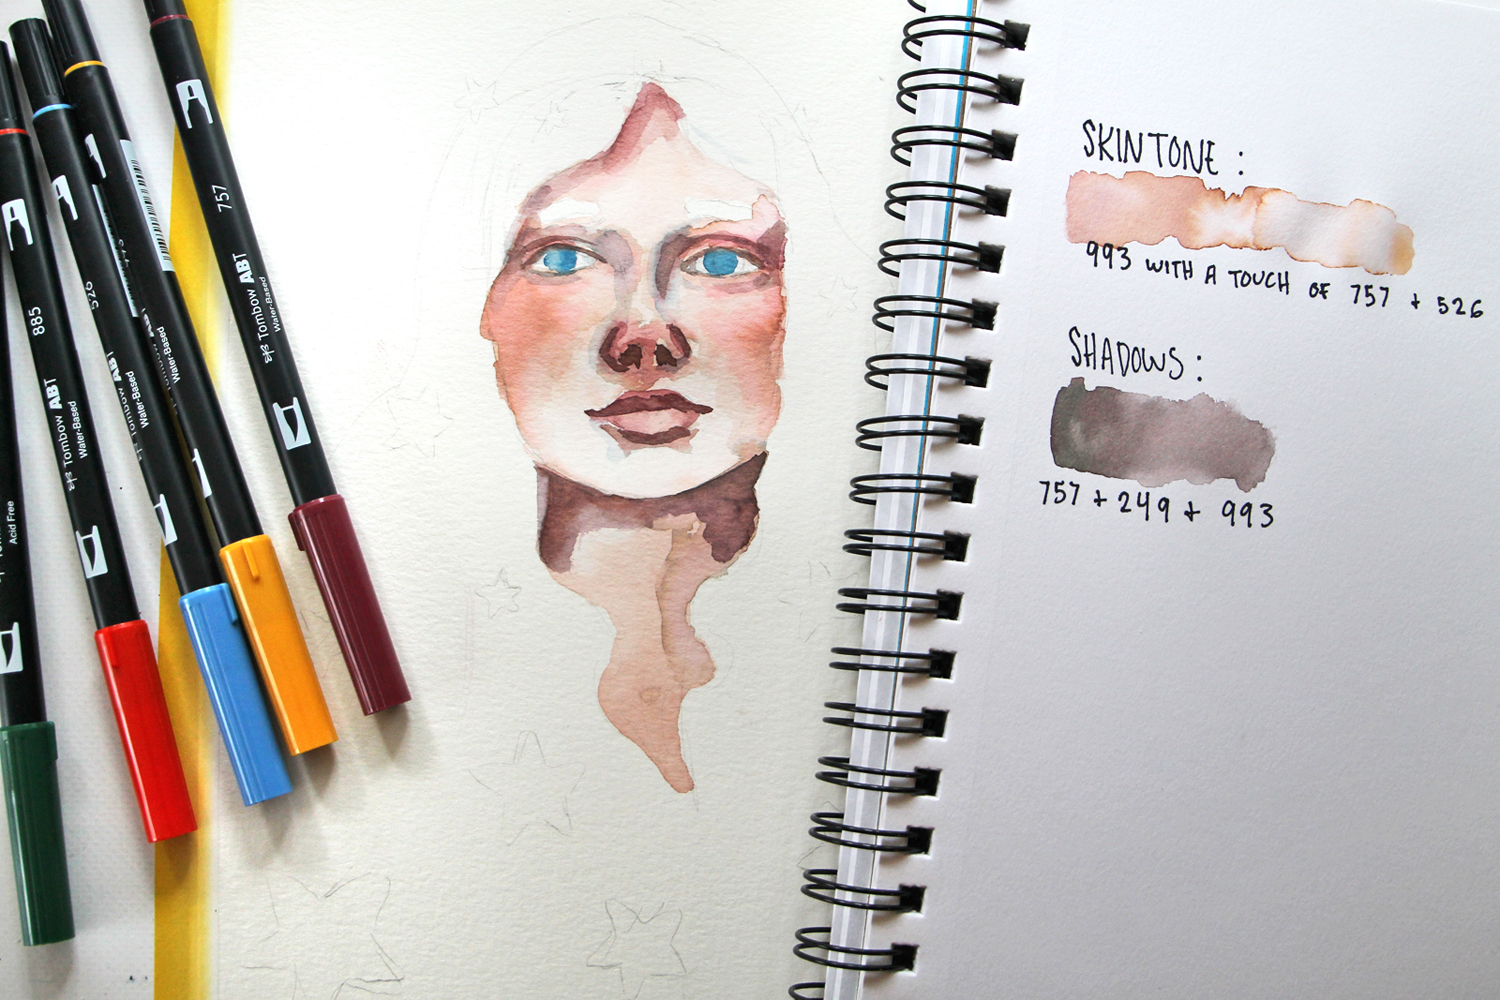
To create a shadow color, try mixing 757, 249 and 993. I used this for around the edges of her face and neck. If you add more 757 or a little 885, it becomes more of a blush you can use for lips and nose.
Step three:
To get the light purple shade of her hair, I mixed 526 with 757. Remember that the amount of water you use will also affect the value (brightness) of the color! If you add less water, the color will be darker/more pure or if you add more water, the color becomes lighter.
Click here to read 4 tips for working with water brushes.
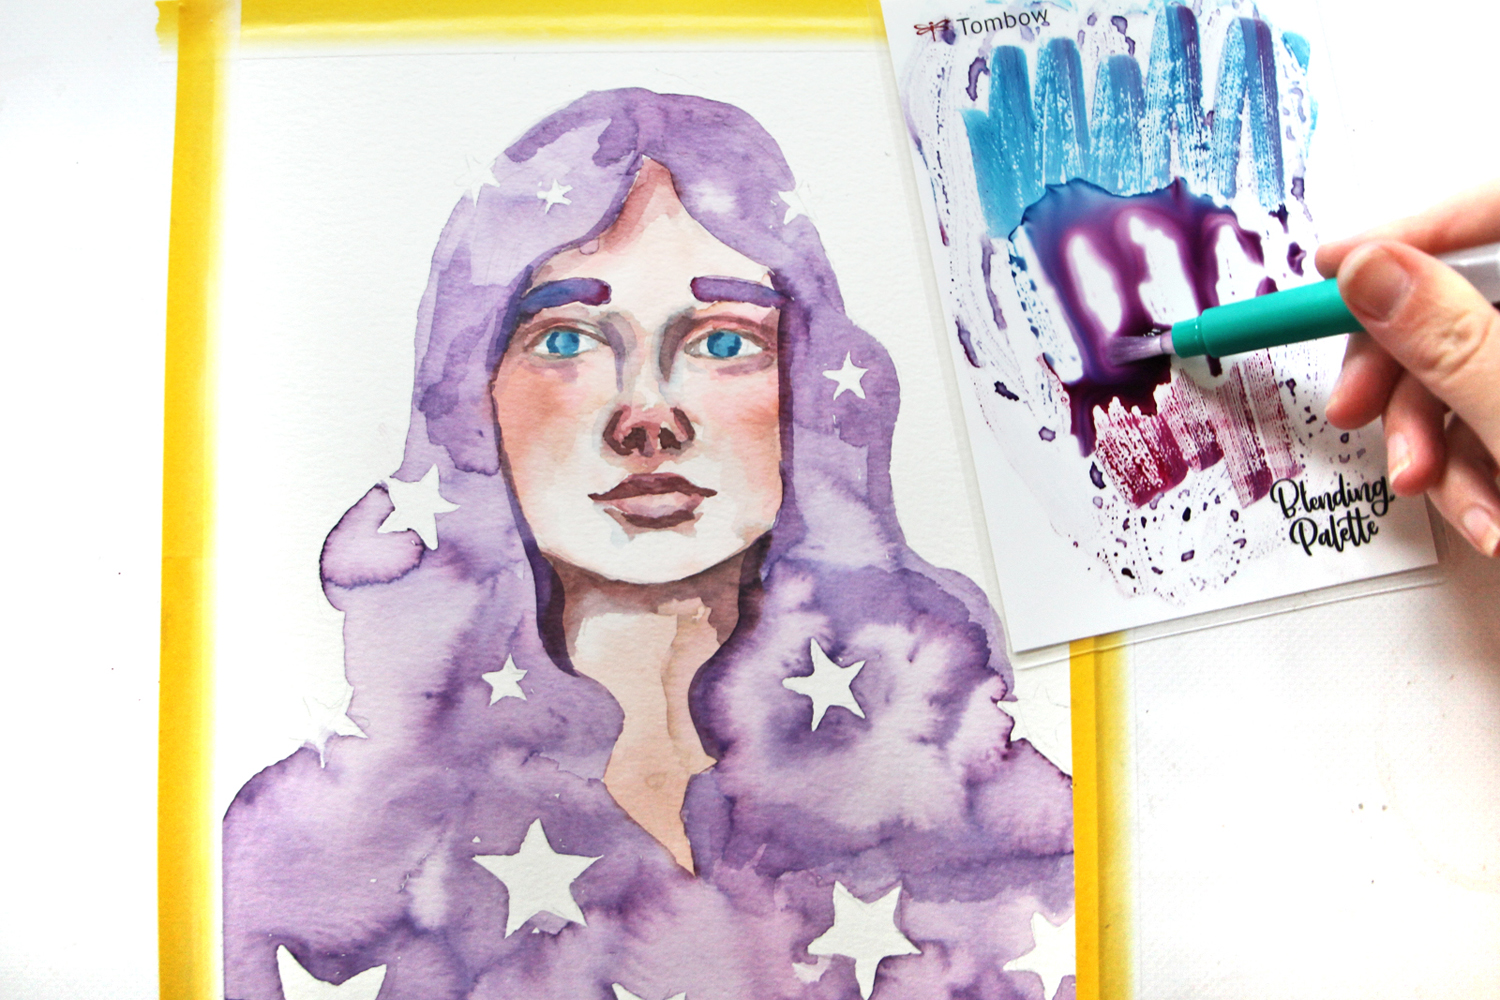
Step four:
Continue mixing colors and painting in your art piece! One of my best tips is to let each color dry before moving onto the next. This way the colors don’t blend into each other and make a mess. You can use a heat gun to speed up the drying process too.
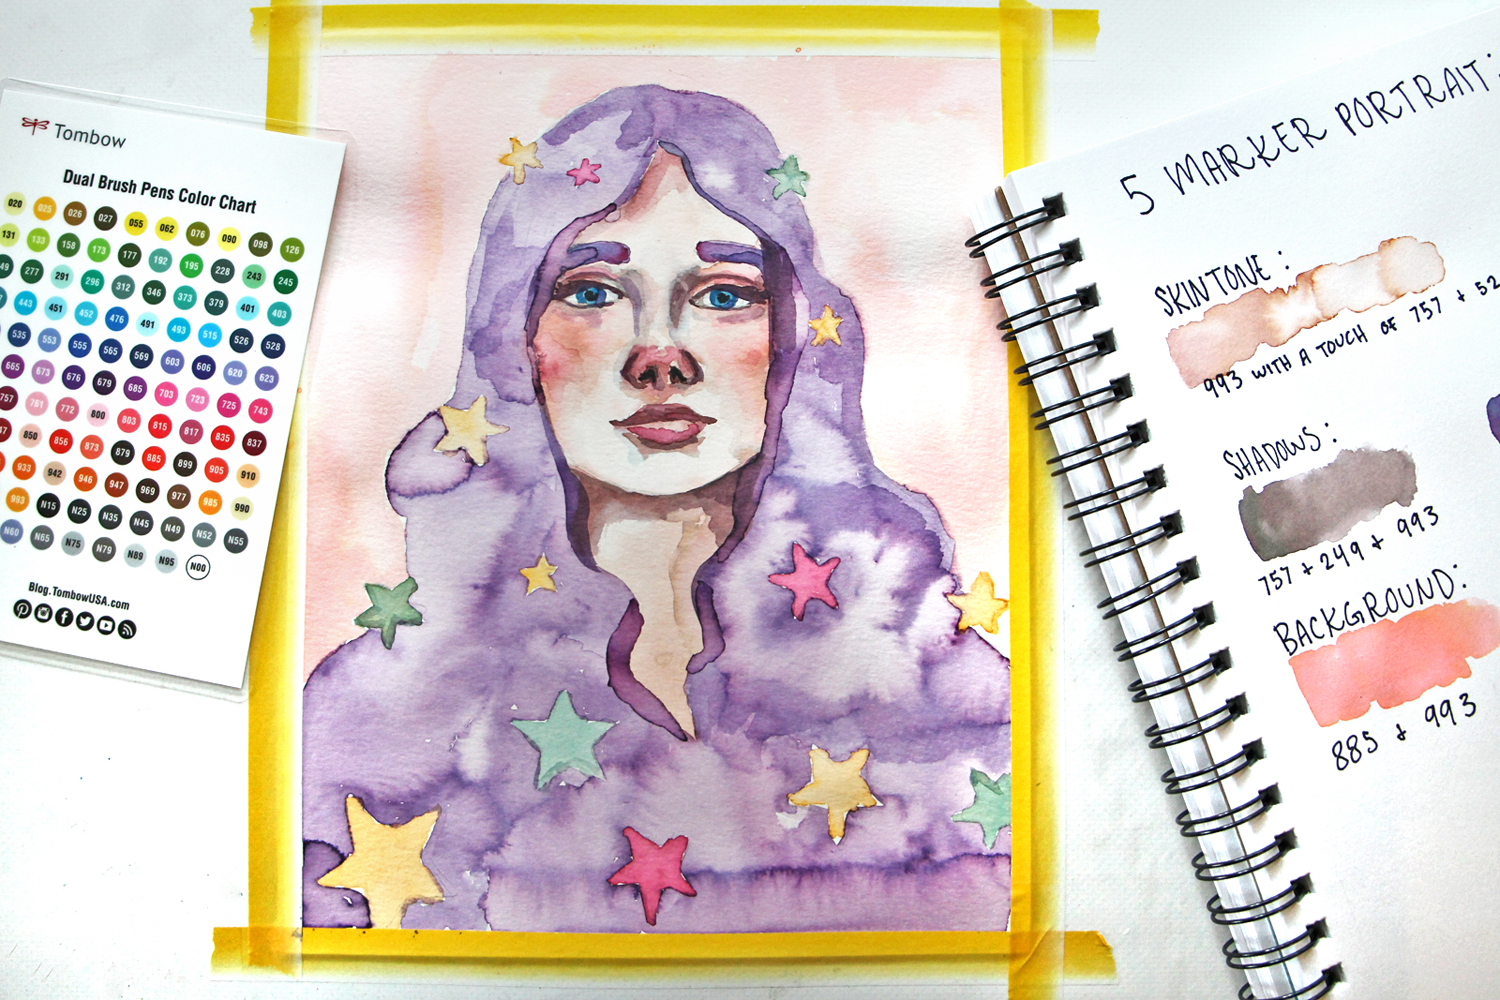
Step five:
Once finished, remove the tape. You can also outline your work in black using the MONO Twin Permanent Marker. This is an optional last step. While I do love the organic look of just watercolors, I’m always partial to black outlines!
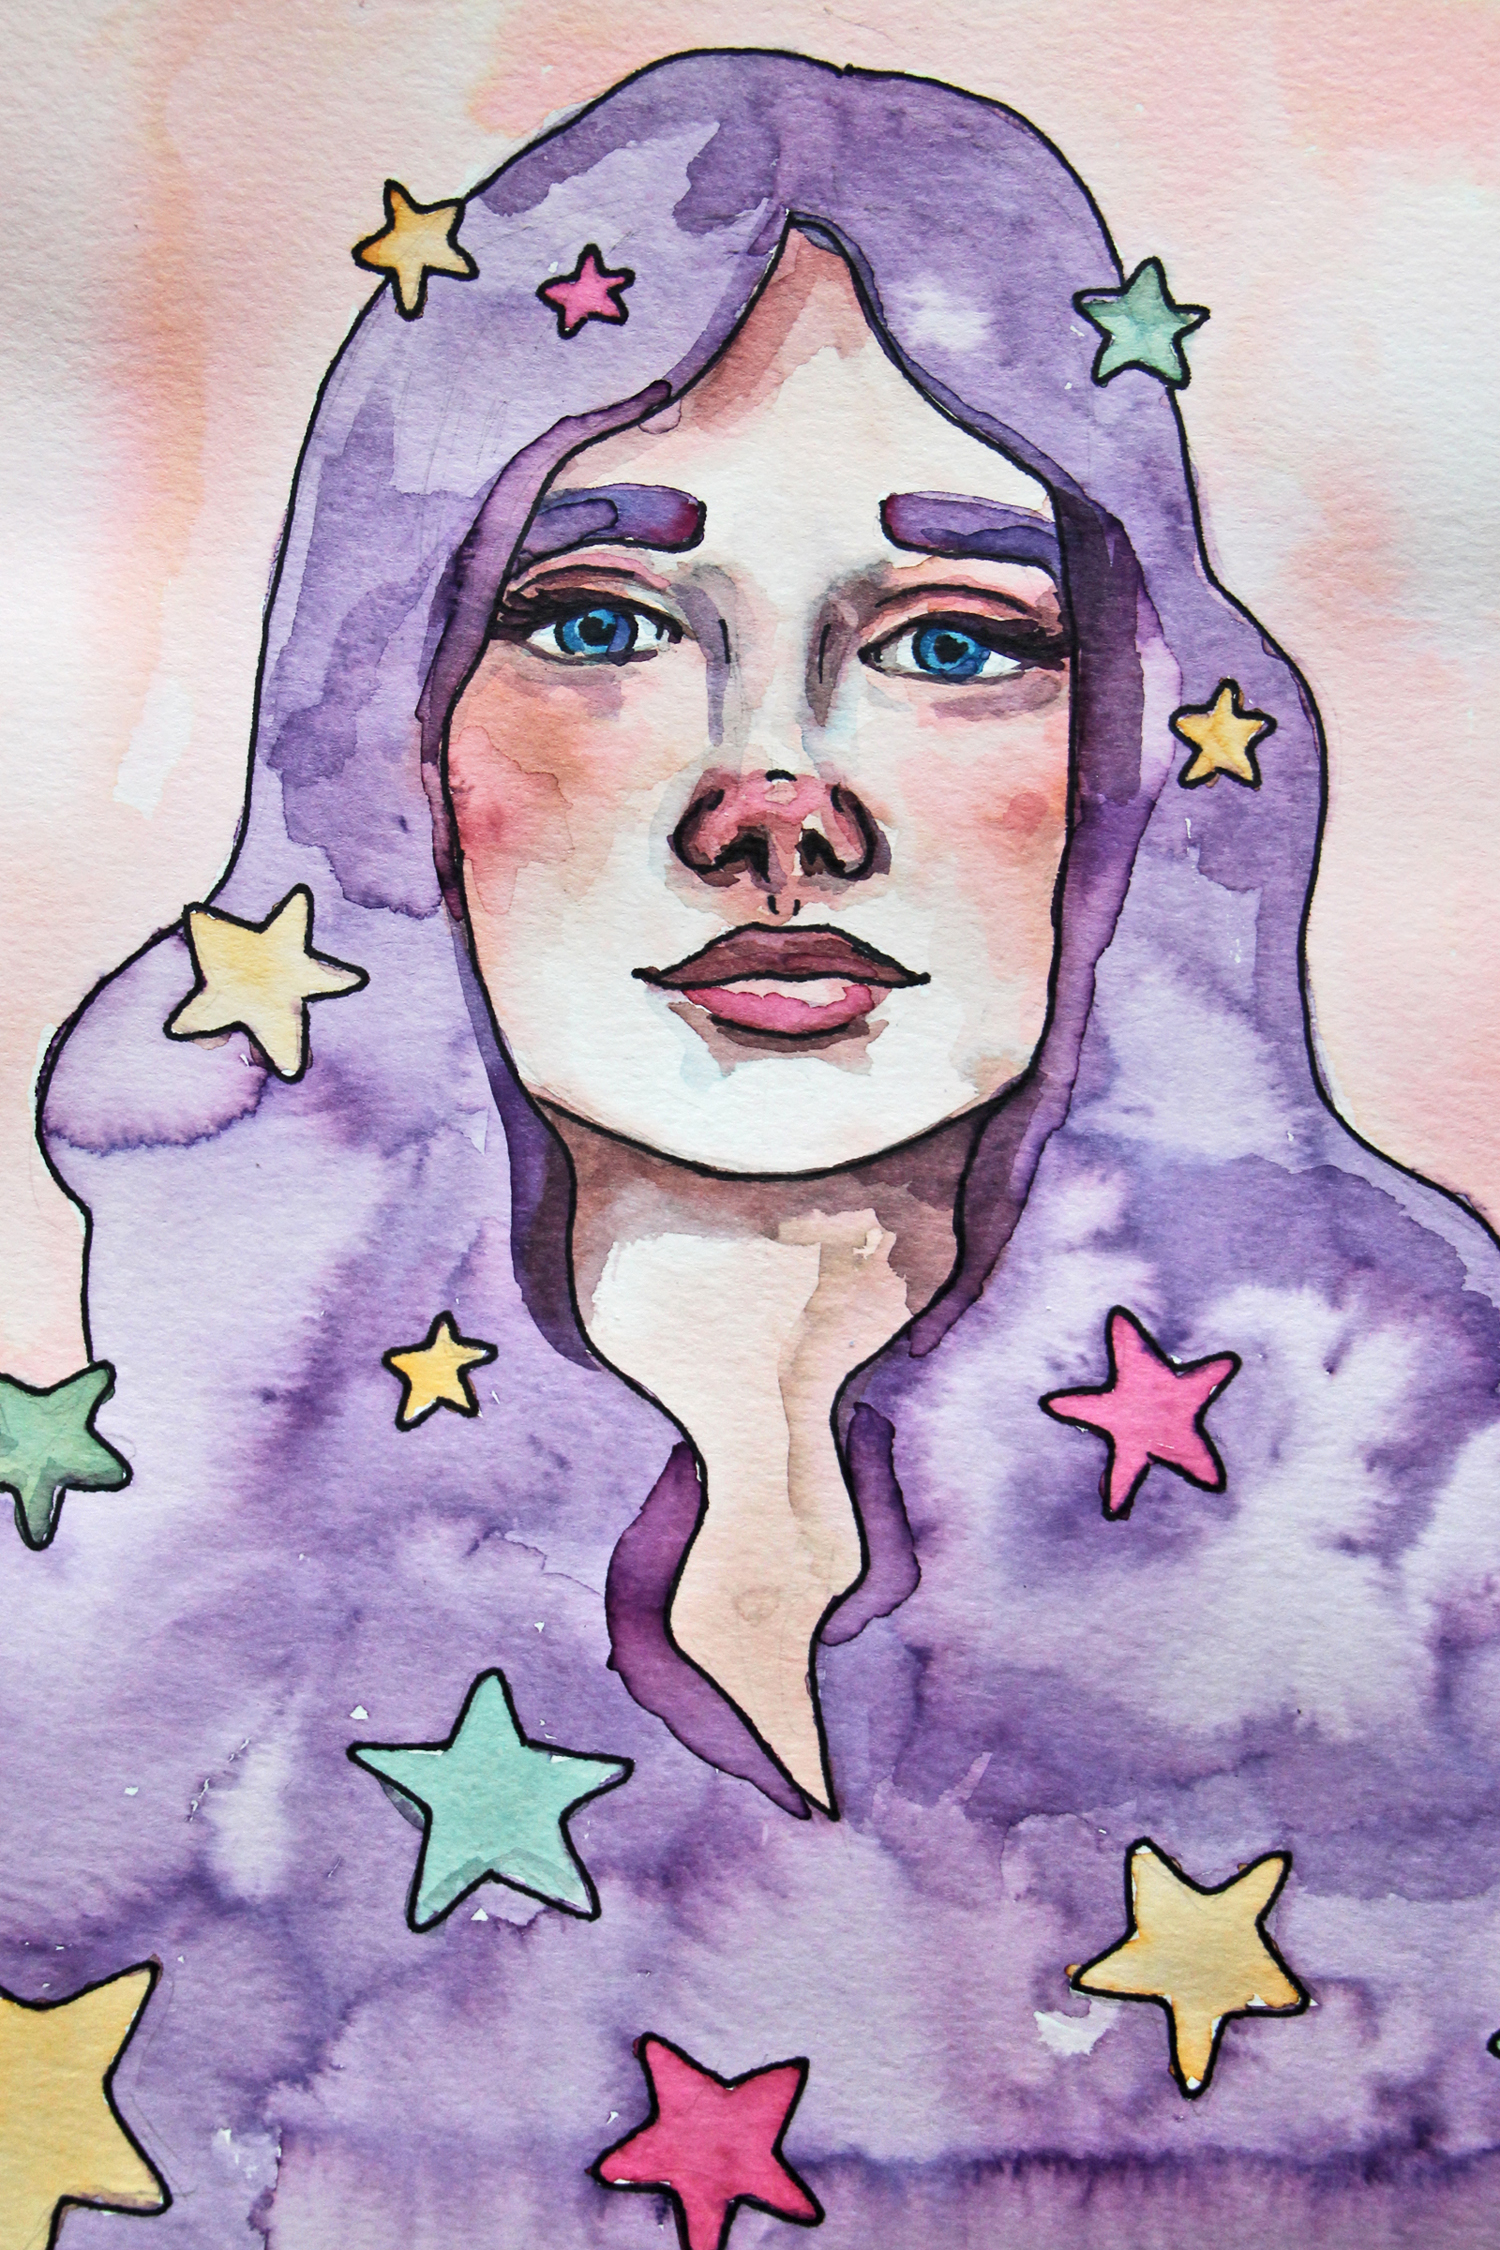
That’s it! I love seeing what color variations I can get by mixing Dual Brush Pens. My last tip is to keep in mind what colors you mix! Mixing all of the primary colors (yellow + red + blue) will always end up in a muddy brown, but watered down it can make a beautiful skin tone. 🙂
Want another fun project? Learn About Warm and Cool Colors with Jennie’s Galaxy Girl Tutorial here.
Find the Watercolor Set on Tombow’s website here.
That technique makes for intriguing results. Going have to try this technique.
Pingback: Watercolor Valloween Cards - Tombow USA Blog
Pingback: Create a Tropical Watercolor Invitation - Tombow USA Blog
Pingback: Tombow Dual Brush Pen Review - Tombow USA Blog
Pingback: Whimsical Moths With the Tombow Watercolor Set - Tombow USA Blog
Pingback: How to Paint a Watercolor Succulent - Tombow USA Blog