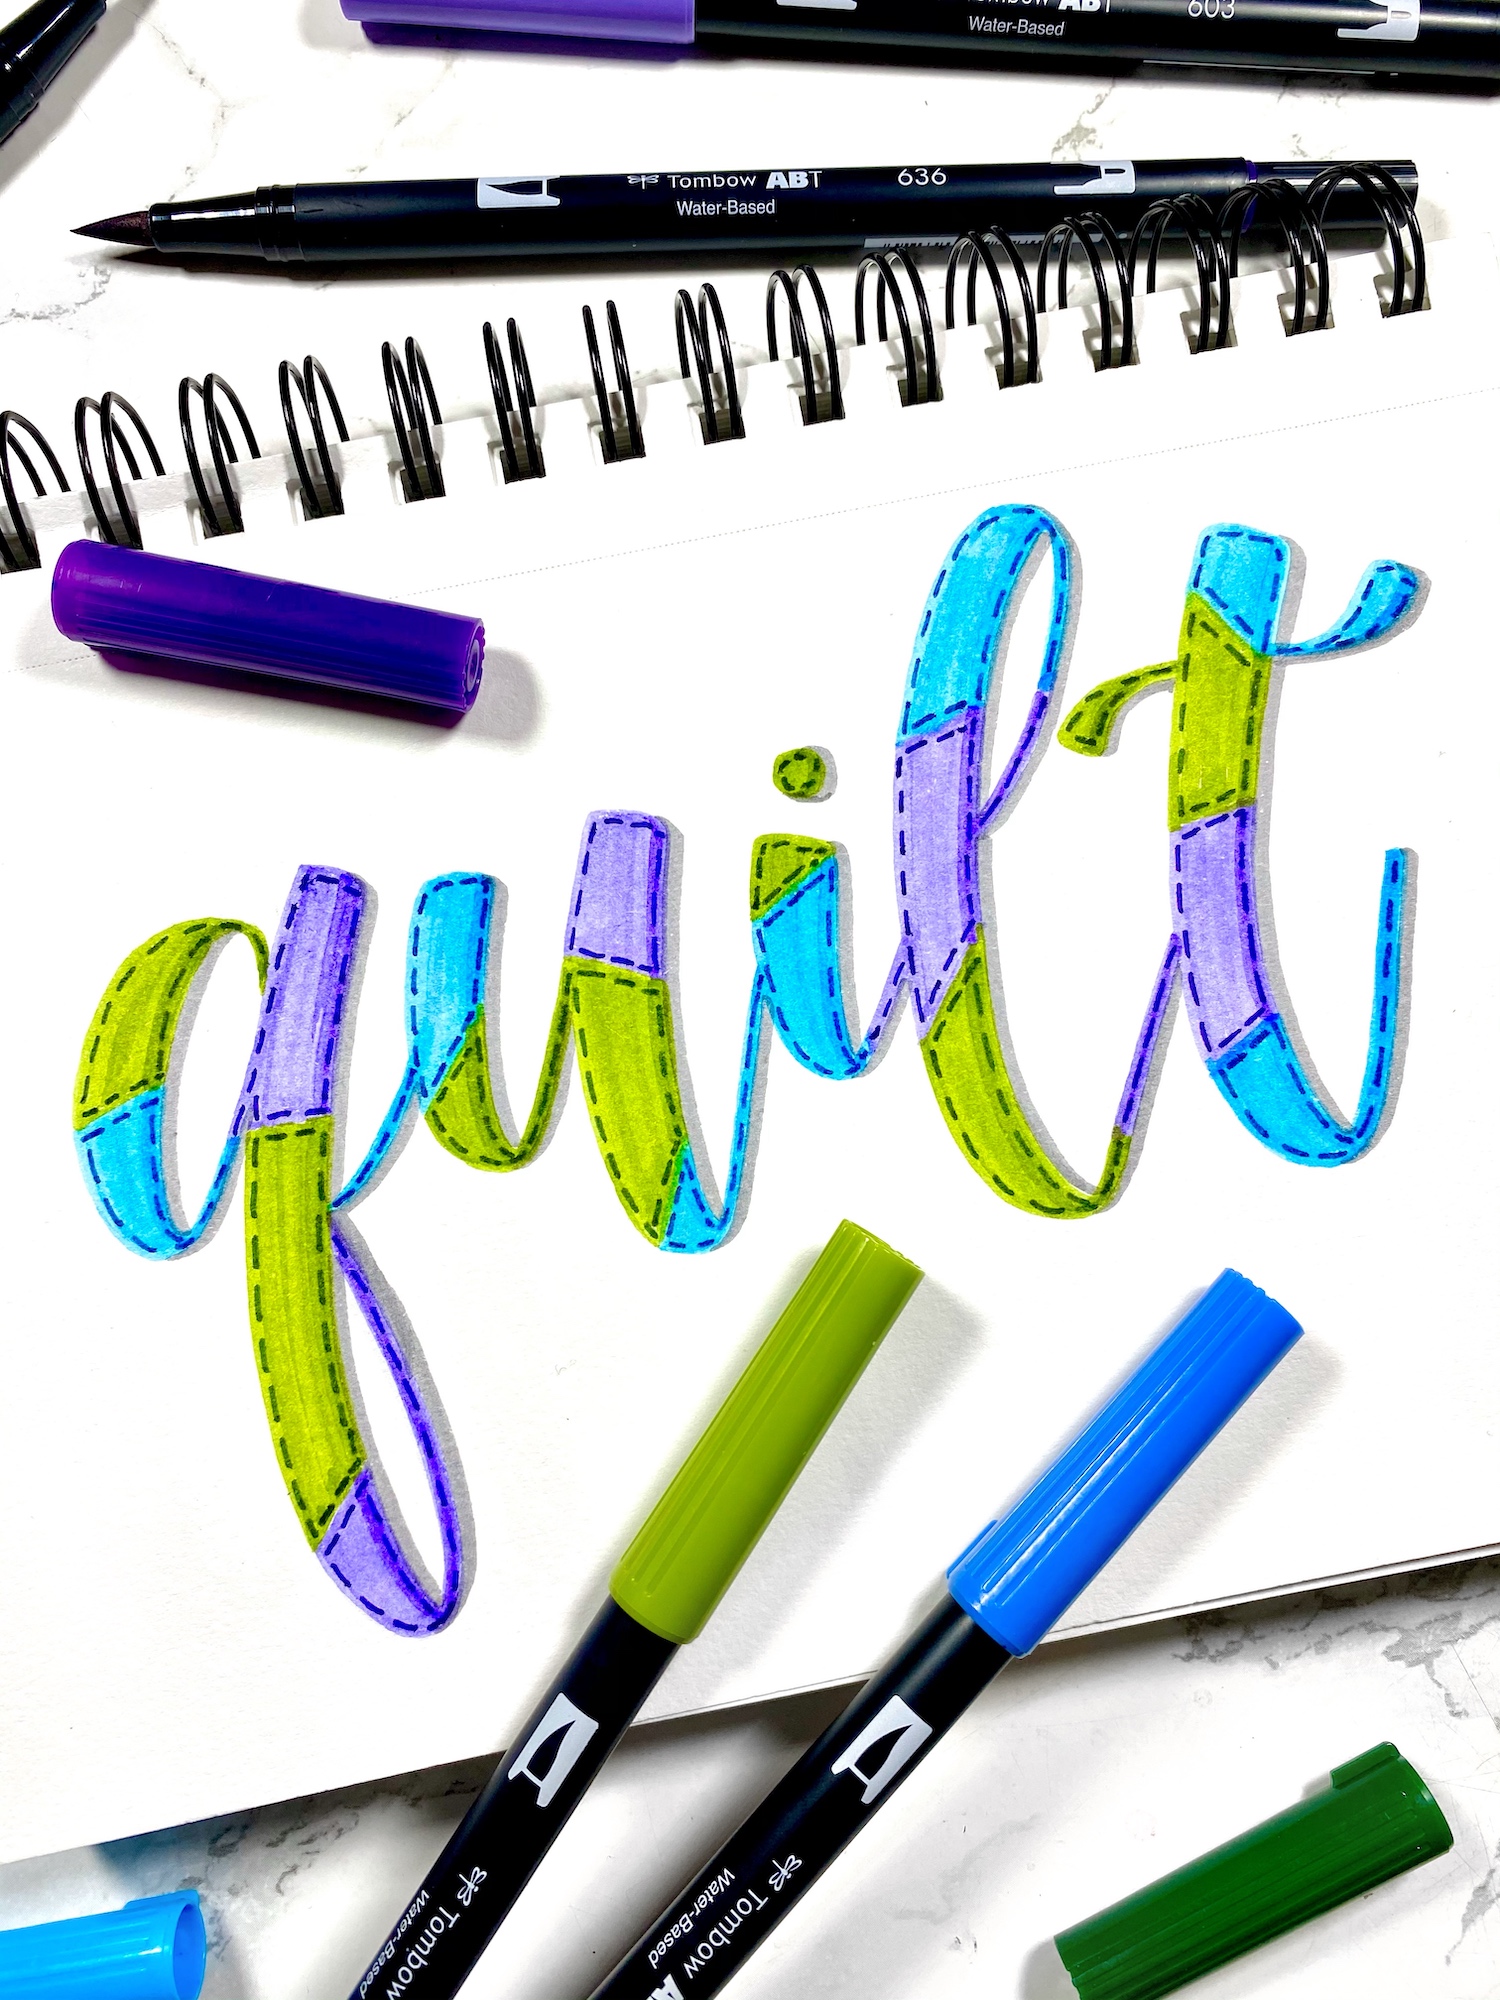
Hi everyone, Marcella from Lovable Letters here! I’ve been sewing a lot since quarantine began, so I decided to combine my newfound sewing skills with lettering. I’m showing you how I created this stitched lettering in six easy steps.
Materials:
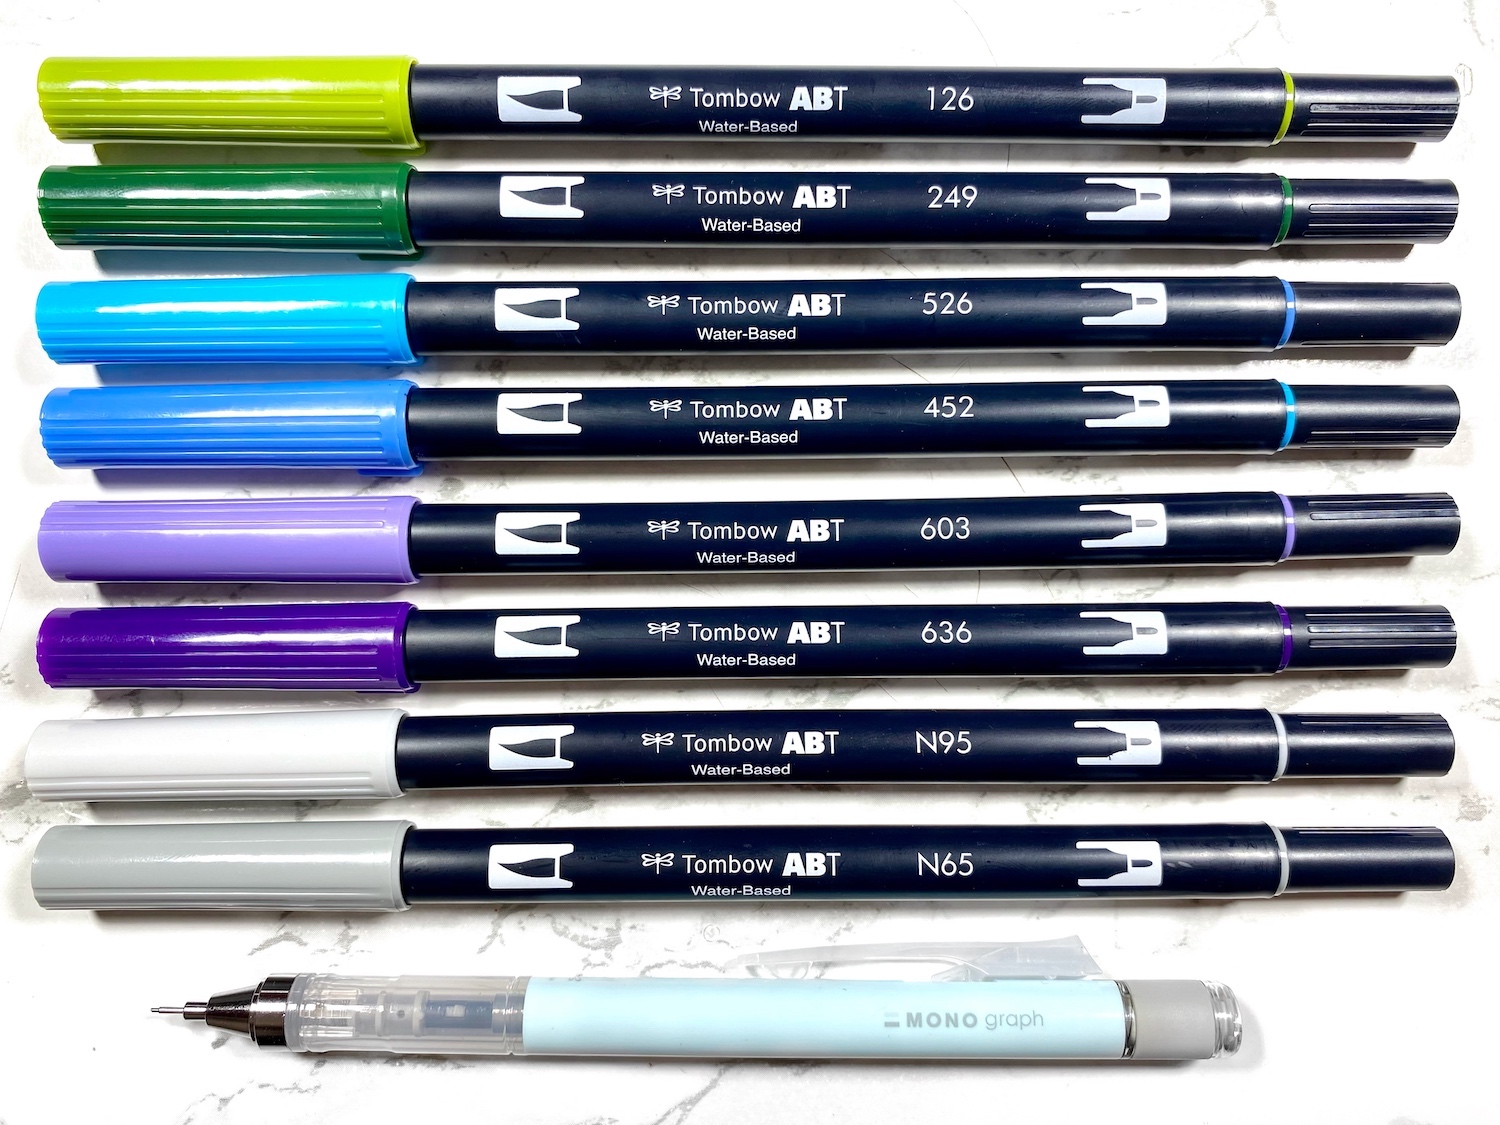
- Tombow Dual Brush Pens – 126, 249, 452, 526, 603, 636, N95, N65
- Tombow MONO Graph Mechanical Pencil
- Marker or mix media paper
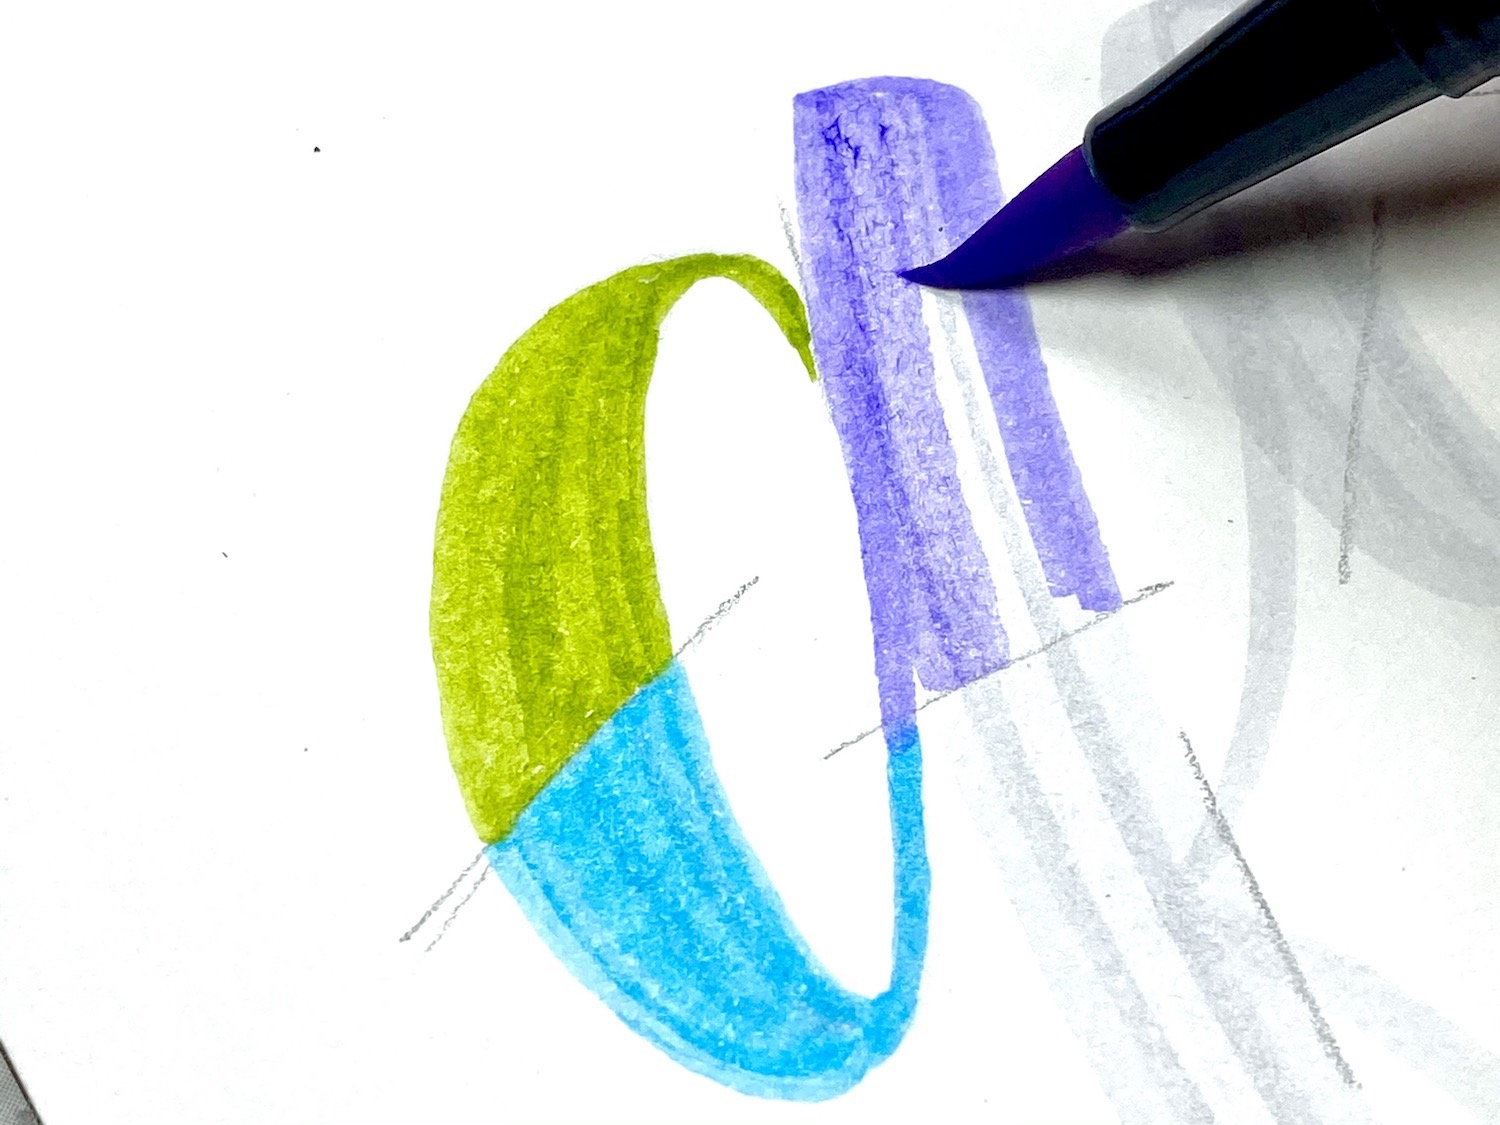
Step 1: Letter Your Base
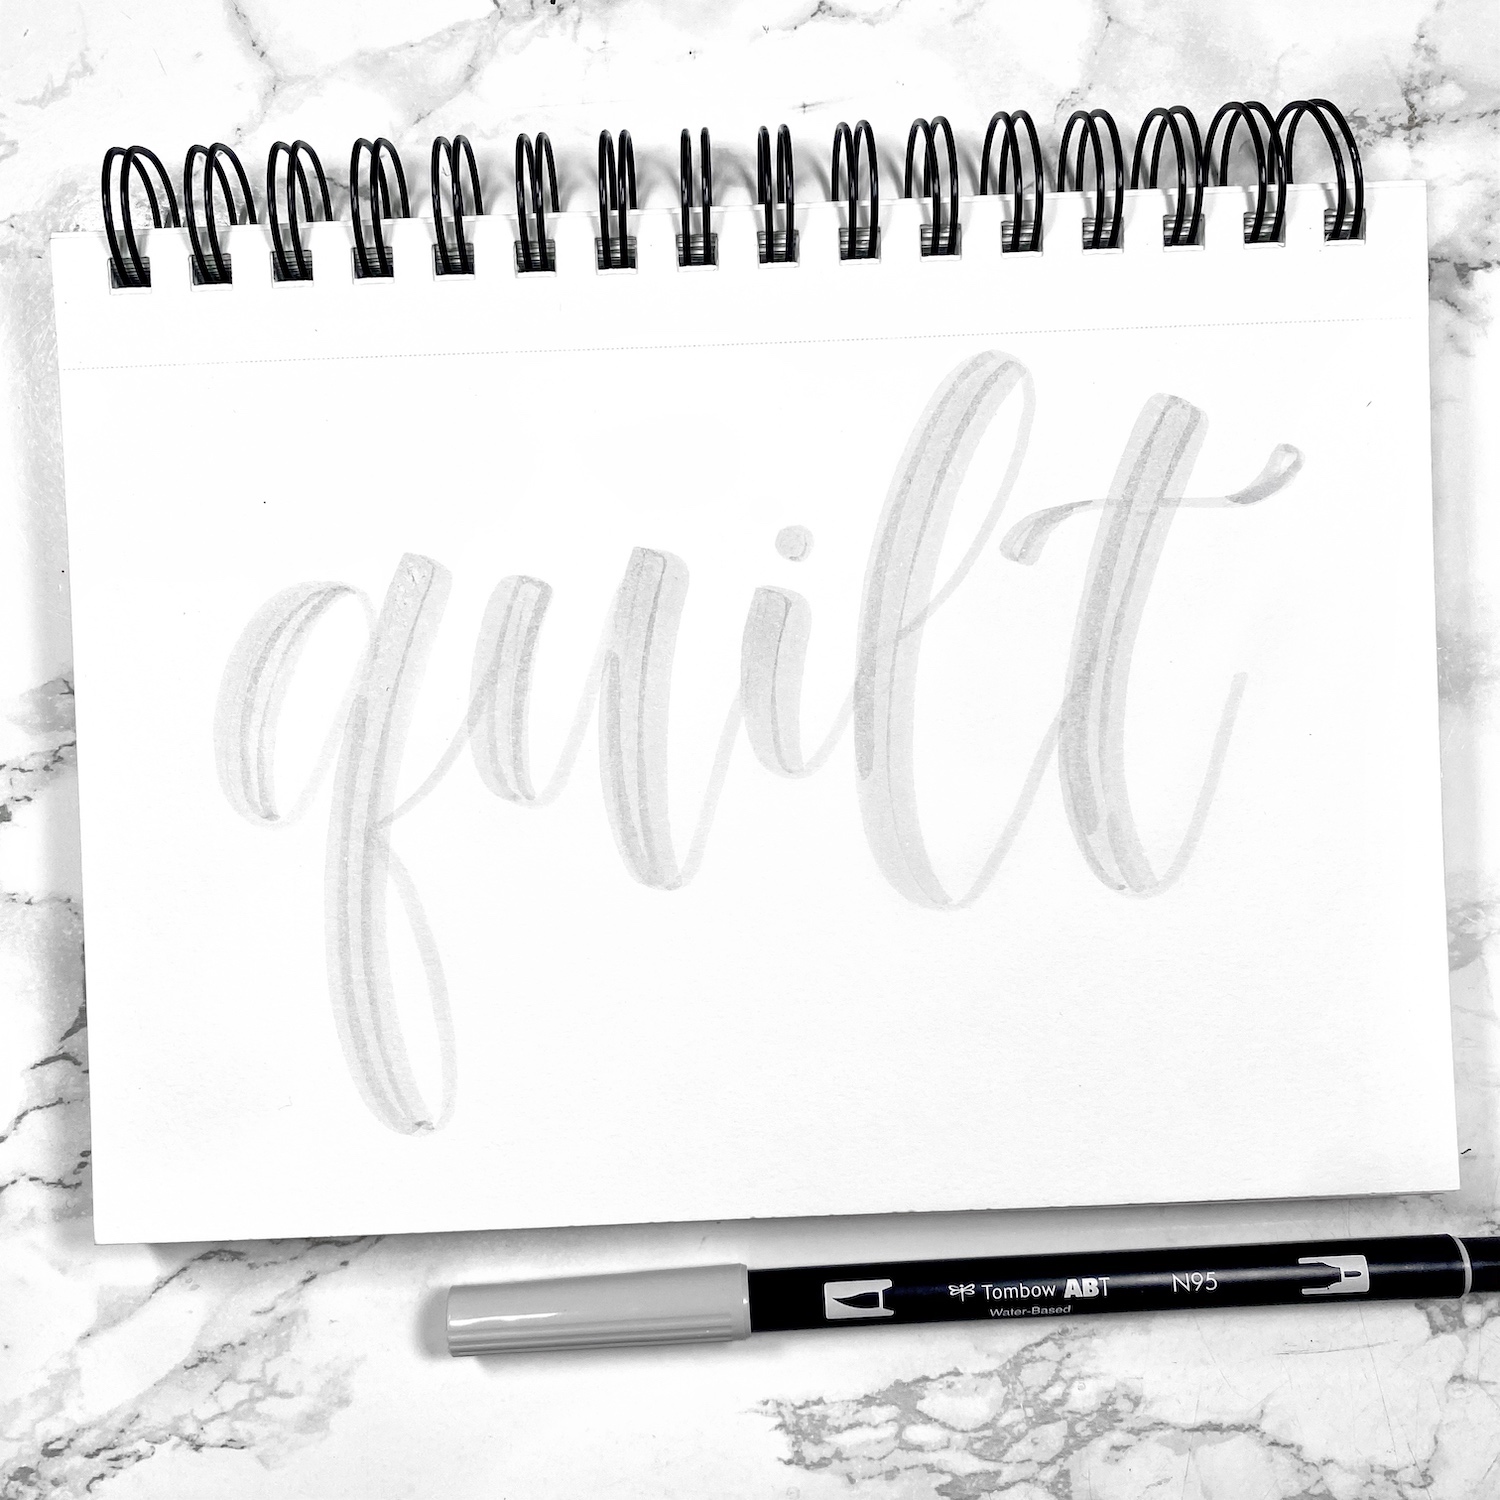
I started off by lettering the word “quilt” with my N95 Dual Brush Pen. Then, I doubled the width of the downstrokes so that I had more room to add detail.
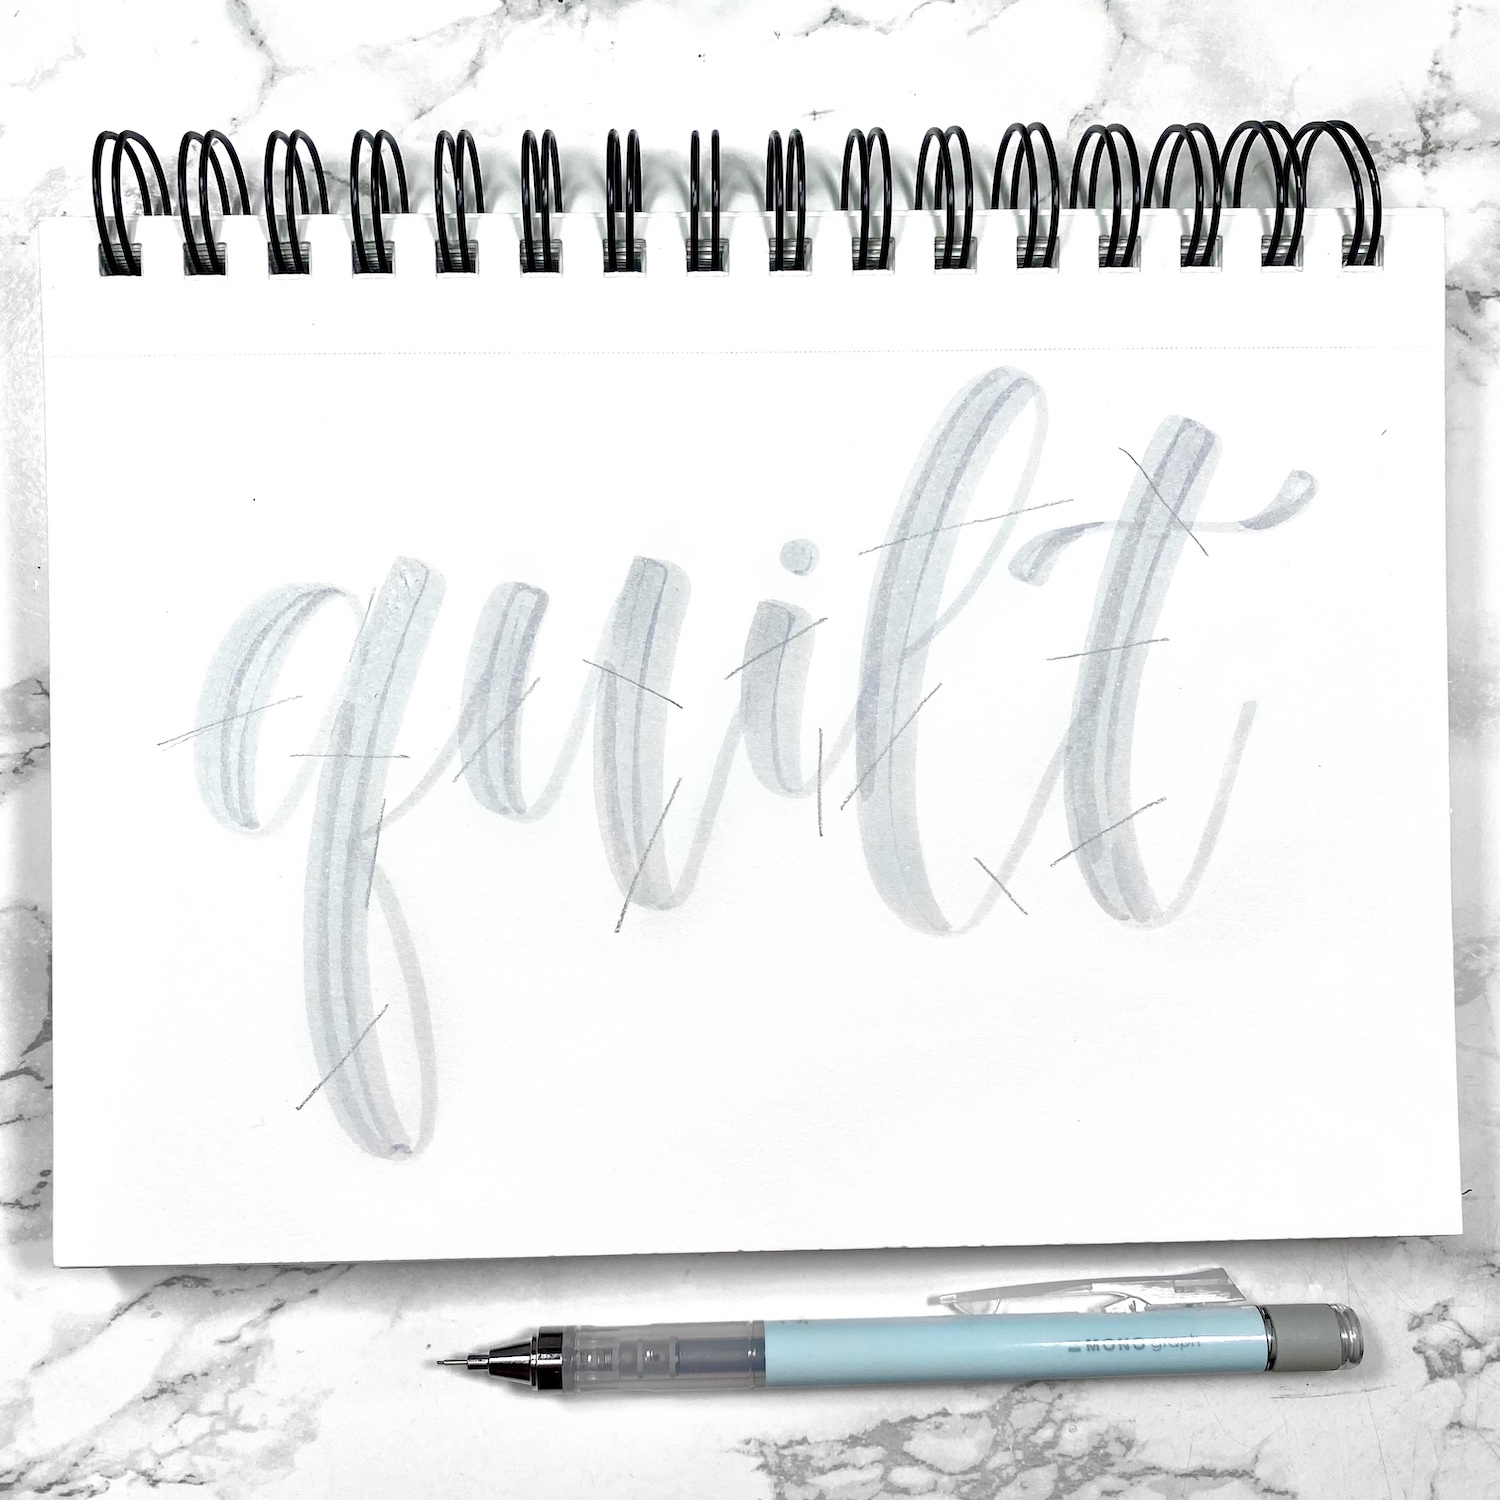
Step 2: Plan Your Sections
Using my MONO Graph Mechanical pencil, I drew straight lines through the letters to block off each color section.
Step 3: Add Color
Next, I took Dual Brush Pens 126, 452 and 603 and colored in each section of the letters. I alternated between the three colors so that there were no sections of the same color next to each other.
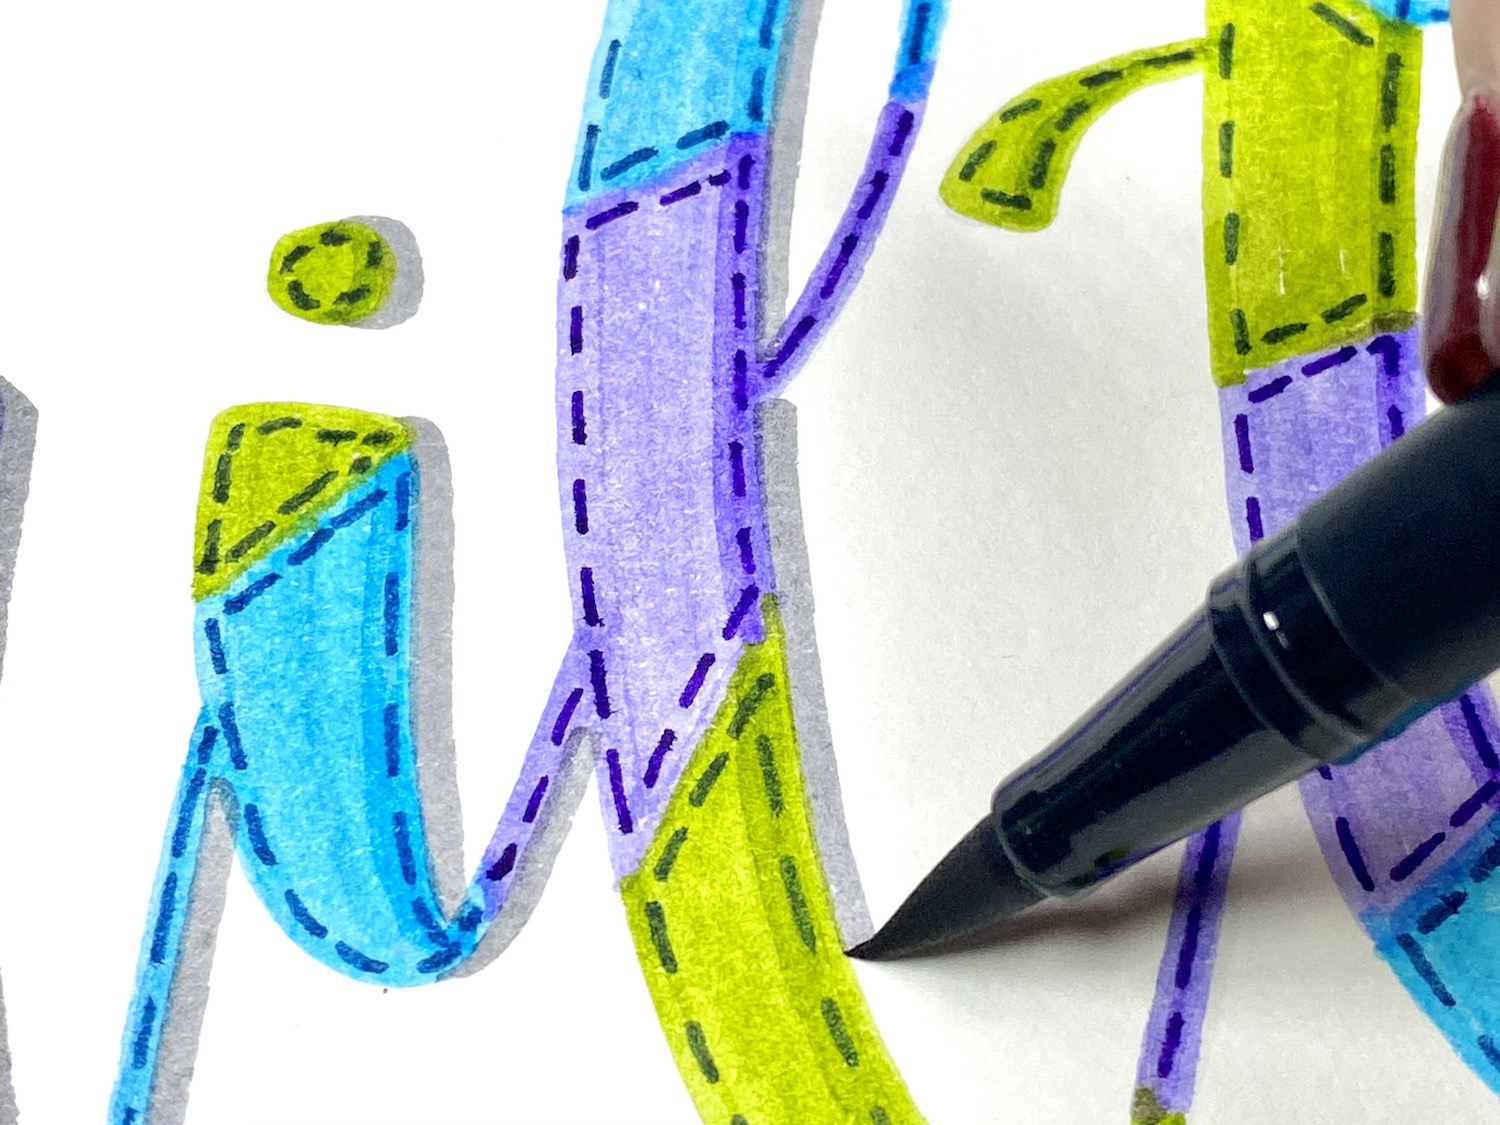
Step 4: Add the Stitching
I used the bullet tips of Dual Brush Pens 249, 526, and 636 to add straight lines around the edges of each section. This is done to mimic sewn stitches and help give the impression that the lettering is stitched together. I matched each stitch color to its corresponding base – 126 with 249, 452 with 526, and 603 with 636. For the thin upstrokes, I added one line of stitches following the curve of the lettering.
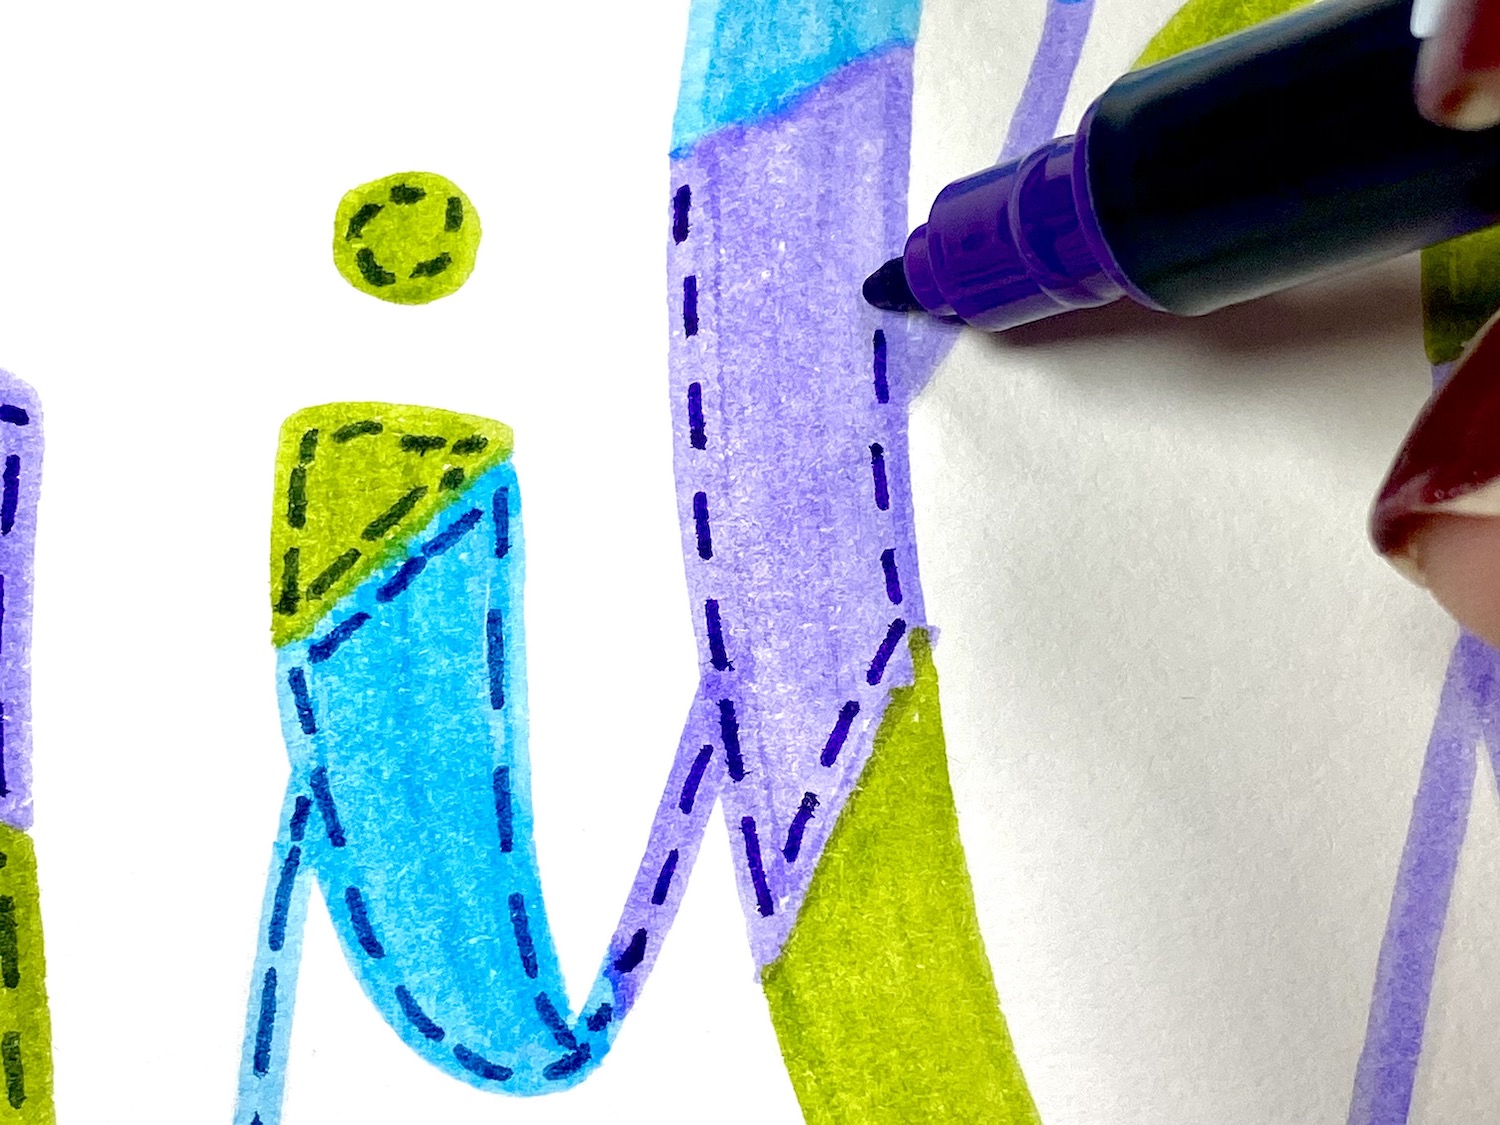
Step 5: Erase the Pencil Marks
I erased the pencil sectioning using the eraser on the back of my MONO Graph Mechanical Pencil.
Step 6: Add Shadows
I finished this project by adding shadows to the right of each letter to give it more dimension.
Thanks for following along! If you try stitched lettering or any of the blog tutorials, make sure to tag Tombow so we can all cheer you on!
Pingback: Curved Lettering Inspired by Ernie Barnes - Tombow USA Blog