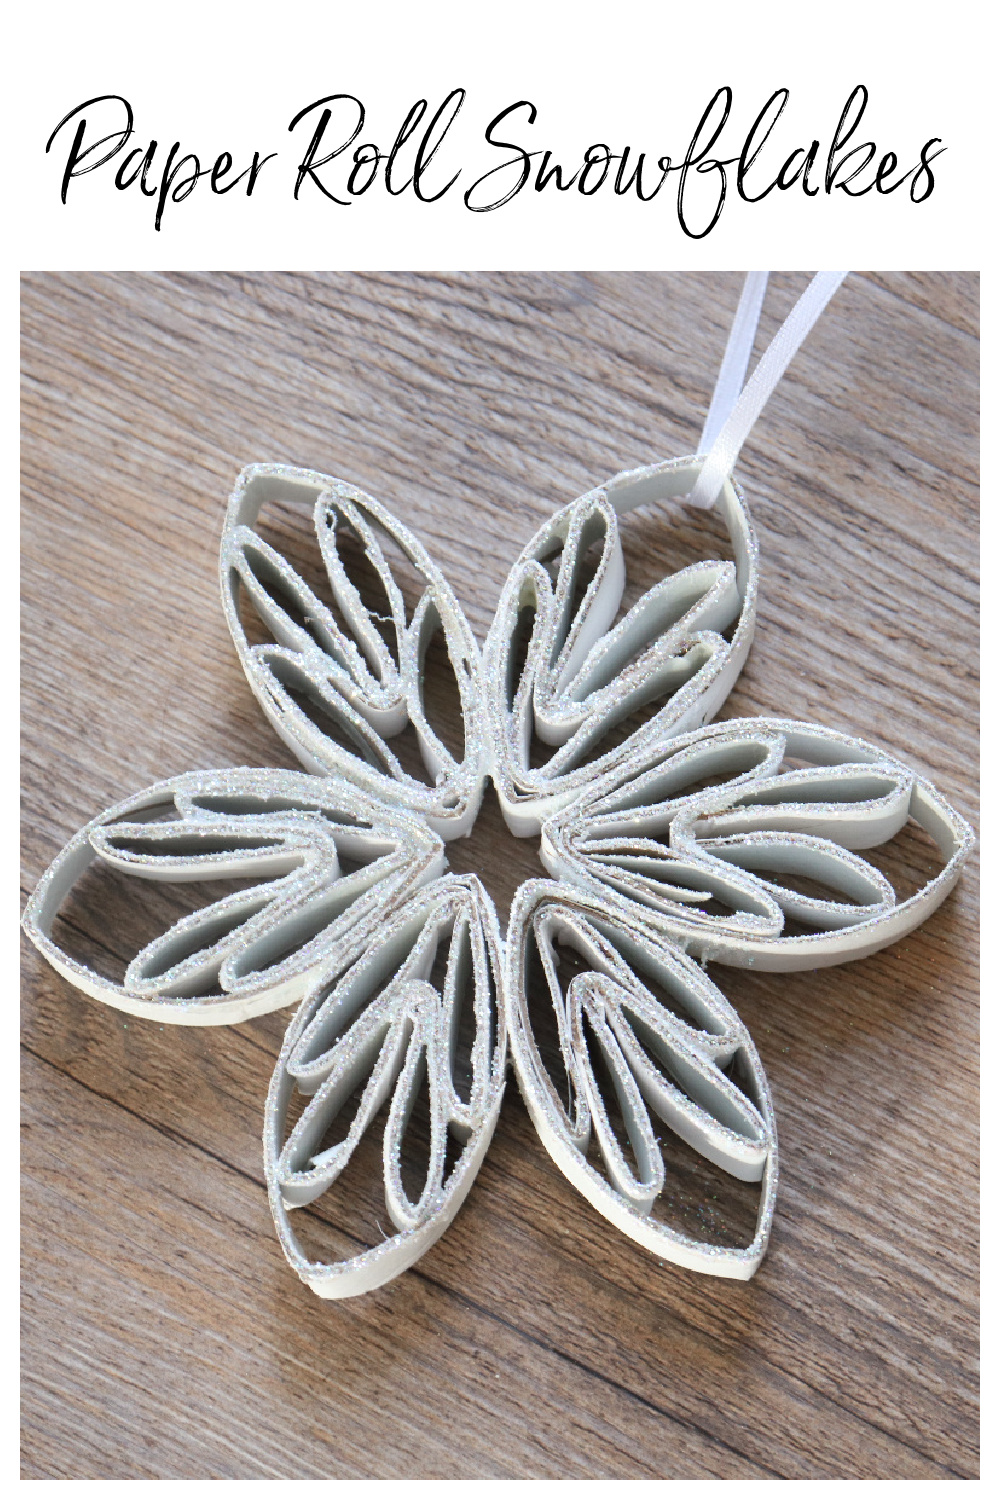
Do you love to create seasonal home decor? I’m Amy, from Amy Latta Creations, and I’m excited to share a quick and simple winter project that anyone can make; DIY Paper Roll Snowflakes! These are perfect for displaying around the house all season long to bring a little sparkle and cheer. All you need are a few basic supplies, and you’ll have a winter wonderland in no time. Let’s get started.
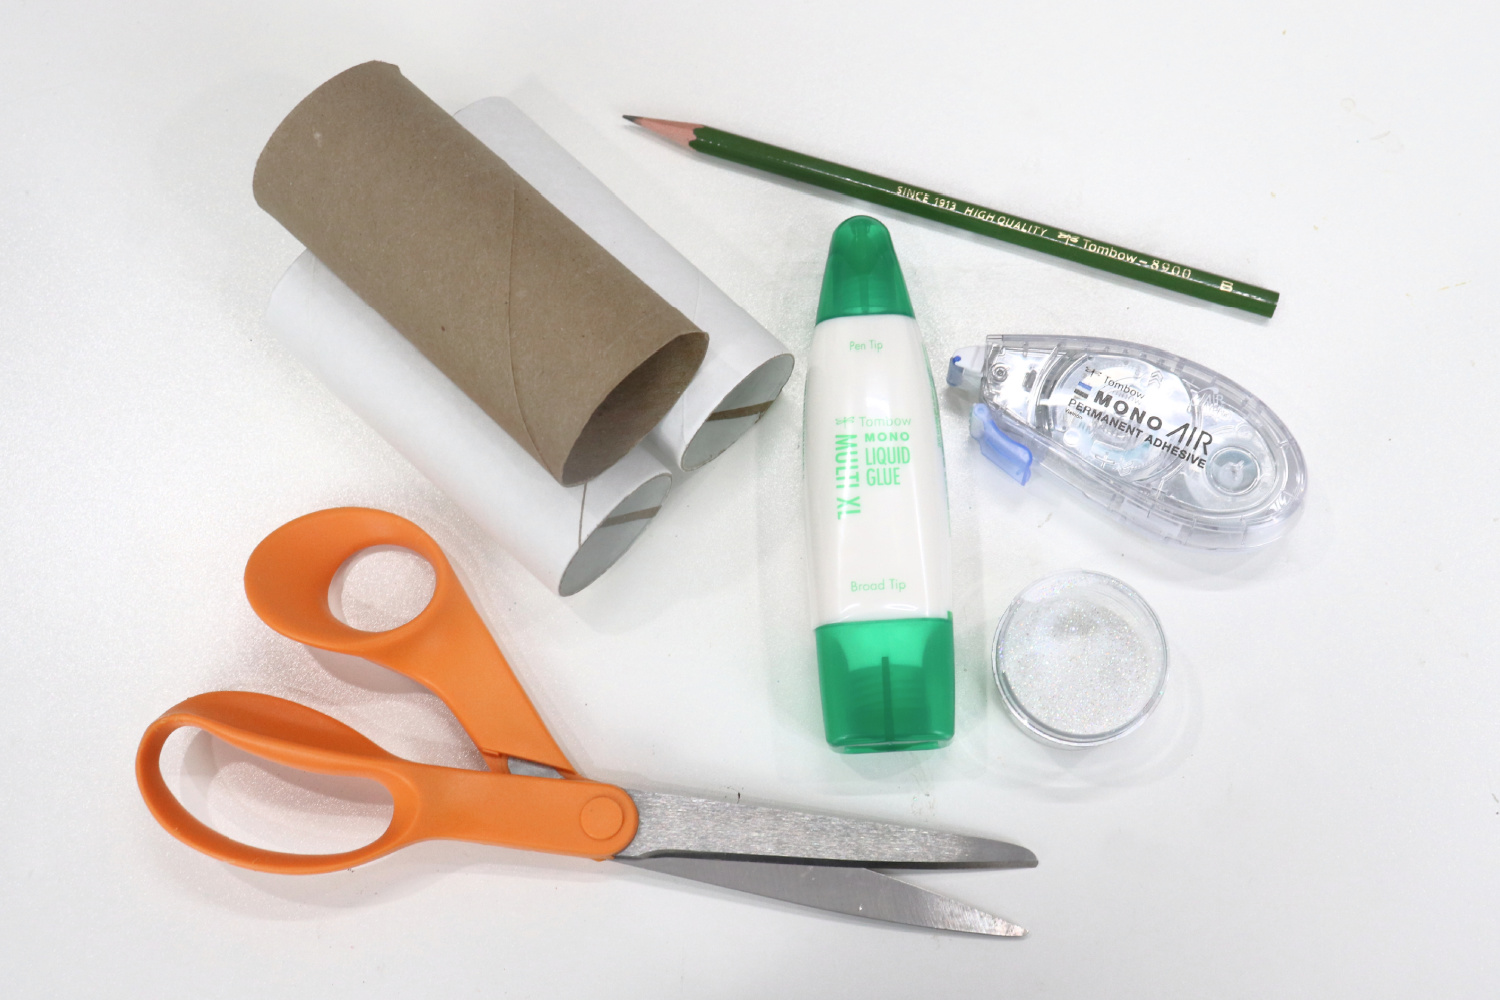
Materials
- 3 paper rolls per snowflake (you can repurpose regular toilet paper rolls or order white ones designed for crafting!)
- Tombow 8900 Drawing Pencil
- Tombow MONO Air Touch Adhesive
- Tombow MONO Multi Liquid Glue
- Glitter
- Scissors
- Ruler
- String/Ribbon
How to Make DIY Paper Roll Snowflakes
Step 1: Flatten your rolls and mark off 1/2” sections using your 8900 Drawing Pencil and a ruler.
If you prefer to cut thinner sections, feel free. I like the 1/2” width because it’s easy to work with and sturdy, while still making the snowflake look delicate.

Step 2: Cut your rolls into 1/2” sections.
For this particular design, you will need 18 sections. Each 4” toilet paper or craft roll will give you eight sections, so you’ll need three rolls per snowflake. Another option is to use one paper towel roll, which will give you 22 sections!
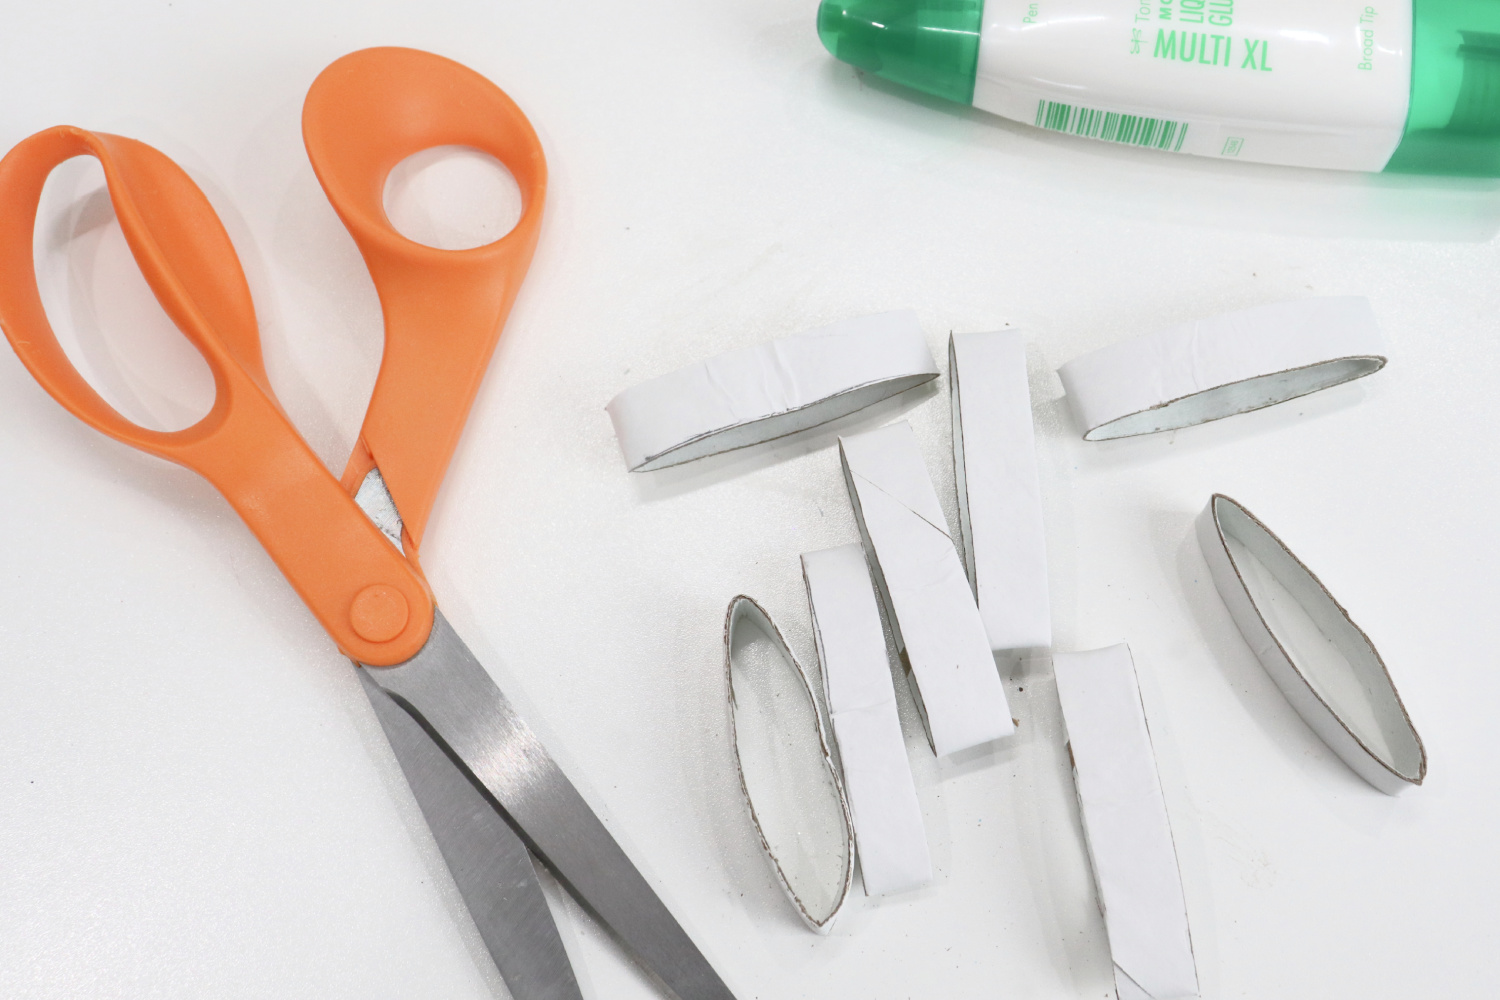
Step 3: Flatten and fold 12 of the sections in half.
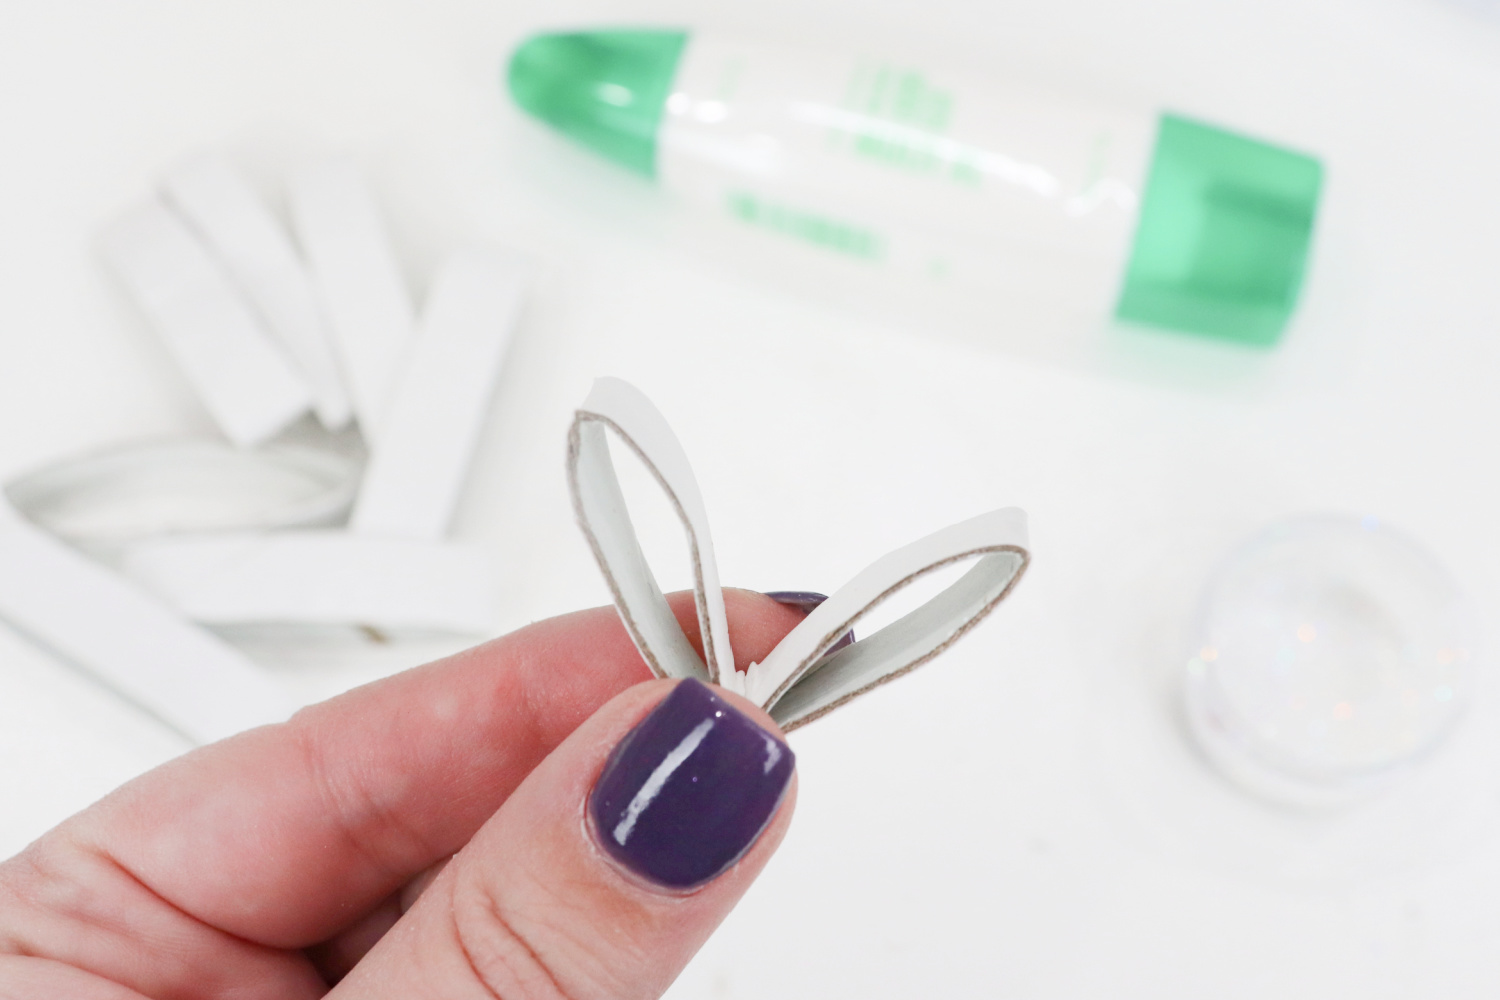
Step 4: Adhere the half sections together to form six pairs, using Tombow MONO Air Touch Adhesive.
This is the perfect adhesive for the job, because it’s not messy, and it has an immediate, permanent hold. Plus, if you run out, you can just order a refill for your dispenser; an eco-friendly adhesive for a recycled craft.

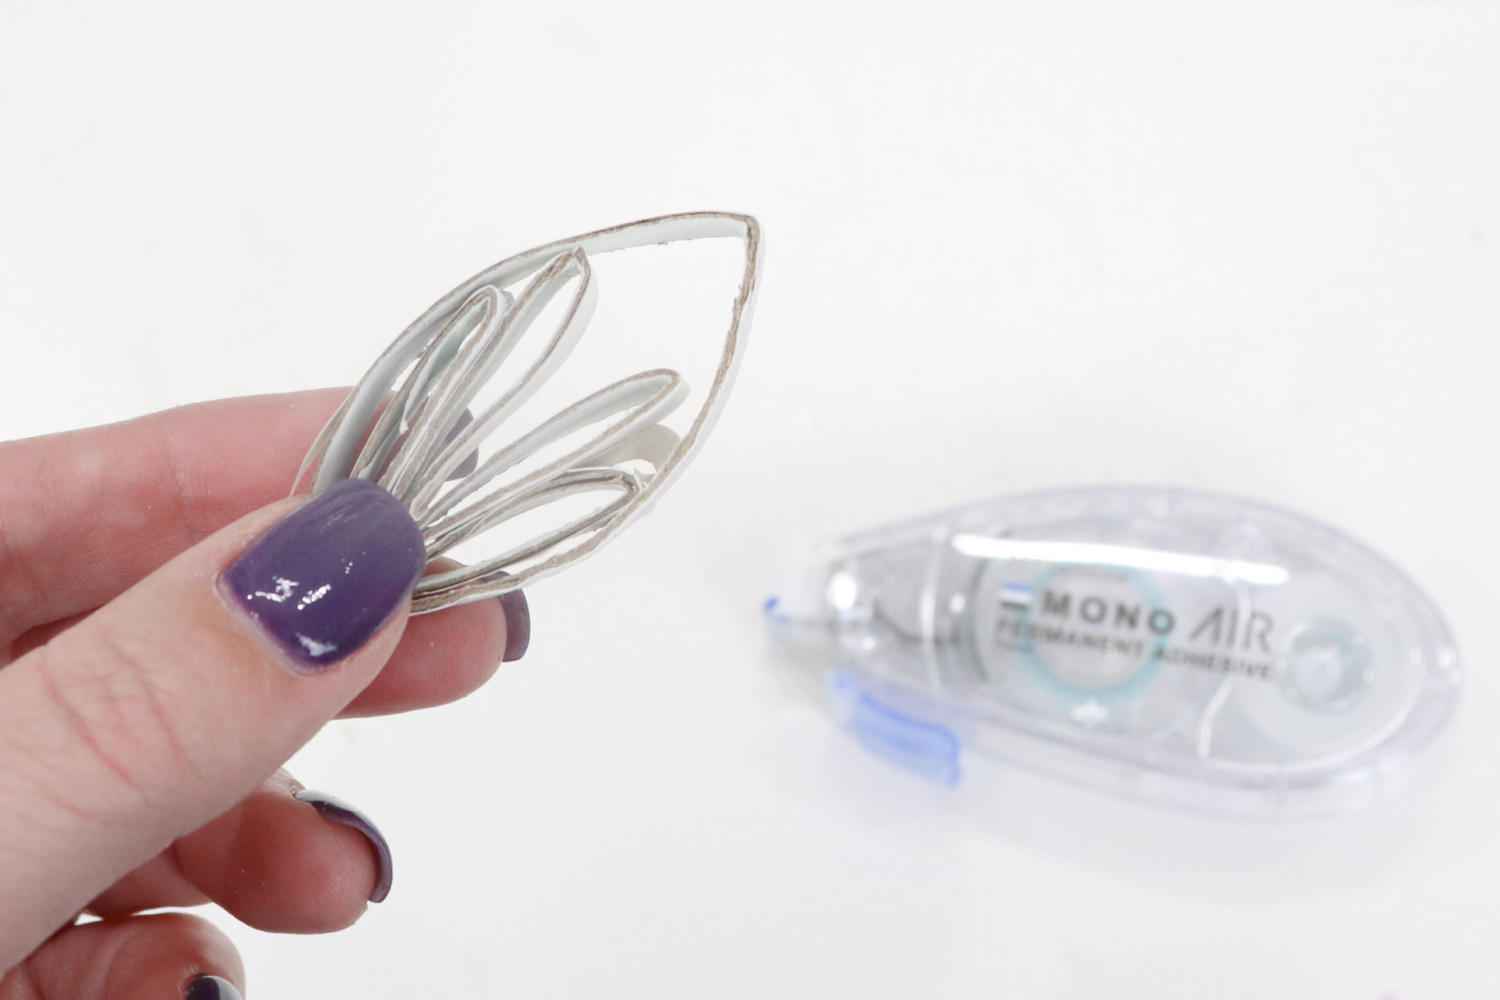
Step 5: Place a pair inside each of the six larger sections and adhere in place.
Apply Tombow MONO Air Touch Adhesive to the outer sides of each pair, then slide the pairs inside and press gently to adhere.
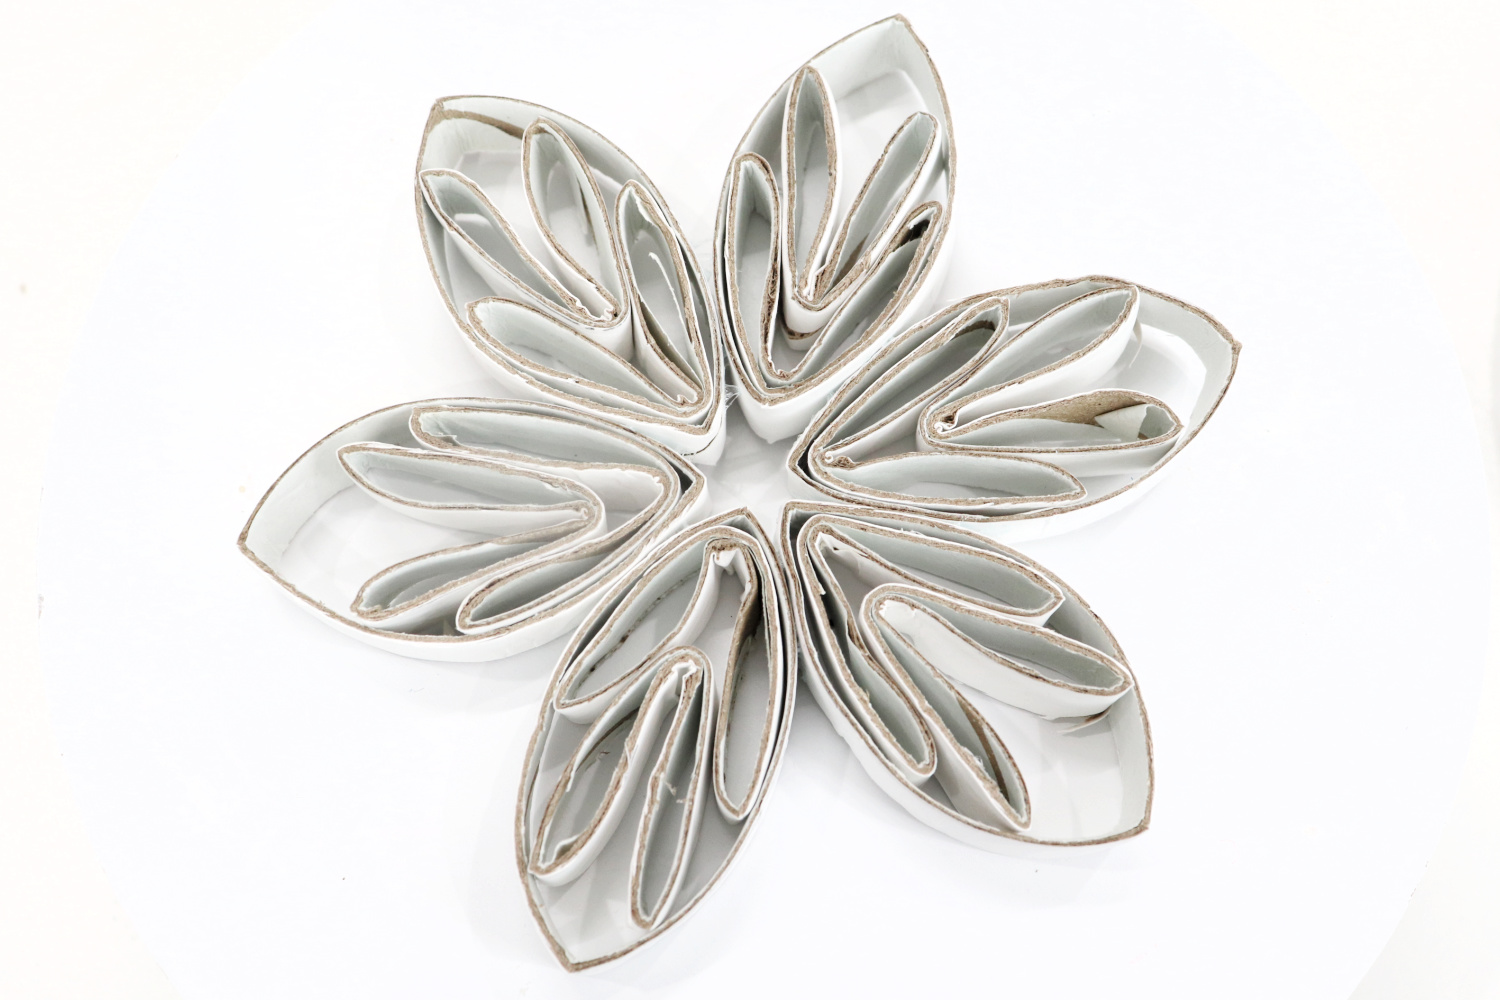
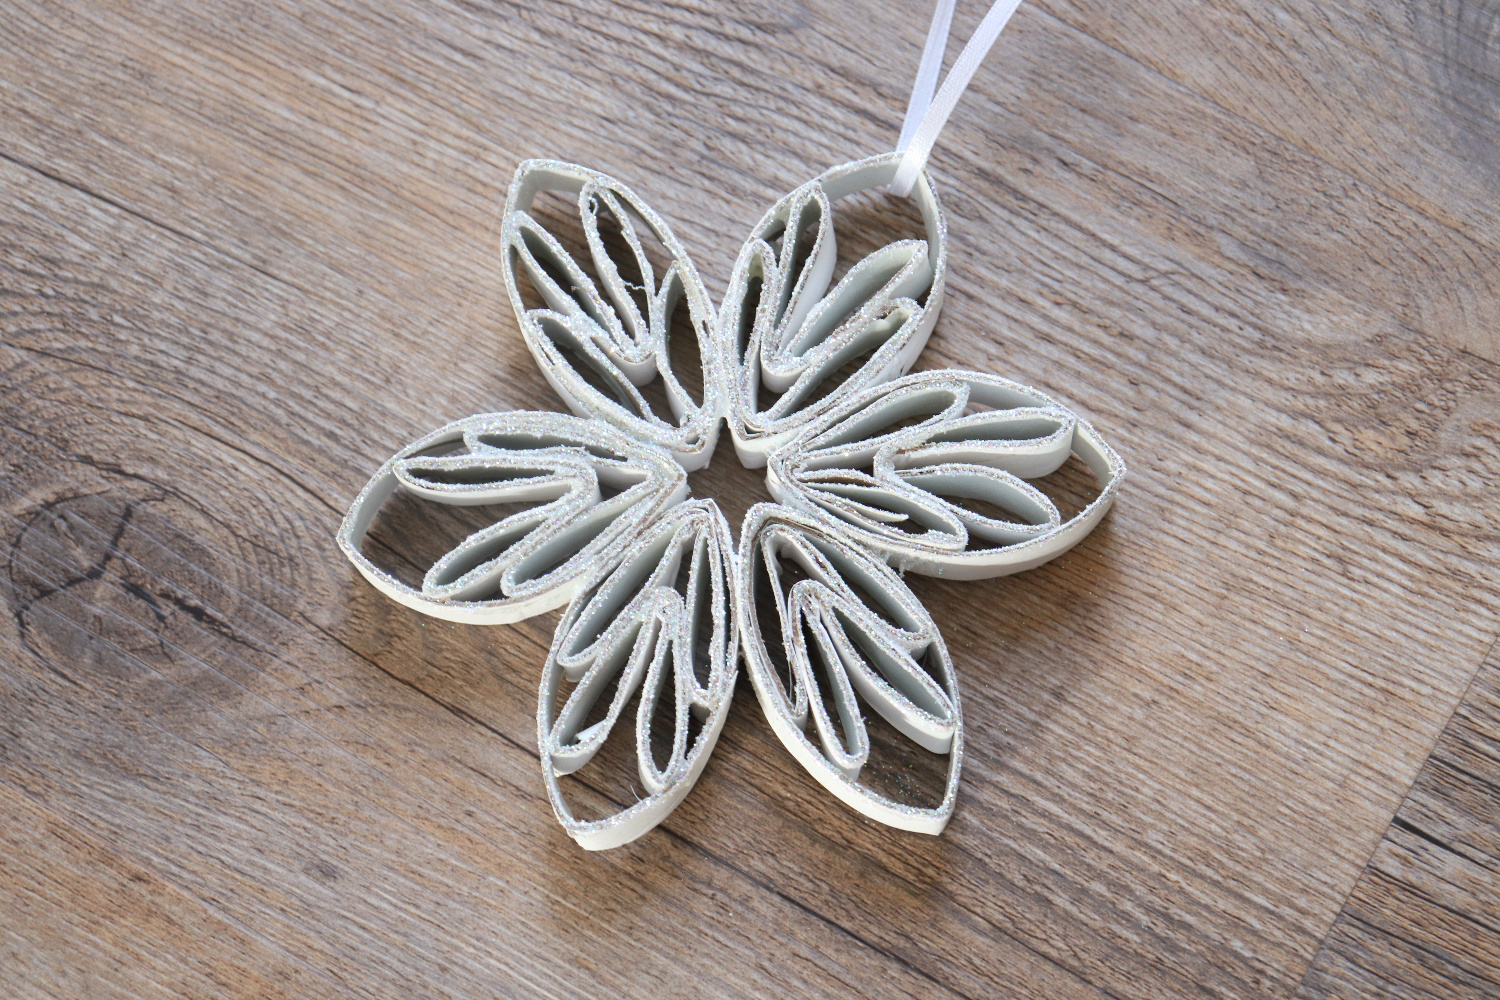
Step 6: Use Tombow MONO Air Touch Adhesive to adhere the six large sections together to form the snowflake shape.
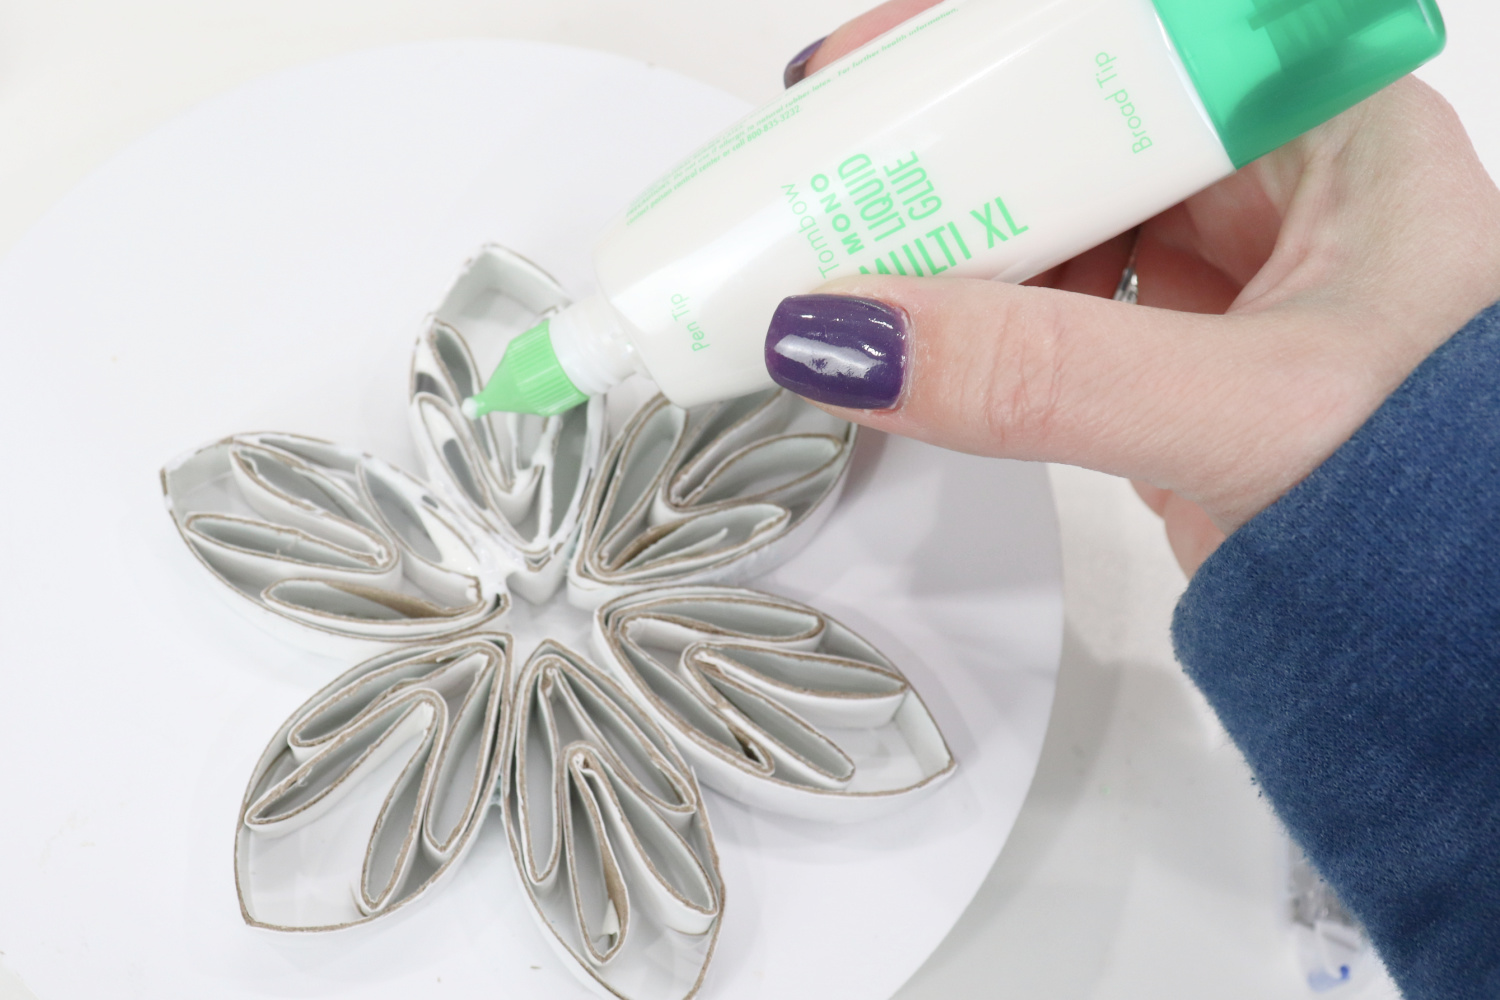
Step 7: Apply Tombow MONO Multi Liquid Glue to the front edges of the snowflake.
This acid-free glue is ideal for cardboard and has a fine detail tip as well as a broad tip. For this project, I like using the detail tip, since the edges are so thin and intricate.
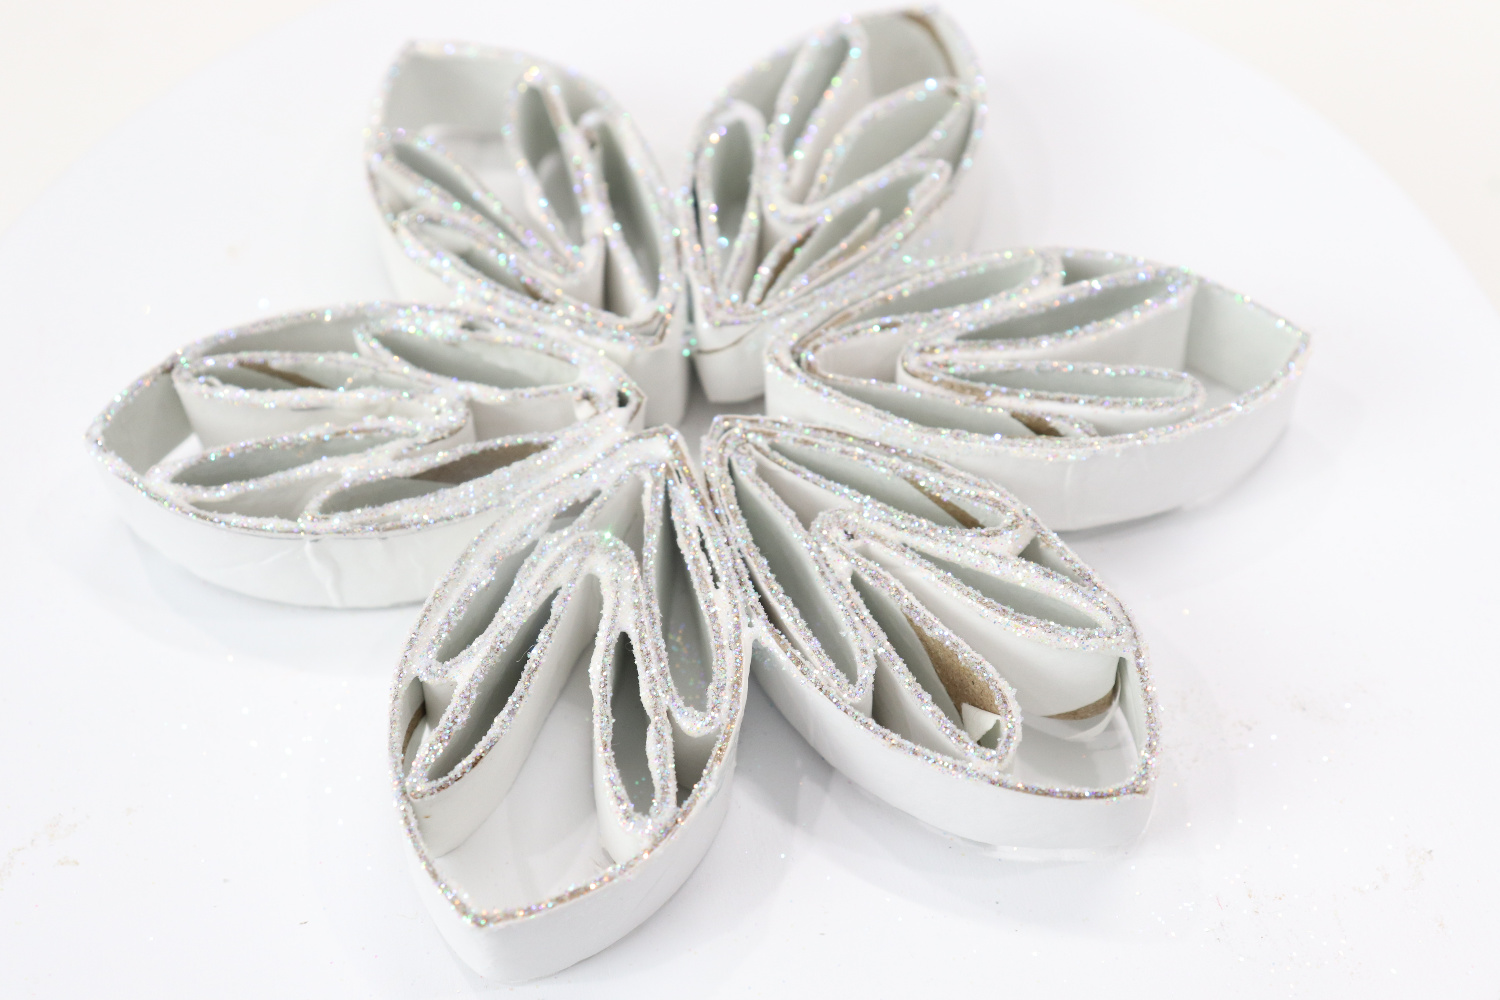
Step 8: Sprinkle the snowflake with loose glitter.
You can choose any color and size glitter you like to add sparkle to your project!
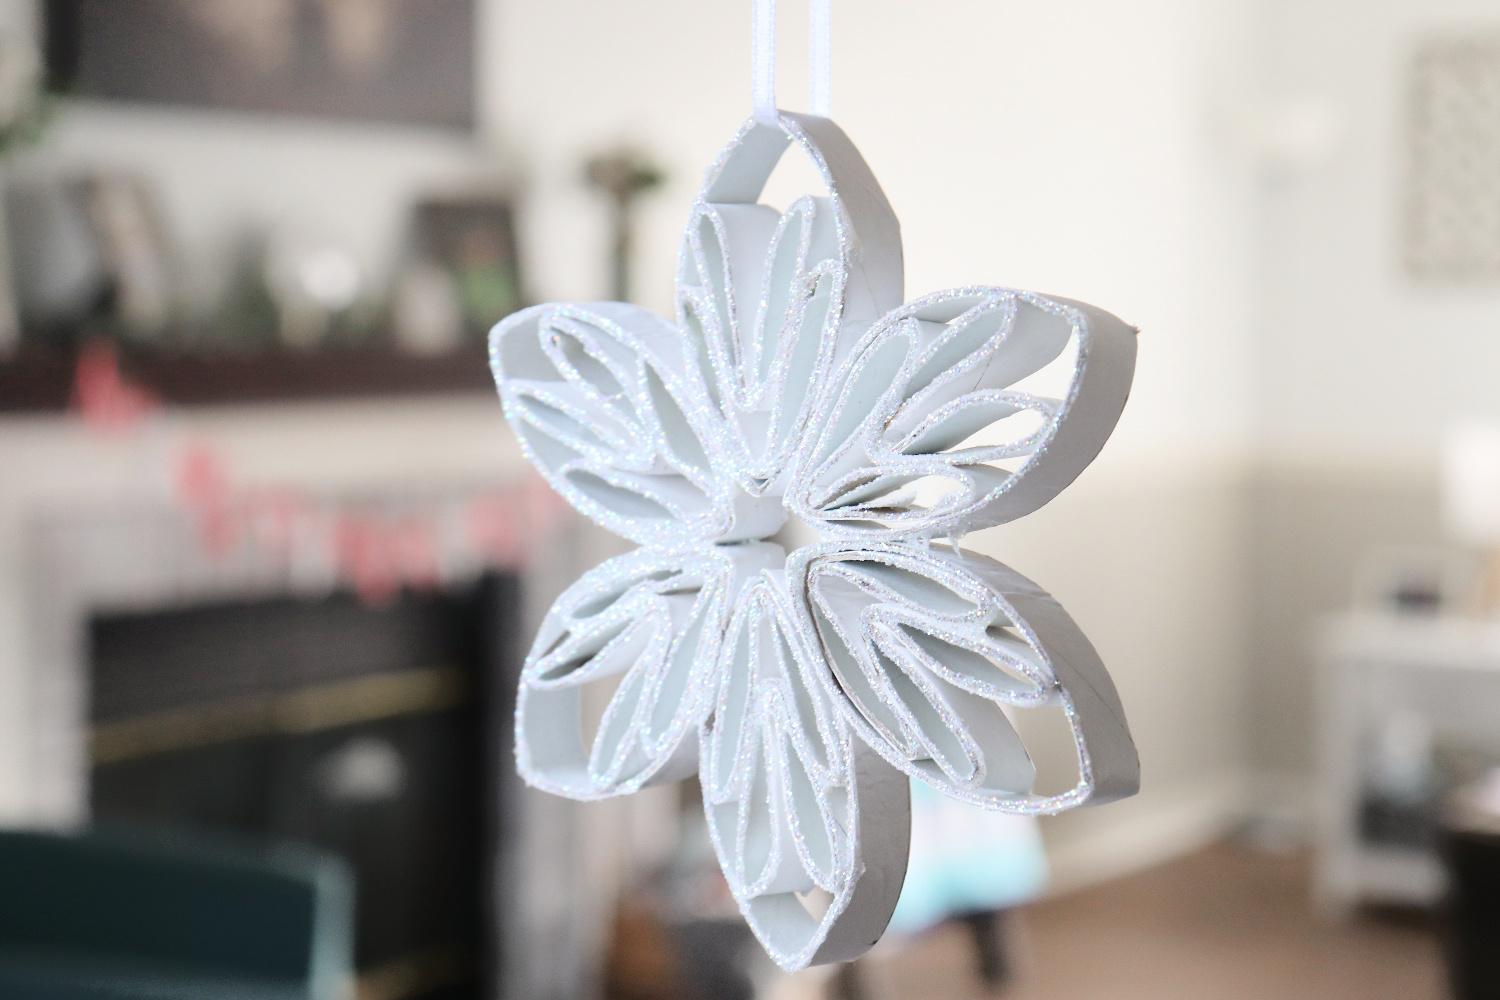
Step 9: Tie a ribbon or string at the top.
Now, your project is ready to hang on display anywhere in your home.
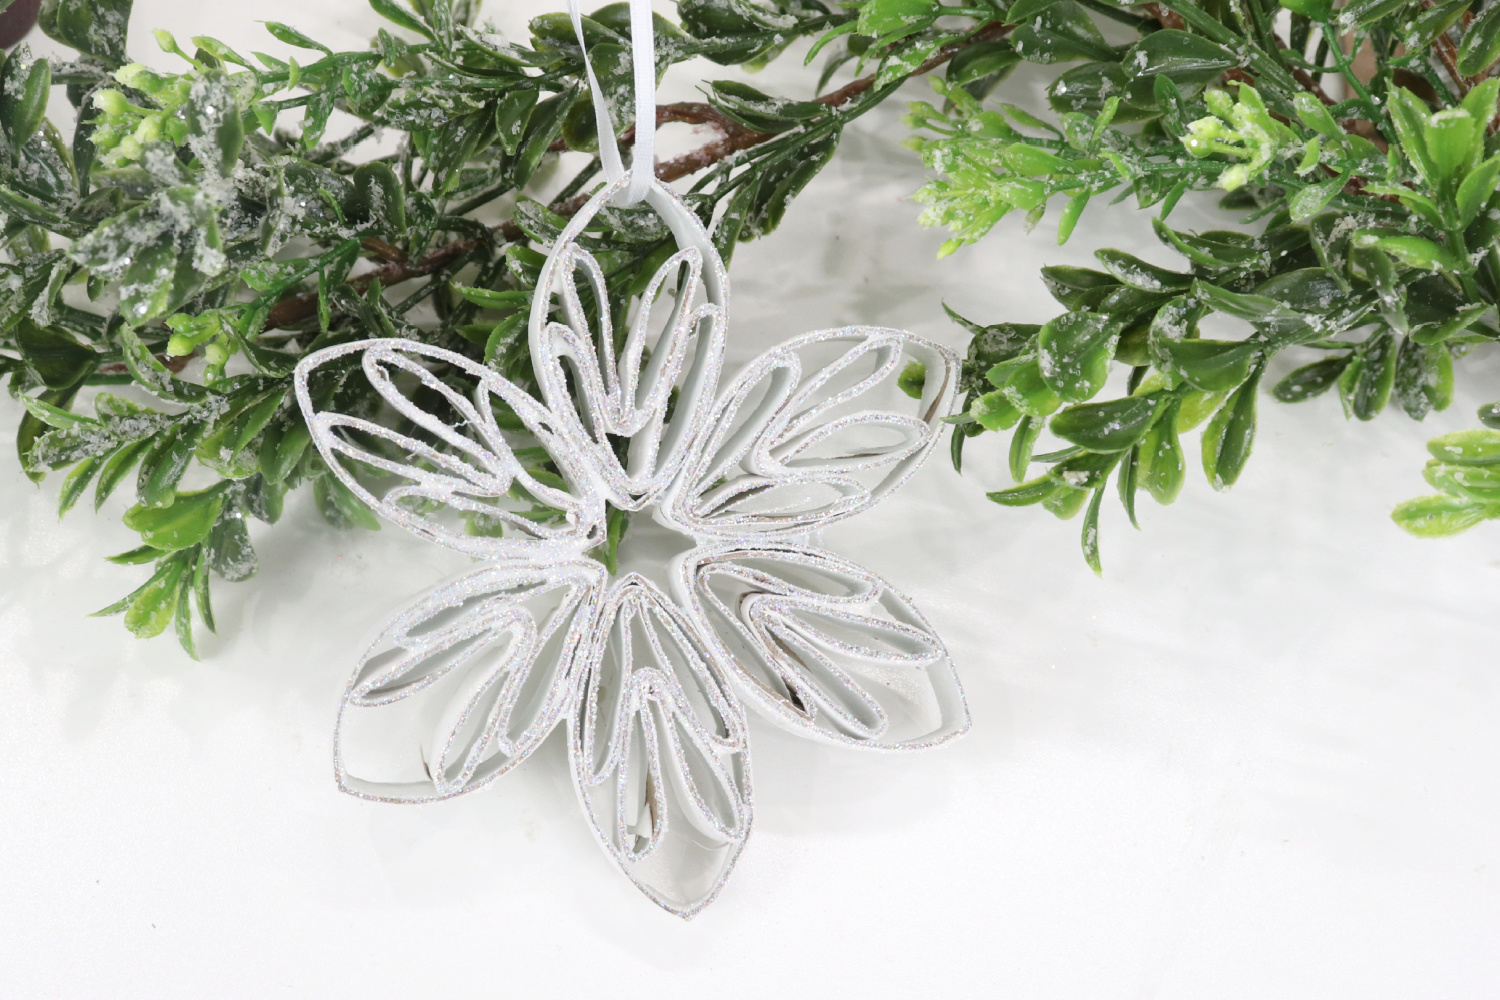
Whether you make just one, or create a whole winter wonderland, I hope you enjoy these DIY Paper Roll Snowflakes. Feel free to play around with the design, making your own patterns; after all, every snowflake is unique. Try combining the sections in different ways to see what you can create. There’s no wrong way to make art!
If you try making your own Paper Roll Snowflakes, be sure to share them and tag @tombowusa or use the hashtag #tombowusa so we can all be inspired by each other. Also, for more winter craft projects featuring your favorite Tombow products, check out these Glitter Gift Tags by Katie Smith, and these fun New Year’s bookmarks. Happy winter crafting!
Pingback: DIY Paper Roll Snowflakes - Amy Latta Creations