Whether you’re headed to the classroom or the office, here’s a way to take notes more effectively with the Tombow Creative Notetaking Kit! I’m Amy from Amy Latta Creations, and I’ve found Sketchnotes to be a really great way to help me focus and remember information. Take a look!
What are Sketchnotes?
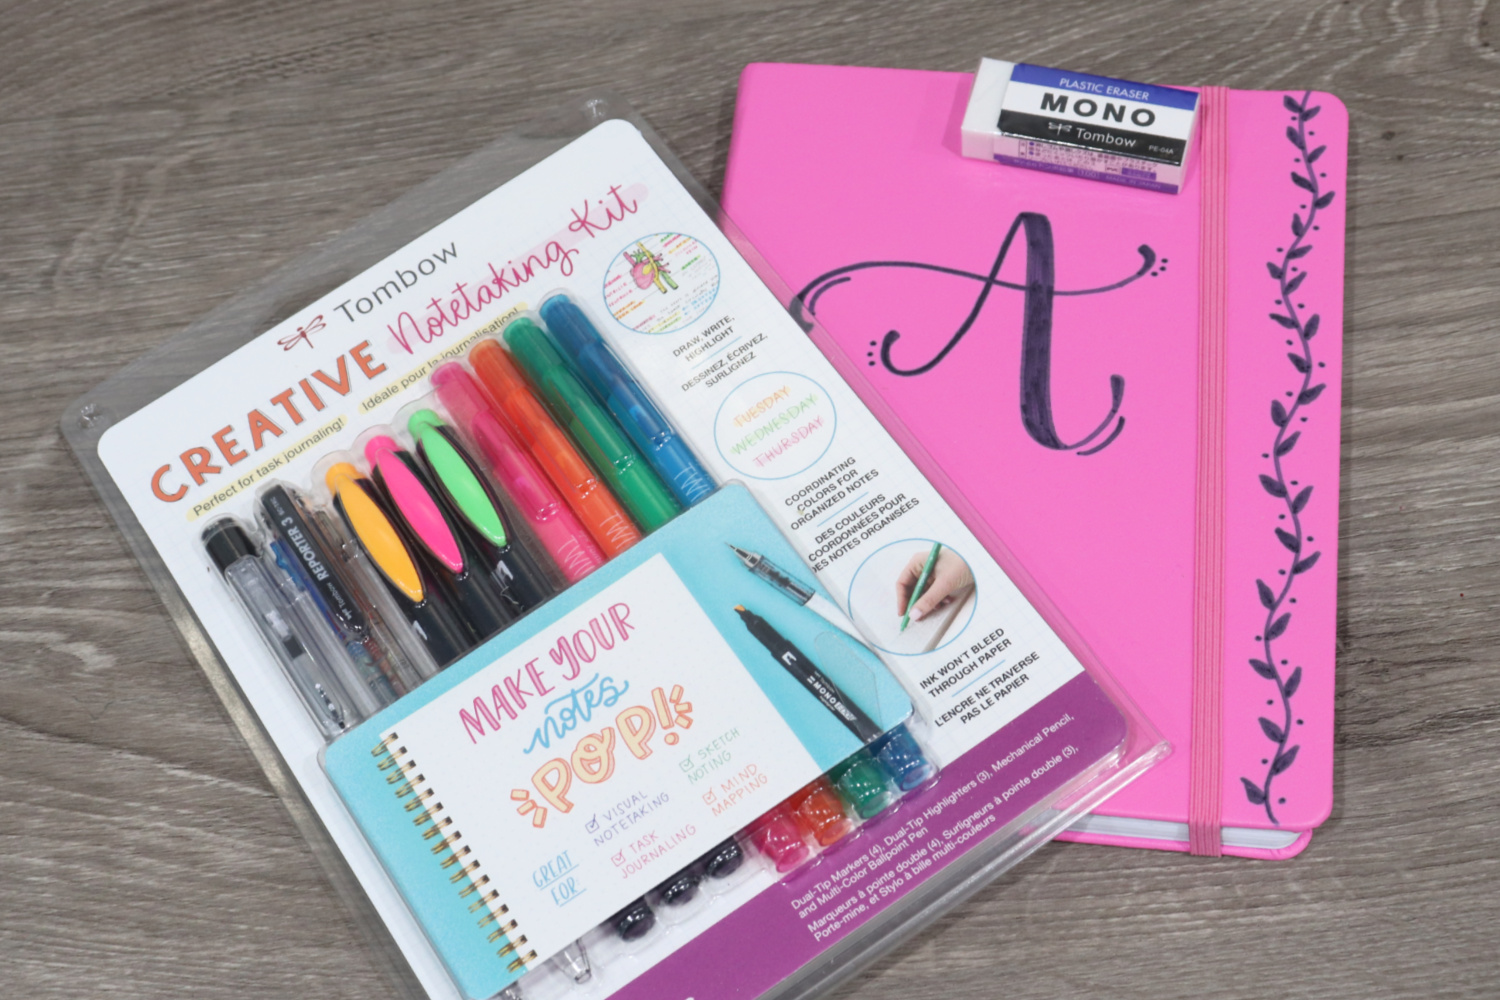
Sketchnoting is a visual form of note-taking that combines shapes, drawings, and text to help capture and summarize ideas in a memorable way. While it’s a great study aid for visual learners in particular, it can help literally anyone take more effective notes. The Tombow Creative Notetaking Kit is perfect for this style of note-taking, because it contains everything you need: a MONO Graph Mechanical Pencil and a Reporter Multi-Color Ballpoint Pen for your notes, 3 MONO Edge Highlighters for highlighting important content, and 4 TwinTone Dual-Tip Markers for shapes, connectors, and more. You don’t have to be an artist to sketchnote, all you need are a few simple visual components to get started. Just grab the supplies below, and let’s learn some basics.
Materials:
- Tombow Creative Notetaking Kit
- Notebook
Visual Components of Sketchnotes
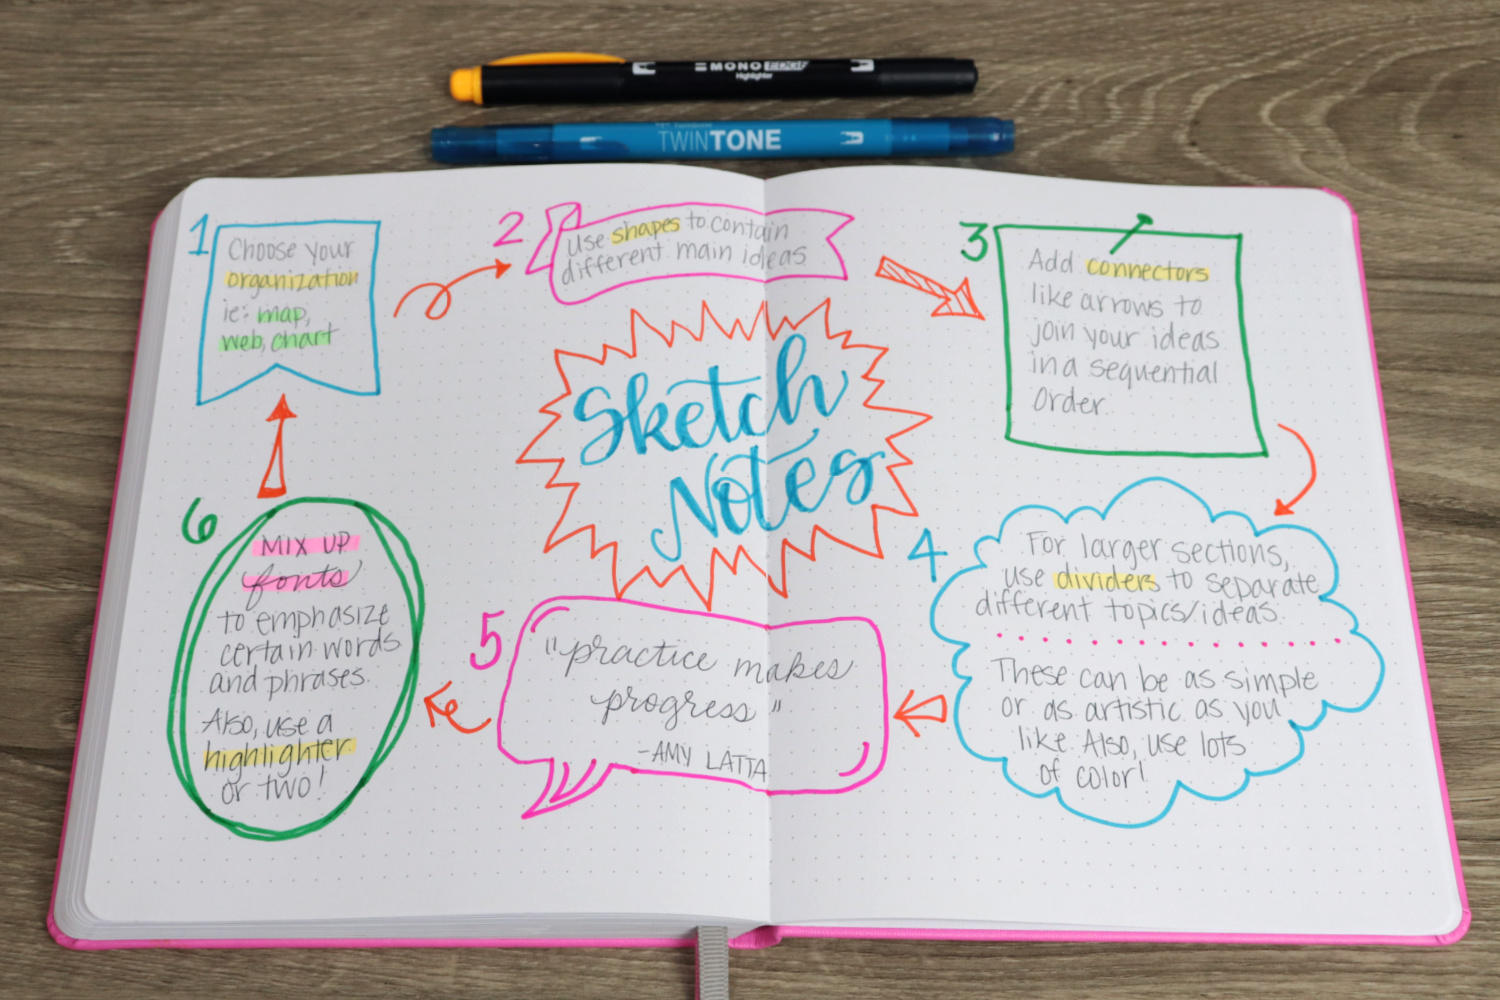
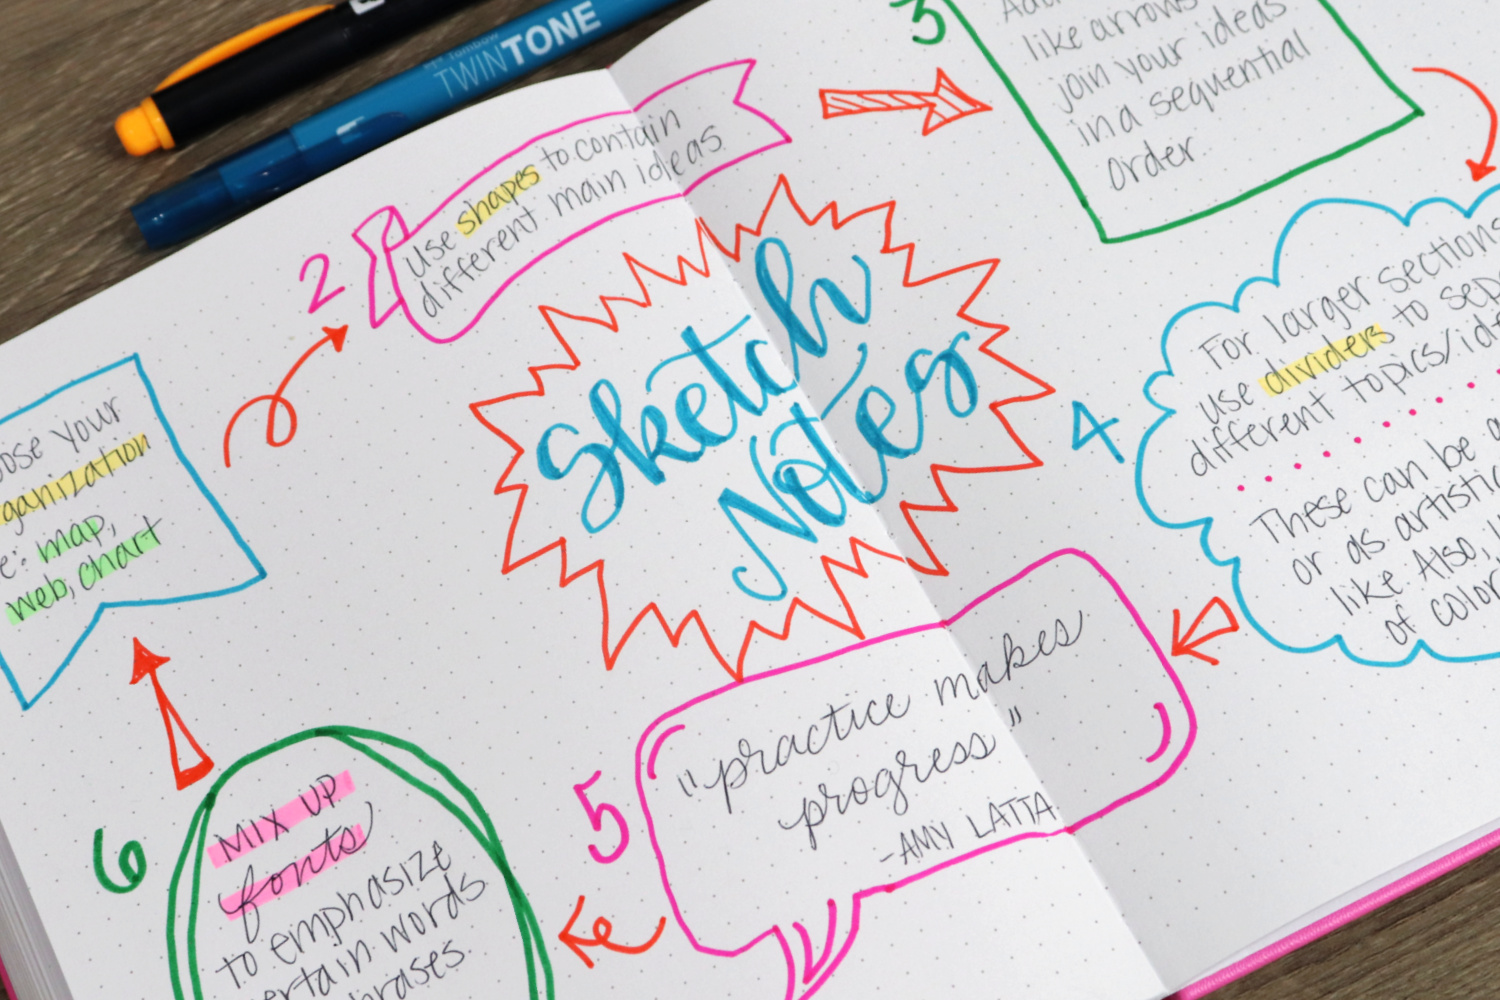
The main idea behind sketchnotes is that adding shapes, color, and drawing to normal handwritten notes will help you to better organize and retain the information you’re learning. The visual elements are great memory aids, and the simple act of creating the notes in this way helps to solidify the information in your brain. So where do we start? Here are several basic components you can practice drawing and incorporating into your notes.
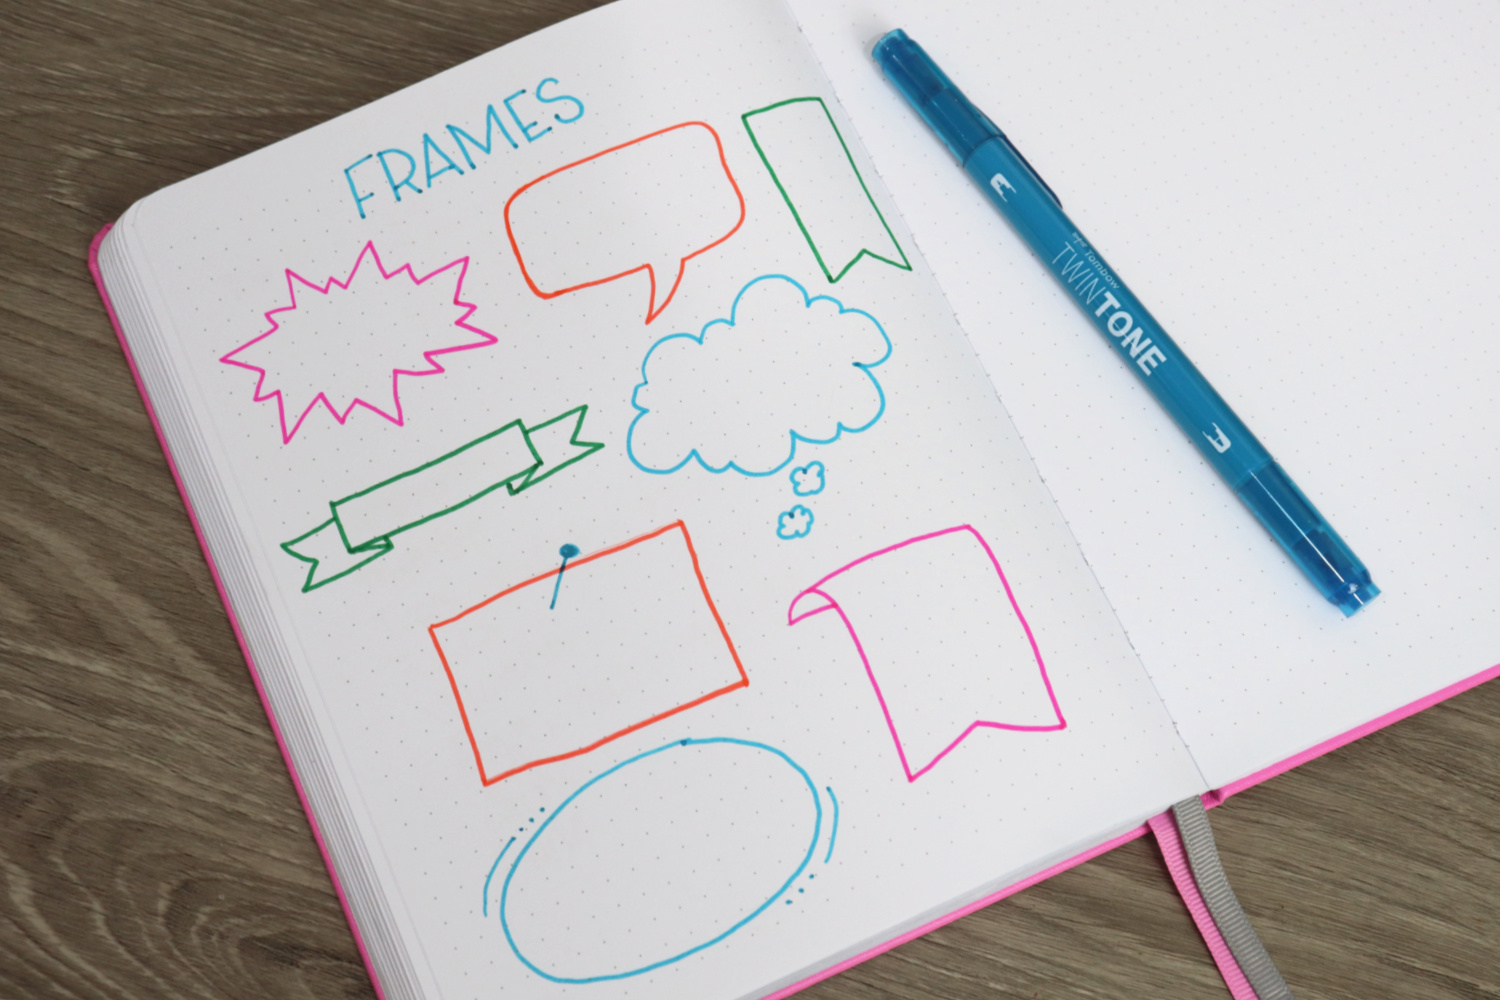
1. FRAMES
Frames are simple shapes that you can draw around your main ideas to make them stand out. A frame can be as simple as a box, a rectangle, or a circle, or you can get more creative. Try drawing a cloud, a banner, or a quote bubble, then writing your notes inside. For my frames, I like to use the fine-tip end of a TwinTone marker. Then, I can write the notes themselves with the smaller, extra-fine tip.
2. CONNECTORS AND SEPARATORS
In order to organize your notes and maintain a good flow, you’ll want to play around with connectors and separators. Connectors are things like arrows that will help direct your eyes from one piece of information to the next. Separators, on the other hand, divide your page into sections and signaling where a new idea begins. For separators, you can use any type of line, from dots to zig-zags, loops, or waves. Try experimenting with all kinds of separators to see what you like best!

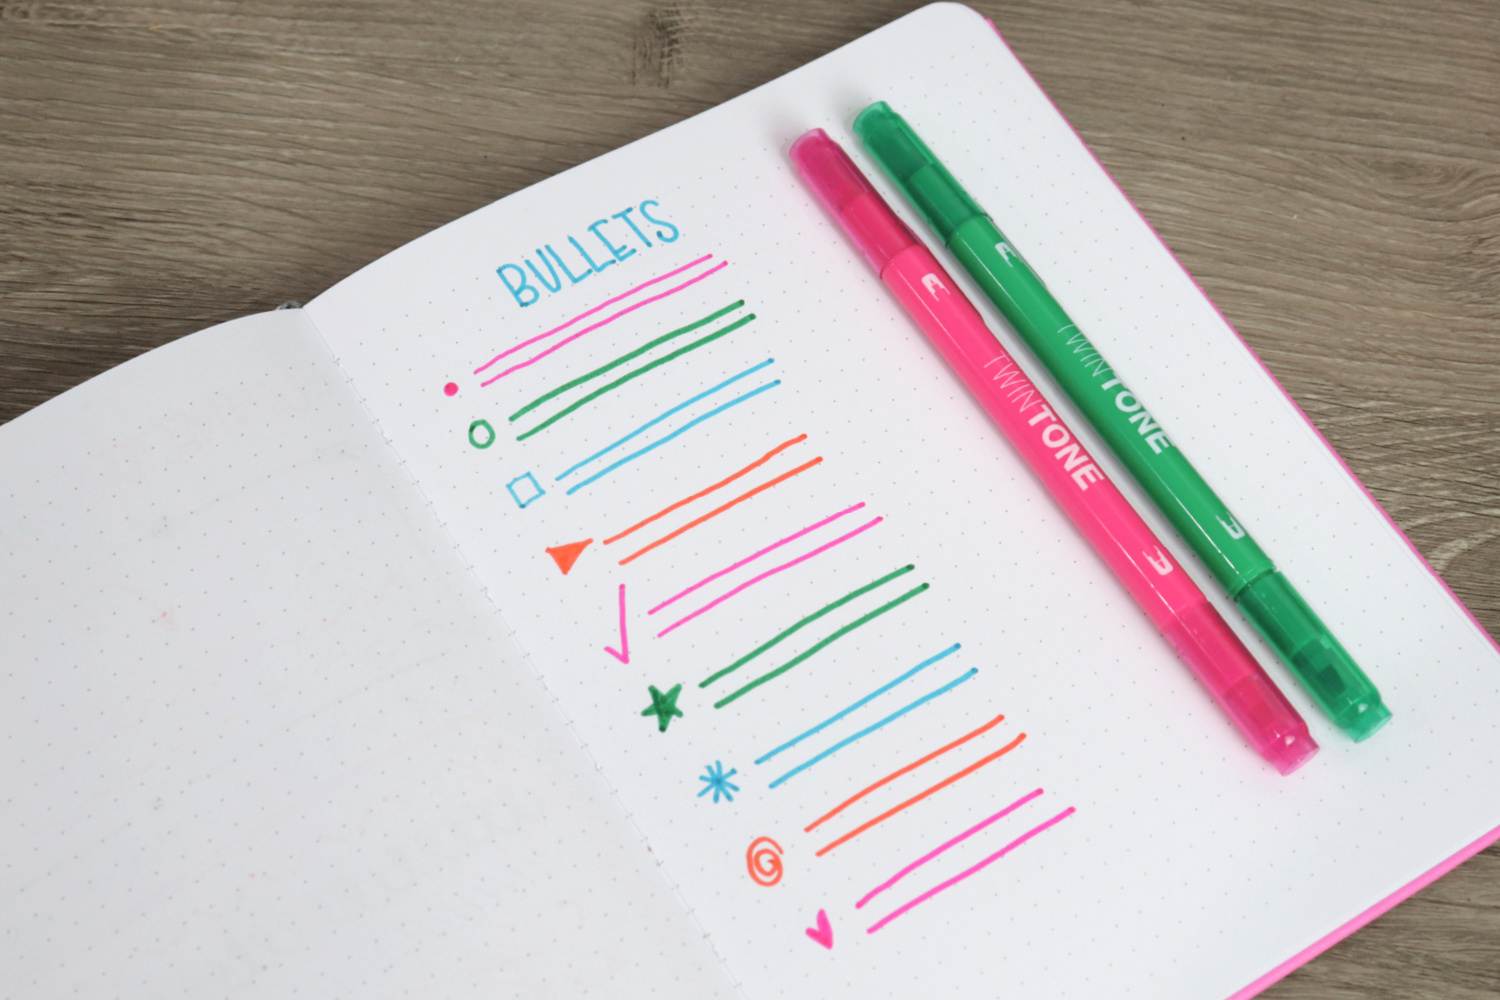
3. BULLETS
When writing a list, try using shapes other than a basic dot for your bullet points. Some ideas for variety include open circles and squares, arrows/triangles, checkmarks, stars, spirals, and hearts.
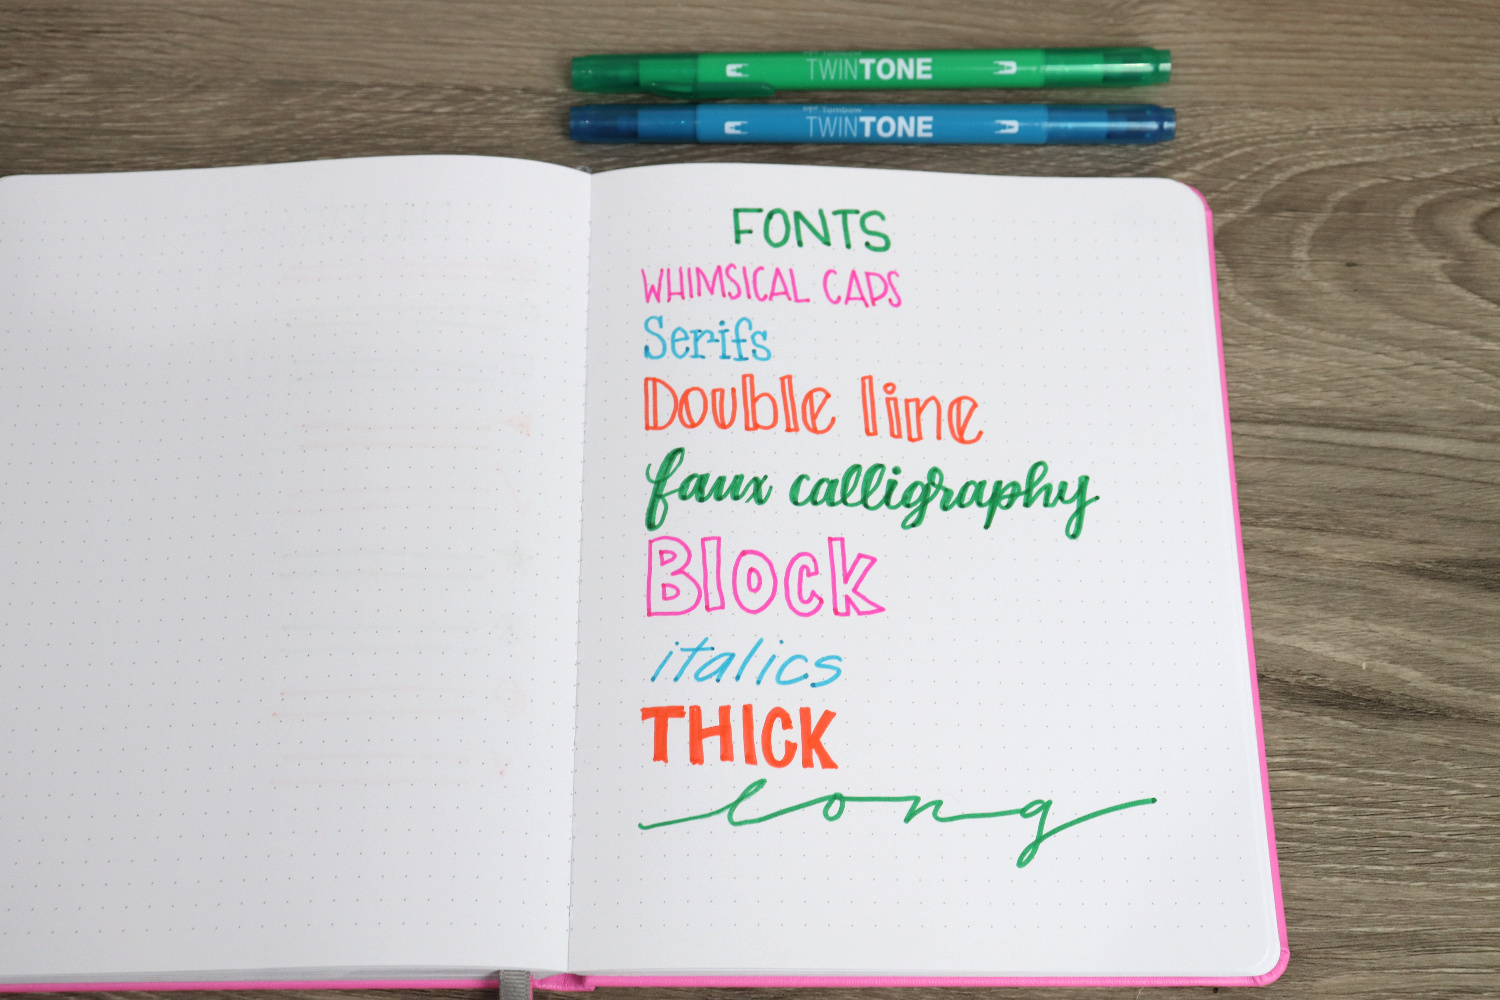
4. DIFFERENT FONTS
Using different fonts for headings, titles, quotes, and other important information can help to make those things jump off the page and stand out from the rest of your notes. Here are some ideas for different fonts to try, or you can create your own. Something as simple as writing in all caps or elongating your script can really make a word pop!
PUTTING IT ALL TOGETHER
When taking your notes, the mechanical pencil and/or the ballpoint pen are great tools for the bulk of the information. Then, you can use the MONO Edge Highlighters to make important information stand out. The TwinTone Markers are perfect for creating your shapes, connectors, dividers, bullets, and anywhere else you want a pop of color. You can also include other little doodles and drawings to your notes to make the information more memorable.
For more ideas on how to use the Creative Notetaking Kit, check out these posts:
Five Easy Ideas Using the Creative Notetaking Kit
Five Passion Planner Printables
Happy note-taking!