Wedding season is here, and whether you’re planning a shower, a rehearsal dinner, or the big day itself, these Mini Floral Arrangement Place Cards are a beautiful way to organize your guest seating. They also work wonderfully for other types of festive events, like anniversary and birthday parties, too. Here’s how to easily create your own.
How to Make Mini Floral Arrangement Place Cards
One of my favorite things about this project is its simplicity. Nature does the work for you, making any arrangement beautiful. It’s also inexpensive; I picked these perennials from my garden! You can customize the bouquet, choosing flowers that coordinate with your wedding or event color scheme.
Materials:
- mini glass jars (mine are 40 mL)
- cardstock
- scissors or paper cutter
- Tombow Dual Brush Pen(s), your choice of colors
- Tombow Fudenosuke Hard Tip Brush Pen
- Tombow MONO Drawing Pen
- paintbrush and water
- 20 gauge wire
- wire cutters
- small flowers and herbs
Instructions:
Step 1: Cut your cardstock.
Trim your cardstock into a small rectangle that’s a little taller than you want it to be. Then, carefully rip off the bottom edge, gently tearing toward yourself to create a textured effect.
Step 2: Add color to the ripped edge.
To do this, start by scribbling a Dual Brush Pen onto a non-absorbent surface like a plastic baggie or a blending palette. This will allow the ink to pool up on top of the surface. Then, dip a wet paintbrush into the ink and paint with it along the torn edge of the cardstock to add color.
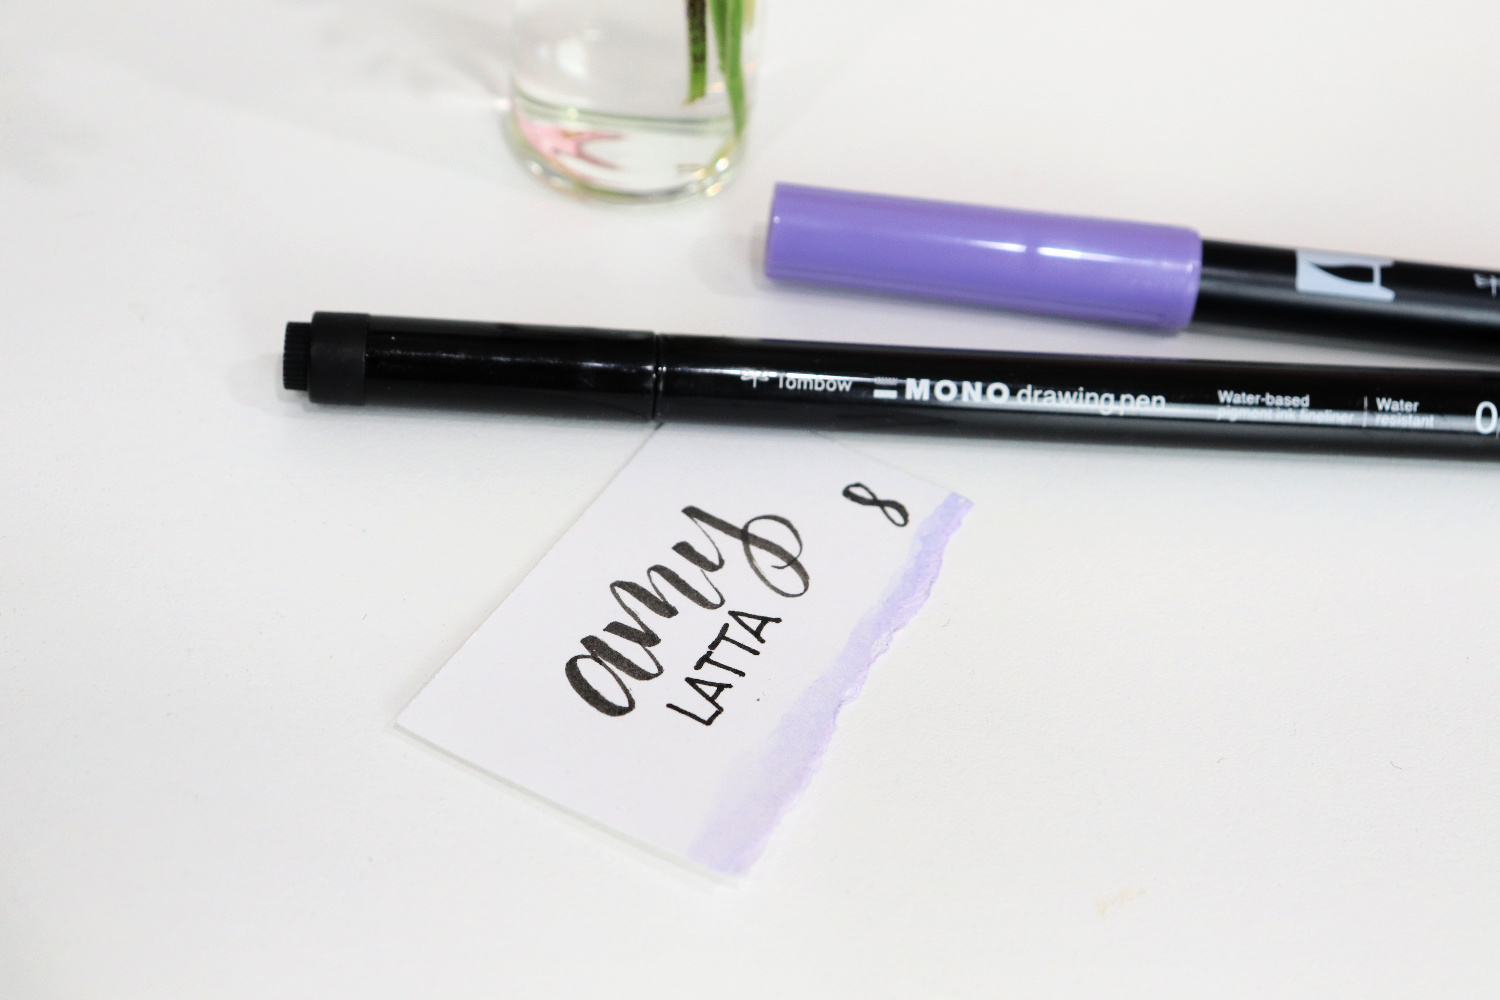
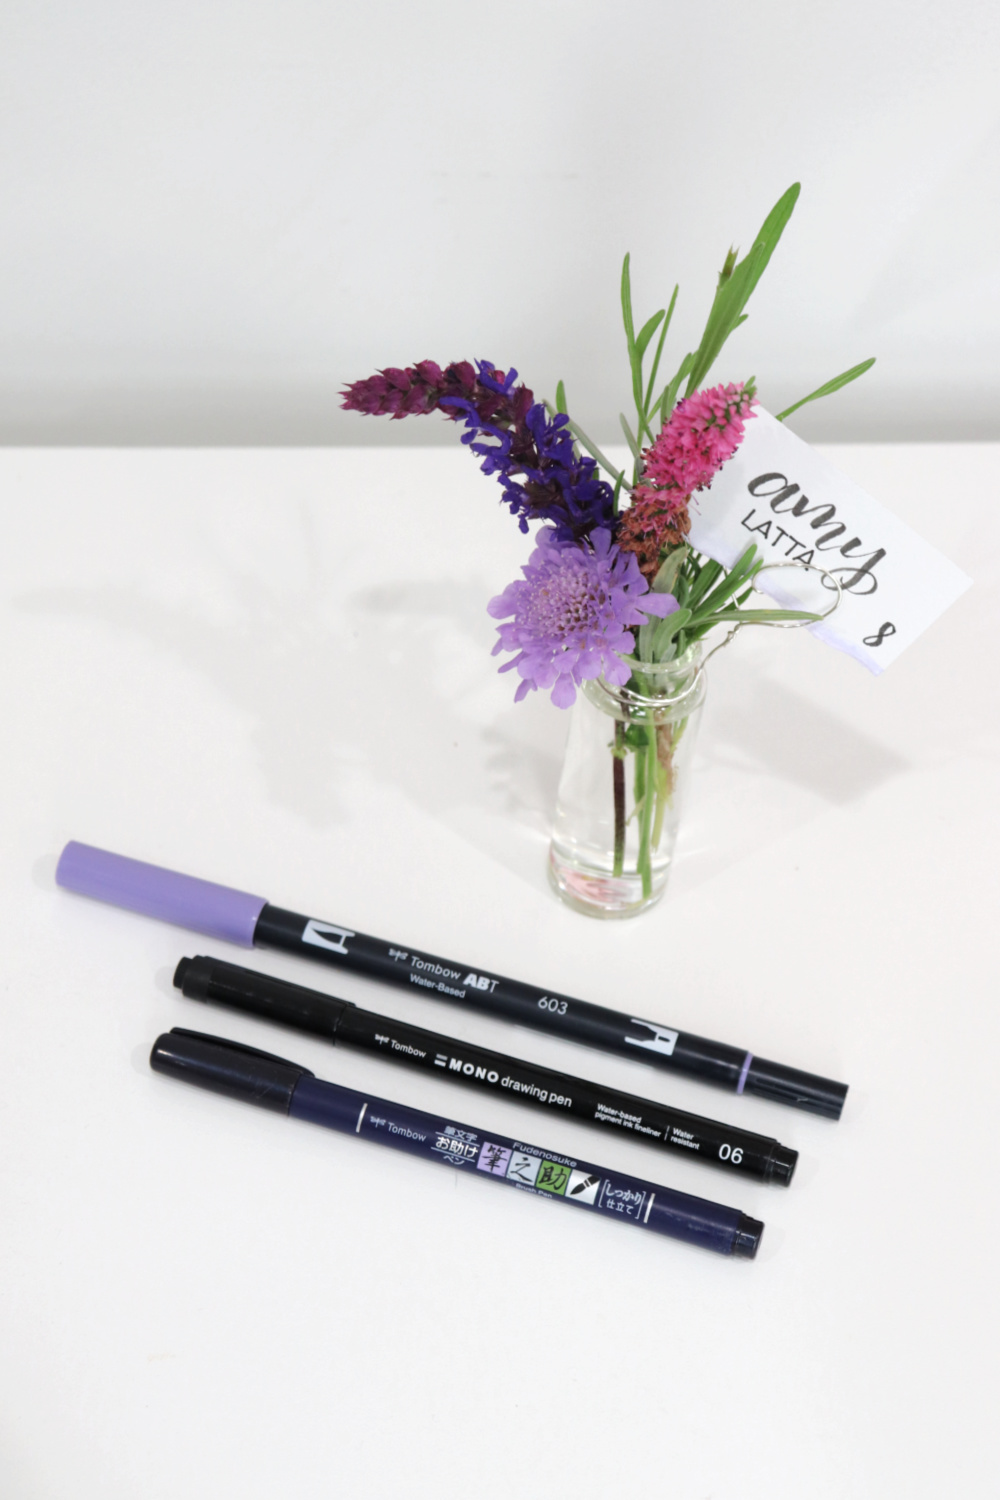
Step 3: Hand letter the guest’s name and table number.
To do this, I used the Tombow Fudenosuke Hard Tip Brush Pen and wrote the first name in brush script. Then, I used a MONO Drawing Pen (06) to print the last name underneath in all capital letters.
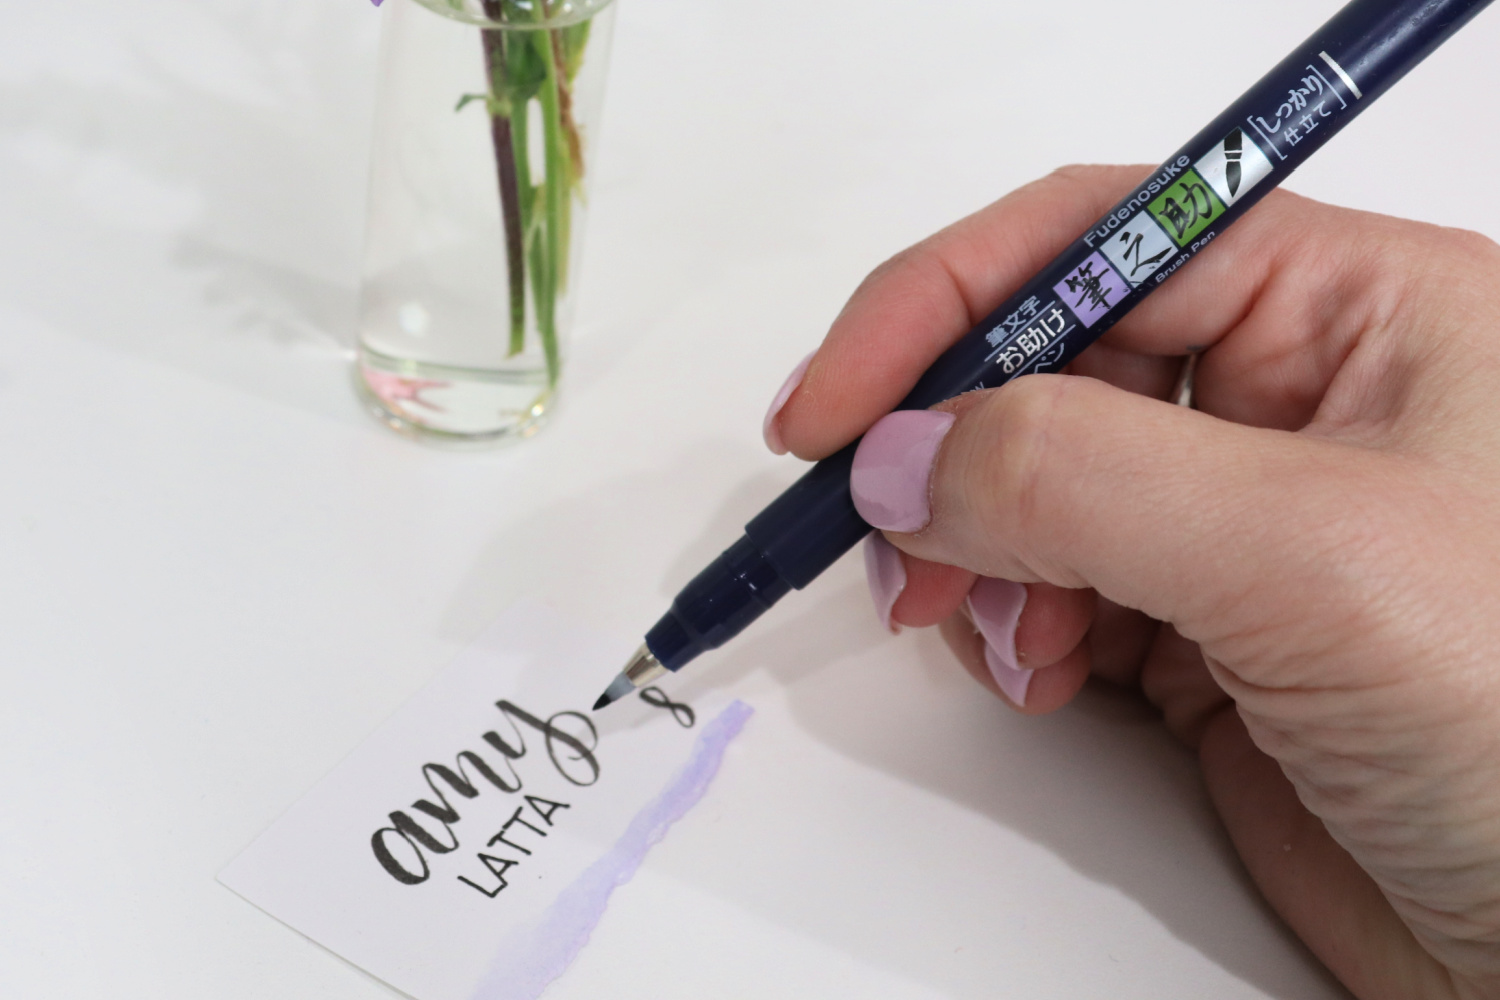
Finally, I added the table number in the bottom right corner with the Fudenosuke.
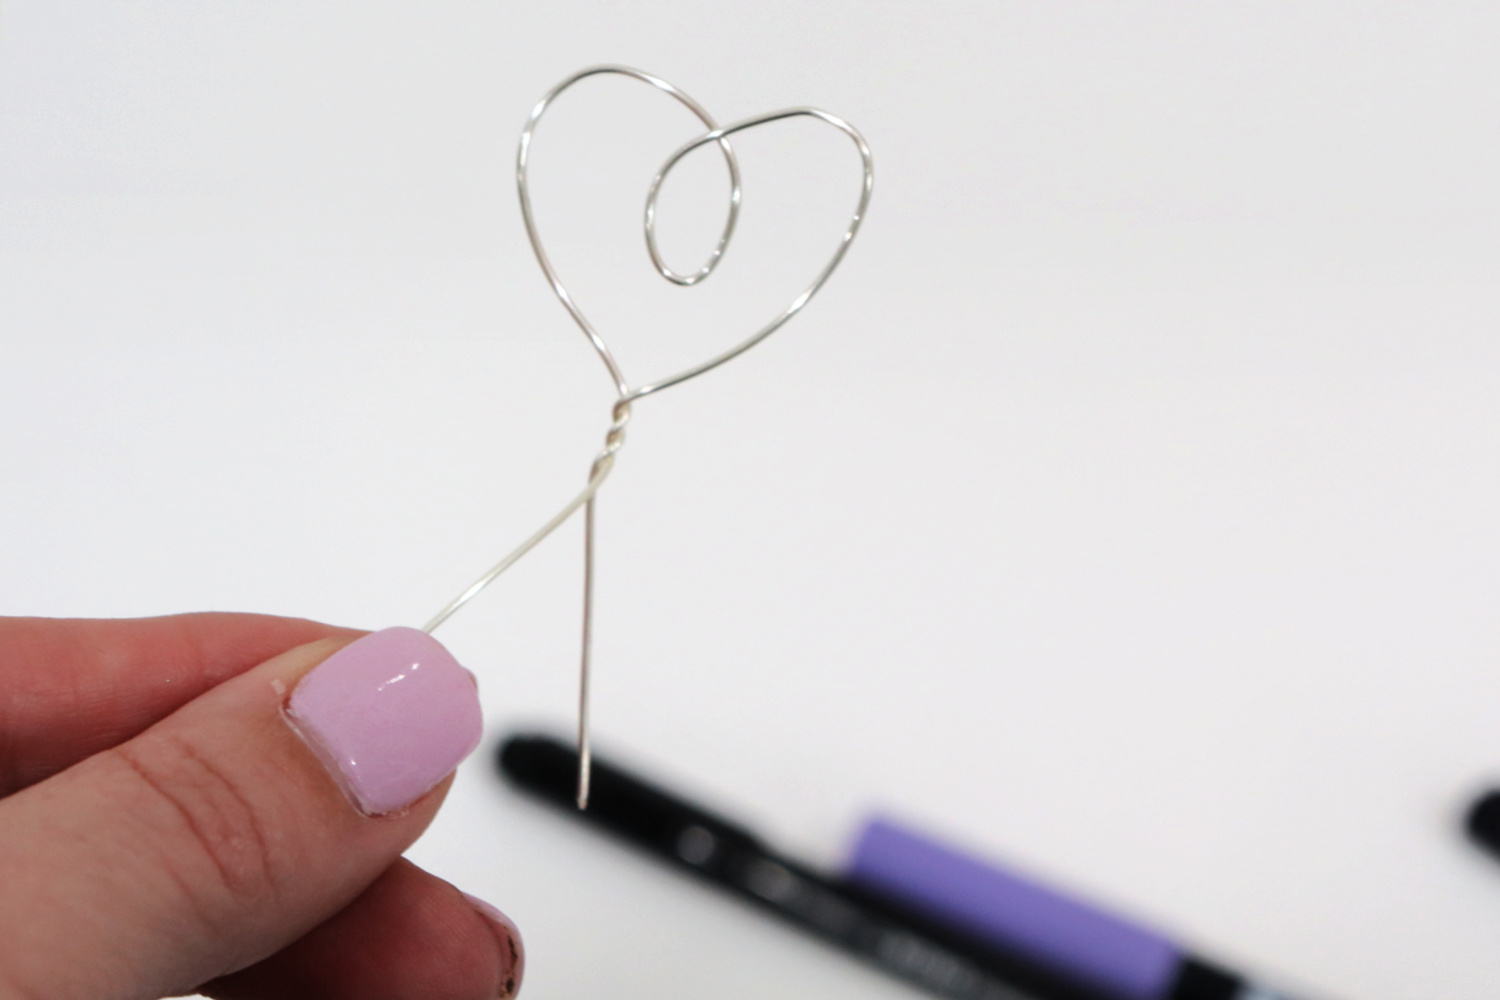
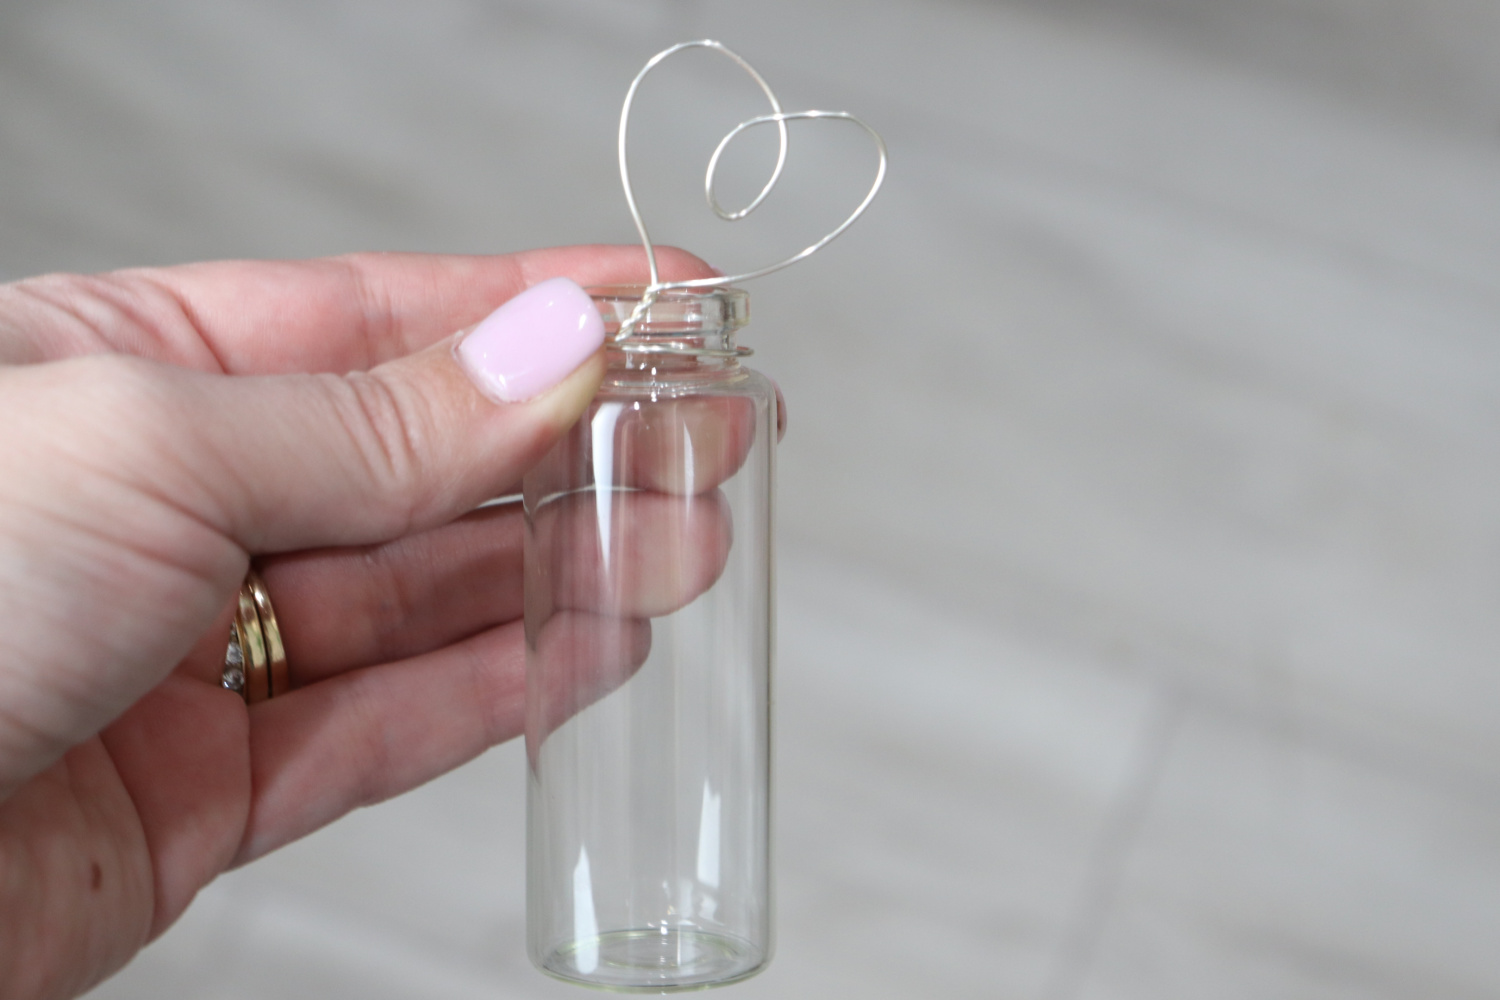
Step 4: Bend the wire into a looping heart shape.
Twist the cut end of the wire around the base of the heart to secure it and trim the excess.
Step 5: Wrap the wire around the neck of the jar.
Or, you can simply stick the end of the wire down inside the jar if you prefer.
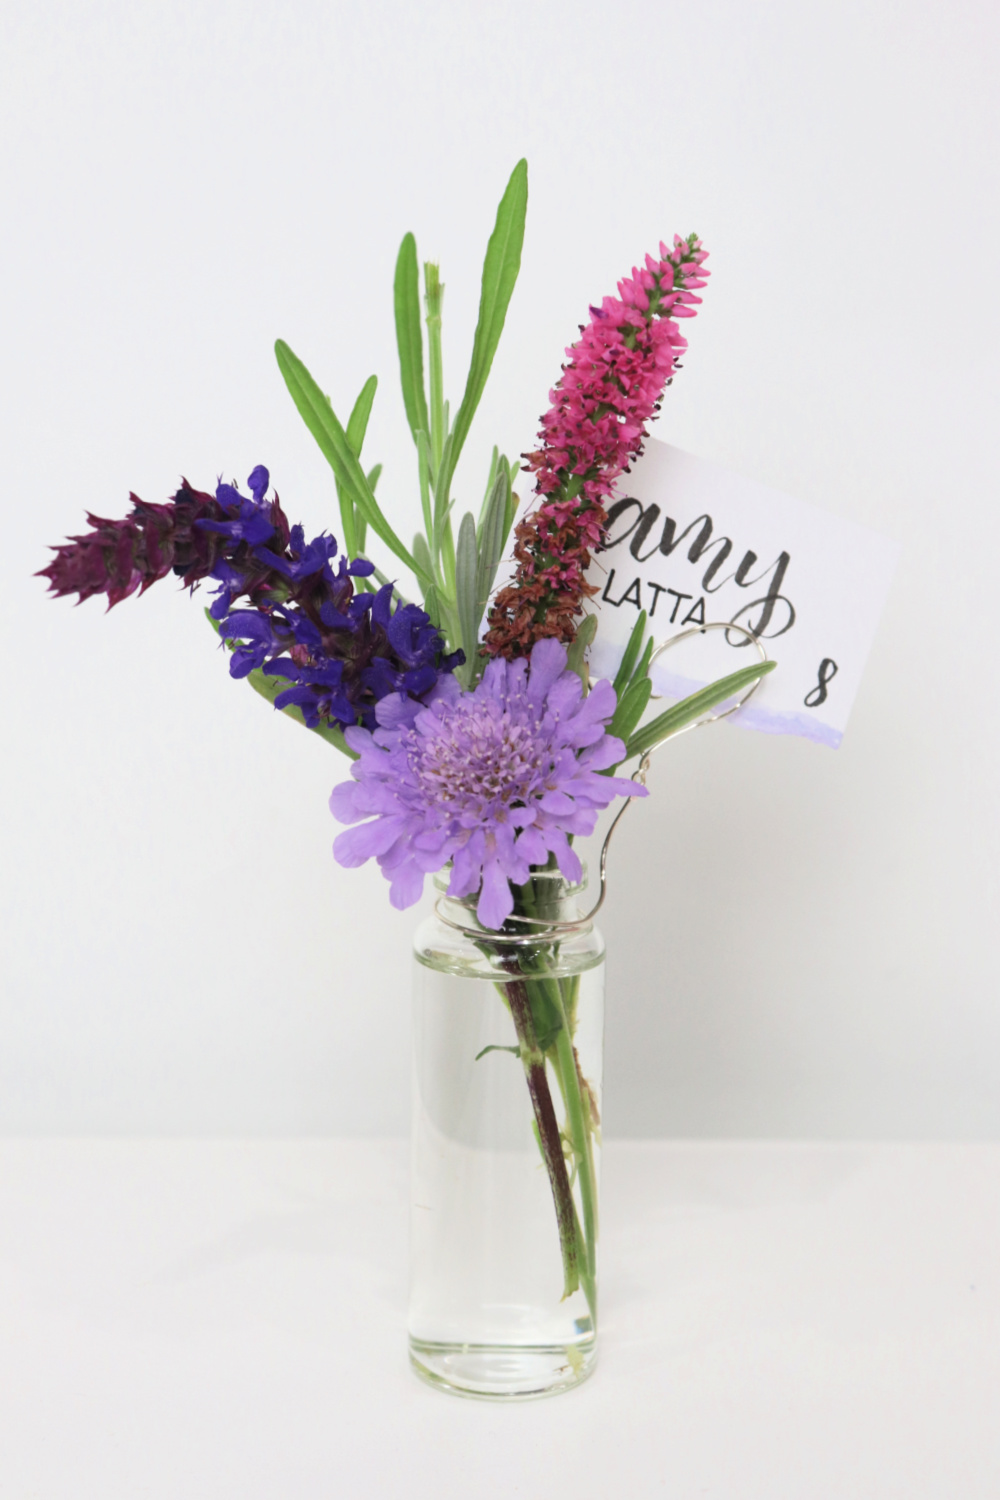
Step 6: Fill your jar with water and small wildflowers.
I used a few perennials from my garden and some lavender, so it smells really good, too!

Step 7: Slide the cardstock into the center of the wire heart.
Now, your arrangement is ready to use! Your guests will love having their own miniature flower arrangement to take home, and they can even refill the jar with new flowers from their own gardens anytime.
If you enjoyed this project, be sure to check out these other wedding-themed ideas from the Tombow designers!
DIY Wedding Place Cards
DIY Wedding Congratulations Card
Rustic Wedding Party Favors
And, of course, if you make your own Mini Floral Arrangement Place Cards, we’d love to see! Make sure to tag @amylattacreations and @tombowusa on social so we can all be inspired. Happy creating!